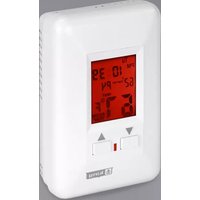
ES-230 - Thermostat KING - Free user manual and instructions
Find the device manual for free ES-230 KING in PDF.


| Product Type | Line Voltage Thermostat for Electric Heating |
| Model | ES-230 |
| Voltage | 208/240 VAC |
| Temperature Range | 40°F to 95°F (4.4°C to 35°C) |
| Default Temperature | 68°F (20°C) |
| Display | Liquid Crystal Display (LCD), Extra Large 2" x 1.5" |
| Accuracy | ±1.2°F |
| Relay Rating | 30 Amps (before derating), 22 Amps continuous resistive |
| Maximum Wattage | 5280 Watts at 240V |
| Dimensions (Estimated) | 4.5" x 3.0" x 1.5" (114 x 76 x 38 mm) |
| Weight (Estimated) | 0.5 lb (0.23 kg) |
| Mounting | Standard 2" x 4" electrical outlet box, ~5 ft above floor |
| Delay | 3 minutes on and off (built-in time delay) |
| Backlight | LED, user-selectable on/off via switch under left corner |
| Heat Indicator | Red LED (illuminates when calling for heat) |
| Power Supply | Hardwired, no batteries required |
| Installation | Qualified electrician required; wire connections: black (line), red (load), blue/white (neutral) |
| Cleaning | Damp cloth for case; blow out dust from air vents for accurate operation |
| Safety | Electric shock hazard; turn off power before installation; read all instructions |
| Repair / Spare Parts | No user-serviceable parts; contact qualified service if faulty |
Frequently Asked Questions - ES-230 KING
User questions about ES-230 KING
0 question about this device. Answer the ones you know or ask your own.
Ask a new question about this device
Download the instructions for your Thermostat in PDF format for free! Find your manual ES-230 - KING and take your electronic device back in hand. On this page are published all the documents necessary for the use of your device. ES-230 by KING.
USER MANUAL ES-230 KING
General information:
This thermostat is designed to provide the highest level of accurate temperature control for residential line voltage electric heating in 120 or 208/240 volt. Almost all electric heaters installed as original equipment in a residential application will be 208 or 240 volt. It is very rare that a home, apartment or condominium would be wired with all 120 volt heaters. Check your voltage to make sure you have the right thermostat for your heater voltage. A 2 pole or double wide circuit breaker at the panel would indicate that you should use the 240 volt model. A single pole or single wide breaker would indicate a 120 volt circuit. There are some exceptions to this rule so checking with a voltmeter is the only way to know for sure. Be safe and smart, electricity can cause severe injury or death.
The thermostat will provide years of comfort control for your family for small fan driven electric heaters, baseboards, radiant ceiling, wall panel heaters, cove heaters, or any line voltage resistance heating systems that do not have an electric motor over 1/3 hp. The thermostat will be warm to the touch on top. This the electronics operating, it also provides air currents across the face of the thermostat that help it sense room temperature better.
Specifications: For ES-120 and ES-230
Temperature range: 40 to 95
Temperature Default: 68 Degrees
Display Format: Liquid Crystal Display (LCD)
Display Size: Extra Large Format - 2" x 1½"
Sample Rate: Every 60 seconds
Time Delay: 3 Minutes on and off
Relay rating: 30 amps before De-rating
Backlighting: LED
Heat Indicator: Red LED
Accuracy: + or- 1.2 Degrees F
Rating: 22 amps resistive continues
Wattage:5280 watts ES-230
2640 watts ES-120
Power Supply: 120 volt for ES-120
208/240 volt for ES-230
Operation:
This precision electronic thermostat will sense the room air at the bottom of the thermostat by a thermistor. This very sensitive sensor will send information to the microprocessor. As the temperature drops, the information it sends will indicate if heat is needed. To reduce any undesirable fast on/off cycles, the processor has a built in 1 to 3 minute delay. This will save energy and provide the best control of a space. This thermostat dose not require batteries and will have a default setting of 68^ F when powered up. It is easily changed by tapping the arrow keys on the front of the thermostat. Up arrow increases temperature and down arrow reduces temperature. Backlighting is provided on some models and can be turned off or on by a small switch under the left corner of the thermostat. This will allow you to see the thermostat in low light or at night.
Installation:
This line voltage device should be installed and serviced by a qualified electrician. The thermostat has been designed to mount to a standard 2" x 4" electrical outlet box. Leveling of the thermostat is not required. Mounting screws are provided. Mount the thermostat about five feet above the floor in an open area in the living room. A good rule of thumb is to place the thermostat above the wall switch for that room. This works well for most bedroom and makes it very convenient to turn the heat lower when leaving the room. Avoid mounting the thermostat where there may be plumbing pipes in the wall or placing a lamp or TV too close to the thermostat. The heat from these items affects the thermostats performance.
KING ELECTRICAL MFG. CO. 9131 10TH AVENUE SOUTH SEATTLE, WA 98108 · PH: 206.762.0400 · FAX: 206.763.7738 · www.king-electric.com
INSTALLATION AND MAINTENANCE

ES-230 & ES-120

DANGER

ELECTRIC SHOCK OR FIRE HAZARD
READ ALL WIRE SIZING, VOLTAGE REQUIREMENTS AND SAFETY DATA TO AVOID PROPERTY DAMAGE AND PERSONAL INJURY
REPLACES MODELS: CALV/T4800/T4700/T4600/1A66/D22/S22/
M602/T498/T4398/MD26/WR661/1D22/S2022/
TW242/TD902/T410/TD942/M7/M402/M512

TOOLS NEEDED:
PHILLIPS SCREWDRIVER
WIRECUTTERS
VOLT METER
DISPLAY LEGEND


WARNING

READ CAREFULLY - These instructions are written to help you prevent difficulties that might arise during installation of thermostat. Studying the instructions first may save you considerable time and money later. Observing the following procedures will cut your installation time to a minimum. Save these instructions for future use.
Thank you for buying this King Thermostat. It should provide years of service and comfort to your home. Inspect the package. You should have received the thermostat with its cover and two screws to attach it to a wall box.
- Check the total load of the heaters that you are connecting to the thermostat. The maximum wattage at 240 Volt is 5280 Watts. If you have the 120 Volt version maximum is 2640 Watts. You need to stay below this total wattage connected to the thermostat. The lower the wattage the longer the life of the contacts in the relay.
- To wire the thermostat determine which pair of wires are coming from the breaker panel and which pair lead to the heater.
- Attach, with a wire nut, the blue wire (white wire on 120 Volt model ES120) into the pair of white wires in the junction box.
- Use black lead from the Circuit Breaker panel and attach it to the black lead on the thermostat. This will provide power to the thermostat and LCD display and backlight.
- Attach black lead going to the heater to the red lead on the thermostat. This will provide power to the heater when the thermostat calls for heat.
- Remove thermostat cover by holding back of thermostat with one hand and grasp the top and bottom of the cover with the other hand, pulling towards you evenly.
- Push the wires carefully into the junction box making sure no wires will be pinched when attaching to the wall using #6-32 screws provided.
- Holding thermostat into wall box, fasten screws at the top and bottom mounting holes attaching to wall box. (Do not over tighten screws)
- Turn on power to test. Increase set point to higher than current room temperature by tapping the up button. There will be up to a 3 minute delay in turning on. The red indicator will turn on and you will here a small click as the heater energizes. Turn the thermostat down by tapping on the down arrow.
- To turn on backlighting: Under the bottom left of the thermostat, you will feel a small switch. Moving one way will turn on the light and the other will turn off the backlight. You have now verified that the thermostat is in perfect working order and ready for years of trouble free operation.
- Mounting tips: Make sure there is not anything that could affect the average room temperature sensing of the thermostat such as plumbing pipes in the wall, a lamp close by, direct sunlight, a T.V. set, and/or cold drafts from a door opening.
- Cleaning: A damp cloth will clean the plastic case surface of finger prints and dust. Strong spray cleaners may damage plastic case, remove writing or arrows printed on case. Blow out any dust that may accumulate on air vents on top or bottom. Good air circulation is key to long life and accurate operation.
- Humid locations: Mildly humid location like bathrooms may see a reduced life due to corrosion on the contact and lint from towels getting into air vents on thermostat. Blow out vent regularly and mount thermostat away from shower locations for longer life.
- Power outages: The thermostat will default to the 68 degree factory setting.
KING ELECTRICAL MFG. CO. 9131 10TH AVENUE SOUTH SEATTLE, WA 98108 · PH: 206.762.0400 · FAX: 206.763.7738 · www.king-electric.com
WIRING INSTRUCTIONS

king
ES-230 & ES-120

DANGER

ELECTRIC SHOCK OR FIRE HAZARD
READ ALL WIRE SIZING, VOLTAGE REQUIREMENTS AND SAFETY DATA TO AVOID PROPERTY DAMAGE AND PERSONAL INJURY

DIMENSIONS:
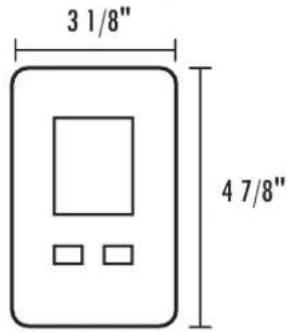

START-UP DISPLAY:

Will flash until button is pushed to stop it.
DEFAULT:

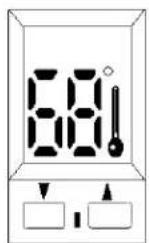
Defaults to set point temperature 68°F.
ROOM TEMPERATURE:

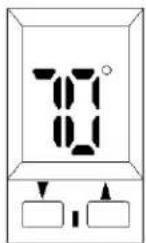
The thermostat will default to displaying the room temperature.
ADJUST MODE:

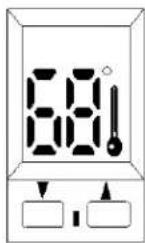

ROOM TEMPERATURE:

To adjust temperature: Tap one of the arrow keys to change from room temperature to Set Point temperature. A thermometer will show up on the display. This shows that you can now tap the key up or down to change the temperature of the room.
The thermostat will default back to the room temperature after a few moments.
DISPLAY CHANGE
On the bottom edge of the thermostat, there are air vents. In one of the vents on the left side, just behind the illumination switch, there is a larger opening with a pin collector attached. With needle nose pliers, pull the connector off. This will put the thermostat into the metric Celsius mode.

natural_image
Exterior view of a white industrial electrical enclosure with ventilation grilles and a small circular button (no visible text or symbols)POWER IN

Brand : KING
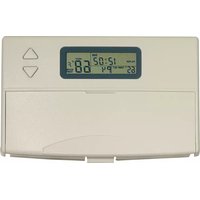
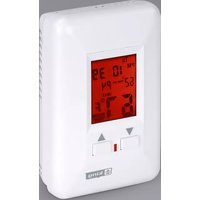
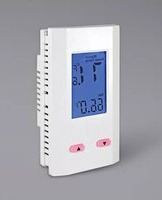
Model : ES-230
Category : Thermostat