
DJ Ditty - Unknown DELL - Free user manual and instructions
Find the device manual for free DJ Ditty DELL in PDF.


| Product Type | Portable Music Player |
| Brand | Dell |
| Model | DJ Ditty |
| Dimensions | Approximately 10 x 5 x 1 cm |
| Weight | Approximately 50 g |
| Power Source | Built-in rechargeable lithium-ion battery, USB charging |
| Battery Life | Up to 12 hours of music playback |
| Storage | Internal flash memory (estimated 1-4 GB) |
| Audio Format Support | MP3, WMA, WAV |
| FM Radio | Built-in FM tuner with presets |
| Voice Recording | Built-in microphone for voice memo recording |
| Display | LED or LCD screen (estimated monochrome) |
| Connectivity | USB 2.0 for data transfer and charging |
| Headphone Jack | 3.5 mm stereo |
| Controls | Physical buttons for play, pause, skip, volume |
| Maintenance | Clean with a soft, dry cloth; avoid liquids |
| Safety | Keep away from moisture and extreme temperatures |
| Spare Parts | Earbuds, USB cable, carrying pouch (optional) |
| Repairability | Not user-serviceable; contact Dell support |
| Warranty | 1 year limited warranty |
Frequently Asked Questions - DJ Ditty DELL
User questions about DJ Ditty DELL
0 question about this device. Answer the ones you know or ask your own.
Ask a new question about this device
Download the instructions for your Unknown in PDF format for free! Find your manual DJ Ditty - DELL and take your electronic device back in hand. On this page are published all the documents necessary for the use of your device. DJ Ditty by DELL.
USER MANUAL DJ Ditty DELL
Notes, Notices, and Cautions

NOTE: A NOTE indicates important information that helps you make better use of your computer.

NOTICE: A NOTICE indicates either potential damage to hardware or loss of data and tells you how to avoid the problem.

CAUTION: A CAUTION indicates a potential for property damage, personal injury, or death.
Information in this document is subject to change without notice. © 2006 Dell Inc. All rights reserved.
Reproduction in any manner whatsoever without the written permission of Dell Inc. is strictly forbidden.
Trademarks used in this text: Dell, Dell DJ Ditty and the DELL logo are trademarks of Dell Inc.; Microsoft and Windows are registered trademarks of Microsoft Corporation.
Other trademarks and trade names may be used in this document to refer to either the entities claiming the marks and names or their products. Dell Inc. disclaims any proprietary interest in trademarks and trade names other than its own.
March 2006 P/N UD342 Rev. A01
Contents
Finding Information 6
1 About Your Dell DJ Ditty
Introduction 8
Top, Front and Side Views 10
How to use the Volume/Scroll/Select Dial. 12
Installing Software 13
Connecting to your Computer & Charging the Battery. . . . 15
Performing a Reset 17
Contents 3|
2 Using Your Dell DJ Ditty
Playing Digital Music 19
How to Repeat a Marked Segment (AB mode) ..... 21
How to Cancel AB mode 22
Managing Files from the Main Menu 22
Music Library. 23
Play Mode 25
FM Radio Using the Dell DJ Ditty. 26
Date & Time. 29
Settings & Info 32
Transferring Music to the Dell DJ Ditty 35
Transferring Music Tracks Using Musicmatch®
to Your Dell DJ Ditty 36
Storing Data Files on the Dell DJ Ditty. 39
3 Frequently Asked Questions
Installation 41
4 Contents
Usage 43
General 44
Firmware Upgrade 45
Warning Indications 46
Troubleshooting. 47
Musicmatch 51
Musicmatch Jukebox FAQ. 51
Error Messages 53
Solutions 54
4 Appendix
Specifications. 61
Glossary 64
Index 67
Contents 5
Finding Information
What are you looking for? Find it here:
| How to set up my Dell DJ Ditty and information on the connectors and buttons on my Dell DJ Ditty. | Dell DJ DittyTM Getting StartedGuide and the Dell DJ DittyTMOwner’s Manual |
| Information on using my Dell DJ Ditty. | Dell DJ DittyTM Owner’s Manual |
| Information on using Musicmatch with my Dell DJ Ditty. | Musicmatch® online helpClick Start > All Programs>Musicmatch Jukebox . ClickHelp in Musicmatch. |
Dell DJ Product News, Accessories, http://www.DJLife.com Downloads, Troubleshooting information and more.
Connecting to and synchronizing Dell DJ Ditty™ Owner's Manual with a computer. and Musicmatch online help
6 Finding Information
What are you looking for? Find it here:
Up-to-date information on your
Dell DJ Ditty, including the latest software downloads, latest versions of the Dell DJ Ditty™ Owner's Manual, Dell DJ Ditty™ Getting Started Guide, and answers to Frequently Asked Questions.
Warranty information
http://support.dell.com
Dell DJ Ditty™ Product Information Guide
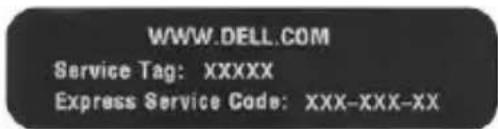
My Service Tag Located on the back of the Dell DJ
Ditty
Finding Information 7
1
About Your Dell DJ Ditty
Introduction
Congratulations on purchasing the Dell DJ Ditty™! In this document, you can find instructions on how to use the key features of your new Dell DJ Ditty with the accompanying software. You can also find more sources of useful information in "Finding Information" on page 6.
Your Dell DJ Ditty comes with a Dell DJ Ditty™ Product Software CD that you can use to install software onto your computer. The software includes Musicmatch®, a soft copy of the Dell DJ Ditty Owner's Manual and Acrobat Reader. You can use this software to manage your music library and to transfer audio tracks and data files between your Dell DJ Ditty and your computer. In order to
8 About Your Dell DJ Ditty
transfer these files, your Dell DJ Ditty must be connected directly to your computer's USB port. See "Installing Software" on page 13 to get started.
After installing the software on your computer, you can use your Dell DJ Ditty in a number of ways:
- As a digital music player (see "Playing Digital Music" on page 19), or
- As an FM Radio (see "FM Radio Using the Dell DJ Ditty" on page 26), or
- As a data storage device (see "Transferring Music to the Dell DJ Ditty" on page 35).
For details about using these features and getting the most out of your Dell DJ Ditty, see "Using Your Dell DJ Ditty" on page 19.

NOTICE: Dell's Limited Warranty does not cover data loss resulting from the unlikely failure of the flash memory in the Dell DJ Ditty.

NOTICE: While your Dell DJ Ditty is robust, do not subject it to excessive force or impact. This may damage your Dell DJ Ditty.
Top, Front and Side Views

10 About Your Dell DJ Ditty
USB PROTECTIVE CAP - Keep attached at all times when your Dell DJ Ditty is not connected to a computer. This protects the USB connector.
USB CONNECTOR - Connects your Dell DJ Ditty to a computer to transfer data files or tracks, and charges the battery.
LCD SCREEN - Displays operating information.
HOME/POWER BUTTON - Main Menu/PowerOff/PowerOn Button.
HEADPHONE CONNECTOR - Connects earphones or headphones.
RESET BUTTON - Reset when your Dell DJ Ditty stops responding.
VOLUME/SCROLL/SELECT DIAL - Increases or decreases volume. Scroll to choose item from menu/list. Press in on the dial to select a highlighted item.
FAST FORWARD/SKIP FORWARD - Goes to next track or moves within a track.
PLAY/PAUSE -Starts or pauses a track.
REWIND/SKIP BACK - Moves to start of current track, or goes to previous track. Skips to move back within a track.
LANYARD ATTACHMENT - Connects lanyard.
How to use the Volume/Scroll/Select Dial
The Volume/Scroll/Selectdial can be rotated to the right (scroll-right), left (scroll-left), or pressed in to make selections, as shown in the diagram below.


NOTE: Scroll-select means to move the dial in the desired direction and press in on the scroll dial to select the item.

Permanent hearing loss may occur if earphones or headphones are used at high volume.
12 About Your Dell DJ Ditty
Installing Software
Your Dell DJ Ditty comes with software that helps you create audio tracks and manage Music Library.
To install software:

NOTE: Ensure that your Dell DJ Ditty is not connected to your computer during the software installation process.

NOTE: Close all other applications while installing the software.
1 Insert the Dell DJ Ditty™ Product Software CD into your CD drive. The CD runs automatically, and the installation process begins. If the CD does not run automatically:
a Using Windows ^® Explorer ^® or the My Computer icon, navigate to the drive where you loaded the Dell DJ Ditty ^™ Product Software CD.
b Double-clickCDINSTALLER.EXE
2 When the Dell DJ Ditty installation screen appears, click OK to start the software installation process. Follow the instructions on the screen and click OK, Next, or Yes when prompted.

NOTE: The software may determine that you have a different version of Musicmatch already on your computer. If so, you are asked whether or not you would like to continue installing Musicmatch from the CD. Make your selection to proceed.
- I f y oYes, the installation process continues. You must select Yes if you intend to use Musicmatch with your Dell DJ Ditty.
- I f y oNoyou are asked to confirm the selection. Select Yes to quit the installation.
3 After the software installation is complete, a message appears asking if you want to restart your computer now or later. Select Yes to restart your computer immediately or No if you intend to restart your computer later.

NOTE: The software is not enabled until after you restart your computer.
4 After restarting your computer, connect your Dell DJ Ditty to your computer. See "Connecting to your Computer & Charging the Battery" on page 15.
14 About Your Dell DJ Ditty
Connecting to your Computer & Charging the Battery
Connect your Dell DJ Ditty directly to the USB port of your computer in order to transfer data files or audio tracks, and to charge the battery.

natural_image
Close-up of a USB flash drive with an open port, showing internal components and a magnified view (no text or symbols visible)About Your Dell DJ Ditty 15
To charge the battery:
Plug your Dell DJ Ditty directly into your computer's USB port (see above). Leave the Dell DJ Ditty plugged in for 2.5 hours, in order to properly charge the battery.
Your Dell DJ Ditty has an integrated, rechargeable, lithium-polymer battery. Before you use your Dell DJ Ditty for the first time, you must charge the battery for 2.5 hours. Use the battery icon on your Dell DJ Ditty's screen to monitor the battery charge.
While the battery is being charged, the battery icon is animated. Once the battery is fully charged, the full battery icon 📄 is shown.
During normal operation, the battery icon indicates approximate remaining battery power, as follows:
4 bars - 79% to 100%
3 bars - 58% to 78%
2 bars - 36% to 57%
1 bar - 16% to 35%
0 bars - 0% to 15%
16 About Your Dell DJ Ditty
NOTE: Do not use your Dell DJ Ditty for the first time until you have charged the battery for at least 2.5 hours.
NOTE: To charge your Dell DJ Ditty from your computer's USB connector, your computer must be turned on.
NOTE: Charge your Dell DJ Ditty at least once a month, even if it is not being used.
NOTICE: Do not attempt to replace or remove the integrated battery from your Dell DJ Ditty. You may damage the Dell DJ Ditty permanently. Any attempt to open your Dell DJ Ditty voids the warranty.
See "Transferring Music to the Dell DJ Ditty" on page 35 for information on transferring data files and audio tracks.
Performing a Reset
If your Dell DJ Ditty stops responding, perform a reset.
To perform a reset :
1 Make sure the Dell DJ Ditty is disconnected from the computer.
2 Insert the end of a thin object, such as a straightened paper clip, into the reset button.

natural_image
Close-up of a silver and black electronic device with a paperclip inserted, showing ports and an open screen (no visible text or symbols)
NOTICE: Files or tracks that were being transferred may be lost but other data is normally retained.
18 About Your Dell DJ Ditty
2
Using Your Dell DJ Ditty
Your Dell DJ Ditty can be used in different ways:
- As a digital music player (see below), or
- As an FM Radio (see "FM Radio Using the Dell DJ Ditty" on page 26), or
- As a data storage device (see "Transferring Music to the Dell DJ Ditty" on page 35).
Playing Digital Music

Permanent hearing loss may occur if earphones or headphones are used at high volume.
Using Your Dell DJ Ditty 19
The Dell DJ Ditty can play tracks in MP3 or WMA file formats. It also has PlaysForSure support, meaning that you can play downloaded songs in WMA format with PlaysForSure Digital Rights Management technology. The Dell DJ Ditty comes with a few sample MP3 tracks already loaded into the Music Library. To load your own music files onto the Dell DJ Ditty, see "Transferring Music to the Dell DJ Ditty" on page 35.

NOTE: On the "Now Playing" screen, the buttons are defined as follows:
- Press the Play/Pause button ▶/II to pause or resume playing at rack.
- Press the Fast Forward/Skip Forward button to go to the next track.
- Press and hold the Fast Forward/Skip Forward button to fast-forward within a track.
- Press the Rewind/Skip Back button to go to the start of the current track, or the start of previous tracks.
- Press and hold the Rewind/Skip Back button to rewind within a track.
- Scroll-right to increase the volume.
20 Using Your Dell DJ Ditty
- Scroll-left to decrease the volume.
- Press in on the Volume/Scroll/Selectdial to switch between Title, Artist, or Album information (When listening to audiobooks, press in on the Volume/Scroll/Selectdial to switch between Title, Author, or Chapter information).
- Press in on and hold the Volume/Scroll/Select dial to switch between lock or unlock keys.
How to Repeat a Marked Segment (AB mode)

NOTE: You can only use AB mode with Music Tracks.
1 Press and hold the Play/Pause button ▶/|| for 2 seconds and then release to activate the start point for AB mode ()A→
2 With the start point for AB mode activated, while still on the same track, press and hold thePlay/Pausebutton ▶/II for 2 seconds and then release to activate the stop point for AB mode ( )ATh chosen segment is repeatedly played until AB mode is cancelled.
How to Cancel AB mode
With both the start and stop points for AB mode activated, press and hold the Play/Pause button ▶/|| for 2 seconds and then release to cancel AB mode.
Managing Files from the Main Menu
Start from the Main Menu to perform any Dell DJ Ditty operation.
To get to the Main Menu, press the Home/Power button on your Dell DJ Ditty.
• Music Library is your window to the music tracks stored on your Dell DJ Ditty.
- Play Mode enables you to change the sequence and manner in which tracks are played.
• FM Radio enables you to manage your favorite FM radio stations.
- Date & Time enables you to display the date and time settings and adjust your sleep timer.
22 Using Your Dell DJ Ditty
- Settings & Info enables you to customize certain settings, such as EQ, to your personal preference, and provides you with data such as firmware version and space on your Dell DJ Ditty.
Music Library
Playing Music Tracks
Listed below are some quick tips on playing music on your Dell DJ Ditty.
To play music tracks:
1 Press the Home/Power button on your Dell DJ Ditty.
2 Scroll-select Music Library.
3 Scroll-select Music.
4 Press the Play/Pause button.
Your Dell DJ Ditty plays music tracks in the sequence determined by the Play Mode setting.
To change the Play Mode setting, see "Play Mode" on page 25.
Listening to Spoken Word Audiobooks
You can purchase and download spoken word audiobooks from http://www.audible.com and listen to them on your Dell DJ Ditty.
You can use MusicMatch Jukebox to transfer audiobooks to your Dell DJ Ditty.
If you stop listening to an audiobook on your Dell DJ Ditty and go back to it later, the audiobook begins playing from where you left off.

NOTE: All spoken word content is listed in the "Audiobooks" section of the Music Library.
To play audiobooks:
1 Press the Home/Power button on your Dell DJ Ditty.
2 Scroll-select Music Library.
3 Scroll-select Audiobooks.
4 Scroll to highlight the audiobook of your choice.
5 Press the Play/Pause button.
To skip through sections in an Audiobook:
24 Using Your Dell DJ Ditty
1 Press and hold the Play/Pause button ▶/Ⅱ while in Audiobook mode until you see the Symbol on the screen.
2 Press Fast Forward or Rewind to skip to the next or previous section within a book.
3 Press and hold the Play/Pause button to exit section skip mode.
Play Mode
You can use the Play Mode function to determine the sequence of playing the selected tracks.
To view play mode options:
1 Press the Home/Power button on your Dell DJ Ditty.
2 Scroll-select Play Mode.
3 To change the play mode, scroll-select a play mode.
Normal - Plays each track one time in sequential order.
Repeat Track 📋 - Repeatedly plays the selected track until you turn off the Dell DJ Ditty or change the play mode.
Repeat All AE Repeatedly plays all tracks until you turn off the Dell DJ Ditty or change the play mode.
Shuffle - Randomly plays all tracks one time without repeating any tracks.
Shuffle & Repeat Randomly plays all tracks, then repeats them in a different random sequence until you turn off the Dell DJ Ditty or change the play mode.
Play Mode icons are shown at the top of the display, as shown below. If no icon is present, Normal Play Mode is activated.

FM Radio Using the Dell DJ Ditty
You can listen to and store your favorite FM radio stations on the Dell DJ Ditty.
To listen to F M radio:
1 Press the Home/Power button to access the main menu.
26 Using Your Dell DJ Ditty
2 Scroll-select FM Radio.
3 If you see the message "AutoScan 10 stations to presets?", scroll-select Yes. This automatically searches for and saves the 10 strongest-signalled stations as presets 1 to 10. During this process, "AutoScan" is displayed on the screen.
4 Once the scanning process has finished, "Preset 1" is displayed on the screen, and this station is played.
5 To listen to another station, press and release the Fast Forward or Rewind buttons to move to the next/previous preset.

NOTE: You only need to Autoscan FM radio stations during initial FM Radio use. However, you can repeat this procedure at any time by pressing in on the scroll dial while in FM Radio mode and scroll-selecting AutoScan.
To tune to an FM radio station by frequency:
1 Press the Home/Power button.
2 Scroll-select FM Radio.
3 If you see the message "AutoScan 10 stations to presets?", scroll-select No.
Using Your Dell DJ Ditty 27
4 Press the Play/Pause button. "SEEK" appears on the screen.
5 Press the Fast Forward/Skip Forward button to go to the next strong-signalled station. Press and hold the Fast Forward/Skip Forward button to advance by 0.1MHz. Similarly, you can use the Rewind/Skip Back button to search in the other direction.
To save an FM radio station as a preset:
Once you have tuned to a station using the above method, press and hold the Play/Pause button. Preset x (where x=1 to 10) blinks on the screen. Use the Fast forward/Skip Forward or Rewind/Skip Back buttons to increase or decrease the preset number, then press and hold Play/Pause to save.
To listen to a preset station:
1 Press the Home/Power button.
2 Scroll-select FM Radio.
3 Press the Play/Pause button until "Preset" is displayed on the screen.
4 Press the Fast Forward or Rewind button to go to the next/previous preset. Press and hold the Fast Forward or Rewind button for 2 seconds to go to the next/previous preset,
28 Using Your Dell DJ Ditty
play that station for 5 seconds and then move to the next/previous one, giving you a preview of all stations. To cancel, press the Fast Forward, Rewind or Play/Pause button.

NOTE: Use the Volume/Scroll/Select dial to adjust the volume of an FM radio station.

NOTE: Press in on the Volume/Scroll/Select dial to enter the FM Radio Menu. Scroll-select AutoScan to go through the autoscanning procedure.

NOTE: Scroll-select means to move the dial in the desired direction and press in on the scroll dial to select the item.
Date & Time
Enables you to display and set the date and time and adjust the sleep timer.
You can select:
• Display - view date and time, as well as sleep time.
- Sleep Timer - choose how much time passes before your Dell DJ Ditty shuts itself off.
- Set Time - change the time.
- Set Date - change the date.
To view the time, date and day:
1 Press the Home/Power button.
2 Scroll-select Date & Time.
3 Scroll-select Display. The date and time appear.
To set the sleep timer:
1 Press the Home/Power button.
2 Scroll-select Date & Time.
3 Scroll-select Sleep Timer A list of available times appears.
4 Scroll-select a duration.

NOTE: The Idle Timer is different from the Sleep Timer.
To set the time:
1 Press the Home/Power button.
2 Scroll-select Date & Time.
3 Scroll-select Set Time.
4 Scroll-select Change.
30 Using Your Dell DJ Ditty
5 Scroll-right to increase, or left to decrease the item which is highlighted.
6 Press in on the Volume/Scroll/Selectdial to change which item is highlighted (e.g. to change the highlighted item from hours to minutes).
7 Scroll-select < to accept the new time.
To set the date:
1 Press the Home/Power button.
2 Scroll-select Date & Time.
3 Scroll-select Set Date.
4 Scroll-select Change.
5 Scroll-right to increase, or left to decrease the item which is highlighted.
6 Press in on the Volume/Scroll/Selectdial to change which item is highlighted (e.g. to change the highlighted item from month to day).
7 Scroll-select < to accept the new date.
Settings & Info
Settings
You can customize the Dell DJ Ditty to your preferences by adjusting the settings.
You can set:
• EQ - choose from available EQ presets.
- Backlight - choose how long the backlight remains lit.
- Contrast - choose a contrast level for optimal viewing.
- Idle Timer - choose how much idle time passes before your Dell DJ Ditty shuts itself off.
- Language - choose the Dell DJ Ditty's menu language.

NOTE: Scroll-select means to move the dial in the desired direction and press in on the scroll dial to select the item.
To select an EQ setting:
1 Press the Home/Power button.
2 Scroll-select Settings & Info.
3 Scroll-select Settings.
32 Using Your Dell DJ Ditty
4 Scroll-select EQ. A list of EQ presets appear. To select one of the EQ presets, scroll-select the preset.
To set the backlight duration:
1 Press the Home/Power button.
2 Scroll-select Settings & Info.
3 Scroll-select Settings.
4 Scroll-select Backlight. A list of available durations appears.
5 Scroll-select a duration.
To set the contrast level:
1 Press the Home/Power button.
2 Scroll-select Settings & Info.
3 Scroll-select Settings.
4 Scroll-select Contrast. A level-bar of contrast levels appears.
5 Scroll-select a level.
To set the idle timer:
1 Press the Home/Power button.
2 Scroll-select Settings & Info.
3 Scroll-select Settings.
4 Scroll-select Idle Timer A list of available times appears.
5 Scroll-select a shutdown time.

NOTE: Your player is "idle" when you do not press a player button and you do not have any tracks playing during the specified duration.
To set the menu language:
1 Press the Home/Power button.
2 Scroll-select Settings & Info.
3 Scroll-select Settings.
4 Scroll-select Language. A list of available languages appears.
5 Scroll-select a language.
Information
Provides you with information such as:
- Firmware version
- Total amount of space for storing music or data
34 Using Your Dell DJ Ditty
• Available space for storing music or data
• Number of tracks stored
To check the information for your Dell DJ Ditty:
1 Press the Home/Power button.
2 Scroll-select Settings & Info.
3 Scroll-select Information
Transferring Music to the Dell DJ Ditty
With Musicmatch ^® , you can transfer music tracks from your personal music library to the Dell DJ Ditty. Musicmatch has the capability to ‘rip’ or convert music CDs to digital music files on your computer. Refer to the Musicmatch Help tutorial to create digital music files from your music CDs.

NOTE: Before transferring data files or music tracks, you must first connect your Dell DJ Ditty to your computer.
Transferring Music Tracks Using Musicmatch® to Your Dell DJ Ditty
Dell DJ Ditty software powered by Musicmatch ^® makes buying and enjoying digital music easy by providing a simple graphical interface between your computer and the Dell DJ Ditty, as well as access to the Musicmatch Downloads service. Some of the basic features of Musicmatch are covered below, but for complete instructions on how to use the Musicmatch software, click Start > All Programs > Musicmatch Jukebox. Click Help in Musicmatch (see "Finding Information" on page 6).
Transferring Music Tracks from Musicmatch Library
1 Connect the Dell DJ Ditty to your computer.
2 Start Musicmatch by clicking Start > All Programs > Musicmatch Jukebox. The Musicmatch main window appears.
3 Click View > Portable Device Manager.
![File Edit View Options Help Upgrade MUSIC™ musicmatch jokesbox Upgrade to Plus - Click Here! Current Playlist Playlists Save Clear Burn Send to Log In Account Not Logged in Library View Library by AutoDJB Add Tracks Tools View by Artlet Album Genre Time Aie Rock.Pop 3:36 Athleta Alternative Rock 46:21 Coldplay (Various) 11:33 Eagles Rock.Pop 38:14 Snow Patrol Rock.Pop 6:32 U2 (Various) 1-12:03 Musicmatch Portable Device Manager Find - Syns Add Tracks Select: Dell DJ Ditty Tools Type City Artist Album Track # Center MB2 MP3 Get the Blue Sky U2 The Joshua Tree Get the Blue Sky [Live] U2 Ruttle and Hum Chances Athleta Tourist Clocks Coldplay A Rush or Blood to... Discothèque U3 Pop Don't rank Coldplay Porechutes Even Better Than the Real U2 Even Better Than ... Hell Light Athleta Tourist Heartache Tonight Eagles The Complete Area... High Speed Colplay Porechutes I Love Athleta Tourist Device: 339.89 MB Free, 446.25 MB Table 31 track(s) 0:08 98.98 MB](/content/2026/05/1083339/images/40f609d896f2124f5ad51f8c864c381aa47a2255d7ef7038ac509f2f1d87720b.jpg)
Using Drag-and-Drop:
1 Follow steps 1 through 3 on page 36.
2 With the Portable Device Manager (PDM) open, you can transfer tracks in a drag-and-drop operation from your computer's Musicmatch Jukebox onto the Dell DJ Ditty.
3 To drag-and-drop, locate and click the track that you want to copy, then drag it to Dell DJ Ditty.
Using the Add Tracks button:
1 Open the Portable Device Manager (PDM) as described above.
2 Click the Add Tracks button.
3 Click the Library, Playlists, My Music, Desktop, or My Computer icon on the left side of the "Add tracks to Dell DJ Ditty" window.
4 To add all categories, clickSelect All and then clickOK. To add one category, select the category and click OK. Double-click a category to see its sub-categories and tracks. Musicmatch displays the main PDM window when all selected tracks are added.
38 Using Your Dell DJ Ditty
Using Synchronization:
1 Open the Portable Device Manager (PDM) as described above.
2 Click the Sync button to update your Dell DJ Ditty with tracks from your computer.

NOTE: The first time you use the Sync feature, it may be necessary to set your preferences in the Portable Device Assistant, if you have not already done so. If this is the case, the Portable Device Assistant appears automatically.

NOTE: Synchronization is a one-way process that copies files from the computer to the Dell DJ Ditty. Select Help on the Musicmatch toolbar for more information.
Storing Data Files on the Dell DJ Ditty
You can store data files on your Dell DJ Ditty in the same way as a standard USB Flash Memory device.
To transfer files:
1 Using Windows ^® Explorer ^® or the My Computer icon, navigate to the My Computer folder.
2 Your Dell DJ Ditty is displayed as an MTP (Media Transfer Protocol) Player (See below).

MTP Player
3 Within the MTP directory, there are two folders: Data and Media. Be sure to copy-and-paste/drag-and-drop any data files into the Data folder.
40 Using Your Dell DJ Ditty
3
Frequently Asked Questions
This section covers common problems you might encounter or questions you might have while using your Dell DJ Ditty. If you have a problem that is not addressed in this chapter, visit http://support.dell.com for more information.
Installation
1 I can't install the Dell DJ Ditty software on my computer, which has Microsoft ^® Windows ^® 95, Windows 98 or Windows 2000 installed on it. The installation stops halfway.
You cannot install the Dell DJ Ditty software on a computer with Windows 95, Windows 98 or Windows 2000.
Frequently Asked Questions 41
Upgrade your computer's operating system to Windows XP (with Windows Media Player 10.0 or above) before attempting to install the Dell DJ Ditty.
2 My Dell DJ Ditty is not recognized by Musicmatch, after installing the software from the Dell DJ Ditty™ Product Software CD.
In Musicmatch I can't see my Dell DJ Ditty.
Your Dell DJ Ditty was probably connected to your computer during the installation.
Your Dell DJ Ditty may not be properly connected to your computer.
Disconnect your Dell DJ Ditty and restart your computer. You may also have to re-install the software from the Dell DJ Ditty™ Product Software CD. Be sure to follow the installation steps carefully. Do not connect your Dell DJ Ditty to your computer during software installation.
You may not have the latest version of Windows Media Player installed on your computer. Previous versions might cause your Dell DJ Ditty not to be recognized.
42 Frequently Asked Questions
Download and install the latest version of Windows Media Player.
Usage
1 I can't turn my Dell DJ Ditty off.
I was using my Dell DJ Ditty, and now the Dell DJ Ditty is not responding.
The keys on the Dell DJ Ditty have been locked.
Unlock the keys by pressing in on and holding the
Volume/Scroll/Select dial until the lock icon disappears.
The Dell DJ Ditty's operating system may be locked.
Insert the end of a thin object, such as a straightened paper clip, into the reset button, located next to the headphone connector on your Dell DJ Ditty.
2 I've disconnected my Dell DJ Ditty from my computer, but the display still shows that it is connected.
The Dell DJ Ditty's operating system may be locked.
Insert the end of a thin object, such as a straightened paper clip, into the reset button, located next to the headphone connector on your Dell DJ Ditty.
3 My computer does not recognize my Dell DJ Ditty.
You may be using a USB hub to connect your Dell DJ Ditty to your computer.
Connect your Dell DJ Ditty directly to your computer's USB port.
Your computer's USB port may not be functioning properly.
Connect your Dell DJ Ditty to another USB port which is known to function correctly.
General
1 When I listen to music tracks, I hear a lot of noise or drop-outs.
The track you are listening to was not recorded or encoded properly.
44 Frequently Asked Questions
Verify that the music track sounds the same when you play it from the Dell DJ Ditty and from your computer. You can then acquire a better recording of the track and transfer it to your Dell DJ Ditty.
Firmware Upgrade

NOTICE: This step replaces the operating software (firmware) on your Dell DJ Ditty with a newer version.
Make sure a suitable firmware file is copied to your computer before performing this operation.
The latest firmware file can be downloaded from http://support.dell.com.
To upgrade the firmware:
a Connect your Dell DJ Ditty directly to an available USB port on your computer.
b Run the firmware update program and click the "Next" button.
c Verify that the "Format Data Area" option is unchecked, then click the "Start" button.

NOTICE: All files and music tracks are lost if "Format Data Area" is checked.
d After firmware upgrade is complete, disconnect your Dell DJ Ditty from the computer.
e The Dell DJ Ditty restarts.

NOTE: Restarting the Dell DJ Ditty may take up to 2 minutes.
Warning Indications
1 Low Battery Shutting Down
The battery is low or depleted. Connect the Dell DJ Ditty to a powered USB port and allow the unit's battery to charge fully.
2 License Expired
The Subscription Song license has expired. Connect the Dell DJ Ditty to the PC and perform a music track sync to refresh all licenses automatically.
3 Error! Reformat with Firmware Updater
46 Frequently Asked Questions
Flash memory data error. Follow the steps Reload or Upgrade firmware with “Format Data Area” checked in the Troubleshooting section.
Troubleshooting
1 All the buttons on my Dell DJ Ditty are not responding and there is a lock icon 🔒 on the LCD Screen
The Button Lock function has been activated. Press in on and hold the Volume/Scroll/Select dial until the lock icon disappears, and then release the button.
2 LCD Display is frozen
The Dell DJ Ditty is unresponsive to all button presses and the Button Lock function has not been activated. Make sure your Dell DJ Ditty is not connected to your computer and perform the reset. To perform the reset, insert the end of the thin object, such as a straightened pin paper clip, into the reset button near the headphone jack. See "Performing a Reset" on page 17 for more information.
3 Your Dell DJ Ditty is Frequently Unresponsive
Frequently Asked Questions 47
i. Reset Dell DJ Ditty
Make sure your Dell DJ Ditty is not connected to your computer. To perform the reset, insert the end of the thin object, such as a straightened pin paper clip, into the reset button near the headphone jack.
ii. Format Dell DJ Ditty

NOTICE: Be sure to backup all the files and music tracks in your Dell DJ Ditty before performing this step.

NOTICE: All files and music tracks in your Dell DJ Ditty are lost when this operation is selected.
There are two ways to format data on your Dell DJ Ditty.
Format using Musicmatch Jukebox:
a Run Musicmatch® Jukebox.
b Connect your Dell DJ Ditty to your computer.
c Click the “Portable Device” button on the left-hand side of the screen.
d The “Portable Device Manager” window pops up.
48 Frequently Asked Questions
e Click the "Tools" button on the right-hand side of "Portable Device Manager" window.
f Choose the “Format media”.
g Disconnect your Dell DJ Ditty and reboot it
Format using Windows Media Player 10:
a Run Microsoft® Media Player 10.
b Connect your Dell DJ Ditty to the computer.
c Click the Sync feature.
d Click the “Format storage media” button on the right-hand side of the screen.
e Disconnect your Dell DJ Ditty and reboot it.
iii. Reload or Upgrade firmware with “Format Data Area” checked.

NOTICE: This step replaces the operating software (firmware) in your Dell DJ Ditty with a newer version.
You should always have the latest firmware installed in your player.
Frequently Asked Questions 49
For steps to check the firmware version, refer to "Information" on page 34.
The latest firmware file can be downloaded from http://support.dell.com.
Make sure a suitable firmware file is copied to your computer before performing this operation.
a Connect your Dell DJ Ditty to your computer.
b Run the firmware update program and click the Next button.

NOTICE: Be sure to backup all the files and music tracks on your Dell DJ Ditty before performing this step.
c Check the "Format Data Area" option and click the Start button.

NOTICE: All files and music tracks on your Dell DJ Ditty are lost if "Format Data Area" is checked.
d After the firmware upgrade is complete, disconnect your Dell DJ Ditty from the computer.
e The Dell DJ Ditty will restart.
50 Frequently Asked Questions

Restarting the Dell DJ Ditty may take up to 2 minutes.
Musicmatch
Musicmatch Jukebox FAQ
1 Are there other services available to use with Musicmatch Jukebox?
Musicmatch Jukebox comes fully integrated with Musicmatch Radio, Musicmatch Music Store and Musicmatch On Demand. These services help you listen to and discover music in ways never before possible, or as easy, on your personal computer. For more information click thOn Demand, Music Store or Radio buttons on the Musicmatch Jukebox interface.
2 If I install Musicmatch Jukebox over a previous version, does it delete my playlists or libraries?
Musicmatch Jukebox preserves both your Playlists and Music Library content if you install using the default installation options. If you opt to change your default installation to a custom install in a different location, you may have to re-add
Frequently Asked Questions 51
your music files to your Music Library and rebuild your Playlists. Your music files still remain on your computer and do have not been removed.
3 I'm getting an error when trying to update the firmware on my Dell DJ Ditty
If you are getting the error:
"PC Firmware update cannot proceed because Musicmatch Jukebox software is interfering, please restart system and run this firmware update again."
Try opening the task manager and ending the "mim" process.
a Press Ctrl+Alt+Delete on your keyboard.
b From Windows Task Manager, select the Processes tab.
c Highlight mim.exe and select the End Process button
d Select Yes to the Task Manager warning
e Proceed with the firmware update
f If problem remains, restart the system and update the firmware again.
52 Frequently Asked Questions
4 The tracks in my Library have different colored icons next to each track. What does each color mean?
- Gray music-note icons represent standard MP3, mp3PRO, WMA and WAV music files.
- Green music-note icons represent purchased Musicmatch Downloads tracks.
- Orange sound waves are links to Internet streamed files playable through your Music Library.
- Blue sound waves are Musicmatch On Demand tracks playable through your Music Library.
- A CD represents a CD that is inserted into your CD drive, and it represents albums when in View By Album mode.
• A white page represents a playlist.
Error Messages
"Unsupported Operation: You must be logged-in to your On Demand portable account to download and transfer On Demand tracks to your portable device."
"On Demand services are currently unavailable. Updating your PC settings may resolve the problem. Go to Help > Additional Help Online > FAQ for more information."
"Some On Demand services are unavailable. Logging in at a later time may resolve the problem."
Solutions
Jukebox
1 Open the Windows Task Manager [Ctrl-Alt-Del] and select the Processes tab.
2 Highlight mmjb.exe [if it exists] and press the End Processes button [press OK to the pop up dialog].
3 Highlight mim.exe and press the End Processes button [press OK to the pop up dialog].
User Settings
1 Set up your XP login with administrator rights from Start menu > Control Panel > User Accounts.
Internet Explorer
54 Frequently Asked Questions
Right-click on Internet Explorer from your desktop and select Properties.
1 Select the Privacy tab and make sure your cookie tolerance is set to Medium or lower.
2 Select the Security tab and click the Default Level button from the lower right side.
- If this button is not active, set the level to Medium or lower.
3 From the Security tab, highlightTrusted Sites and press the Sites button
- Uncheck the option Require server verification (https:) for all sites in this zone.
- I n Add this Web site to the zone text box, type in http://www.musicmatch.com and press the Add button.
4 Select the Advanced tab and place a checkmark next to the following options:
- Enable Install on Demand (Internet Explorer)
- Enable Install on Demand (Other)
5 Select the Connections tab, and make sure the following options are correct:
a If you're using a Modem, click on the name of your ISP and press the Settings button.
- Uncheck the box that reads Use a proxy server for this connection
b If you're using a Cable service [Comcast, Cox, RoadRunner, etc], press the LAN Settings button.
- Uncheck the box that reads Use a proxy server for your LAN
Windows Media Player 10
If you don't have Windows Media Player (WMP)10, install it from http://www.microsoft.com/downloads/details.aspx?FamilyID=b446ae53-3759-40cf-80d5-cde4bbe07999&displaylang=en
1 Press the down arrow in the top right corner of WMP and select Tools / Options.
2 Select the Privacy tab and place a checkmark next to the following options:
• Acquire licenses automatically for protected content.
56 Frequently Asked Questions
- Send unique Player ID to content providers.
Firewall/Antivirus Software
Do you have an active Firewall? Go to the Start menu, select Control Panel, then select Security Options.
1 Select the Windows Firewall link under Manage Security Settings. If the firewall is on, continue.
- Select the General tab and uncheckDon't allow exceptions
2 Select the Exceptions tab, press the Add Program button, and press the Browse button.
- Select the My Computers shortcut from the browse dialog and navigate toC:\Program Files\Musicmatch\Musicmatch Jukebox\
- Add the following programs: mmjb.exe, mm_TDMEngine.exe, mim.exe, mimboot.exe, MMJBBurn.exe, mmjblaunch.exe and mm_server.exe.
If you are running a firewall other than Windows Firewall, unblock the following programs:mmjb.exe, mm_TDMEngine.exe, mim.exe, mimboot.exe, MMJBBurn.exe, mmjblaunch.exe, and mm_server.exe.
General Usage
1 Add tracks to your portable device
a Connect the portable device to your computer as instructed in the Getting Started Guide.
b Click the Portable Device button to open the Portable Device Manager, (or send tracks to the PDM by selecting the menu File>Send to Portable Device).

NOTE: When you first connect your portable device, the Portable Device Assistant should open, giving you options on how to add music to the device; either manually or automatically through synchronization. You may opt to cancel the assistant and simply add tracks via drag-and-drop, clicking the Add button, or clicking the Send To button under the Playlist Window.)
2 Device Assistant
When the Device Assistant opens it helps you copy music to the device.
58 Frequently Asked Questions
a Decide if you want to manually add tracks, or have the process more automated by using synchronization.
Manually Add Tracks - You may either:
- drag-and-drop tracks into the PDM window,
• c l i Add button in the PDM window, or
• c l i Send To button orethe Playlist window to send your Playlist to the PDM window.
Automatically add tracks using synchronization
b Click Next. You have two options:
- Choose a random assortment of tracks (from your playlists or library)
- Transfer as much as possible of each source (from your playlists or library)

NOTE: Either choice attempts to use all tracks, but only uses as many tracks as can fit on the portable device.
c Click Next. Select the playlists you'd like to transfer, or choose All Musicmatch Library Tracks Musicmatch calculates and display the amount of space required based
on your selection, and display the amount of space available on your device.
d Musicmatch is now ready to copy files to the device. You now have two options next time you connect your device.
- To have the assistant display again. This lets you use this automated assistant to add files to your portable device.
- To not have the assistant display and have synchronization occur automatically each time you connect your device, using the same settings you have just selected in the previous steps.
e Click SyncNow. Tracks begin to transfer.

NOTE: If your device does not display, you may need to download a plug-in for it. Click the Tools button and select Add A Device Plug-in. Find your device and click on its picture. The plugin downloads and installs automatically. Reattach your portable device and try again.

NOTE: MusicMatch Jukebox Software, which is included on your Dell DJ Ditty Product Software CD, already has the Dell DJ Ditty Plug-in Preinstalled.
60 Frequently Asked Questions
4
Appendix
Specifications
Hardware
| Display | LCD |
| 96 x 32 resolution | |
| Blue EL back light | |
| Storage media 512MB non-volatile flash memory | |
| Battery Embedded lithium-polymer | 300mAh max. |
| Computer connection USB 2.0/1.1 | |
Performance Parameters
| Audio quality (specifications based on 32-ohm load at 1-kHz tone are typical values) | |
| Signal-to-noise ratio | up to 92 dB |
| Channel separation | up to 65 dB |
| Frequency response | 24 Hz-20 kHz (headphones) |
| Harmonic distortion < 0.1% | |
| Playtime up to 14 hours (based on 128 kbps MP3 songs, continuous playback, volume 7(maximum 21), EQ off, using included Dell earphones) | |
| Battery charging time 2.5 hrs | |
| Operating temperature 0°C/32°F to 40°C/104°F | |
| Storage temperature | -10°C/14°F to 45°C/113°F |
Supported Audio Formats
MP3 Bitrates 8 \~ 320 kbps, Variable
Bitrate (VBR) supported
WMA Bitrates 32\~192 kbps, Variable
Bitrate (VBR) supported
PlaysForSure Licensed WMA
Audible files Format 2, format 3 and format 4.
Supported Operating Systems
Windows XP Home 32 bit, SP 1, Windows Media
Player 10
Windows XP Professional 32 bit, SP 1, Windows Media
Player 10
Glossary
AUDIBLE—Audible format is used for Audiobooks which can be downloaded and listened to on your Dell DJ Ditty. When you stop listening to an Audiobook and return to it later, it will still be at the same place.
BITRATE —A bitrate indicates the average number of bits in 1 second of a digital audio track. MP3 encoders allow you to specify the bitrate when making MP3 files. The higher the bitrate, the better the audio quality. Unfortunately, this also means a larger file size.
DIGITAL RIGHTS MANAGEMENT (DRM) —A technology enabling the copyright owner of intellectual property, like a digital audio track, to control file usage. It is normally used to allow you to download digital audio tracks while preventing you from distributing the files to other people or other devices. With DRM, digital audio tracks contain digital signatures. Your Dell DJ Ditty is DRM-compliant.
EQ—Short for "Graphic Equalizer". Different settings will boost or reduce certain frequencies and enhance the sound.
FIRMWARE—The software in your device that allows you to perform numerous functions including playing audio.
KBPS—Kilobits-per-second. A measure of how good the bitrate is. 128 kbps is the standard bitrate for MP3 files. 128-kbps MP3s are near-CD quality.
64 Appendix
Some other commonly used encoding rates are 160 or 192kbps.
LITHIUM-POLYMER BATTERY (LI-POLY) —A battery composed of lithium, a light metal with high electrochemical potential. Lithium batteries are light and store high amounts of electrical energy. Because of this, lithium-polymer batteries are ideal for your portable device. Lithium-polymer batteries do not use poisonous metals, such as lead, mercury, or cadmium, and have no "memory effect" problems (caused by not being fully discharged before a new recharge, and remembering a shorter battery cycle). However, they are more expensive than conventional nickel-cadmium (NiCad) and nickel metalhydride (NiMH) batteries. Your Dell DJ Ditty uses a Li-Poly battery.
MEGABYTE (MB) —About 1 million bytes. Bytes, megabytes, and gigabytes are measures of how much data a storage device can hold. For example, a 3-minute MP3 encoded at standard bitrates is approximately 3 MB in size.
MP3 —A member of the MPEG compression family, MP3 is a commonly used compressed digital-audio format. MP3 encoding transforms digital audio files (like WAV) to provide reasonable audio quality in relatively small file sizes.
PLAYSFORSURE—Digital Rights Managed music in WMA format (See reference to Digital Rights Management above).
SHUFFLE —A Play mode that randomly plays tracks once only from the
Selected Music list.
SHUFFLE REPEAT—A Play Mode that randomly plays tracks from the Selected Music List repeatedly.
USB —Universal Serial Bus. A moderately high-speed input/output technology for "hot swap" data transfers, meaning that you can connect or disconnect a USB device without turning off your computer. Your Dell DJ Ditty uses the newer USB 2.0 standard that allows for higher speed transfers than USB 1.1.
WMA —Windows Media Audio. This is the standard used by Windows Media. Your Dell DJ Ditty can play tracks in this format, as well as MP3.
Index
A
AB mode, 21-22
Available space, 34
B
Backlight duration, 32
C
Contrast level, 32
D
Data Files, 39
Date & Time, 22
Date and Time, 29
Digital Rights Management, 20
Display, 29
E
EQ, 32
Error Indications, 46
Index 67
F
Fast Forward/Skip Forward, 11, 20
Firmware, 52
Firmware version, 34
FM Radio, 22
L
Language, 32
Lanyard Attachment, 12
LCD Screen, 11
Listen to a preset station, 28
Lock keys, 21
H
Headphone Connector, 11
Home/Power Button, 11
M
Main Menu, 22
Music Library, 22, 25
Music Store, 51
Musicmatch Help, 36
Musicmatch Library, 36
Musicmatch®, 35-36
|
Idle Timer, 32
68 Index
N
Normal, 25
Number of tracks, 35
0
On Demand, 51
P
Play All, 23-24
Play Mode, 22
Play/Pause, 11, 20
PlaysForSure, 20
Portable Device Manager, 36, 38
Preset, 27
R
Radio, 51
Repeat All, 25
Repeat Track, 25
Reset Button, ll
Rewind/Skip Back, 12, 20
S
Scroll-select, 12
SEEK, 28
Settings & Info, 23
Shuffle, 26
Index 69
Shuffle Repeat, 26
Sleep timer, 29
Solutions, 54
Spoken Word Audio, 24
Synchronization, 39
T
Troubleshooting, 47
U
Unlock keys, 21
USB Connector, 11
USB Protective Cap, 11
70 Index
V
Volume/Scroll/Select Dial, 11
W
Windows Media Player 10, 56
WMA, 20
- Notes, Notices, and Cautions
- Contents
- About Your Dell DJ Ditty
- Using Your Dell DJ Ditty
- Playing Digital Music 19
- Managing Files from the Main Menu 22
- Transferring Music to the Dell DJ Ditty 35
- Frequently Asked Questions
- Installation 41
- Contents
- Appendix
- Finding Information
- What are you looking for? Find it here:
- 1
- About Your Dell DJ Ditty
- Introduction
- Top, Front and Side Views
- How to use the Volume/Scroll/Select Dial
- Installing Software
- Connecting to your Computer & Charging the Battery
- To charge the battery:
- Performing a Reset
- 2
- Using Your Dell DJ Ditty
- Playing Digital Music
- How to Repeat a Marked Segment (AB mode)
- How to Cancel AB mode
- Managing Files from the Main Menu
- Music Library
- Playing Music Tracks
- Listening to Spoken Word Audiobooks
- Play Mode
- FM Radio Using the Dell DJ Ditty
- To listen to F M radio:
- To save an FM radio station as a preset:
- To listen to a preset station:
- Using Your Dell DJ Ditty
- Date & Time
- You can select:
- To set the date:
- Settings & Info
- Settings
- To set the backlight duration:
- To set the contrast level:
- To set the idle timer:
- Information
- Transferring Music to the Dell DJ Ditty
- Transferring Music Tracks Using Musicmatch® to Your Dell DJ Ditty
- Transferring Music Tracks from Musicmatch Library
- Using Drag-and-Drop:
- Using the Add Tracks button:
- Using Your Dell DJ Ditty
- Using Synchronization:
- Storing Data Files on the Dell DJ Ditty
- To transfer files:
- 3
- Frequently Asked Questions
- Installation
- Usage
- General
- Firmware Upgrade
- Warning Indications
- Troubleshooting
- i. Reset Dell DJ Ditty
- ii. Format Dell DJ Ditty
- Frequently Asked Questions
- Musicmatch
- Musicmatch Jukebox FAQ
- I'm getting an error when trying to update the firmware on my Dell DJ Ditty
- Frequently Asked Questions
- Error Messages
- Solutions
- Jukebox
- User Settings
- Internet Explorer
- Windows Media Player 10
- Frequently Asked Questions
- Firewall/Antivirus Software
- General Usage
- 4
- Appendix
- Specifications
- Supported Audio Formats
- Supported Operating Systems
- Glossary
- Appendix
- Index
- A
- B
- C
- D
- E
- F
- L
- H
- M
- |
- N
- 0
- P
- R
- S
- T
- U
- V
- W
Brand : DELL
Model : DJ Ditty
Category : Unknown