CD084B - CD Player CURTIS - Free user manual and instructions
Find the device manual for free CD084B CURTIS in PDF.


| Product type | CD Player |
| Brand | Curtis |
| Model | CD084B |
| Power supply | DC 3V (2 x AA batteries) or AC adapter (not included) |
| Playback formats | CD, CD-R, CD-RW, MP3 CD |
| Play modes | Play, Pause, Skip (forward/back), Repeat (one/all), Shuffle |
| Display | LCD screen with track/time info |
| Audio output | 3.5mm headphone jack |
| Battery life | Approximately 8 hours continuous playback |
| Dimensions (approx.) | 140 x 130 x 25 mm |
| Weight (without batteries) | 290 g |
| Accessories included | User manual, stereo earphones (may vary) |
| Anti-skip protection | Yes, electronic skip protection (e.g., 30 seconds) |
| Programming | Yes, up to 20 tracks |
| Language options | English (default), others via translation request |
| Cleaning | Clean lens with soft cloth; avoid liquids |
| Safety warnings | Do not expose to moisture or extreme temperatures |
Frequently Asked Questions - CD084B CURTIS
User questions about CD084B CURTIS
0 question about this device. Answer the ones you know or ask your own.
Ask a new question about this device
Download the instructions for your CD Player in PDF format for free! Find your manual CD084B - CURTIS and take your electronic device back in hand. On this page are published all the documents necessary for the use of your device. CD084B by CURTIS.
USER MANUAL CD084B CURTIS
COMPACT DISC PLAYER WITH
ELECTRONIC ANTI SKIP PROTECTION
PLUS AM/FM PLL RADIO
CD084B

INSTRUCTION MANUAL
052CD084B74
Please read this manual thoroughly before operating your new CD player.
IMPORTANT NOTES
Avoid installing the unit in locations described below.
- Places exposed to direct sunlight or close to heat radiating appliances such as electric heaters.
- On top of other stereo equipment that radiates too much hot.
- Places locking ventilation or dusty places
- Places subject to constant vibration
• Humid or moist pieces.
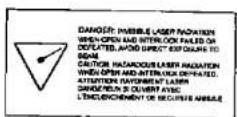
This product utilizes a laser.
Danger - Invisible laser radiation is present when unit is opened and interlock failed or defeated. Caution - Use of the controls or adjustments of procedures other than these specified herein may result in hazardous radiation.
THIS LASER COMPACT DBO PLAYER FUNCTIONS BY HELP OF INVISIBLE LASER LIGHT AND IS EQUIPPED WITH SAFETY SWITCHES TO AVOID EXPOSURE WHEN DOOR IS OPEN AND SAFETY INTERLOCKS ARE DEFEATED. IT IS DANGEROUS TO DEFEAT OR BYPASS SAFETY SWITCHES.


DANGEROUS VOLTAGE
Uninequated Dangerous Voltage, that may be of sufficient magnitude to constitute a risk of electric shock to persons is present within the product's enclosure.
ATTENTION
The Owner's Manual contains important operating and maintenance instructions. For your safety, it is necessary to refer to the manual.
WARNING: TO PREVENT FIRE OR SHOCK HAZARD, DO NOT EXPOSE THIS LIMIT TO RAIN OR MOISTURE.
LOCATION OF CONTROLS

-
CO DOOR OPEN SWITCH
-
CD COMPARTMENT LID
-
PROG. (PROGRAM) & MEMORY BUTTON
-
MODE & STEREO/MOND BUTTON
-
FUNCTION (TUNER / CD) SWITCH
-
PRESET MEMORY & PLAY TRACK BUTTON
-
BAND & ANTI - SKIP
-
LCD DISPLAY WINDOW
-
DC 4.5V INPUT JACK
-
SKIP / SEARCH (▶▶) & TUNING UP BUTTON
11.SKIP / SEARCH (◀◀) & TUNING DOWN BUTTON
-
PLAY / PAUSE & RADIO ON BUTTON
-
STOP & POWER OFF BUTTON
-
LINE OUT JACK
-
HEADPHONE or EARPHONE JACK
-
VOLUME CONTROL KNOB
-
DBBS (BASS BOOST) SWITCH
-
RECHARGE SWITCH
ALL BATTERIES MUST BE OF RECHARGEABLE NICKEL-CADMIUM TYPE. OTHERWISE THE BATTERIES MAY EXPLODE OR LEAK. MAKE SURE THE RECHARGE SWITCH IS IN THE "OFF" (NORMAL) POSITION WHEN USING REGULAR BATTERIES.
POWER SOURCE NORMAL BATTERIES/AC ADAPTOR
Battery Power Operation
- Open the battery compartment cover and insert two "AA" alkaline batteries inside the battery compartment. Follow the polarity as indicated in the battery compact.
- Close the battery compartment cover.
Note
- When the unit is to be operated using batteries, always unplug the AC adaptor from the AC adaptor from the AC power outlet and the DC output jack from the set. Otherwise the player will not operate.
- When operating on batteries and the CD player no longer plays, the Radio can still be used.
AC Operation
- Insert the DC plug at the end of the AC adaptor cord into the DC input jack, on the rear of the unit
- Plug the AC adaptor into a 120V/60Hz AC power outlet socket.
Note :
If the AC plug of this unit does not fit in your AC outlet, a plug adaptor (not included) should be used. Consult your local dealer on the type of plug adaptor required.
HEADPHONE AND HI-FI CONNECTION
■ Listing with the Headphone
Connect the plug of the stereo headphones into the (GREEN) socket.
Caution: Avoid excessive volume levels and listening to sound for a long period of time when using headphone, as this may impair your hearing.
■ Connecting to component audio systems
Connect a stereo connection cable (not included) into the 3.5mm LINE OUT (BLACK)Socket of the unit and the CD / AUX inputs of an audio system.
Note: Always switch the power off before making any connections between the player and another unit.
PLAYER MAINTENANCE
Cleaning the Cabinet
Wipe with a soft cloth. If the cabinet is very dirty, dampen the cloth with a weak solution of neutral detergent and water, and then wipe clean.
Cleaning the lens
A dirty lens will cause sound skipping and, if the lens is very dirty, the CD may not work. Open the disc cover and clean the lens as follows:
Dust or Dry Particles
Using a camera lens brush / blower, blow on the lens couple times, then wipe it lightly with the brush to remove dust. Then, blow on the lens once more.
Finger prints
If the lens cannot be cleaned by using a brush / blower, use a dry cotton swab starting in the middle and working to the outside edge.

DISC CLEANING AND TROUBLE SHOOTING GUIDE
Cleaning the Disc
When a disc becomes dirty, clean it with a cleaning cloth. Wipe the disc from the centre out.

Note
Do not use solvents such as benzine petrol, thinner, commercially available cleaners or anti-static spray intended for analogue discs.
Should you experience difficulties in the use of this player please refer to the following chart before contacting your dealer or the place of purchase.
| Troubleshooting Guide | |
| Problem | Points to Check |
| Player fails to function | Disc may be inserted upside downDisc not mounted correctly on chuckDirty or defective discDirty pick up lensPlayer ld not closedMoisture/Condensation, e/ow player to warm up to room temperature for 60 minutesAC power to adaptor switched offWeak batteriesAuto power off has occurred, press play button to restore power. |
| No sound from Headphones | Headphone plug is not firmly inserted into the Green Phones socket.Headphones have been inserted into the Black line output socket.CD/RADIO function switch incorrectly set. |
| No sound when played through an external amplifier | Connection is incorrectPower to external amplifier not switched on |
| Intermittent sound | Dirty or defective discDirty pick up lensPlayer is subject to excessive vibration or shockLow battery powerPoor Headphone connectionANTI-SKIPnot selected |
| Noise or sound distorted on AM or FM broadcast | Station not tuned properlyTurn the unit for best reception (AM only) |
| No FM RADIO when played though an external amplifier | Ensure headphone is plugged into the headphone socket. |
BASIC DISC PLAY
- Set the Tuner/CD switch to CD
- Connect the headphones to the PHONES (GREEN) socket
- Slide the OPEN switch to open the CD compartment lid
- Set the VOLUME control to minimum.
- Insert the disc with the label side facing up. Push down in the center until the disc is locked in place.
- Close the lid securely until it clicks shut.
- Press the PLAY button, the total number of tracks will be displayed and the disc will start playing.
B. Adjust volume level as required
NOTE:
Press the buttons (M1-M5 or M+5) to select the desired CD track number during play. Directly use the M1-M5 button to play the first of five track numbers only. For 6 to 10 or more, press the M+5 and M1 buttons once to select the desired track number 6.
e.g. Press(M+5)+M1=tracknumber6
Press (M+5)+(M+5)+M1=track number 11
Turning Power on and off (CD Mode)
This unit has no ON/OFF switch for the CD section. To turn on and off, press the following buttons.
To turn on: Press ▶ PLAY/PAUSE (playback Starts).
To turn off: Press ■ STOP during standby mode. Opening the disc compartment also turns the power off.
Remove the Disc
Hold the edge and gently press the center pivot as illustrated, then pick up the disc. CAUTION:
Wait for disc to stop rotating before pressing the OPEN button.
Note: This unit can play 3" (8cm) single CD'S without an adaptor. Do not use a CD single adaptor for these discs.
AUTO power-off function (CD Mode only)
when the unit is stopped (standby mode) for approximately 1 minutes, the power is automatically turned off.
To Emphasize the bass sound
Set the BASS BOOST switch to the ON position.
DBBS

Note: The Bass Boost Performance will be dependant on the VOLUME control setting.
LCD DISPLAY INFORMATION
When the ▶ is pressed at initial start up
The display will briefly show as diagram
then proceed to start playback.
To review the total number of tracks on
the disc and total disc times, press the
■ STOP button once.
Note: The ANTI-SKIP function will start automatically. Once the PLAY button is pressed.
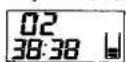
During PLAY mode
The track number and the elapsed playing
Time are displayed.


This sixth track has elapsed
2 min 30sec.
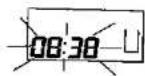
During PAUSE mode
The track playback is paused, the elapsed time and track number is flashing.
Note
When lid is opened during play mode * ----* shows in the display is indicating the door still open.
Note
A flashing ▶ indication appears on the display when the batteries need to be changed.

REPEAT AND PLAY MODES
Every time the CD MODE button is pressed.
The corresponding mode appears in the display window.


Show on the LCD display. The current track on the disc will be repeated.
During the play


Show on the LCD display. All tracks on the disc will be repeated.
During the play
NOTE: In normal mode none of the above symbols show in the display.
NORMAL PLAYBACK
Play the whole disc.
Press once to play
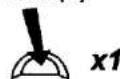
PLAY/PAUSE
INTRO SCAN AND PROGRAMMED TRACK PLAY
INTRO
During playback
Plays the first 10 second of each track on the disc.


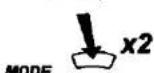
MODE
When in the STOP mode press the MODE button three times and then press the PLAY/PAUSE button to start INTRO playback. During disc playback press the MODE button three times and then press the back skip ◀◀ button to start INTRO playback. Alternatively, INTRO will start at the end of the current playing track.
PROGRAMME
This allows selected tracks on the disc to be played in any desired order.
To set the programme play
* Programmers can only be set in the STOP mode.
- Press the MEMORY button when the unit is in the stop mode.
* The track number and [PROG] indicator appear in the display. - Press 🖼◀ or ▶▶ to select the desired track.
- Press the MEMORY button to enter the track into memory.
- Repeat step 2 and 3 to programme the order of more tracks up to 24 tracks can be programmed into memory.
- Press ▶ to start the programmed play.
- To erase the programme, simply press the ■ STOP button twice.
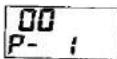

Track no. of the first desired selection

The second selection
During stop mode

PROG
RANDOM PLAY
SHUFFLE
Enables all the tracks on a disc to be played in a Random (Shuffle) sequence.
For example: If "RAND" is selected while playing track 8, the random function will commence once track 8 has ended. When all tracks on a disc have been played the player will automatically stop and power down in approx. 1 minutes to preserve battery life.

During the play

MODE
Press MODE button again to return to the NORMAL play mode.
SKIP AND SEARCH FUNCTIONS
Locating a Particular track
| To skip back to the beginning of the current or a previous track | Press ◀◀ lightly and repeatedly. |
| To skip to the beginning of following tracks | Press ▶▶lightly and repeatedly. |
Locating a Particular Point in a track
| To search back at a high speed | Keep ▶depressed |
| To search forward at a high speed | Keep ▶depressed |
Low level audio will be heard during the search process to assist in locating correct point in the track.
This player incorporates the latest digital anti shock circuit, which prevents interruption of the sound output if the unit is subjected to shock or vibration during disc playback. The anti shock system will automatically start when a disc is played, L is shown in the display during start up and ■ when shows the data buffer is full and the anti shock system is it's most effective. If the anti shock function is not required then it can be switched off by pressing the ANTI-SKIP button until the symbol ■ disappears from the display.

The sound will mute for approximately 1 second while the buffer fills, once filled the buffer will give approximately 45 seconds of protection against interruption of sound output, if the player is subjected to shock of over 45 seconds duration some interruption of sound output will occur, this is normal and to be expected, the sound will resume once the player has stabilized from the shock.
To turn this function off press the ANTI-SKIP button.
Notes:
- When using the ANTI-SKIP function the battery power consumption increases because the disc rotates faster than normal and the dynamic memory is active.
- Whilst the ANTI-SKIP function provides for continuous sound output when the unit is subjected to shock or vibration. It will not correct errors arising from the use of defective scratched or dirty discs.
- When powering the player solely from batteries, only use the ANTI-SKIP function where necessary to preserve their life.
RADIO OPERATION
- Set the TUNER/CD switch to tuner for RADIO mode, press RADIO ON (▶▶▶) key.
- Press the BAND key to select AM or FM,
Note: To improve reception, rotate the unit in all directions until best reception is obtained (AM only). - Press the MODE button key to select FM MONO or FMSTEREO (FM Band only).
- To turn the radio off press RADIO OFF (■) key.
Stereo/Mono
When listening to a radio station broadcasting in FM stereo, press the MODE button to select STEREO mode. The STEREO indicator will show in the display. If the FM Stereo signal is weak, push the MODE button to select MONO mode (the station will be received in mono but the background noise will be reduced.) The stereo indicator will be off.
Aerial
AM: The unit is equipped with an internal rod aerial. For best reception, rotate the unit
FM: The headphones cord acts as an aerial and must be fully extended for best reception.
Manual Tune
To manually tune to a station briefly, press the Tune up or down (▶▶▶ or ◀◀◀) buttons until the station is tuned in.
Automatic Tune
To Automatically tune to a station, press and hold either tune up or down (▶▶▶ or ◀◀◀) buttons. The unit will automatically tune to and stop at the first Station of sufficient signal strength.
MEMORIZING PRESET STATIONS
You can store up to 10 radio stations for each band into the memory. To memorize
presetstions. 1. Selthe function
- Set the function switch TUNER/CD to TUNER for RADIO mode.
-
Prosec the RAND button to select AM-TH
-
Press the BAND button to select AM or FM.
3 Tune the desired station by pressing the Tuning UP/DOWN (▶▶ or ◀◀) buttons. 4 Press the MEMORY button *PROG* indicators express in the direction.
- Pass the (M1-M5 or M1-F) button, PROG indicator appear in the display.
Press the (M1-M5 or M+5) buttons to select the desired preset station number. To Recall preset stations 1 to 5 use the M1-M5 buttons, for 6 to 10 use the M+5 and M1 buttons to select No. 6 station etc.
-
Press the MEMORY button again to store the station in the required location
-
Repeat step 3 to 6 until all desired stations are programmed into the memory.
When a new, different station is preset, the previous preset station will be erased.
REGALLING PRESET STATIONS
- Set the function switch TUNER/CD to TUNER for RADIO mode
- Press the BAND button to select AM or FM
- Press the (M1 - M5 or M+5) buttons to select the desired station number
PRODUCT SPECIFICATIONS
PICK-UP
| System | Compact disc digital audio system |
| Laser diode | Material: GaAlAs |
| Properties | Wavelength: λ = 780nmEmission duration: continuousLaser output: >44.6 μW |
| Error correction | Cross-interleave Rced-solomon code |
TUNER AUDIO
| AM Frequency | 530 - 1720 KHz |
| FM Frequency | 87.5 - 108 MHz |
| AM usable | 66dB/M |
| FM usable | 28dB/M |
| AM S/N | 30dB |
| FM S/N | 40dB |
AUDIO
| D/A conversion | 16-bit DAC EIGHT times over sampling |
| Frequency response | 20-20, 000Hz (+1/-3 dB) |
| Anti shock | 45 seconds buffer |
| Wow and flutter | Below measurable limits |
| No. of channels | 2 channels ( stereo ) |
| Output level | Line output: 0.6 Vrms ( 47 KΩ )Headphone: 16 mW ( 32 Ω ) |
| Bass boost effect | 6 dB |
GENERAL
| Power requirements | -2 x LR6 " AA * size alkaline battery- DC in 4.5V jack accepts AC power adaptor( centre positive ) |
| Power consumption | 0.8W DC 3V (UNDER NORMAL CONDITION) |
| Dimension | Approx. 145 (W) x 28 (H) x 165 (D) mm |
| Weight | Approx. 260g excluding battery(Main Unit) |
- IMPORTANT NOTES
- DANGEROUS VOLTAGE
- ATTENTION
- POWER SOURCE NORMAL BATTERIES/AC ADAPTOR
- BATTERY POWER OPERATION
- NOTE
- AC OPERATION
- HEADPHONE AND HI-FI CONNECTION
- LISTING WITH THE HEADPHONE
- CONNECTING TO COMPONENT AUDIO SYSTEMS
- PLAYER MAINTENANCE
- CLEANING THE CABINET
- CLEANING THE LENS
- DUST OR DRY PARTICLES
- FINGER PRINTS
- DISC CLEANING AND TROUBLE SHOOTING GUIDE
- CLEANING THE DISC
- BASIC DISC PLAY
- TURNING POWER ON AND OFF (CD MODE)
- REMOVE THE DISC
- AUTO POWER-OFF FUNCTION (CD MODE ONLY)
- TO EMPHASIZE THE BASS SOUND
- LCD DISPLAY INFORMATION
- REPEAT AND PLAY MODES
- NORMAL PLAYBACK
- INTRO SCAN AND PROGRAMMED TRACK PLAY
- INTRO
- PROGRAMME
- TO SET THE PROGRAMME PLAY
- RANDOM PLAY
- SHUFFLE
- SKIP AND SEARCH FUNCTIONS
- NOTES
- RADIO OPERATION
- STEREO/MONO
- AERIAL
- MANUAL TUNE
- AUTOMATIC TUNE
- MEMORIZING PRESET STATIONS
- REGALLING PRESET STATIONS
Brand : CURTIS
Model : CD084B
Category : CD Player