
BTC-405 - Turntable BRIGMTON - Free user manual and instructions
Find the device manual for free BTC-405 BRIGMTON in PDF.


| Product Type | Turntable |
| Brand | Brigmton |
| Model | BTC-405 |
| Drive System | Belt drive |
| Speeds | 33 1/3, 45, 78 RPM |
| Cartridge Type | Moving magnet (MM) |
| Stylus | Diamond tip, replaceable |
| Built-in Speakers | Yes, stereo pair |
| Outputs | RCA line out, headphone jack |
| Dimensions (W x D x H) | 420 x 350 x 120 mm |
| Weight | 2.5 kg |
| Power Supply | AC adapter (DC 12V, 500mA) |
| Material | Plastic chassis with aluminum platter |
| Cover | Removable dust cover |
| Auto-Stop | Yes, at end of record |
| Connections | Bluetooth (for wireless speakers) |
| USB Recording | Yes, to computer via USB |
| Color | Black |
| Warranty | 1 year limited |
| Cleaning | Use a soft, dry cloth; avoid liquids |
| Safety | Keep away from water and heat sources |
| Repairability | Replaceable belt and stylus; contact support for parts |
Frequently Asked Questions - BTC-405 BRIGMTON
User questions about BTC-405 BRIGMTON
0 question about this device. Answer the ones you know or ask your own.
Ask a new question about this device
Download the instructions for your Turntable in PDF format for free! Find your manual BTC-405 - BRIGMTON and take your electronic device back in hand. On this page are published all the documents necessary for the use of your device. BTC-405 by BRIGMTON.
USER MANUAL BTC-405 BRIGMTON
natural_image
Black BRIGMTON radio device with circular dial and external ports (no visible text or symbols on body)BTC-405
TOCADISCOS REPRODUCTOR/GRABADOR
- El software comenzará a instalarse:

natural_image
Black BRIGMTON radio device with circular head and external ports (no visible text or symbols on body)BTC-405 PLAYING/RECORDING TURNTABLE
INSTRUCTION MANUAL
SECURITY
- Read Instructions: All safety and operating instructions should be read before operating the machine
- Retain Instructions: The instructions should be retained for future reference.
- Heed Warnings: All warnings on the appliance and in the operating instructions should be adhered to.
- Follow Instructions: All operating and use instructions should be followed.
- Water and moisture: The appliance should not be used near water; for example, near a bathtub, kitchen sink, laundry tub, in a damp or near a swimming pool basement, and the like.
- Ventilation: The appliance should be situated so that its location or position does not interfere with proper ventilation. For example, the appliance should not be situated on a bed, sofa, rug or similar surface that may block the ventilation openings; or placed in a built-in installation such as a bookcase or cabinet that may impede the flow of air through the ventilation openings.
- Heat: The appliance should be situated away from heat sources such as radiators, heaters, stoves or other apparatus (including amplifiers) that produce heat.
- Power Sources: The appliance must be connected to a power supply of the type described in the operating instructions or as marked on the appliance.
- Grounding or Polarization: Precautions should be taken so that the grounding or polarization means of an appliance is not defeated.
- Power Cord Protection: Power supply cords should be routed so they are not walked on or pinched by items placed upon or against them, paying particular attention to cords at plugs, receptacles, and the point where they exit from the appliance.
- Plug Protection: The unit is equipped with an attachment plug having overload protection. This is a safety feature. See Instruction Manual for replacement or resetting of protective device. If you need to replace the plug, make sure the service technician has used a replacement plug specified by the manufacturer that has the same overload protection as the original plug.
- Non-use Periods: The power cord of the appliance should be disconnected from the outlet when not in use for a long period of time.
- Object and Liquid Entry: Care should be taken so that objects do not fall and liquids are not spilled into the enclosure through openings.
- Damage Requiring Service: The appliance should be serviced by qualified service personnel when:
- The power cord or plug has been damaged
- Have Debris or liquid has been spilled into the appliance
- The appliance has been exposed to rain
- The appliance does not appear to operate normally or exhibits a marked change in performance
- The appliance has been dropped or the cabinet damaged.
- Servicing: The user should not attempt to service the appliance beyond that described in the operating instructions. All other servicing should be referred to qualified service personnel.
When using electrical appliances, basic safety precautions should always be followed. - Children should be supervised to ensure they do not play with the appliance.
- Do not leave the appliance unattended while connected to the network electric.
- To reduce the risk of electric shock, do not use outdoors or on wet surfaces.
- Do not immerse in water or any other liquid.
- Unplug from the outlet when not in use.
- Do not unplug by pulling the cable. To unplug, grasp the plug, not the cord.
- Do not use a power cord or plug damaged.
- Do not use if the unit has been dropped or damaged in any way.
- Repairs to electrical equipment should only be performed by a qualified electrician. Improper repairs may place user at serious risk.
- Place the unit in a place free from vibrations and away from heat sources.
- Do not leave the unit plugged in for long periods of time.
- Do not use with wet hands.
- Do not put any object into openings.
- Keep free of dust, dirt, etc.
- Do not use this unit for anything other than its intended use.
- Never place the unit on or near the speakers an acoustic coupling occurs.
CONTROLS

- Adaptor
- Tone arm
- Speed control switch
- Tone arm rest and security latch
- Cartridge/Stylus
- Hi-fi speaker
- Turntable
- USB OUTPUT
- AUX-L OUT
- AUX-R OUT
- Power Switch & Volume Control
- Auto Stop Switch
REPLACING THE NEEDLE
Place a screwdriver at the end and gently push down. Then disconnect the wiring and connect the new needle in the same position.

PLAYING A DISC
- Place the disc on the turntable. If necessary, be sure to attach the adapted.
- Select the desired playback speed using the speed selection switch between 33.3, 45 and 78rpm.
- Turn the rotary power switch and select the volume.
- Raise the arm retaining clip.
- Raise the arm slightly.
- Place the needle vertically on the first track and the turntable starts to spin automatically.
- Slowly lower the needle on the disc to be played.
- When the disc comes to an end, the record player will automatically stop if auto stop switch is in the ON position. If the switch is in the OFF position then continue turning until the tone arm returns to the rest position.
- Lift the tone arm and place in the holder when finished.
- Replace the protective cap over the needle and close the lock arm.
INSTALLING THE SOFTWARE
- Place the supplied CD into the drive of your computer, follow the instructions and the software will automatically install as follows:
- Click 'Next'

- Select 'I accept' option then click 'Next':

- Click 'Next':

- Here either select another location or click 'Next' to continue (recommended):
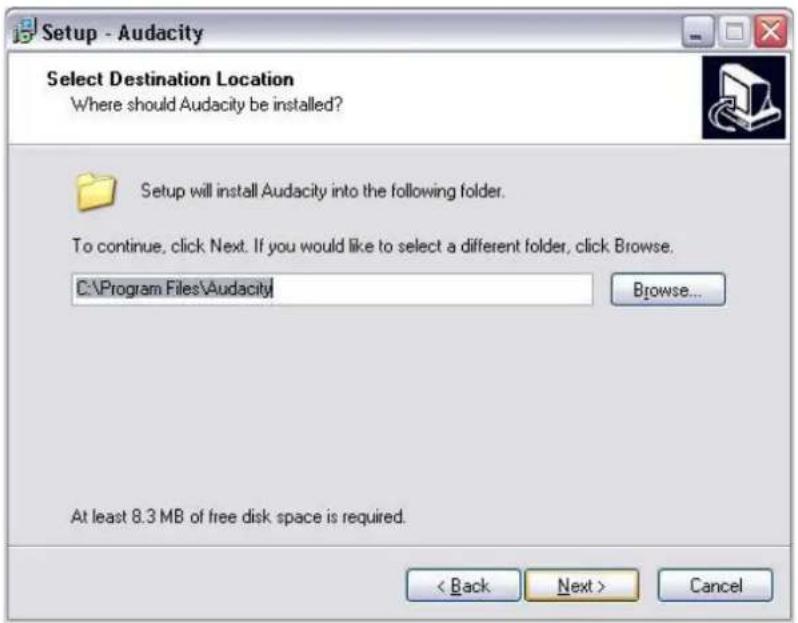
- Click 'Next' to continue:
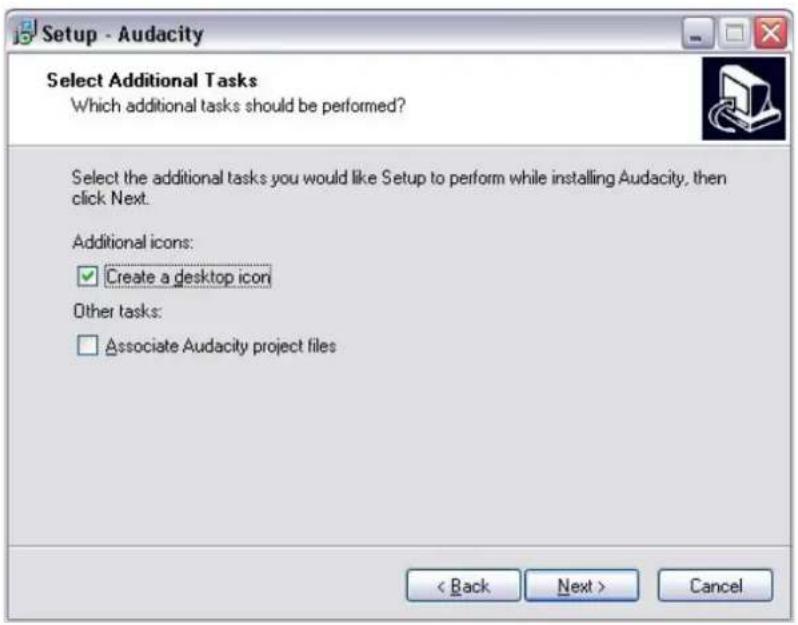
- Click 'Install' to continue:

- The software will start to install:
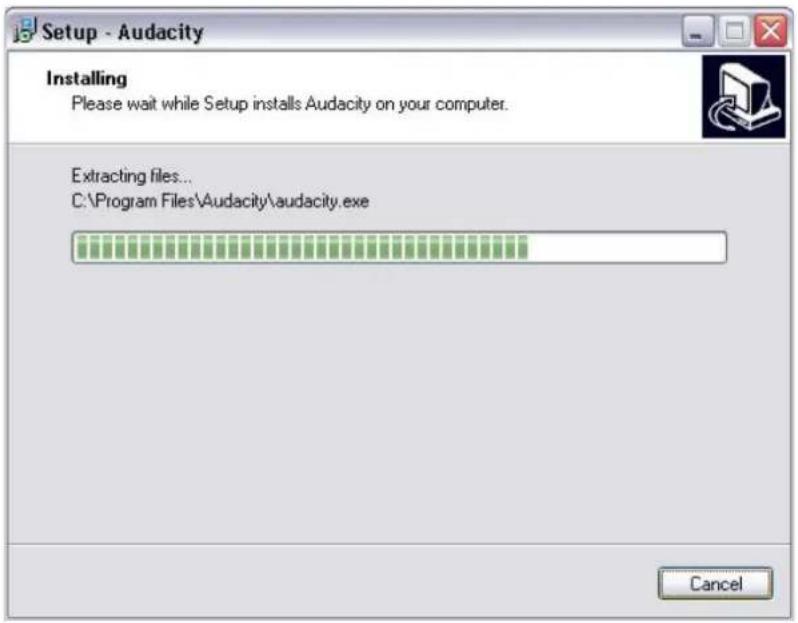
- Click on 'Finish' to complete the installation:
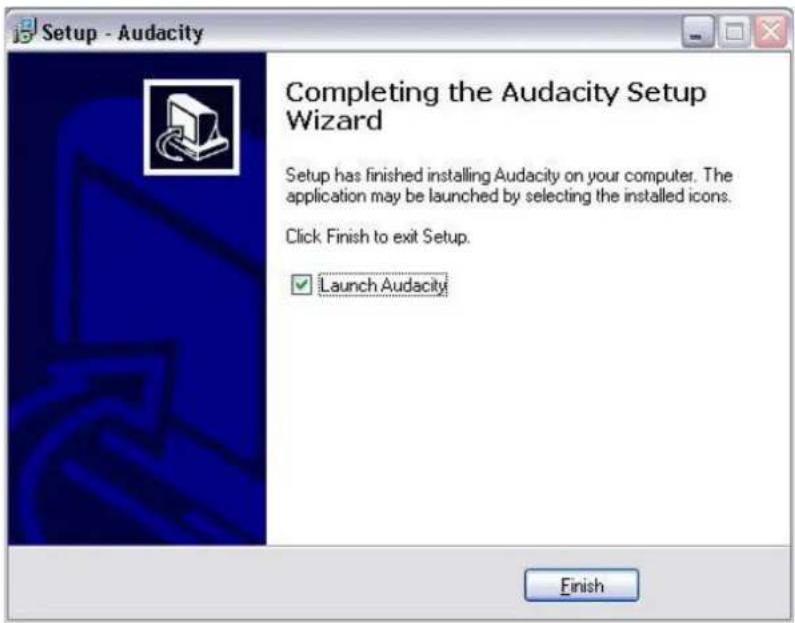
Audacity should automatically start up, if not follow the next sequence:
- The Audacity icon will now be seen on the desktop, double click on it to start Audacity running, if an icon does not appear, go to the 'C' drive under 'My Computer', click on 'Program files' and then 'Audacity'. Right click on the 'orange ball wearing Headphones' icon and select 'Send to' then 'Desktop (create shortcut)'.
Using Audacity
- Plug the USB cable into the back of the unit and the other end into a spare USB port on your computer.
- Run the Audacity software by double clicking the Audacity icon.
- Before recording, click on Edit at the top of the main page; select Preferences at the bottom of the menu which will open up Preferences.
- At the recording part of the window open the Device menu by using the down arrow on the right hand side. Select the USB PnP Audio Device option from the menu. Also tick the box next to 'Software Play through (Play new track while recoding it)'.
- The lower box enables the number of recording channels to be set, 1 is Mono and 2 is Stereo, select the Stereo option.
- Click 'OK' once the options have been selected:

Recording to computer using Audacity
- Start the record playing as described above, and press Record at the top of the Audacity window to start recording to the computer.
- Once recorded use the Transport controls at the top of the screen to, Go to start, Play, Record, Pause, Stop and Go to end of Wave form as below:
![17 Flamboyant File Edit View Project Generate Effect Analysis Help L R -48 -42 -36 -30 -24 -18 -12 -6 0 48 -42 -36 -30 -24 -18 -12 -6 0 30 -15 0 15 30 15 1:00 1:15 1:30 1:45 2:00 2:15 2:30 2:45 3:00 3:15 3:30 3:45 17/Flamboy Stereo, 44109Hz 32-bit float Multi Solo L R 1.0 0.5 0.0 -0.5 -1.0 1.0 0.5 0.0 -0.5 -1.0 Projectrate: 44100 Cursor: 0.00.00000 min/sec [Snap-To Off]](/content/2026/05/1079603/images/c4b2d3706caa213f57d9f9c18567170e74ae29878de5c2e816a62409f8f5318b.jpg)
Use the file, Edit, View, Project, Generate, Effect and Analyse menus to Save, Export and Manipulate your music.
- If the recording level requires adjustment, click on 'START', 'SETTINGS' and select control panel. Under Control Panel select 'SOUNDS and AUDIO DEVICES', click on the 'VOLUME' tab and select 'ADVANCED'.
- On the Master volume window select options at the top left hand corner, click on properties in the drop down menu.
- In the Properties window select "USB PnP Audio Device" from the drop down menu at the top. Click on "OK" to confirm the selection and a window will now appear with a control for the recording level. Move this control up if the recording is too quiet and down if the recording is too loud
- NOTE: the blue wave form should sit in the Audacity window such that the peaks of it stop short of the top and bottom
- Before editing your music, the recorded waveform will need to be highlighted.
- To highlight your wave form, click with the left mouse button on the left hand side of the waveform (under the L+R controls) and the waveform will go darker.
- At this point the whole waveform can be edited. However if only a section of the waveform needs to be edited (or saved) the section required can be highlighted by placing the mouse over the beginning of the section holding the left button down and dragging it right over the area required and releasing it when the end of the desired section is reached. This darkened section will now be the only audio that will be edited.
- Alternatively click on the EDIT menu at the top left and then click on SELECT then choose from: All (whole wave form), Start to Cursor or Cursor to end.
- NOTE: after recording to the Computer, the USB cable may have to be removed from the USB port in order to enable playback later from the Computer.
Exporting your music files (.WAV)
- Once you have recorded and edited your music, you will need to save your files to the computer. To do this, click on file and move down to Export as WAV tab.
- Click on this and you will promptly be asked for the file name of the music recorded which will be saved in the location shown. At this point either make a note of the folder where your music is saved or save it in a folder of your choice.
- This can either be an existing one or a new folder.
Exporting your music files (.Mp3)
- Once you have recorded and edited your music, you will need to save your files to the computer. To do this click on file and move down to Export as Mp3 tab.
- Click on this and you will promptly be asked for the file name of the music recorded which will be saved in the location shown. At this point either make at note of the folder where your music is saved or save it in a folder of your choice.
- This can be either an existing one or a new folder.
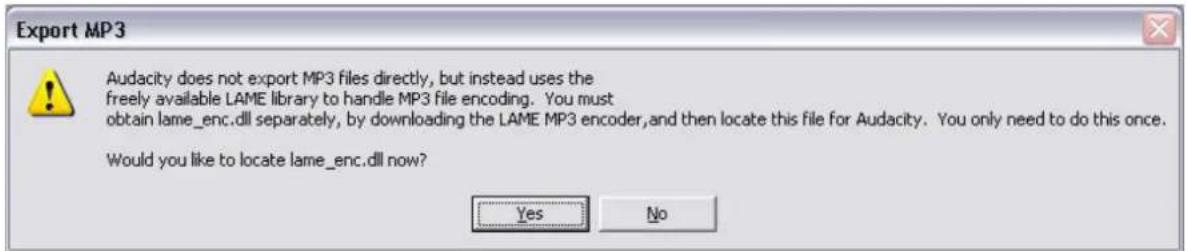
- NOTE: In order to activate the Export to Mp3 feature, it will be necessary to copy a file named lame_enc.dll from the installation CD and paste it in the AUDACITY folder that contains the software on the hard drive that was copied earlier from the CD. The software will automatically detect this file and exporting as an mp3 will now be possible.
"Features can change without notice"
BRIGMTON
surfing technology
IMPORTED
FERSON ELECTRÓNICA, S.A.
CIF: A-41111881
SANTA CLARA DE CUBA 12
SEVILLA
ESPAÑA
DECLARATION OF CONFORMITY
Ferson Electrónica, S.A. declares under our responsibility that the equipment meets the requirements indicated in the following directives:
EMC DIRECTIVES
EN 55022:2006+A1:2007
EN 55013:2001+A1:2003+A2:2006
EN 61000-3-2: 2006+A1: 2009+A2: 2009
EN 61000-3-3: 2008
EN 55024: 1998+A1: 2001+A2: 2003
EN 55020: 2007
Description of apparatus:
BRIGMTON Model BTC-405
Turntable
CE

Brand : BRIGMTON
Model : BTC-405
Category : Turntable