
Click&Style YS536 - Electric razor PHILIPS - Free user manual and instructions
Find the device manual for free Click&Style YS536 PHILIPS in PDF.


| Product Type | Electric Razor with Styling and Cleansing Attachments |
| Brand | Philips |
| Model | Click&Style YS536 (also YS527, YS526, YS523, YS505) |
| Power Source | Rechargeable battery, adapter input 100-240 V |
| Charging Time | Approx. 60 minutes (90 minutes for first use or after long storage) |
| Quick Charge | 5 minutes for one touch-up |
| Battery Life | Up to 40 minutes of use |
| Attachments Included | Shaving attachment, beard styler attachment (with comb), brush attachment |
| Wet/Dry Use | Can be used wet with shaving foam/gel or dry |
| Cleaning | Rinse under tap; shaving heads removable for thorough cleaning; brush attachment washable with soap |
| Replacement Shaving Heads | Philips RQ32, replace every 2 years |
| Replacement Brush Head | Philips RQ560, replace every 3 months or if damaged |
| Safety Features | Adapter must stay dry; not intended for use by children without supervision; automatic shut-off when overheated |
| Compliance | Safe in bath/shower; complies with EMF standards |
| Beard Styling | Length settings 1-5 mm, with/without comb (YS536, YS523 only) |
| Skin Adaptation Period | 3 weeks of regular use recommended |
Frequently Asked Questions - Click&Style YS536 PHILIPS
User questions about Click&Style YS536 PHILIPS
0 question about this device. Answer the ones you know or ask your own.
Ask a new question about this device
Download the instructions for your Electric razor in PDF format for free! Find your manual Click&Style YS536 - PHILIPS and take your electronic device back in hand. On this page are published all the documents necessary for the use of your device. Click&Style YS536 by PHILIPS.
USER MANUAL Click&Style YS536 PHILIPS
Always here to help you / 始终如一地为您提供帮助
Register your product and get support at / 请登录以下网址并得到相应的帮助 www.philips.com/welcome

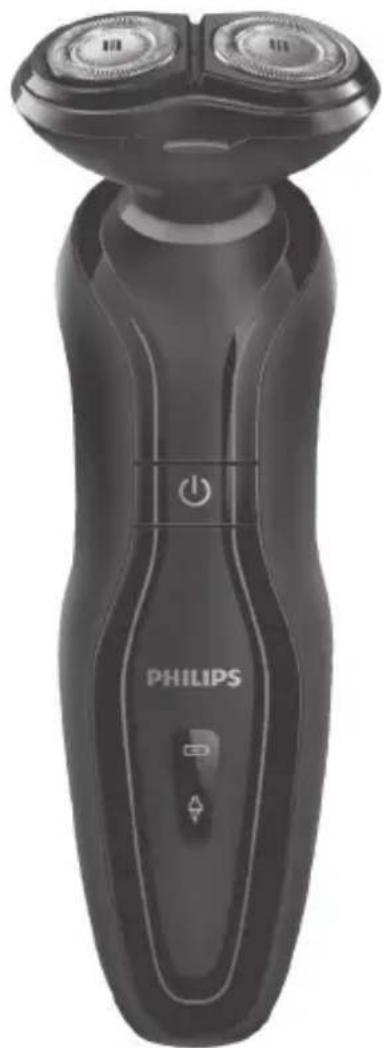
natural_image
Black Philips electric shaver with dual buttons and power button (no visible text or symbols beyond brand name)YS536
YS527
YS526
YS523
YS505
User manual / 用户手册
PHILIPS


natural_image
Simple line drawing of an open book with a grid on the left and a closed page on the right (no text or symbols)
1


ENGLISH 6
한국어 26
繁體中文 46
简体中文 63
YS536, YS527, YS526, YS523, YS505
6 ENGLISH
Introduction
Congratulations on your purchase and welcome to Philips! To fully benefit from the support that Philips offers, register your product at www.philips.com/welcome.
For additional functionality you can buy click-on/off attachments at www.philips.com/shop.
Important
Read this user manual carefully before you use the appliance and save it for future reference.

natural_image
Simple line drawing of a plug connected to a terminal with a no-smoking symbol (no text or labels)Danger
- Make sure the adapter does not get wet.
- The adapter contains a transformer. Do not cut off the adapter to replace it with another plug, as this causes a hazardous situation.
Warning
- This appliance is not intended for use by persons (including children) with reduced physical, sensory or mental capabilities, or lack of experience and knowledge, unless they have been given supervision or instruction concerning use of the appliance by a person responsible for their safety.
- Keep the appliance, the attachments and the adapter out of the reach of children.
- Before you use an attachment, always check it for damage or wear. If the attachment is damaged or worn, do not use it, as injury may occur. Replace a damaged attachment before you use it again (see chapter 'Replacement').
- Be careful with hot water when you clean the appliance and the attachments. Always check if the water is not too hot, to prevent your hands from getting burnt.
ENGLISH 7
Caution
- Charge, use and store the appliance and the attachments at a temperature between 5°C and 35°C.
- Do not use the attachment to style body hair or scalp hair.
- Do not use the brush attachment on chapped skin, open wounds, or if you suffer from skin diseases or skin irritations, such as severe acne, sunburn, skin infection, etc.
- Do not use the brush attachment with self-made cleansers or cleansers containing harsh chemicals or rough particles.
- Only use the beard styler attachment to trim facial hair (beard, moustache and sideburns).
- Always put the protection cap on the shaver to protect the shaving heads when you are travelling.
- The appliance and the attachments are not dishwasher-proof.
- Never use water hotter than 80^ C to rinse the appliance and the attachments.
- Only use the adapter supplied.
- Do not use the appliance, the attachments or the adapter if they are damaged.
- If the adapter or an attachment is damaged, always have it replaced with one of the original type in order to avoid a hazard.
- Water may leak from the socket at the bottom of the appliance when you rinse it. This is normal and not dangerous because all electronics are enclosed in a sealed power unit inside the appliance.
Compliance with standards
- This appliance complies with the internationally approved safety regulations and can be safely used in the bath or shower and cleaned under the tap.

ENGLISH8
- This Philips appliance complies with all standards regarding electromagnetic fields (EMF). If handled properly and according to the instructions in this user manual, the appliance is safe to use based on scientific evidence available today.
General
- The adapter transforms 100-240 volts to a safe low voltage of less than 24 volts.
General description (Fig. 3)
1 Protection cap
2 Shaving unit
3 Shaving unit release buttons
4 Shaving attachment
5 On/off button
6 Display
7 Adapter
8 Small plug
9 Cleaning brush
10 Hair length selector (YS536, YS523 only)
11 Beard styler attachment (YS536, YS523 only)
12 Beard styler trimming comb (YS536, YS523 only)
13 Brush attachment (YS536, YS527, YS526 only)
14 Protection cap for brush attachment (YS536, YS527, YS526 only)
15 Shaving head holder
16 Guard
17 Cutter
18 Retaining ring

ENGLISH 9
Charging
It takes approx. 60 minutes to fully charge the battery. When you charge the appliance for the first time or after a long period of disuse, let it charge for 90 minutes. A fully charged appliance provides up to 40 operating minutes.
The operating minutes of your appliance may vary over time, depending on your shaving/styling behaviour, cleaning habits, beard type and whether or not you use shaving gel or shaving foam.
'Charging' indication

natural_image
Simple line drawing of a door with a starburst symbol and a small lamp icon (no text or labels)- When the appliance is charging, the battery symbol flashes green. When the battery is low or empty, the battery symbol and the plug symbol flash green and orange alternately during the first few minutes of charging to indicate quick charging.
'Battery fully charged' indication

natural_image
Simple diagram of a device with a battery icon and a leaf symbol, no text or labels present.- When the battery is fully charged, the battery symbol lights up green continuously.
- If you leave the appliance connected to the mains, the battery symbol goes out after 30 minutes.
ENGLISH10
'Battery low' indication

natural_image
Pure electrical circuit lines without any symbols- When the battery is almost empty, the plug symbol starts flashing orange.
- When you switch off the appliance, the plug symbol continues to flash orange for a few more seconds.
Quick charge
The quick charge is indicated by the battery symbol and plug symbol flashing green and orange alternately. When the plug symbol stops flashing orange after approximately 5 minutes, the appliance contains enough energy for a touch up.
Charging
Do not charge the appliance in a closed pouch or in the packaging.
1 Put the small plug in the appliance.
2 Put the adapter in the wall socket.
The battery symbol on the appliance flashes to show that the appliance is charging (see chapter 4).
When you remove the adapter from the wall socket and leave the small plug in the appliance, the appliance may not work for a few seconds.
Caution: It is not possible to use the appliance while it is connected to the mains.
Shaving
Skin adaptation period
Your first shaves may not bring you the result you expect and your skin may even become slightly irritated. This is normal. Your skin and beard need time to adapt to any new shaving system.
We advise you to shave regularly (at least 3 times a week) for a period of 3 weeks to allow your skin to adapt to the new shaver. During this period, use your new electric shaver exclusively and do not use other shaving methods. If you use different shaving methods, it is more difficult for your skin to adapt to the new shaving system.
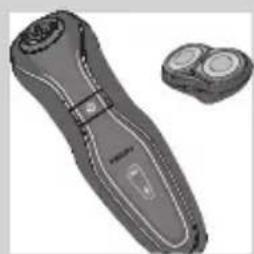
natural_image
Illustration of a pair of electronic devices with no visible text or symbols- Only use this shaving attachment to shave facial hair. You can use this attachment wet or dry with shaving gel or shaving foam. Do not use this attachment to shave body hair or scalp hair. The different attachments of this appliance are designed for specific types of hair and your facial hair differs from body hair or scalp hair.
Note: The appliance does not work from the mains for safety reasons.
Attaching the shaving attachment
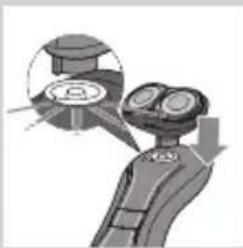
natural_image
Illustration of a robot with two circular headsets and a magnified inset showing a mechanical component (no text or symbols)1 Make sure the appliance is switched off.
2 Insert the lug of the shaving attachment into the slot in the top of the appliance. Press it downwards to attach it to the appliance.
Do not twist the shaving attachment while you place it on the appliance.
ENGLISH12
Using the shaver

natural_image
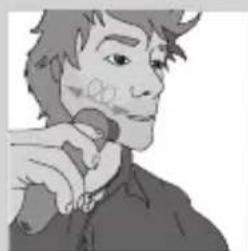
Illustration of a person holding a microphone, no text or symbols visible1 Press the on/off button to switch on the appliance.
2 Move the shaving unit over your skin.
To ensure the best result move the appliance in circular motion over your skin.
3 Press the on/off button to switch off the appliance.
Wet shaving
To achieve better shaving results you can also use this shaver on a wet face with shaving foam or shaving gel.
To shave with shaving foam or shaving gel, follow the steps below:

natural_image
Illustration of a faucet with liquid being poured into a container, accompanied by a thermometer icon (no text or symbols)1 Apply some water to your skin.
2 Apply shaving foam or shaving gel to your skin.
3 Rinse the shaving unit under the tap to ensure that the shaving unit glides smoothly over your skin.
4 Press the on/off button to switch on the appliance.
5 Move the shaving unit over your skin. Make circular movements.
Rinse the shaving unit under the tap regularly to ensure that it continues to glide smoothly over your skin.
6 Dry your face and thoroughly rinse the shaving unit with a sufficient amount of water after every shave. Make sure you rinse all foam or shaving gel off the shaving unit (see also chapter 9).
natural_image
Illustration of a person holding a microphone (no text or symbols visible)

Beard styling (YS536, YS523 only)

natural_image
3D rendered image of a pair of electronic devices, one with a handle and the other a rectangular casing (no text or symbols visible)- Only use this beard styler attachment to style facial hair. Do not use this attachment to style body hair or scalp hair. The different attachments of this appliance are designed for specific types of hair and your facial hair differs from body hair or scalp hair.
The appliance does not work from the mains for safety reasons.
Attaching the beard styler attachment

natural_image
Illustration of two hands holding a small object with checkmark and cross symbols (no text or symbols present)1 Make sure the appliance is switched off.
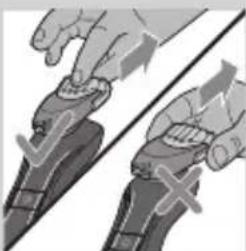
2 Pull the shaving attachment straight off the appliance.
Do not twist the shaving attachment while you pull it off the appliance.
3 Insert the lug of the beard styler attachment into the slot in the top of the appliance. Press it downwards to attach it to the appliance.

natural_image
Diagram of a mechanical device with a rotating component and directional arrow (no text or symbols)Using the beard styler attachment with comb
- You can use the beard stylisty attachment with the comb attached to trim your beard at one fixed setting, but also at different length settings. You can choose any setting between 1 and 5mm.


ENGLISH14
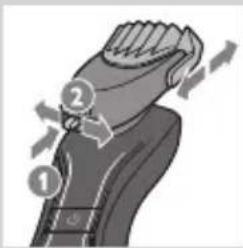
1 Press the length selector (1) and then push it to the left or right (2) to select the desired hair length setting.
2 Press the on/off button to switch on the appliance.
natural_image
Black-and-white illustration of a man's face with short hair and beard, wearing a necklace (no text or symbols)3 You can now start styling your beard.
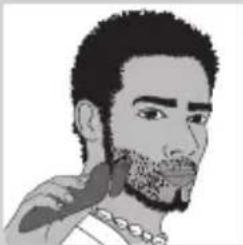
Make sure that the front of the comb is fully in contact with the skin and move the appliance against the direction of hair growth. You may want to try different positions (upwards, downwards, or across), depending on the direction of hair growth.
Using the beard styler attachment without comb
natural_image
Illustration of two hands adjusting a tool, one pointing at the blade and the other holding the grip (no text or symbols present)You can use the beard styler attachment without comb to contour or cut shapes in beard hair.
1 Pull the comb off the beard stylisty attachment.
2 Press the on/off button to switch on the appliance.

natural_image
Black-and-white illustration of a man with short hair and beard, wearing a circular frame (no text or symbols)3 You can now start contouring your beard. Be careful, the appliance cuts hair very close to the skin, at a length of 1mm.
Facial cleansing with brush (YS536, YS527, YS526 only)
Use the rotating brush with your daily cleansing cream. The cleansing effect removes oil and dirt, contributing to a healthy and oil free skin.


ENGLISH 15
Attaching the cleansing brush
natural_image
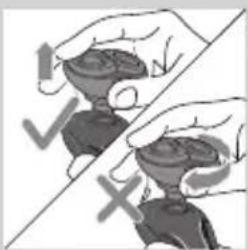
Illustration of two hands holding a small object, one with an arrow and the other with a checkmark (no text or symbols)1 Pull the shaving attachment straight off the appliance.
Do not twist the shaving attachment while you pull it off the appliance.

natural_image
Mechanical component diagram showing a lever and gear assembly (no text or symbols)2 Insert the lug of the brush attachment into the slot in the top of the appliance. Press it downwards to attach it to the appliance.
Using the cleansing brush attachment
natural_image
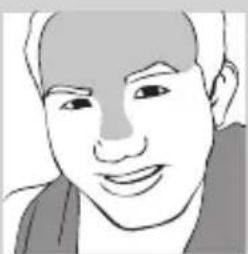
Simple line drawing of a person's face (no text or symbols)1 Moisten the cleansing brush and your face with warm water and cleansing cream.
Tip: Use the brush attachment before shaving for an easier shaving and a more hygienic shaving result.
2 Press the on/off button to switch on the appliance.
3 Start cleaning the T-zone with the brush attachment.
Note: Make circular motions no more than 3 times in one spot.
4 Start cleaning the rest of your face
Tip: Treat your face with the brush attachment for about one minute.
Caution: Do not clean the sensitive area around your eyes.
ENGLISH16
Cleaning and maintenance
Never use scouring pads, abrasive cleaning agents or aggressive liquids such as petrol or acetone to clean the shaver and its accessories.
Be careful with hot water. Always check if the water is not too hot, to prevent your hands from getting burned.
Note: To prevent inflammation of your skin, you should clean the appliance thoroughly on a regular basis.
- Clean the appliance and the attachments after every use to prevent pollution of the shaver and blockages.
- You can clean the outside of the appliance with a damp cloth. Do not clean an attachment with a cloth.
Cleaning the shaving attachment


natural_image
Cross-sectional diagram of a mechanical component with concentric circular features (no text or symbols)- Clean the shaving heads frequently with Philips Shaving Head Cleaning Spray (HQ110) for optimal shaving performance.
1 Switch off the appliance.
2 Press the release buttons on the shaving attachment (1) and pull the shaving unit off the shaving attachment (2).
3 To unlock the orange retaining ring, turn it in the direction of the arrows indicated in and on the retaining ring.
ENGLISH 17

natural_image
Mechanical assembly diagram showing a bearing housing with an arrow indicating motion direction (no text or symbols present)
natural_image
Diagram showing a mechanical component with rotating parts and directional arrows, no text or symbols present.
natural_image
Illustration of a hand holding a textured object with arrows indicating movement or force (no text or symbols)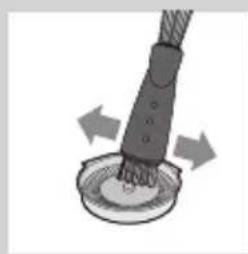
natural_image
Illustration of a cable being inserted into a circular component with arrows indicating direction (no text or symbols)
natural_image
Diagram showing a mechanical component with a circular base and a magnified inset of its internal structure (no text or symbols)4 Lift the retaining ring out of the shaving head holder.
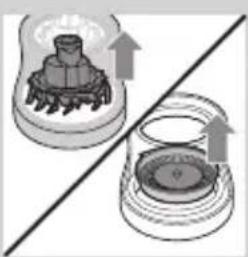
5 Remove one cutter and its shaving guard.
Do not clean more than one cutter and shaving guard at a time, since they are all matching sets. If you accidentally put a cutter in the wrong shaving guard, it may take several weeks before optimal shaving performance is restored.
6 Clean the cutter with the cleaning brush supplied.
7 Clean the inside of the shaving guard.
You can also clean the cutter and its guard under a tap of hot water.
8 After cleaning, place the shaving guard back into the shaving head holder. Make sure the two wings fit exactly into the recesses of the shaving head holder.
9 Place the cutter back into the shaving guard with the cutter legs pointing downwards.
ENGLISH18
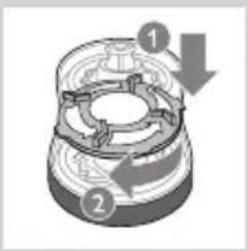
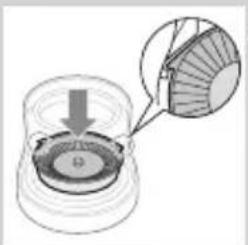
10 Place the retaining ring back onto the shaving head holder (1). To reattach the retaining ring, turn it against the direction of the arrows indicated in and on the retaining ring (2).
Make sure the retaining ring is fixed properly. The four wings of the retaining ring have to be located exactly under the recesses of the shaving head holder.
Repeat steps 5-10 for the other shaving heads.
11 Reattach the shaving unit to the shaving attachment.
If the shaving unit cannot be reattached smoothly, check if you have positioned the shaving heads properly and if the retaining rings are fixed properly.
Cleaning the beard styler attachment (YS536, YS523 only)
natural_image
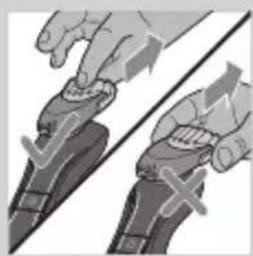
Illustration of hands using a tool to grip a piece, showing a diagonal line and a cross mark (no text or symbols)1 Switch off the appliance.
2 Pull the comb off the beard stylist attachment.

natural_image
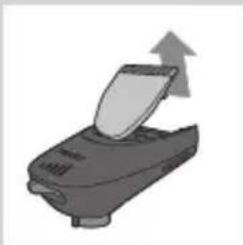
Illustration of a printer with an open lid and an upward arrow indicating print (no text or symbols)3 Open the beard styler attachment. Dispose of the hairs in the garbage bin.
ENGLISH 19
natural_image
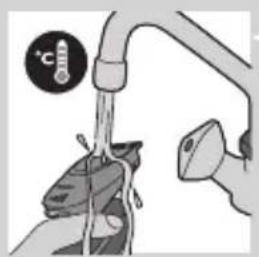
Diagram of a faucet with a thermometer and valve, showing fluid flow (no text or symbols)4 Rinse the beard styler attachment and the comb separately under a hot tap for some time.
5 Lubricate the trimmer teeth with a drop of sewing machine oil every six months.
Cleaning the cleansing brush attachment (YS536, YS527, YS526 only)

natural_image
Mechanical component diagram showing a knob with a handle and a top cylindrical part, no text or symbols present.1 Switch off the appliance.
2 Detach the brush head from the brush base.
3 Clean them thoroughly with warm water and soap.
4 Dry the brush attachment with a towel.
Storage

natural_image
Illustration of a hand holding a small object with a downward arrow, no text or symbols presentNote: Make sure the appliance and the attachments are dry before you store them.
1 Put the protection cap on the shaver after use to prevent damage and to avoid dirt accumulation in the shaving heads.
2 Put the protection cap on the cleansing brush to protect it from dirt accumulation.
ENGLISH20
Replacement
Replacing the shaving heads
For maximum shaving performance, we advise you to replace the shaving heads every two years. Replace damaged shaving heads right away. Only replace the shaving heads with original RQ32 Philips shaving heads. See also chapter 'Ordering accessories'.
1 Follow steps 1-4 from chapter ‘Cleaning and maintenance’ under ‘Cleaning the shaving attachment’.
2 Remove the shaving heads and place new ones in the shaving unit.
Make sure the two wings of the shaving heads fit exactly into the recesses.
3 Place the retaining rings back onto the shaving unit (1). To reattach the retaining rings, turn it against the direction of the arrows indicated in and on the retaining rings (2).
Make sure the retaining rings are fixed properly. The four wings of the retaining ring have to be located exactly under the recesses of the shaving head holder.
4 Reattach the shaving unit to the shaving attachment.
If the shaving unit cannot be reattached smoothly, check if you have positioned the shaving heads properly and if the retaining rings are fixed properly.
Replacing the cleansing brush
The brush head replacement should be replaced every 3 months or earlier if the filaments are deformed or damaged.


Ordering accessories
To buy accessories or spare parts, visit
www.shop.philips.com/service or go to your
Philips dealer. You can also contact the Philips
Consumer Care Centre in your country (see the worldwide guarantee leaflet for contact details).
The following accessories are available:
- RQ32 Philips shaving heads
- YS511 Philips beard styler attachment
- HQ110 Philips Shaving Head Cleaning Spray
- RQ560 Philips cleansing brush head replacement
- RQ575 Philips cleansing brush attachment
For replacement combs, please also visit
www.shop.philips.com/service.
Environment

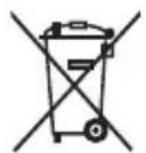
- Do not throw away the appliance with the normal household waste at the end of its life, but hand it in at an official collection point for recycling. By doing this, you help to preserve the environment.
- The built-in rechargeable battery contains substances that may pollute the environment. Always remove the battery before you discard or hand in the appliance at an official collection point. Dispose of the battery at an official collection point for batteries. If you have trouble removing the battery, you can also take the appliance to a Philips service centre. The staff of this centre will remove the battery for you and will dispose of it in an environmentally safe way.
ENGLISH22
Removing the rechargeable battery
Only remove the rechargeable battery when you discard the appliance. Make sure the rechargeable battery is completely empty when you remove it.
Be careful, the battery strips are sharp.
1 Undo the screw in the back panel of the appliance with a screwdriver (1) and remove the back panel (2).
2 Bend the hooks aside and remove the power unit.
3 Break the snap hooks (1) and remove the front panel of the power unit (2).
4 Take out the battery holder (1) and cut the battery tags with a pair of cutting pliers (2).
5 Remove the rechargeable battery.
Guarantee and service
If you need information or support, visit www.philips.com/support or the separate worldwide guarantee leaflet.
Guarantee restrictions
The shaving heads (cutters and guards) are not covered by the terms of the international guarantee because they are subject to wear.

Troubleshooting
This chapter summarises the most common problems you could encounter with the appliance. If you are unable to solve the problem with the information below, visit www.philips.com/support for a list of frequently asked questions or contact the Consumer Care Centre in your country.
Problem Possible cause Solution
| The appliance does not work, even though it is connected to the mains. | This appliance is not designed to be used directly from the mains. | Remove the adapter from the wall socket and the small plug from the appliance. You can now switch on the appliance again. |
| The appliance does not shave as well as it used to. | The shaving heads are damaged or worn. | Replace the shaving heads. See chapter ‘Replacement’. |
| The shaving heads are dirty. | Clean the cutters and guards with the cleaning brush supplied. See chapter ‘Cleaning and maintenance’. | |
| Long hairs obstruct the shaving heads. | Clean the cutters and guards with the cleaning brush supplied. See chapter ‘Cleaning and maintenance’. | |
| Shaving foam or shaving gel has accumulated in the shaving heads. | Rinse the shaving heads thoroughly with a sufficient amount of water. |


ENGLISH24
| Problem Possible cause Solution | ||
| The appliance does not work when I press the on/off button. | The rechargeable battery is empty. | Recharge the battery. See chapter ‘Charging’. |
| The temperature of the appliance is too high. In this case, the appliance does not work. | Let the appliance cool down. As soon as the temperature of the appliance has dropped sufficiently, you can switch on the appliance again. | |
| When you remove the adapter from the wall socket and leave the small plug in the appliance, the appliance does not work for a few seconds. | Remove the small plug from the appliance. | |
| My skin is irritated after shaving. | Your skin needs time to get used to the Philips shaving system. | Skin irritation during the first 2-3 weeks of use is possible. After this period, the skin irritation usually disappears. |
| The shaving heads are damaged or worn. | Replace the shaving heads. See chapter ‘Replacement’. | |


ENGLISH 25
Problem Possible cause Solution
| The rotation speed of the shaving heads is lower than usual. | Too much dirt has collected in the shaving heads. | Clean the shaving heads. See chapter ‘Cleaning and maintenance’. |
| The rechargeable battery is low. | Recharge the battery. See chapter ‘Charging’. | |
| The shaving heads do not stay in place. | You did not fix the retaining rings properly. | The retaining ring is fixed properly if the four wings of the retaining ring are located exactly under the recesses of the shaving head holder. |
| After fully charging the appliance, it provides less than 40 operating minutes. | If you have a heavy beard, the appliance may provide less than 40 operating minutes. The number of operating minutes may also vary over time, depending on your styling behaviour, cleaning habits and beard type. | |
| Reduced grooming performance | You have not attached the comb properly. | Remove the comb and reattach it. |


한국어26
소개
natural_image
Illustration of a plug connected to a cable with a no-smoking symbol (no text or labels)위험
natural_image
Simple line drawing of a showerhead spraying water into a container (no text or symbols)기준 준수
natural_image
Simple diagram of a door with a star and warning symbol (no text or labels)natural_image
Illustration of a pair of electric shakers with black bands and white end caps (no text or symbols)natural_image
Illustration of a robotic arm with two rotors and a circular head, showing motion or interaction (no text or symbols)natural_image
Illustration of a person holding a microphone, no text or symbols visiblenatural_image
Illustration of a faucet with liquid being poured into a container, accompanied by a thermometer icon (no text or symbols)natural_image
Illustration of a person holding a small object, no visible text or symbols

natural_image
3D rendered image of a handheld device with a separate rectangular housing (no text or symbols visible)natural_image
Illustration of two hands holding small bowls with checkmark and cross symbols (no text or labels)natural_image
Diagram of a mechanical or electrical component with a circular inset showing internal components (no text or symbols)natural_image
Black-and-white illustration of a man's face with short hair and beard, wearing a pearl necklace (no text or symbols)natural_image
Illustration of two hands holding a grip with arrows indicating force direction (no text or symbols)natural_image
Illustration of a person's face with short hair and beard (no text or symbols)natural_image
Illustration of two hands holding a small object with directional arrows and checkmark symbols (no text or labels)natural_image
Mechanical component diagram showing a lever and gear assembly (no text or symbols)natural_image
Simple line drawing of a person's face (no text or symbols)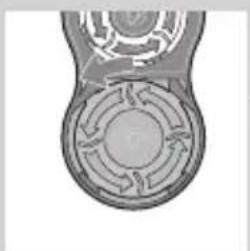
natural_image
Cross-sectional diagram of a mechanical component with internal gear-like structure (no text or symbols)1 제품 전원을 끄십시오.
natural_image
Mechanical assembly diagram showing a bearing housing with an arrow indicating motion direction (no text or symbols present)
natural_image
Diagram showing a device with a fan and a lid, separated by a diagonal line (no text or symbols)
natural_image
Illustration of a hand turning a mechanical component with arrows indicating motion (no text or symbols)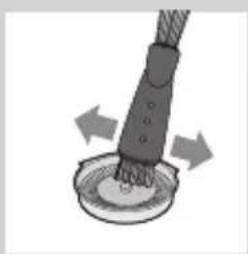
natural_image
Close-up of a cable being inserted into a circular component with arrows indicating direction (no text or symbols)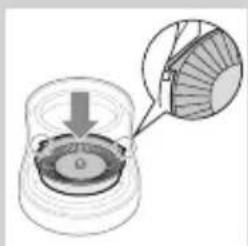
natural_image
Diagram showing a mechanical component with a downward arrow and a magnified inset of its internal structure (no text or symbols)natural_image
Illustration of two hands holding a tool, one with a magnified view and the other crossed out (no text or symbols)natural_image
Illustration of a printer with an open lid and an upward arrow indicating print (no text or symbols)natural_image
Diagram of a faucet with water flowing from a sink, showing a thermometer and a small temperature gauge (no text or symbols present)natural_image
Illustration of a mechanical component with a cylindrical top and base, showing an upward arrow (no text or symbols)natural_image
Illustration of a mechanical component with a downward arrow indicating compression or disassembly (no text or symbols)

액세서리 주문
natural_image
Electrical plug and clamp symbol with no text or labels- 請確定轉換器沒有弄濕。
natural_image
Simple line drawing of a showerhead spraying water into a container (no text or symbols)natural_image
Simple line drawing of a stylized object with a starburst shape and a triangular base, no text or symbols present.natural_image
Close-up of a battery icon with a circular outline and a triangular switch symbol (no text or labels)natural_image
Simple line drawing of a door with a star and bell symbol (no text or labels)natural_image
Illustration of a pair of electronic devices with no visible text or symbolsnatural_image
Illustration of a robot with two circular heads and a magnified inset showing a device (no text or symbols)natural_image
Illustration of a person holding a small object, no visible text or symbols2 讓電鬍刀組在皮膚上移動。
natural_image
Illustration of a faucet with liquid and a thermometer icon (no text or symbols)natural_image
3D rendered image of a handheld device with a separate clasp (no text or symbols visible)natural_image
Illustration of two hands holding a small object with directional arrows and checkmark symbols (no text or labels)natural_image
Diagram of a mechanical device with a circular component and directional arrow, no visible text or symbolsnatural_image
Illustration of a person's face with short hair and beard, wearing a necklace (no text or symbols)natural_image
Illustration of two hands holding a tool, one with arrows indicating motion and the other with a cross mark (no text or symbols)natural_image
Illustration of a person with short hair and beard, wearing an earpiece (no text or symbols)natural_image
Illustration of two hands holding a small object with directional arrows and a checkmark (no text or symbols)1 從產品中垂直抽出除毛組件。
natural_image
Diagram of a mechanical joint or clamp mechanism with no visible text or symbolsnatural_image
Simple line drawing of a person's face (no text or symbols)1 以溫水和潔面乳潤溼清潔刷與臉部。
natural_image
Cross-sectional diagram of a mechanical component with concentric circular features (no text or symbols)natural_image
Mechanical assembly diagram showing a gear or cam mechanism with an arrow indicating motion (no text or symbols present)4 從電鬍刀刀頭固定座上取出固定環。
natural_image
Diagram showing a lid and lid with arrows indicating direction, no text or symbols presentnatural_image
Illustration of a hand holding a mechanical component with arrows indicating motion or force (no text or symbols)natural_image
Illustration of a hand using a tool to lift a circular component with directional arrows (no text or symbols)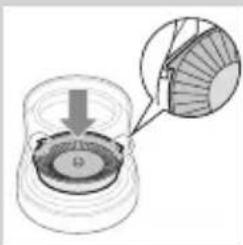
natural_image
Diagram showing a mechanical component with a magnified inset of its internal structure (no text or symbols)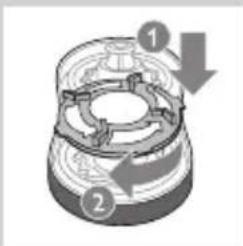
7 清潔電鬍刀刀網內部。
natural_image
Illustration of hands using a belt buckle to grip a cable, with no text or symbols present1 關閉產品。
2 從鬚角造型修容器配件上拆下梳具。


natural_image
Illustration of a printer with an open lid and upward arrow indicating print (no text or symbols)natural_image
Diagram of a faucet with water flowing through a sink, showing a thermometer and partial view of the drain (no text or symbols)natural_image
Mechanical component diagram showing a knob with a gear-like top and a base, no text or symbols presentnatural_image
Illustration of a mechanical component with a downward arrow indicating compression or disassembly (no text or symbols)注意:收納前,請確保產品與配件乾燥。
natural_image
Electric plug connected to a clamp with a no-smoking symbol (no text or labels)

64 简体中文
natural_image
Simple line drawing of a stylized object with a starburst shape and a small symbol inside, no text or symbols present.natural_image
Simple diagram of a device with a circular button and a leaf symbol, no text or labels present.natural_image
Simple diagram of a door with a star-shaped button and a small icon, no text or symbols present.natural_image
Illustration of a pair of electronic devices with no visible text or symbolsnatural_image
Illustration of a robotic arm with two circular heads and a magnified inset showing a mechanical component (no text or symbols)natural_image
Illustration of a person holding a small object, no visible text or symbolsnatural_image
Illustration of a faucet with liquid being poured into a sink, accompanied by a thermometer icon (no text or symbols)
natural_image
Illustration of a person holding a microphone, no text or symbols visible湿剃
natural_image
3D rendered image of a pair of electronic devices, one with a handle and the other with a clip (no text or symbols visible)natural_image
Illustration of two hands holding a small object, separated by a diagonal line with checkmark and cross symbols (no text or labels)natural_image
Mechanical component diagram showing a lever mechanism with a magnified inset (no text or symbols)natural_image
Black-and-white illustration of a man's face with short hair and beard, wearing a necklace (no text or symbols)

简体中文70
使用不带修剪梳的胡须造型器附件

natural_image
Illustration of two hands holding a tool, one with arrows indicating direction and the other with a cross mark (no text or symbols)natural_image
Illustration of a person's face with short hair and beard (no text or symbols)natural_image
Illustration of hands holding a small object with checkmark and cross symbols (no text or labels)natural_image
Mechanical component diagram showing a lever and gear assembly (no text or symbols)natural_image
Simple line drawing of a person's face (no text or symbols)natural_image
Cross-sectional diagram of a mechanical component with concentric circular features (no text or symbols)natural_image
Mechanical assembly diagram showing a bearing housing with an arrow indicating motion (no text or symbols present)natural_image
Diagram showing a mechanical component with arrows indicating direction, no text or symbols present5 取下一个刀片及其网罩。
natural_image
Illustration of a hand inserting a plug into a socket (no text or symbols)6 用随附的清洁刷清洁刀片。


简体中文

natural_image
Close-up of a hand holding a circular object with arrows indicating motion or force (no text or symbols visible)7 清洁网罩的内侧。
您也可以在热水龙头下清洁刀片及其网罩。
natural_image
Diagram showing a mechanical component with a downward arrow and a magnified inset of a gear-like structure (no text or symbols)natural_image
Illustration of two hands adjusting a cable or connector, showing force application and alignment (no text or symbols)1 关闭产品。
2 将修剪梳抽离胡须造型器附件。


简体中文74
natural_image
Illustration of a printer with an open lid and upward arrow indicating print (no text or symbols)3 打开胡须造型器附件。
将毛发弃置在垃圾桶中。

natural_image
Illustration of a mechanical component with a cylindrical top and base, showing an upward arrow (no text or symbols)natural_image
Illustration of a bowl with two cups above and a downward arrow indicating compression (no text or symbols)100% recycled paper 100% papier recyclé 100% 循环再造纸
4222.002.5478.5
- Always here to help you / 始终如一地为您提供帮助
- User manual / 用户手册
- PHILIPS
- ENGLISH
- Introduction
- Important
- Danger
- Warning
- ENGLISH 7
- Caution
- Compliance with standards
- ENGLISH8
- General
- General description (Fig. 3)
- ENGLISH 9
- Charging
- 'Charging' indication
- 'Battery fully charged' indication
- ENGLISH10
- 'Battery low' indication
- Quick charge
- Shaving
- Skin adaptation period
- Attaching the shaving attachment
- ENGLISH12
- Using the shaver
- Wet shaving
- Beard styling (YS536, YS523 only)
- Attaching the beard styler attachment
- Using the beard styler attachment with comb
- ENGLISH14
- Using the beard styler attachment without comb
- Facial cleansing with brush (YS536, YS527, YS526 only)
- ENGLISH 15
- Attaching the cleansing brush
- Using the cleansing brush attachment
- ENGLISH16
- Cleaning and maintenance
- Cleaning the shaving attachment
- ENGLISH 17
- ENGLISH18
- ENGLISH 19
- Cleaning the cleansing brush attachment (YS536, YS527, YS526 only)
- Storage
- ENGLISH20
- Replacement
- Replacing the shaving heads
- Replacing the cleansing brush
- Ordering accessories
- Environment
- ENGLISH22
- Removing the rechargeable battery
- Guarantee and service
- Guarantee restrictions
- Troubleshooting
- ENGLISH24
- ENGLISH 25
- 한국어26
- 소개
- 위험
- 기준 준수
- 액세서리 주문
- 简体中文
- 湿剃
- 简体中文70
- 使用不带修剪梳的胡须造型器附件
- 简体中文
- 简体中文74
Brand : PHILIPS
Model : Click&Style YS536
Category : Electric razor