
XMR400HS - Voice recorder Epcom - Free user manual and instructions
Find the device manual for free XMR400HS Epcom in PDF.


| Brand | Epcom |
| Model | XMR400HS |
| Product Type | Voice Recorder |
| Dimensions (H x W x D) | 4.5 x 1.2 x 0.6 inches |
| Weight | 2.5 oz |
| Power Source | Built-in rechargeable lithium battery, USB charging |
| Recording Formats | MP3, WAV |
| Storage Capacity | Up to 8GB internal, expandable via microSD up to 32GB |
| Battery Life | Up to 20 hours continuous recording |
| Connectivity | USB 2.0, 3.5mm earphone jack |
| Main Functions | Voice activation, noise reduction, playback, loop recording, timer recording |
| Display | OLED screen |
| Controls | Play, Record, Menu, Volume buttons |
| Maintenance | Clean with dry cloth; avoid moisture |
| Safety | Do not disassemble; keep away from water and heat |
| Spare Parts | Rechargeable battery, USB cable |
| Reparability | Not user-serviceable; contact support |
| General Information | User manual available for download; auto-off feature |
Frequently Asked Questions - XMR400HS Epcom
User questions about XMR400HS Epcom
0 question about this device. Answer the ones you know or ask your own.
Ask a new question about this device
Download the instructions for your Voice recorder in PDF format for free! Find your manual XMR400HS - Epcom and take your electronic device back in hand. On this page are published all the documents necessary for the use of your device. XMR400HS by Epcom.
USER MANUAL XMR400HS Epcom
To configure the hybrid equipment and add it to the Syscom server, we have to enter the computer through Internet Explorer version 9 with the IP that the factory equipment has. (192.168.1.100)
We enter the equipment configuration menu.

You have to configure the team ID. This data is important since this data they will allow us to have an administration on the server.
Note: if you use the free server of the Syscom server, the engineers will provide this data.
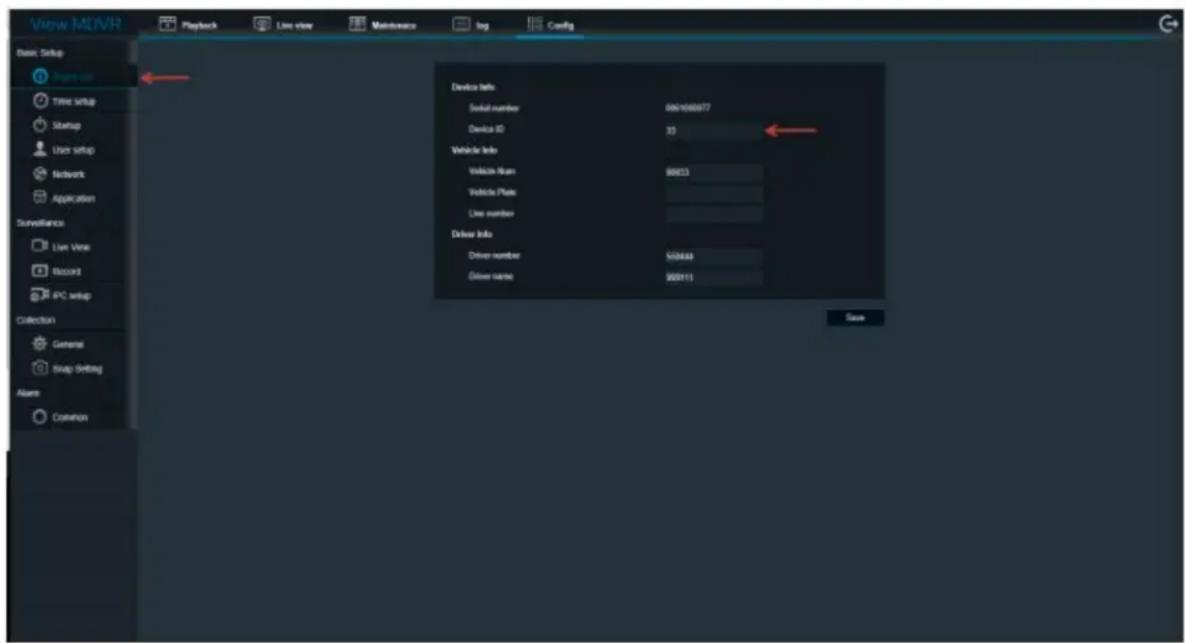

It is important that at the time of requesting the server account with Syscom engineers you have at hand the Serial Number of your equipment since this is an important data for identification on the server.
In the section of Network we will find several sections such as: Wifi configuration, APN configuration and server configuration.
You can modify the IP address of the equipment for your own administration.
It is recommended to configure Google DNS.

In the Wifi menu we will have the opportunity to make the configuration if we wish to enter the equipment wirelessly.

In the Communication Module section we find the option to configure the Internet service APN. If we do not have the information, we can find it on Google.

Finally, we find the section of Server Setup, where we can configure the data; IP address and server ports to which we are going to communicate.

Brand : Epcom
Model : XMR400HS
Category : Voice recorder