SVAN121IN - Air Conditioning SVAN - Free user manual and instructions
Find the device manual for free SVAN121IN SVAN in PDF.


Pick your language and provide your email: we'll send you a specifically translated version.
| Brand | SVAN |
| Model | SVAN121IN |
| Product Type | Split Air Conditioner (Cooling Only) |
| Power Supply | 220-240V, 50Hz |
| Btu/h Ranges Covered | 5,000 to 36,000 Btu/h (depending on model variant) |
| Air Filter | Washable polyester filter |
| Control | Remote control with LCD display |
| Cooling Modes | Cool, Fan, Dry, Auto |
| Fan Speeds | Low, Medium, High, Turbo |
| Timer | 24-hour on/off timer |
| Sleep Mode | Yes |
| Efficiency | Energy Class A (typical) |
| Refrigerant | R32 (common for modern units) |
| Maintenance | Clean air filter every 2 weeks; check for obstructions |
| Safety | Disconnect power before maintenance; ensure proper grounding |
| User Manual | PDF available, 29 pages |
Frequently Asked Questions - SVAN121IN SVAN
How do I clean the air filter?
Turn off and unplug the unit. Open the front panel and remove the filter. Wash it with warm water and mild detergent, then let it dry completely before reinstalling. Clean the filter every 2 weeks during heavy use.
What does the error code E1 mean?
Error code E1 typically indicates a thermistor sensor problem. Check if the sensor is properly connected. If the issue persists, contact a qualified technician.
Can I use the air conditioner in winter for heating?
The SVAN121IN is a cooling-only unit and does not provide heating. For heating, consider a heat pump or a different model with a reverse cycle.
How to set the timer?
Press the TIMER button on the remote. Use the +/- buttons to set the desired time for the unit to turn on or off. Confirm by pressing TIMER again. The timer can be set up to 24 hours.
What is the recommended temperature setting for cooling?
For optimal comfort and efficiency, set the temperature between 24°C and 26°C (75°F - 78°F). Lower settings increase energy consumption.
How often should I service the unit?
We recommend professional maintenance once a year before the cooling season. Regular cleaning of the filter and outdoor unit helps maintain performance. Refer to the user manual for detailed intervals.
Why is my unit leaking water?
Common causes: a clogged drain pipe, dirty air filter, or improper installation. Check and clean the drain line and filter. If the problem continues, contact a technician to inspect the drainage system.
How to install the air conditioner?
Installation should be done by a qualified professional. The unit requires proper placement, secure mounting of indoor and outdoor units, electrical wiring according to the manual's cable section, and safe refrigerant handling.
What is the voltage requirement?
The unit operates on 220-240V, 50Hz single phase. The specific cable section depends on the Btu/h capacity; refer to the cable table in the manual for exact requirements.
How to reset the remote control?
Remove the batteries, press and hold the RESET button (if available) for 5 seconds, then reinsert the batteries. If your remote has no reset button, simply remove batteries for 10 minutes.
User questions about SVAN121IN SVAN
0 question about this device. Answer the ones you know or ask your own.
Ask a new question about this device
No questions yet. Be the first to ask one.
Download the instructions for your Air Conditioning in PDF format for free! Find your manual SVAN121IN - SVAN and take your electronic device back in hand. On this page are published all the documents necessary for the use of your device. SVAN121IN by SVAN.
USER MANUAL SVAN121IN SVAN
natural_image
Diagram showing two connected electronic devices with a close-up of the internal components (no text or symbols)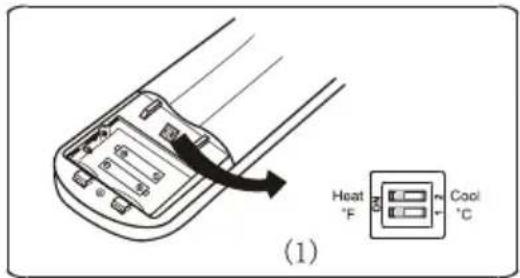
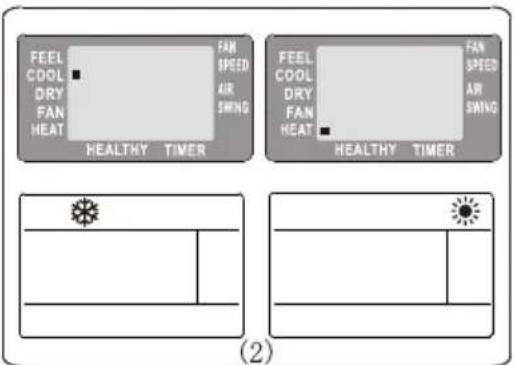
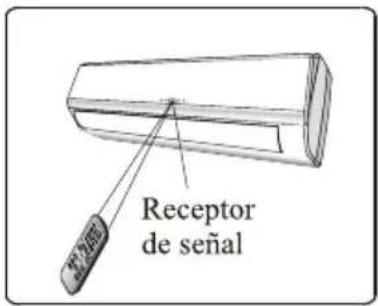
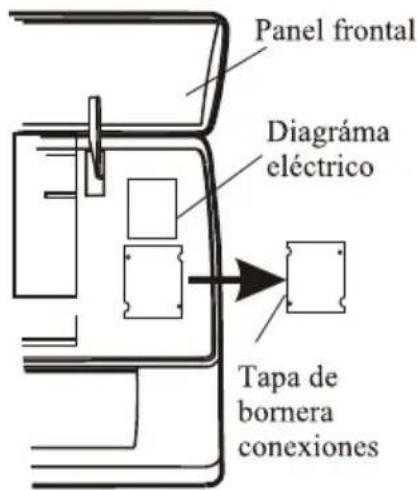
natural_image
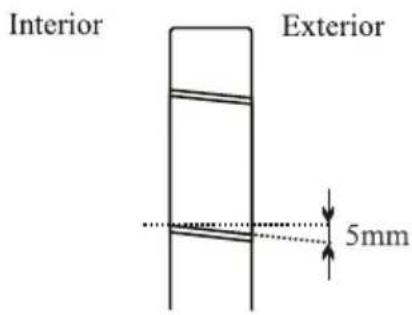
Diagram of a brick wall joint with a tool, showing no text or symbols| MODELO capacidad (Btu/h) | 5k | 7k | 9k | 12k | 15/18k | 22/24k | 28/30k/36k | |
| Sección del cable | ||||||||
| Cable de alimentación | N | 1.0mm^2 AWG18 | 1.0mm^2 AWG18 | 1.0mm^2 AWG18 | 1.0mm^2(1.5mm^3) AWG18(AWG16) | 1.5mm^2 AWG16 | 2.5mm^2 AWG14 | 4.0mm^2 AWG12 |
| L | 1.0mm^2 AWG18 | 1.0mm^2 AWG18 | 1.0mm^2 AWG18 | 1.0mm^2(1.5mm^3) AWG18(AWG16) | 1.5mm^2 AWG16 | 2.5mm^2 AWG14 | 4.0mm^2 AWG12 | |
| E | 1.0mm^2 AWG18 | 1.0mm^2 AWG18 | 1.0mm^2 AWG18 | 1.0mm^2(1.5mm^3) AWG18(AWG16) | 1.5mm^2 AWG16 | 2.5mm^2 AWG14 | 4.0mm^2 AWG12 | |
| Cable de interconexión | N | 1.0mm^2 | 1.0mm^2 | 1.0mm^2 | 1.0mm^2(1.5mm^3) | 1.5mm^2 | 0.75mm^2 | 0.75mm^2 |
| L | 1.0mm^2 | 1.0mm^2 | 1.0mm^2 | 1.0mm^2(1.5mm^3) | 1.5mm^2 | 0.75mm^2 | 0.75mm^2 | |
| 1 | 1.0mm^2 | 1.0mm^2 | 1.0mm^2 | 1.0mm^2(1.5mm^3) | 1.5mm^2 | 0.75mm^2 | 0.75mm^2 | |
| 2 | 0.75mm^2 | 0.75mm^2 | 0.75mm^2 | 0.75mm^2 | 0.75mm^2 | 0.75mm^2 | 0.75mm^2 | |
| 3 | 0.75mm^2 | 0.75mm^2 | 0.75mm^2 | 0.75mm^2 | 0.75mm^2 | 0.75mm^2 | 0.75mm^2 | |
| ⊕ | 0.75mm^2 | 0.75mm^2 | 0.75mm^2 | 0.75mm^2 | 0.75mm^2 | 0.75mm^2 | 0.75mm^2 | |
| UNIDADES INVERTER MODELO capacidad (Btu/h) | 9k | 12k | 18/22k | 24k | |||||
| Sección del cable | |||||||||
| Cable de alimentación | N | 1.0mm^2(1.5mm) AWG18(AWG16) | 1.0mm^2(1.5mm) AWG18(AWG16) | 1.5mm^2 AWG16 | 2.5mm^2 AWG14 | ||||
| L | 1.0mm^2(1.5mm) AWG18(AWG16) | 1.0mm^2(1.5mm) AWG18(AWG16) | 1.5mm^2 AWG16 | 2.5mm^2 AWG14 | |||||
| E | 1.0mm^2(1.5mm) AWG18(AWG16) | 1.0mm^2(1.5mm) AWG18(AWG16) | 1.5mm^2 AWG16 | 2.5mm^2 AWG14 | 1.0mm^2(1.5mm) AWG18(AWG16) | ||||
| Cable de interconexión | N | 1.0mm^2(1.5mm) | 1.0mm^2(1.5mm) | 1.5mm^2 | 0.75mm^2 | ||||
| L | 1.0mm^2(1.5mm) | 1.0mm^2(1.5mm) | 1.5mm^2 | 0.75mm^2 | |||||
| I | 1.0mm^2(1.5mm) | 1.0mm^2(1.5mm) | 1.5mm^2 | 0.75mm^2 | |||||
| ① | 1.0mm^2(1.5mm) | 1.0mm^2(1.5mm) | 1.5mm^2 | 0.75mm^2 | |||||
natural_image
Technical line drawing of a cylindrical mechanical component with directional arrows indicating force or movement (no text or symbols)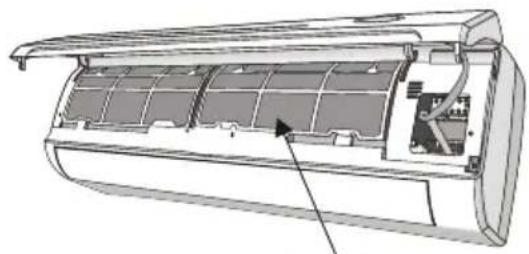
natural_image
Technical illustration of an air conditioner unit showing internal compartments and ventilation duct (no text or symbols)Filtro de aire
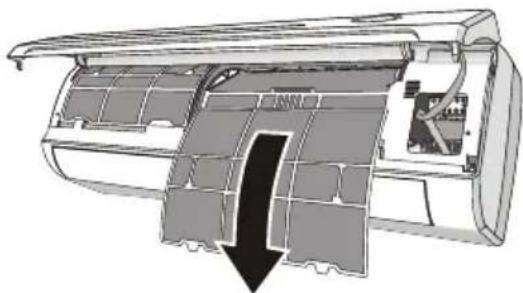
natural_image
Cross-sectional diagram of an air conditioner unit showing internal structure and airflow direction (no text or labels)AL FINALIZAR LA TEMPORADA

Table of contents
Click a title to access it
Manual assistant
Powered by Anthropic
Waiting for your message
Product information
Brand : SVAN
Model : SVAN121IN
Category : Air Conditioning