
KX-T3846E - Phone Accessories PANASONIC - Free user manual and instructions
Find the device manual for free KX-T3846E PANASONIC in PDF.


| Product Type | Corded Telephone |
| Dimensions (W x H x D) | 200 mm x 170 mm x 80 mm |
| Weight | 500 g |
| Power Source | AC adapter (9V DC) or telephone line power |
| Dialing Mode | Pulse / Tone switchable |
| Last Number Redial | Yes, up to 32 digits |
| Hold Function | Yes |
| Mute Function | Yes |
| Ringer Volume Control | High / Low / Off |
| Handset Volume Control | Yes, 3 levels |
| Flash Key | Yes, for call waiting |
| Pause Key | Yes |
| Wall Mountable | Yes |
| Display | LCD, 16 characters x 1 line (optional model) |
| Memory Dialing | 10 one-touch keys |
| Cleaning | Wipe with a soft, dry cloth. Avoid liquids. |
| Safety | Use only specified Panasonic AC adapter. Do not install in wet locations. |
| Spare Parts | Handset cord (15 ft), line cord (10 ft), AC adapter (model KX-TCA174) |
| Repairability | Contact authorized Panasonic service center. No user-serviceable parts inside. |
Frequently Asked Questions - KX-T3846E PANASONIC
User questions about KX-T3846E PANASONIC
0 question about this device. Answer the ones you know or ask your own.
Ask a new question about this device
Download the instructions for your Phone Accessories in PDF format for free! Find your manual KX-T3846E - PANASONIC and take your electronic device back in hand. On this page are published all the documents necessary for the use of your device. KX-T3846E by PANASONIC.
USER MANUAL KX-T3846E PANASONIC
Operating Instructions
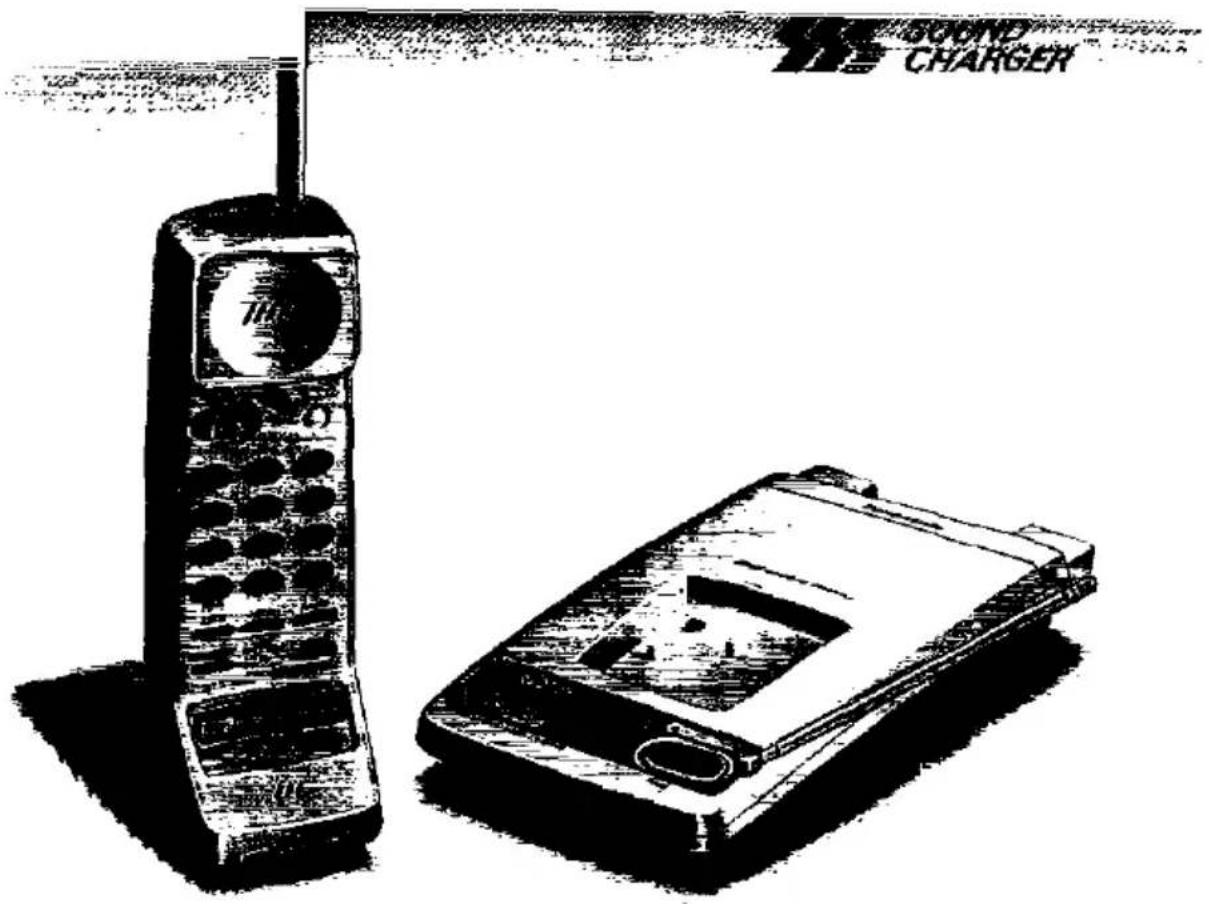
Please read before use.
Charge the battery for about 10 hours before Initial use.
Important information
APPROVED for connection to telecommunication systems specified in the instructions for use subject to the conditions set out in them.
S/1010/3/R/503098
Do not connect the AC adaptor to any AC outlet other than the standard AC 240 V, 50 Hz.
●Outlet voltage DC 12 V, 150 mA
●The apparatus is approved for use with the KX-A14BE and KX-A91E power supply
- CAUTION: Do not remove cover. Live parts inside.
Ringer Equivalence Number (REN):
This relates to the performance of the apparatus when used in combination with other items of apparatus. It enables the calculation of the maximum number of items of apparatus that may be connected simultaneously to the line by summing the REN values of each item. A BT supplied instrument has a REN value of 1 unless otherwise marked. A maximum REN value of 4 should not be exceeded. The REN value of this apparatus is 1.
Method of connection
This is connected to the exchange line or PABX/PMBX (Private Automatic/Manual Branch Exchange) extension by the new standard British Telecom plug and socket. Arrangements for provision of this type of termination can be made through the nearest British Telecom Sales Office. The apparatus may be connected to the following types of installation. The apparatus has been approved for use under the following conditions:
a) For connection to the public switched telephone network (PSTN) and compatible PBX (Private Branch Exchange), which use LD signalling and MF signalling. (Please consult your supplier for an up to date list of compatible PBX's.)
b) The apparatus can be used on extension sockets connected to a direct exchange line (D.E.L.).
c) This apparatus is suitable for connection to the telecommunication system directly or via compatible private branch exchange as an extension. The supplier of the apparatus should be consulted for an up to date list of PBX's with which the apparatus is compatible.
d) This apparatus must not be connected in the following manner:
1) As an extension to a pay phone
2) As a party line with shared service
It cannot be guaranteed that the apparatus will operate under all possible conditions of connection to compatible PBX's.
●This apparatus is suitable for connection to a PBX with or without initial proceed indication.
- This apparatus is suitable for connection to a PBX with or without secondary proceed indication.
This cordless telephone has been designed to operate on radio frequencies which have been assigned to the exclusive use of cordless telephones. As the use of cordless telephones becomes more widespread users may experience a reduction in the quality of service obtainable from this apparatus.
You may receive some interference on domestic radio receivers because the cordless telephone transmission is around 1.7 MHz.
There is a possibility of occurrence of overhearing between cordless telephones operating on the same radio channel. And such interference may increase with greater usage of cordless telephones.
This apparatus has been approved for the use of the following facilities:
1) Storage of telephone numbers for retrieval by a predetermined code
2) Automatic dialling
3) Automatic storage of last number dialled
4) Repeat attempt: Single
5) Simple telephone facility
6) PBX earth register recall
PBX timed break register
recall
7) MF signalling
8) LD signalling
9) Mercury dialling compatibility
10) Pause
11) 1way paging
Any other usage will invalidate the approval of the apparatus if as a result, it then ceases to conform to the standards against which approval was granted.
999 or 112 can be dialled on the apparatus for the purposes of making outgoing calls to the BT Emergency (999 or 112) Service.
WARNING:
The apparatus may be unable to make emergency 999 or 112 telephone calls, under certain conditions, e.g.
● Radio interference caused by another cordless telephone operating on the same radio frequency.
●The portable handset battery needs recharging, or has failed.
- The base unit back-up batteries are exhausted. With the batteries in good condition the base unit will be able to operate without mains power for at least seven hours, including one hour in the TALK mode.
●The portable handset cannot be used while charging.
Any cases of difficulty should be referred in the first instance to the supplier of the apparatus.
NOTE:
If you experience any problems with the normal use of your apparatus, you should unplug it from the telephone outlet and connect a known working telephone in its place. If the known working telephone still gives problems, then call British Telecom Engineers. If it operates properly, then the problem is likely to be a fault in your apparatus. In this case, contact your supplier for advice. British Telecom will charge you if they attend a service call that is not due to apparatus supplied by them.
Contents
Important information 2
Included with this unit 6
For best performance 7
Battery charge 7
Operating range 8
Noise 9
Location of controls 10
Setting up the unit 12
Connection 12
Setting the selector switches ..... 16
Making calls 18
Answering calls 20
Automatic dialling 22
Storing phone numbers in memory 22
Dialling a stored number from memory .....24
Paging the portable handset from the base unit .....25
The Mercury Residential Service 26
For Residential 132 Service customers .....26
For Mercury PIN Codes Service customers .....28
Resetting the Mercury station's memory (Returning to Residential 132 Service) ....32
Other features 33
For users of a PBX (PAUSE) 33
Temporary tone dialling (TONE) 33
Using the recall feature (RECALL) 34
Automatic security code setting 34
Battery replacement 35
Wall mounting 36
Troubleshooting guide 38
Safety instructions 40
Included with this unit
AC Adaptor .....one
(p. 13)
Screws two
(p. 36)

natural_image
Simple line drawing of a rectangular device with a coiled cable at the bottom (no text or symbols)
Battery Box ..... one
(p. 13, 14)
Washers .... two
(p. 36)
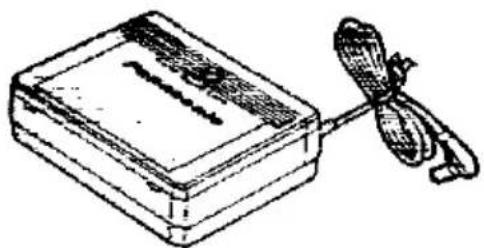
natural_image
Simple line drawing of a box with a ribbon and a coiled cable (no text or symbols)

Rechargeable Battery
(KX-A36A) . . . . . . . . . . . . one
(p. 35)

natural_image
Simple line drawing of a cylindrical battery connected to a terminal plug (no text or symbols)The battery has been installed in the portable handset at the factory.
For best performance
Battery charge
To power the portable handset, charge the battery before initial use.
The portable handset should be charged for 10 hours. Place the portable handset on the base unit. The base unit must be connected to the mains for the portable handset to charge.
—The IN USE/CHARGE indicator light is on.
—The battery cannot be overcharged.

Notes:
—Clean the charge contacts with a soft cloth once a month, or the battery may not charge properly.
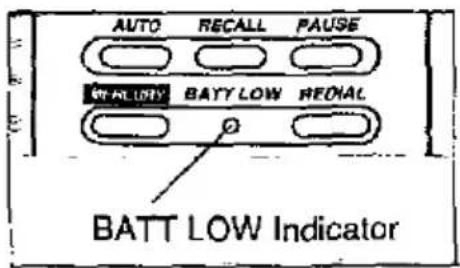
—Once the battery is fully charged, you do not have to place the portable handset on the base unit until the BATT LOW indicator flashes.
Recharge the battery when the BATT LOW indicator flashes or beep tone sounds every 15 seconds during a conversation.
Standard battery life
If your Panasonic battery is fully charged:
| In TALK mode | Up to about 7 hours |
| In Stand-by mode | Up to 7 days |
Battery life may vary depending on actual use and ambient temperature.
Operating range
Range of operation depends on the construction of your home, weather or actual operation, because calls are transmitted between the base unit and the portable handset by radio waves.
Normally you may get longer range outdoors than indoors. If there are some obstacles such as walls, noise may prevent your telephone calls. In particular, high metal shelves or cement-iron walls will shorten the operating range.
For maximum range
It is best to place the base unit in a HIGH and CENTRAL location of the house, with no obstructions. Be sure to fully extend the aerials of the portable handset and the base unit for best reception.

Noise
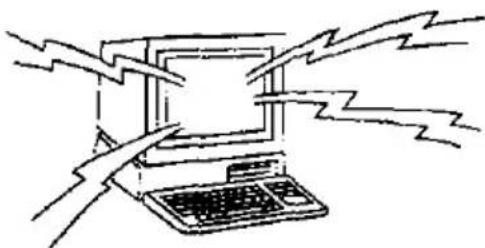
Occasional noise or interference may occur due to other random radio waves.
natural_image
Simple line drawing of a computer with a keyboard and lightning bolts, no text or symbols present.Electrical appliances such as a refrigerator, microwave oven, fax, TV, radio, or personal computer might interfere with the telephone conversation or shorten the operating range.
If noise affects your telephone calls, keep the base unit, telephone line cord or AC adaptor cord away from electrical appliances.
To reduce noise during a conversation (Selecting a clear channel)
A channel is a set of receiving and transmitting frequencies. You may select the clearer of the 2 available channels.

During a conversation, press the CH button.
—Each time you press the button, the other channel is selected.
Note:
—If the portable handset user is too far from the base unit, the CH button may not function fully. Move toward the base unit.
Location of controls
Portable handset

Base unit

Setting up the unit
Connection
USE ONLY Panasonic AC ADAPTOR KX-A14BE AND BATTERY BOX KX-A91E.

Power failure protection
The unit will not function during a power failure. We recommend that you install eight optional batteries (AA, R6 or UM-3 size) into the Battery box. Then, you can operate the unit during a power failure (see page 14).
CONNECTION OF POWER SUPPLY
This apparatus is intended for use when powered by the KX-A14BE and KX-A91E. Using other power supplies will invalidate any approval given to this apparatus.

Note:
—The AC adaptor and the Battery box must remain connected at all times.
Battery installation into the Battery box
Installing eight optional batteries (AA, R6 or UM-3 size) into the Battery box enables you to operate the unit during a power failure. You can use the unit for up to about 1 hour when new batteries are installed.
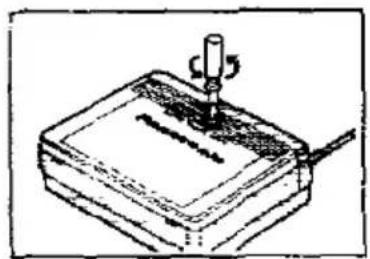
1
natural_image
Simple line drawing of a mechanical device with a lever and base plate (no text or symbols)Loosen the screw.
2

natural_image
Simple line drawing of a mechanical device with no text or symbolsOpen the battery compartment as shown.
3

Insert eight AA, R6 or UM-3 size batteries in the proper order as indicated, matching the correct polarity.
—When you finish, close the cover and tighten the screw.
Battery precautions:
The batteries should be used correctly, otherwise, the unit may be damaged due to battery leakage.
—Do not mix old, new or different types of batteries.
—Do not charge, short-circuit, disassemble, heat or dispose in fire.
—Do not use Nickel-Cadmium batteries.
—Please renew the batteries annually as a matter of routine.
—After a power failure has taken place, you should replace the batteries with new ones.
—Battery life depends on operating temperature and quality of batteries.
To install the wire aerial
The base unit has two types of aerial. One is wire and the other is telescopic.
The wire aerial is used to transmit sounds to the portable handset while the telescopic aerial is used to receive them from the portable handset.
Uncoil the wire aerial to its full extent and fix its end at the highest position in your room. Avoid metal objects such as window frames for best performance.

Note:
—Do not cut the wire aerial or connect other wires.
To connect another telephone
To B.T. Socket

Setting the selector switches

① POWER/RINGER Switch

Set to the ON position. If set to the OFF position, battery power will be saved, but the portable handset will not operate or ring.
② VOLUME Selector

Set to the NORMAL position. If the other party's voice is difficult to hear, set to the HIGH position.
④ RECALL Selector

Set to the T BR position if the unit is to be connected directly to an exchange line. If the unit is to be connected via a PBX (switchboard) then you may need to switch to the E RE position. If you are in any doubt, then please contact your switchboard manager or supplier for advice.
③ DIALLING MODE Selector

Set to the TONE position when your telephone line has touch tone service. If it has rotary service, set to the PULSE position.
You can ascertain which type of local BT exchange you are connected to using the following procedure.
-
Ensure that the DIALLING MODE selector is set to TONE.
-
Press the TALK button, then identify the dial tone.
-
Dial a number you are familiar with.
-
If the call is successful, you are connected to a Tone exchange, therefore leave the DIALLING MODE selector on TONE.
-
If the call is not successful, you are connected to a Pulse exchange. Therefore, switch the DIALLING MODE selector back to PULSE.
Making calls
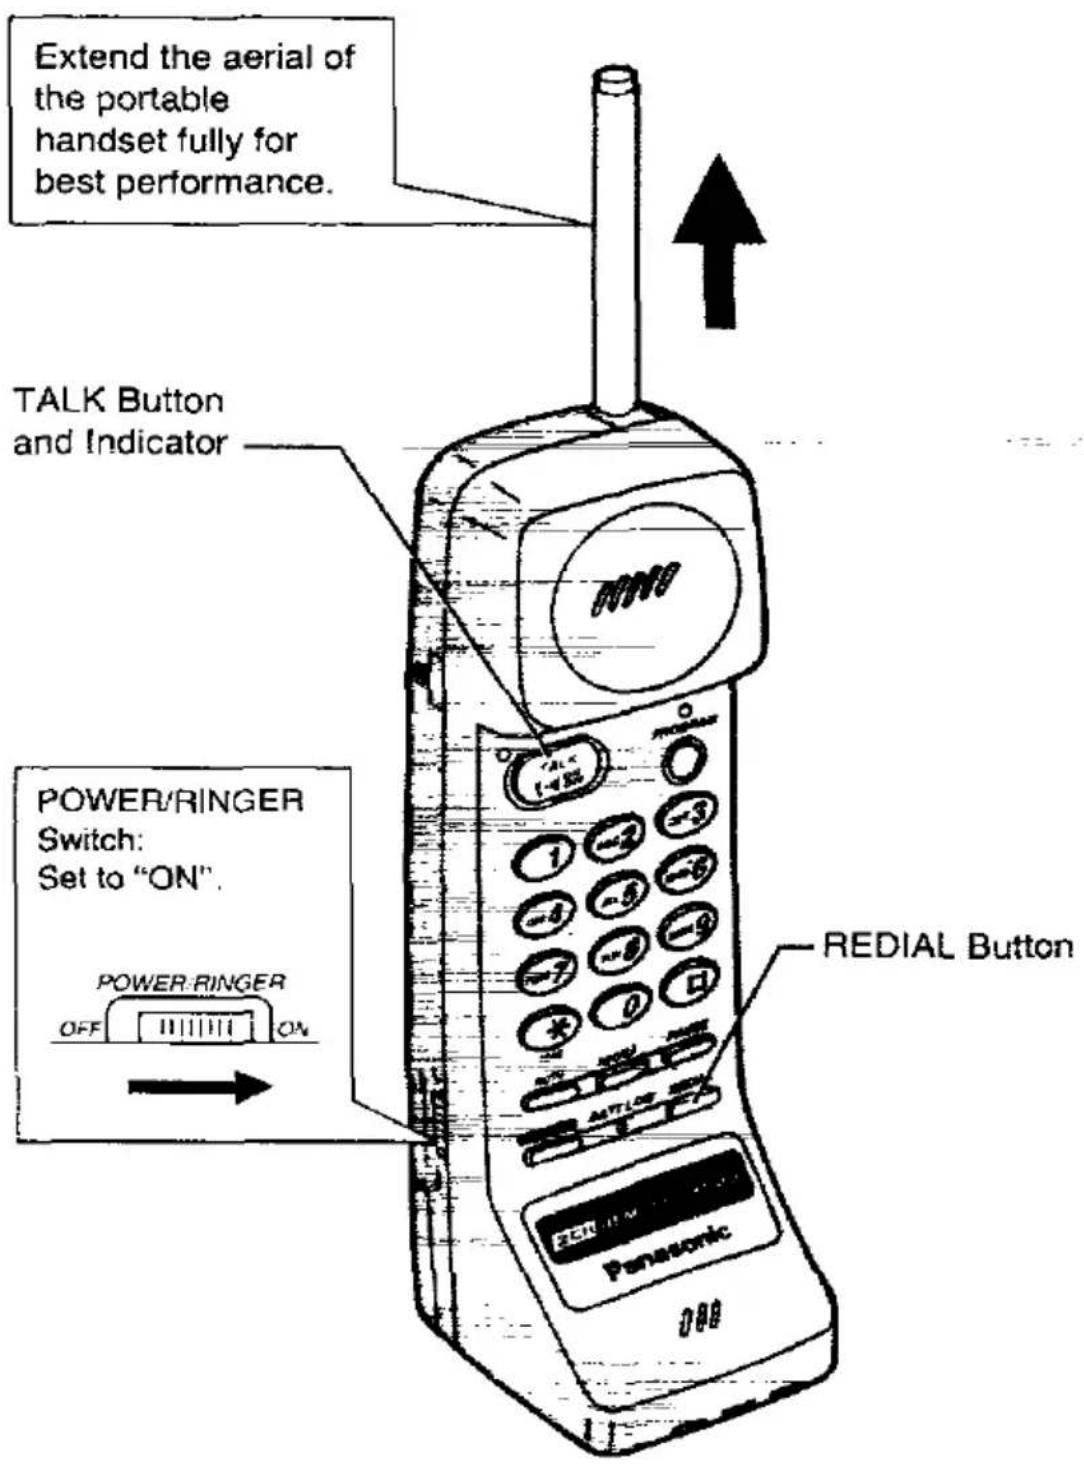
Note:
—If the alarm tone sounds when you press the TALK button, move toward the base unit or place the portable handset on the base unit. Then try again.
1

Press the TALK button to get dial tone.
—The TALK indicator and the dialling button lights are on.
2

Dial a telephone number.
—The dialling button lights will go out about 10 seconds later.
3

To hang up, press the TALK button or place the portable handset on the base unit.
—The TALK indicator light goes out.
To redial
Press the TALK button to get dial tone, then press the REDIAL button.
The last dialled number is automatically redialled.
Answering calls

1
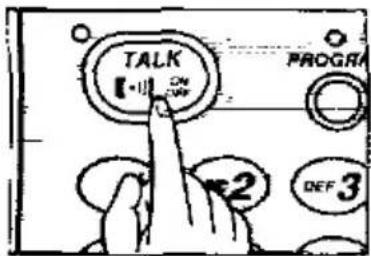
If the portable handset is off the base unit:
When the telephone rings, press the TALK button to answer the call.
—The TALK indicator light is on.
OR

natural_image
Illustration of a hand holding a mobile phone with a keypad and antenna (no text or symbols visible)If the portable handset is on the base unit:
When the telephone rings, lift the portable handset to answer the call.
2

To hang up, press the TALK button or place the portable handset on the base unit.
—The TALK indicator light goes out.
Note:
—The dialling button lights are on when a call comes in. They will go out about 10 seconds after you answer the call.
Automatic dialling
The unit can store 10 phone numbers you often dial, in memory. The stored number is dialled automatically by pressing the AUTO button and one of the dialling buttons.
Storing phone numbers in memory
The dialling buttons (0 through 9) function as memory stations for automatic dialling. A 16-digit phone number can be stored in each station.
Make sure that the TALK indicator light is off.
1
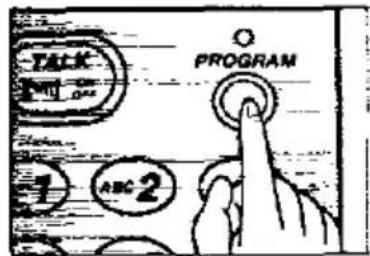
Press the PROGRAM button.
—The PROGRAM indicator light is on to show the unit is in the programming mode.
2

Enter a phone number up to 16 digits.
3

Press the AUTO button.
4

Press one of the dialling buttons (0 through 9) to select a memory station.
—The PROGRAM indicator light goes out.
—The phone number is stored in the memory location.
—To store other numbers, repeat steps 1 through 4.
To correct an error while storing
Press the PROGRAM button to end the programming mode, then start from step 1 on page 22 to store the correct number.
To confirm a stored number
Store the phone number in the same memory station as the phone number you want to confirm. You will hear one or two beeps.
2 beeps: The newly stored number is the same as the previously stored one.
1 beep: The newly stored number is different from the previously stored one.
To erase a stored number
- Press the PROGRAM button.
- Press the AUTO button.
- Press the dialling button of the memory station for the phone number to be erased.
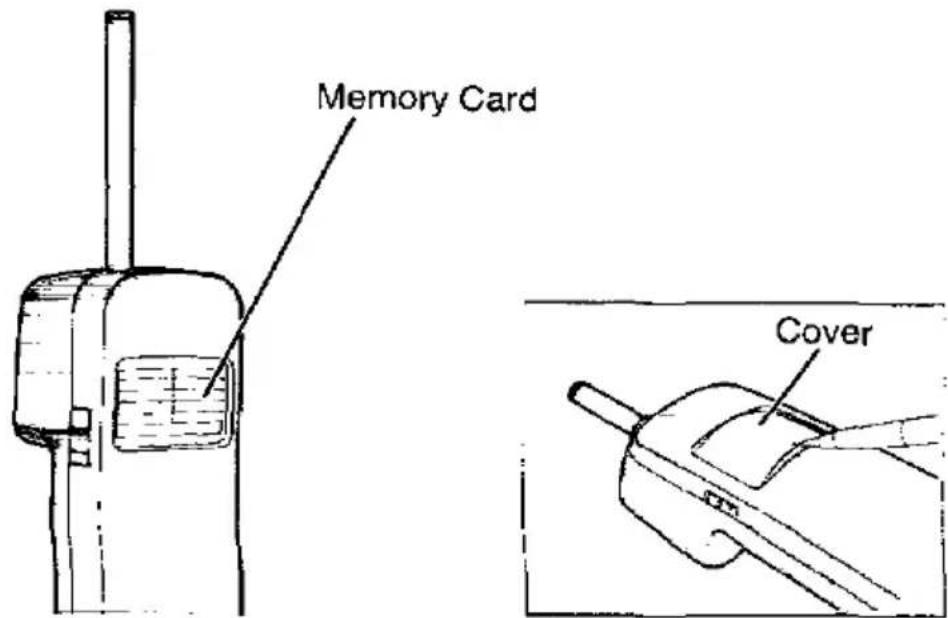
Memory card
Pull out the memory card and write down the names or phone numbers associated with automatic dialling.
Dialling a stored number from memory
1
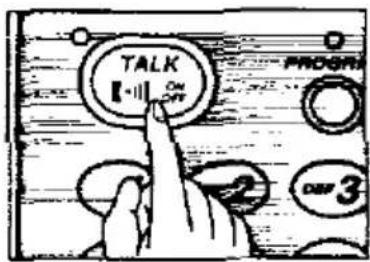
Press the TALK button to get dial tone.
—The TALK indicator and the dialling button lights are on.
2
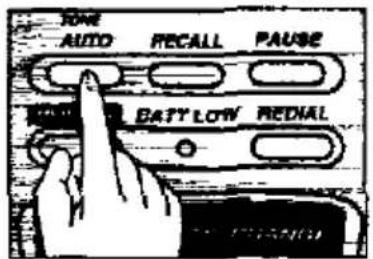
Press the AUTO button.
3

Press the dialling button (0 through 9) where the phone number you want to dial is stored.
—The stored number is dialled automatically.
Paging the portable handset from the base unit —
The base unit user can page the portable handset user by alerting him/her with beep tones.
This feature also helps you to find the portable handset if you misplace it.

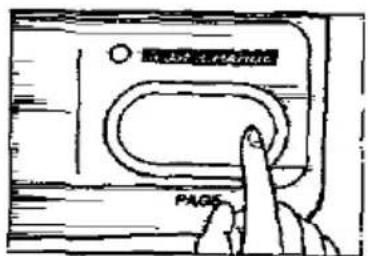
Press the PAGE button.
—The portable handset beeps.
—The IN USE/CHARGE indicator flashes.
—To stop paging, press the PAGE button again.
The Mercury Residential Service
Mercury's Residential Service is a highly competitive telephone service for the residential and small business user.
Most UK long distance and international calls are cheaper over Mercury, especially in the Economy period.
Mercury calls are rounded to the second, and charged to the nearest tenth of a penny. You will also receive fully itemized bills. Mercury Customer Services are available 24 hours a day to provide the highest level of customer service.
There are two ways to access Mercury, the Residential 132 Service and the Mercury PIN Codes Service. You can find out the best method for you by calling Mercury Customer Services on FreeCall 0500-500 194 (24 hours). Most homes and businesses are now able to access the Mercury network via their existing BT line.
Mercury Customer Services will be able to check whether Mercury is available in your area.
All Mercury's charges and tariffs are the same for both methods of accessing Mercury—the only difference is how you connect to the Mercury network.
For Residential 132 Service customers
Once you have become a Mercury Residential 132 customer, you simply dial 132 before a long distance or international call to send it over the Mercury network.
The MERCURY button on your unit comes with the digits "132" pre-stored in it.
To check that you have access to Mercury, press the TALK button, wait for the dial tone, press the MERCURY button, and dial 132. This call is free of charge. You should be connected to a recorded message welcoming you to the Mercury network. If you have any difficulties, please contact Mercury Customer Services (Fault Reporting) on FreeCall 0500-500 193 (24 hours).
To send your long distance and international calls over Mercury, press the MERCURY button before the STD code and telephone number of the person you are calling.
Making a call via Mercury
1

Press the TALK button.
—The TALK indicator and the dialling button lights are on.
2

Press the MERCURY button.
—A series of short beeps will be heard.
3

Dial the chosen Cost Centre Code* if applicable (see page 31).
4

Dial either the phone number required, or automatic dial memory.
Please note that Cost Centre Codes are not currently available with Residential 132 Service.
For Mercury PIN Codes Service customers
After you apply for Mercury PIN Codes Service you will receive a Mercury PIN code in two separate parts.
The PIN code, which is similar to a bank PIN number, identifies you as a Mercury customer and will need to be stored in the unit's memory using the MERCURY button.
Programming the MERCURY button
Before programming your unit with the Mercury PIN code;
1) You must ascertain which type of local BT exchange you are connected to (see page 17).
2) Reset the Mercury station's memory (see page 32).
Ensure that the unit is plugged into the BT socket.
1

Press the PROGRAM button.
—The PROGRAM indicator light is on to show the unit is in the programming mode.
2
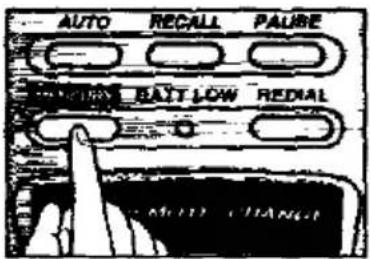
Press the MERCURY button.
3

Dial 131.
4

If you are connected to a Tone exchange;
Press the PAUSE button once (twice if programming proves unsuccessful).
OR

If you are connected to a Pulse exchange;
Press the * (TONE) button, then press the PAUSE button once.
5
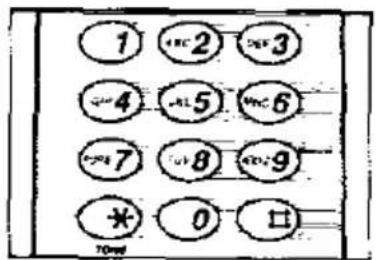
Enter the digits of the Mercury PIN code (part 1 then part 2).
—To correct an error while programming, press the PROGRAM button, then proceed from step 1 again.
6
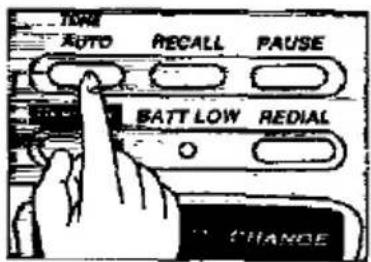
Press the AUTO button to store the program into memory.
Note:
—If programming proves unsuccessful reset the Mercury memory as described on page 32 then re-program the memory from step 1.
To check if the PIN code has been programmed correctly, press the TALK button, wait for the dialling tone, and press the MERCURY button (followed by 2 or 3 digit Cost Centre Code* if applicable) and dial 1500. This call is free of charge. During connection you will hear a series of short beeps. This is the Mercury dial tone. After a few seconds you should be connected to a recorded message welcoming you to the Mercury network. If you have any difficulties, please contact Mercury Customer Services on FreeCall 0500-500 193 (24 hours). (*Cost Centre Code: see page 31.)
Confirming the Mercury station's memory
Store the Mercury code again in the Mercury station. When the AUTO button is pressed, you will hear a beep once, twice or six times for confirmation.
1 beep: A new code number has been stored in the memory.
2 beeps: The code number newly entered is the same as that was previously stored.
6 beeps: The code number newly entered is different from the one that was previously stored. If you want to store the new code number, reset the Mercury station's memory, then reprogram it (for resetting the memory, see page 32).
Making a call via Mercury
1

Press the TALK button.
—The TALK indicator and the dialling button lights are on.
2
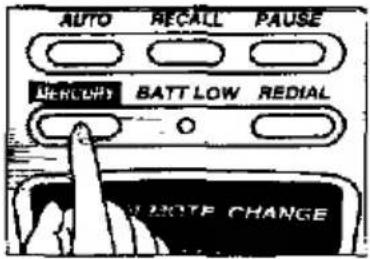
Press the MERCURY button.
—A series of short beeps will be heard.
3

Dial the chosen Cost Centre Code ^® if applicable (see below).
4

Dial either the phone number required, or automatic dial memory.
\*Cost Centre Codes
Cost Centre Codes are selectable on your Mercury order form. By keying in a code number (either 2 or 3 digits) before dialling each and every Mercury call, businesses can allocate calls to different jobs, or residential users can see who is responsible for each call. If you have requested this option, then to make a call via Mercury you must:
- Press the TALK button.
- Press the MERCURY button.
- Dial your chosen Cost Centre Code (any 2 or 3 digit number except 112 or 999).
- Dial either the phone number required, or automatic dial memory.
Resetting the Mercury station's memory (Returning to Residential 132 Service)
If you want to change your Mercury code to a new one or if you need to send your telephone away for repair, you must reset the Mercury station's memory using the following procedure.
1

Press the PROGRAM button.
—The PROGRAM indicator light is on to show the unit is in the programming mode.
2

Press the MERCURY button.
3
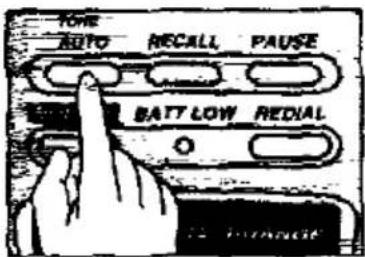
Press the AUTO button.
—The Mercury memory is reset to 132 (Residential 132 Services). You can store a new Mercury code (see pages 28–29).
Other features
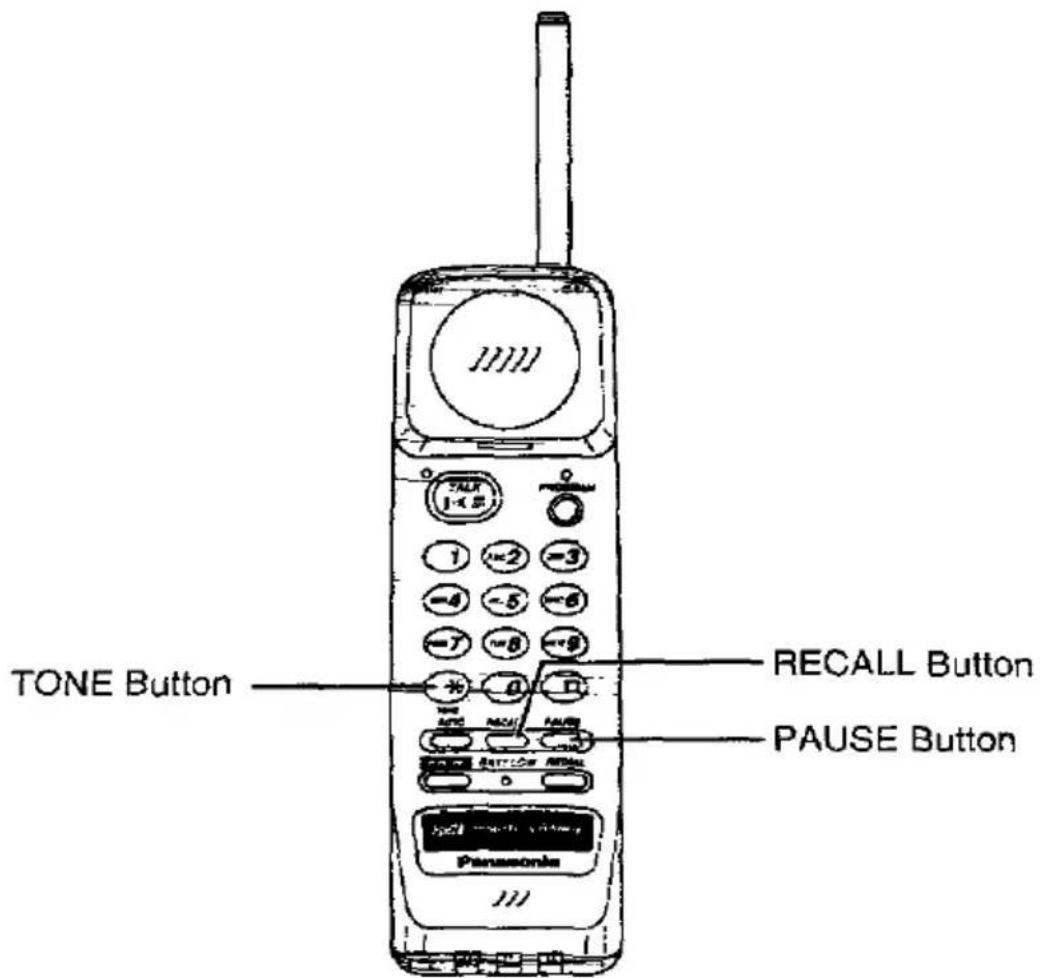
For users of a PBX (PAUSE)
If your unit is connected to a PBX, you need to dial an access number (usually 9) to get an outside line. In this case, inserting a pause between the access number and the phone number is necessary, especially when redialling or storing the number in memory. Pressing the PAUSE button once causes a 3.5-second pause.
Temporary tone dialling (TONE)
If your line has rotary service, pressing the TONE (*) button allows you to change the dialling mode temporarily to tone. You can dial the numbers or codes needed to operate an answering system, to use electronic banking services or other special services. When you hang up, the dialling mode returns to pulse automatically.
Using the recall feature (RECALL)
The RECALL button is used to access special telephone services (optional) such as call waiting. Contact your telephone company business office for details
Example: British Telecom call waiting
- Ensure that you have set the RECALL selector to the TBR position.
- When the call waiting tone is heard during a conversation, press the RECALL button.
-
When dial tone is heard, dial 2. The first call is put on hold and you can have a conversation with the second party.
-
To keep the present call and return to the first call: Press the RECALL button, then dial 2.
To hang up the first call: Press the RECALL button, then dial 0.
To hang up the present call and return to the first call: Press the RECALL button, then dial 1.
If your unit is connected to a PBX, pressing the RECALL button allows you to access some features of your host PBX such as transferring an extension call.
Automatic security code setting
Whenever you place the portable handset on the base unit, the unit automatically selects one of 60,000 security codes. This code helps to avoid unauthorized use of your telephone line by another cordless telephone in your area.
Battery replacement
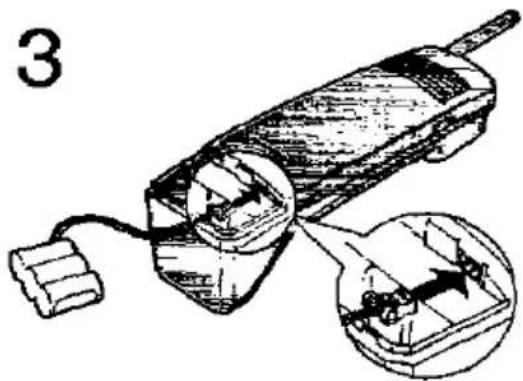
Replace the battery with a new one if the BATT LOW indicator flashes after a few telephone calls even when the battery has been charged for 10 hours.
1

Set the POWER/RINGER switch on the portable handset to the OFF position, in order to prevent memory loss.
2

natural_image
Diagram of a mechanical component with a directional arrow indicating movement (no text or symbols present)Remove the battery compartment cover.
3
natural_image
Diagram of a handheld device with internal components and a magnified inset showing internal wiring (no text or symbols)Replace the battery.
4

Close the cover and set the POWER/RINGER switch to the ON position.
Notes:
—Please use only Panasonic KX-A36A battery.
—Remember to charge the battery for about 10 hours after battery replacement.
Wall mounting
This unit can be mounted on a wall using the supplied screws and washers together with suitable wall fixings, if required.
1

natural_image
Technical line drawing of a device with internal components and wiring (no text or symbols)Fasten the telephone line cord to the hooks at the bottom of the base unit.
2
Install screws and washers using the wall template indicated on next page.
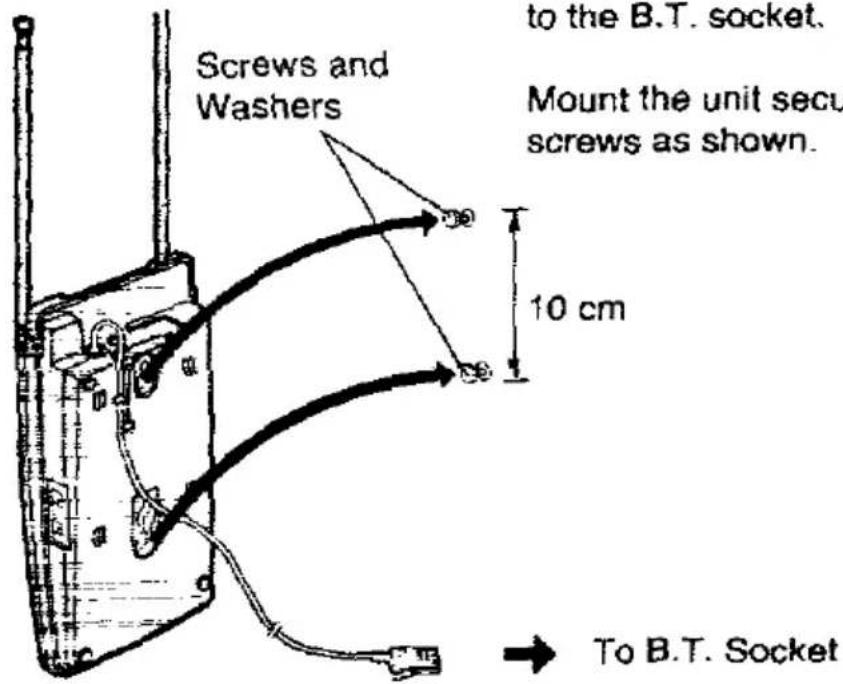
Connect the telephone line cord to the B.T. socket.
Mount the unit securely on the screws as shown.

To B.T. Socket
3

natural_image
Line drawing of two mobile phones connected by a cable, one with a switch and the other with a power cord (no text or symbols)To charge the portable handset battery:
Place the portable handset as shown.
—The IN USE/CHARGE indicator light is on.
Note:
—The portable handset battery continues to charge while in the wall mounting position. The battery cannot be overcharged.
Wall Template

Troubleshooting guide
The unit does not work.
—The connection of the unit was made improperly (see page 12).
—The portable handset battery has become weak. Charge the battery fully (see page 7).
—The security codes in the portable handset and the base unit are not the same. Place the portable handset on the base unit.
—Connect your unit to the main (first) socket in your premises. If it operates correctly then there is a fault in your extension wiring, if it still fails to ring then contact your supplier for advice.
Static, sound cuts in and out, or fade. Interference from another unit.
—Electrical interference may cause static and poor range. Set the portable handset and the base unit away from other electrical appliances.
—You may be too far from the base unit. Move toward it.
—Extend the aerials of the base unit and the portable handset fully (see page 8).
—Change the channel (see page 9).
When I press the TALK button, alarm tone sounds.
—Move toward the base unit and try again.
—Place the portable handset on the base unit and try again.
—Make sure that the AC adaptor is connected.
The portable handset does not operate or ring.
—The POWER/RINGER switch is in the OFF position. Set to the ON position (see page 16).
I cannot store a phone number in memory.
—You cannot store the number in memory while the unit is in the talk mode.
—Do not pause for over 30 seconds while storing.
While storing a phone number, the unit starts to ring.
—You can answer the call by pressing the TALK button. The programming will be cancelled, store the phone number again.
I cannot page the portable handset from the base unit.
—You cannot page the portable handset while it is engaged on a call.
—Set the POWER/RINGER switch to the ON position.
—The portable handset is too far from the base unit.
I cannot use the unit during a power failure.
—The unit will not function during a power failure. We recommend that you install eight optional batteries in the Battery box for power failure protection (see page 14).
—You can connect a reserve telephone on the same line for power failure protection (see page 15).
The BATT LOW indicator flashes.
Beep tone sounds every 15 seconds during a conversation.
—Charge the battery fully (see page 7).
I charged the battery for 10 hours, but the BATT LOW indicator flashes after a few telephone calls.
—Clean the charge contacts and charge again (see page 7).
—It is time to change the battery. Please replace with a new one (see page 35).
While operating the unit, the AC adaptor feels warm.
The IN USE/CHARGE indicator light never goes out while the portable handset is on the base unit.
—These are normal conditions.
Safety instructions
Take special care to follow the safety suggestions listed below.
Safety
1) Power Source: The unit should be connected to a power supply only of the type described in the operating instructions or as marked on the unit.
2) Non use Periods: When the unit is not used, turn the power off. When left unused for a long period of time, the base unit should be unplugged from the household AC outlet.
Installations
Environment
1) Water and Moisture: Do not use this unit near water—for example, near a bath tub, washbowl, sink, etc. Damp basements should also be avoided.
2) Heat: The unit should be situated away from sources of heat such as radiators, cookers, etc. It also should not be placed in rooms where the temperature is less than 5°C (41°F) or greater than 40°C (104°F).
Placement
1) Stacking: Do not place heavy objects on top of this unit.
2) Foreign Material: Care should be taken so that objects do not fall onto and liquids are not spilled into the unit. Do not subject this unit to excessive smoke, dust, mechanical vibration, or shock.
3) Surface: Place the unit on a flat level surface.
For best performance
1) If noise prevents the conversation from being understood at the portable handset, approach the base unit to reduce the noise.
2) The portable handset should be used in the "HIGH" volume setting when the other party sounds quiet.
3) The portable handset should be fully recharged on the base unit when the BATT LOW indicator flashes.
4) The small-sized aerial of the portable handset should not be touched during use because of its high sensitivity.
5) The possible calling distance may be shortened when the unit is used in the following places: Near obstacles such as hills, tunnels, undergrounds, near metal objects such as wire fences, etc.
WARNING:
TO PREVENT THE RISK OF FIRE OR ELECTRICAL SHOCK, DO NOT EXPOSE THIS PRODUCT TO RAIN OR ANY TYPE OF MOISTURE.
GUARANTEE CONDITIONS OF GUARANTEE
This guarantee is in addition to and does not in any way affect any statutory or other rights of consumer purchasers. If within the applicable guarantee period, the appliance proves to be defective by reason of faulty design, workmanship or materials, we undertake subject to the following conditions to have the defective appliance (or any part or parts there of) repaired or replaced free of charge.
- The appliance shall have been purchased and used solely within the UK and in accordance with standard operating instructions and the technical and/or Safety Standards required in the UK.
- The purchaser will within 7 days of purchase complete the included card and send it to us for registration. Failure to return such card could result in delay in providing the guarantee service.
- The appliance should be returned together with this guarantee and proof of date of purchase promptly on being found defective at the purchaser's risk and expense to the authorized dealer from whom the appliance was purchased or to the nearest authorized dealer. All enquiries must be through such dealers.
- This guarantee shall not apply to damage caused through fire, accident, lightning, misuse, wear and tear, neglect, incorrect adjustment or repair, to damage caused through installation, adaption, modification or use in an improper manner or inconsistent with the technical and/or safety standards required in the country where this appliance is used, or to damage occurred during transit to or from the purchaser.
- If at any time during the guarantee period any part or parts of the appliance are replaced with a part or parts not supplied or approved by us or of an objective quality safe and suitable for the appliance, or the appliance has been dismantled or repaired by any person not authorized by us, we shall have the right to terminate this guarantee in whole or in part immediately without further notice.
- The purchaser's sole and exclusive remedy under this guarantee against us is for the repair or replacement of the appliance or any defective part or parts and no other remedy, including, but not limited to, incidental or consequential damage or loss of whatsoever nature shall be available to the purchaser.
- This guarantee shall not apply to cassette tapes, batteries and any other items of limited natural life.
- Our decision on all matters relating to complaints shall be final. Any appliance or defective part which has been replaced shall become our property.
- The guarantee period applicable to this product shall be 12 months.
Please keep these Operating Instructions with your receipt.
Panasonic Business Systems U.K.
| Receipt No. | Date of Purchase |
| Model No.KX-T3846E | Serial No. |
| MODEL No.KX-T3846E | SERIAL No. |
| CUSTOMERS NAME etc. (BLOCK CAPITALS) | DEALERS |
| ...... | ...... |
| ...... | ...... |
| ...... | ...... |
| ...... | ...... |
| TELEPHONE No. | DATE OF PURCHASE |
WE WOULD BE GRATEFUL IF YOU WOULD COMPLETE THE FOLLOWING BEFORE RETURNING THIS CARD FOR REGISTRATION.
□ Male □ Female Age ( )
- WHAT TYPE OF STORE?
□ RADIO-TV GENERAL
-
REPLACEMENT?
-
HOW DO YOU RATE THIS MODEL ON THE SCALE FOR:
EXCELLENT GOOD FOOR
14: PERFORMANCE
(b) FEATURES
ICI DESIGN
id: VALLE VS PRICE
→ → + + +
(No text)
- IF FOR BUSINESS USE, HOW MANY
EMPLOYEES ARE THERE IN YOUR COMPANY?
C. UNDER 10 C. UNDER 50
C UNDER 100 □ -100-
- YOUR COMMENTS IF ANY
Registered No. 1485987
CONNECTION REQUEST
For B.T. owned wiring:
The following subscriber requests you to install a wall socket to enable connection of a "direct exchange line"-P.B.X. extension line for the Panasonic KX-T3846E Cordless Telephone which is fitted with a normal 431A connector.
Approval Number S/1010/3/R/503098
Subscriber
Address
Telephone Number .... Signature ....
*Delete if not required.
For wiring not owned by B.T.
Request should be made to the Authorized maintainer of the PBX for extension wiring and socket installation within 14 days. Expiry of the period or notice will allow another installer to be employed.
Panasonic Business Systems u.k.
WILLOUGHBY RD.
BRACKNELL, BERKSHIRE
RG12 4FP
POST CARD
STAMP REQUIRED
The Telephone Manager British Telecom Sales Department
Area

- Important information
- Ringer Equivalence Number (REN):
- Method of connection
- WARNING:
- NOTE:
- Contents
- Included with this unit
- For best performance
- Battery charge
- Notes:
- Standard battery life
- Operating range
- For maximum range
- Noise
- To reduce noise during a conversation (Selecting a clear channel)
- Location of controls
- Setting up the unit
- Connection
- Power failure protection
- CONNECTION OF POWER SUPPLY
- Battery installation into the Battery box
- Battery precautions:
- To install the wire aerial
- To connect another telephone
- Making calls
- 1
- 2
- 3
- To redial
- Answering calls
- Automatic dialling
- Storing phone numbers in memory
- To correct an error while storing
- To confirm a stored number
- To erase a stored number
- Memory card
- Dialling a stored number from memory
- Paging the portable handset from the base unit —
- The Mercury Residential Service
- For Residential 132 Service customers
- Making a call via Mercury
- For Mercury PIN Codes Service customers
- Programming the MERCURY button
- Ensure that the unit is plugged into the BT socket.
- Confirming the Mercury station's memory
- 4
- \*Cost Centre Codes
- Resetting the Mercury station's memory (Returning to Residential 132 Service)
- Other features
- For users of a PBX (PAUSE)
- Temporary tone dialling (TONE)
- Using the recall feature (RECALL)
- Automatic security code setting
- Battery replacement
- Wall mounting
- To charge the portable handset battery:
- Troubleshooting guide
- The unit does not work.
- Static, sound cuts in and out, or fade. Interference from another unit.
- When I press the TALK button, alarm tone sounds.
- The portable handset does not operate or ring.
- I cannot store a phone number in memory.
- While storing a phone number, the unit starts to ring.
- Safety instructions
- Safety
- Installations
- Environment
- Placement
- GUARANTEE CONDITIONS OF GUARANTEE
- CONNECTION REQUEST
- Panasonic Business Systems u.k.
- POST CARD
Brand : PANASONIC
Model : KX-T3846E
Category : Phone Accessories