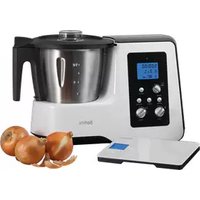
BTMKM980X - Blender Bellini - Free user manual and instructions
Find the device manual for free BTMKM980X Bellini in PDF.


| Product Type | Blender |
| Brand | Bellini |
| Model | BTMKM980X |
| Power Consumption | 800 W |
| Jug Capacity | 1.5 L |
| Speed Settings | 2 speeds + pulse |
| Blade Material | Stainless steel |
| Jug Material | Plastic |
| Dimensions (H x W x D) | 40 x 20 x 20 cm |
| Weight | 2.5 kg |
| Voltage | 220-240 V |
| Frequency | 50/60 Hz |
| Cord Length | 1.2 m |
| Safety Features | Overload protection, non-slip feet |
| Cleaning | Removable parts dishwasher safe |
| Additional Functions | Ice crush, detachable blade assembly |
| Color | Stainless steel / Black |
| Warranty | 2 years |
Frequently Asked Questions - BTMKM980X Bellini
User questions about BTMKM980X Bellini
0 question about this device. Answer the ones you know or ask your own.
Ask a new question about this device
Download the instructions for your Blender in PDF format for free! Find your manual BTMKM980X - Bellini and take your electronic device back in hand. On this page are published all the documents necessary for the use of your device. BTMKM980X by Bellini.
USER MANUAL BTMKM980X Bellini
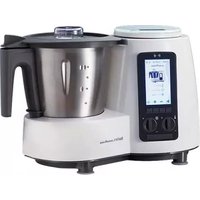
Bellini Intelli Kitchen Master

natural_image
White Bellini kitchen appliance with digital display and control panel (no visible text or symbols on main body)
Important Safeguards
When using electrical appliances, in order to reduce the risk of fire, electric shock and/or injury, these basic safety precautions should always be followed:
For Your Safety
Read all instructions carefully, even if you are familiar with the appliance.
- To protect against the risk of electric shock, DO NOT IMMERSE main body of this appliance, plug or power cord in water or any other liquid.
- This appliance is not intended for use by young children or infirm persons unless they are adequately supervised by a responsible person to ensure that they can use the appliance safely.
• Children should be supervised to ensure that they do not play with the appliance. - Switch off the power outlet and remove the plug before cleaning or when not in use. To unplug, grasp the plug and pull from the power outlet. Never pull the power cord. Never carry the appliance by the power cord.
- Do not operate any appliance with a damaged power cord or plug; if the appliance malfunctions; or if it is dropped or damaged in any manner.
- Do not allow the power cord to hang over the edge of a table or counter, or touch hot surfaces.
- Do not operate or place any part of the appliance on or near any hot surfaces (such as a hot gas or electric burner, or in a heated oven).
- Do not use this appliance for anything other than its intended use. This product is intended for household use only.
- This appliance is intended to be plugged in a standard domestic power outlet only.
-
Do not attempt to repair, disassemble or modify the appliance. There are no user-serviceable parts.
-
Do not use outdoors.
- Operate on a dry level surface. Sinks, drainboards or uneven surfaces must be avoided.
- The use of attachments or accessories not recommended or sold by the manufacturer can cause fire, electric shock or injury.
- Never insert utensils into the appliance when the appliance is running.
- Allow to cool before cleaning.
- Do not use with an extension power cord.
- Store the unit indoors in a dry location.
- Do not operate under or near flammable materials, such as curtains, drapes or any other combustible materials.
- Caution should be taken when handling this appliance as some surfaces may be hot during and immediately after boiling. Severe burns may result from misuse.
- Avoid contact with steam from the lid when water is boiling, or just after the steamer has switched off. Take care when opening the lid when the steamer has recently boiled, as steam can burn.
- Extreme caution is necessary when moving any appliance containing hot water. Wait until the appliance has switched off automatically, or switch it off manually before moving it.
- Do not move the appliance containing hot liquids or food.
- Do not touch food inside the bowl directly.
- Do not touch the appliance when it is producing steam. Use a cloth to remove the steam compartment.
- To disconnect, remove plug from wall outlet.
- CAUTION: This appliance generates heat and escaping steam during use. Proper precautions must be taken to prevent the risk of burns, fires or other damage to persons or property.
- Do not touch any moving parts.
- Keep hands and utensils away from cutting blade while chopping food to reduce the risk of injury to persons or damage to the food processor. A plastic or wooden scraper may be used but only when the blender is not running.
- Never attach the chopping blade without the bowl in place.
- Do not operate the appliance when empty.
- Do not operate any appliance with a damaged power cord or plug after the appliance malfunctions, or is dropped or damaged in any manner.
- Ensure the bowl and lid are fitted correctly before starting appliance.
- Blade must stop completely before removing lid.
- Do not touch the blade when removing food from the bowl or when removing the blade for cleaning as they are sharp.
- Do not attempt to override the cover lock mechanism.
- Do not touch the blade, especially when the appliance is plugged in. The blade are very sharp.
- If the blade get stuck, unplug the appliance before you remove the ingredients blocking the blade.
- The appliance becomes very hot during steaming and may cause burns when touched. Only lift the bowl by its handle.
- Beware of hot steam that comes out of the steam basket during steaming and when you remove its lid.
• Always unplug the appliance and let it cool down before you clean it.
- Never use the bowl or any other part of the appliance in a microwave, as they are not suitable for this use.
- Never sterilise the bowl or any other part of the appliance in a steriliser or in a microwave, as they are not suitable for this use.
- Do not use the appliance if it has fallen or is damaged in any way.
- Make sure that you do not overfill the bowl. Do not exceed the maximum level indicated on bowl.
- When you steam ingredients, make sure that you do not overfill the steam basket.
- When you blend liquids, do not exceed the maximum level indicated on the bowl.
- Never connect this appliance to a timer switch or remote control system in order to avoid a hazardous situation.
• Always check the consistency of baby food. Make sure there are no chunks in the food. - Turn the Measuring cup to lock position whilst using the machine at high speeds or when using the Pulse function.
Warning
If the supply power cord is damaged, the power cord must be replaced by the manufacturer, its service agent or similarly qualified persons in order to avoid a hazard.
This product has not been designed for any uses other than those specified in this booklet.
Save These Instructions
Features of Your Bellini Intelli Kitchen Master

Accessories Included with Intelli Kitchen Master

natural_image
Black plastic filter or filter component with grid pattern (no text or symbols visible)Cooking Basket

natural_image
Line drawing of a cooking pot with lid and side handles (no text or symbols)Steam Accessory

natural_image
Close-up of a black hair clip with multiple teeth and a central handle (no text or symbols visible)Mixing Tool

Spatula
Getting to Know the Control Panel

Power Switch
Press the power switch to on position before use.
Power Indicator Light
When the Intelli Kitchen Master is connected to the power supply, a red Power Indicator Light situated in the upper part of the control panel will come on and will remain this way until the machine is disconnected from the electrical supply. A beep confirms that the machine is ready to be used. All the functions that appear on the LCD screen, such as time, speed and temperature will mark "00". Press the On/Off button to turn Intelli Kitchen Master on, the Power Indicator Light's colour will change to blue.
Timer Dial
The Timer Dial is used to program the cooking and/or the preparation time of the ingredients for a maximum of 60 minutes with this Timer Dial.
Intelli Kitchen Master can be programmed in minutes with an interval of 1 second for the first minute and then in intervals of 30 seconds.
The timing can be increased by turning the Timer button clockwise, or decrease the time in an anti-clockwise direction. Intelli Kitchen Master counts the time down and the initial timing of the function can be changed if needed.
It is necessary to program the operation time.
ON/OFF Button
This button is used to start the Intelli Kitchen Master after having selected the time, speed and temperature (although the temperature function is not always necessary given the cooking function). When it is ON, the Power Indicator Light changes from red to blue and the appliance begins to perform the programmed task.
To stop the machine, simply press this button again.
Pulse/Pause Button
The PULSE function can only be activated when appliance is in Standby mode.
At standby mode, press ON/OFF button once, then press Pulse/Pause button to activate Pulse and release to stop Pulse.
In Operation mode (When appliance is in use, blade are running and timer is counting down) press this button to pause operation.
The Pulse function is used to mix and chop ingredients at a very high speed by keeping this button pressed during the required time usually of 3 to 4 seconds.
Note: At Pulse mode, the speed icon on the display is flashing.
Caution: When using this function, it is important to note that the ingredients may splash and might result in burns if the necessary caution is not taken. It is therefore recommended to Turn the Measuring cup to lock position when using Pulse function. Do not use the Mixing tool with this function.
NOTE: For an added safety measure the pulse function is only available in the OFF mode.
Reverse button:
Press this button, the blade starts running in anticlockwise direction. press it once more, it change back clockwise direction. note :
- the Reverse function does not work if the speed level is over 3.
- the Reverse icon appears on the display at reverse mode.
- the reverse function is intended for gently stirring delicate foods which are not required to be chopped,
Pause function:
During operation, press Pulse/Pause once to pause the operation. press ON/OFF button to re-start the operation. During operation, open the lid to pause the operation, after close the lid, press ON/OFF button to re-start the operation. note: at Pause mode, the digits for time are flashing.
Knead button:
Press this button, then press ON/OFF, the machine starts kneading automatically in clockwise or anticlockwise. it will stop automatically after the operation time goes to "00".
Note: At Kneading mode, the time/speed is not accessible to be adjusted. During kneading, press ON/OFF button to stop the operation.
Temperature
Intelli Kitchen Master has a temperature range from 37irc C minimum to a maximum of 100irc C and Steam setting (ST) that can be programmed with the temperature control TEMP. The temperature is increased or selected by turning this control in a clockwise direction and reduced in an anticlockwise direction. The selected temperature will appear on the screen and a beep will indicate that the Intelli Kitchen Master has reached the selected temperature.
This innovative Intelli Kitchen Master comes with the heating film technology which is situated in the base of the bowl and allows the machine to quickly reach the desired temperature. The temperature interval is of 10irc C and begins from 37irc C: 37, 50, 60, 70 until it reaches a maximum of 100irc C and Steam setting (ST)

Soft start function (above 60°C)
If the Pulse button is pressed or the high speed level actuated while the temperature in the bowl is 60irc C or above, the electronic system prevents the food from escaping by delaying the speed increase. This soft start only works if the food has been heated up or cooked in the bowl. Then the temperature sensor can measure the actual temperature correctly and control soft start accordingly. If using the machine to process food that has not been heated or cooked in the appliance (e.g. preparing a gravy from hot meat juices) you should only increase the speed slowly and gradually.
CAUTION: Danger of scalding by splashing hot food. Never use the Pulse button or abruptly increase the speed when processing food that has not been heated in the machine.
SPEED Dial
Intelli Kitchen Master comes with 10 speeds for chopping, mixing, blending, kneading and grating that are controlled by the Speed dial.
Speed for Creamy Mixtures
As certain recipes require a smooth or slow speed, such as cream, soups, whipped creams etc. Intelli Kitchen Master comes with an accessory, the Mixing Tool, specially designed for these types of dishes.
This accessory is placed on top of the blade inside the bowl and mixes at speeds 1 -3.
Note: Do not surpass speed 3 when the Mixing tool is in place.
LCD Screen
When Intelli Kitchen Master is connected to the power supply, the LCD screen lights up and shows all the control symbols of the Intelli Kitchen Master. (See Figure 1)

Figure 1
Time
The selected time appears in the upper part of the screen with the symbol of the clock and the work time. Here the time is shown in minutes and seconds and can be programmed up to a maximum of 60 minutes. (See Figure 2)

Figure 2
Speed
The selected speed is shown on the screen by the Speed symbol and ranges from 1 to 10. (See Figure 3)

Figure 3
Speed for Creamy Mixtures
The symbol for creamy mixtures appears on the screen when the speeds 1, 2 and 3 are selected. The use of the Mixing Tool accessory for creamy mixtures is optional and may vary according to the type of recipe.
Note: The Pulse symbol does not appear on the screen when this function is being used.
Temperature
The temperature selected is shown on the screen by the TEMP symbol (See Figure 4) with a range from 37ircC to 100ircC . This temperature is the exact temperature inside the bowl and can be changed without having to stop the machine.

Figure 4
Steam Function:

setting ST is only for steam function.
Screen Messages
Bowl lid is open

The Intelli Kitchen Master bowl comes with two security sensors in the lid and base of the bowl. When the lid is open or incorrectly closed, this warning symbol will appear on the screen.
Programmed temperature reached

This symbol flashes on the screen for a few seconds to indicate that Intelli Kitchen Master has reached the selected temperature. Also, a beep can be heard when the temperature is reached.
Getting to Know the Intelli Kitchen Master

natural_image
Two kitchen ovens with digital display and control knobs, one showing a glass lid (no visible text or symbols)Before using the Intelli Kitchen Master for the first time, make sure that it has all the listed parts and accessory.
1. Placing the bowl:
Ensure that the blade are well placed in the bowl.
Connect the bowl to the central unit by placing it in the cavity of the central unit and lightly pressing it down so that it fits correctly in place.
Warning:
The lid will not fit into place if the bowl is not well connected.
2. Placing the lid:
First, place the lid diagonally on top of the bowl and turn in a clockwise direction in such a way that the tongue underneath the lid fits into the space that projects from the central unit.
Also, the clip in the back of the cover, connects perfectly with the cavity in the handle of the bowl. (See Figure 5 & 6)

natural_image
Close-up of a black plastic container with lid and handle, no visible text or symbolsFigure 5

Clip

Figure 6
Warning: The appliance is equipped with a built-in safety lock between the lid and main unit. The Intelli Kitchen Master will not work unless the lid is correctly fitted.
If the bowl is incorrectly placed the "☐!" symbol will appear on the screen and will only disappear when the bowl is correctly fitted in place.
The Intelli Kitchen Master bowl has a maximum capacity of 2 litres indicated by level marks of 0.5 litres both on the inside as well as on the outside.
Caution: Never exceed the maximum level of the bowl.
3. Assembling the blade
The blade can be removed easily for cleaning and maintenance of the machine.
Installing the Blade Assembly:
BE CAREFUL, THE CUTTING BLADE IS VERY SHARP. Pick up the blade assembly with a tea towel and hold it with three fingers at the Hex nut.
Place bowl in an inverted position with the opening facing downwards.
Ensure that blade lock mechanism of the bowl is pushed to Un-Lock position.
From inside the bowl push blade assembly all the way through the opening in the bottom, aligning blade assembly locking tabs with slots in base.
Turn lever of the blade lock.
Removing the Blade Assembly:
Place a bundled tea towel inside the bowl.
Place the bowl in an inverted position with its opening facing downwards.
Disengage the Locking Lever by turning in an anticlockwise direction and allow the blade assembly to drop on to the towel. Carefully remove the loose blade assembly from inside the bowl.(See Figure 7)

natural_image
3D rendered image of a mechanical component with no visible text or symbolsReassemble the blade

natural_image
3D rendered mechanical component with internal gear and handle (no visible text or symbols)Remove the blade
Figure 7
Caution
-
Special care must be taken when removing or replacing these blade as they are very sharp.
-
After cooking, leave the blade to cool before handling them.
Getting to know the Components & Accessories
Bowl
The Intelli Kitchen Master bowl is made of stainless steel and has a maximum capacity of 2litres with marked levels of 0.5litres indicated on the outside and inside of the bowl.
Caution
- Never fill the bowl exceeding the maximum level amount for safer use of the Intelli Kitchen Master and for better performance.
- Special care must be taken when removing the bowl from the central unit to avoid spills and splashes.
- At high speed levels and when using the Pulse function, the Measuring cup should be turned to lock position for additional security.
Lid
The Intelli Kitchen Master only Works with the cover in place and it is therefore necessary to close it correctly. The bowl symbol 📋! will appear on the screen to indicate that the bowl is not properly closed.
Measuring Cup
The Measuring cup is very versatile and allows the easy use of the Intelli Kitchen Master without the need to stop it whilst it is in use:
- For adding ingredients to the bowl with the cover closed while Intelli Kitchen Master is working.
• To maintain the cooking temperature. - As a measuring cup with a capacity of 100ml.
Caution
When using higher speed or pulse function, place the Measuring cup onto the lid, turn it in clockwise direction to lock position to avoid the ingredients or the Measuring cup from splashing.
Cooking Basket
For the maximum functionality of the machine, Intelli Kitchen Master comes with a Cooking Basket that is placed inside the bowl and is perfect for preparing different types of dishes:
- Filtering of fruit and vegetable juices. Chop and make a puree in the machine, then insert the basket into the mixing bowl and use it as a filter when pouring the juice out. When pouring the juice use the spatula to hold the basket.
- Delicate food such as meatballs or fishballs that are not suited to be prepared in the mixing bowl as a whole should be put into the basket. Here they can be stewed.
- For cooking side dishes (e.g. rice, potatoes).

natural_image
Black plastic filter or holder with grid pattern (no text or symbols visible)Steam Accessory
The Steam Accessory is perfect for steaming meat, fish and vegetables. This accessory consists of four parts the first of them being an outer tray for collecting liquids that may fall from the ingredients during the cooking process.
A second and third tray is used for placing the ingredients inside for steaming. The fourth part, is the steamer lid.

natural_image
Line drawing of a cooking pot with lid and side handle (no text or symbols)Warning
- This accessory is not to be used in the microwaves, ovens or other cooking appliances.
- Care must be taken when using the Steam Tray as it may have steam or hot water inside.
Blade:
- Has a sharp edge and is intended for blending, chopping, mincing, ice crushing and grinding functions.
Ensure great care when handling the blade, due to its sharp edge.

How to Use the Steam Tray
- Put the bowl in place in the central unit and add 0.5 litres of water.
Note: 30 minutes steam cooking requires 0.5 litre of water, for every additional 15 minutes an additional 250ml.
- Place the steam tray on the bowl, turn the bottom tray in clockwise direction to the lock position ensuring that they are well fitted.
- Place the ingredients in the inner tray for steaming.
- Cover the trays.
- Program the time and temperature.
The ingredients will start cooking when the water begins to boil in Steam setting and the steam rises from the bowl and passes to the trays.

natural_image
Modern kitchen blender with digital display and conical lid (no visible text or symbols)Mixing Tool
The Mixing Tool is ideal for whipping cream or beating egg whites.
It is also the perfect utensil for the preparation of creamy puddings or cream mixtures.
The Mixing Tool is placed on top of the blade and works with speeds 1, 2 and 3. To remove it, hold it firmly by the upper part and pull it out with rotations in both directions..
Do not use the Mixing Tool with the Pulse function.

natural_image
Black plastic hair clip with multiple teeth and a pointed tip (no text or symbols visible)Warning: Do not use the Mixing Tool when Kneading dough to avoid the blade becoming jammed.
Do not add ingredients that might damage or block the Mixing tool when the blade is in motion and the Mixing tool is fitted.
Spatula
Use this accessory for stirring, mixing the ingredients. Or lifting the basket as per the below image:

Warning
- Do not use other utensils to stir the ingredients inside the Intelli Kitchen Master bowl as these may damage the machine and may get caught between the blade.
- Never place the Spatula inside the bowl whilst the blade is in motion.
- When using the spatula to scrape or remove food from the bowl, only scrape in a clockwise direction. The spatula will be damaged by the sharp blade if used in an anticlockwise direction
How to use the Intelli Kitchen Master
Important
- Place the Intelli Kitchen Master on a clean and stable surface that does not radiate heat.
-
Intelli Kitchen Master comes with two security sensors that can be found in the handle and bottom of the bowl. For an optimum use of the machine, the bowl has to be properly fitted to the central unit. Otherwise, the machine will detect an error and will not work.
• Make sure the bowl, blade and all the accessories are well cleaned before using the machine. -
Place bowl in to unit (Without lid) and firmly press down until lip on bowl sits below the locking tab of appliance
Place the lid on the bowl with the lid lever at 2 o'clock position to the handle ( Or align unlock Icon on lid with Arrow on locking tab of the appliance )
Rotate the lever on the lid in a clockwise direction to lock the lid by aligning the lever with the handle.
- Select the cooking time.
- Turn the temperature control to the right to select the cooking temperature.
- Turn the Speed dial to select the speed.
- Press the ON/OFF button once, it will start operation.
- During the cooking process Intelli Kitchen Master will count down the programmed time and a beep will indicate that the cooking has finished.
The cooking time, temperature and speed can be amended at any time without the need to stop the machine.
Strongly recommended to turn it off and disconnect it from the power supply when not in use.
- To avoid overheating, do not cover the air vents of this machine.
- Never exceed the maximum capacity of the bowl.
- Allow hot ingredients to cool before transferring them directly.
- Wash and dry the blade thoroughly never leaving them to soak.
- If the appliance blade speed shows signs of slowing under load at the selected speed or stalling, please progressively increase speed to the nearest speed setting where the blade will move freely.
Note: Speeds 1, 2 and 3 are for cooking (with heat) and mixing at the same time. For additional safety the Intelli Kitchen Master will not work if the speed for mixing and cooking is higher than 3.
The cooking function will only work when the speed level for mixing of 1, 2 or 3 is programmed in addition to the temperature and time.
- For preparing dishes at high speeds, turn the measuring cup to lock position to avoid spills.
- Special caution has to be taken when removing the chopping blade as they are very sharp.
- Never place your hands in the bowl when the machine is turned on and in functioning mode.
Note: When using the appliance in conjunction with heating function please be aware that recipes containing ingredients with high sugar or dairy contents may leave a thin film of caramelised deposit (Brown staining) on the bottom of the bowl during the cooking process “This can easily be removed after the use of the appliance by adding equal amounts (approx . 300ml) of white vinegar & water, heating bowl and allowing it to steam for a few minutes, turn the appliance Off and allow mixture to sit overnight, dispose of mixture in the morning and immediately rub with a fine scouring pad and rinse bowl afterwards.
When crushing ice cubes or grinding hard food, select the Pulse button in short bursts until the desired result is achieved
Danger of scalding by splashing hot food
Never use the Pulse button or high speed or abruptly increase the speed above speed 3 when processing hot food.
Danger of injury by escaping food
Turn the Measuring cup to lock position while operating at higher (6–10) speed levels or pressing Pulse button to chop or to purée cold food to avoid the measuring cup or food splashing out.
Property damage
Place your appliance on a clean, solid, even and non-heatable surface so that it cannot slip. Keep the appliance in a sufficient distance from the edge of this surface to prevent it from falling down. When preparing dough or chopping food, an imbalance can develop in the mixing bowl which, under certain circumstances, may cause the whole appliance to move. Do not, therefore, leave the appliance unattended while it is operating as it might fall from the work surface.
When Kneading dough, Never use a low speed of 1-4 at the beginning, always mix the dough at higher speeds for a few seconds, then set the speed back to 2-3 for 3-4 minutes. Never use the Mixing tool when Kneading dough, if the blade become jammed or the unit begins to seriously vibrate, turn it off immediately to avoid damaging the appliance.
Pulse and High Speeds (7-10) are only designed for short time operation, never use this function for more than 30 seconds at one time.
Leaking of food
Ensure sealing ring of the blade is fitted to the blade bearing. If there is no sealing ring the food to be mixed or cooked may leak out and damage the appliance.

Cleaning
- Before using the Intelli Kitchen Master for the first time and after each use, clean the machine, its components and accessories thoroughly.
- The contact points that are at the bottom of the bowl should always be clean and dry.
- Special care must be taken when removing the blade from the bowl as they are very sharp.
- All the stainless steel components of this machine can be washed in the dishwasher, recommended to wash by hand plastic components
Note: Remove the seal prior to washing blade assembly and ensure both parts are dried before fitting back together
- Clean the sealing ring that can be found in the cover after each use.
- Thoroughly dry all the components and bowl accessories after each wash for optimum performance of the machine.
- Clean the cavity of the central unit with a damp towel and dry well.
Warning: Never immerse the main unit, cord and plug into any liquids.
Warning:
Do not using the Mixing Tool for Kneading.
Do not use speeds 1-3 at the beginning of the Kneading process.
Do not mix frozen fruit or frozen meat.
Cease use immediately if excessive vibrations are experienced during use; serious damage to the machine can occur if these warnings are not followed.
Troubles shooting
| Problem Possible cause Solution | |||
| Unit not working |  Appears on the LCD Appears on the LCD | Bowl lid is incorrectly placed and not completely pushed down. | Reposition the bowl lid correctly until this Icon disappears. |
| E3 appears on the LCD The | motor has overheated. Unplug | the power plug, allow the unit to cool down, normal operation will commence once it has sufficiently cooled down. | |
| E2 appears on the LCD the | bowl is not placed at correct position. | reposition the bowl. | |
| When kneading dough the unit is noisy and blade slows down or stall under load. | Blade Jammed. Temporarily adjust the speed higher for a few seconds, then set the speed back to 3 | ||
| Burn mark appears when heating milk, dairy products or cooking recipes with high sugar contents. | food burn marks are not unusual for high sugary or dairy ingredients. | 1) a light food burn is not unusual and easy to clean up, follow cleaning instructions on the page 112) if burn marks are distinct, need to increase the speed to 3 and reduce cooking time | |
| Lid cannot be locked into position. Bowl | is not correctly positioned (Sitting up to high) or lid is not correctly aligned to match arrow on appliance with unlock icon on lid before turning to lock position. | Place bowl in to the unit (Without the lid) and firmly press down until the lip on the bowl sits below the locking tab of the appliance. Place lid on the bowl with lid lever at 2 O’Clock position to the handle (Or align unlock Icon on lid with Arrow on locking tab of the appliance) Rotate Lever on lid in clockwise direction to lock lid by aligning lever with handle | |
| Unit will not cook (with heat) and mix if the speed is higher than 3. | The cooking function will only work with a speed for mixing of no more than 3. This is by design to ensure the safe use of the product | Only cook (with heat) and mix at a speed no higher than 3 | |
Note:
Note:
Due to the incorporation of reverse rotation feature for both the knead and stirring modes into the design of this BTMKM980X model , the Jug and Blade construction supplied with this appliance are unique to this product and are not interchangeable with the Older style, BTMKM510W, BTMKM600X,BTMKM800X and the new BTMKM810X WIFI Model or vice versa.
As a result of continual improvements, the design and specifications of the product within may differ slightly to the unit illustrated on the packaging.

Gerard Sourcing & Manufacturing
GSM International Ltd.
Consumer Service Centre : 1300 373 199
In the event of any product fault you must contact 1300 373 199 as the first step to obtain advise on Warranty support, for replacement parts or Return Authority to return product back to place of purchase for replacement or refund.
GSM International Ltd has a policy of continual improvement throughout the product range. As such the unit contained within may differ slightly from the unit illustrated on the pack.
MADE IN CHINA for GSM International Ltd.
- Bellini Intelli Kitchen Master
- Important Safeguards
- For Your Safety
- Warning
- Save These Instructions
- Getting to Know the Control Panel
- Power Switch
- Power Indicator Light
- Timer Dial
- ON/OFF Button
- Pulse/Pause Button
- Note: At Pulse mode, the speed icon on the display is flashing.
- Reverse button:
- Pause function:
- Knead button:
- Temperature
- Soft start function (above 60°C)
- SPEED Dial
- Speed for Creamy Mixtures
- LCD Screen
- Time
- Speed
- Steam Function:
- Screen Messages
- Bowl lid is open
- Programmed temperature reached
- Getting to Know the Intelli Kitchen Master
- Placing the bowl:
- Warning:
- Placing the lid:
- Assembling the blade
- Caution
- Getting to know the Components & Accessories
- Bowl
- Lid
- Measuring Cup
- Cooking Basket
- Steam Accessory
- Blade:
- How to Use the Steam Tray
- Mixing Tool
- Spatula
- How to use the Intelli Kitchen Master
- Important
- Danger of scalding by splashing hot food
- Danger of injury by escaping food
- Property damage
- Leaking of food
- Cleaning
- Note: Remove the seal prior to washing blade assembly and ensure both parts are dried before fitting back together
- Troubles shooting
- Note:
- GSM International Ltd.
Brand : Bellini
Model : BTMKM980X
Category : Blender