
LC-32LE330H - Television SHARP - Free user manual and instructions
Find the device manual for free LC-32LE330H SHARP in PDF.


| Product Type | Television |
| Brand | Sharp |
| Model | LC-32LE330H |
| Screen Size | 32 inches |
| Resolution | 1920 x 1080 (Full HD) |
| Backlight System | LED |
| TV System (Analogue) | PAL-B/G, I, D/K, SECAM-B/G, D/K, NTSC-MN |
| TV System (Digital) | DMB-T/H |
| Receiving Channel | VHF/UHF 48MHz-858MHz |
| Power Consumption (Operational) | 54 W |
| Power Consumption (Standby) | 0.5 W |
| Audio Output Power | 2 x 7.5 W |
| Input Terminals | HDMI (x2), VGA (x1), USB (x1), Video (x1), Component (x1), Audio (x1), Antenna (x1) |
| Output Terminals | Video (x1), Audio (x1) |
| Remote Control | Included (requires 2 x AAA batteries) |
| Stand Installation | Requires 4 screws (included) |
| Cleaning Instructions | Clean with a dry soft cloth only |
| Safety Precautions | Do not block ventilation; avoid moisture; unplug during storms |
| Operating Temperature | 0°C to 40°C |
| Accessories Included | User manual, remote control, batteries (AAA x2), AC power cord |
Frequently Asked Questions - LC-32LE330H SHARP
User questions about LC-32LE330H SHARP
0 question about this device. Answer the ones you know or ask your own.
Ask a new question about this device
Download the instructions for your Television in PDF format for free! Find your manual LC-32LE330H - SHARP and take your electronic device back in hand. On this page are published all the documents necessary for the use of your device. LC-32LE330H by SHARP.
USER MANUAL LC-32LE330H SHARP
natural_image
Front view of a black Sharp TV monitor with no visible text or symbols on the screen.HDMI®
HIGH-DEFINITION MULTIMEDIA INTERFACE
DOLBY®
DIGITAL PLUS
内容
安全及警告 …… 2-3
介紹....4
安裝說明.... 5-8
遥控器.... 9-10
選項表操作 …… 11 - 14
常見問題及解決方法 15
輪廓圖.... 16 - 18
規格.... 19
關於安全的重要注意事項
natural_image
Illustration of a computer monitor with a lightning bolt symbol above it and a crossed-out black line indicating no text or symbols (no readable text)
警告
natural_image
Simple line drawing of a monitor with a black X mark and a cloth, no text or symbols present
警告

警告
natural_image
Simple line drawing of a computer monitor with a stand and smokestack (no text or symbols)
注意
natural_image
Simple line drawing of a flat-screen TV with a black X mark on the stand (no text or symbols)注意

請勿將電源線繞在機器底部。

natural_image
Cartoon illustration of a person on a computer screen with a crossed-out X symbol (no text or symbols present)注意

natural_image
Illustration of a person running away from a computer monitor next to a megaphone (no text or symbols present)注意

1: 器感應器遙控
2: LED指示燈
藍色 ○ 開機
紅色 ● 待機
3: 控制面板
侧面控制面板

480i, 480p, 576i, 576p, 720p/50Hz, 720p/60Hz,
1080i/50Hz, 1080i/60Hz, 1080p/24Hz, 1080p/50Hz, 1080p/60Hz.
底座安装
LC-19LE330H
- 確認底座組件附有3枚螺絲釘。
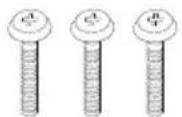
螺絲釘(x3) (在步驟2使用)
natural_image
Pure mechanical component diagram without any text, numbers, or symbolsSafety and warnings.... 2-3
Introduction.... 4
Installation.... 5-8
Remote Control.... 9-10
Operation.... 11-14
Trouble Shooting.... 15
Dimensional Drawings.... 16-18
Specifications.... 19
IMPORTANT SAFETY INSTRUCTION
1) Read these instructions.
2) Keep these instructions.
3) Heed all warnings.
4) Follow all instructions.
5) Do not use this apparatus near water.
6) Clean only with dry cloth.
7) Do not block any ventilation openings, install in accordance with the instructions.
8) Do not install near any heat sources such as radiations, heat registers, stoves, or other apparatus (including amplifiers) that produce heat.
9) Do not defeat the safety purpose of the polarized plug. If the provided plug does not fit into your outlet, consult an electrician for replacement of the obsolete outlet.
10) Protect the power cord from being stepped on or pinched particularly at plugs, convenience receptacles, and the point where they extend from the apparatus.
11) Only use attachments/accessories specified by the manufacturer.
12) Unplug this apparatus during lightning storms or when unused for long periods of time.
13) Refer all servicing to qualified service personnel. Servicing is required when the apparatus has been damaged in any way, such as power-supply cord or plug is damaged, liquid has been spilled or objects have fallen into the apparatus, the apparatus has been exposed to rain or moisture, does not operate normally, or has been dropped.
14) Main plug is used as the disconnect device, the disconnect device shall remain readily operable.
15) The ventilation openings should not be covered by items, such as newspapers, table-cloth, curtains, etc.
16) No naked flame sources, such as lighted candles, should be placed on the apparatus.
17) Attention should be drawn to the environmental aspects of battery disposal.
18) The use of apparatus in moderate climate.
19) The apparatus shall not be exposed to dripping or splashing and that no objects filled with liquids, such as vases, shall be placed on the apparatus.
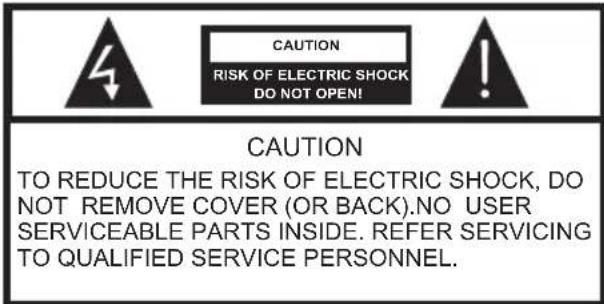
The symbol indicates that dangerous voltages constituting a risk of electric shock are present within this unit.
The symbol indicates that there are important operating and maintenance instructions in the literature accompanying this unit.
WARNING:
To prevent fire or shock hazard, do not expose this appliance to rain or moisture.
A warning that batteries (battery pack or batteries installed) shall not be exposed to excessive heat such as sunshine, fire or the like.

This symbol indicates that this product incorporates double insulation between hazardous main voltage and user accessible parts. Only use identical replacement parts. WARNING: To reduce the risk of fire or electric shock, do not expose this apparatus to rain.

natural_image
Illustration of a computer monitor with a lightning bolt symbol and a crossed-out black line indicating no text or symbols (no readable text)Warning

High voltages are used in the operation of this television. Do not remove the back cabinet from your set. If maintenance is required, contact qualified service personnel.
natural_image
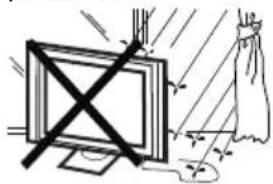
Simple line drawing of a monitor with a cross symbol and a cloth, no text or symbols presentWarning

To prevent fire or electrical shock hazard, do not expose the television to rain or moisture.
natural_image
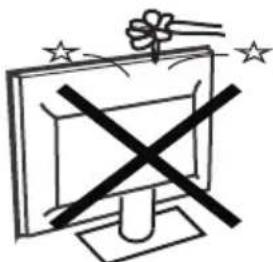
Simple line drawing of a computer monitor with a crossed-out X symbol and stars above (no text or labels)Warning

Do not drop or push objects into the television cabinet, slots or openings. Never spill any kind of liquid on the television.

natural_image
Simple line drawing of a computer monitor with a stand and smokestack (no text or symbols)Caution

Do not block the ventilation holes at the back cover. Adequate ventilation is essential to prevent failure of electrical components.

natural_image
Simple line drawing of a flat-screen monitor with a black X mark on the stand (no text or symbols)Caution

Do not trap the power supply cord under the television.

natural_image
Cartoon illustration of a person running away from a computer monitor with a crossed-out X symbol (no text or symbols present)Caution

Never stand on, lean on, or suddenly push the television or its stand. You should pay special attention to children. Serious injury may result if the television overturns.

Caution

Do not place your television on an unstable cart, stand, shelf or table. Serious injury to an individual or damage to the television may result if the television overturns.

natural_image
Illustration of a person reacting to a computer screen with a megaphone nearby (no text or symbols)Caution

When the television is not used for an extended period of time, it is recommended to disconnect the AC power cord from the AC outlet.
Thank you very much for purchasing this television. To enjoy trouble-free operation of your product, please read this manual carefully and keep it handy for easy reference.
CAUTION
Never tamper with any components inside the TV, or any other adjustment controls not mentioned in this manual. All LCD-TVs are high voltage instruments. Unplug the AC cord from the AC outlet before cleaning the product, then wipe the TV with a dry soft cloth. During thunder and lightning, unplug the power cord and antenna cord to prevent damage to your TV. All repairs to this TV should only be performed by qualified TV service personnel.
INSTALLATION
*Locate the TV in the room where light does not strike the screen directly.
*Total darkness or a reflection on the picture screen can cause eyestrain. Soft and indirect lighting is recommended for comfortable viewing.
*Allow enough space between the TV and the wall to permit ventilation.
*Avoid excessively warm locations to prevent possible damage to the cabinet or premature component failure.
*Do not cover the ventilation openings when using the TV.
Trademarks
- Manufactured under license from Dolby Laboratories, Dolby and the double-D symbol are trademarks of Dolby Laboratories.
- "HDMI,the HDMI logo, and High-Definition Multimedia Interface are trademarks or registered trademarks of HDMI Licensing LLC in the united states and other countries."
Main features
① Used as Television, display terminal, PC display
③ HDMI interface
② High luminance, wide viewing angle
④ NICAM
Main parameter
| Model | LC-19LE330H | LC-24LE330H | LC-32LE330H |
| Size | 19 24 | 32 | |
| TV System | PAL-B/G、I D/K SECAM-B/G D/K NTSC-MN | ||
| Video Signal System | PAL/NTSC/SECAM | ||
| Input Power Voltage | DC 12V, AC 110-240V, 50/60Hz | AC 110-240V, 50/60Hz | |
| Power Consumption(Standby) | DC12V: 25W(0.3W) | DC12V: 35W(0.3W) | 54W(0.5W) |
| Audio Output Power | 2x3W 2x7.5W | ||
| Input Terminals | USB x 1 | ||
| VGA x 1,AUDIO x 1(shared with HDMI)( 3.5mm jack) | |||
| HDMI x 2 | |||
| Video x 1 | |||
| Component x1 | |||
| Audio x 1 | |||
| Antenna x1(UHF/VHF/75 Din type) | |||
| Output Terminals | Video x 1, Audio x 1 | ||
Front Panel

1: Remote control sensor
2: Indicator LED:
BLUE ○ POWER ON
RED ● STANDBY
3: Control Panel
Control Panel
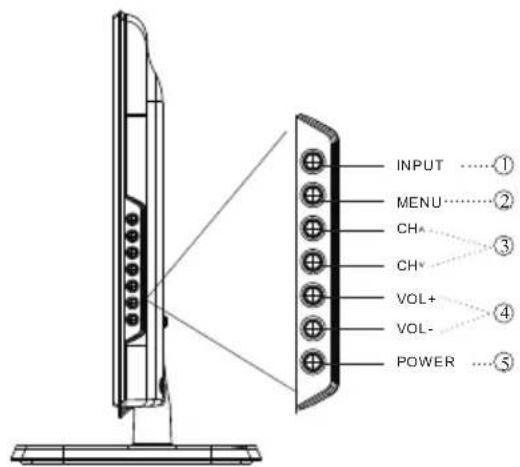
- INPUT
Display the input source menu.
- MENU
Display main MENU.
- CH^/CH^
In TV mode, press “CH^” or “CHv” to change the channel up and down. In MENU mode, press “CH^” or “CHv” to select items. In standby mode, it can turn on the TV.
- VOL+/VOL-
Adjust sound level. In MENU mode, press “VOL+” or “VOL-” to adjust the item that you selected.
- POWER
Side Panel

All the input terminals are(from left to right):
1:HDMI1, 2:USB, 3:PC AUDIO(Share with HDMI terminals), 4:MONITOR OUT, 5:VGA INPUT, 6:ANTENNA
Rear Panel
LC-19LE330H/LC-24LE330H:

All the input terminals are(from left to right):
1:VIDEO, 2:AUDIO INPUT, 3:DC INPUT, 4:COMPONENT, 5:HDMI2
LC-32LE330H:

All the input terminals are (from left to right):
1: AC INPUT, 2: VIDEO, 3: AUDIO INPUT, 4: COMPONENT, 5: HDMI2
ANTENNA

Note:
Aerial connections: IEC(female).
Input impendance:75 Onbalanced.
Connecting a PC
STEPS:
Be sure both the TV and computer are set to Power off.
- Connect VGA and audio cable.
- Connect the power cord.
- Power on the TV, switch to PC mode.
- Power on the PC.
This sequence is very important.
*Side Panel

PC Compatibility Chart
| RESOLUTION | V.Freq.(Hz) H.Freq.(KHz) | ||
| 1 | 640x480 | 60 | 31.47 |
| 2 | 800x600 | 60 | 37.88 |
| 3 | 1024x768 | 60 | 48.36 |
| 4 | 1280x1024 | 60 | 63.98 |
| 5 | 1360x768 | 60 | 47.70 |
| 6 | 1920x1080 (Applied only on 24/32") | 60 | 66.64 |
HDMI Compatible Signal Format
480i, 480p, 576i, 576p, 720p/50Hz, 720p/60Hz,
1080i/50Hz, 1080i/60Hz, 1080p/24Hz, 1080p/50Hz, 1080p/60Hz.
Stand Installation
LC-19LE330H
- Confirm the stand unit came with 3 screws.

screws (x3) (used in step 2)
- Insert the stand into the slot at the bottom of the TV.
Insert and tighten the 3 screws into the 3 holes at the bottom of the stand.

LC-24LE330H/LC-32LE330H
- Confirm the stand unit came with 4 screws.

screws (x4) (used in step 2)
- Insert the stand into the slot at the bottom of the TV. Insert and tighten the 4 screws into the 4 holes at the bottom of the stand.

NOTE:
- To detach the stand, perform the steps in reverse order.
- Angle adjustment is not available with the LC-19LE330H/LC-24LE330H/LC-32LE330H.
- Screwdriver is not supplied with this product.
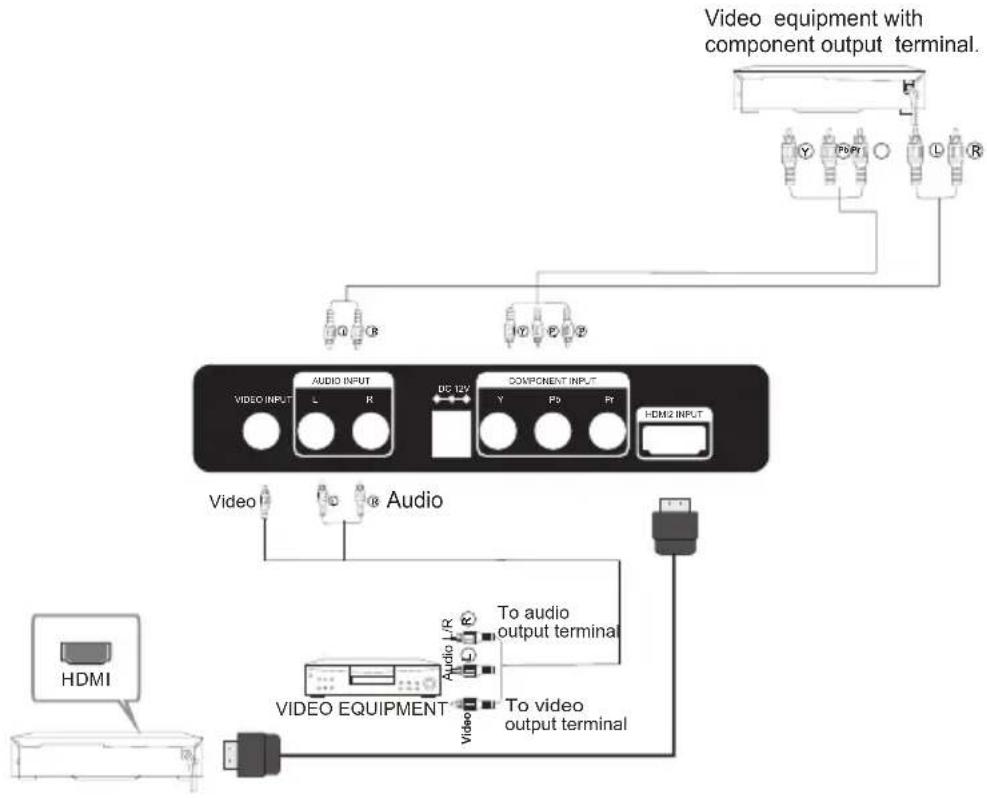
Connecting External Devices
This television provides two group of AV, one group of component terminals for convenient connection to VCR, DVD or other video equipment. Please refer to the owner's manual of the equipment to be connected as well.
You can use the input terminals on the rear panel as follows.
flowchart
graph TD
    A["VIDEO EQUIPMENT"] -->|To audio output terminal| B["VIDEO INPUT"]
    A -->|To video output terminal| C["VIDEO INPUT"]
    D["HDMI"] --> E["USB"]
    F["Video equipment with component output terminal"] --> G["Output Terminal 1"]
    F --> H["Output Terminal 2"]
    I["Video"] --> J["Audio"]
    K["Video"] --> L["Audio Input"]
    M["Video"] --> N["Audio Input"]
    O["Video"] --> P["Video Input"]
    Q["Video"] --> R["Video Input"]
    S["Video"] --> T["Video Input"]
It can be connected to the following equipments: VCR, multi disc player, DVD player, camcorder, video game console or stereo system, etc.
Component terminals can support these video formats: 480i, 480p, 576i, 576p, 720p/50Hz, 720p/60Hz, 1080i/50Hz, 1080i/60Hz, 1080p/24Hz, 1080p/50Hz, 1080p/60Hz.
Note: 1. Video and component terminals share the same audio input terminal.
- In DVI mode, HDMI1/HDMI2 shares the same audio input terminal with PC.
REMOTE CONTROL
Insert Batteries Into the Remote Control

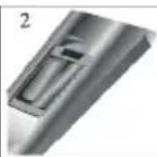

- Remove the battery cover.
- Insert 2 × AAA 1.5V batteries, make sure the polarity (+ or -) of the batteries matches the polarity marks inside the unit.
- Mount the battery cover. Replace with new batteries when the TV set begins to show the following symptoms: Operation is unsteady or erratic. Sometimes the TV set does not function with Remote Control Unit.
Remark:
1) Alkaline Battery is recommended.
2) Remove batteries when they are exhausted or if the remote control is not to be used for a long period of time.
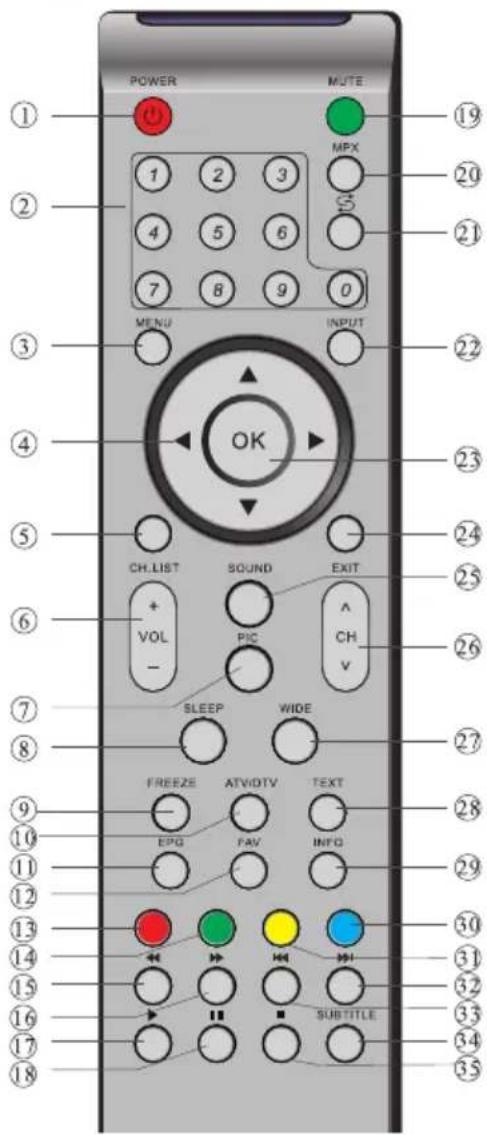
1: POWER
To set the TV to standby or power on.
2: NUMERIC KEY
For direct access to channels.
3: MENU
To display TV menu.(Page 11)
4: CURSOR
To move within the menu.
5: CH LIST
To display the channel list.
6: VOL+/-
To adjust sound level.
7: PIC
To switch picture mode.
8: SLEEP
Set timer to turn off the TV.
9: FREEZE
To freeze the picture.
10: ATV/DTV
To switch between ATV (Analogue TV) and DTV(Digital TV).
11: EPG
To display the Electronic Program Guide Screen. (Page 14)
12: FAV
To access your favourite channels list in ATV or DTV mode.(Page 12)
19: MUTE
To disable or enable the sound output.
20: MPX
To select the available audio language.
21: FLASHBACK (S)
To access the previously viewed channel.
22: INPUT
To select input source.
23: OK
To confirm selection.
24: EXIT
To return to the previous menu or exit menu.
25: SOUND
To switch sound mode.
26: CH^/CH^
To access the next or previous channels.
27: WIDE
To change picture aspect ratio.
28: TEXT
MHEG5 function key. (Page14)
29: INFO
To display information of current and next program in DTV mode.
34: SUBTITLE
To switch between different subtitles in DTV mode.
13,14,30,31: COLOUR KEY
4 coloured keys are used to access the items on corresponding pages.(Page 12 & 14)
MEDIA PLAY key:
15: FW
Fast backward.
16: ▶▶ FF
Fast forward.
17:
Play in media play mode.
18: II
Pause in media play mode.
32:
NEXT
33:
PREVIOUS
35: ■
Stop in media play mode.
Installation Guide

This screen only appear when the TV is turn on for first time or reset to factory setting. Press OK key to start auto tuning. And after tuning, the screen will show the first DTV program.
1.CHANNEL MENU
The first item of the MENU is channel menu (for ATV or DTV only).

You can search channels and edit programs here.
1). Auto tuning
Search all the channels automatically(you can select ATV, DTV or DTV+ATV)
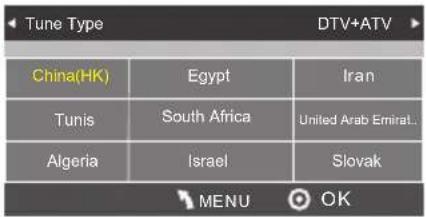
Press ◀▶ to select ATV and DTV at first, then press OK to start auto tuning.
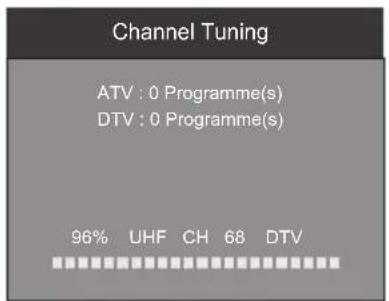
NOTE:
All the channels including ATV and DTV can be tuned at one time, if the Tune Type is DTV+ATV.
All the stored channels will be disappeared after auto tuning.
After auto tuning, the TV will show the contents of the first DTV channel.
2).DTV Manual tuning
You can select a DTV channel, then find the program in this channel.
Press ◀▶ to change the channel number or input the channel number. Press OK to search the programs.
NOTE:
Bad, Normal and Good means signal intensity.

Press ◀▶ to select the channel number for manual tuning. Press ▼▶ to select "Search" or "Fine tune", confirm the execution by pressing ◀▶.
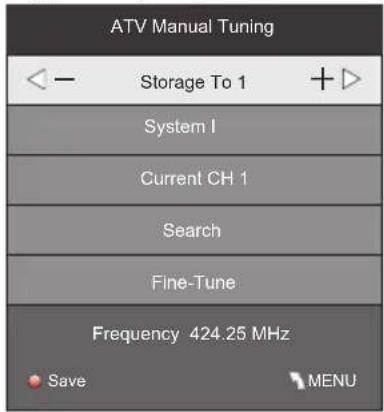
NOTE:
Press red button to store the channels after manual tuning.
4). Program edit
You can Delete, Rename, Skip, or assign any programs as your favourite programs.

Delete
Press red button, the highlighted program will be deleted.

Rename
Only ATV programs can be renamed.
Move the cursor to the program, press green button to rename the program.
Press ▼▲ to choose the character. Press ◀▶ to move the cursor.
Press MENU button to exit edit. Press EXIT to exit the menu.
Note: ATV programs name can only contain 5 characters.

Skip
Press ▼▲ to choose the program, press
blue button to skip this program, The will show on the right side of the program.
Choose the skipped program, press blue button again, you can cancel the skip. The will disappear.

Favourite
Press ▼▲ to choose the program, press FAV button, it will show ♥ on the right side of the program. Choose the FAV program, press
FAV button again, you can cancel the FAV, ♥ will disappear.
Once your favorite group is created, you can press the FAV key to quickly access your favorite channel.
2. PICTURE MENU
The second item of the MENU is PICTURE MENU. You can adjust picture effect here, such as contrast, brightness, etc.
Press ▼▲ to move, press OK to adjust.

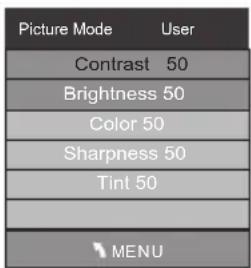

NOTE:
1). There are 4 picture modes: Standard, Mild, User and Dynamic. You can only adjust the picture effect when "User" mode is selected.
2). Tint is available in NTSC system only.
3). There are 4 colors temperature modes: Cool, Medium, Warm and User.
4). Screen is available in PC mode only which, you can adjust horizontal position, vertical position, size and phase.
3.SOUND MENU
The third item of the MENU is the SOUND MENU.
You can adjust the sound effect here such as treble, bass, balance etc.
Press ▼▲ to move, press OK to adjust.
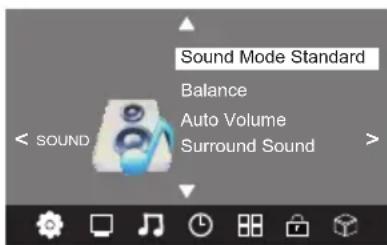
Note:
1). There are 5 sound modes:
Standard, Music, Movie, Sports and User. You can only adjust the sound effect when "User" mode is selected.
2). Auto volume: only available when the input signal volume is too large or with distortion.
4.TIME MENU
The forth item of the menu is the TIME MENU.
You can adjust the power on/off time, sleep time etc. Press ▲▼to move, press OK to adjust.

NOTE:
- If "Auto Sleep" is set to on, the TV will be automatically powered off if there is no signal within 15 minutes.
- The clock time will be set automatically after the DTV channels are tuned.
5. OPTION MENU
The fifth item of the MENU is the OPTION MENU. You can adjust the Menu language, Audio language, Subtitle language etc (only for DTV).

NOTE:
Restore factory default will clear all the programs.
6. LOCK MENU
The sixth item of the MENU is the LOCK MENU. You can lock system, set password, block program and set parental guidance. Once you set the lock system on, you cannot search the channels or change any programs.

NOTE:
1) When "Lock system" is highlighted, press OK and enter the default password "6666" to activate it.
2) Block program: Press ▼▲to choose the program, press green button to block the program. If you want to unblock the program, simply repeat steps mentioned in 1 and 2.
3) Parental guidance: Press ▼▲to choose 4\~18 years.
If you forget your password, you can clear it with the following steps:
1) Enter into the "Lock" menu.
2) Enter the super code: 9527.
3) Select "Set Password".
4) Input "9527" as old password.
5) Enter the new password, then the setting process is finished and the new password will be enabled.
7. APPLICATIONS MENU
The seventh item of the MENU is the APPLICATIONS MENU.

Press OK to enter the DMP menu.
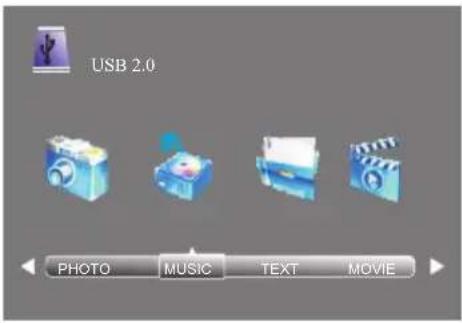
You can enjoy viewing photos, listening music and watching video and text from external USB device. Select the media type by pressing ▶press OK to enter the next selection menu.

Press ◀▶ to select the right drive and press OK to display media files and folder list or choose "Return" to back to the media type selection menu. Select the media file by pressing ◀▶ or ▼▲, then the preview frame will pop up.

Press the button ▶ to play the media file in full screen, the following control bar will be displayed on the screen.

Press the ▶ cursor on the remote control to display the other options on the control bar.

The options available in the control bar will be different when "Photo" is selected from the external USB device.
Press ◀▶ to select the function icon, press OK to confirm the function.
Press ▼ or EXIT to exit the control bar.
Press "INFO" or "OK" to display the control bar again.
NOTE:
Choose the Info icon and press OK to display the Info MENU.
Below photo formats are supported:
—JPEG(JPEG format, files with the extension ".jpg")
—BMP (files with the extension ".bmp")
—PNG (files with the extension ".png")
Below music formats are supported:
—MP3 (files with the extension ".mp3")
—WAV (files with the extension ".wav")
Below video formats are supported:
—AVI (files with the extension ".AVI")
—MP4 (files with the extension ".MP4")
—TS (files with the extension ".TS")
Below text formats are supported:
—TEXT (files with the extension ".txt")
Note: Only supported the traditional
Chinese with Unicode format.
8.EPG Menu(Electronic Program Guide)
The EPG menu is used to look at what is being broadcasted on DTV channel.
To access the EPG menu, press EPG button, the following menu will be displayed:

1. INFO
Use to choose the programs, Press
INFO key, you can display the highlighted program's information.
2. Schedule
Press yellow key, the entire reminder schedule will be listed. Press ▼▲to choose the list, press red key ● DELETE to delete the schedule list. Press EPG to return to EPG menu.

3. Reminder
Press the blue key to choose one program and set up one reminder time, the TV screen will show the selected program in the reminder time automatically.

Press OK to save the reminder.
TEXT
MHEG-5 data broadcast is scheduled in Hong Kong. You can watch a MHEG-5 data broadcast after pressing the TEXT button.
| Phenomenon or Symptom | Inspection Check | |||
| Picture Audio | ||||
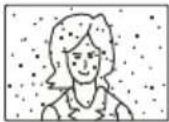 | Snow Noise |  | Antenna position, direction or connection | |
 | Ghost |  | Normal audio | Antenna position, direction or connection |
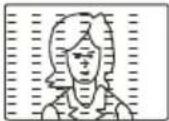 | Interference | 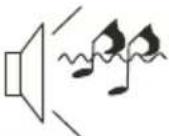 | Noise | Electronic equipment, car/ motorcycle, fluorescent light |
 | Normal Picture | 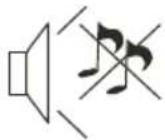 | Mute | Volume(check if mute is activated or if the audio system connections are not correct) |
 | No picture Mut | 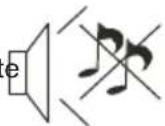 | Power cord is not inserted Contrast and brightness/volume setup | |
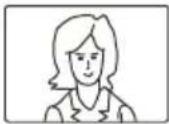 | No colour Norm |  | our control | |
 | Picture breaking up | 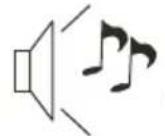 | Normal audio or weak | Retune channel |
 | No colour | 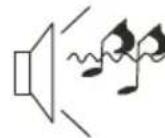 | Noise | TV system |
The LCD TV panel is produced with very high precision technology giving you fine picture details in vibrant color. Occasionally, a few non-active pixels may appear on the screen as a fixed point of red, green, blue, black or white. Please note this does not affect the performance of the product.
LC-19LE330H
Units:mm
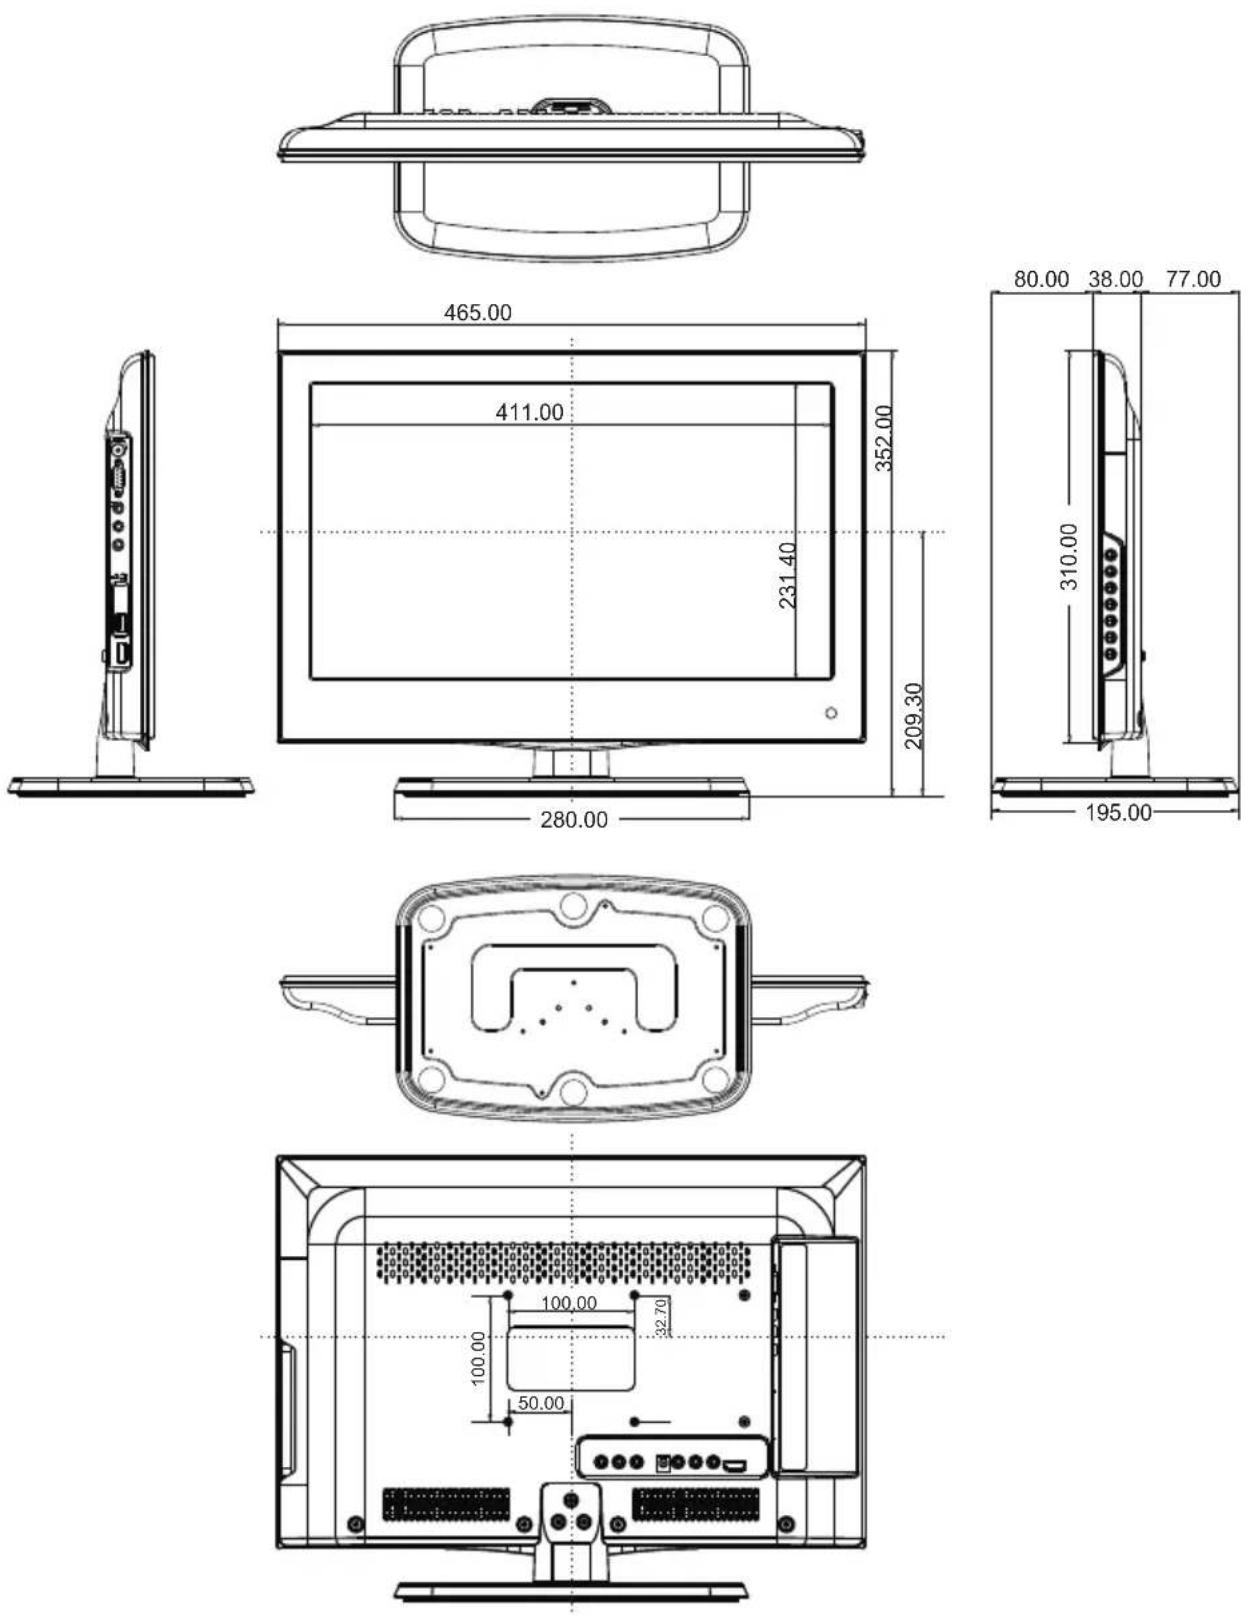
Units:mmLC-24LE

Units:mmLC-32LE

Specifications
| Model | LC-19 | LE330H | LC-24 | LE330H | LC-32 | |
| Size | 19 | 24 | 32 | |||
| Resolution | 136 | 6 x 7 | 820 x 1080 | 1920 x 1080 | ||
| Backlight System | LED | |||||
| TV System | Analogue | PAL-B/G, I, D/K, SECAM-B/G, D/K, NTSC-MN | ||||
| Digital | DMB-T/H | |||||
| Receiving Channel | VHF/UHF | 48MHz-858MHz | ||||
| Digital Terrestrial Broadcast | 470 -858MHzMHz | |||||
| Auto Preset 99 CHTV-Tuning System | ||||||
| Stereo System NICAM: B/G, I, D/K, | A2 Stereo: B/G | |||||
| Video Input | YPbPr, CVBS, VGA, HDMI | |||||
| Component | 480i/p, 576i/p, 720p/50Hz, 720p/60Hz, 1080i/50Hz, 1080i/60Hz, 1080p/24Hz, 1080p/50Hz, 1080p/60Hz | |||||
| HDMI | 480i/p, 576i/p, 720p/50Hz, 720p/60Hz, 1080i/50Hz, 1080i/60Hz, 1080p/24Hz, 1080p/50Hz, 1080p/60Hz | |||||
| Power Requirement | DC 12V, AC 110-240V, 50/60Hz | AC 110-240V, 50/60Hz | ||||
| Power Consumption (Standby) | 54W(0.5W)DC12 | |||||
| Audio Output | 2x3W | 2x7.5W | ||||
| Operating Temperature | 0°C - 40 °C | |||||
| Accessory | User manual, Remote control, Battery (AAA x 2), AC adapter (only for 19" / 24") | |||||
LE330H
V: 25W(0
* The specifications provided here are for reference only.
Differences may occur as product technology will be updated occasionally.
Design and specifications are subject to change without notice.
SHARP®
SHARP CORPORATION
- 内容
- 關於安全的重要注意事項
- 侧面控制面板
- 底座安装
- IMPORTANT SAFETY INSTRUCTION
- WARNING:
- CAUTION
- INSTALLATION
- Trademarks
- Main features
- Front Panel
- Control Panel
- Side Panel
- Rear Panel
- LC-32LE330H:
- Connecting a PC
- STEPS:
- PC Compatibility Chart
- HDMI Compatible Signal Format
- Stand Installation
- LC-19LE330H
- LC-24LE330H/LC-32LE330H
- NOTE:
- Connecting External Devices
- REMOTE CONTROL
- Remark:
- Installation Guide
- 1.CHANNEL MENU
- 1). Auto tuning
- 2).DTV Manual tuning
- 4). Program edit
- Delete
- Rename
- Skip
- Favourite
- PICTURE MENU
- 3.SOUND MENU
- 4.TIME MENU
- OPTION MENU
- LOCK MENU
- APPLICATIONS MENU
- 8.EPG Menu(Electronic Program Guide)
- INFO
- Schedule
- Reminder
- TEXT
- SHARP®
- SHARP CORPORATION
Brand : SHARP
Model : LC-32LE330H
Category : Television