
NVR-8117 BVM - Blender NEVIR - Free user manual and instructions
Find the device manual for free NVR-8117 BVM NEVIR in PDF.


| Type of Product | Blender |
| Brand | Nevir |
| Model | NVR-8117 BVM |
| Dimensions (L x W x H) | 20 x 18 x 42 cm |
| Weight | 1.5 kg |
| Power Supply | 220-240 V, 50/60 Hz |
| Power Consumption | 500 W |
| Jug Capacity | 1.5 L |
| Number of Speeds | 2 |
| Pulse Function | Yes |
| Main Functions | Blending, mixing, pureeing, ice crushing |
| Blade Material | Stainless steel |
| Jug Material | BPA-free plastic |
| Care and Cleaning | Detachable parts dishwasher safe; wipe base with damp cloth |
| Safety Features | Non-slip feet, overload protection |
| Spare Parts Availability | Replacement jug and blade assembly available |
| Cord Length | 1.2 m |
Frequently Asked Questions - NVR-8117 BVM NEVIR
User questions about NVR-8117 BVM NEVIR
0 question about this device. Answer the ones you know or ask your own.
Ask a new question about this device
Download the instructions for your Blender in PDF format for free! Find your manual NVR-8117 BVM - NEVIR and take your electronic device back in hand. On this page are published all the documents necessary for the use of your device. NVR-8117 BVM by NEVIR.
USER MANUAL NVR-8117 BVM NEVIR
natural_image
White Nevir blender with clear glass body and handle, no visible text or symbols on the device itself.MANUAL DE INSTRUÇÕES
INSTRUCTION MANUAL
Fig. 1

natural_image
Line drawing of a mechanical device with a curved handle and circular opening, showing rotational motion (no text or symbols)natural_image
Line drawing of a blender with a side panel showing internal components and a downward arrow indicating process (no text or symbols)
natural_image
Line drawing of a mechanical component with a curved handle and internal structure, showing rotational motion (no text or symbols)When using the electrical appliance, the below basic safety precautions should be followed:
- Read all instructions.
- Before using check that the voltage power corresponds to the one shown on the appliance nameplate.
-
Do not let cord hang over edge of table or counter.
-
Do not operate any appliance with a damage cord or plug or after the appliance malfunction or has been damaged in any manner. Return the appliance to the nearest authorized service facility for examination, repair or adjustment.
-
If the supply cord is damaged, it must be replaced by the manufacture or its service agent or a similarly quality person in order to avoid a hazard.
-
Use by children not intended but foreseeable, but only allowed with supervision.
-
Avoid contacting moving parts.
-
Blades are sharp, so handle carefully.
-
The use of attachment, including jar, top cover, not recommended or sold by manufacture may cause fire, electric shock or injury.
-
The appliance can not be used for blending hard and dry substance, otherwise the blade could be blunted.
-
Switch off the appliance before approaching parts which move in use.
-
Do not immerse the Motor Unit into water or other liquids.
-
This appliance is not intended for use by persons (including children) with reduced physical, sensory or mental capabilities, or lack of experience and knowledge, unless they have been given supervision or instruction concerning use of the appliances by a person responsible for their safety.
-
Children should be supervised to ensure that they do not play with the appliance.
-
Do not use outdoors.
-
Save these instructions
- Care shall be taken when handling the sharp cutting blades, emptying the bowl and during cleaning.
- Avoid to potential injury from misuse.
HOUSEHOLD USE ONLY
KNOW YOUR BLENDER:

BEFORE THE FIRST USE
Check that the accessories are complete and the unit is not damaged. Then pour a little water into the jar and mix according to the steps below for one or two times, then pour out. Clean Top Cover, Measuring Cup, jar thoroughly with warm water.
Warning: the blade is sharp, Handle with great care and ensure that unplug the appliance from outlet before assembling and removing parts.
USING THE BLENDER
- For attaching jug, first place the jug into the motor unit, then turn it in clockwise (see fig.1).
- Peeled or cored the fruit or vegetables and then cut it into small dices, put the food piece into the jar. Usually certain amount of purified water has to be added to facilitate the smooth running of appliance. The amount of mixture should not exceed the max level as indicated on the jar. The best proportion of the fruit and water is 2:3.
Note: never use boiling liquids or run the appliance empty.
- Replace the Top Cover on the jar.
- You may add ingredient into the jar through the center opening of top cover during operation, then replace Measuring Cup if necessary. Let the tab of Measuring Cup aligns with the groove of Top Cover, put down and turn clockwise until the Measuring cup in place.
- Connect the plug to the wall outlet and set Speed selector to your desired setting. You can set the "PULSE" position if want to accelerate the process of blending. The detailed information of Speed Selector is as following figure 2.

natural_image
Line drawing of a blender with a side panel showing internal components and a downward arrow indicating process (no text or symbols)Fig. 1

Fig. 2
- The consecutive operation time shall not exceed 3 minutes.
- Turn the Speed Selector to "0" Position once the mixture has been blended to your desired consistency.
- Turn anti-clockwise and remove the jar from the Motor unit, carefully take down the Top Cover, then pour and serve.
CLEANING AND MAINTENANCE
The Auto Clean feature can clean the blender and blade assembly easily, rapidly in complete safety.
-Pour a little warm soapy water into the jar and turn the Speed Selector to P position for a few seconds.
-Remove the jar and rinse under running water.
-Wiping the outer surface of Motor Unit with a damp cloth, do not use abrasive cleansers. Never immerse in water for cleaning
-Dry all parts and then replace them
The blade can be disassembled for complete cleaning. Hold the blade assembly at the bottom of jar carefully, for it is sharp, take it out by turning coupling on the other side withershins emphatically(see Fig 3), then put Top Cover, Measuring Cup, Jar, blade assembly into Dishwasher for clean, they are dishwasher safe components, but the temp setting shall not exceed 60°C.

natural_image
Line drawing of a mechanical component with a curved handle and circular opening, showing rotational motion (no text or symbols)Fig. 3
If any problem has been encountered during use never disassemble the Motor Base by yourself, no user serviceable parts inside. Contact only the authorized service facility for examination and repair.
ENVIRONMENT FRIENDLY DISPOSAL

natural_image
Symbol of a trash bin crossed with two diagonal lines, no text or numbers presentYou can help protect the environment!
Please remember to respect the local regulations: hand in the non-working electrical equipments to an appropriate waste disposal center.
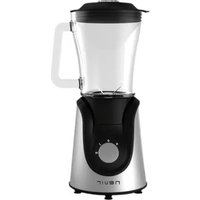
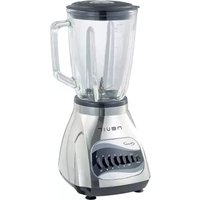


Brand : NEVIR
Model : NVR-8117 BVM
Category : Blender