XSVI-9003 - Air conditioner Metra - Free user manual and instructions
Find the device manual for free XSVI-9003 Metra in PDF.


| Product Type | Vehicle Radio Replacement Interface |
| Brand | Metra |
| Model | XSVI-9003 |
| Compatible Vehicles | Select Ford, Lincoln, Mercury models (2000-2010) |
| Dimensions | Approximately 2.0 x 1.0 x 0.5 inches |
| Weight | Approximately 0.2 lbs (90g) |
| Input Voltage | 12V DC (vehicle battery) |
| Current Draw | Up to 10A (fused) |
| Wiring Features | Color-coded wires for easy installation |
| Included Components | Interface module, wiring harness, instruction manual |
| Installation Location | Behind the aftermarket radio or in dash |
| Operating Temperature | -30°C to +85°C |
| Certifications | CE, RoHS compliant |
| Warranty | 1 year limited warranty |
| Maintenance | Keep dry, free of dust and debris |
| Safety Warnings | Disconnect vehicle battery before installation |
| Spare Parts Availability | Contact Metra support for replacement harnesses |
| Repairability | Not user-serviceable; replace if defective |
Frequently Asked Questions - XSVI-9003 Metra
User questions about XSVI-9003 Metra
0 question about this device. Answer the ones you know or ask your own.
Ask a new question about this device
Download the instructions for your Air conditioner in PDF format for free! Find your manual XSVI-9003 - Metra and take your electronic device back in hand. On this page are published all the documents necessary for the use of your device. XSVI-9003 by Metra.
USER MANUAL XSVI-9003 Metra
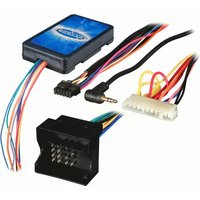
In the VW vehicles listed below there are no 12 volt accessory wires currently in the factory harness making the installer run an accessory wire to the fuse box or underneath the steering column when installing an aftermarket radio. The XSVI-9003 is designed to provide a 12 volt 10 amp switched accessory output along with the rest of the wires needed to install an aftermarket radio. The R.A.P. (Retained Accessory Power) function, where power is supplied to the radio after the ignition is shut off until one of the front doors are opened, is retained by the XSVI-9003.
INITIALIZE THE XSVI INTERFACE BEFORE TURNING ON RADIO: With all connections made and harnesses connected to the vehicle, turn ignition key to the ON position for thirty seconds, then turn key off.
Wiring the XSVI-9003: Wiring up the XSVI-9003 is like wiring up any other wire harness that would attach to the aftermarket radios harness. The Metra/EIA wire code can be found on the back of this package that will aid you in the wiring of your aftermarket radio.
(See Applications on back of page)
REV. 06/12/07 INSTXSVI-9003
1-800-221-0932 www.metraonline.com
METHA ELECTRONICS CORPORATION
© COPYRIGHT 2007
X5VI-9003
INSTALLATION INSTRUCTIONS
In the VW vehicles listed below there are no 12 volt accessory wires currently in the factory harness making the installer run an accessory wire to the fuse box or underneath the steering column when installing an aftermarket radio. The XSVI-9003 is designed to provide a 12 volt 10 amp switched accessory output along with the rest of the wires needed to install an aftermarket radio. The R.A.P. (Retained Accessory Power) function, where power is supplied to the radio after the ignition is shut off until one of the front doors are opened, is retained by the XSVI-9003.
INITIALIZE THE XSVI INTERFACE BEFORE TURNING ON RADIO: With all connections made and harnesses connected to the vehicle, turn ignition key to the ON position for thirty seconds, then turn key off.
Wiring the XSVI-9003: Wiring up the XSVI-9003 is like wiring up any other wire harness that would attach to the aftermarket radios harness. The Metra/EIA wire code can be found on the back of this package that will aid you in the wiring of your aftermarket radio.
(See Applications on back of page)
REV. 06/12/07 INSTXSVI-9003
1-800-221-0932 www.metraonline.com
METRA ELECTRONICS CORPORATION
© COPYRIGHT 2007
XSVI-9003
INSTALLATION INSTRUCTIONS
In the VW vehicles listed below there are no 12 volt accessory wires currently in the factory harness making the installer run an accessory wire to the fuse box or underneath the steering column when installing an aftermarket radio. The XSVI-9003 is designed to provide a 12 volt 10 amp switched accessory output along with the rest of the wires needed to install an aftermarket radio. The R.A.P. (Retained Accessory Power) function, where power is supplied to the radio after the ignition is shut off until one of the front doors are opened, is relained by the XSVI-9003.
INITIALIZE THE XSVI INTERFACE BEFORE TURNING ON RADIO: With all connections made and harnesses connected to the vehicle, turn ignition key to the ON position for thirty seconds, then turn key off.
Wiring the XSVI-9003: Wiring up the XSVI-9003 is like wiring up any other wire harness that would attach to the aftermarket radios harness. The Metra/EIA wire code can be found on the back of this package that will aid you in the wiring of your aftermarket radio.
(See Applications on back of page)
REV. 06/12/07 INSTXSVI-9003
1-800-221-0932 www.metraonline.com
METRA ELECTRONICS CORPORATION
© COPYRIGHT 2007
XSVI-9003
INSTALLATION INSTRUCTIONS
In the VW vehicles listed below there are no 12 volt accessory wires currently in the factory harness making the installer run an accessory wire to the fuse box or underneath the steering column when installing an aftermarket radio. The XS0i-9003 is designed to provide a 12 volt 10 amp switched accessory output along with the rest of the wires needed to install an aftermarket radio. The R.A.P. (Retained Accessory Power) function, where power is supplied to the radio after the ignition is shut off until one of the front doors are opened, is retained by the XS0i-9003.
INITIALIZE THE XSVI INTERFACE BEFORE TURNING ON RADIO: With all connections made and harnesses connected to the vehicle, turn ignition key to the ON position for thirty seconds, then turn key off.
Wiring the XSVI-9003: Wiring up the XSVI-9003 is like wiring up any other wire harness that would attach to the aftermarket radios harness. The Metra/EIA wire code can be found on the back of this package that will aid you in the wiring of your aftermarket radio.
(See Applications on back of page)
REV. 06/12/07 INSTXSVI-9003
1-800-221-0932 www.metraonline.com
METRA ELECTRONICS CORPORATION
© COPYRIGHT 2007
X5VI-9003
INSTALLATION INSTRUCTIONS
In the VW vehicles listed below there are no 12 volt accessory wires currently in the factory harness making the installer run an accessory wire to the fuse box or underneath the steering column when installing an aftermarket radio. The XSVI-9003 is designed to provide a 12 volt 10 amp switched accessory output along with the rest of the wires needed to install an aftermarket radio. The R.A.P. (Retained Accessory Power) function, where power is supplied to the radio after the ignition is shut off until one of the front doors are opened, is retained by the XSVI-9003.
INITIALIZE THE XSVI INTERFACE BEFORE TURNING ON RADIO: With all connections made and har-
nesses connected to the vehicle, turn Ignition key to the ON position for thirty seconds, then turn key off.
Wiring the XSVI-9003: Wiring up the XSVI-9003 is like wiring up any other wire harness that would
attach to the aftermarket radios harness. The Metra/EIA wire code can be found on the back of this package that will aid you in the wiring of your aftermarket radio.
(See Applications on back of page)
REV. 06/12/07 INSTXSVI-9003
1-800-221-0932 www.metraonline.com
METRA ELECTRONICS CORPORATION
© COPYRIGHT 2007
XSVI-9003
INSTALLATION INSTRUCTIONS
In the VW vehicles listed below there are no 12 volt accessory wires currently in the factory harness making the installer run an accessory wire to the fuse box or underneath the steering column when installing an aftermarket radio. The XSVI-9003 is designed to provide a 12 volt 10 amp switched accessory output along with the rest of the wires needed to install an aftermarket radio. The R.A.P. (Retained Accessory Power) function, where power is supplied to the radio after the Ignition is shut off until one of the front doors are opened, is retained by the XSVI-9003.
INITIALIZE THE XSVI INTERFACE BEFORE TURNING ON RADIO: With all connections made and harnesses connected to the vehicle, turn ignition key to the ON position for thirty seconds, then turn key off.
Wiring the XSVI-9003: Wiring up the XSVI-9003 is like wiring up any other wire harness that would attach to the aftermarket radios harness. The Metra/EIA wire code can be found on the back of this package that will aid you in the wiring of your aftermarket radio.
(See Applications on back of page)
REV. 06/12/07 INSTXSVI-9003
1-800-221-0932 www.metraonline.com
METRA ELECTRONICS CORPORATION
© COPYRIGHT 2007
X5VI-9003
INSTALLATION INSTRUCTIONS
In the VW vehicles listed below there are no 12 volt accessory wires currently in the factory harness making the installer run an accessory wire to the fuse box or underneath the steering column when installing an aftermarket radio. The XSVI-9003 is designed to provide a 12 volt 10 amp switched accessory output along with the rest of the wires needed to install an aftermarket radio. The R.A.P. (Retained Accessory Power) function, where power is supplied to the radio after the ignition is shut off until one of the front doors are opened, is retained by the XSVI-9003.
INITIALIZE THE XSVI INTERFACE BEFORE TURNING ON RADIO: With all connections made and har-
nesses connected to the vehicle, turn ignition key to the ON position for thirty seconds, then turn key off.
Wiring the XSVI-9003; Wiring up the XSVI-9003 is like wiring up any other wire harness that would attach to the aftermarket radios harness. The
Metra/EIA wire code can be found on the back of this package that will aid you in the wiring of your aftermarket radio.
(See Applications on back of page)
REV. 06/12/07 INSTXSVI-9003
1-800-221-0932 www.metraonline.com
METRA ELECTRONICS CORPORATION
© COPYRIGHT 2007
XSVI-9003
INSTALLATION INSTRUCTIONS
In the VW vehicles listed below there are no 12 volt accessory wires currently in the factory harness making the installer run an accessory wire to the fuse box or underneath the steering column when installing an aftermarket radio. The XSVI-9003 is designed to provide a 12 volt 10 amp switched accessory output along with the rest of the wires needed to install an aftermarket radio. The R.A.P. (Retained Accessory Power) function, where power is supplied to the radio after the ignition is shut off until one of the front doors are opened, is retained by the XSVI-9003.
INITIALIZE THE XSVI INTERFACE BEFORE TURNING ON RADIO: With all connections made and har-
nesses connected to the vehicle, turn ignition key to the ON position for thirty seconds, then turn key off.
Wiring the XSVI-9003: Wiring up the XSVI-9003 is like wiring up any other wire harness that would attach to the aftermarket radios harness. The
Metra/EIA wire code can be found on the back of this package that will aid you in the wiring of your after-market radio.
(See Applications on back of page)
REV. 06/12/07 INSTXSVI-9003
1-800-221-0932 www.melraonline.com
METRA ELECTRONICS CORPORATION
© COPYRIGHT 2007
APPLICATIONS
VOLKSWAGEN
Golf (Double-Din models only) 2002-06
GTI 2002-07
New Jetta 2005-07
Jetta 2005
Jetta (Double-Din models only) 2002-04
Passat (Double-Din models only) 2002-07
EOS 2007
Rabbit 2006-07
APPLICATIONS
VOLKSWAGEN
Golf (Double-Din models only) 2002-06
GTI 2002-07
New Jetta 2005-07
Jetta 2005
Jetta (Double-Din models only) 2002-04
Passat (Double-Din models only) 2002-07
EOS 2007
Rabbit 2006-07
APPLICATIONS
VOLKSWAGEN
Golf (Double-Din models only) 2002-06
GTI 2002-07
New Jetta 2005-07
Jetta 2005
Jetta (Double-Din models only) 2002-04
Passat (Double-Din models only) 2002-07
EOS 2007
Rabbit 2006-07
APPLICATIONS
VOLKSWAGEN
Golf (Double-Din models only) 2002-06
GTI 2002-07
New Jetta 2005-07
Jetta 2005
Jetta (Double-Din models only) 2002-04
Passat (Double-Din models only) 2002-07
EOS 2007
Rabbit 2006-07
APPLICATIONS
VOLKSWAGEN
Golf (Double-Din models only) 2002-06
GTI 2002-07
New Jetta 2005-07
Jetta 2005
Jetta (Double-Din models only) 2002-04
Passat (Double-Din models only) 2002-07
EOS 2007
Rabbit 2006-07
APPLICATIONS
VOLKSWAGEN
Golf (Double-Din models only) 2002-06
GTT 2002-07
New Jetta 2005-07
Jetta 2005
Jetta (Double-Din models only) 2002-04
Passat (Double-Din models only) 2002-07
EOS 2007
Rabbit 2006-07
APPLICATIONS
VOLKSWAGEN
Golf (Double-Din models only) 2002-06
GTI 2002-07
New Jetta 2005-07
Jetta 2005
Jetta (Double-Din models only) 2002-04
Passat (Double-Din models only) 2002-07
EOS 2007
Rabbit 2006-07
APPLICATIONS
VOLKSWAGEN
Golf (Double-Din models only) 2002-06
GTI 2002-07
New Jetta 2005-07
Jetta 2005
Jetta (Double-Din models only) 2002-04
Passat (Double-Din models only) 2002-07
EOS 2007
Rabbit 2006-07
Brand : Metra
Model : XSVI-9003
Category : Air conditioner