
LX-570 - Laminator BROTHER - Free user manual and instructions
Find the device manual for free LX-570 BROTHER in PDF.


| Product Type | Cold Laminator / Backing Applicator |
| Brand | Brother |
| Model | LX-570 |
| Maximum Item Width | 5 inches (12.7 cm) |
| Item Thickness Range | 0.004 - 0.010 inches (0.1 - 0.25 mm) |
| Power Source | Manual (no electricity required) |
| Backing Types (Interchangeable Cartridges) | Permanent Adhesive, Repositionable Adhesive, Laminate + Adhesive, Magnetic + Laminate, Double-Sided Laminate |
| Starter Cartridge Included | Yes (Permanent Adhesive, 5 feet length) |
| Cartridge Length (Replacement) | Up to 18 feet (5.5 m) for adhesive, 7 feet (2.1 m) for magnetic |
| Cutter | Sliding cutter on cutter bar, replaceable |
| Dimensions | Approx. 7.5 x 4 x 3 inches (19 x 10 x 7.6 cm) |
| Weight | Approx. 0.5 lbs (0.23 kg) |
| Operation | Insert item face up, turn knob forward, cut when exiting |
| Cartridge Installation | Open top cover, insert cartridge with label up, ensure backing under cutter bar, close cover until click |
| Maintenance | Clean cutter, exit area, and rollers with isopropyl alcohol using cotton swab or soft cloth |
| Cutter Replacement | Unsnap old cutter, snap new cutter onto cutter bar ensuring blade fits in groove |
| Safety Warnings | Keep fingers away from cutter and top cover; avoid ingestion; avoid contact with adhesive |
| Compatible Cartridges | LF-AO5RP (repositionable), LF-LA5 (laminate+adhesive), LF-AO5 (permanent), LF-LM5 (magnetic+laminate), LF-DL5 (double-sided laminate) |
| Warranty | Use only Brother parts and accessories; disassembly voids warranty |
Frequently Asked Questions - LX-570 BROTHER
User questions about LX-570 BROTHER
0 question about this device. Answer the ones you know or ask your own.
Ask a new question about this device
Download the instructions for your Laminator in PDF format for free! Find your manual LX-570 - BROTHER and take your electronic device back in hand. On this page are published all the documents necessary for the use of your device. LX-570 by BROTHER.
USER MANUAL LX-570 BROTHER
The LX-570 applies an adhesive, laminate, or magnetic backing to an item without using heat or electricity. You choose a backing by swapping the drop-in cartridge.
The LX-570 comes with a starter cartridge already installed. This cartridge applies a permanent adhesive backing and is shorter than replacement cartridges.
See the reverse for available cartridges and for application ideas on using your LX-570. First, take a few minutes to read these instructions.
About the LX-570
Top Cover. Your LX-570 comes with a "starter" cartridge already installed, which applies a permanent adhesive backing to an item.
Cutter. The cutter is for trimming the backing material and slides on the cutter bar. It can be replaced.
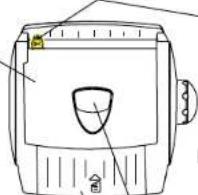
Knob
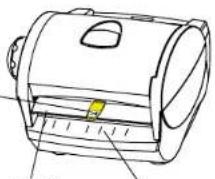
Exit area
Feed Deck. The LX-570 is designed for use with items up to five inches wide. It works best with item thicknesses between 20 pound bond paper and 100 pound card stock or construction paper (min. thickness is 0.004 inches, max. thickness is 0.010 inches).
Latch (opens top cover)
Notes:
Before using, remove the protective tape and other packaging materials under the top cover.
Under the terms of an agreement with Xyron, Inc., the purchase or other acquisition of this product confers no right or license to use the product in the Retroreflective Field.
How to Use the LX-570
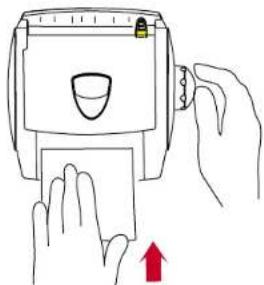
1 Insert the item:
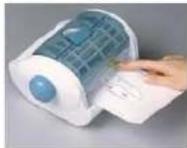
Insert the item face up at the feed deck and turn the knob in the direction of the arrows only; do not turn knob backwards.
Insert the item and be sure it is straight. Insert until you feel contact; then release it as you turn knob.
natural_image
Line drawing of hands using a handheld device to press or<|rotate_right|> (no text or symbols present)Feed straight, not at an angle. Turn the knob forward only.
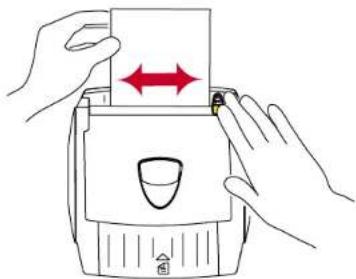
2 Cut:
When the item clears the cutter at the exit area, gently push down on the cutter knob and slide it all the way to the left or right.
natural_image
Illustration of hands inserting a card into a printer (no text or symbols)To avoid wasting the backing material, note the location of the cut. Feed only enough material to clear the cutter.
When Using the
Starter Cartridge...
Feed and cut the item as described here. Be sure to feed face up.
Press down firmly around all the edges. This action prevents adhesive from remaining on the front of the item. Then remove the clear film and discard carefully as it is sticky.
When you are ready to place the item on a surface, peel it from the white backing.
This starter cartridge contains five feet of backing material. After you use it a few times, always make certain that it contains sufficient material. If uncertain, install a new cartridge to avoid partial processing.
Note: the starter cartridge is shorter than the replacement cartridges. See the other side for cartridge descriptions and lengths. Always consult packaging of replacement cartridges.


How to Change the Cartridge
1
Remove the cartridge:
Lift up the latch to open the top cover. Then grasp the cartridge in one hand, hold the LX-570 with the other, and lift the cartridge up and out.

natural_image
Line drawing of two hands operating a device with red arrows indicating motion (no text or symbols)2
Insert a cartridge:
Open the top cover and lower the cartridge in with the label up, facing the feed deck.
As you lower the cartridge, be sure that the backing material fits underneath the cutter bar at the exit area.
Close the top cover by gently pushing down until it clicks and is fully seated.
Guide the backing material under the cutter bar into the exit area.

Notes: When placing a partially-used cartridge back in the machine, be sure the material does not adhere to the cartridge itself.
When removing a used cartridge whose material has wrapped around the rollers, remove the cartridge and pull the material from the rollers.

The cartridge is properly installed when the label is flush with the feed deck. Close the top cover before using.
How to Change the Cutter
1
Unsnap the cutter:
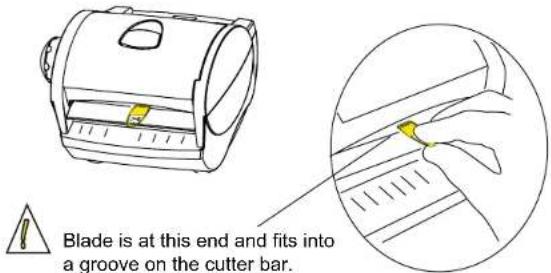
Place your thumb underneath the back of the cutter knob and your index finger on the cutter bar. Lift up with your thumb to unsnap the cutter from the cutter bar.
2
Snap the new cutter into place:
At any point on the cutter bar, place the front of the cutter into the groove on the cutter bar so the blade fits into it. Then rotate the cutter back and snap down.

When installed properly, the cutter slides back and forth on the cutter bar.
Warnings:

- Never place your finger under the cutter bar at the cutter. When handling cutters, take care to avoid injury to yourself or others.
- Avoid ingestion of the backing material or cutter.
- Avoid contact of adhesive backing materials with skin or other delicate surfaces.
- Keep fingers out of the top cover when closing.
Cautions:

- All backing materials are permanent once applied and cannot be removed without damage. Do not use on single-source items.
- Once you start feeding an item, do not try to back it out by turning the knob in the opposite direction.
•Always feed items straight, not at an angle. - Before processing an item, make certain that the cartridge contains sufficient backing material. If uncertain, install a new replacement cartridge to avoid partial processing.
- When using the magnetic cartridge, do not place close to computer diskettes or other sensitive materials.
- Avoid exposure to excessive heat or moisture or dusty environments. Do not place foreign objects inside or heavy objects on top of the unit.
- When discarding any portion of this product, check with local solid-waste officials for recycling options or proper disposal methods.
- For best results, be sure that all items are clean and free of debris before inserting in the LX-570.
- The LX-570 is not designed for use with thermal paper.
- Do not disassemble, or the warranty will be void. Use only Brother parts and accessories.
Troubleshooting Tips
Problem
The cutter does not cut cleanly or must be run across the backing material several times.
Solution
Clean the cutter and area (see below). Or replace the cutter.
The item does not feed properly.
Be sure that the cartridge is properly installed.
Be sure the top cover is closed.
Do not hold on to the item as you turn the knob; allow it to feed freely through the LX-570.
When using the laminate cartridge, air bubbles appear.
Turn the knob to feed laminate film until there are no visible bubbles. Or replace the cartridge.
Maintaining the LX-570
To maintain your LX-570, clean the cutter, exit area, and rollers. It is a good idea to clean whenever you remove and replace a cartridge.
To clean the cutter area:
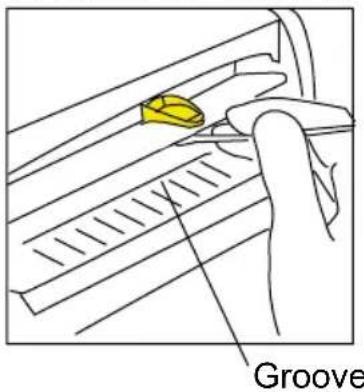
Moisten the end of a cotton swab in isopropyl (rubbing) alcohol. Use the moistened end to remove dust, adhesive, or debris from the cutter blade, groove, and exit area.
Always be careful to avoid touching the blade.
To clean the rollers:
natural_image
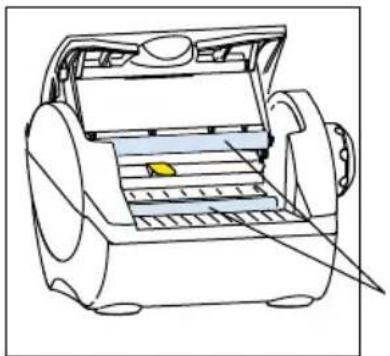
Technical line drawing of a mechanical device with internal components and a yellow component (no text or symbols)Open the top cover and remove the cartridge. Moisten a soft cloth or cotton swab with isopropyl (rubbing) alcohol to remove dust, adhesive, or debris from the rollers.
There are two rollers.
Replacement
Cartridges & Ideas
brother, LX-570
To apply a different backing to an item, swap out the LX-570's cartridge with one of the Brother replacement cartridges shown below.

For example, you can use the magnetic back cartridge for a few items, replace it with an adhesive back cartridge for other items, and then reinstall the partially used magnetic back cartridge.
To start using your LX-570, read the instructions on the other side; then, just for practice, try this:
Try Me
1 Fill out the label at the far right; then cut it out.
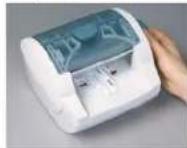
2 Insert the label face up at the feed deck and turn the knob. Feed the label straight and turn the knob in the direction of the arrows only.
This is just one example of the many ways you can use your new LX-570. It's great at making special labels, stickers, and much more. After completing the project below, you will have a permanent label to attach to the bottom of your LX-570.
3 Once the label clears the cutter at the exit area, cut it.

4 Press down firmly around all the edges of the label; then remove the clear material.

5 Remove the label from the white backing and attach to the LX-570.

LF-AO5RP: Repositionable Adhesive Backing

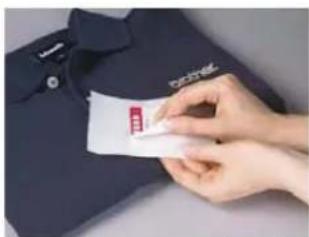
Perfect for temporary placement
Applies an adhesive to the back that allows the item to adhere, be removed, and reattached. Length: 18 feet. Width: 5 inches. Adhesive thickness: approx. 18.7 microns. Acid free, PAT approved.

natural_image
Close-up of a hand holding a red label on a dark polo shirt (no visible text or symbols)
natural_image
Blue polo shirt with white 'berbird' logo and red badge (no text or symbols on body)Feed face up and cut as usual. Then press down on item before removing the clear film. When ready to apply, remove item from the white backing.
Helpful Hints
- For maximum yield, feed smaller items side by side through the LX-570.
● To prevent adhesive buildup on your item, press firmly around the edges of the item before removing the clear, protective film. - When adhering to uneven surfaces, use the permanent adhesive backing (LF-AO5).
Before processing an item, make certain that the cartridge contains sufficient backing material. If uncertain, install a new replacement cartridge to avoid partial processing.

Works with most fabrics that do not have sizing and is also safe for most painted surfaces. Test in an unnoticeable area first.
LF-LA5: Permanent Adhesive Back & Laminate Front
Perfect for
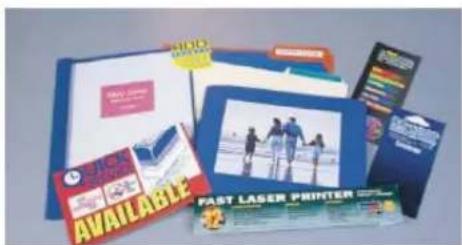
protecting signs
from wear & tear
Applies a permanent adhesive to the back and a laminate to the front. Length: 15 feet. Width: 5 inches. Thickness: approx. 62.5 microns.

natural_image
Purple fabric bag with black straps being placed on a white surface, no visible text or symbols
natural_image
Stacked purple fabric with a hand holding a label (no visible text or symbols on the fabric itself)
natural_image
Purple box-shaped device with black handle and label (no visible text or symbols on body)Feed face up and cut as usual. Then peel the item from the white backing when ready to apply to a surface.
Helpful Hints
- Position the item properly. This adhesive is permanent.
- Do not overlap items when feeding unless you want them laminated together.
- To ensure that the laminate seals at the edges, allow one-quarter inch around the outside of the item.
- For smooth lamination, be sure item is clean and free of debris.
- Before processing an item, make certain that the cartridge contains sufficient backing material. If uncertain, install a new replacement cartridge to avoid partial processing.
- Avoid contact of adhesive backing materials with skin or other delicate surfaces.
For window decals, feed the item face down.

LF-AO5: Permanent Adhesive Backing
Use instead of messy glue
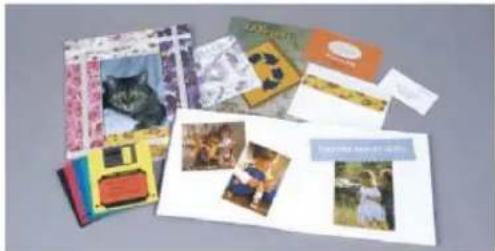
Applies a permanent adhesive to the back of an item. Length: 18 feet. Width: 5 inches. Adhesive thickness: approx. 28 microns. Acid free, PAT approved.

natural_image
Hand holding a piece of food next to jars of brown liquid, no visible text or symbols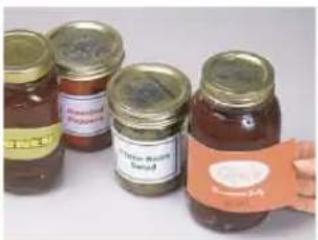
natural_image
Four glass jars with labeled brown and gold contents, one being handled by a hand (no visible text or symbols)
natural_image
Four glass jars of brown liquid, each labeled with a label (no visible text or symbols on the jars themselves)Feed face up and cut as usual. Then press down on item before removing the clear film. When ready to apply, remove item from the white backing.
Helpful Hints
- Position properly; the adhesive is permanent. Use the LF-AO5RP for temporary adhesive use.
- For maximum yield, feed smaller items side by side through the LX-570.
- To prevent adhesive buildup on your item, press firmly around the edges of the item before removing the clear, protective film.
- Before processing an item, make certain that the cartridge contains sufficient backing material. If uncertain, install a new replacement cartridge to avoid partial processing.
- Avoid contact of adhesive backing materials with skin or delicate surfaces.
natural_image
Collection of printed and photo cards including a cat, books, and children (no visible text or symbols)Works with most fabrics that do not have sizing and is also safe for most painted surfaces. Test in an unnoticeable area first.
This cartridge is the same type as the starter cartridge, but is 18 feet long.
LF-LM5: Magnetic Back & Laminate Front

Turns an item into a magnet
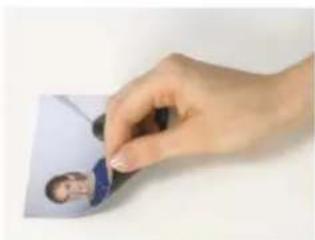
Applies a flexible magnet to the back and a clear laminate to the front of an item. Length: 7 feet. Width: 5 inches. Magnet thickness: approx. 226 microns, laminate 62.5 microns.
Helpful Hints
- Do not overlap items when feeding unless you want them laminated together.
- Peel the white backing from the magnet slowly to ensure that all the white material is removed.
- To ensure that the laminate seals at the edges, allow one-quarter inch around the outside of the item.
- Before processing an item, make certain that the cartridge contains sufficient backing material. If uncertain, install a new replacement cartridge to avoid partial processing.
- Do not use near computers, diskettes, or other sensitive items.
natural_image
Hand holding a small photo of a person's face on a plain background (no text or symbols visible)
natural_image
Hand holding a folded paper with food items, no visible text or symbolsFeed face up and cut as usual. Then peel the white backing slowly from the magnet so that all the white material is removed.
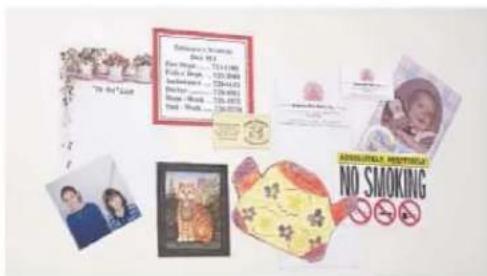
You can use scissors to trim the item as needed.
The magnetic backing is thicker than the other materials. After using the entire cartridge, you may find it necessary to replace the cutter.
BONUS: Extra cutter included with the LF-LM5
LF-DL5: Double Side Laminate

Preserve & protect your keepsakes
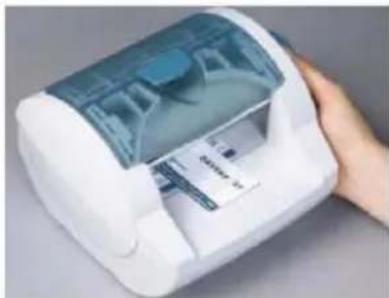
Applies a laminate to both sides of an item. Length: 18 feet, width: 5 inches.
Thickness: approx. 62.5 microns.
natural_image
Hand holding a white medical or laboratory device with a transparent screen, no visible text or symbols on the device itself.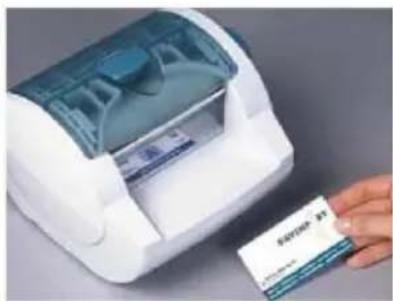
Feed and cut as usual. Trim item with scissors if needed.
Helpful Hints
- Do not overlap items when feeding unless you want them laminated together.
- To ensure that the laminate seals at the edges, allow one-quarter inch around the outside of the item.
- For smooth lamination, be sure that item is clean and free of debris before you insert it.
- Before processing an item, make certain that the cartridge contains sufficient backing material. If uncertain, install a new replacement cartridge to avoid partial processing.

Laminate photos, maps, recipes, etc. without using heat or electricity.
Other Exciting Brother Products
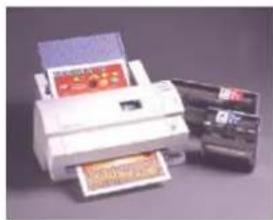
LX-900 Cool Laminator Multi-finishing System
This laminator is a cartridge-based system that
natural_image
White printer with paper and card spines, no visible text or symbols on the device itselfmakes laminating as easy as pushing a button. It offers a variety of finishing options:
- Two sided laminate
• Laminate with magnetic back
• Laminate with adhesive back
Laminates and trims automatically in under 30 seconds. Accepts items up to 8.5 inches wide and banner length. Safe and easy to use. Needs no heat or warm-up time. Simple, one-step operation.
LX-1200 Cool Laminator Multi-finishing System
More than a new way to laminate, it's the only way to laminate. This cartridge-based
laminator is safe, fast, and easy to use.
Offers a variety of finishing options:
- Two sided laminate
• Laminate with magnetic back - Laminate with adhesive back
Accepts items up to 11.7 inches wide and banner length. Needs no heat or warm-up time. Simple, one-step operation.

natural_image
White printer emitting green paper with yellow flowers, no visible text or symbolsP-Touch Home & Project
Organize your life. Our P-Touch

Electronic Labeling Systems have become the world's standard for creating sharp, adhesive-backed, laminated labels for a variety of applications:
- Runs on AAA Batteries
• Fits in the palm of your hand
• 8-character LCD display
• Uses one-quarter, three-eighths, and one-half inch wide tapes
• Laminate with adhesive back
In addition to the Home & Project model, we offer a wide range of P-Touch labeling products for all your home and office needs.
Order Anytime
For accessories, we suggest that you visit your Brother authorized reseller. However, if you are unable to locate one in your area, you may order directly from Brother.
Telephone: 1-888-879-3232
Internet: www.brothermall.com
- About the LX-570
- How to Use the LX-570
- Insert the item:
- Cut:
- When Using the
- Starter Cartridge...
- How to Change the Cartridge
- 1
- Remove the cartridge:
- 2
- Insert a cartridge:
- How to Change the Cutter
- Unsnap the cutter:
- Snap the new cutter into place:
- Warnings:
- Cautions:
- Troubleshooting Tips
- Problem
- Solution
- Maintaining the LX-570
- Replacement
- Cartridges & Ideas
- brother, LX-570
- Try Me
- LF-AO5RP: Repositionable Adhesive Backing
- Helpful Hints
- LF-LA5: Permanent Adhesive Back & Laminate Front
- LF-AO5: Permanent Adhesive Backing
- LF-LM5: Magnetic Back & Laminate Front
- LF-DL5: Double Side Laminate
- Other Exciting Brother Products
- LX-900 Cool Laminator Multi-finishing System
- LX-1200 Cool Laminator Multi-finishing System
- P-Touch Home & Project
- Order Anytime
Brand : BROTHER
Model : LX-570
Category : Laminator