
Controleunit DX2 Basic - Scooter de mobilité Vermeiren - Free user manual and instructions
Find the device manual for free Controleunit DX2 Basic Vermeiren in PDF.

| Product Type | Mobility Scooter Control Unit |
| Brand | Vermeiren |
| Model | Controleunit DX2 Basic |
| Dimensions (approx.) | 150 x 100 x 50 mm |
| Weight (approx.) | 1 kg |
| Power Supply Voltage | 24 V DC |
| Main Functions | Speed control, battery indicator, horn, lights control, on/off switch |
| Maintenance | Keep dry, clean with damp cloth, check connections regularly |
| Safety Features | Overload protection, automatic shut-off, emergency stop |
| Spare Parts Availability | Through authorized Vermeiren dealers |
| Repairability | Serviceable by qualified technicians only |
| General Information | Compatible with Vermeiren mobility scooters; 20-page user manual available |
| Warranty | 2 years (subject to terms) |
| Certifications | CE, ISO 7176 |
Frequently Asked Questions - Controleunit DX2 Basic Vermeiren
User questions about Controleunit DX2 Basic Vermeiren
0 question about this device. Answer the ones you know or ask your own.
Ask a new question about this device
Download the instructions for your Scooter de mobilité in PDF format for free! Find your manual Controleunit DX2 Basic - Vermeiren and take your electronic device back in hand. On this page are published all the documents necessary for the use of your device. Controleunit DX2 Basic by Vermeiren.
USER MANUAL Controleunit DX2 Basic Vermeiren
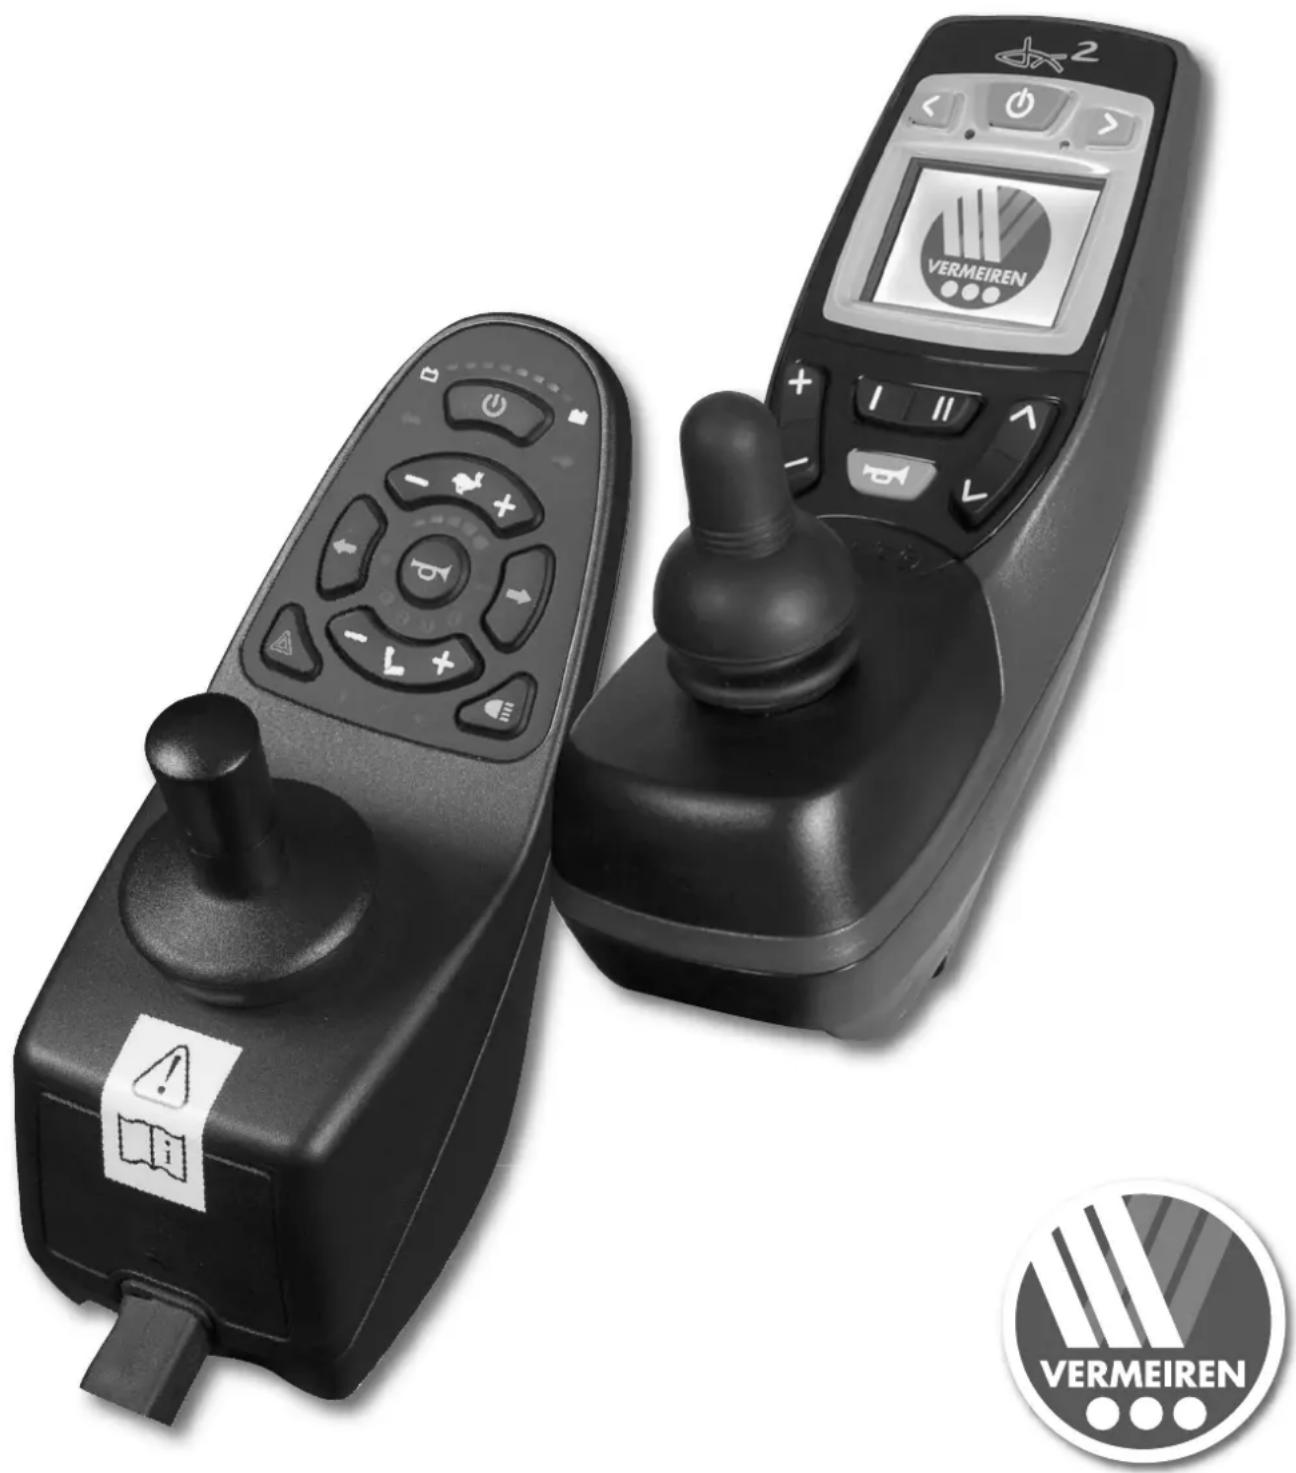
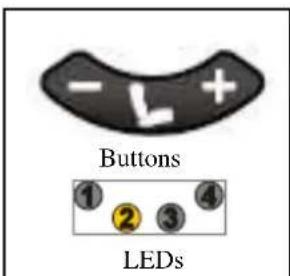
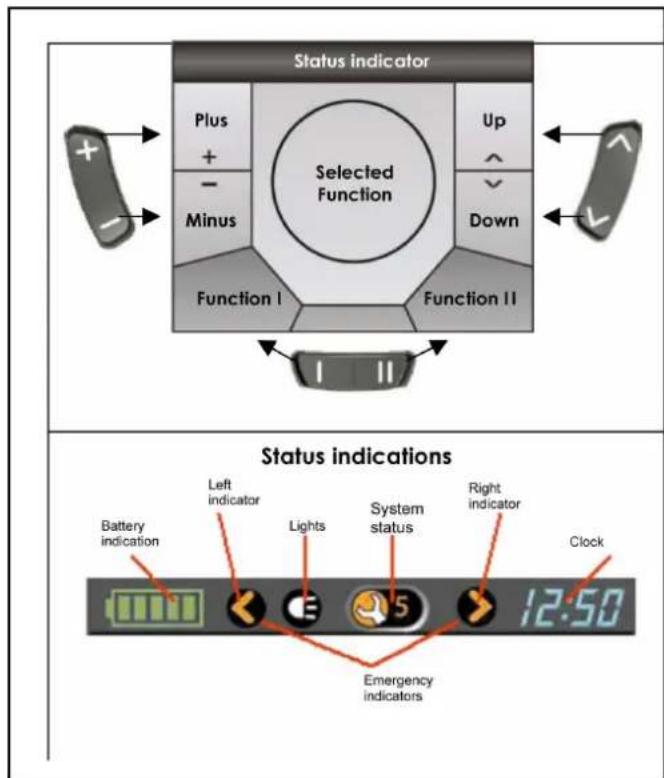
DX2 Basic: without LCDscreen DX2 with LCD screen
INSTRUCTION MANUAL
natural_image
Two black industrial control devices with visible buttons and control knobs, one labeled 'VERMEIREN' (no other text or symbols)The operator control built into your electric wheelchair enables you to control all the driving, steering, braking and operating processes and to control other adjusting motors (lifting column, seat and back adjuster). The wheelchair's electrical unit and electronics are constantly being monitored internally. Any fault in the electronics is indicated on the operating display (6) and the status display (1) and, if necessary, the wheelchair may be switched off for reasons of safety (see the chapter on fault analysis).
Vermeiren is responsible for the changes in the software. For changes in the software contact Vermeiren.
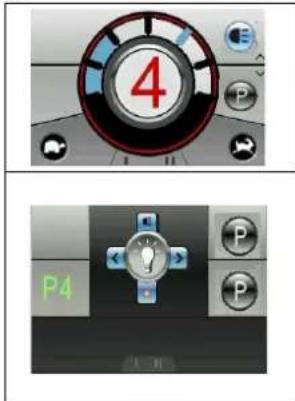
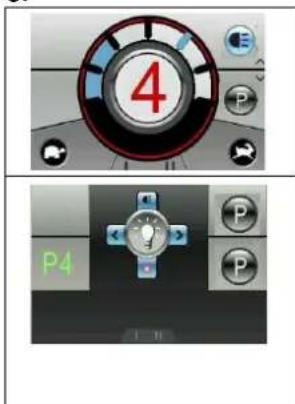
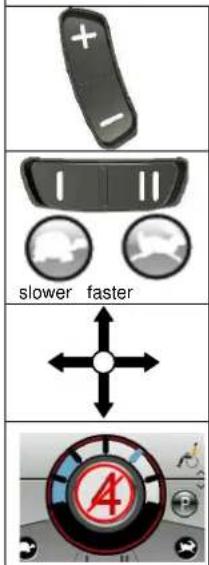
The DX2 system is available in two different operator controls (DX2 Basic; DX2 with LCD screen) which have some different operating buttons.
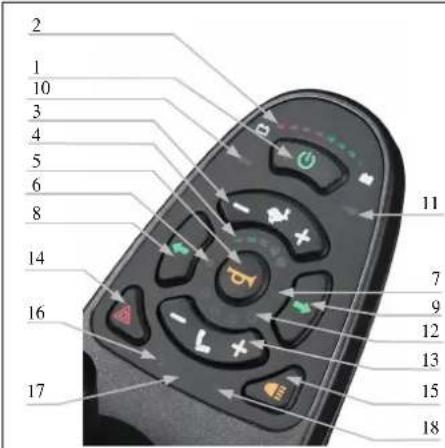
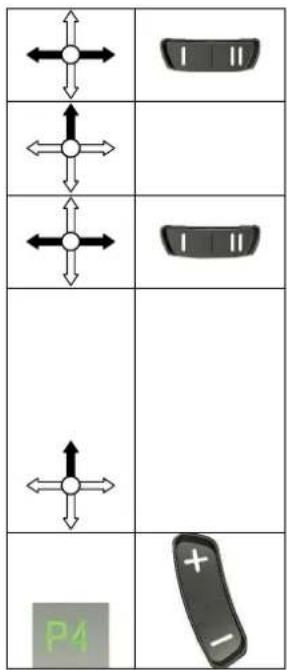
DX2 Basic: Without LCD screen
1 = "ON / OFF" button 10 = Left indicator LED
2 = Battery charge 11 = Right indicator LED indicator 12 = Adjustment Actuator
3 = Speed switch 13 = Adjustment Actuator
"-" : slower selection
"+" : faster "-": down
4 = Speed indicator "+": up
5 = "Horn" button 14 = Warning indicator
6 = Light sensor* 15 = Lights
7 = Lock Led 16 = Attendant profile LED
8 = Left indicator 17 = Fault indicator LED
9 = Right indicator 18 = LED side lights
* The light sensor dims the display when it is dark
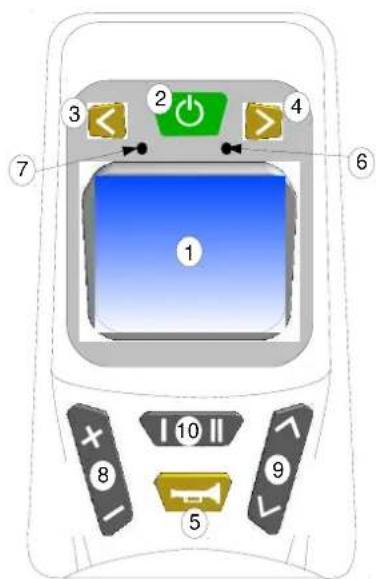
With LCD screen
1 = Display
2 = "ON / OFF" button
3 = "Left indicator" + "Light" button
4 = "Right indicator" + "Warning indicator" button
5 = "Horn" button
6 = Fault code/operating display
7 = Brightness sensor
8 = "Drive profile" button
9 = "Select field" button
10 = Max speed reduction
1.1. DX2 without LCD screen
Press the "ON/OFF" button (1). The charge indicator (2), which also indicates the batteries' charge level, lights up for a moment. If all the lights come on, the batteries are sufficiently charged. If the lights do not all come on, you must adjust your driving activities to suit the low capacity of the batteries. If the battery charger display lights do not come on, check the plug connections of the electronic system.
Now select the driving program you want by pressing the speed switch (3), (-) symbol to go slower and (+) symbol to go faster.
The selected speed is showed with the speed indicator (4). If you have any special needs, you can ask your dealer to enter a personalised driving program.
To set the wheelchair in motion, push the joystick forwards slowly. The speed will increase when you push the joystick further forwards. If you want to turn left or right, simply push the joystick in the desired direction. To reverse, pull the joystick backwards from the central position.
Note that, when pressing the "ON/OFF" button, the joystick stays in the central position for at least two seconds. It is programmed this way for technical and safety reasons, to prevent the joystick being pushed at the same time as the wheelchair is being switched on. If both processes are activated at the same time, the steering unit locks itself and can only become operational again after being switched off completely.
Press the "Left indicator" (10) or "Right indicator" (11) buttons to signal a change in your driving direction. The driving lights are switched on or off by pressing the "Lights" (15) button. You can sound an acoustic warning signal with the "Horn" (5) button. The hazard warning lights, used in critical situations, can be switched on or off by pressing the "Hazard warning lights" (14) button.
To brake while driving, simply push the joystick to its central position. Move the joystick slowly for gradual braking. Simply release the lever for a quick stop; the wheelchair will then stop as quickly as possible.
To activate the back adjuster, select button (13) until the corresponding number for the backrest adjustment actuator lights up, and you can then use the joystick to tilt the back in the direction you want.
To activate the seat incliner, select button (13) until the corresponding number for the seat adjustment actuator lights up, and you can then use the joystick to incline the seat in the direction you want.
Turn wheelchair On/Off
In case of an emergency, you can use the On/off button to turn your wheelchair off.
Turn the power on:
Press the On/Off button. All LEDs of the battery indicator turn on simultaneously and the fault indicator flash twice.
If the wheelchair is turned on while the joystick is out of neutral, an fault will be displayed on the battery charge indicator (the five drive profile LEDs flash continuously and the chair will not drive). Release the joystick back to neutral and the fault will disappear. If the joystick is not released back to neutral (centre) within 4 seconds, the fault becomes a Module fault (the drive profile LEDs + fault indicator are flashing). To clear this fault, turn the DX system off and then turn it back on.
Turn the power off:
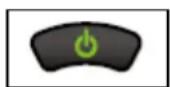
Press the On/Off button. All LED's will go out. If the ON/OFF button is pressed while driving the wheelchair perform an emergency stop and it turns off.
Locking your operator control
It is possible to lock your operator control so that unauthorized people cannot turn your electric wheelchair on.
To lock your wheelchair:
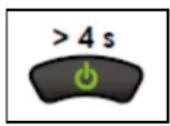
While the power is ON, press and hold the ON/OFF button for 4 seconds.
The display will turn off immediately. After 4 seconds all LED's and the Lock LED turn on for 1 second to indicate that the DX system is now locked.
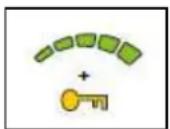
To unlock your wheelchair:

While your wheelchair is locked, press the ON/OFF button to turn your wheelchair on.

The Lock LED will flash for 10 seconds to indicate that the DX system is locked.
Press the Horn button twice before the countdown is completed (approximately 10 seconds).
The current state-of-charge will then be displayed and the operator control may be operated normally.
If the user does not press the Horn button twice before the countdown is complete, the Horn will sound a short beep and your operator control will turn itself off.
You must complete these procedure completely otherwise your wheelchair will not drive again.
Sleep mode
The DX System will go to sleep after a period of inactivity of a quarter.
When the DX System sleeps, it is partially turned off to reduce energy consumption.
To reactivate the DX system:
Press any button on the DX system or move the joystick. The DX system turns on.
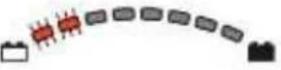
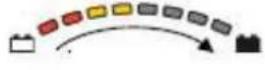
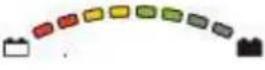
Using battery charge indicator
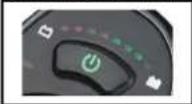
The battery charge indicator is used to indicate that your wheelchair power is on and provides an estimate of the remaining battery capacity.
Any green LED's indicate that your batteries are well charged.
If only amber and red LED's are light, the batteries are moderately charged. Recharge your batteries before you make a long trip.
If only red LED's are light, the batteries are running out of charge. Recharge as soon as possible.
The following table indicates what the battery charge indicator will display.
| Display Description Meaning Remarks | |||
 | All LEDs dark. System off. | ||
 | All LEDs are flashing. | System on. Warning: battery | too full.Slow down if you are driving down a slope. |
 | All LEDs are lit. System on. LEDs show the charge | level.: Full battery | |
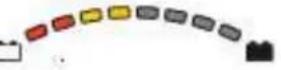 | Only red and yellow LEDs lit. | Low battery level. Battery half | If full. Start the return journey. |
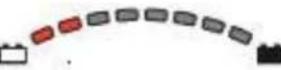 | Only red LEDs lit. Very low battery level. Battery low. Recharge soon. | ||
 | Red LEDs are flashing. | Battery almost empty. | Recharge now. |
 | 1 Red Led is flashing. | Battery empty. | Recharge immediately. |
 | The LEDs turn on one by one from left to right. | Drive inhibit, the chair will not drive. | |
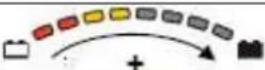  | The LEDs turn on one by one from left to right, followed by one second where the current battery capacity is displayed. | The charger is connected to the operator control. | |
 | All leds turn on one by one from left to right. The Fault indicator will show corresponding flash code. | Indicate that the chair will not drive. | A fault has occurred. |
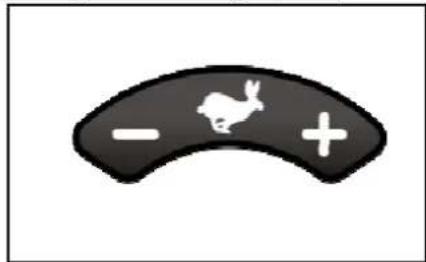
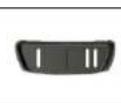
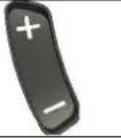
Adjusting the Driving Speed
natural_image
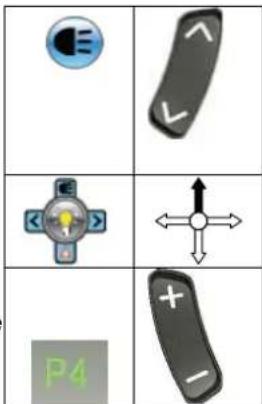
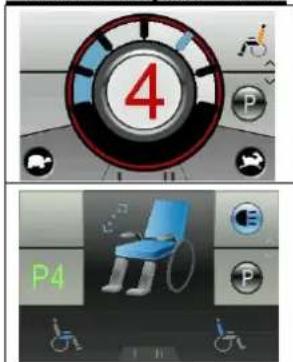
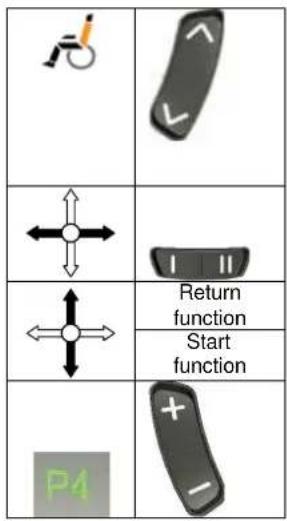
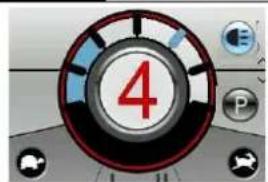
Simple curved black button with white rabbit symbol and plus/minus signs (no text or numbers)The DX2 system without LCD screen support 5 drive profiles. A drive profile is a specific drive setting (slow or fast, indoors or outdoors) that your therapist or dealer can adjust to suit your personal needs and preference. You can select the active Drive Profile with the Drive Profile Selection button.
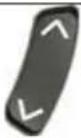
Press '+' to increase the drive speed/profile.
Press '-' to decrease the drive speed/profile.
Using the drive profile indicator
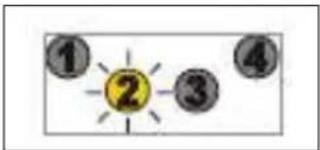
Select a Drive Profile that suits your preference and environment. The currently selected Drive profile is indicated with the speed indicator LED's.
| LEDs Meaning | ||
 | Drive Profile 1. | |
 | Drive Profile 2. | |
 | Drive Profile 3 | |
 | Drive Profile 4 | |
 | Drive Profile 5 | |
Attendant Control

When the attendant control is activated, the ACU LED will light up and remain light until the attendant relinquishes control.
In these mode the DX joystick does not work and it is not possible to select a different drive profile. All the other buttons works.
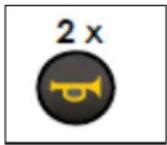
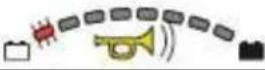
Using the horn

Press the horn button. The horn shall sound as long as the button is pressed.
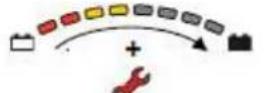
The Service indicator light
The Service indicator LED is dedicated to displaying fault codes. For a list of the fault codes refer to paragraph 2.
If the electric wheelchair has exceeded the drive time and needs maintenance, the fault indicator LED turns on continuously for 15 seconds every time the system is turned on. Take your wheelchair to a qualified service center for maintenance.
Using the lights
Headlights:
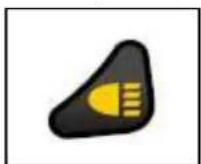
To turn the Headlights on, press the Headlight Button. The green Headlight LED next to button will lit. Press the Headlight Button again to turn the headlights off.
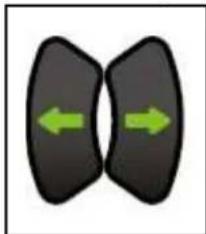
Left and Right indicator lights:
natural_image
Two overlapping dark oval shapes with green arrows indicating bidirectional movement (no text or symbols)To indicate left or right turns, press the Left or Right Indicator Button as required. The green activated Light Indicator LED will flash. Press the Button again to turn the indicator off.
Hazard warning lights:
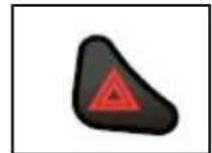
To turn the Hazard lights on, press the Hazard Button. The two green Left and Right Indicator LEDs will both flash simultaneously. Press the Hazard button again to turn the hazard function off.
Using the seating function Button
When you have placed the DX system in the seating mode the joystick does not drive the wheelchair, it only selects and operates the seating functions.
Press the '+' or the '-' on the seat function button to activate the seating mode. The seating mode starts with the seating function that was last selected. The seat function LEDs indicate the currently selected seating function.
Selecting the correct seat function (adjustment seat, backrest, legrests, ...).
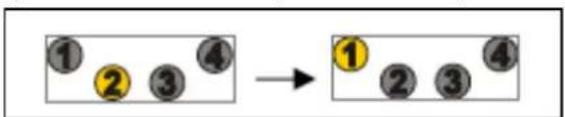
Press '+' or move the joystick right to select the next seating function.

flowchart
graph LR
    A["① ② ③ ④"] --> B["① ② ③ ④"]
Press '-' or move the joystick left to select the previous seating function.
flowchart
graph LR
    A["①"] --> B["②"]
    B --> C["③"]
    C --> D["④"]
    D --> E["→"]
    E --> F["①"]
    F --> G["②"]
    G --> H["③"]
    H --> I["④"]
Operating the seating functions (adjustment seat, backrest, legrests, ...).
Move the joystick forward to operate the seating function in one direction. Move the joystick backwards to operate the seating function in the opposite direction.
The active seating function LED flashes while operating the actuator. If you move the joystick further forward, the seating function moves faster.
Return to the driving mode
Press the '+' or the '-' on the drive profile selection button to return to the driving mode.
The Driving mode returns to the drive profile that was selected before the seating mode was activated.
Available seating functions
The DX2 basic system can operate in 4 seating functions or 4 seating functions and one combined function (ex. 2 footrests together).
| Actuator Function LEDs Meaning | |
 | Seating Function 1 selected |
 | Seating Function 2 selected |
 | Seating Function 3 selected |
 | Seating Function 4 selected |
 | Seating Function 3 and 4 selected |
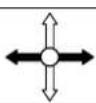
Using the Joystick
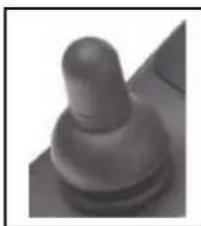
natural_image
Close-up of a black, textured object resembling a knob or grip (no visible text or symbols)Moving the joystick will drive the electric wheelchair in that direction. The amount of joystick movement will determine the speed that the powerchair will move in that direction.
Make sure that the joystick is in the neutral (central) position when pressing the on/off button, otherwise the electronics will be locked. To take this block away let go the joystick until he goes back in neutral position.
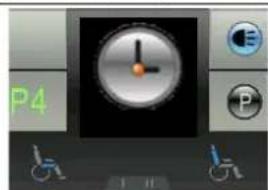
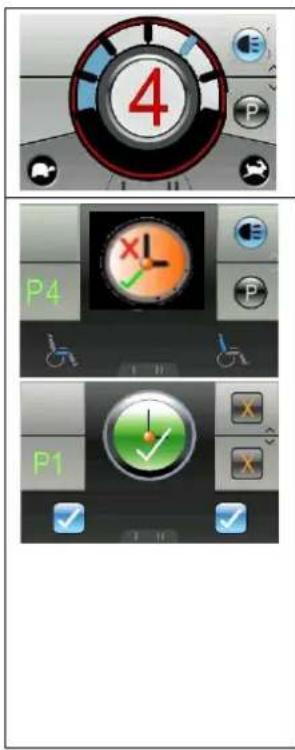
1.2. DX2 with LCD screen
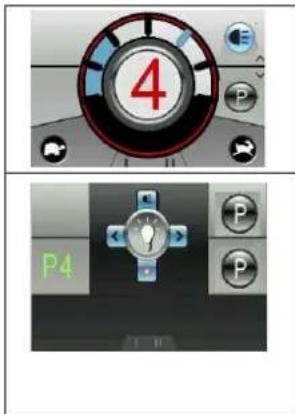
The function buttons (8), (9) and (10) enable functions to be selected that are displayed in the assigned fields on the screen.
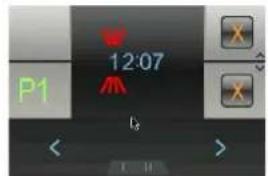
The status display is constantly visible in the upper part of the display and always shows the batteries' charge level and the current time.
The light, indicator and warning light displays only appear when the relevant function is selected. The system status display appears when there is a fault or an event, and displays the relevant event or fault code (1-12).
| Display | Meaning |
| Battery fully charged | |
| Battery fully charged | |
| Battery half charged | |
| Battery will soon be low, charge it | |
| Battery is low, charge it soon | |
| Battery is dead, charge now |
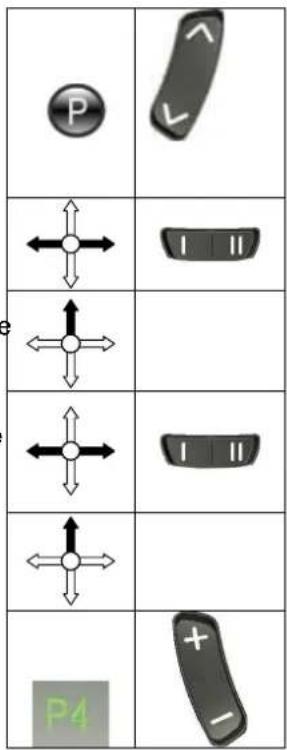
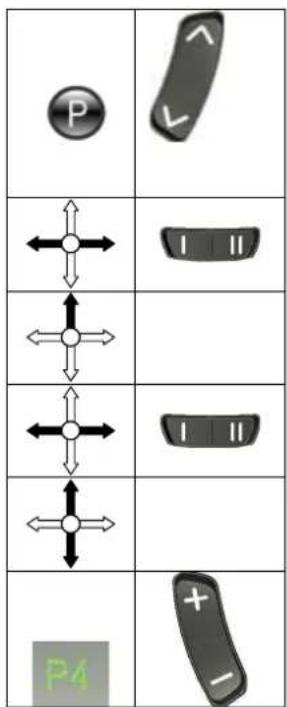
Start the steering / control unit

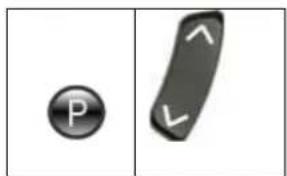
Press the ON/OFF button (2) and the operating display (6) will briefly flash on and the screen will show the drive level (1-5) last used.
Switch off the steering / control unit

Press the ON/OFF button (2) and the system will switch off.
Lock the steering / control unit

If you keep the ON/OFF button (2) pressed for longer than 4 seconds, the operator control will be locked.

The lock symbol will briefly appear in the display.
Unlock the steering / control unit

When the ON/OFF button (2) is pressed ...

... the lock symbol will appear in the display.

When you press the horn button (5) twice while the lock symbol is showing, the control unit will be unlocked. The drive level (1-5) last used will appear in the display (1-5).
Switch the indicators on/off

To switch the drive direction display on and off, press buttons (3) or (4) for whichever indicator you wish, left or right. When you activate a drive direction, it will flash in the status display.

or
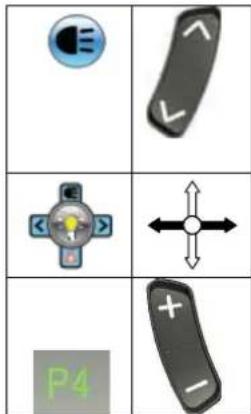
Select the light function using the field selection button (9) and the display will show the light selection menu.
To switch the flash function (left or right) on or off, move the joystick in the appropriate direction left or right.
To switch back to the driving program, select the drive profile button (8) in drive mode.
Switch the light on/off

To switch the light on and off, keep the button for the left-hand indicator (3) pressed for longer than 3 seconds. When the light function is switched on its symbol will light up in the status display.
or
Select the light function using the field selection button (9) and the display will show the light selection menu.
Push the joystick upwards to switch the light on or off.
To switch back to the driving program, select the drive profile button (8) in drive mode.
Switch the warning light on/off

To switch the warning light on and off, keep the button for the right-hand indicator (4) pressed for longer than 3 seconds. When the warning light function is switched on its symbol will light up in the status display.
or
Select the light function using the field selection button (9) and the display will show the light selection menu.
Push the joystick downwards to switch the warning light on or off.
To switch back to the driving program, select the drive profile button (8) in drive mode.

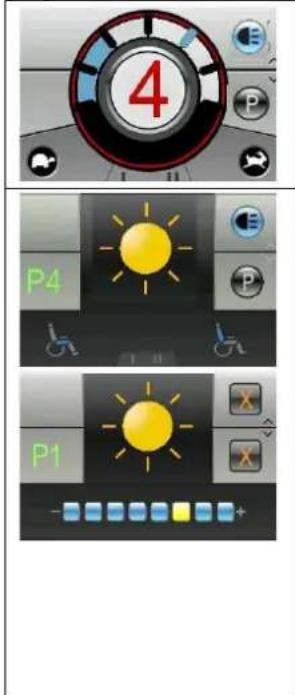
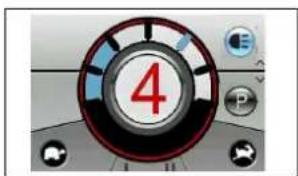
Drive functions
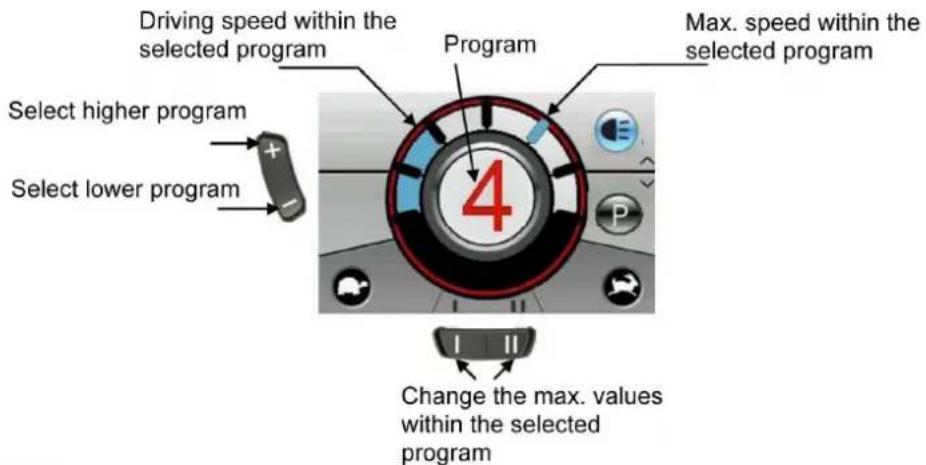
In drive mode use the drive profile button (8) to select a higher or lower driving program (drive profile 1-5). These drive programs are programmed in the factory to rise from slow to fast. The drive program you select appears in red text in the middle of the display.
The top speed in any drive program can be changed using the menu selection button (10) in the drive program selected.
To drive the wheelchair in the direction you wish, move the joystick to the position you want.
If the loading socket is plugged in, the wheelchair will be locked for drive functions. If the joystick is moved, the display will also briefly show a red warning bar.
Make sure that the joystick is in the neutral (central) position when pressing the on/off button, otherwise the electronics will be blocked. This block can be lifted by switching the operator control off and then on again or just let go the joystick, now the joystick goes in neutral position.
Always adapt your speed to the prevailing environmental conditions.
Electric adjustments
Select the program function using the field selection button (9) and the display will show the menu for the adjust functions.
Select left/right with the joystick or the menu selection button (10) until the adjust function you want appears in the centre of the display.
To adjust the selected function, move the joystick in the direction you want up or down.
To switch back to the driving program, select the drive profile button (8) in drive mode.
| Adjust function | In Display | Display Menu |
| Seat inclination | 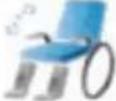 |  |
| Angle of backrest |  |  |
| Leg support left |  |  |
| Leg support right |  |  |
| Leg supports simultaneous |  |  |
| Lift column |  |  |

CAUTION: Risk of injury or damage Make sure that no objects and/or persons are inside the swinging range of the adjust functions, since this could cause damage and/or injury.
The only functions displayed in the menu selection and the centre of the display are those which exist on your wheelchair and have been enabled.
For your safety the adjust functions can only be activated when all four wheels of the wheelchair are standing still. The driver programs are disabled while the adjust functions are active.
Set time
Select the program function using the field selection button (9) and the display will show the menu for the special functions.
Select left/right with the joystick or the menu selection button (10) until the time function you want appears in the centre of the display.
If you want to set the time, confirm by moving the joystick upwards.
The time digit waiting to be set flashes. To change other digits, you can select left/right with the joystick or use the menu selection button (10).
To adjust the digits, select upwards with the joystick.
To save the new time, confirm by moving the joystick downwards.
To switch back to the driving program, select the drive profile button (8) in drive mode.
 |  |
 |  |
 |  |
 |  |
 |  |
 |  |
 |  |
By default, the factory sets the time to be visible in the status display. To change this option, proceed as follows:
Select the program function using the field selection button (9) and the display will show the menu for the special functions.
Select left/right with the joystick or the menu selection button (10) until the time function you want appears in the centre of the display.
If you want to change the display option for the time, confirm by moving the joystick upwards.
The option currently selected will appear in the menu and the centre of the display. To change this, select left/right with the joystick or the left/right menu selection button (10).
To save the option you want, confirm by moving the joystick upwards.
To switch back to the driving program, select the drive profile button (8) in drive mode.
Adjust the screen brightness
Select the program function using the field selection button (9) and the display will show the menu for the special functions.
Select left/right with the joystick or the menu selection button (10) until the brightness function you want appears in the centre of the display.
If you want to change the brightness of the display, confirm by moving the joystick upwards.
Adjust the brightness of the display by moving the joystick left/right or selecting the left/right menu selection button (10).
To save the brightness you have selected, confirm by moving the joystick upwards or downwards.
To switch back to the driving program, select the drive profile button (8) in drive mode.
By default, the factory sets the brightness of the display to be automatically adjusted to match the light conditions. To change this function, proceed as follows:
Select the program function using the field selection button (9) and the display will show the menu for the special functions.

Select left/right with the joystick or the menu selection button (10) until the brightness function you want appears in the centre of the display.
If you want to change the brightness function, confirm by moving the joystick upwards.
Adjust the display's brightness function by moving the joystick left/right or selecting the left/right menu selection button (10).
To save the brightness function you have selected, confirm by moving the joystick upwards.
To switch back to the driving program, select the drive profile button (8) in drive mode.
If you have special requirements, you can ask Vermeiren to enter an individual driving program (changes in the software).
2. Troubleshooting
DX2 Basic (without LCD screen)

Symbol flickering fast at intervals. The number of flashes per interval provides the information below (the following actions and checks should only be carried out by authorised individuals).
DX2 with LCD screen
The following diagnoses refer to all the electronics. The flashing code is read from the status display on the DX2 steering and control unit. The various modules for steering, power, and lamps, have their own light signals indicating the status of the module concerned (steady light = OK; flashing light = defective).
This fault analysis aids problem analysis and problem solving by indicating the possible faults. If faults arise which cannot be identified and remedied with the aid of this analysis, kindly contact the manufacturer. We wish to point out that in any case of improper handling or if the delivered configuration has been changed, we cannot guarantee the accuracy of the fault indications.

DX2: The status display shows the workshop ID with the code number.
| Number | Problem/Fault Checks | |
| 0 | There is no indication of the charge level of the batteries after the steering unit is switched on. | 1. Check whether the battery plug is inserted fully and correctly connected to the socket of the steering unit.2. Check whether the two batteries are connected correctly.3. Check whether the batteries are charged.4. Check whether the thermal fuse is defective or loose. |
| 1 | One of the DX modules is defective (controls, power module, light module, CLAM module). | 1. If the control unit's module LED flashes, the control unit should be replaced.2. If the power module diode flashes, this module must be replaced.3. If the lamp module diode flashes, this module must be replaced.⚠️If the steering and control unit has to be replaced, a new error code might be indicated, since a complete fault analysis could not be carried out. |
| 2 | A module connected to the power module is defective. | Check the condition of the connected module. |
| 3 | Left motor (or its connection) is defective. | 1. Check whether the plugs of both motors have been inserted properly.2. Check the plug contacts of both motors for corrosion or damage.3. Check both motors. Unplug the motors and measure the plug connection with an Ohm meter. If you obtain readings of more than 1 Ohm or less than 100 milliOhms, the motor is defective.4. Check the resistance of the motor. Measure every contact using an Ohm meter.⚠️A Fault is also indicated if the motors are disconnected. Connect again and restart the system. |
| 4 | Right motor (or its connection) is defective. | As described above. |
| 5 | Left parking brake (or its connection) is defective or neutral active. | 1. Check whether the motors' plugs have been inserted properly.2. Check the plugs for corrosion or damage.3. Check the parking brakes. Measure the resistance of the connections by means of an Ohm meter. If the resistance value is above 100 Ohms or beneath 20 Ohms, the parking brake is probably defective. |
| 6 | Right parking brake (or its connection) is defective. | As described above. |
| 7 | Battery voltage too low | 1. Check that the charger provided is properly connected.2. Check whether the battery charger indicates "Charging".3. Check whether the batteries are really being charged (deep discharge)4. Check whether the so-called "memory effect" has resulted in the battery no longer being able to generated the capacity to enable the control elements to work properly. |
| 8 | Battery overcharged 1. | Check that only the charger supplied has been used.2. Check that the battery charger is working.3. This fault may also be displayed if an external power source comes in contact with the wheelchair.4. You can use a multimeter to check that the battery voltages that the manufacturer has specified are being complied with and are below 32 V. |
| 9 | Faulty communication between the power module and the steering unit | 1. Check that the plug connections between the power module and the steering unit have been installed properly.2. Check the plug connectors for corrosion or damage.3. Check whether the cable is damaged or broken (multimeter).⚠ The error code can be cancelled by switching the steering unit off and back on. However, the problem should be remedied as quickly as possible, or other faults may occur. |
| 10 | Communication fault between multiple components | 1. Check the relevant status indicators.2. Check that the plug connections are properly engaged.3. Check the cables and plug connectors for corrosion and damage. |
| 11 | Motor rest phases The system switches off automatically if the motors' programmed running times are exceeded. The wheelchair can be reactivated by switching the system off and back on. | |
| 12 | Module tuning error A module can fail if different programming affects its tuning. Kindly contact the manufacturer. | |
Only when there is a liftcolumn available:
If the liftcolumn is placed in the highest position, the driving programs are significantly reduced.
When the liftcolumn is placed back in the most lowest position, the driving programs will function normally again.
Notes
Notes
Belgium
N.V. Vermeiren N.V.
Vermeirenplein 1 / 15
B-2920 Kalmthout
Tel: +32(0)3 620 20 20
Fax: +32(0)3 666 48 94
website: www.vermeiren.be
e-mail: info@vermeiren.be
Germany
Tel: +43(0)732 37 13 66
Fax: +43(0)732 37 13 69
website: www.vermeiren.at
e-mail: info@vermeiren.at
Italy Switzerland
Realtime S.R.L. Vermeiren Suisse S.A.
website: www.realtime.it
e-mail: info@reatime.it
Poland The Netherlands
Vermeiren Polska Sp. z o.o Vermeiren Nederland B.V.
ul. Łączna 1
PL-55-100 Trzebnica
Tel: +48(0)71 387 42 00
Fax: +48(0)71 387 05 74
website: www.vermeiren.pl
e-mail: info@vermeiren.pl
Domstraat 50
Spain Czech Republic
Vermeiren Iberica, S.L. Vermeiren ČR S.R.O.
Trens Petits, 6. - Pol. Ind. Mas Xirgu.
17005 Girona
Tel: +34 902 48 72 72
Fax: +34 972 40 50 54
website: www.vermeiren.es
e-mail: info@vermeiren.es
- DX2 Basic: without LCDscreen DX2 with LCD screen
- DX2 without LCD screen
- Turn wheelchair On/Off
- Locking your operator control
- Sleep mode
- Using battery charge indicator
- Adjusting the Driving Speed
- Using the drive profile indicator
- Attendant Control
- Using the horn
- The Service indicator light
- Using the lights
- Using the seating function Button
- Return to the driving mode
- Available seating functions
- Using the Joystick
- DX2 with LCD screen
- Start the steering / control unit
- Switch off the steering / control unit
- Lock the steering / control unit
- Unlock the steering / control unit
- Switch the indicators on/off
- Switch the light on/off
- or
- Switch the warning light on/off
- Drive functions
- Electric adjustments
- Set time
- Adjust the screen brightness
- Troubleshooting
- DX2 Basic (without LCD screen)
- DX2 with LCD screen
- Only when there is a liftcolumn available:
- Notes
- Belgium
- Germany
- Italy Switzerland
- Poland The Netherlands
- Spain Czech Republic
Brand : Vermeiren
Model : Controleunit DX2 Basic
Category : Scooter de mobilité