CR 1138 - Hi-Fi System CAMRY - Free user manual and instructions
Find the device manual for free CR 1138 CAMRY in PDF.

| Product Type | Hi-Fi System |
| Brand | Camry |
| Model | CR 1138 |
| Dimensions (W x H x D) | Approx. 360 x 250 x 300 mm |
| Weight | Approx. 5.5 kg |
| Power Supply | AC 230V ~ 50Hz |
| Power Consumption | 45 W (max) |
| Supported Media | CD, CD-R/RW, MP3 |
| Radio Tuner | FM/AM with digital tuning |
| Audio Output | 2 x 10W RMS |
| Connectivity | USB, AUX input, headphone jack |
| Speaker Configuration | 2.0 stereo, detachable speakers |
| Remote Control | Included |
| Display | LCD with backlight |
| Main Functions | CD/MP3 playback, FM/AM radio, USB playback, clock/alarm |
| Cleaning Instructions | Wipe with a soft dry cloth; avoid solvents |
| Safety Features | Auto power off, overheating protection |
| Spare Parts & Repairability | Contact Camry customer support for spare parts |
| General Information | User manual included; for indoor use only |
Frequently Asked Questions - CR 1138 CAMRY
User questions about CR 1138 CAMRY
0 question about this device. Answer the ones you know or ask your own.
Ask a new question about this device
Download the instructions for your Hi-Fi System in PDF format for free! Find your manual CR 1138 - CAMRY and take your electronic device back in hand. On this page are published all the documents necessary for the use of your device. CR 1138 by CAMRY.
USER MANUAL CR 1138 CAMRY
natural_image
Black cylindrical device with a circular button on the side (no visible text or symbols)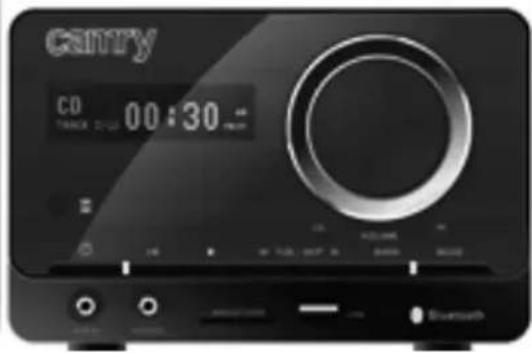
text_image
GNTY CD 00:30 -
natural_image
Black cylindrical device with a circular button on the side (no text or symbols visible)CR 1138
(GB) user manual
(F) mode d'emploi
text_image
Technical diagram showing front and back views of a device with labeled ports and internal componentsENGLISH
SAFETY CONDITIONS IMPORTANT INSTRUCTIONS ON SAFETY OF USE PLEASE READ CAREFULLY AND KEEP FOR FUTURE REFERENCE
The warranty conditions are different, if the device is used for commercial purpose.
-
Before using the product please read carefully and always comply with the following instructions. The manufacturer is not responsible for any damages due to any misuse.
-
The product is only to be used indoors. Do not use the product for any purpose that is not compatible with its application.
-
The applicable voltage is 110-240V \~50/60Hz. For safety reasons it is not appropriate to connect multiple devices to one power outlet.
-
Please be cautious when using around children. Do not let the children to play with the product. Do not let children or people who do not know the device to use it without supervision.
5.WARNING: This device may be used by children over 8 years of age and persons with reduced physical, sensory or mental capabilities, or persons without experience or knowledge of the device, only under the supervision of a person responsible for their safety, or if they were instructed on the safe use of the device and are aware of the dangers associated with its operation. Children should not play with the device. Cleaning and maintenance of the device should not be carried out by children, unless they are over 8 years of age and these activities are carried out under supervision.
-
After you are finished using the product always remember to gently remove the plug from the power outlet holding the outlet with your hand. Never pull the power cable!!!
-
Never put the power cable, the plug or the whole device into the water. Never expose the product to the atmospheric conditions such as direct sun light or rain, etc.. Never use the product in humid conditions.
-
Periodically check the power cable condition. If the power cable is damaged the product should be turned to a professional service location to be replaced in order to avoid hazardous situations.
-
Never use the product with a damaged power cable or if it was dropped or damaged in any other way or if it does not work properly. Do not try to repair the defected product yourself because it can lead to electric shock. Always turn the damaged device to a professional service location in order to repair it. All the repairs can be done only by authorized service professionals. The repair that was done incorrectly can cause hazardous situations for the user.
-
Never put the product on or close to the hot or warm surfaces or the kitchen appliances like the electric oven or gas burner.
-
Never use the product close to combustibles.
12.Do not let cord hang over edge of counter or touch hot surfaces.
-
Never leave the product connected to the power source without supervision. Even when use is interrupted for a short time, turn it off from the network, unplug the power.
-
In order to provide additional protection, it is recommended to install residue current device (RCD) in the power circuit, with residual current rating not more than 30 mA. Contact professional electrician in this matter.
-
Avoid getting the radio wet.
-
The radio may only be wiped with a dry cloth. Do not use water or cleaning fluids.
-
The radio should be kept in a dry room.
-
Special discs for cleaning the CD player should be used regularly.
DESCRIPTION OF THE DEVICE
-
POWER button
-
Power diode
-
FUNCTION button
-
AUX port
-
LCD display
-
Speakers
-
USB port
-
STOP/USB/SD button
-
NEXT button
-
BACK button
-
REPEAT button
-
OPEN / CLOSE button
-
Headphone port
-
AUDIO OUT port
-
Button of reviewing the contents of the CD/USB INTRO
-
PRESET DOWN button
-
Numeric buttons
-
FM antenna socket
-
TIME button
-
PLAY / PAUSE button
-
Volume control knob buttons
-
Equalizer button
-
PROGRAM button
-
CD drawer
-
MUTE button
-
Key Shuffle RANDOM
-
PRESET UP button
-
BBS/CD/USB button
-
Charger input
-
SD port
SETTING THE CLOCK
Before first use, unpack everything and remove all protective materials. Unwind the FM antenna cable and power cable. Do not cover the ventilation holes, make sure that there is a gap of a few centimeters around the radio, which is required for proper ventilation.
-
In standby mode, press and hold the TIME button (29). '12H/24H' will start flashing on the display (2). Using the BACK (11) and NEXT buttons (9) select either the 12-hour or 24-hour mode and confirm by pressing the TIME button (29) again. The device will enter the hour editing mode.
-
Using the BACK (11) and NEXT buttons (9) set the current hour and confirm by pressing the TIME button (29). The device will enter the minute editing/ mode.
-
Using the BACK (11) and NEXT buttons (9) set the current minute and confirm by pressing the TIME button (29).
SETTING THE ALARM
-
In standby mode, press and hold the TIME button (29).
-
ON icon will flash. Using BACK (11) and NEXT buttons (9) set the alarm start time and confirm by pressing the TIME button (29) once again.
-
The same way you set:
- after flashing of OFF icon - alarm finish time,
- mode in which the alarm will work choosing between RADIO, CD, USB, AUX and SD
- after flashing of V01 icon - number of track or number of radio station that have to be played
- After setting of all parameters the device will flash them in order on the display.
FUNCTION BUTTONS (5)
Used to change the operating mode of the device
- CD (CD playing mode)
-AUX (external device operation mode)
- RADIO (FM radio mode)
- USB (USB operation mode)
- SD (SD operation mode) (in order to choose this mode you have to choose USB mode and than hold STOP/USB/SD button (8))
-
Turn the device on using the POWER button (1) and set the radio mode using the FUNCTION button (5).
-
Using the BACK (11) and NEXT buttons (9) tune to the desired radio frequency. Pressing and holding these buttons for approximately
1-2 seconds will automatically search for the closest frequency. After it is found the search will stop.
-
When the frequency of the selected station is found, press the PROGRAM button (16) to save the station. The program number will begin flashing.
-
Using the PRESET UP button (23) and PRESET DOWN button (24) select the program number in which you want to save the radio station.
-
Confirm the selected program number by pressing the PROGRAM button (16) again.
-
Repeat steps 3-5 to program selected stations
-
You can switch between saved programs by using the PRESET DOWN button (23) and PRESET UP button (24).
-
You can set the volume by turning the volume control knob or using the buttons (12) on the remote control.
-
The FM antenna (27) is located on the back panel. If the reception is poor, try to move the antenna and find a spot in which the signal is strongest.
PLAYBACK OF MP3 FILES FROM USB/SD MEMORY
CAUTION: The device may not be compatible with all of the files due to coding differences. The device may not work with some USB/SD memories. The device supports 16 GB USB memories and SD cards.
-
Turn the player on using the POWER button (1). Place the USB or SD memory in the port (USB port - 6, SD port - 30)
-
Select the mode using the FUNCTION button (5)
-
The device will then begin playback of the first track.
-
You can pause and resume playback of the given track using the PLAY/PAUSE button (10).
-
You can playback the previous or next tracks using the BACK (11) and NEXT buttons (9). Pressing and holding these buttons during playback of a track will make it rewind or fast-forward.
-
During playback of a track press the REPEAT button (13) to activate repeat of track:
1 time - repeating of one track
2 times - repeating of all tracks on card
3 times - repeating of all tracks in concrete folder
4 times - cancelling of repeating
PLAYBACK OF AUDIO CDs OR MP3 Cds
CAUTION: The CD player can play audio CDs, CD-Rs, and CD-RWs. Some discs may not be played due to mechanical damage, quality of the media or the software used to create the disc. There is no 100% guarantee that all CDs will play.
-
Turn the player on using the button (1). Press the FUNCTION button (5).
-
Open the CD player drawer (18) by pressing the OP/CL button (15). Insert the disc label side up and close the drawer by pressing the OP/CL button (44,46).
-
The disc will play automatically. The display will show the playback indicator and the track number.
-
You can pause and resume playback of the given track using the PLAY/PAUSE button (10).
- You can playback the previous or next tracks using the BACK (11) and NEXT buttons (9). Pressing and holding these buttons during playback of a track will make it rewind or fast-forward.
- During playback of a track press the REPEAT button (13) once to activate repeat of one track. Pressing the REPEAT button (13) again will repeat the entire content of the CD.
USING A DEVICE CONNECTED THROUGH THE AUX IN UNIVERSAL ENTRY PORT:
- Connect the external device to the player by the AUX IN port (7).
- Switch the player to the AUX IN mode by pressing the FUNCTION button (5).
PROGRAMMING play songs
- Press the STOP (8) button. Press PROGRAM (16) button. PROGRAM icon appears.
- Select a track using the buttons BACK (11) and NEXT (9).
- Confirm your selection by pressing the PROGRAM button (16).
- Repeat the above steps to program next tracks. Up to 99 tracks - MP3, up to 20 tracks - CD.
- After selecting tracks to be programmed, you can press STOP (8) or PLAY (10). After pressing the STOP button programming will be canceled and the player returns to STOP mode. After pressing the PLAY button, the player starts playing the programmed tracks.
- To cancel you should: during playback, press the STOP button twice, open the CD tray or select a different mode.
CLEANING AND MAINTENANCE
- Disconnect the device from the mains power.
- The device may only be wiped with a dry cloth.
- The device should be kept in a dry room.
CAUTION: Do not use water for cleaning - this may damage the device.
TECHNICAL DATA
Power source: 230V \~50Hz
RMS power: 10W
Power: 18W
Device is made in class II of insulation.
Device is compliant with EU directives:
Low voltage directive (LVD)
Electromagnetic compatibility (EMC)
Device marked CE mark on rating label

To protect your environment: please separate carton boxes and plastic bags and dispose them in corresponding waste bins. Used appliance should be delivered to the dedicated collecting points due to hazarsous components, which may effect the environment. Electrical appliance must be returned in order to reduce its reuse and utilization. If the device contains batteries they should be delivered to dedicated points separately.
DEUTSCH
BESCHRIJVING VAN HET APPARAAT
- EMC (Electromagnetic Compatibility)
natural_image
Symbol of a trash bin crossed with a diagonal line, no text or numbers presentnatural_image
Black vintage radio with two dials and a textured grille (no visible text or symbols)Retro radio CR 1103

natural_image
Close-up of a small electric cooker with a lid and cooling fins (no visible text or symbols)Halogen oven CR 6305

natural_image
Abstract black ink brushstroke pattern on white background, no text or symbols presentElectronical bathroom scale CR 8118

Slow juicer
CR 4108

Ionic hair brush
CR 2017

natural_image
Black and silver handheld device with a small circular button on the side (no visible text or symbols)Hair clipper CR 2820

natural_image
Black handheld electric shaver with three buttons and a brand logo (no visible text or symbols on body)Shaver CR 2917

natural_image
Close-up of a white and black electric shaver with three circular buttons (no visible text or symbols)Shaver CR 2915

natural_image
White plastic medical device with a circular top and base (no text or symbols visible)Manicure set CR 2151

natural_image
Black and white photo of a small glass blender with lid and handle (no visible text or symbols)Citrus juicer CR 4001
natural_image
Exterior view of a black electric stove oven with control knobs and a tray (no visible text or symbols)Electric oven CR111

natural_image
Black and white photo of a blender with a handle and control knob (no visible text or symbols)Blender CR 4050
natural_image
Front view of a portable electric heater with grille and control panel (no visible text or symbols)Food dryer CR 6653

natural_image
Exterior view of a stainless steel oven with open glass door (no visible text or symbols)Mini-fridge CR 8062

natural_image
Black and white photo of a modern juice<|im_start|> Greenland filter with glass, apple, and pepper nearby (no text or symbols visible)Juice extractor CR 110

Steam mop
CR 7004

natural_image
Black rectangular electronic device with a central display and two side buttons (no visible text or symbols)Electronic kitchen scale CR 3149
camry
natural_image
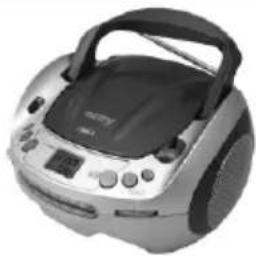
Black and white photo of a portable electronic device with control knobs and a display (no visible text or symbols)CD/MP3 player (boombox) CR 1123

text_image
10 14Auto-flip clock CR 1131

natural_image
White toaster with black control panel and side buttons (no visible text or symbols)Deep fryer CR 4907

natural_image
Medical pressure monitor with digital display and blood pressure monitor (no visible text or symbols)Arm blood pressure monitor CR 8409
natural_image
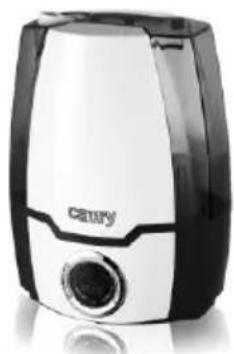
Exterior view of a modern kitchen appliance with black and white casing (no visible text or symbols)Air humidifier CR 7952

Hair clipper for pets
CR 2821

natural_image
White and black handheld device resembling a smart air purifier or blender (no visible text or symbols)Lint remover CR 9606

natural_image
Modern desk lamp with curved arm and circular top (no text or symbols visible)Portable illuminated mirror CR 2154

natural_image
White and black plastic kitchen blender with a handle (no visible text or symbols)Popcorn maker CR 4458

natural_image
Black and white electronic device labeled 'CCTY' with a V-shaped cutout (no readable text beyond branding)Air dehumidifier CR 7903

natural_image
Black and white photo of a blender with a glass handle and two smaller glasses (no visible text or symbols)Blender with grinding attachment CR 4058

natural_image
Exterior view of a stainless steel cooking pot with black handles and lid (no text or symbols visible)Pressure cooker CR 6726
natural_image
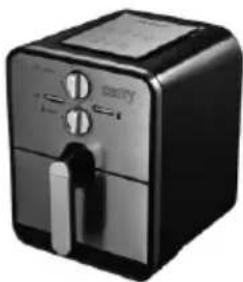
Black and silver photo of a modern air fryer with control buttons (no visible text or symbols)Air fryer CR 6306

natural_image
Exterior view of a silver rectangular refrigerator (no visible text or symbols)Aggregate refrigerator CR 8064

natural_image
Exterior view of a modern white and black industrial air purifier unit (no visible text or symbols)Air conditioner CR 7902
natural_image
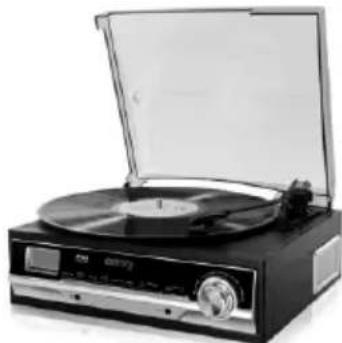
Black-and-white photo of a vintage gramophone with open lid and stand (no visible text or symbols)Turntable with radio CR 1113
camry

natural_image
Exterior view of a modern office building (no signage)Meat slicer CR 4702

natural_image
Electric iron with black handle and silver casing (no visible text or symbols)Steam travel iron
CR 5024

natural_image
Stack of folded fabric with a small medical device attached (no visible text or symbols)Electric blanket CR 7407

natural_image
Black and white photo of a pair of headphones with earbuds (no text or symbols visible)Headphones CR 1128

natural_image
White and black coffee kettle with polka dots, no visible text or symbolsElectric kettle CR 1243
natural_image
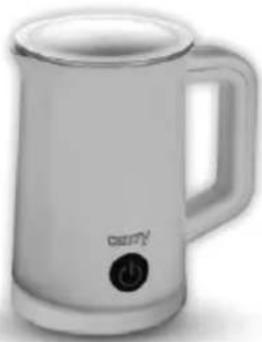
Exterior view of a modern white ceramic water heater with a handle and label 'carry!' (no additional text or symbols)Automatic milk frother CR 4464

natural_image
Grayscale photo of a small massage chair with a remote control unit (no text or symbols visible)Heating and massage shoe CR 7411

natural_image
Black hair dryer with a brush and cord, no visible text or symbolsHair dryer CR 2241
natural_image
White electronic device with circular control knob and buttons (no visible text or symbols)Cone maker CR 3028

natural_image
Black and silver rice cooker with digital display showing 'calgary' on front panel (no visible text or symbols beyond branding)Rice cooker CR 6407
natural_image
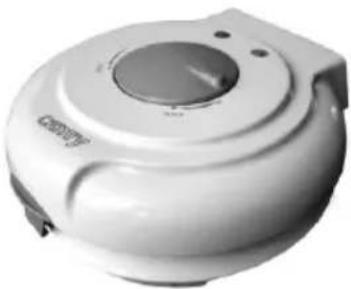
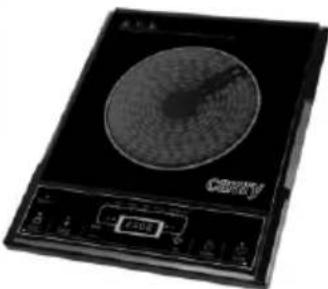
Black induction cooktop appliance with circular top and control buttons (no visible text or symbols)Ceramic cooker CR 6506
natural_image
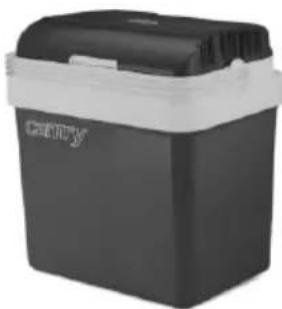
Black and white portable box with 'catnry' branding on front (no other text or symbols visible)Portable cooler CR 8065

natural_image
Exterior view of a modern kitchen washing machine (no visible text or symbols)Washing + spinning mashine CR 8052

natural_image
White standard 3D toaster with two shades and a handle (no visible text or symbols)Toaster CR 3209
natural_image
White industrial bread maker with control panel and circular vent (no visible text or symbols)Bread maker CR 6012
