
M6768U1 - Microwave DE DIETRICH - Free user manual and instructions
Find the device manual for free M6768U1 DE DIETRICH in PDF.


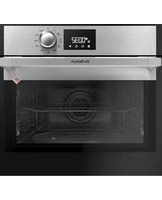
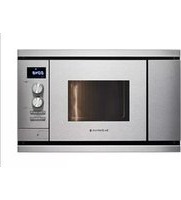
| Product Type | Built-in Microwave Oven |
| Brand | De Dietrich |
| Model | M6768U1 |
| Installation Type | Built-in |
| Dimensions (HxWxD) | 38.2 x 59.5 x 56.8 cm |
| Oven Capacity | 35 L |
| Microwave Power | 900 W |
| Grill Power | 1000 W |
| Power Supply | 230 V ~ 50 Hz |
| Weight | 19.5 kg |
| Functions | Microwave cooking, Grill, Combination, Defrost, Auto menu |
| Control Type | Touch control with digital display |
| Interior Material | Stainless steel |
| Door Opening | Drop-down door |
| Child Lock | Yes |
| Cleaning | Easy-clean enamel interior |
| Spare Parts Availability | Up to 10 years after purchase |
| Energy Efficiency Class | A |
| Turntable Diameter | 31.5 cm |
Frequently Asked Questions - M6768U1 DE DIETRICH
User questions about M6768U1 DE DIETRICH
0 question about this device. Answer the ones you know or ask your own.
Ask a new question about this device
Download the instructions for your Microwave in PDF format for free! Find your manual M6768U1 - DE DIETRICH and take your electronic device back in hand. On this page are published all the documents necessary for the use of your device. M6768U1 by DE DIETRICH.
USER MANUAL M6768U1 DE DIETRICH
Operating instructions
Microwave oven combination cooking

natural_image
Illustration of a microwave oven with control panel and buttons (no text or symbols)M 6768 U1
De Dietrich

Ref. 9961 5991 · 03/00
TROUBLESHOOTING GUIDE
| Problem | Suggestion |
| The time counts down, but the appliance does not function (the turntable does not rotate, the light does not come on and the food is not heated). | Press the TURNTABLE OFF key for 5 seconds. |
| The microwave oven is noisy when operating. | Adjust: the height by turning the left foot. Clean the wheels and the well area beneath the turntable. |
| Condensation forms on the door glass. | Clean the vents under the appliance |
| The grill element smokes at the beginning of a grill programme. | Clean all cooking residue from the grill element. |
| The turntable does not revolve correctly. | Clean the wheels and the well beneath the turntable. |
| The microwave programmes do not produce the desired results. | Clean the vents under the appliance. Make sure that you use only containers which are suitable for microwave cooking. |
| The appliance produces sparks. | Check whether the wheel support is correctly positioned. Thoroughly clean the appliance remove any greasy deposits, cooking residue, etc... Move any metal objects away from the oven walls Never use metallic containers with the rack |
INSTALLATION
BEFORE CONNECTION
- Check whether your oven has suffered any damage during transport (deformed door or door seal, etc.). If you see any signs of damage, contact your dealer before use.
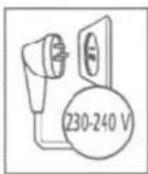
- Verify the power voltage. If there is a PERMANENT undervoltage (200-210 volts), consult your electrical installar:
ELECTRICAL CONNECTION
- Your installation must be protected by a 13 Amp thermal fuse.
- It is mandatory to use a power point with a ground terminal connected in accordance with current safety regulations.
- In your electrical installation, provide a device that is accessible to the installer, capable of separating the appliance from the mains power and whose contact opening is at least 3 mm at all of the pcles.
- Never operate the oven if the supply cord and/or its plug are damaged. In case of damage, call in a specialised technician trained by the manufacturer.
INSTALLATION
- For full details, please refer to the installation instructions included with your microwave oven

RECOMMENDATIONS
- You may change the programme length at any time.
- You may stop or start the turntable revolving during a programme by pressing the TURNTABLE STOP key
• To change a programme, press the C/STOP key twice and programme again. - If you open the door before the end of the programme, shut the door and press the START key to continue the programme
- When using the defrost function a beep indicates the midpoint of the programme (the oven continues to operate); to obtain the best results, turn the food at this time, close the door and press the START key to continue the second half of the programme.
- If you remove a dish before the end of the programme, press the C/STOP key twice to erase the programme.
REMARKS:
- If you wait longer than 3 minutes to press the START key after having entered a programme, it will be canceled (the clocktime will be displayed).
IMPORTANT INSTRUCTIONS
- Your appliance is designed exclusively for the domestic purposes of defrosting, heating or cooking foods. The manufacturer bears no responsibility in the case of improper usage.
- To avoid deterioration of your microwave oven, never operate it empty or with the taintable removed.
- Never tamper with the lock mechanism of your microwave oven; this could cause damage requiring repair by an authorised technician.
- Before use, make sure that the containers are appropriate for microwave usage (e.g. heat resistant glass, porcelain, etc.).
- It is not advisable to use metal recipients, forks, spoons, knives, metal ties or staples for deep-freeze bags
• For baby food and children's food, it is essential - to remove the teat before heating up baby bottles, shake the contents and test the temperature on the back of your hand before feeding.
- to stir and verify the temperature of children's foods before serving to avoid causing serious internal burns.
- WARNING Do not allow children to use the microwave even without supervision until they have been thoroughly instructed in the proper use and the dangers of improper operation.
- It is advisable to cover food in moist cases. It will be tastier and your oven will stay cleaner. However, be sure to remove the cap or lid before cooking foods or heating liquids in a sealed bottle or container, which could otherwise explode.
- The heating or cooling of boiled, coddled eggs or 'ried eggs by microwave is prohibited. They can burst and cause serious burns or irreparable damage to your oven
- When heating liquids, the boiling point may be reached without the typical bubbles appearing on the surface. To prevent them from boiling over and causing burns due to sudden spurting of the liquid, wait 20 seconds before removing the containers from the appliance or adding anything to the liquids.
- For small amounts (one sausage, a single croissant, etc.), place a glass of water alongside the food item.
- Time settings that are too long may dry out and burn the food. To avoid such incidents, never use the same cooking times as those recommended for traditional ovens.
- Be sure to watch rinsely when heating or cooking foods in disposable plastic or paper containers or any other combustible material, due to fire hazard.
- If smoke appears, keep the oven door closed and disconnect the oven or turn it off
LINKED PROGRAMMES
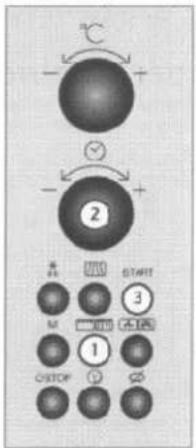
You may link 2 different programmes, combining any of the available functions: defrost / microwave / grill / microwave + grill / fan / fan + microwave.
Example : Using linked programming to defrost ten minutes followed by simmer level microwave + medium grill programme for 20 minutes
① Proceed as if setting only a delrost programme
press the defrost key set the programme time (ex. 10 min).

is displayed
② instead of pressing START programme the next operation - pres the microwave + grill key five times for microwave + medium grill

is displayed
③ Set the microwave level, ex. (swat)

is displayed.
set the programme length [ex. 20 min], adding it to the defrost time
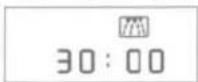
is displayed
④ Press START.

is displayed.
The linked microwave + grill programme will automatically begin at the end of the defeat programme

CONTROL PANEL
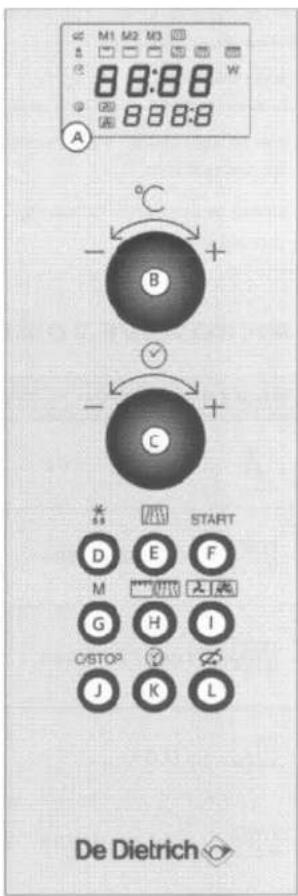
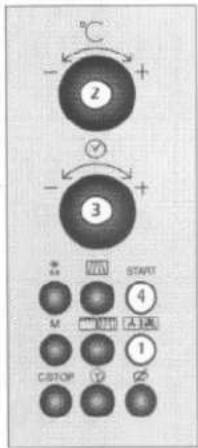
A Display window :
to simplify programming, the display indicates: the time of day, the programme length, the functions, or temperature programmed.
B

Temperature selector knob
- “+ to set the temperature for the fan functions.
C Time selector knob
to set the clock, the programme length or the end-time of the programme.
D DEFROST key
to defrost all frozen food.
E MICROWAVE key
to select the desired microwave power level.
F START key :
to start all programmes.
G MEMORY key M
for rapid access to 3 preprogrammed operations.
H GRILL
/GRILL + MICROWAVE 📋
key
to select the desired level of grill or microwave + grill functions.
I FAN
/ FAN + MICROWAVE
key :
to cook as if with a traditional oven or combined with microwave power for speedy results.
J CLEAR/STOP key C/STOP
to interrupt (press once) or cancel a pro- gramme (press twice).
K CLOCK key
to set the clock or preprogramme START.
L STOP-TURNTABLE key
to stop the turntable from revolving
PROGRAMMING THE FAN + MICROWAVE FUNCTION
Remember to set your ovenware on the rack in the low position.
Example: cooking with fan + 500W microwave power for twenty minutes.
① Press the FAN key 📄 twice to select the fan + microwave function.

the temperature corresponding in the position of the selector knob and 150W are displayed
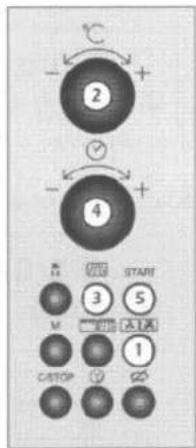
② Set the desired temperature, ex. 250°, with selector knob

is displayed.
② The microwave power levels 150-300-500 may be associated with the fan function.
Set the desired level with the microwave key ex. press once for LOW COOK 300W

is displayed.
Note to combine 150W with the fan function proceed directly to step 3 when 150W is displayed
④ Set the programme time with selector knob _ + , ex. twenty minutes
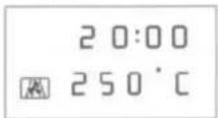
is displayed
⑤ Press START
The programme begins: the turntable revolves, the oven light comes on, the timer counts down.
Two tones announce that the selected temperature (ex. 250°) has been reached
At the end of the cooktime, remember to use an oven mitt to remove the dish.
THE DISPLAY & THE SELECTOR KNOB


The display and the selector knobs guide you in your choice of :
turntable option :

STOP TURNTABLE
memorized programme settings
M1 M2 M3
functions :
Microwave power levels

DEFROST

LOW COOK / SIMMER / COOK / HIGH COOK
Grill levels

LOW GRILL

MEDIUM GRILL

HIGH GRILL
Microwave + grill levels

LOW GRILL

MEDIUM GRILL
+MICROWAVE

HIGH GRILL
+MICROWAVE
Fan functions

FAN

FAN
+MICROWAVE
the programme length, clock or preprogrammed start time

12:00
the temperature

200°C
THE FAN FUNCTIONS
2 convection cooking functions are available :
the fan function
- to cook and brown food just as in a traditional convection oven
the fan + microwave function
- to combine microwave power with fan cooling, for considerable time savings.
Pointers
• The cooking temperature may be set from 50° - 250°C
• Cooking time may be set from 0 - 90 minutes.
- You may modify the cooktime at any point during the programme.
- It is always preferable to set a minimal cooktime and extend it necessary; check the browning of your dishes to avoid overcooking.
- Remember to always place your dishes on the rack in the low position when using the fan function 📁 or fan + microwave function 📄. This will ensure even heat distribution thereby providing optimal cooking results. Never use metal dishes when cooking with the fan + microwave function.
■Use only heat-resistant ovenware.
•The glass pie dish : it may be used for all pastries, quiches, pizzas, or as a roasting pan. You may also place it under the rack when grilling in order to catch drippings.
- When cooking with the fan + microwave function 📄, do not use any metallic dishes.
■Always use an oven mitt to remove your dish as it may become quite hot.
- If you wish to defrost frozen food after using one of the fan functions, for better results, first let the microwave oven cool down for about ten minutes.

the low rack
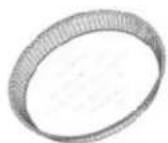
the glass pie dish
PROGRAMMING A MICROWAVE PROGRAMME
4 microwave power levels are available : (300 - 500 - 700 - 900 W). Example : Use the microwave key to set a microwave programme at the HIGH COOK power level (900 W).
① Press the MICROWAVE key

is displayed.
Press the key 3 times to select power level 900 W.

is displayed.
② Set the programme time with the selector knob, ex. five minutes

is displayed.
Press START
The programme begins the turntable revolves, the oven light comes on; the timer counts down.
DEFROSTING
Example: Use the defrost key to set a microwave programme at the defrost power level (150 W).
① Press the DEFROST key ✱.

is displayed
② Set the programme time with the selector knob, ex. ten minutes
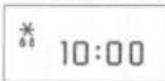
is displayed.
③ Press START
The programme begins: the turnable revolves, the oven light comes on, the timer counts down.


THE GRILL FUNCTION
This function enables you to grill meat and brown dishes such as grains. It may be used before or after cooking, as called for in the recipe.
• The grill folds down for easy cleaning.
1 - Horizontal position : for cooling au gratin, or grilling food laid flat.
2 - Folded-down position: solely for cleaning the oven. Always allow the grill to cool off 25 minutes before touching it.

- After grilling make sure to use an oven mitt to handle dishes, and remember to use only ovenproof cookware such as ceramic dishes or heat resistant glats.
- WARNING: Do not allow children to approach the microwave oven during use of the grill as certain exposed parts may become hot.
- Three grill levels are available LOW GRILL ☐ press the GRILL key once, MEDIUM GRILL ☐ (press the GRILL key twice), and HIGH GRILL ☐ press the GRILL key 3 times.
As a general rule, use the HIGH GRILL level for the grill function, for example to grill meat and fish. The HIGH, MEDIUM & LOW GRILL levels are used with the combined microwave + grill function.
PROGRAMMING THE GRILL FUNCTION
Example : Use the grill key to set a programme using the HIGH GRILL level.
① Pres the GRILL / MICROWAVE + GRILL key 3 times.

is displayed
② Set the programme time with the selector knob, ex. ten minutes
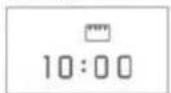
is displayed.
③ Press START.
The programme begins: the turntable revolves, the oven light comes on, the timer counts down.
THE MICROWAVE + GRILL FUNCTIONS

This function enables you to use the microwaves and grill simultaneously, for rapid cooking.
- You may combine each of the 3 grill levels (LOW-MEDIUM-HIGH) with any of the 5 microwave power settings (150-300-500-700-900 W), allowing you to tailor a programme to your specific cocking needs.
Sample programmes to obtain best results :
- beef & lamb : high grill + 150W microwave level
- turkey / pork / veal : high grill + 300W
- poultry: high grill + 500W
- fish : medium grill + 500W
- potatoes au gratin : medium grill + 900W
- lasagna : low grill + 900W
PROGRAMMING THE MICROWAVE + GRILL FUNCTION
Example: use the grill key & the microwave key to set a microwave + grill programme using the MEDIUM GRILL level + LOW COOK microwave power setting.
① Press the GRILL/MICROWAVE + GRILL key 5 times.

is displayed.
② Set the microwave power level with the microwave key ex. press once for LOW COOK, 300W :

is displayed.
③ Set the programme time with the selector knob, ex. ten minutes.
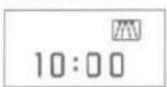
is displayed.
④ Press START.
The programme begins: the turntable revolves, the oven light comes on, the timer counts down.

PROGRAMMING YOUR MICROWAVE OVEN
Your microwave oven is now plugged in and the clock is set.
Oper the door using the handle. Set the dish inside, close the door. If the door is nor properly shut, the appliance will not operate.
The keys pictured are used for the various programmes :

- 3 beeps announce the end of a programme. The beeps are repeated every minute for 10 minutes until you open the door.
- If the dish is too large to turn freely inside the oven, press the STOP TURNTABLE key before or during the programme. If you do stop the turntable, remember to turn the platter and/or stir the contents to ensure even cooking results
- If there is an error in the programming, press the CLEAR/STOP key twice.
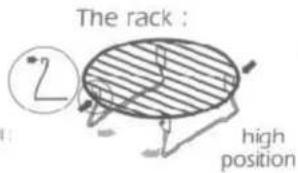
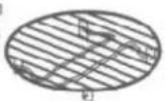
THE FOLDING RACK
To fold down the rack
Push in on the hooked ends and fold the bars in towards the center:
with the grill or grill + microwave functions
choose the rack level according to the dish you wish to grill
-high position to brown shallow dishes, such as pies
- low position as required for other dishes, ex. roats.
with the fan or fan + microwave functions
always set your dishes on the rack folded down to the low position.
Make sure that the rack is well centered on the turnable.
Never set any metal dish on the rack when using the microwave. grill + microwave or fan + microwave functions.
Nevertheless you may heat up food in an aluminium tray provided you place a plate between the tray and the rack.
low
position
(folded)
PROGRAMMING THE FAN FUNCTION

Remember to set your ovenware on the rack in the low position.
Example : baking at 250°C for forty minutes.
① Press the FAN / FAN + MICROWAVE key

the temperature corresponding to the position of the selector knob is displayed.

② Set the desired temperature, ex. 250°, with selector knob
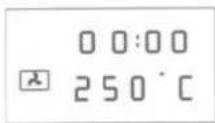
is displayed

③ Set the programme time, ex. 40 min, with selector knob

is displayed
④ Press START
The programme begins: the turntable revolves, the oven light comes on, the timer counts down.
Two tones announce that the selected temperature (ex. 250°C) has been reached.
At the end of the cooking time, remember to use an oven mitt to remove the dish.
SETTING THE CLOCK
After first plugging in your microwave oven or after a power outage, the clock 🔒 appears in the display and 00:00 flashes, inviting you to set the time.

To set the clock :
- Press the CLOCK key 📋 for 5 seconds.
- Turn the time selector knob ⬤ to the correct time (ex. twelve o'clock).
- Validate by pressing the CLOCK key
Your clock is set.

MICROWAVE POWER SETTINGS
| POWER SETTING | APPLICATION | |
| DEFROST 150 | To defrost all frozen food or to top off cooking of delicate dishes or to cook very slowly. | |
| LOW COOK 300 | To finish programmes begun with the HIGH COOK power setting for instance beans or lentils or to cook turkey, pork or veal. | |
| SIMMER 500 | To cook fish and poultry, to cook milk-based dishes, or to finish programmes begun with the HIGH COOK power setting. | |
| COOK 700 | To cook fresh vegetables. | |
| HIGH COOK 900 | To heat up all liquids and all fresh or frozen pre-cooked dishes. | |
MEMORY KEY M
The Memory key allows you to store 3 frequently used programmes which you can then access simply by pressing M. You may memorize any programme you wish:
Example : Use the Memory key to preprogramme heating up a plate of food. Proceed as if setting the programme for immediate use :
① Press the MICROWAVE key 4 times

is displayed.
② Set the programme time with the selector knob, ex. 2 minutes
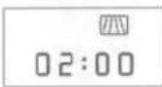
is displayed.
③ instead of START press the MEMORY key M: after several seconds you will hear a tone confirming that the personalized programme has been memorized as M1.
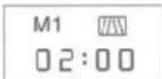
is displayed.

You may memorize two more programmes by pressing the Memory key 2 / 3 times, for programmes M2, M3
To call up the programme, press the Memory key, once for M1, twice for M2, three times for M3; the preprogrammed information is displayed.
Press START, the memorized programme begins
GENERAL DESCRIPTION
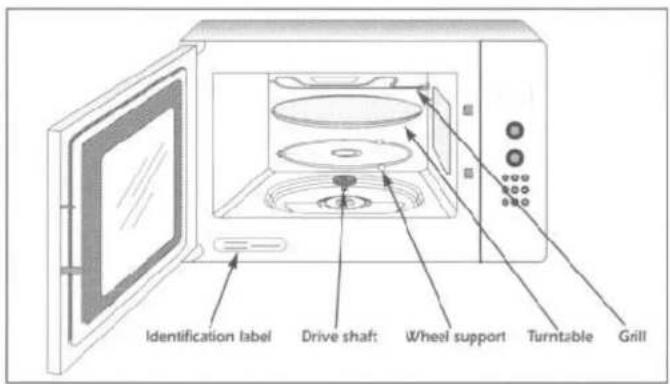
• THE TURNTABLE :
ensures equal cooking of food throughout with no need to stir or turn the dish.
- It may be used as a cooking platter.
- Rotation is controlled by the drive shaft and the wheel support.
- The turntable revolves in both directions.
- If it does not turn, verify that all components are properly positioned.
- For easy removal, wells are provided on either side.
- The turntable may be stopped (STOP TURNTABLE key ☑) in order to use platters which require the entire surface of the oven floor.
• THE WHEEL SUPPORT :
Do not try to rotate the roller ring manually, as this could damage the drive system. If it does not turn smoothly, make sure that there is nothing in the well beneath the turntable.
PREPROGRAMMING START
Before programming, check that the clock is set to the correct time. Example : 16:00
① Proceed to if setting the desired programme for immediate use. Select your function and programme length (ex. fan air 45 minutes).

is displayed.
② Instead of START, press the CLOCK key
The programme length is automatically added to the clocktime and this hour flashes in the display together with the clock symbol and the selected function.

is displayed.
③ Set the hour at which you wish the programme to finish with the time selector knob, ok, you would like the dish to be ready at 20:00.

is displayed, 20:00 flashes
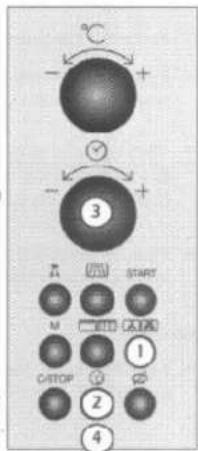
④ Press the clock key 📋 again. The clock symbol and the preprogrammed end of the cooking time are displayed.
You may preprogramme START with whichever functions you like: you may even preprogramme the start of 2 linked programmes.
A minimum programme length of 1 minute is required to preprogramme START
It is not possible to preprogramme the start of a defrost programme.
HOW MICROWAVES WORK
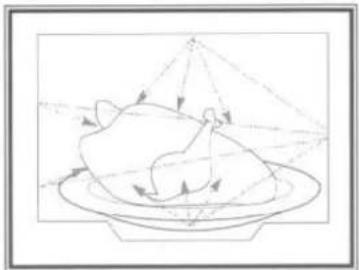
The microwaves used for cooking are electro-magnetic waves. They exist in our environment as do radioelectric waves, light, and infrared rays.
Their frequency is 2,450 MHz.
natural_image
Line drawing of a roasted chicken on a plate with arrows indicating motion or direction (no text or symbols)Their characteristics :
→ They are reflected by metals.
→ They pass through all other materials.
→ They are absorbed by water, sugar and fat molecules
When food is exposed to microwaves there follows a vibration of the molecules at a speed of 2 billion 450 million times a second, which in turn produces heat.
The depth of penetration of the waves into food is about 2.5 cm. If the 'food is thicker' the centre is cooked by normal conduction of heat. It is worth noting that the microwaves produce a simple heat reaction inside food and are not at all harmful to your health.
CARE & CLEANING
- Regular maintenance of your oven will keep it in sound operating condition. To prevent heavy soiling, it is preferable to cover recipients whenever possible.
- Make sure the work surface on which the microwave oven sits is always kept clean as surrounding dirt or dust could enter and damage your appliance.
- Clean with a damp, soapy sponge both on the inside and outside, with special attention to the door seal and front of the cavity which must be kept clean at all times. If these surfaces are damaged because of excessive soiling, call in a specialised technician before using your microwave oven.
- In the event of unsavory odors or caked-on dirt, boil water containing lemon juice or vinegar in a cup for 2 minutes and clean the walls with a little dishwashing liquid.
- For those overs with grill or convection heat functions, the top and rear air vents become very hot. Do not touch these parts after use; wait till the appliance has cooled down in order to clean it. Use a fine steel wool pad on the metal parts.
- The turntable can be removed for cleaning. Wells are provided on both sides for easy access. If you remove the drive shaft, do not allow water to enter the motor shaft hole.
Be sure to put the turntable, the crive shaft and the wheel support back in their proper place
- Do not use abrasives, alcohol or solvents as they are liable to damage the oven.

CONTENTS
Installation 3
How microwaves work 4
Important instructions 5
General description 6
Control panel 7
Setting the clock / Microwave power settings 8
The display & the selector knob . . . . . . . . . . . . . . . . . . . . . . . . . . . . . . . . . . . . . . . . . . . . . . . 9
Programming your microwave / The folding rack .....10
Programming a microwave programme / Defrosting ...11
The grill function / Programming the grill function ....12
The microwave + grill function / Programming
the microwave + grill function .....13
Preprogramming START 19
Recommendations 20
Care & cleaning 21
Troubleshooting guide 22
After-sales service 23
Please read this user manual carefully. It contains important instructions concerning installation, use and security measures.
AFTER-SALES SERVICE
- If the equipment has sustained any damage
- Check that the door is not deformed.
- If the oven does not operate, before calling the repairman
- Check the electrical supply.
- Check that the door is properly closed.
- Check you' programming.
CAUTION: never attempt to repair your oven yourself.
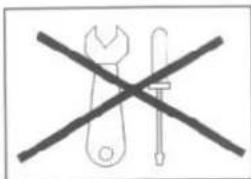
WARNING: it is dangerous for anyone other than qualified personnel to make any repairs requiring removal of the cover providing protection from exposure to microwave energy.
Only a specially trained technician is qualified to repair your microwave oven.
You may contact the after-sales service at :
BRANDT UK LTD.
INTEC FOUR
Wade Rd.
Basingstoke
Hants RG24 OPL
Tel.: 08706 001301
Fax:01256346877
TECHNICAL DATA
Power supply : 230 - 240 V
Microwave power consumption : 3050W
Microwave output power: 900W
Fuse : 13A
Dimensions (w x h x d) . 592 x 460 x 507 mm
Interior volume : 30 L
Weight: 32.5 kg

- INSTALLATION
- BEFORE CONNECTION
- ELECTRICAL CONNECTION
- RECOMMENDATIONS
- REMARKS:
- IMPORTANT INSTRUCTIONS
- LINKED PROGRAMMES
- CONTROL PANEL
- PROGRAMMING THE FAN + MICROWAVE FUNCTION
- THE DISPLAY & THE SELECTOR KNOB
- THE FAN FUNCTIONS
- convection cooking functions are available :
- the fan function
- the fan + microwave function
- Pointers
- PROGRAMMING A MICROWAVE PROGRAMME
- DEFROSTING
- THE GRILL FUNCTION
- PROGRAMMING THE GRILL FUNCTION
- THE MICROWAVE + GRILL FUNCTIONS
- PROGRAMMING THE MICROWAVE + GRILL FUNCTION
- PROGRAMMING YOUR MICROWAVE OVEN
- THE FOLDING RACK
- PROGRAMMING THE FAN FUNCTION
- SETTING THE CLOCK
- To set the clock :
- MEMORY KEY M
- GENERAL DESCRIPTION
- • THE TURNTABLE :
- • THE WHEEL SUPPORT :
- PREPROGRAMMING START
- HOW MICROWAVES WORK
- Their characteristics :
- CARE & CLEANING
- CONTENTS
- AFTER-SALES SERVICE
Brand : DE DIETRICH
Model : M6768U1
Category : Microwave