
PRG300CM-3 - Sports Watch CASIO - Free user manual and instructions
Find the device manual for free PRG300CM-3 CASIO in PDF.


| Product Type | Sports Watch |
| Power Supply | Solar panel and rechargeable battery |
| Battery Operating Time | Approximately 8 months from full charge to Level 4 under typical use (1.5 sec illumination/day, 10 sec beeper/day, 20 direction readings/month, 1 hour altitude readings/month, 24 hours barometric pressure change indicator/month, barometric pressure graph every 2 hours, display 18 hours/day) |
| Accuracy | ±15 seconds per month at normal temperature |
| Timekeeping | Hour, minutes, seconds, p.m. (P), year, month, day, day of the week; 12-hour/24-hour format; Full auto-calendar from 2000 to 2099 |
| Digital Compass | 60 seconds continuous reading; 16 directions; Angle value 0° to 359°; Four direction pointers; Bidirectional calibration; Magnetic declination correction; Bearing Memory |
| Barometer | Measurement range: 260 to 1,100 hPa (7.65 to 32.45 inHg); Display unit: 1 hPa (0.05 inHg); Reading every 2 hours automatically; Barometric pressure graph; Barometric pressure differential pointer; Barometric pressure change indicator; Calibration |
| Thermometer | Measurement range: -10.0 to 60.0°C (14.0 to 140.0°F); Display unit: 0.1°C (0.2°F); Reading every 5 seconds in Barometer/Thermometer Mode; Calibration |
| Altimeter | Measurement range: -700 to 10,000 m (-2,300 to 32,800 ft) without reference altitude; Display unit: 1 m (5 ft); Auto reading intervals: every second for first 3 minutes then every 5 seconds for ~1 hour, or every second for first 3 minutes then every 2 minutes for ~12 hours; Reference altitude setting; Altitude differential; Manually saved records (30), auto save values, trek log data (14 treks) |
| Stopwatch | Measuring unit: 1/10 second; Capacity: 999:59'59.9"; Accuracy: ±0.0006%; Modes: elapsed time, split time, two finishes |
| Countdown Timer | Measuring unit: 1 second; Countdown range: 24 hours; Setting unit: 1 minute |
| Alarms | 5 daily alarms (four one-time, one snooze); Hourly time signal |
| World Time | 48 cities (31 time zones); Daylight Saving Time/Standard Time |
| Illumination | LED light; Selectable duration (approx. 1.5 seconds or 3 seconds); Auto Light Switch (Full Auto Light operates only in the dark) |
| Other Functions | Battery power indicator; Power Saving; Low-temperature resistance (-10°C/14°F); Button operation tone on/off; Sunrise/Sunset time display |
| Sensor Precision | Direction: within ±10°; Barometric pressure: within ±3 hPa; Temperature: ±2°C; Altimeter: within ±75 m (246 ft) based on pressure accuracy |
Frequently Asked Questions - PRG300CM-3 CASIO
User questions about PRG300CM-3 CASIO
0 question about this device. Answer the ones you know or ask your own.
Ask a new question about this device
Download the instructions for your Sports Watch in PDF format for free! Find your manual PRG300CM-3 - CASIO and take your electronic device back in hand. On this page are published all the documents necessary for the use of your device. PRG300CM-3 by CASIO.
USER MANUAL PRG300CM-3 CASIO
Operation Guide 3443
CASIO®
Congratulations upon your selection of this CASIO watch.
Applications
The built-in sensors of this watch measure direction, barometric pressure, temperature and altitude. Measured values are then shown on the display. Such features make this watch useful when hiking, mountain climbing, or when engaging in other such outdoor activities.
Warning!
- The measurement functions built into this watch are not intended for taking measurements that require professional or industrial precision. Values produced by this watch should be considered as reasonable representations only.
- When engaging in mountain climbing or other activities in which losing your way can create a dangerous or life-threatening situation, always use a second compass to confirm direction readings.
• Note that CASIO COMPUTER CO., LTD. assumes no responsibility for any damage or loss suffered by you or any third party arising through the use of this product or its malfunction
ENGLISH
Important!
- Your watch's Altimeter Mode calculates relative altitude based on changes in barometric pressure measurement by its pressure sensor. For more information, see pages E-51 and E-65.
- Immediately before embarking or otherwise taking altitude readings, be sure to specify a reference altitude. If you don't the readings produced by the watch probably will not be very accurate. For more information, see "To specify a reference altitude value" (page E-56).
- To ensure correct direction readings by this watch, be sure to perform bidirectional calibration before using it. The watch may produce incorrect direction readings if you do not perform bidirectional calibration. For more information, see "To perform bidirectional calibration" (page E-30).
E E-1
About This Manual
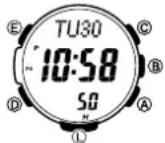
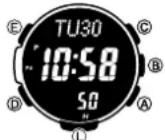
- Depending on the model of your watch, digital display text appears either as dark fi gures on a light background, or light fi gures on a dark background. All examples in this manual are shown using dark fi gures on a light background.
- Button operations are indicated using the letters shown in the illustration.
- Note that the product illustrations in this manual are intended for reference only, and so the actual product may appear somewhat different than depicted by an illustration.
Things to check before using the watch
1. Check the battery power level.
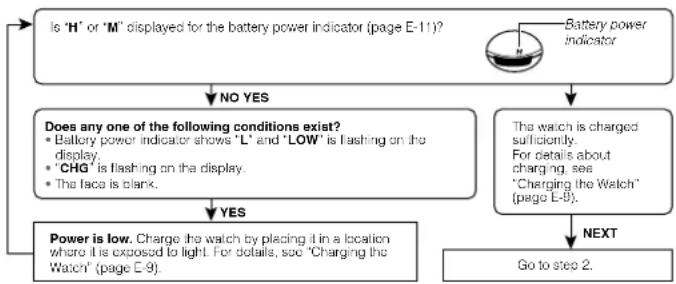
flowchart
graph TD
    A["Is 'H' or 'M' displayed for the battery power indicator (page E-11)?"] --> B{Does any one of the following conditions exist?}
    B -->|NO YES| C["Battery power indicator"]
    B -->|YES| D["Power is low. Charge the watch by placing it in a location where it is exposed to light. For details, see 'Charging the Watch' (page E-9)."]
    C --> E["The watch is charged sufficiently. For details about charging, see 'Charging the Watch' (page E-8)."]
    D --> F["Go to step 2."]
E-2
E-3
2. Check the Home City and the daylight saving time (DST) setting.
Use the procedure under "To confi gure Home City and summer time settings" (page E-20) to confi gure your Home City and daylight saving time settings.
Important!
- World Time Mode and Sunrise/Sunset Mode data depend on correct Home City, time, and date settings in the Timekeeping Mode. Make sure you configure these settings correctly.
3. Set the current time.
See "Configuring Current Time and Date Settings" (page E-22).
The watch is now ready for use.
E-4
Contents
About This Manual E-2
Things to check before using the watch E-3
Charging the Watch ....E-9 To recover from the sleep state ....E-14
Mode Reference Guide ...... E-15
Timekeeping E-19
Confi guring Home City Settings E-20
To confi gure Home City and summer time settings E-20
Confl guring Current Time and Date Settings E-22 To change the current time and date settings E-22
Taking Direction Readings ....E-25 To take a direction reading ....E-26 To perform bidirectional calibration ....E-30 To perform magnetic declination correction ....E-31 To store a direction angle reading in Bearing Memory ....E-32 To set a map and fi nd your current location ....E-34 To fi nd the bearing to an objective ....E-35 To determine the direction angle to an objective on a map and head in that direction (Bearing Memory)....E-36
E-5
Specifying Temperature, Barometric Pressure, and Altitude Display Units E-40 To specify temperature, barometric pressure, and altitude display units E-40
Taking Barometric Pressure and Temperature Readings ....E-42 To take barometric pressure and temperature readings ....E-42 To enable or disable the barometric pressure change alert ....E-47 To calibrate the pressure sensor and the temperature sensor ....E-49
Using the Altimeter Mode E-51 To select the altitude screen format E-52 To select the altitude auto reading interval E-53 To take altitude readings E-55 To specify a reference altitude value E-56 To specify the altitude differential start point E-57 To use the altitude differential value E-58 To save a reading manually E-59 To start trek log value updating E-62 To stop trek log value updating E-62
Precautions Concerning Simultaneous Altitude and Temperature Readings ...... E-67
Viewing Altitude Records E-68 To view altitude records E-68 To delete all manually saved data E-73 To delete data in a specific memory area E-73
Looking up Sunrise and Sunset Times....E-75 To enter the Sunrise/Sunset Mode....E-75 To view the sunrise/sunset time for a particular date....E-76 To look up the sunrise and sunset times for a specific location....E-77
Using the Stopwatch....E-79 To enter the Stopwatch Mode....E-79 To perform an elapsed time operation....E-79 To pause at a split time....E-79 To measure two fillishes....E-80
Using the Countdown Timer ....E-81 To enter the Countdown Timer Mode ....E-81 To specify the countdown start time ....E-81 To perform a countdown timer operation ....E-82 To stop the alarm ....E-82
Using the Alarm ....E-83 To enter the Alarm Mode ....E-83 To set an alarm time ....E-84 To turn an alarm and the Hourly Time Signal on and off....E-85 To stop the alarm ....E-86
E-7
Operation Guide 3443
CASIO®
Checking the Current Time in a Different Time Zone E-87
To enter the World Time Mode E-87
To view the time in another time zone E-87
To specify standard time or daylight saving time (DST) for a city E-88
Illumination E-89
To turn on illumination manually E-89
To change the illumination duration E-89
To turn the auto light switch on and off E-91
Other Settings E-93
To turn the button operation tone on and off E-93
To turn Power Saving on or off E-94
Troubleshooting E-95
Specifi cations E-99
EB
Charging the Watch
The face of the watch is a solar panel that generates power from light. The generated power charges a built-in rechargeable battery, which powers watch operations. The watch charges whenever it is exposed to light.
Charging Guide

Whenever you are not wearing the watch, leave it in a location where it is exposed to light. - Best charging performance is achieved by exposing the watch to the strongest light available.
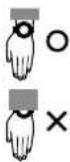
When wearing the watch, make sure that its face is not blocked from light by the sleeve of your clothing. * The watch may enter a sleep state (page E-13) if its face is blocked by your sleeve even only partially.
Warning!
Leaving the watch in bright light for charging can cause it to become quite hot. Take care when handling the watch to avoid burn injury. The watch can become particularly hot when exposed to the following conditions for long periods.
- On the dashboard of a car parked in direct sunlight
• Too close to an incandescent lamp
• Under direct sunlight
E-9
Important!
- Allowing the watch to become very hot can cause its liquid crystal display to black out. The
appearance of the LCD should become normal again when the watch returns to a lower temperature. - Turn on the watch's Power Saving function (page E-13) and keep it in an area normally exposed to bright light when storing it for long periods. This helps to ensure that power does not run down
- Storing the watch for long periods in an area where there is no light or wearing it in such a way that it is blocked from exposure to light can cause power to run down. Expose the watch to bright light whenever possible.
E-10
Power Levels
You can get an idea of the watch's power level by observing the battery power indicator on the display.
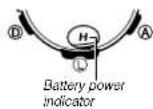
| Level Battery Power Indicator Function Status | ||
| 1(H) | All functions enabled. | |
| 2(M) | All functions enabled. | |
| 3(L) | Illumination, beeper, and sensor operation disabled. | |
| 4(CHG) | Except for the current time and the CHG (charge) indicator, all functions and display indicators disabled. | |
| 5-- | All functions disabled | |
- The I ashingLOW indicator at Level 3 (L) tells you that battery power is very low, and that exposure to bright light for charging is required as soon as possible.
- At Level 5, all functions are disabled and settings return to their initial factory defaults. Once the battery reaches Level 2 (M) after falling to Level 5, reconfi gure the current time, date, and other settings.
E-11
- Display indicators reappear as soon as the battery is charged from Level 5 to Level 2 (M).
- Leaving the watch exposed to direct sunlight or some other very strong light source can cause the battery power indicator to show a reading temporarily that is higher than the actual battery level. The correct battery level should be indicated after a few minutes.
- All data stored in memory is deleted, and the current time and all other settings return to their initial factory defaults whenever battery power drops to Level 5 and when you have the battery replaced.
Power Recovery Mode
- Performing multiple sensor, illumination, or beoper operations during a short period may cause all of the battery power indicators (H, M and L) to start flashing on the display. This indicates that the watch is in the power recovery mode. Illumination, alarm, countown timer alarm, hourly time signal, and sensor operations will be disabled until battery power recovers.
- Battery power will recover in about 15 minutes. At this time, the battery power indicators (H, M L) will stop fl ashing. This indicates that the functions listed above are enabled again.
- If all of the battery power indicators (H, M, L) are flashing and theCHG (charge) indicator also is
If ashing, it means the battery level is very low. Expose the watch to bright light as soon as possible. - Even if battery power is at Level 1 (H) or Level 2 (M), the Digital Compass Mode, Barometer/Thermometer Mode, or Altimeter Mode sensor may be disabled if there is not enough voltage available to power it sufficiently. This is indicated when all of the battery power indicators (H, M, L) are ill ashing.
- Frequent flashing of all of the battery power indicators (H, M, L) probably means that remaining battery power is low. Leave the watch in bright light to allow it to charge.
E-12
Charging Times
| Exposure Level (Brightness) | Daily Operation *1 | Level Change *2 | ||
| Level 5 Level 4 Level 3 Level 2 Level 1 | ||||
| Outdoor sunlight (50,000 lux) 5 min. 2 hours 18 hours 5 hours | ||||
| Sunlight through a window (10,000 lux) | 24 min. | 7 hours 88 hours | 24 hours | |
| Daylight through a window on a cloudy day (5,000 lux) | 48 min. | 14 hours | 179 hours | 48 hours |
| Indoor fluorescent lighting (500 lux) | 8 hours | 221 hours | --- | --- |
*1 Approximate amount of exposure time required each day to generate enough power for normal daily operation.
*2 Approximate amount of exposure time (in hours) required to take power from one level to the next.
• The above exposure times all are for reference only. Actual exposure times depend on lighting conditions.
- For details about the operating time and daily operating conditions, see the "Power Supply" section of the Specifications (page E-102).
Power Saving
When turned on, Power Saving enters a sleep state automatically whenever the watch is left for a certain period in an area where it is dark. The table below shows how watch functions are affected by Power Saving.
- For information about enabling and disabling power saving, see "To turn Power Saving on and off" (page E-94).
- There actually are two sleep state levels: "display sleep" and "function sleep".
E-13
| Elapsed Time In Dark | Display | Operation |
| 60 to 70 minutes (display sleep) | Blank, with PS flashing | Display is off, but all functions are enabled. |
| 8 or 7 days (function sleep) | Blank, with PS not flashing | All functions are disabled, but timekeeping is maintained. |
• The watch will not enter a sleep state between 6:00 AM and 9:59 PM. If the watch is already in a sleep state when 6:00 AM arrives, however, it will remain in the sleep state.
• The watch will not enter a sleep state while it is in the Stopwatch Mode or Countdown Timer Mode.
To recover from the sleep state
Move the watch to a well-lit area, press any button, or angle the watch towards your face for reading (page E-90).
E-14
Mode Reference Guide
Your watch has 10 "modes". The mode you should select depends on what you want to do.
| To do this: | Enter this mode: | See: |
| • View the current date in the Home City• Confl gura Home City and daylight saving time (DST) settings• Confl gura time and date settings | Timekeeping Mode | E-19 |
| Determine your current bearing or the direction from your current location to a destination | Digital Compass Mode | E-25 |
| • View the barometric pressure and temperature at your current location• View a graph of baromclinic pressure readings | Barometer/Thermometer Mode | E-42 |
| • View the altitude at your current location• Determine the altitude differential between two locations (reference point and current location)• Record an altitude reading with the reading time and date | Altimater Mode | E-51 |
| View the sunrise and sunset times for a specific date | Sunrise/Sunset Mode | E-75 |
| Recall records created in the Allimeter Mode | Data Recall Mode | E-68 |
| Use the stopwatch to measure elapsed time | Stopwatch Mode | E-79 |
| Use the countdown timer | Countdown Timer Mode | E-81 |
| Set an alarm time | Alarm Mode | E-83 |
| View the current time in one of 46 cities (31 time zones) around the globe | World Time Mode | E-87 |
E-15
Operation Guide 3443
CASIO
Selecting a Mode
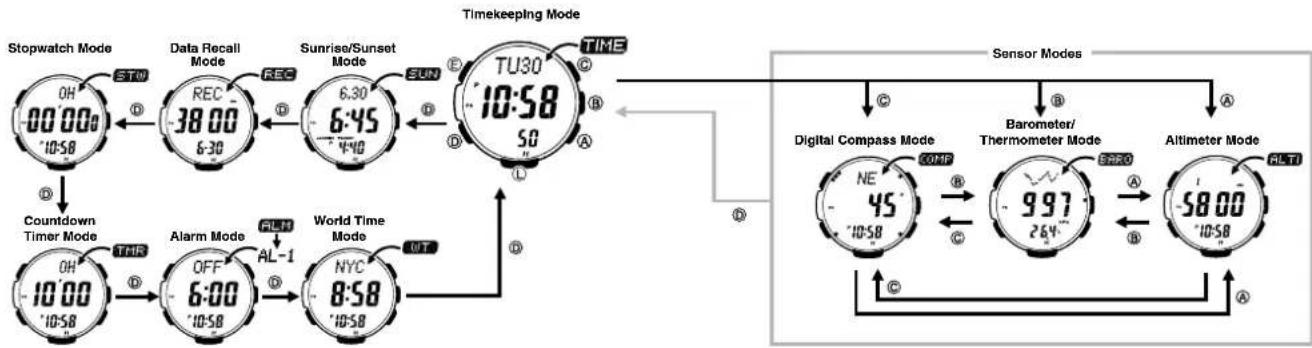
• The illustration below shows which buttons you need to press to navigate between modes
• To return to the Timekeeping Mode from any other mode, hold down Ⓓ for about two seconds.
- You can use buttons A, B, and C to enter a sensor mode directly from the Timekeeping Mode or from another sensor mode. To enter a sensor mode from the Sunrise/Sunset, Data Recall, Alarm, Stopwatch, Countdown Timer or World Time, first enter the Timekeeping Mode and then press the applicable button.
flowchart
graph TD
    A["Stopwatch Mode"] --> B["Countdown Timer Mode"]
    B --> C["Alarm Mode"]
    C --> D["World Time Mode"]
    D --> E["Timekeeping Mode"]
    E --> F["Sensor Modes"]
    F --> G["Digital Compass Mode"]
    G --> H["Barometer/Thermometer Mode"]
    H --> I["Altimeter Mode"]
    I --> J["Sensor Modes"]
    J --> K["Sensor Mode"]
    K --> L["Stopwatch Mode"]
    style A fill:#f9f,stroke:#333
    style B fill:#f9f,stroke:#333
    style C fill:#f9f,stroke:#333
    style D fill:#f9f,stroke:#333
    style E fill:#ccf,stroke:#333
    style F fill:#ccf,stroke:#333
    style G fill:#ccf,stroke:#333
    style H fill:#ccf,stroke:#333
    style I fill:#ccf,stroke:#333
    style J fill:#ccf,stroke:#333
    style K fill:#ccf,stroke:#333
    style L fill:#ccf,stroke:#333
E-16
E-17
General Functions (All Modes)
The functions and operations described in this section can be used in all of the modes.
Direct Timekeeping Mode Access
• To enter the Timekeeping Mode from any other mode, hold down Ⓓ for about two seconds.
Auto Return Features
- The watch will automatically return to the Timekeeping Mode if you do not perform any button operation for a particular amount of time in each mode.
| Mode Name Approximate Elapsed Time | |
| Sunrise/Sunset, Data Recall, Alarm, Digital Compass 3 minutes | |
| Altimeter 1 hour minimum | 12 hours maximum |
| Barometer/Thermometer 1 hour | |
| Setting screen (digital setting / ashing) 3 minutes | |
- If you leave a screen with flashing digits on the display for two or three minutes without performing any operation, the watch exits the setting screen automatically.
Initial Screens
When you enter the Data Recall, Alarm, World Time, or Digital Compass Mode, the data you were viewing when you last exited the mode appears first.
Scrolling
The (A) and (C) buttons are used on the setting screen to scroll through data on the display. In most cases, holding down these buttons during a scroll operation scrolls through the data at high speed. E-18
Timekeeping
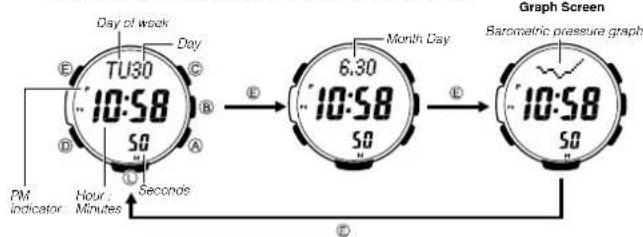
Use the Timekeeping Mode (TIME) to set and view the current time and date.
• Each press of Ⓔ in the Timekeeping Mode will change screen contents as shown below.
Day of the Week/Date Screen Month/Day Screen Barometric Pressure
E-19
Confi guring Home City Settings
There are two Home City settings: actually selecting the Home City and selecting either standard time or daylight saving time (DST).
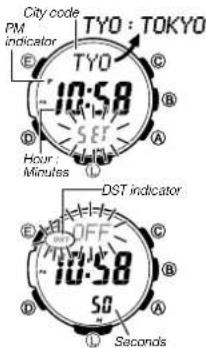
To configure Home City and summer time settings
In the Timekeeping Mode, hold down (E) for at least two seconds. First, SET Hold will fill on the display, and CITY will be displayed in the upper display. After that, the currently selected city code and city name will scroll across the upper display. Keep (E) depressed until the scrolling starts. • The watch will exit the setting mode automatically if you do not perform any operation for about two or three minutes. • For details about city codes, see the "City Code Table" at the back of this manual.
- Use Ⓐ (East) and Ⓐ (West) to scroll through the available city codes.
-
Keep scrolling until the city code you want to select as your Home City is displayed.
-
Press Ⓓ to display the DST setting screen.
-
Press Ⓐ to toggle the DST setting between Daylight Saving Time (ON) and standard time OFF).
- Note that you cannot switch between standard time and daylight saving time (DST) while UTC is selected as your Home City.
E-20
- After all of the settings are the way you want, press (E) twice to exit the setting screen.
Daylight Saving Time is turned on when the DST indicator is on the display.
Note
After you specify a city code, the watch will use UTC* offsets in the World Time Mode to calculate the current time for other time zones based on the current time in your Home City. * Coordinated Universal Time, the world-wide scientific standard of timekeeping. The reference point for UTC is Greenwich, England.
E-21
Configuring Current Time and Date Settings
You can use the procedure below to adjust the Timekeeping Mode time and date settings if they are off.
To change the current time and date settings
-
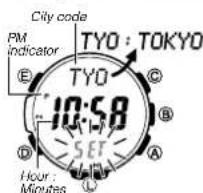
In the Timekeeping Mode, hold down (E) for at least two seconds. First, SET Hold will flash on the display, and CITY will be displayed in the upper display. After that, the currently selected city code and city name will scroll across the upper display. Keep (E) depressed until the scrolling starts.
-
Press Ⓓ to move the flashing in the sequence shown below to select the other settings.

flowchart
graph LR
    A["City Code DST"] --> B["12/24-Hour Format"]
    B --> C["Seconds Hour Minutes Year"]
    C --> D[" "]
    D --> E["Month"]
    E --> F["Day"]
    F --> G["Button Operation Tone"]
    G --> H["Illumination Duration"]
    H --> I["Power Saving"]
    I --> J["Thermometer/Barometer/Airitude display unit"]
• The following steps explain how to configure timekeeping settings only.
- When the timekeeping setting you want to change is fl ashing, use® and/or © to change it as described below.
| Screen To do this: | Do this: | ||
| TYO | Change the city code | Use Ⓐ (East) and Ⓑ (West). | |
| OFF | Toggle between Daylight Saving Time (ON) and Standard Time (OFF). | Press Ⓐ. | |
| 12H | Toggle between 12-hour (12H) and 24-hour (24H) timekeeping. | Press Ⓐ. | |
| 50 | Reset the seconds to 00(If the current seconds count is between 30 and 59, one is added to the minute count). | Press Ⓐ. | |
| 10:58 | Change the hour or minutes | Use Ⓐ (+) and Ⓑ (-). | |
| 20156:30 | Change the year, month, or day | ||
E-22
- After all of the settings are the way you want, press Ⓔ twice to exit the setting screen.
E 23
Operation Guide 3443
CASIO®
Note
- For information about selecting a Home City and configuring the DST setting, see "Configuring Home City Settings" (page E-20).
- While the 12-hour format is selected for timekeeping, a P (PM) indicator will appear for times from noon to 11:59 p.m. No indicator appears for times from midnight to 11:59 a.m. With 24-hour format, time is displayed from 0:00 to 23:59, without any P (PM) indicator.
- The watch's built-in full automatic calendar makes allowances for different month lengths and leap years. Once you set the date, there should be no reason to change it except after you have the watch's rechargeable battery replaced or after power drops to Level 5 (page E-11).
• The day of the week changes automatically when the date changes.
- Refer to the pages shown below for more information on Timekeeping Mode settings. - Button operation tone on/off: "To turn the button operation tone on and off" (page E-93). - Illumination duration setting: "To change the illumination duration" (page E-89). - Enabling and disabling power saving: "To turn Power Saving on and off" (page E-94). - Changing the temperature, barometric pressure, and altitude display units (for a city code other than TYO): "To specify temperature, barometric pressure, and altitude display units" (page E-40)
E-24
Taking Direction Readings
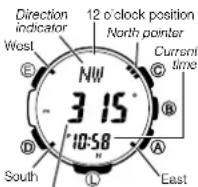
The Digital Compass Mode uses a built-in direction sensor to take direction readings and display the results. North is indicated by three graphic segments (■■■). The watch also displays literal indications of direction that its 12 o'clock position is currently pointed. • For information about what you can do to improve digital compass reading accuracy, see "Calibrating the Bearing Sensor" (page E-28) and "Digital Compass Precautions" (page E-38).
To take a direction reading
-
Make sure the watch is in the Timekeeping Mode or any one of the sensor modes. • The sensor modes are: Digital Compass Mode, Barometer/Thermometer Mode, and Atimeter Mode.
-
Place the watch on a fl at surface. If you are wearing the watch, make sure that your wrist is horizontal (in relation to the horizon).
-
Point the 12 o'clock position of the watch in the direction whose reading you want to take.
-
Press © to start.
- COMP will appear in the upper display to indicate that a digital compass operation is in progress.
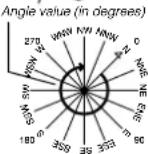
- About one second after you press ©, pointers (three graphic segments for north, one graphic segment each for south, east, and west) will appear on the display to indicate north, south, east, and west. Direction will also be indicated by literal direction indicators and by a direction angle.
E-26
E-25
Note
- If the four pointers (north, south, east, west) and the direction indicating letters do not appear on the display when you press Ⓤ it could mean that the watch is displaying bearing memory information. If this happens, press Ⓔ to delete the current bearing memory contents. For more information, see “Using Bearing Memory” (page E-32).
• To return to the Timekeeping Mode, press (D).
Pressing Ⓓ will return to the Timekeeping Mode even is a reading operation is in progress.
Important!
- If the digital display contains start to flash after you perform a reading operation, it means that abnormal magnetism has been detected. Move away from any potential source of strong magnetism and try taking a reading again. If the problem occurs when you try again, continue to keep away from the source of strong magnetism, perform bidirectional calibration, and then try taking a reading again. For more information, refer to "To perform bidirectional calibration" (page E-30) and "Location" (page E-38).
Digital Compass Readings
- When you press Ⓒ to start digital compass reading operation, COMP will initially appear on the display to indicate that a digital compass operation is in progress.
• After the first reading is obtained, the watch will continue to take digital compass readings automatically each second for up to 60 seconds. After that, the reading operation will stop automatically. - The direction indicator and angle value will show --- to indicate that digital compass readings are complete.
- The auto light switch is disabled during the 60 seconds that digital compass readings are being taken.
- The following table shows the meanings of each of the direction abbreviations that appear on the display.
E-27
| Direction Meaning Direction Meaning Direction Meaning | |||||||
| N | North | NNE | North-northeast | NE | Northeast | ENE | East-northeast |
| E | East | ESE | East-southeast | SE | Southeast | SSE | South-southeast |
| S | South | SSW | South-southwest | SW | Southwest | WSW | West-southwest |
| W | West | WNW | West-northwest | NW | Northwest | NNW | North-northwest |
- The margin of error for the angle value and the direction indicator is ± 11 degrees while the watch is horizontal (in relation to the horizon). If the indicated direction is northwest (NW) and 315 degrees, for example, the actual direction can be anywhere from 304 to 326 degrees.
- Note that taking a direction reading while the watch is not horizontal (in relation to the horizon) can result in large direction reading error.
- You can calibrate the bearing sensor if you suspect the direction reading is incorrect.
- Any ongoing direction reading operation is paused temporarily while the watch is performing an alert operation (daily alarm, Hourly Time Signal, countdown timer alarm) or while illumination is turned on (by pressing ①). The direction reading operation resumes for its remaining duration after the operation that caused it to pause is finished.
• See "Digital Compass Precautions" (page E-38) for important information about taking direction readings
Calibrating the Bearing Sensor
You should calibrate the bearing sensor whenever you feel that the direction readings being produced by the watch are off. You can use any one of two different bearing sensor calibration methods: bidirectional calibration or magnetic declination correction.
E-28
• Bidirectional Calibration
Bidirectional calibration calibrates the bearing sensor in relation to magnetic north. Use bidirectional calibration when you want to take readings within an area exposed to magnetic force. This type of calibration should be used if the watch becomes magnetized for any reason.
Important!
- To ensure correct direction readings by this watch, be sure to perform bidirectional calibration before using it. The watch may produce incorrect direction readings if you do not perform bidirectional calibration.
• Magnetic Declination Correction
With magnetic declination correction, you input a magnetic declination angle (difference between magnetic north and true north), which allows the watch to indicate true north. You can perform this procedure when the magnetic declination angle is indicated on the map you are using. Note that you can input the declination angle in whole degree units only, so you may need to round off the value specified on the map. If your map indicates the declination angle as 7.4°, you should input 7°. In the case of 7.6° input 8°, for 7.5° you can input 7° or 8°.
Precautions about bidirectional calibration
- You can use any two opposing directions for bidirectional calibration. You must, however, make sure that they are 180 degrees opposite each other. Remember that if you perform the procedure incorrectly, you will get wrong bearing sensor readings.
- Do not move the watch while calibration of either direction is in progress.
- You should perform bidirectional calibration in an environment that is the same as that where you plan to be taking direction readings. If you plan to take direction readings in an open fi old, for example, calibrate in an open fi old.
E-29
To perform bidirectional calibration
-
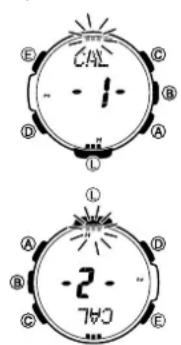
In the Digital Compass Mode, hold down Ⓔ for at least two seconds. First, SET Hold will flash on the display. After that, CALIBRATION will scroll across the upper display. Keep Ⓔ depressed until CALIBRATION starts scrolling. • At this time, the north pointer flashes at the 12 o'clock position and the display will show -1- to indicate that the watch is ready to calibrate the first direction.
-
Place the watch on a level surface facing any direction you want, and press Ⓐ to calibrate the first direction.
- - - is shown on the display while calibration is being performed. When calibration is successful, Turn 18° will appear on the display and three graphic segments (■■■) will flash at 6 o'clock. After about one second, CALIBRATION -2- will scroll across the upper display.
- If ERR-1 appears on the display, press © again to restart the direction reading operation.
-
Rotate the watch 180 degrees.
-
Press © again to calibrate the second direction.
- - - is shown on the display while calibration is being performed. When calibration is successful, the display will show OK and then change to the Digital Compass Mode screen.
To perform magnetic declination correction
Magnetic declination angle direction value (E, W, or OFF)
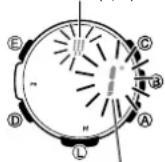
Magnetic declination angle value
- In the Digital Compass Mode, hold down Ⓔ for at least two seconds. First, SET Hold will fl ash on the display. After that, CALIBRATION will scroll across the upper display. Keep Ⓔ depressed until CALIBRATION starts scrolling.
- Press ©
- DEC 0^ will appear on the display and then the current magnetic declination angle setting will flash on the display.
- Use Ⓐ (East) and Ⓐ (West) to change the settings.
- The following explains magnetic declination angle direction settings.
OFF: No magnetic declination correction performed. The magnetic declination angle with this setting is 0°.
E: When magnetic north is to the east (east declination)
W: When magnetic north is to the west (west declination)
You can select a value within the range of W 90° to E 90° with
these settings.
You can turn off (OFF) magnetic declination correction by pressing Ⓐ and Ⓑ at the same time.
The illustration, for example, shows the value you should input and the direction setting you should select when the map shows a magnetic declination of 1° West.
- When the setting is the way you want, press Ⓔ to exit the setting screen.
E-30
E-31
Operation Guide 3443
CASIO
Using Bearing Memory
Bearing
memory
direction angle va
12 o'clock position
North pointer
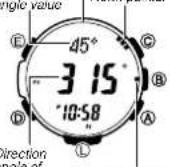
Direction
angle of
current reading
Pointer to bearing
in bearing memory
Bearing Memory
Screen
Bearing Memory lets you temporarily store and display a direction reading so you can use it as a reference as you take subsequent digital compass readings. The Bearing Memory screen displays the direction angle for the stored reading, along with a pointer that indicates the stored reading.
When you take digital compass readings while the Bearing Memory screen is displayed, the direction angle of the current digital compass reading (as read from the 12 o'clock position of the watch) and the stored Bearing Memory direction reading will both be shown.
To store a direction angle reading in Bearing Memory
Press © to start a digital compass reading operation (page E-26).
- This will take an initial reading and then take readings every second for 60 seconds.
- If a bearing memory direction angle value is already displayed, it means that there is a reading already stored in Bearing Memory. If this happens, press (E) to clear the Bearing Memory reading and exit the bearing memory screen before performing the above step.
- During the 60 seconds that digital compass readings are being taken, press Ⓔ to store the current reading in Bearing Memory.
- The Bearing Memory direction angle II ashes for about one second as it is stored in Bearing Memory. After that, the Bearing Memory screen (which shows the bearing memory direction angle and pointer) will appear, and a new 60-second direction reading operation will start.
- You can press Ⓐ at any time while the Bearing Memory screen is displayed, to start a new 60-second direction reading operation. Doing so will display the direction angle for the direction that the 12 o'clock position of the watch is pointed. The direction angle of the current reading will disappear from the display after the 60-second direction reading operation is complete.
- During the first 60 seconds after you display the Bearing Memory screen or during a 60-second direction reading operation you triggered by pressing © while the Bearing Memory screen is on the display, the direction stored in memory is indicated by a Bearing Memory pointer.
- Pressing (E) while the Bearing Memory screen is displayed will clear the reading currently in Bearing Memory and start a new 60-second direction reading operation.
Using the Digital Compass While Mountain Climbing or Hiking
This section provides three practical applications for using the watch's built-in digital compass. - Setting a map and finding your current location
Having an idea of your current location is important when mountain climbing or hiking. To do this, you need to "set the map", which means to align the map so the directions indicated on it are aligned with the actual directions of your location. Basically what you are doing is aligning north on the map with north as indicated by the watch.
• Finding the bearing to an objective
- Determining the direction angle to an objective on a map and heading in that direction
E-32
E 33
To set a map and find your current location
- With the watch on your wrist, position it so the face is horizontal.
- While in the Timekeeping Mode or in any of the sensor modes, press Ⓐ to take a compass reading. • The reading will appear on the display after about one second
North indicated
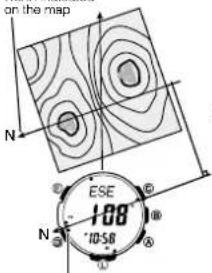
North indicated by
north pointer
- Rotate the map without moving the watch so the northerly direction indicated on the map matches north as indicated by the watch.
- If the watch is configured to indicate magnetic north, align the map's magnetic north with the watch indication. If the watch has been configured with a declination to correct to true north, align the map's true north with the watch indication. For details, see "Calibrating the Bearing Sensor" (page E-28).
- This will position the map in accordance with your current location
- Determine your location as you check the geographic contours around you.
To find the bearing to an objective
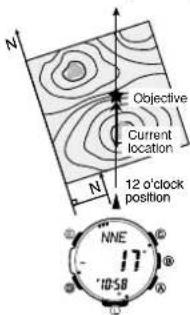
Steps 3 and 4
- With the watch on your wrist, position it so the face is horizontal.
- Set the map so its northerly indication is aligned with north as indicated by the watch, and determine your current location.
- See "To set a map and find your current location" on page E-34 for information about how to perform the above step.
- Next, set the map so the direction you want to travel on the map is pointed straight in front of you.
- While in the Timekeeping Mode or in any of the sensor modes, press © to take a compass reading.
• The reading will appear on the display after about one second. - Still holding the map in front of you, turn your body until north as indicated by the watch and the northerly direction on the map are aligned.
- This will position the map in accordance with your current location. so the bearing to your objective is straight ahead of you.
E-34
E-35
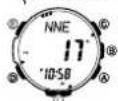
To determine the direction angle to an objective on a map and head in that direction (Bearing Memory)
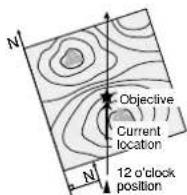
- Set the map so its northerly indication is aligned with north as indicated by the watch, and determine your current location.
- See "To set a map and find your current location" on page F-34 for information about how to perform the above step.
- As shown in the illustration to the left, change your position so you (and the 12 o'clock position of the watch) are pointed in the direction of objective, while keeping the northerly direction indicated on the map aligned with north as indicated by the watch.
- If you find it difficult to perform the above step while keeping everything aligned, first move into the correct position (12 o'clock position of the watch pointed at the objective) without worrying about the orientation of the map. Next, perform step 1 again to set the map.
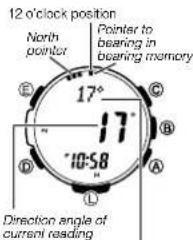
Bearing memory direction angle value
-
While in the Timekeeping Mode or in any of the sensor modes, press © to take a compass reading.
-
While direction angle readings are in progress, press Ⓔ to record the currently displayed direction in Bearing Memory.
-
The direction angle value and pointer stored in Bearing Memory will remain on the display for about 60 seconds.
-
To re-display the Bearing Memory direction angle value and Bearing Memory pointer, press ©.
• See "Using Bearing Memory" (page E-32) for more information. -
Now you can advance while monitoring the Bearing Memory pointer to ensure that it remains in the 12 o'clock position.
- Pressing (E) while the Bearing Memory direction angle value and Bearing Memory pointer are on the display will clear the Bearing Memory data you saved in step 3 and save the current direction reading in Bearing Memory.
Note
- When mountain climbing or hiking, conditions or geographic contours may make it impossible for you to advance in a straight line. If this happens, return to step 1 and save a new direction to the objective.
E-36
E-37
Digital Compass Precautions
Magnetic North and True North
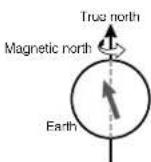
The northerly direction can be expressed either as magnetic north or true north, which are different from each other. Also, it is important to keep in mind that magnetic north moves over time.
- Magnetic north is the north that is indicated by the needle of a compass.
- True north, which is the location of the North Pole of the Earth's axis, is the north that is normally indicated on maps.
- The difference between magnetic north and true north is called the 'declination'. The closer you get to the North Pole, the greater the declination angle.
Location
- Taking a direction reading when you are near a source of strong magnetism can cause large errors in readings. Because of this, you should avoid taking direction readings while in the vicinity of the following types of objects: permanent magnets (magnetic necklaces, etc.), concentrations of metal (metal doors, lockers, etc.), high tension wires, aerial wires, household appliances (TVs, personal computers, washing machines, froozers, etc.).
- Accurate direction readings are impossible while in a train, boat, air plane, etc.
- Accurate readings are also impossible indoors, especially inside ferroconcrete structures. This is because the metal framework of such structures picks up magnetism from appliances, etc.
E-38
Storage
- The precision of the bearing sensor may deteriorate if the watch becomes magnetized. Because of this, you should store the watch away from magnets or any other sources of strong magnetism including permanent magnets (magnetic necklaces, etc.) and household appliances (TVs, personal computers, washing machines, frocozers, etc.).
- Whenever you suspect that the watch may have become magnetized, perform the procedure under "To perform bidirectional calibration" (page E-30).
E-39
Operation Guide 3443
CASIO
Specifying Temperature, Barometric Pressure, and Altitude Display Units
Use the procedure below to specify the temperature, barometric pressure, and altitude display units to be used in the Barometer/Thermometer Mode and the Altimeter Mode.
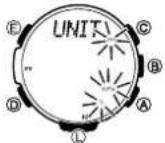
Important!
- When TYO (Tokyo) is selected as the Home City, the altitude unit is set automatically to meters (m), the barometric pressure unit to hectopascals (hPa), and the temperature unit to Celsius (°C). These settings cannot be changed.
To specify temperature, barometric pressure, and altitude display units
-
In the Timekeeping Mode, hold down Ⓔ for at least two seconds. First, SET Hold will ll ash on the display, and CITY will be displayed in the upper display. After that, the currently selected city code and city name will scroll across the upper display. Keep Ⓔ depressed until the scrolling starts.
-
Press (D) as many times as necessary until UNIT appears on the display.
• See the sequence in step 2 of the procedure under "To change the current time and date settings" (page E-22) for information about how to scroll through selling screens.
- Perform the operations below to specify the display units you want.
To specify this unit: Press this key: To toggle between these settings:
| Altitude | A | m (meters) and ft (feel) |
| Barometric Pressure | B | hPa (nectopascals) and lnHg (inches of mercury) |
| Temperature | C | °C (Celsius) and °F (Fahrenheit) |
- After all of the settings are the way you want, press Ⓔ twice to exit the setting screen.
E-40
E-41
Taking Barometric Pressure and Temperature Readings
This watch uses a pressure sensor to measure air pressure (barometric pressure) and a temperature sensor to measure temperature.
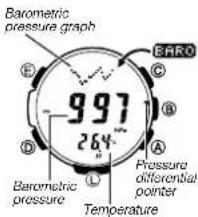
To take barometric pressure and temperature readings
While in the Timekeeping Mode or in any of the sensor modes, press Ⓑ to take barometric pressure and temperature readings.
- BARO will appear on the display, indicating that barometric pressure and temperature reading are in progress. The results will appear on the display after about one second.
- Aller you press Ⓑ the watch will take readings every five seconds for the first three minutes, and then every two minutes after that.
Note
- Press Ⓓ to return to the Timekeeping Mode.
- The watch will return to the Timekeeping Mode automatically if you do not perform any operation for about 1 hour after entering the Barometer/Thermometer Mode.
Barometric pressure change indicator
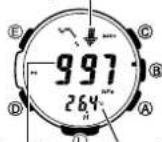
Barometric pressure Temperature
Barometric Pressure
- Barometric pressure is displayed in units of 1 hPa (or 0.05 inHg). - The displayed barometric pressure value changes to --- if a measured barometric pressure falls outside the range of 260 hPa to 1,100 hPa (7.65 inHg to 32.45 inHg). The barometric pressure value will reappear as soon as the measured barometric pressure is within the allowable range.
Temperature
- Temperature is displayed in units of 0.1°C (or 0.2°F). - The displayed temperature value changes to - - - °C (or °F) if a measured temperature falls outside the range of -10.0°C to 60.0°C (14.0°F to 140.0°F). The temperature value will reappear as soon as the measured temperature is within the allowable range.
Display Units
You can select either hectopascals (hPa) or inchesHg (inHg) as the display unit for the measured barometric pressure, and Celsius (°C) or Fahrenheit (°F) as the display unit for the measured temperature value. See "To specify temperature, barometric pressure, and altitude display units" (page E-40).
Barometric Pressure Graph
Barometric pressure graphBarc
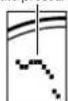
Barometric pressure indicates changes in the atmosphere. By monitoring these changes you can predict the weather with reasonable accuracy. This watch takes barometric pressure reading automatically every two hours. Readings are used to produce barometric pressure graph and barometric pressure differential pointer readings.
E-42
E-43
Reading the Barometric Pressure Graph
The barometric pressure graph shows a chronological history of pressure readings.
- When display of the barometric change indicator is disabled, the graph shows the results of up to 21 barometric pressure readings (42 hours).
- When display of the barometric change indicator is enabled, the graph shows the results of up to 11 barometric pressure readings (22 hours).
Barometric pressure

Time
- The horizontal axis of the graph represents time, with each dot standing for two hours. The rightmost dot represents the most recent reading.
- The vertical axis of the graph represents barometric pressure, with each dot standing for the relative difference between its reading and that of the dots next to it. Each dot represents 1 hPa.
The following shows how to interpret the data that appears on the barometric pressure graph.

Rising barometric pressure indicates that upcoming weather will improve.
Falling barometric pressure indicates that upcoming weather will deteriorate.
Note
- If there are sudden changes in weather or temperature, the graph line of past reading may run off the top or bottom of the display.
- The following conditions cause the barometric pressure reading to be skipped, with the corresponding point on the barometric pressure graph being left blank. - Barometric reading that is out of range (260 hPa to 1,100 hPa or 7.65 inHg to 32.45 inHg)
Sensor malfunction

Not visible on the display.
E-44
Barometric Pressure Differential Pointer

Barometric pressure differential pointer
This pointer indicates the relative difference between the most recent barometric pressure reading indicated on the barometric pressure graph (page E-44), and the current barometric pressure value displayed in the Barometer/Thermometer Mode (page E-43).
Reading Barometric Pressure Differential Pointer
Pressure differential is indicated in the range of ±10 hPa, in 1-hPa units.
- The nearby screen shot, for example, shows what the pointer would indicate when the calculated pressure differential is approximately -5 hPa (approximately -0.15 inHg).
- Barometric pressure is calculated and displayed using hPa as the standard. The barometric pressure differential also can be read in inHg units as shown in the illustration (1 hPa = 0.03 inHg).
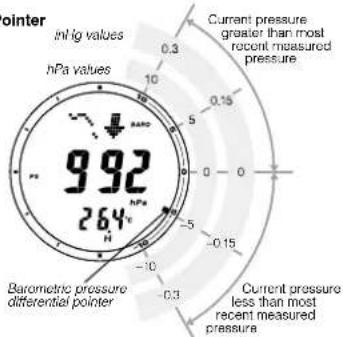
other
| Current pressure | Value | | ---------------- | ----- | | greater than most recent measured pressure | 0.3 | | -0.15 | 0 | | -0.15 | -0.15 | | -0.3 | -0.3 | | -0.3 | 0.3 |E-45
Barometric Pressure Change Indications
Your watch analyzes past barometric pressure readings and uses a barometric pressure change indicator to inform you about changes in pressure. If it determines there has been a significant change in pressure, it will beop and all of the graphic segments (■) around the periphery of the face will flash as a barometric pressure change alert. This means you could start taking barometric pressure readings after reaching a lodge or camp area, and then check the watch the next morning for changes in pressure, and plan you day's activities accordingly. Note that you can enable or disable display of the barometric pressure change indicator as desired.
Reading the Barometric Pressure Change Indicator
| Indicator Meaning | |
| Sudden fall in pressure. | |
| Sudden rise in pressure. | |
| Sustained rise in pressure, changing to a fall. | |
| Sustained fall in pressure, changing to a rise. |
- The barometric pressure change indicator is not displayed if there has been no noteworthy change in barometric pressure.
Important!
- To ensure proper results, take barometric readings under conditions where the altitude remains constant.
Example
In a lodge or campground On the ocean
- A change in altitude causes a change in barometric pressure. Because of this, correct readings are impossible. Do not take readings while ascending or descending a mountain, etc.
Enabling or Disabling Display of the Barometric Pressure Change Indicator
You can enable or disable display of the barometric pressure change indicator as desired. When display of the indicator is enabled, the watch will take a barometric pressure reading every two minutes, regardless of the mode it is in
- When BARO is shown on the display, it means that barometric pressure change indicator display is enabled.
- When BARO is not on the display. It means that barometric pressure change indicator display is disabled.
To enable or disable the barometric pressure change alert
In the Barometer/Thermometer Mode, hold down Ⓑ for at least two seconds. Keep Ⓑ depressed until the current setting (INFO Hold ON or INFO Hold OFF) starts to flash on the display.
- If barometric pressure change indicator display is currently enabled, BARO will also appear in the upper display. BARO will not appear if display is currently disabled.
- Note that barometric pressure change indicator display will turn off automatically 24 hours after you turn it on or battery power goes low.
- Note that barometric pressure change indicator display cannot be enabled while the watch's battery is low.
Operation Guide 3443
CASIO
Pressure Sensor and Temperature Sensor Calibration
The pressure sensor and temperature sensor built into the watch are calibrated at the factory and normally require no further adjustment. If you notice serious errors in the pressure readings and temperature readings produced by the watch, you can calibrate the sensor to correct the errors.
Important!
- Incorrectly calibrating the barometric pressure sensor can result in incorrect readings. Before performing the calibration procedure, compare the readings produced by the watch with those of another reliable and accurate barometer.
- Incorrectly calibrating the temperature sensor can result in incorrect readings. Carefully read the following before doing anything.
- Compare the readings produced by the watch with those of another reliable and accurate thermometer
- If adjustment is required, remove the watch from your wrist and wait for 20 or 30 minutes to give the temperature of the watch time to stabilize.
To calibrate the pressure sensor and the temperature sensor
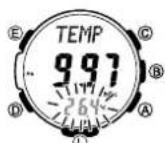
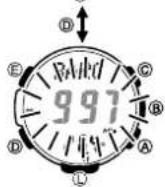
- Take a reading with another measurement device to determine the exact current barometric pressure or temperature.
- With the watch in the Timekeeping Mode or in any of the sensor modes, press Ⓑ to enter the Barometer/Thermometer Mode.
- Hold down Ⓔ for at least two seconds. SET Hold will flash on the display and then TEMP will appear in the upper display. Keep Ⓔ depressed until TEMP appears.
- The current temperature calibration setting will flash in the lower display at this time.
- Press Ⓓ to move the flashing between the temperature value and barometric pressure value, to select the one you want to calibrate.
- Use Ⓐ (+) and Ⓐ (−) to select the temperature and barometric pressure value display units as shown below.
Temperature 0.1°C (0.2°F) Barometric Pressure 1 hPa (0.05 in
- To return the currently fl ashing value to its initial factory default selling, press Ⓐ and Ⓐ at the same time. OFF will appear at the fl ashing location for about one second, followed by the initial default value.
- Press Ⓔ to return to the Barometer/Thermometer Mode screen.
E-48
E49
Barometer and Thermometer Precautions
- The pressure sensor built into this watch measures changes in air pressure, which you can then apply to your own weather predictions. It is not intended for use as a precision instrument in official weather prediction or reporting applications.
- Sudden temperature changes can affect pressure sensor readings. Because of this, there may be some error in the readings produced by the watch.
- Temperature reading are affected by your body temperature, direct sunlight, and moisture. To achieve a more accurate temperature reading, remove the watch from your wrist, place it in a well ventilated location out of direct sunlight, and wipe all moisture from the case. It takes approximately 20 to 30 minutes for the case of the watch to reach the surrounding temperature.
E-50
Using the Altimeter Mode
The watch takes altitude readings and displays results based on air pressure measurements taken by a built-in pressure sensor. It also saves various types of altitude records and data.
Important!
- See "To specify a reference altitude value" (page E-56) and "Altimeter Precautions" (page E-66) for information about how to minimize differences between readings produced by the watch and values provided by local altitude (elevation) indications.
Getting Ready
Before actually taking an altitude reading you need to select an altitude screen format and select an altitude reading interval.
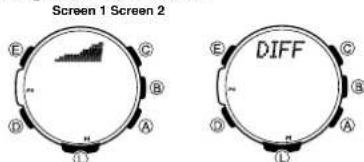
Selecting the Altitude Screen Format
You can select either of two screen formats for the Altimeter Mode.
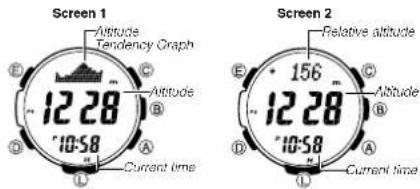
E-51
- Altitude tendency graph contents are updated each time you take an altitude reading.
- Graph units are 10 meters on the vertical axis, and the measurement reading interval (one second, five seconds, or two minutes) on the horizontal axis (page E-53).
- To take readings of the difference between the altitude at your current location and the altitude at a reference point, select Screen 2. See "Using an Altitude Differential Value" (page E-57) for more information.
To select the altitude screen format
-
In the Altimeter Mode, hold down Ⓔ for at least two seconds.
-
SET Hold will flash on the display and then ALTI will appear in the upper display. Keep Ⓔ depressed until ALTI appears.
• The current altitude value will appear at this time. -
Press ① twice.
- DISP will appear, and then the current screen setting will appear in the upper display.
- Use Ⓐ to toggle the setting between the two screens.
- Press Ⓔ to exit the setting screen.
E-52
Selecting the Altitude Auto Reading Interval
You can select either of the following two altitude auto reading interval.
0'05: Readings at one-second intervals for the fl rst three minutes, and then every fl ve seconds for approximately the next hour
2'00: Readings at one-second intervals for the first three minutes, and then every two minutes for approximately the next 12 hours
Note
- If you do not perform any button operation while in the Altimeter Mode, the watch will return to the Timekeeping Mode automatically after 12 hours (altitude auto reading interval: 2'00) or after one hour (altitude auto reading interval: 0'05).
- If trek log operation is in progress with 0'05 selected as the altitude auto measurement method, exiting the Altimeter Mode to another mode will automatically cause the auto reading interval to change to 2'00.
To select the altitude auto reading interval
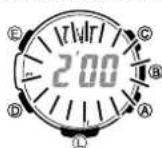
- In the Altimeter Mode, hold down Ⓔ for at least two seconds. SET Hold will ll ash on the display and then ALTI will appear in the upper display. Keep Ⓔ depressed until ALTI appears.
- The current altitude reading value will appear at this time.
- Press ① to display the current altitude auto reading interval setting.
- This will cause INTERVAL to scroll across the top display. The current altitude auto reading interval setting (0'05 or 2'00) will be flashing in the center display.
- Press Ⓐ to toggle the altitude auto measurement interval setting between 0'05 and 2'00.
- Press Ⓔ to exit the setting screen.
E-53
Taking Altitude Readings
Use the procedure below to take basic altitude readings.
- See "Using Reference Altitude Values" (page E-56) for information about how to make altimeter readings more accurate.
- See "How does the altimeter work?" (page E-65) for information about how the watch measures altitude.
To take altitude readings
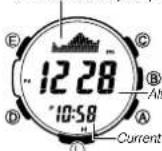
Screen 1 Selected
Altitude Tendency Graph
Screen 2 Selected
Relative altitude
- Make sure the watch is in the Timekeeping Mode or any one of the sensor modes.
- The sensor modes are: Digital Compass Mode, Barometer/Thermometer Mode, and Altimeter Mode.
- Press Ⓐ to start auto altimeter readings.
- The current altitude value is displayed in units of 1 meter (5 feet)
- For information about the measurement interval, see page E-53.
- Alter you are finished, press (D) to return to the Timekeeping Mode and stop auto allimeter readings.
- The watch will return to the Timekeeping Mode automatically if you do not perform any operation (page E-18).
- The measurement range for altitude is 700 to 10,000 meters (2,300 to 32,800 foot).
- The displayed altitude value changes to - - - if an altitude reading fails outside the measurement range. An altitude value will reappear as soon as the altitude reading is within the allowable range.
- Normally, displayed altitude values are based on the watch's preset conversion values. You also can specify a reference altitude value, if you want. See "Using Reference Altitude Values" (page E-56).
- You can change the unit for displayed altitude values to either meters (m) or feet (ft). See "To specify temperature, barometric pressure, and altitude display units" (page E-40).
E-55
Operation Guide 3443
CASIO®
Using Reference Altitude Values
To minimize the chance of reading error, you should update the reference altitude value before setting off on a trek or any other activity where you plan to take altitude readings. During a trek, keep checking the readings produced by the watch against altitude information provided by markers and other information, and update the reference altitude value as required.
- Reading error can be caused by changes in barometric pressure, atmospheric conditions, and elevation.
- Before performing the procedure below, look up the altitude of your current location on a map, the Internet, etc.
To specify a reference altitude value
-
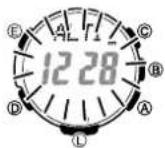
In the Altimeter Mode, hold down (E) for at least two seconds. SET Hold will flash on the display and then ALTI will appear in the upper display. Keep (E) depressed until ALTI appears. • The current altitude reading value will appear at this time.
-
Use Ⓐ (+) or Ⓗ (−) to change the current reference altitude value in 1-meter (5-foot) increments.
- Change the reference altitude value to an accurate altitude reading that you get from a map or other source.
- You can set the reference altitude value within the range of -10,000 to 10,000 meters (-32,800 to 32,800 feet).
- Pressing Ⓐ and Ⓐ at the same time returns to OFF (no reference altitude value), so (he watch performs air pressure to altitude conversions based on presel data only.
- Press Ⓔ to exit the setting screen.
E-56
Advanced Altimeter Mode Operations
Use the information in this section to obtain more accurate altimeter readings, especially while mountain climbing or trekking.
Using an Altitude Differential Value
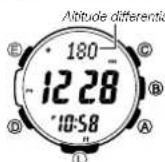
The Altimeler Mode screen has an altitude differential value that shows the change in altitude from a reference point you specify. The altitude differential value is updated each time the watch takes an altitude reading. • The range of the altitude differential value is -3,000 meters (-9,995 feet) to 3,000 meters (9,995 feet).
- - - - is displayed in place of the altitude differential value whenever the measured value is outside the allowable range.
- See "Using the Altitude Differential Value While Mountain Climbing or Hiking" (page E-58) for some real-life examples of how to use this feature.
To specify the altitude differential start point
- In the Altimeter Mode, select Screen 2 as the Altimeter Mode display Altitude differential/Altitude differential (page E-82).
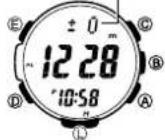
- Press (E). • The watch will take an altitude reading and register the result as the altitude differential value start point. The altitude differential value will be reset to zero at this time.
E-57
Using the Altitude Differential Value While Mountain Climbing or Hiking
After you specify the altitude differential start point while mountain climbing or hiking, you can easily measure the change in the altitude between that point and other points along the way.
To use the altitude differential value
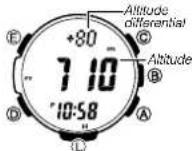
- In the Altimeter Mode, check to make sure that an altitude reading is on the display.
- If an altitude reading is not displayed, press Ⓐ to take one. See "To take altitude readings" (page E-55) for details.
-
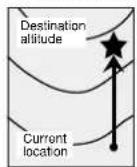
Use the contour lines on your map to determine the difference in altitude between your current location and your destination.
-
In the Altimeter Mode, press Ⓔ to specify your current location as the altitude differential start point.
- The watch will take an altitude reading and register the result as the altitude differential value start point. The altitude differential value will be reset to zero at this time.
- While comparing the altitude difference you determined on the map and the watch's altitude differential value, advance towards your destination.
- If the map shows that the difference in altitude between your location and your destination is +80 meters for example, you know you will be nearing your destination when the displayed altitude differential value shows +80 meters.
E-58
Types of Altitude Data
Your watch can record three types of altitude data in its memory: manually saved data, auto save values, and trek log values.
- Use the Data Recall Mode to view data stored in memory. See "Viewing Altitude Records" (page E-68) for details
Manually Saved Records
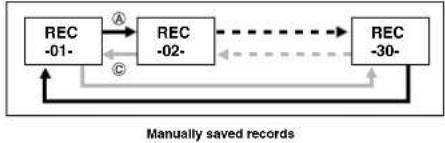
Any time you perform the procedure below in the Altimeter Mode, the watch will create and store a record with the currently displayed altitude reading, along with the date and time the reading was taken. There is enough memory to store up to 30 manually saved records, which are numbered from REC 1 through REC 30.
To save a reading manually
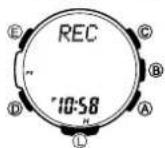
- In the Altimeter Mode, check to make sure that an altitude reading is on the display. • If an altitude reading is not displayed, press Ⓐ to take one. See "To take altitude readings" (page E-55) for details.
- Hold down Ⓐ. First, REC Hold will ll ash on the display. After that, REC and the current time will appear in the lower display. Release Ⓐ as soon as REC and the current time appear. • This will save the currently displayed altitude reading in a manually saved record, along with the time and date of the reading. • The watch will return to the Altimeter Mode screen automatically after the save operation is complete. • Holding down Ⓐ for too long will advance to trok log update start/stop (page E-62).
E-59
- There is enough memory to store up to 30 manually saved records. If there are already 30 manually saved records in memory, the above operation will cause the oldest record to be deleted automatically to make room for the new one.
Auto Save Values
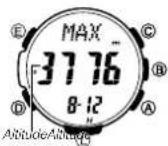
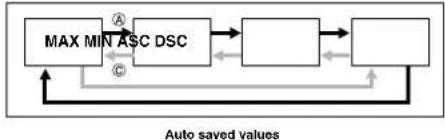
Auto save values are one type of data stored in the memory of your watch.
Auto Save Values
| High Altitude (MAX) |
| Low Altitude (MIN) |
| Total Ascent (ASQ) |
| Total Descent (DSC) |
• These values are checked and updated automatically by the watch as altitude auto measurements are taken.
- Auto save is performed only while the watch is in the Allimeter Mode.
- Cumulative ascent and cumulative descent values are updated whenever there is a difference of at least ±15 meters (±49 feet) from one reading to the next.
• Auto save values also include the date and time each value was recorded.
E-60
Trek Log Values
While trek log updating is enabled, altitude values (high altitude/low altitude, cumulative ascent/descent) for a particular trek are automatically checked and updated at regular intervals, even if you exit the Altimeter Mode. Values include the date and time each is updated. Up to 14 records of trek log values can be maintained in memory, and each record is assigned a number from Mt.1 through Mt.14 in the sequence they are stored.
Trek Log Values in Each Record
| High Altitude (MAX) |
| Low Altitude (MIN) |
| Total Ascent (ASQ) |
| Total Doscent (DSC) |
- For up to 12 hours after trek log value updating is enabled, the values are updated automatically even if you exit the Altimeter Mode. A segment (■) in the graphic around the periphery of the display fl ashes to show the time elapsed since trek log value updating was enabled. Each graphic segment represents 12 minutes, and one revolution around the display represents 12 hours.
- You can select the altitude reading interval you want. For more information, see "To select the altitude auto reading interval" (page E-53).
- Trek log value updating stops automatically whenever the battery charge goes low.
Note
• Even if you exit the Altimeter Mode while trekking, updating of the trek log high altitude, low altitude, and cumulative ascent and descent values continues.
- Your watch has enough memory for 14 trek log records, which means you can maintain values for up to 14 troks.
E-61
To start trek log value updating
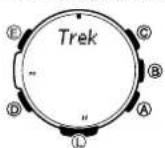
In the Altimeter Mode, hold down Ⓐ for at least fl ve seconds. First, Trek Hold will fl ash on the display. After that, Hold will disappear and a pointer (■) indicating elapsed reading time will appear at 12 o'clock. Release Ⓐ when Hold disappears.
- This indicates that updating of trek log values (high altitude/low altitude, cumulative ascent/descent) is being performed.
To stop trek log value updating
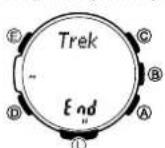
In the Allimeter Mode, hold down Ⓐ for at least five seconds. First, Trek Hold End and the elapsed time pointer (■) will flash. After that, Hold will disappear. Release Ⓐ when Hold disappears.
- This indicates that updating of trek log values (high altitude/low altitude, cumulative ascent/descent) has been stopped.
Note
- To start a new trek log record while there are already 14 trek log records in memory, you will need to delete existing records. For more information, see "To delete data in a specific memory area" (page E-73).
How High and Low Altitude Values are Updated
With each auto save or trek log reading, the watch compares the current reading against the MAX (high altitude) and MIN (low altitude) values. It will replace the MAX value if the current reading is at least 15 meters ( ± 49 feet) greater than MAX, or the MIN value if the current reading is at least 15 meters ( ± 49 feet) less than MIN.
How Cumulative Ascent and Cumulative Descent Values Are Updated
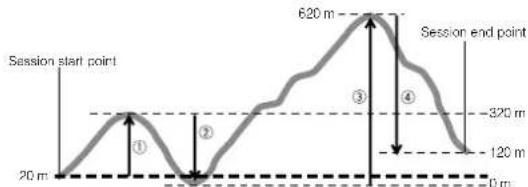
The total ascent and total descent values produced by an Altimeter Mode reading operation session during the example climb illustrated above are calculated as follows. Total Ascent: ①(300 m) + ③ (620 m) = 920 m Total Descent: ② (320 m) + ④ (500 m) = 820 m
E-62
E·63
Operation Guide 3443
CASIO®
- Entering the Altimeter Mode starts a new altitude auto reading session, but it does not reset the current ASC and DSC values or change them in any way. This means that the starting ASC and DSC values for a new Altimeter Mode auto reading session are the values that currently are in memory. Each time you complete an altitude auto reading session by exiting the Altimeter Mode, the total ascent value of the current session (920 meters in the above example) is added to the session's starting ASC value. Also, the total descent value of the current auto reading session (-820 meters in the above example) is added to the session's starting DSC value.
- Logging of trek log data continues even if you exit the Altimeter Mode.
Note
- The high altitude, low altitude, total ascent, and total descent values are retained in memory when you exit the Altimeter Mode. To clear values, perform the procedure under "To delete data in a specific memory area" (page E-73).
How does the altimeter work?
Generally, air pressure decrease as altitude increases. This watch bases its altitude reading on International Standard Atmosphere (ISA) values stipulated by the International Civil Aviation Organization (ICAO). These values define relationships between altitude and air pressure.
- Note that the following conditions will prevent you from obtaining accurate readings:
When air pressure changes because of changes in the weather
Extreme temperature changes
When the watch itself is subjected to strong impact
There are two standard methods of expressing altitude: absolute altitude, which expresses an absolute height above sea level, and relative altitude, which expresses the difference between the altitudes of two different places. This watch expresses altitudes as relative altitude.
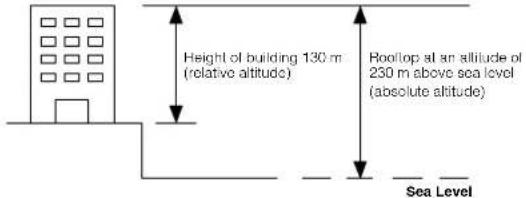
E-64
E·65
How the Altimeter Measures Altitude
The altimeter can measure altitude based on its own preset values (initial default method) or using a reference altitude specified by you.
When you measure altitude based on preset values
Data produced by the watch's barometric pressure sensor is converted to approximate altitude based on ISA (International Standard Atmosphere) conversion values stored in watch memory.
When you measure altitude using a reference altitude specified by you
After you specify a reference altitude, the watch uses that value to convert barometric pressure readings to altitude (page E-56).
- When mountain climbing, you can specify a reference altitude value in accordance with a marker along the way or altitude information from a map. After that, the altitude readings produced by the watch will be more accurate than they would without a reference altitude value.
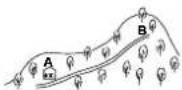
Altimeter Precautions
- This watch estimates altitude based on air pressure. This means that altitude readings for the same location may vary if air pressure changes.
- Do not rely upon this watch for altitude reading or perform button operations while sky diving, hang gliding, or paragliding, while riding a gyrocopter, glider, or any other aircraft, or while engaging in any other activity where there is the chance of sudden altitude changes.
- Do not use this watch for measuring altitude in applications that demand professional or industrial level precision.
- Remember that the air inside of a commercial aircraft is pressurized. Because of this, the readings produced by this watch will not match the altitude readings announced or indicated by the flight crew.
E-66
Precautions Concerning Simultaneous Altitude and Temperature Readings
For the more accurate altitude readings, leaving the watch on your wrist is recommended in order to maintain the watch at a constant temperature.
- When taking temperature readings, keep the watch at as stable a temperature as possible. Changes in temperature can affect temperature readings. See product specifications (page E-99) for sensor accuracy information.
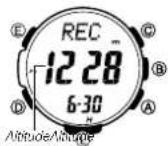
- Use Ⓐ and Ⓐ to scroll through the screens for an area and display the one you want.
flowchart
graph TD
    A["REC -01-"] -->|A| B["REC -02-"]
    B -->|B| C["REC -30-"]
    C -->|C| A
    style A fill:#f9f,stroke:#333
    style B fill:#f9f,stroke:#333
    style C fill:#f9f,stroke:#333
    linkStyle 0 stroke:#000,stroke-width:2px
    linkStyle 1 stroke:#000,stroke-width:2px
    linkStyle 2 stroke:#000,stroke-width:2px
    linkStyle 3 stroke:#000,stroke-width:2px
    linkStyle 4 stroke:#000,stroke-width:2px
    linkStyle 5 stroke:#000,stroke-width:2px
    linkStyle 6 stroke:#000,stroke-width:2px
    linkStyle 7 stroke:#000,stroke-width:2px
    linkStyle 8 stroke:#000,stroke-width:2px
    linkStyle 9 stroke:#000,stroke-width:2px
    linkStyle 10 stroke:#000,stroke-width:2px
    linkStyle 11 stroke:#000,stroke-width:2px
    linkStyle 12 stroke:#000,stroke-width:2px
    linkStyle 13 stroke:#000,stroke-width:2px
    linkStyle 14 stroke:#000,stroke-width:2px
    linkStyle 15 stroke:#000,stroke-width:2px
    linkStyle 16 stroke:#000,stroke-width:2px
    linkStyle 17 stroke:#000,stroke-width:2px
    linkStyle 18 stroke:#000,stroke-width:2px
    linkStyle 19 stroke:#000,stroke-width:2px
    linkStyle 20 stroke:#000,stroke-width:2px
flowchart
graph TD
    A["MAX MIN ASC DSC"] --> B[" "]
    B --> C[" "]
    C --> D[" "]
    D --> E[" "]
    E --> F[" "]
    F --> G[" "]
    G --> H[" "]
    H --> I[" "]
    I --> J[" "]
    J --> K[" "]
    K --> L[" "]
    L --> M[" "]
    M --> N[" "]
    N --> O[" "]
    O --> P[" "]
    P --> Q[" "]
    Q --> R[" "]
    R --> S[" "]
    S --> T[" "]
    T --> U[" "]
    U --> V[" "]
    V --> W[" "]
    W --> X[" "]
    X --> Y[" "]
    Y --> Z[" "]
    Z --> A
Viewing Altitude Records
You can use the Data Recall Mode to view manually saved record data, auto save values, and trek log values.
E-68
To view altitude records
-
Use Ⓐ to select the Data Recall Mode (REC) as shown on page E-16. • About one second after REC appears on the display, the display will change to show the first record of the memory area you were viewing when you last exited the Data Recall Mode.
-
Use Ⓑ to select the memory area you want.
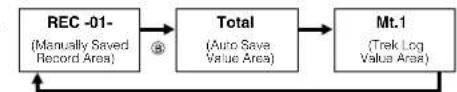
flowchart
graph LR
    A["REC -01-(Manually Saved Record Area)"] --> B["Total(Auro Save Value Area)"]
    B --> C["Mt.1(Trek Log Value Area)"]
    C --> A
- Aller you select the Trek Log Value Area screen, use the ^® button to select the trek whose values you want to view. Treks are numbered from 1 (Mt.1) through 14 (Mt.14).
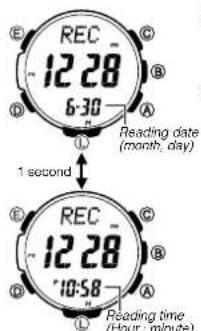
• After you select the Manually Saved Record Area screen, the date (month and day) and time of the record will alternate on the display in the lower display at one-second intervals.
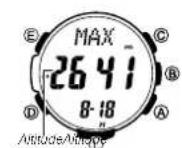
- Manually saved records (REC01 to REC30), auto save MAX and MIN values, and trek log values all include the date (month and day) and time (hour and minute) that the data was recorded.
- Records of the ASC and DSC include altitude values along with the date (month, day) and year that the data was recorded.
- For details about auto save values, see "Auto Save Values" (page E-60). For details about trek log values, see "Trek Log Values" (page E-61).
- ---- will be displayed if MAX/MIN data has been deleted or if there is no corresponding MAX/MIN data due to error, etc. In such cases, total ascent (ASC) and total descent (DSC) values will show zero.
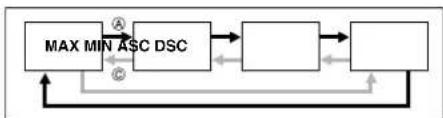
flowchart
graph TD
    A["MAX MIN ASC DSC"] --> B["Block"]
    B --> C["Block"]
    C --> D["Block"]
    D --> E["Block"]
    E --> F["Block"]
    F --> G["Block"]
    G --> H["Block"]
    H --> I["Block"]
    I --> J["Block"]
    J --> K["Block"]
    K --> L["Block"]
    L --> M["Block"]
    M --> N["Block"]
    N --> O["Block"]
    O --> P["Block"]
    P --> Q["Block"]
    Q --> R["Block"]
    R --> S["Block"]
    S --> T["Block"]
    T --> U["Block"]
    U --> V["Block"]
    V --> W["Block"]
    W --> X["Block"]
    X --> Y["Block"]
    Y --> Z["Block"]
    Z --> A
Trek Log Values (Mt.1 to Mt.14)
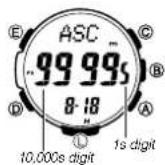
E-69
- When the total ascent (ASC) or total descent (DSC) exceeds 99,998 meters (or 327,997 feet), the applicable value will restart from zero. Note that the watch can display up to five digits only. When using feet as the altitude display units, altitude values are displayed only up to the rightmost five digits. - When the total ascent (ASC) or total descent (DSC) value becomes five digits long, the rightmost (ones) digit is shown in the lower right of the display. The nearby illustration shows the display when the value of ASC is 99995 meters.
E-71
Operation Guide 3443
CASIO®
Trek Log Values (Mt.1 to Mt.14)
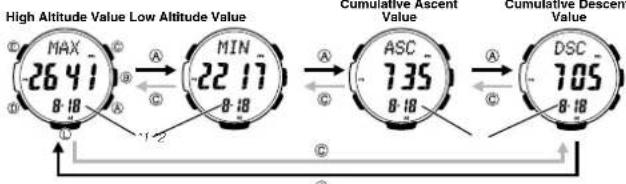
*1: Month and day the displayed value was recorded.
*2: Month and day cumulation started.
- Holding down (A) or (C) scrolls at high speed.
- On the high altitude value (MAX) and low altitude value (MIN) screens, the lower display area alternates between the date (month and day) and time at one-second intervals.
- On the cumulative ascent and cumulative descent screens, the lower display area alternates between the month and day, and the year at one-second intervals.
To delete all manually saved data
Memory contents cannot be deleted while trek log values are being recorded.
1. Use Ⓓ to enter the Data Recall Mode.
2. Use Ⓑ to display the Manually Saved Record Area (page E-68).
3. Hold down (E) for at least three seconds. First, Clear Hold ALL will flash in the display. After that, Hold
will disappear. Release Ⓔ when Hold disappears.
• This will cause - - - to appear in the lower display.
• This indicates that all manually saved data is cleared.
To delete data in a specific memory area
Memory contents cannot be deleted while trek log values are being recorded.
-
Use Ⓓ to enter the Data Recall Mode.
-
Use Ⓑ to display the memory area (Manually Saved Record Area, Auto Save Value Area, or Trek Log Value Area) that contains the data you want to delete.
-
What you should do next depends on which memory area you displayed in step 2, above.
• If you displayed the Manually Saved Record Area, use Ⓐ and Ⓒ to display the number of the
record (REC-01- through REC-30-) you want to delete.
- If you displayed the Auto Save Value Area, all of its values will be deleted, so you do not need to
select anything
- If you displayed the Trek Log Value Area, use Ⓑ to display the trek (mountain) number of the
record (Mt.1 through Mt.14) you want to delete.
Important!
• A delete operation cannot be undone! Make sure you do not need data before you delete it.
E-72
E·73
-
Hold down Ⓔ for at least two seconds. First, Clear Hold will flash in the display. After that, Hold will disappear. Release Ⓔ when Hold disappears.
-
If you are deleting a Manually Saved Record Area record, holding down (E) too long (after Hold disappears) will cause all manually saved records to be deleted.
- Deleting a record in either the Manually Saved Record Area or Trek Log Value Area will cause all records following it to be shifted upwards and renumbered accordingly. If the record you delete is the last one currently in the memory area where you deleted it, ---- will be displayed in the display in place of the record number.
- After you delete Auto Save Values, the MAX (high altitude) and MIN (low altitude) values will show ----, while the ASC (cumulative ascent) and DSC (cumulative descent) values will show zero.
Looking up Sunrise and Sunset Times
You can use the Sunrise/Sunset Mode to look up the sunrise and sunset times for a particular date (year, month, day) and location.
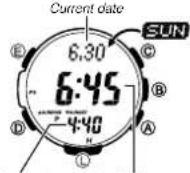
Sunset time Sunrise time
To enter the Sunrise/Sunset Mode
While in the Timekeeping Mode, press Ⓓ to enter the Sunrise/Sunset Mode.
- This will display the sunrise and sunset times for the current date based the currently specified city code, latitude, and longitude.
- Sunrise/sunset times will not be displayed when battery power is low.
- Before trying to use the Sunrise/Sunset Mode, you need to configure settings for the city code, longitude, and latitude for the location whose sunrise and sunset times you want to view.
• The factory default configuration of the location is: City Code: TYO (Tokyo); Latitude: North 35.7 degrees; Longitude: East 139.7 degrees
E-74
E-75
To view the sunrise/sunset time for a particular date
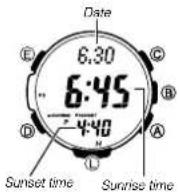
- Enter the Sunrise/Sunset Mode.
- This will display the sunrise and sunset times for the current date at the location specified by the city code, latitude, and longitude.
- While the sunrise/sunset time are on the display, use Ⓐ (+) and Ⓑ (−) to scroll through the dates.
- Pressing one of the above buttons causes the month and day to appear in the upper display area, and the year to appear in the lower display area.
- When you release the button, the sunrise time of the selected day will be shown in the middle display, while the sunset time will be shown in the lower display.
- You can select any date between January 1, 2000 and December 31, 2009.
Note
- If you think that the sunrise and/or sunset times are not correct for some reason, check the watch's city code, longitude and latitude settings.
- The sunrise and sunset times displayed by this watch are times at sea level. Sunrise and sunset times are different at altitudes other than sea level.
To look up the sunrise and sunset times for a specific location
Important!
- You do not need to perform this procedure to look up the sunrise and sunset times in your currently selected Home City.
- If you select a different city code to look up the sunrise and sunset times there, return to the city code of your Home City (your current location) when you are finished. Otherwise, the time shown in the Timekeeping Mode will not be correct.
-
For information about the Home City setting, see "Configuring Home City Settings" (page E-20).
-
In the Timekeeping Mode, hold down Ⓔ for at least two seconds. First, SET Hold will flash on the display, and CITY will be displayed in the upper display. After that, the currently selected city code and city name will scroll across the upper display. Keep Ⓔ depressed until the scrolling starts.
- Use Ⓐ (East) and Ⓐ (West) to select the city code whose sunrise and sunset times you want to view. • For details about city codes, see the "City Code Table" at the back of this manual.
- If this display shows the information you need, you can exit this procedure at this point by pressing (E) twice. If you want to specify a latitude and longitude for a more exact reading, advance to step 3, below.
E-76
E-77
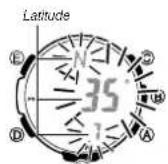
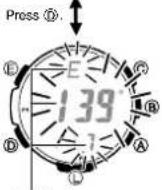
Longitude
- Press Ⓔ to display the longitude/latitude setting screen, with the latitude setting fl ashing.
- Use Ⓐ to move the flashing between the latitude and the longitude setting.
- Use Ⓐ (+) and Ⓐ (−) to change the fl ashing setting. • You can configure the longitude and latitude setting within following ranges.
Latitude Range: 65.0°S (South 65.0 degrees) to 0°N to 65.0°N (North 65.0 degrees)
Longitude Range: 179.9°W (West 179.9 degrees) to 0°E to 180.0°E (East 180.0 degrees)
• Latitude and longitude values are rounded off to the nearest degree.
-
Press Ⓔ to return to the Timekeeping Mode.
-
In the Timekeeping Mode, press Ⓓ.
• Display the location whose sunrise and sunset times you want to view.
Using the Stopwatch
The stopwatch measures elapsed time, split times, and two finishes.
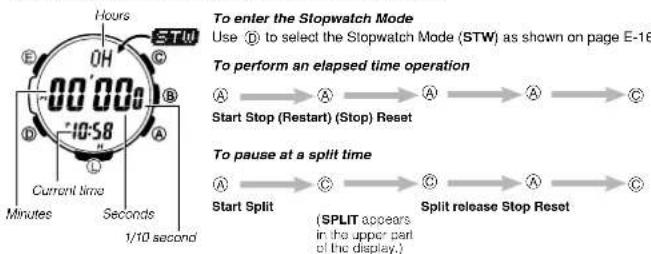
E-78
E-79
Operation Guide 3443
CASIO®
To measure two fi nishes

Start Split
First runner finishes
(SPLIT appears in
the upper part of the
display.)
Display time of first
runner
Stop
Second runner
fin shes.
Split release
Display time of
second runner
Note
• The Stopwatch Mode can indicate elapsed time up to 999 hours, 59 minutes, 59.9 seconds.
- Once started, stopwatch timing continues until you press (A) to stop it, even if you exit the Stopwatch Mode to another mode and even if liming reaches the stopwatch limit deli ned above. A paused liming operation will remain paused until you press (A) to restart if or (C) to reset.
- Exiting the Stopwatch Mode while a split time is frozen on the display clears the split time and returns to elapsed time measurement.
- While SPLIT is shown in the upper display, it alternates with the hour digits of the split time at one-second intervals.
EBO
Using the Countdown Timer
The countdown timer can be configured to start at a preset time, and sound an alarm when the end of the countdown is reached.
Countdown time
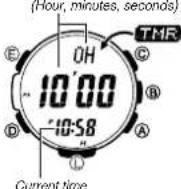
To enter the Countdown Timer Mode
Use Ⓐ to select the Countdown Timer Mode (TMR) as shown on page E-16. • About one second after TMR appears on the display, the display will change to show the countdown time hours.
To specify the countdown start time
- Enter the Countdown Timer Mode.
- If a countdown is in progress (indicated by the seconds counting down), press Ⓐ to stop it and then press Ⓐ to reset to the current countdown start time.
- If a countdown is paused, press © to reset to the current countdown start time.
- Hold down Ⓔ for at least two seconds.
-
SET Hold will flash on the display and then the current start time setting will start to flash. Keep Ⓔ depressed until the start time setting starts to flash.
-
Press Ⓓ to move the flashing between the hour and minute settings.
- Use Ⓐ (+) and Ⓒ (−) to change the flashing item.
• To set the starting value of the countdown time to 24 hours, set OH 00'00. - Press Ⓔ to exit the setting screen.
E-B1
To perform a countdown timer operation

Start Stop (Restart) (Stop) Reset
- Before starting a countdown timer operation, check to make sure that a countdown operation is not in progress (indicated by the seconds counting down). If it is, press Ⓐ to stop it and then Ⓑ to reset to the countdown start time.
- An alarm sounds for ten seconds when the end of the countdown is reached. This alarm will sound in all modes. The countdown time is reset to its starting value automatically when the alarm sounds.
To stop the alarm
Press any button.
Using the Alarm
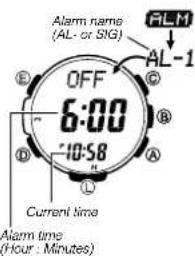
You can set fi ve independent daily alarms. When an alarm is turned on, an alarm will sound for about 10 seconds each day when the time in the Timekeeping Mode reaches the preset alarm time. This is true even if the watch is not in the Timekeeping Mode. One of the daily alarms is a snooze alarm. The other four are one-time alarms. The snooze alarm will sound every fi ve minutes up to seven times or until it is turned off. You can also turn on an Hourly Time Signal, which will cause the watch to beep twice every hour on the hour.
To enter the Alarm Mode
Use Ⓓ to select the Alarm Mode (ALM) as shown on page E-16.
- About one second after ALM appears on the display, the display will change to show an alarm name (AL-1 to AL-4, or SNZ) or the SIG indicator. The alarm name indicates an alarm screen. SIG is shown when the Hourly Time Signal screen is on the display.
- When you enter the Alarm Mode, the data you were viewing when you last exited the mode appears first.
E-82
E-83
To set an alarm time
- In the Alarm Mode, use A and C to scroll through the alarm screens Alarm ON/OFF indicatorAlarm ON/OFF Indicator Until the one whose time you want to set is displayed.
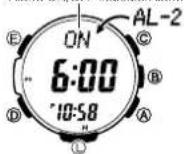
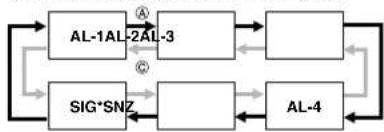
flowchart
graph TD
    A["AL-1AL"] -->|A| B["AL-3"]
    C["SIG*SNZ"] -->|C| D["AL-4"]
    B --> E[" "]
    D --> F[" "]
    E --> G[" "]
    F --> H[" "]
    G --> I[" "]
    H --> J[" "]
    I --> K[" "]
    J --> L[" "]
    K --> M[" "]
    L --> N[" "]
    M --> O[" "]
    N --> P[" "]
    O --> Q[" "]
    P --> R[" "]
    Q --> S[" "]
    R --> T[" "]
    S --> U[" "]
    T --> V[" "]
    U --> W[" "]
    V --> X[" "]
    W --> Y[" "]
    X --> Z[" "]
    Y --> AA[" "]
    Z --> AB[" "]
* There is no time setting for the hourly time signal.
- Hold down Ⓔ until SET Hold appears on the display and then the current settings start to flash. • This is the setting screen.
- Press Ⓓ to move the fl ashing between the hour and minute settings.
- While a setting is flashing, use Ⓐ (+) and Ⓑ (−) to change it.
- When selling the alarm time using the 12-hour formal, take care to set the time correctly as a.m. (no indicator) or p.m. (P indicator).
- Press Ⓔ to exit the setting screen.
- Setting an alarm time causes that alarm to turn on automatically
E-84
To turn an alarm and the Hourly Time Signal on and off
- In the Alarm Mode, use Ⓐ and Ⓑ to select an alarm or the Hourly Time Signal.
- When the alarm or the Hourly Time Signal you want is selected, press Ⓗ to turn it on and off.
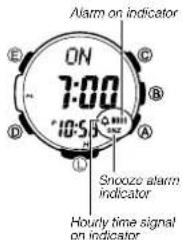
- The alarm on indicator (when any alarm is on), snooze alarm indicator (when the snooze alarm is on), and the Hourly Time Signal on indicator (when the Hourly Time Signal is on) are shown on the display in all modes.
To stop the alarm
Press any button.
Note
• The sneeze alarm sounds up to seven times at intervals of about five minutes.
• After the snooze alarm first sounds, SNZ will flash on the display until the snooze alarm sounds all seven times or until it is canceled.
- The scooze alarm will be canceled when any of the following occurs while the SNZ indicator is flashing on the display.
- If you turn off the snooze alarm
- If you display the snooze alarm setting screen
- If you display the Timekeeping Mode setting screen
- If your Home City and World Time City are the same city, and you use the World Time Mode to change the summer time setting of your Home City
Checking the Current Time in a Different Time Zone
You can use the World Time Mode to view the current time in one of 31 time zones (48 cities) around the globe. The city that is currently selected in the World Time Mode is called the "World Time City".
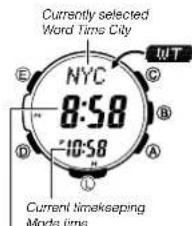
To enter the World Time Mode
Use ① to select the World Time Mode (WT) as shown on page E-16. • One second after WT appears on the display, the city code of the currently selected World Time City will scroll once in the upper display. After that, the World Time City's city code will be displayed in the upper display.
To view the time in another time zone
In the World Time Mode, use Ⓐ (East) and Ⓐ (West) to scroll through city codes.
E-86
E-87
Operation Guide 3443
CASIO
To specify standard time or daylight saving time (DST) for a city
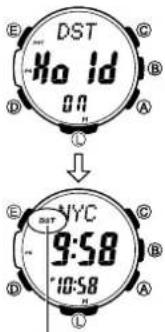
DST indicatorDST indicator
- In the World Time Mode, use Ⓐ (East) and Ⓒ (West) to scroll through the available city codes.
- Keep scrolling until the city code whose Standard Time/Daylight. Saving Time setting you want to change is displayed.
-
Hold down Ⓔ for at least two seconds.
-
Keep (E) depressed until the current setting (DST Hold ON or DST Hold OFF) starts to flash on the display.
- DST Hold ON means that summer time is enabled, and that the current time is advanced accordingly. DST Hold OFF means that summer time is disabled, and that the current time shows standard time.
- This toggles the city code you selected in step 1 between Daylight Saving Time (DST indicator displayed) and standard time (DST indicator not displayed).
- Using the World Time Mode to change the DST setting of the city code that is selected as your Home City also will change the Timekeeping Mode time DST setting.
• Note that you cannot switch between standard time/daylight saving time (DST) while UTC is selected as the World Time City - Note that the standard time/daylight saving time (DST) setting affects only the currently selected time zone. Other time zones are not affected.
E-88
Illumination
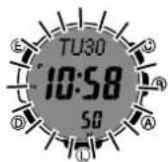
The display of the watch is illuminated for easy reading in the dark. The watch's auto light switch turns on illumination automatically when
you angle the watch towards your face.
• The auto light switch must be turned on (page E-91) for it to operate.
To turn on Illumination manually
Press Ⓐ in any mode to illuminate the display
- You can use the procedure below to select either 1.5 seconds or three seconds as the illumination duration. When you press Ⓑ, the display will remain illuminated for about 1.5 seconds or three seconds, depending on the current illumination duration setting.
- The above operation turns on illumination regardless of the current auto light switch setting.
- Illumination is disabled while conli guring sensor measurement mode settings, and during bearing sensor calibration.
To change the illumination duration
- In the Timekeeping Mode, hold down Ⓔ for at least two seconds. First, SET Hold will flash on the display, and CITY will be displayed in the upper display. After that, the currently selected city code and city name will scroll across the upper display. Keep Ⓔ depressed until the scrolling starts.
- Use ① to cycle through the setting screens until LIGHT appears in the upper display.
- The current illumination duration selling (1 or 3) will be flashing in the middle display.
- See the sequence in step 2 of the procedure under "To change the current time and date settings" (page E-22) for information about how to scroll through setting screens.
E-89
- Press Ⓐ to toggle the illumination duration between three seconds (3 displayed) and 1.5 seconds (1 displayed).
- After all of the settings are the way you want, press Ⓔ twice to exit the setting screen.
About the Auto Light Switch
Turning on the auto light switch causes illumination to turn on, whenever you position your wrist as described below in any mode. Moving the watch to a position that is parallel to the ground and then tilting it towards you more than 40 degrees causes illumination to turn on.
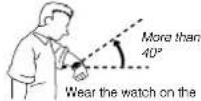
Wear the watch on the outside of your wrist
Warning!
• Always make sure you are in a safe place whenever you are reading the display of the watch using the auto light switch. Be especially careful when running or engaged in any other activity that can result in accident or injury. Also take care that sudden illumination by the auto light switch does not startle or distract others around you.
- When you are wearing the watch, make sure that its auto light switch is turned off before riding on a bicycle or operating a motorcycle or any other motor vehicle. Sudden and unintended operation of the auto light switch can create a distraction, which can result in a traffic accident and serious personal injury.
E-90
Note
- This watch features a "Full Auto Light", so the auto light switch operates only when available light is below a certain level. It does not illuminate the display under bright light.
- The auto light switch is always disabled, regardless of its on/off setting, when any one of the following conditions exists.
While an alarm is sounding
While a bearing sensor calibration operation is being performed in the Digital Compass Mode. While a sunrise or sunset time is being calculated
While in a sensor mode, an auto light switch operation is performed after a sensor reading
To turn the auto light switch on and off
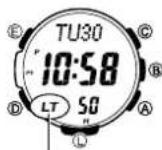
Auto light switch on indicator
In the Timekeeping Mode, hold down Ⓐ for at least three seconds to toggle the auto light switch on (LT displayed) and off (LT not displayed). The auto light switch on indicator (LT) is on the display in all modes while the auto light switch is turned on.
- The auto light switch turns off automatically whenever battery power drops to Level 4 (page E-11).
E-91
Illumination Precautions
- The LED that provides illumination loses power after very long use.
- Illumination may be hard to see when viewed under direct sunlight.
• Illumination turns off automatically whenever an alarm sounds. - Frequent use of illumination runs down the battery
Auto light switch precautions
- Wearing the watch on the inside of your wrist, movement of your arm, or vibration of your arm can cause frequent activation of the auto light switch and illumination of the display. To avoid running down the battery, turn off the auto light switch whenever engaging in activities that might cause frequent illumination of the display.
- Note that wearing the watch under your sleeve while the auto light switch is turned on can cause frequent illumination of the display and can run down the battery.
- Illumination may not turn on if the face of the watch is more than 15 degrees above or below parallel. Make sure that the back of your hand is parallel to the ground.
- Illumination turns off after the preset illumination duration (page E-89), even if you keep the watch pointed towards your face.
- Static electricity or magnetic force can interfere with proper operation of the auto light switch. If illumination does not turn on, try moving the watch back to the starting position (parallel with the ground) and then tilt it back towards your face again. If this does not work, drop your arm all the way down so it hangs at your side, and then bring it back up again.
- You may notice a very faint clicking sound coming from the watch when it is shaken back and forth. This sound is caused by mechanical operation of the auto light switch, and does not indicate a problem with the watch.
E-92
Other Settings
The button operation tone sounds any time you press one of the watch's buttons. You can turn the button operation tone on or off as desired.
- Even if you turn off the button operation tone, the alarm, Hourly Time Signal, barometric pressure change alert, and Countdown Timer Mode alarm all operate normally.
To turn the button operation tone on and off
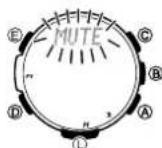

Mule indicatorMule indicator
- In the Timekeeping Mode, hold down (E) for at least two seconds. First, SET Hold will flash on the display; and CITY will be displayed in the upper display. After that, the currently selected city code and city name will scroll across the upper display. Keep (E) depressed until the scrolling starts.
- Use Ⓓ to cycle through settings on the display until the current button operation tone (MUTE or key) is displayed.
- See the sequence in step 2 of the procedure under "To change the current time and date settings" (page E-22) for information about how to scroll through setting screens.
- Press Ⓐ to toggle the button operation tone on (key) and off (MUTE).
- After all of the settings are the way you want, press Ⓔ twice to exit the setting screen.
Note
- The mute indicator is displayed in all modes when the button operation tone is turned off.
E-93
To turn Power Saving on or off
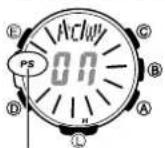
Power saving on indicator
- In the Timekeeping Mode, hold down Ⓔ for at least two seconds. First, SET Hold will fill ash on the display, and CITY will be displayed in the upper display. After that, the currently selected city code and city name will scroll across the upper display. Keep Ⓔ depressed until the scrolling starts.
- Use Ⓓ to cycle through the setting screens until the current power saving setting (On or OFF) is displayed.
- POWER SAVING will scroll across the upper display at this time. - See the sequence in step 2 of the procedure under "To change the current lime and date settings" (page E-22) for information about how to scroll through setting screens.
- Press Ⓐ to toggle Power Saving on (On) and off (OFF).
- After all of the settings are the way you want, press Ⓔ twice to exit the setting screen.
Note
• The Power Saving on indicator (PS) is on the display in all modes while Power Saving is turned on.
Troubleshooting
Time Setting
■ The current time setting is off by hours.
Your Home City setting may be wrong (page E-20). Check your Home City setting and correct it, if necessary.
Sensor modes
I can't change the temperature, barometric pressure, and altitude display units.
When TYO (Tokyo) is selected as the Home City, the altitude unit is set automatically to meters (m), the barometric pressure unit to hectopascals (hPa), and the temperature unit to Celsius (°C). These settings cannot be changed.
E·95
Operation Guide 3443
CASIO
■ "ERR" appears on the display while I am using a sensor.
Subjecting the watch to strong impact can cause sensor malfunction or improper contact of internal circuitry. When this happens, ERR (error) will appear on the display and sensor operations will be disabled.
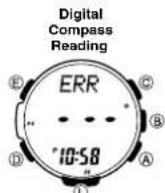
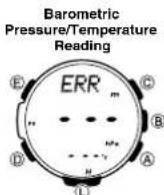
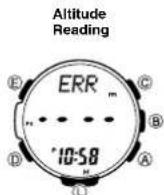
- If ERR appears while a reading operation is being performed in a sensor mode, restart the operation. If ERR appears on the display again, it can mean there is something wrong with the sensor.
- Even if battery power is at Level 1 (H) or Level 2 (M), the Digital Compass Mode, Barometer/Thermometer Mode, or Altimeter Mode sensor may be disabled if there is not enough voltage available to power it suffi cliently. In this case, ERR will appear on the display. This does not indicate malfunction, and sensor operation should resume once battery voltage returns to its normal level.
- If ERR keeps appearing during a reading operation, it could mean there is a problem with the applicable sensor.
E-96
■ ERR appears on the display after I perform bidirectional calibration.
If ...appears and then changes to ERR (error) on the calibration screen, it means that there is something wrong with the sensor.
- II ERR disappears after about one second, try performing the calibration again.
- If ERR keeps appearing, contact your original dealer or nearest authorized CASIO distributor to have the watch checked.
Whenever you have a sensor malfunction, take the watch to your original dealer or nearest authorized CASIO distributor as soon as possible.
■ What causes incorrect direction readings?
- Incorrect bidirectional calibration. Perform bidirectional calibration (page E-30).
- Nearby source of strong magnetism, such as a household appliance, a large stool bridge, a steel beam, overhead wires, etc., or an attempt to take direction readings on a train, boat, etc. Move away from large metal objects and try again. Note that digital compass operation cannot be performed inside a train, boat, etc.
■ What causes different direction readings to produce different results at the same location?
Magnetism generated by nearby high-tension wires is interfering with detection of terrestrial magnetism. Move away from the high-tension wires and try again.
■ Why am I having problems taking direction readings indoors?
A TV, personal computer, speakers, or some other object is interfering with terrestrial magnetism readings. Move away from the object causing the interference or take the direction reading outdoors. Indoor direction readings are particularly difficult inside ferro-concrete structures. Remember that you will not be able to take direction readings inside of trains, airplanes, etc.
E-97
■ The barometric pressure differential pointer does not appear on the display when I enter the Barometer/Thermometer Mode.
- This could indicate sensor error. Try pressing (B) again.
- The barometric pressure differential pointer is not displayed when the displayed current barometric value is outside of the allowable measurement range (260 to 1,100 hPa).
■ Correct altitude readings are not possible.
Relative altitude is calculated based on changes in barometric pressure measurement by its pressure sensor. To minimize the chance of reading error due to changes in barometric pressure, you should update the reference altitude value before setting off on a trek or any other activity where you plan to take altitude readings. For more information, see "To specify a reference altitude value" (page E-56).
World Time Mode
■ The time for my World Time City is off in the World Time Mode.
This could be due to incorrect switching between standard time and daylight saving time. See "To specify standard time or daylight saving time (DST) for a city" (page E-88) for more information.
Charging
■ The watch does not resume operation after I expose it to light.
This can happen after the power level drops to Level 5 (page E-11). Continue exposing the watch to light until the battery power indicator shows "H" or "M".
E-98
Specifications
Accuracy at normal temperature: ±15 seconds a month
Timekeeping: Hour, minutes, seconds, p.m. (P), year, month, day, day of the week
Time format: 12-hour and 24-hour
Calendar system: Full Auto-calendar pre-programmed from the year 2000 to 2099
Other: Three display formats (day of the week/day screen, month/day screen, barometric pressure
graph screen); Home City code (can be assigned one of 48 city codes); Standard Time / Daylight
Saving Time (summer time)
Year display on setting screen only.
Digital Compass: 60 seconds continuous reading; 16 directions; Angle value 0^ to 359^ ; Four direction pointers; Calibration (bidirectional); Magnetic declination correction; Bearing Memory
Barometer:
Measurement and display range
260 to 1,100 hPa (or 7.65 to 32.45 inHg)
Display unit: 1 hPa (or 0.05 inHg)
Reading timing: Daily from midnight, at two hour intervals (12 times per day): Every five seconds in
the Barometer/Thermometer Mode
Other: Calibration; Manual reading (button operation); Barometric pressure graph; Barometric
pressure differential pointer; Barometric pressure change indicator
Thermometer:
Measurement and display range: -10.0 to 60.0°C (or 14.0 to 140.0°F)
Display unit: 0.1°C (or 0.2°F)
Reading timing: Every five seconds in the Barometer/Thermometer Mode
Other: Calibration; Manual reading (button operation)
E-99
Altimeter:
Measurement range: -700 to 10,000 m (or -2,300 to 32,800 ft.) without reference altitude
Display range: -10,000 to 10,000 m (or -32,800 to 32,800 ft.)
Negative values can be caused by readings produced based on a reference altitude or due to
atmospheric conditions.
Display unit: 1 m (or 5 ft.)
Current Altitude Data: Every second for the first 3 minutes, followed by every 5 seconds for approximately 1 hour (0'05); every second for the first 3 minutes, followed by every 2 minutes for approximately 12 hours (2'00)
Altitude Memory Data:
Manually saved records: 30 (altitude, date, time)
Auto saved values: One set of high altitude and its reading date and time, low altitude and its reading date and time, total ascent and its save start date and time, total descent and its save start date and time
Trek log data: High altitude, low altitude, cumulative ascent, cumulative descent for up to 14 treks
Other: Reference altitude setting; Altitude differential; Altitude auto measurement interval (0'05 or
2'00)
Bearing Sensor Precision:
Direction: Within ±10°
Values are guaranteed for a temperature range of -10^ to 60^ (14°F to 140°F).
North pointer: Within ±2 digital segments
Pressure Sensor Precision:
Measurement accuracy: Within ±3hPa (0.1 InHg) (Altimeter accuracy: Within ± 75m (246 ft.))
- Values are guaranteed for a temperature range of -10^ to 40^ (14°F to 104°F).
- Precision is lessened by strong impact to either the watch or the sensor, and by temperature
extremes.
E-100
Temperature Sensor Precision:
±2°C (±3.6°F) in range of -10°C to 60°C (14.0°F to 140.0°F)
Sunrise/sunset:
Sunrise/sunset time display: selectable date
Stopwatch:
Measuring unit: 1/10 second
Measuring capacity: 999:59' 59.9"
Measuring accuracy: ±0.0006%
Measuring modes: Elapsed time, split time, two finishes
Countdown Timer:
Measuring unit: 1 second
Countdown range: 24 hours
Setting unit: 1 minute
Alarms: 5 Daily alarms (four one-time alarms; one snooze alarm); Hourly time signal
World Time: 48 cities (31 time zones)
Other: Daylight Saving Time/Standard Time
Illumination: LED light; Selectable illumination duration (approximately 1.5 seconds or 3 seconds); Auto Light Switch (Full Auto Light operates only in the dark)
Other: Battery power indicator; Power Saving; Low-temperature resistance ( -10^/14^ ); Button operation tone on/off
E-101
Power Supply: Solar panel and one rechargeable battery
Approximate battery operating time: 8 months (from full charge to Level 4) under the following
conditions:
• Light: 1.5 seconds/day
• Booper: 10 seconds/day
• Direction readings: 20 times/month
• Climbs: Once (approximately 1 hour of altitude readings)/month
- Barometric pressure change indicator readings: Approximately 24 hours/month
• Barometric pressure graph: Readings every 2 hours
• Display: 18 hours/day
Frequent use of illumination runs down the battery. Particular care is required when using the auto light switch (page E-92).
City Code Table
L-1
Operation Guide 3443
CASIO®
City Code Table
| City Code | City | UTC Offset/GMT Differential |
| PPG Pago Pago -11 | ||
| HNL Honolulu -10 | ||
| ANC Anchorage -9 | ||
| YVR Vancouver | 8 | |
| LAX Los Angeles | ||
| YEA Emerton | -7 | |
| DEN Denver | ||
| MEX Mexico City | -6 | |
| CHI Chicago | ||
| NYC New York 5 | ||
| SCL Santiago | -4 | |
| YHZ Halifax | ||
| YYT St. Johns -3.5 | ||
| RIO | Rio De Janeiro | -3 |
| FEN | Fernando de Noronha. | -2 |
| RAI | Praia | -1 |
| City Code | City | UTC Offset/ GMT Differential |
| UTC | 0 | |
| LIS | Lisbon | |
| LON London | ||
| MAD | Madrid | +1 |
| PAR | Paris | |
| ROM | Rome | |
| BER | Berlin | |
| STO Stockholm | ||
| ATH Athens | +2 | |
| CAI | Cairo | |
| JRS Jerusalem | ||
| MCW | Moscow | +3 |
| JED Jeddah | ||
| THF Tehran | +3.5 | |
| DXB | Dubai | +4 |
| KBL | Kabul | +4.5 |
| KHI | Karachi | +5 |
| City Code | City | UTC Offset/ GMT Differential |
| DEI | Delhi | +5.5 |
| KTM Kathmandu | +5.75 | |
| DAC Dhaka | +6 | |
| RGN | Yangon +6.5 | |
| BKK Bangkok | +7 | |
| SIN | Singapore | +8 |
| HKG Hong Kong | ||
| BJS | Beijing | |
| TPE | Taipei | |
| SEL | Seoul | +9 |
| TYO | Tokyo | |
| ADL Adelaide +9.5 | ||
| GUM | Guam | +10 |
| SYD Sydney | ||
| NOU Noumea +11 | ||
| WLC Wellington | +12 | |
• This table shows the city codes of this watch. (As of December 2014)
• The rules governing global times (GMT differential and UTC offset) and summer time are determined by each individual country.

- Operation Guide 3443
- CASIO®
- Applications
- Warning!
- ENGLISH
- Important!
- About This Manual
- Things to check before using the watch
- Check the battery power level.
- Check the Home City and the daylight saving time (DST) setting.
- Set the current time.
- Contents
- Charging the Watch
- Charging Guide
- Power Levels
- Power Recovery Mode
- Charging Times
- Power Saving
- To recover from the sleep state
- Mode Reference Guide
- CASIO
- Selecting a Mode
- General Functions (All Modes)
- Direct Timekeeping Mode Access
- Auto Return Features
- Initial Screens
- Scrolling
- Timekeeping
- Confi guring Home City Settings
- To configure Home City and summer time settings
- Note
- Configuring Current Time and Date Settings
- Taking Direction Readings
- Digital Compass Readings
- Calibrating the Bearing Sensor
- • Bidirectional Calibration
- • Magnetic Declination Correction
- Precautions about bidirectional calibration
- To perform magnetic declination correction
- Using Bearing Memory
- To store a direction angle reading in Bearing Memory
- Using the Digital Compass While Mountain Climbing or Hiking
- To set a map and find your current location
- To find the bearing to an objective
- To determine the direction angle to an objective on a map and head in that direction (Bearing Memory)
- Digital Compass Precautions
- Magnetic North and True North
- Location
- Storage
- Specifying Temperature, Barometric Pressure, and Altitude Display Units
- To specify temperature, barometric pressure, and altitude display units
- Taking Barometric Pressure and Temperature Readings
- To take barometric pressure and temperature readings
- Barometric Pressure
- Temperature
- Display Units
- Barometric Pressure Graph
- Reading the Barometric Pressure Graph
- Barometric Pressure Differential Pointer
- Reading Barometric Pressure Differential Pointer
- Barometric Pressure Change Indications
- Example
- Enabling or Disabling Display of the Barometric Pressure Change Indicator
- To enable or disable the barometric pressure change alert
- Pressure Sensor and Temperature Sensor Calibration
- Barometer and Thermometer Precautions
- Using the Altimeter Mode
- Getting Ready
- Selecting the Altitude Screen Format
- To select the altitude screen format
- Selecting the Altitude Auto Reading Interval
- To select the altitude auto reading interval
- Taking Altitude Readings
- To take altitude readings
- Using Reference Altitude Values
- Advanced Altimeter Mode Operations
- Using the Altitude Differential Value While Mountain Climbing or Hiking
- Types of Altitude Data
- Manually Saved Records
- Auto Save Values
- Trek Log Values
- How High and Low Altitude Values are Updated
- How does the altimeter work?
- How the Altimeter Measures Altitude
- When you measure altitude based on preset values
- When you measure altitude using a reference altitude specified by you
- Altimeter Precautions
- Precautions Concerning Simultaneous Altitude and Temperature Readings
- Viewing Altitude Records
- To view altitude records
- To delete all manually saved data
- To delete data in a specific memory area
- Looking up Sunrise and Sunset Times
- To enter the Sunrise/Sunset Mode
- To look up the sunrise and sunset times for a specific location
- Using the Stopwatch
- To measure two fi nishes
- Using the Countdown Timer
- To enter the Countdown Timer Mode
- To specify the countdown start time
- To perform a countdown timer operation
- Start Stop (Restart) (Stop) Reset
- To stop the alarm
- Using the Alarm
- To enter the Alarm Mode
- To set an alarm time
- To turn an alarm and the Hourly Time Signal on and off
- Checking the Current Time in a Different Time Zone
- To enter the World Time Mode
- To view the time in another time zone
- To specify standard time or daylight saving time (DST) for a city
- To turn on Illumination manually
- To change the illumination duration
- About the Auto Light Switch
- To turn the auto light switch on and off
- Illumination Precautions
- Auto light switch precautions
- Other Settings
- To turn the button operation tone on and off
- To turn Power Saving on or off
- Troubleshooting
- Time Setting
- ■ The current time setting is off by hours.
- Sensor modes
- I can't change the temperature, barometric pressure, and altitude display units.
- World Time Mode
- Charging
- Specifications
Brand : CASIO
Model : PRG300CM-3
Category : Sports Watch