
LTGS40RCS - Lawn mower Conair - Free user manual and instructions
Find the device manual for free LTGS40RCS Conair in PDF.


| Type | Lawn mower |
| Brand | Conair |
| Model | LTGS40RCS |
| Cutting Width | 40 cm (15.7 in) |
| Power Source | 40 V Lithium-ion battery |
| Battery Capacity | 4.0 Ah |
| Runtime | Up to 45 minutes |
| Charging Time | Approximately 90 minutes |
| Cutting Height Adjustment | 6 positions, 25-75 mm (1-3 in) |
| Grass Collection | 50 L grass bag included |
| Mulching Function | Yes, with included plug |
| Handle Type | Foldable, ergonomic with soft grip |
| Weight | 4.5 kg (9.9 lb) |
| Dimensions (L x W x H) | 120 x 45 x 90 cm (47 x 18 x 35 in) folded |
| Safety Switch | Two-hand operation with safety key |
| Blade Type | Rotating steel blade, 18 cm diameter |
| Blade Brake | Electric brake stops blade within 2 seconds |
| Grass Catcher Indicator | Transparent bag with fill level window |
| Maintenance | Clean after use; sharpen blade periodically |
| Spare Parts Available | Blade, battery, charger, grass bag |
Frequently Asked Questions - LTGS40RCS Conair
User questions about LTGS40RCS Conair
0 question about this device. Answer the ones you know or ask your own.
Ask a new question about this device
Download the instructions for your Lawn mower in PDF format for free! Find your manual LTGS40RCS - Conair and take your electronic device back in hand. On this page are published all the documents necessary for the use of your device. LTGS40RCS by Conair.
USER MANUAL LTGS40RCS Conair
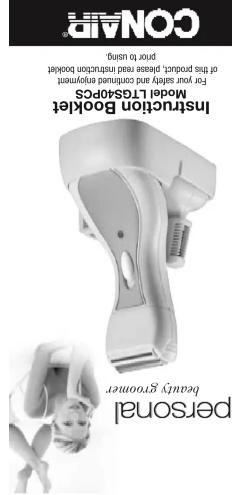
Congratulations on the purchase of your new ladies Total Grooming System. For maximum satisfaction when using this quality product, please take a minute to read the following operating and care instructions. Thank you for choosing Conair, the #1 brand in personal care appliances.
IMPORTANT SAFETY INSTRUCTIONS
When using an electrical appliance, basic precautions should always be taken, including the following:
READ ALL INSTRUCTIONS BEFORE USING
DANGER or serious injury fr
-
Do not place or store appliance where the stand can fall or be pulled into a tub or sink. Do not place or drop charging stand into water or other liquid.
-
Except when charging, always unplug this appliance from the electrical outlet immediately after using.
-
Always turn this appliance off before cleaning.
-
Do not reach for an appliance that has falle into water.
WARNING
WARNING- To reduce the risk of burns, fire, electrical shock, or injury to persons:
-
This appliance should not be used by, on, or near children or individuals with certain disabilities.
-
Use this appliance only for its intended use as described in this manual. Do not use attachments not recommended by the manufacturer.
-
Never operate this appliance if it has a damaged cord or plug, if it is not working properly, if it has been dropped or damaged, or if the stand has been dropped into water. Return the appliance to a service center for examination and repair.
-
Keep the cord away from heated surfaces.
-
Never drop or insert any object into any opening.
-
Do not use outdoors or operate where aerosol (spray) products are being used or where oxygen is being administered.
-
Do not use this appliance with damaged or bro foils, as injury may occur.
-
Always attach plug to appliance first, then to outlet. To disconnect turn all controls to off position before removing plug from outlet.
Shaver voltage: This appliance comes with an adapter that can be used on an alternating current (120V AC only).
SAVE THESE NSTRUCTIONS
WARNING
-
Women whose skin is sensitive to cosmetics or easily irritated by shaving, or who suffer from a skin allergy, should test one section of the leg or arm before using the shaver.
-
The foils are thin and precisely finished pieces. Do not press hard against the foils, or drop foils. A warped or distorted foil will produce poor shaving results. Also a dam-
precause poor shaving roaster. Also a damaged foil may cause skin injury. A damaged foil should be replaced immediately.
-
When cleaning, use cold or warm water. Do not use hot water, sea water, or cleaners, as they can cause damage to the waterproof seals.
-
Do not leave the entire unit submerged in water for a long period of time.
-
To prevent possible damage to the foils and the cutter, women who use underarm deodorant must thoroughly clean and air-dry the foil and cutter after each use. Failure to do this may result in corrosion 6. Keep out of reach of children.
The Conair® Personal Beauty Groomer gives you today's complete shaving and trimming all in one. It has three interchangeable heads that are specially designed to work quickly and leave you perfectly groomed all over.
GETTING TO KNOW YOUR PERSONAL BEAUTY GROOMER Rechargeable Unit
(charge for 16 hours prior to first use)

natural_image
Assorted cleaning tools and accessories arranged on a tiled floor (no visible text or symbols)① Full size, shaver head
② Bikini trimmer head
③ Eyebrow trimmer head
4 2-position eyebrow comb
⑤ 5-position attachment comb
⑥ Oil
⑦ Cleaning brush
8 Stand
⑨ Charging adapter (not pictured)
- Make sure the on/off switch is in the OFF position
- Plug the Adapter into a 120V outlet
- Place the rechargeable handle on the base on the charging contacts
- The charging indicator light should go on, indicating that the unit is being charged
- Before the first use, or if the device has not been used for a long time, be sure to charge the unit for 16 hours.
CHANGING THE HEADS
Before changing the heads, be sure that the on/off switch is in the OFF position.
To remove the shaver head, gently twist counter clockwise and gently pull the head up and away from the handle (see Fig. 1).
Be careful not to push against or hold on to the foil. It is delicate and may be easily damaged.
To install the Bikini or the eyebrow trimmer head, reverse the removal process. Position the head and gently twist clockwise until the attachment snaps into place (see Fig. 2).


To remove the bikini or the eyebrow trimmer follow the same process for removing the shaver head.
USING THE SHAVER
The shaver head is designed to provide a clean, close shave to your legs, arms, and underarms. Take care with the foil as it is very sensitive and easily damaged. Always inspect it for damage before you use it.
Never use a foil that is damaged, as this can result in injury. Make sure your skin is clean and dr before use. Do not use any lotions or oils before shaving.
SHAVING
NOTE: if you are switching to an electric shaver for the first time, it will take 12 uses for your skin and hair to adjust to this new method of removing hair. Do not evaluate performance until you have allowed your skin and hair to adjust.
- Be sure the unit is fully charged
-
Attach the shaver head as describe in "Changing The Heads" section
-
Move the power switch to the ON position
- Hold the shaving foil against the skin moving the shaver gently against the direction of hair growth
-
Don't push too hard against the skin as this will cause irritation and may damage the foil
-
As your skin may be sensitive after shaving, test your moisturizer on a small patch of skin and wait to see if irritation occurs
-
Cleaning: After each use you will need to clean the shaver head to ensure continued performance
-
Move the power on/off switch to the OFF positio
-
Remove the shaver head from the handle
-
Remove the foil head assembly from the shaver head by pushing on the two side buttons and pulling the foil away from the head (see Fig. 3).

-
Using the supplied cleaning brush, gently brush the hair away from the cutter. Blow the hair off the foil, do not use the brush on the foil, it will cause damage.
-
The head may also be rinsed under water. Be sure to allow both to dry before using.
To maintain the best cutting performance, be sure to replace the foil head and cutter every six months of regular use. Contact Conair Customer Service to order the replacement parts
TRIMMING
-
Be sure the unit is fully charged
-
Attach the trimming head as described in "Changing the Heads" section
-
To fully remove hair or to outline the bikini area, use the trimmer without the attachment comb
-
When removing hair, gently move the blades against the direction of growth.
-
To outline, place the blades perpendicular to the skin surface and apply the blades to the edge of the hair. Use the blades to create the desired outline.
-
For the cleanest finish, follow up with the foil shaver
-
For cutting hair without completely removing it, attach the 5-position comb to the head. Place the
WPSOOS简历 by General Women's School

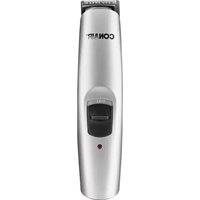
LT10CS Battery Operated Trimmer
FROM CONAIR
EXCITING ITEMS
Bikni Trimmer Attachment - Bikni-LTGS40 - \$5.00
Charging Base - LTC540-CB - \$6.00
Cleaning Brush - BruSH-180 - \$0.50
Replacement Foil and Cutters - CSP26 - \$6.50
1-800-3-CONAIR.
by calling customer service at
nasa sanays use the following replacement wards, which can be ordered directly from Cenir
REPLACEMENT PARTS:
Glendale, AZ 85307
7475 N. Glen Harbor Blvd.
BRIUO WLADRW
1100157420
call: 1-800-3-CONAIR or visit us on the web at WW.
For sharing tips and information on Cover applications
7475 N. Gen Harbor Blvd.
Service Department
SERVICE CENTER
damages, so the above limitation may not apply to
WHAT TO CALL, some claims do not know the excision or limitation of special, incidental, or provisional
OTHER WARRANTY, EXPRESS OR IMPLIED.
DAMAGES FOR BREAK OF THIS OR ANY
IN NO EVENT SHALL CONAIR BE LIABLE FOR ANY SPECIAL UNRESTINAL OR CONSTRUCTION
any lasts, so the above limitations may not apply to you.
do not allow limitations on how long an implied war-
Limited IN DOKATION TO THE 24 MONTH DOKATION OF THIS WRITTEN. LIMITED WARRANTY. Some states
FINNESS FOR A PARTICULAR PURPOSE, SHALL BE
ILLARILIES, INCLUDING OUT NOT LIMITED TO THE
ANY IMPULDED WARRANTIES, OBLIGATIONS, OR
date of manufacture.
shipping instructions. In the absence of a purchase recent that warranty period shall be 24 months from this
purchase and should call 1-800-366-0937 for
with your purchase receipt and \$3.00 for postage and
the product to the service center listed below, together
WORKING IS OF THEIRALS.
purchase if the appliance is defective in
control will train on replace (ax out option) you with free of charge for 24 months from the date of
LIMITED TWO YEAR WARRANTY
oppon of proper disposals.
officials for details in your area for recycling
waste stream. Check with your local solid waste
to dispose of these batteries into the municipal
recalibration of allanes, the salenars are
NOTE: The product you have purchased contacts
place the bikini timmer and eyelow timmer
and maintenance,
mer. After each use
10 Don't the飞机 and Every Way film.
omlazed occasions
designed with cus-
The storage stand is
SHAND
STAND STORATE
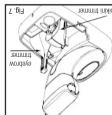
(see Fig. 6).
- Push up the comb attachment to release.
mer head and press down (see Fig. 5).
- Place the comb attachment on the bikini trim-
1
↓
m = 311
m = 311
1
The Ground Truth image displays a single, solid horizontal line. According to Rule 2 (UNDERSCORE & LINE RULES), this is a stylistic or background line, not a placeholder underscore. Therefore, the OCR result must ignore it. The provided OCR content is "____", which consists of four underscores. This is an incorrect interpretation of the line as a placeholder, violating the rule that stylistic lines must be ignored. The OCR has hallucinated text (underscores) where none should exist. Hence, the result is inconsistent with the Ground Truth.
COMB ATTACHMENT
Bikini trimmer
CAUTION
cutters to air-dry before replacing foil frame.
- Allow the shaver
which is included.
hot water (you can also use the cleaning brush
warm or cold runni
- Binses the shaver cutter and toll frame under
RINSE THE SHAVYER HEAD
Fig.7.
into the customized locations for storage (see
into place.
- Every press the inner blades until they snap
SMALL SPRING UNDER THE CUTTER5.
Caution: MAKE SURF YOU DO NOT LUSE THE
blade and gently guide it into
- Firmly hold the new inner
up (Fig. 4).
inner blades and pull straight
IS NOW IN VIEW.
and then remove it from shaver head. the cutter
- to remove the shaver head from the unit, press
17774 0/6719 1711 20105 171
FOR ALLINGS THE FILL 3A WELT
(INNEN BLADES)
REPLACING THE CUTTER
the foils.
frame into position, being careful not to push on
head. Remove and then gently insert the new roll
- When regulating the ions, press the ion turn release, butions on the both sides of the shield
bar groups and if given you put the job can have you
often to get a smooth result, or if you experience
shave, or if you have to go over your leg area more
have to push harder on the shaver to get a close
- If it is time to replace the tolls when you find you
REPLACING THE FOILS FRAME
piled cleaning brush.
OFFE position and clean the blades with the sup-
- When finished, move the on/off switch to the
blades against the direction of growth.
completely leave the comb off and move the
shoulder position. If you want to remove the bar
- Many move the coming through the bank, if you
INSTITUTE OUT OF ORDERING TELE
на не атоюб ану ио г become на бор-
- Place the comb on the head in the ontset posi-
How do to be back of the interest board:
GARANTÍA LIMITADA POR DOS AÑOS
Consolidation Service Department
7475 N. Clap Harbor Blvd
Glendale, A7 85307
©2008 Consix Corporation
7475 N. Glen Harber Blvd
7470 N. diorn Harbar Blvd.
dichatic, AL 60007
PARTES DE REPUESTO:
LWD500CS Rasuradora Infiniti by Conair™
• Recargable
NOTE: Attachment comb is designed to work with
You may thin out the hair using the attachment comb
- Once the share of your experts has been declared
We tested the results issued by the
- May be a result of the NO
timmer without the attached comb.
A TO outline and scope of the frameworks - use the
everbrows. The smaller blade is ideal for detailing.
The larger blade can be used to trim body back arch.
- 2017年1月1日 星期一、召开情况
„Changting the Heads” section is
2014年1月1日
The following table is in English:
charging base to ensure it is fully charged for the
to the on pension, clean and passes with the following: provided for both and fully confident the behalf to the
- When you have finished, move the switch
SJIEU
included) through the hair to remove any cut loose
- After hair removal, run a comb or brush (not
fair is accheveled.
the next lowest position until the desired length of
bing. If you want to make the hair shorter, move to
10 After you have done this with the longest set-
direction of growth.
- Gently move the camp through the bay in the
comb switch away from the back of the trimmer.
- Start with the longest setting, by moving the
down on to the back of the trimmer head.
comb on the cutting blades first, and


natural_image
White disposable medical device with adjustable grip and base (no visible text or symbols)m = 311
CON
- IMPORTANT SAFETY INSTRUCTIONS
- READ ALL INSTRUCTIONS BEFORE USING
- DANGER or serious injury fr
- WARNING
- SAVE THESE NSTRUCTIONS
- GETTING TO KNOW YOUR PERSONAL BEAUTY GROOMER Rechargeable Unit
- CHANGING THE HEADS
- USING THE SHAVER
- SHAVING
- TRIMMING
- FROM CONAIR
- COMB ATTACHMENT
- Bikini trimmer
- CAUTION
- RINSE THE SHAVYER HEAD
- (INNEN BLADES)
- REPLACING THE CUTTER
- REPLACING THE FOILS FRAME
- GARANTÍA LIMITADA POR DOS AÑOS
- PARTES DE REPUESTO:
Brand : Conair
Model : LTGS40RCS
Category : Lawn mower