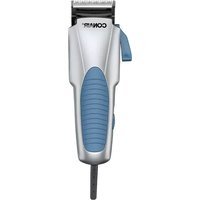
HC244NGBV - Lawn mower Conair - Free user manual and instructions
Find the device manual for free HC244NGBV Conair in PDF.


| Brand | Conair |
| Model | HC244NGBV |
| Product Type | Hair Clipper / Trimmer |
| Power Source | Rechargeable lithium-ion battery |
| Battery Life | Up to 60 minutes of cordless use |
| Charging Time | Approximately 4 hours |
| Blade Material | Stainless steel, self-sharpening |
| Cutting Lengths | Adjustable with included guide combs (sizes 1-8) |
| Number of Guide Combs | 8 |
| Waterproof | Washable blade assembly, not fully waterproof |
| Dimensions (L x W x H) | 7.1 x 2.0 x 1.8 inches (180 x 50 x 45 mm) |
| Weight | 0.7 lbs (320 g) |
| Motor Type | Rotary motor with low vibration |
| Accessories Included | Charger, cleaning brush, oil, storage case |
| Usage | Hair cutting, beard trimming, detail work |
| Maintenance | Oil blades after each use, clean with brush |
| Safety Features | Ergonomic grip, safety lock on blade |
| Spare Parts Available | Replacement blades and combs available |
| Warranty | 2 years limited warranty |
Frequently Asked Questions - HC244NGBV Conair
User questions about HC244NGBV Conair
0 question about this device. Answer the ones you know or ask your own.
Ask a new question about this device
Download the instructions for your Lawn mower in PDF format for free! Find your manual HC244NGBV - Conair and take your electronic device back in hand. On this page are published all the documents necessary for the use of your device. HC244NGBV by Conair.
USER MANUAL HC244NGBV Conair
[custom]cut 43 PIECE HAIRSUT KIT

INSTRUCTIONS for Care and Use
MODEL HC3MGB
CONAIR
IMPORTANT SAFETY INSTRUCTIONS
When using electrical appliances, especially basis procedures should change be followed.
basic precautions should always be followed, including the following:
including the following:
READ ALL INSTRUCTIONS
BEFORE USING
BEFORE USING
KEEP AWAY FROM WATER
[Non-Text]
DANGER — any appliance is elect
cally live, even when the switch is off.
To reduce the risk of electric shock
-
Do not reach for an appliance that has fail
-
Do not reach for an appliance that has been into water. Unplug immediately.
-
Do not use while bathing or in the shower
-
Do not place or store appliance where it c
fall or be pulled into a tub or sink. Do not pla
in or drop into water or other liquid.
- Always unplug this appliance from t
electrical outlet immediately after using.
- Unplug this appliance before cleaning.
DO NOT REACH
DO NOT REACH
INTO THE WATER
WARNING
WARNING — To reduce the ri
of burns, electric shock, fire, or injury
persons:
[Non-Text]

- With screwdriver or dime, turn the power screw counter clockwise until arm strikes the coil, making a clacking noise. (FIG. 1)

- Then turn the screw clockwise, until the
noise stops and then turn about 45 degrees
more. This is the maximum power setting.

OIL BLADE BEFORE USE
ADJUSTABLE TAPER LEVER Just like professional attire. The Capoir tape
Just like professional clippers, the conlal taper lever is positioned at your thumb. You can hold
the clipper in your hand and adjust the lever at
the same time...while you're clipping
This taper lever eliminates the need for
an attachment comb because it lets you
gradually adjust the closeness of the cut. For
the closest cut and the shortest hair, push taper
lever up as far as it will go. To increase cutting length, slowly much less down. If you must be
length, slowly push lever down. If you push to the lowest position, it will leave hair about the
same length as the short attachment.
Because a different cutting edge is used in each setting, the taper lever lengthens the life of your blades.
Packed-in hair can slow down any clipper.
To remove hair without removing the blades,
use your cleaning brush to brush hair out of
the blades. This should be done after each Class Out
Close cut
[Non-Text]
A
(1)
Lower Cut
2017
use. When blades are free of hair put a small
amount of oil across them.
If you do this after every clipping, especially
with heavy hair cutting, the blades should
remain in good working condition. It clipper stops cutting and this action doesn't help
stops eating and food doesn't help, check the blades. If they've become dull
re place them. For new blades, send chec
or money order for \$6.50 (see order blank.)
This price includes postage and handling, but \$10.00 minimum must be met
\$10.00 minimum must be met.
[Non-Text]
Copair Corporation
150 Milford Rd.
East Windsor, NJ 0852
CAUTION: Never pull on the clipp
Never twist or wrap the cord around the clip
per. Lay it flat with the cord coiled up when
THE CONAIR GUIDE
THE DOWN GUIDE TO CUTTING HAIR AT HOME
Before you start:
- Inspect your clipper. Make sure it's
free of hair and dirt, properly oiled, and running smoothly.
- Place a towel or cape around the neck
of the person.
- Seat the person so that his or her head is at your own level. This gives you more
is at your eye level. This gives you greater visibility and control.
- First, comb hair until it's tangle-free. Then
hold clipper in a comfortable grip. Now you're ready to cut
ready to eat.
MEDIUM TO LONG CUT
To begin with, cut only a small amount of
hair until you become used to the length each attachment leaves the hair. Try the longest
attachment is above the half. Try the longest attachment on the clipper first. If you want a
shorter cut, you can then use shorter combs.
- Short attachment comb (number 1) cuts hair to 1/9"
• Medium-Short attachment comb (number 2)
cuts hair to 1/4".
• Medium-Long attachment comb (number 3)
cuts hair to 3/8". Long attachment comb (number 4) cuts
- Long adjustment comb (number 4) data hair to 1/2".
• Long attachment comb (number 5) cuts
hair to 5/8".
- Long attachment comb (number 7) cuts hair to 3/4"
• Left ear attachment comb lightly tapers
over left ear.
• Right ear attachment comb lightly tapers
over right bar.
(1)
[Unreadable]
图2-1
[NO TEXT]
[NO TEXT]
三
(2)
[Figure]
The image is too blurry to recognize any text content.
[Figure]
1
NOTE: Never push
through the hair to
quickly. Professional the clinner works m
cuts through the hair
。
(3)
1 √3
人
[NO TEXT]
[Unreadable]
•
Hold clinner light
with teeth of the a
ing up ward, yet
Gradually lift the cl ward, though the
ward through the little at a time
Bareat ground sirdes
Propost. Around class
[Non-Text]
If you want hair to be even shorter
A) Apply more
the head with
ment comb that
This takes a Ⅱ of course.
3 of course.
B) Just switch
attachment con
Remember, it's
leave 100 much little. For longer
Note: For longer use the berber of
hair on the top
cutting over the
Or hold the hair
fingers and car length Always
the front to the
head, gradually
shorter by re
space between
fingers and the often to check for uprawn strand
often to check for uneven setting rid of trimmed hair
OUTLINING:
OUTLINING. Outlining requires no attachments.
Coding requirement attachments: the desired style. Position the clip
the sideburns and the ear (see be
sure the corner edge of the blade
hairline. With the outline of the hair
slowly move the clipper over, behind the ears. For the back of
the sideburns, hold the closer
(see Fig. 1) and, holding it against t
length desired, move the clipper d










To taper hair down to the neckline, use
attachment comb #1. Comb hair and
check for uneven spots. Outline sideburns
and neck areas (see "Outlining").
USED MAINTENANCE
USER-MAINTENANCE
INSTRUCTIONS
INSTRUCTIONS OARE OF YOUR CURRERO
MAINTENANCE OF THE BLADE Always apply oil to the blades before, during and
Always apply on to the blade before, during and after use. This will ensure maximum cutting
performance. Hold clipper away from your body
in a downward position and apply oil on the front
and sides of the cutter blade. Wipe excess oil off with a soft dry cloth.
Conair® hair dinners are carefully inspected to
insure that the blades are in perfect alignment.
You will need to realign the blades after remov-
ing them for cleaning or replacement, or if they
should be knocked out of alignment. How can you tell if the blades good relipping? Simb
you tell if the blades need realigning? Simply match them up, point for point, to conform with
mush start up, plain for pain; to conform with the drawing below.
To replace cutting comb and cutter after removal.
to replace taking some and satisfy after removal for cleaning, replacement or, because they
are out of alignment, slide the cutter back on to
the black plastic oscillating head. Next, you
must make sure that the cutter (small blade) and the rolling ramp (large blade) are properly
and the cutting comb (large blade) are properly slipped. Line up the new or existing cutting
Figures: Line up the flow of closing closing
comb with the two screw holes. Place the
original screws, one in each hole, and lightly
tighten with a Phillips head screwdriver.
Fig. 1
large blade (cutting comb)—
(二) 1.2.3.4.5.6.7.8.9.10.11.12.13.14.15.16.17.18.19.20.21.22.23.24.25.26.27.28.29.30.31.32.33.34.35.36.37.38.39.40.41.42.43.44.45.46.47.48.49.50.51.52.53.54.55.56.57.58.59.60.61.62.63.64.65.66.67.68.69.70.71.72.73.74.75.76.77.78.79.80.81.82.83.84.85.86.87.88.89.90.91.92.93.94.95.96.97.98.99.100
Blade screws — ⊕ ⊕
Small blade (cutter)
Officer blade (pilot)
[Non-Text]
Then, match the two blades up, point to point,
following with the illustration below in (Fig. 6)
•
Fig. 2 1/32" to 1/16"
Cutting Comb (large blade)
Outer
small blade)
(No text)
*The top edge of the cutting comb should be
1/32" to 1/16" (.79 mm. to 1.59 mm.) higher than the top edge of the cutter. This is important
than the top edge of the cortex. This is important, so that the dinner does not cut too close or
come in contact with the skin.
*The extreme left-hand tooth of the cutting
comb must cover or be to the extreme left hand of the first small truth of the author.
of the first small tooth of the cutter.
be sure that the extreme right hand big tooth of the cutter touches the extreme right hand
tooth of the cutting comb.
Any other servicing should be performed by an
authorized service representative or that the
appliance has no user servicesable parts. The product is for household use.
product is for household use.
HAIRCUT KIT REPLACEMENT PARTS & ACCESSORIES ORDER FORM
Pricing in effect through June 1, 2010. Orders postmarked after this date
| ITEM | RATE 4 | PAGE | QUANTITY | EXPACT |
| Base Set for HC102, HC200, HC203, HC205, HC207A, HC102, HC117Set of 4 Adjustment Contact 1/8", 1/4", 5/8", 1/2".File all dropers (e.g. HC203, HC205, HC207A, HC102, HC117)HC200, HC203, HC205, HC207A, HC102, HC205Set of 2 Adjustment Contact left air and right air. File all dropers (see COMB-10), except HC222 | BL:D-0.00 | |||
| COMB-10 | 0.00 | |||
| 1.75 | COMB-11 | |||
| 1"Comb fit clips"Slab attachment contact 5/8", 5/4", 7/8".File all dropers | 1.75/100 MB-12 | |||
| 0.00/100 MB-13 | ||||
| Navi Brush | HCN-B-1 | 1.50 | ||
| Deluxe Black Vinyl Capex with Velecr Colar | CAPC-1-0.00 | |||
| Luminating Oil (pig. of 3 flakes) | HC OIL | 2.00 | ||
| 30-Minu Harnet Vinyl | HC XHODD | 6.00 | ||
| Baseline Sissure | BC-1 | 2.00 | ||
| Elbow Guard | HC-1 | 1.00 | ||
| Sitting Clips (set of 3). | CLP-1-1.00 | |||
| Dissueton check for every other possible sites in the case. We can be trained on each distance to 0.75 cm from 1.9 L at 40°C. We can be trained on every other possible site in the distance to 0.75 cm from 1.9 L at 40°C. We can be trained on every other possible site in the distance to 0.75 cm from 1.9 L at 40°C. Please note if there is delivery to any end delivery, please check and verify that the road has a street address, or 10% contact details is $1.00. | ||||
| Description: | Subtotal | |||
| Suisse Tax | "Sales Tax | |||
| TOTAL | TOTAL | |||
| ACCOCONC | Mail No: | |||
| UPL | Fiscal Year Ended | |||
| RICHMONDAY | Section 1 December | |||
| For information on either guard behind parts of 1:300-2:300-R | Source: http://www.bocm.com | |||
[Non-Text]
[custom]cut

Consair Corporation 150 Milford Rd.
East Windsor, NJ 085
m = 311
[Non-Text]
[Non-Text]
[Non-Text]
[Non-Text]


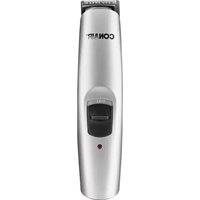
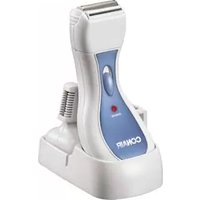
Brand : Conair
Model : HC244NGBV
Category : Lawn mower