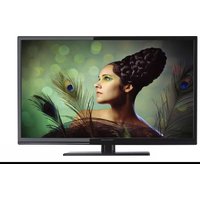
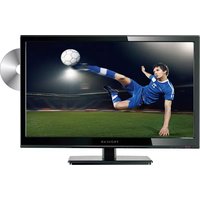
Proscan PLDED3996A - Television CURTIS - Free user manual and instructions
Find the device manual for free Proscan PLDED3996A CURTIS in PDF.


| Product Type | LED Television |
| Brand | Curtis |
| Model | Proscan PLDED3996A |
| Screen Size | 39 inches (measured diagonally) |
| Resolution | 1920 x 1080 pixels (Full HD) |
| Display Technology | LED-backlit LCD |
| Aspect Ratio | 16:9 |
| Refresh Rate | 60 Hz |
| Inputs | 2 x HDMI, 1 x USB, 1 x Composite (AV), 1 x VGA (PC), 1 x RF (Antenna/Cable) |
| Outputs | 1 x Digital Optical Audio, 1 x Headphone Jack |
| Audio Power | 2 x 8 Watts |
| Power Consumption (Operate) | 70 Watts (typical) |
| Power Consumption (Standby) | Less than 0.5 Watts |
| Power Supply | AC 100-240V, 50/60Hz |
| Weight with Stand | 9.5 kg (20.9 lbs) |
| Weight without Stand | 8.6 kg (19.0 lbs) |
| Dimensions with Stand (W x H x D) | 889 x 574 x 180 mm (35.0 x 22.6 x 7.1 in) |
| Dimensions without Stand (W x H x D) | 889 x 519 x 76 mm (35.0 x 20.4 x 3.0 in) |
| VESA Mount Pattern | 200 x 200 mm |
| Remote Control | Included (batteries included) |
| Tuner | ATSC (Digital) / NTSC (Analog) |
| Warranty | 1 Year Limited |
| Cleaning Instructions | Wipe with a soft, dry cloth. Do not use abrasive cleaners. |
| Safety Warning | Use only with the specified stand or wall mount. Avoid placing near heat sources. |
Frequently Asked Questions - Proscan PLDED3996A CURTIS
User questions about Proscan PLDED3996A CURTIS
0 question about this device. Answer the ones you know or ask your own.
Ask a new question about this device
Download the instructions for your Television in PDF format for free! Find your manual Proscan PLDED3996A - CURTIS and take your electronic device back in hand. On this page are published all the documents necessary for the use of your device. Proscan PLDED3996A by CURTIS.
USER MANUAL Proscan PLDED3996A CURTIS
natural_image
Illustration of a peacock feather with visible eye and eyelid (no text or symbols)
natural_image
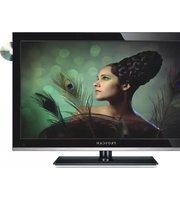
Modern flat-screen TV displaying a woman with feather-like makeup against a bokeh green background (no text or symbols visible)LED
39" LED TV
PLDED3996A
Contents
- Introduction
- Warning
- Caution
- Important Information
- Attaching or Removing the Stand
● Installing Batteries to the Remote Control
● Identifying Front and Rear Panel - Connection Suggestion
- Main Unit Description
- Remote Control
- OSD Basic Adjustment
● How Do I Clean The TV - Troubleshooting
- Specifications
● FCC Compliance Statement
Introduction
Thank you very much for purchasing your LED TV. It serves as a normal colour TV and a PC monitor. To enjoy your set fully from the very beginning, read this manual carefully and keep it handy for future reference.
INSTALLATION
① Locate the receiver in the room where direct light does not strike the screen. Total darkness or a reflection on the picture screen can cause eyestrain. Soft and indirect lighting is recommended for comfortable viewing.
② Allow enough space between the receiver and the wall to permit ventilation.
③ Avoid excessively warm locations to prevent possible damage to the cabinet or premature component failure.
④ This TV can be connected to AC 100-240V\~50/60HZ.
⑤ Do not install the TV in a location near heat sources such as radiators, air ducts, direct sunlight, or in closed compartments and closed areas. Do not cover the ventilation openings when using the TV.
⑥ The indicator light will last for about 30 seconds after the power has been turned off. Wait until the indicator light goes out before repowering the TV.
Warning

CAUTION RISK OF ELECTRIC SHOCK DO NOT OPEN

CAUTION: TO AVOID THE RISK OF ELECTRIC SHOCK. DO NOT REMOVE COVER (OR BACK). NO USER- SERVICEABLE PARTS INSIDE. REFER SERVICING TO QUALIFIED SERVICE PERSONNEL

This symbol is intended to alert the user to avoid the risk of electric shock. This equipment may only be disassembled by qualified service personnel.

This symbol is intended to alert the user to the presence of important operation and maintenance instructions in the literature accompanying the equipment.

Class I structures of equipment should be connected to the grid power output with a protective earth connection on the socket. Power plug as a broken appliance, broken installations should be easy to operate.
Caution

natural_image
Illustration of a computer monitor with a crossed-out hand and lightning bolts, symbolizing anti-telecom fraud (no text present)
High voltages are used in the operation of this product. Do not open the product's casing. Refer servicing to qualified service personnel.

natural_image
Simple line drawing of a computer monitor with a blue X mark and a hanging curtain (no text or symbols)
To prevent fire or electrical shock hazard, do not expose the main unit to rain or moisture, do not place objects filled with liquids, such as vases, on the apparatus.

natural_image
Illustration of a computer monitor with a 'X' symbol and decorative stars above it (no text or symbols present)
Do not drop or push objects into the television cabinet slots or openings. Never spill any kind of liquid on the television receiver.
natural_image
Simple line drawing of a box with a cross symbol inside, placed on a base (no text or labels)
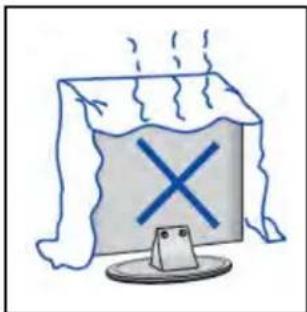
Avoid exposing the main unit to direct sunlight and other sources of heat. Do not stand the television receiver directly on other products which give off heat: e. g. video cassette players and audio amplifiers. Do not block the ventilation holes in the back cover. Ventilation is essential to prevent failure of electrical components. Do not squash the power supply cord under the main unit or other heavy objects.
Caution

natural_image
Cartoon illustration of a person using a computer monitor with a blue X symbol (no text or symbols present)
Caution
Never stand on, lean on or suddenly push the product or its stand. You should pay special attention to children.

natural_image
Illustration of a computer monitor with a blue X symbol and a blue lightning bolt, placed on a table (no text or symbols present)
Caution
Do not place the main unit on an unstable cart stand, shelf or table. Serious injury to an individual and damage to the television may result if it should fall.

natural_image
Illustration of a person standing next to a computer monitor and a small circular object with an insect (no text or symbols)
Caution
When the product is not used for an extended period of time, it is advisable to disconnect the AC power from the AC outlet.
natural_image
Simple line drawing of a hammer striking a surface with radiating lines (no text or symbols)
Caution
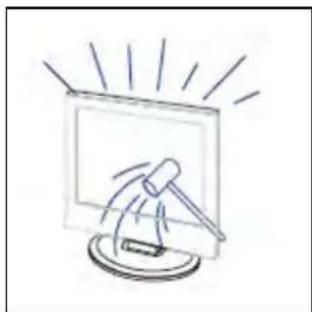
The LED panel used in this product is made of glass and is therefore breakable. This product must not be dropped or banged. If the LED Panel breaks be careful of being injured by broken glass.
Important Information
Television Antenna Connection Protection
External Television Antenna Grounding
If an outside antenna or cable system is to be connected to the TV, make sure that the antenna or cable system is electrically grounded to provide some protection against voltage surges and static charges. Article 810 of the National Electrical Code, ANSI/NFPSA 70, provides information with regard to proper grounding of the mast and supporting structure, grounding of the lead-in wire to an antenna discharge unit, size of the grounding conductors, location of antenna discharge unit, connection to grounding electrodes, and requirements of the grounding electrode.

Lightning Protection
For added protection of the TV during a lightning storm or when it is left unattended or unused for long periods of time, unplug the TV from the wall outlet and disconnect the antenna or cable system.
Power Lines
Do not locate the antenna near overhead light or power circuits, or where it could fall into such power lines or circuits.
Attacting or Removing the Stand
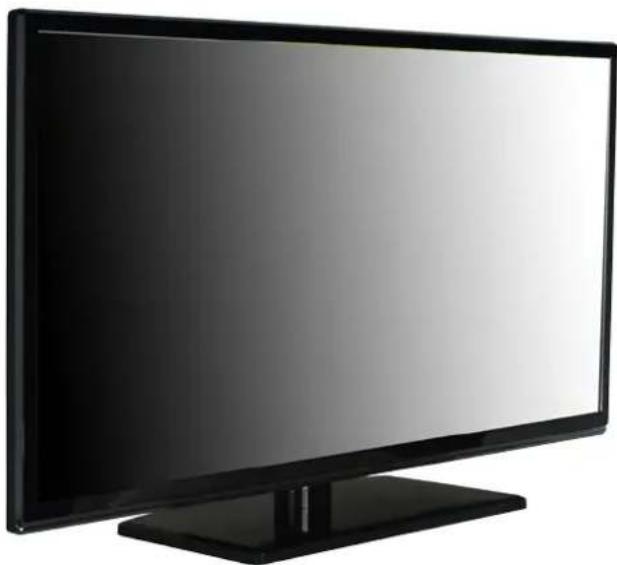
- To attach the base place the display unit flat on a table. Afterwards attach the stand onto the bottom of the stand. Screw in the 5 screws to secure the stand.
natural_image
Exterior view of a modern flat-screen monitor with black frame and stand (no text or symbols visible)
natural_image
Close-up of a black plastic panel with grid lines and a central circular component, no visible text or symbols.- To remove the stand, remove the 4 screws in the area and the stand will come off.

natural_image
Close-up of a mechanical component with four red-circled mounting points and black connectors (no visible text or symbols)Installing Batteries to the Remote Control
Please insert two AAA batteries into the remote control. Make sure that you match the (+) and (-) symbols on the batteries with the (+) and (-) symbols inside the battery compartment. Afterwards, re-attach the battery cover.

natural_image
Black rectangular device with a handle and two cylindrical batteries on the right side (no visible text or symbols)Please note:
Only use AAA batteries.
Do not mix new and old batteries. This may result in cracking or leakage that may pose a fire risk or lead to personal injury.
Inserting the batteries incorrectly may also result in cracking or leakage that may pose a fire risk or lead to personal injury.
Dispose the batteries in accordance with local laws and regulations.
Keep the batteries away from children and pets.
If the remote control is not used for a long time, remove the batteries.
Keep the remote control away from moisture, sunlight, and high temperatures.
Identifying Front and Rear Panel
Front View
natural_image
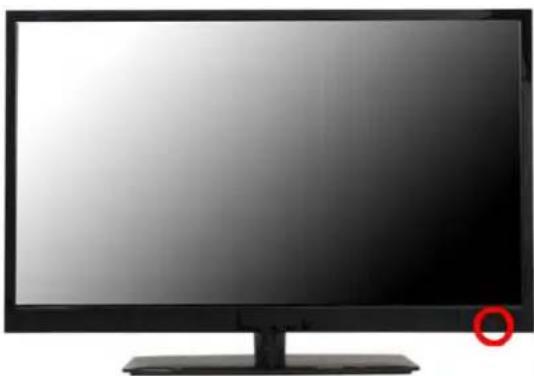
Front view of a modern flat-screen monitor with a red circular button on the side (no text or symbols visible)INDICATOR LIGHT – The light is red when power is plugged in but the TV is not turned on. The light turns blue when the TV is turned on. Because of the LED in the panel, the TV might take 10 – 12 seconds to power on.
REMOTE SENSOR – The remote sensor receives all the commands from the remote control.
Rear View Mounting Pattern

natural_image
Back view of a laptop computer with ventilation grilles and drive bays (no visible text or labels)Mounting Specification : 200mm x 200mm using screw size M6. Length of screw should not exceed 8mm. Please Note : The 8mm length of screw refers to how deep the screw can go inside the mounting holes. When you're buying screws, you should add the original 8mm to the thickness of your mounting plate in order to get the total screw length.
Connection Suggestions
If You Have Digital Cable without Cable Box or Antenna...
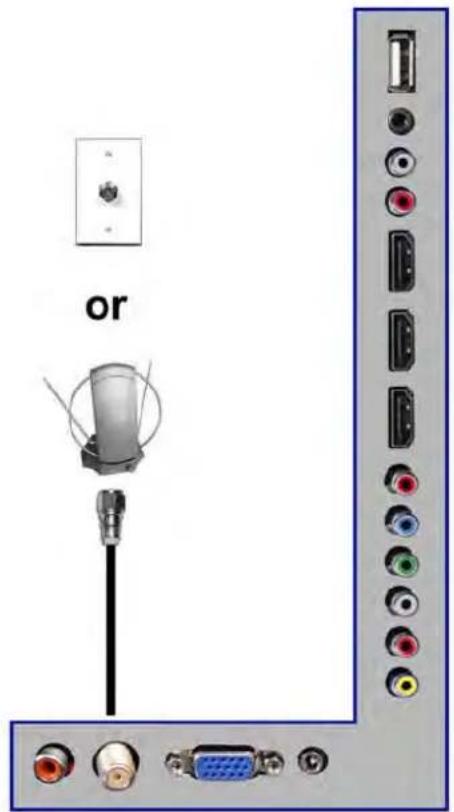
- Make sure the power of HDTV is turned off.
- Connect the RF cable from your antenna or digital cable to the TV port on the back of your HDTV.
- Turn on the HDTV.
- Follow the first time on screen instructions.
Please Note:
- Not all broadcasts are in High Definition (HD). Please refer to your local broadcasting stations for more information.
- The HDTV's tuner is designed for HDTV therefore requires a stronger signal than normal TVs. If you cannot achieve that signal level with your antenna or cable, your HDTV might lose picture or sound.
Connecting DVD Player with Component YPbPr...

natural_image
Diagram showing a CD-ROM connector with colored cables connected to a vertical panel (no text or symbols visible)-
Make sure the power of HDTV and your DVD player is turned off.
-
Obtain a Component Cable. Connect the green color connector to both your DVD player and YPbPr's green connector port on the back of your HDTV.
-
Connect the blue color connector to both your DVD player and YPbPr's blue connector port on the back of your HDTV.
-
Connect the red color connector to both your DVD player and YPbPr's red connector port on the back of your HDTV.
-
Obtain a RCA Audio Cable. Connect the white color connector to both your DVD player and YPbPr's white connector port on the back of your HDTV.
-
Connect the red color connector to both your DVD player and YPbPr's red connector port on the back of your HDTV.
-
Turn on the HDTV and your DVD player.
-
Use the remote control's source button or the source button on the TV to switch to YPbPr.
Please Note :
- Sometimes DVD players will not automatically output to YPbPr. You will need to configure your DVD player with AV connection first then switch to YPbPr. Please reference the DVD player's manual, to make sure the DVD player is configured to output correctly to the TV.
• This source shares audio jacks with composite video.
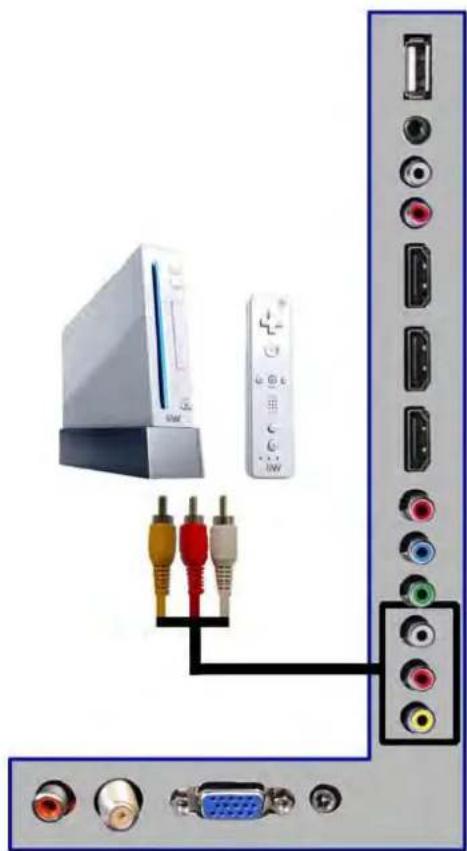
Connecting Wii TM with Composite...
natural_image
Diagram showing a Sony TV tower connected to various audio and remote ports (no text or labels visible)- Make sure the power of HDTV and your Wii TM is turned off.
- Obtain a Yellow Video Cable. Connect the Yellow Video connector to both your Wii™ and AV's Yellow Video connector port on the back side of your HDTV.
- Obtain a RCA Audio Cable. Connect the white color connector to both your Wii™ and AV's white connector port on the back side of your HDTV.
- Connect the red color connector to both your Wii™ and AV's red connector port on the back side of your HDTV.
- Turn on the HDTV and your Wii TM .
- Use the remote control's source button or the source button on the TV to switch to AV.
Please Note:
- Make sure to read your Wii™ installation guide for further information. This source shares audio jacks with YPbPr.
Connecting Cable or Satellite boxes with HDMI...

natural_image
Panel view of a network device with attached cable and antenna, showing ports and connectors (no text or symbols visible)- Make sure the power of HDTV and your set-top box is turned off.
- Connect a HDMI cable to the HDMI output of your set-top box and the other end to the HDMI port on the back of your HDTV.
- Turn on the HDTV and your set-top box.
- Use the remote control's source button or the source button on the TV to switch to HDMI.
Please Note:
- Please reference the set-top box's manual, to make sure the set-top box is configured to output correctly to the TV.
- HDTV supports NEC's universal remote code. Please look up NEC's codes in your universal remote's hand book.
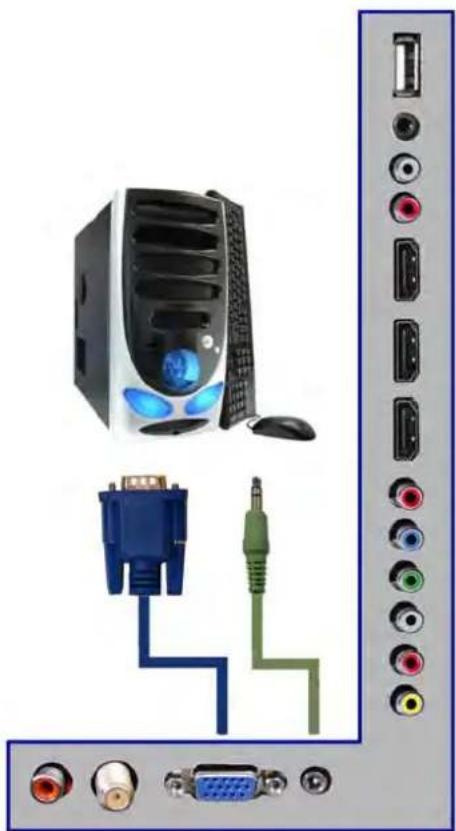
Connecting to a PC with VGA and 3.5 mm minijack ...
natural_image
Diagram showing computer tower connected to various audio and VGA connectors (no text or labels visible)- Make sure the power of HDTV and your PC is turned off.
- Obtain a 15-pin D-Sub VGA cable; connect to the VGA output of your PC and the other end to the VGA port on the back of your HDTV.
- Obtain a 3.5 mm Mini-jack, connect to the audio out of your PC and the other end to the VGA Stereo Input port.
- Turn on the power of the HDTV and your PC.
- Use the remote control's source button or the source button on the TV to switch to PC.
- Change your PC resolution to 1920x1080 at 60hz refresh rate.
- Press MENU to use the OSD's PICTURE option.
- Under the PICTURE option select PC Settings.
- Under PC Settings use AUTO ADJUST to adjust the screen.
Please Note:
- For the best results, please set your PC resolution to 1920x1080 at 60 Hz. Please refer to the PC or graphic card's manual for further instructions on how to set your resolution and refresh rate.
- Please refer to your PC manual for video output requirements of the video card.
- The VGA port of the TV features a power saving mode which will automatically turn off the TV, if there's no signal provided for more than 5 minutes.
Connecting a Digital Audio Receiver with Coaxial...

natural_image
Back panel with black connectors and colored connectors, no visible text or symbols-
Make sure the power of HDTV and your receiver is turned off.
-
Obtain a COAXIAL cable, connect it to your receiver's COAXIAL digital input and the COAXIAL connection on the LINE OUT port on the back of the HDTV.
-
Turn on the HDTV and your receiver.
Please Note:
- If you want pure digital stream for your receiver to decode, you must also configure the TV's OSD Sound->Digital Audio Out function. Make sure the option is on 5.1CH.
- If your receiver is making static noises when receiving 5.1CH, you must use the PCM option instead.
- Please reference the receiver's manual as well, to make sure the receiver is configured to receive signals correctly from the TV.
- The TV's COAXIAL out for 5.1CH is ONLY used for antenna/cable connection. Any other incoming audio signal will be passed out of COAXIAL in PCM format.
Main unit description
Control Panel Button Function
VOL+ : Volume up.
VOL- : Volume down.
CH+ : TV channel up.
CH- : TV channel down.
MENU : Press to select the main menu.
TV/AV : Select the input signal.
POWER : Switch on when at standby mode or enter the standby mode.
TV Terminal Connections


- Coaxial out terminal.
- RF antenna.
- VGA input terminal of simulation signal of PC.
- PC AUDIO input terminal.
- Video input terminal.
- AUDIO input terminal (Audio input terminal for Component and Video).
- Component input terminal.
- HDMI1 input terminal.
- HDMI2 input terminal.
- HDMI3 input terminal
- Line out terminal.
- EARPHONE out terminal.
- USB input terminal (Only be used to upgrade).
Remote control

POWER: Power on/off button, press once to turn the TV on and press again to turn the TV off.
MUTE: Press this button to mute or restore sound.
MTS/AUDIO: When stereo program is received, press this key to switch sound system between mono and stereo.
When SAP program is received, press this button to switch sound system between mono and SAP
When stereo and SAP program is received, press this key to switch among mono, stereo and SAP.
Press this key to show the list of audio languages available for the current channel in ATSC.
ASPECT: Press to adjust picture ratio.
PMODE: Select picture mode.
SMODE: Select sound mode.
0-9: Select and switch to a channel using 0 - 9.
-/-: Switch the program digit.
: Switch back and front between the current and previous channels.
DISPLAY: Display TV information.
EPG: Enter electronic program guide
AUTO: Adjust the picture automatically in pc mode.
RED, GREEN, YELLOW, CYAN: This button is not available.
SLEEP: Set the sleep timer.
SOURCE: Press to change signal source.
ENTER: Enter the selected option or perform the selected operation.
MENU: Press this button to enter the main menu.
EXIT: Exit the OSD (On-screen display).
CH+/CH-: Change the channel.
CC: Press this key to select the CC ,ON or OFF mode and CC on Mute .
INFO: Display some information of current program in TV mode.
VOL+/VOL-: Adjust the volume.
FAV: Switch between custom set "Favorite List"
F.LIST: Press this key to display the Favorite List mode.
C.LIST: Press this key to display the channel list mode.
OSD basic adjustment
Installation Guide
Press MENU button to display the MAIN OSD MENU; Press ◀ / ▶ button to select the MENU you want; Press ENTER button to enter the sub menu; Press ▼ / ▲ button to select the option and then press ◀ / ▶ to adjust the value in the sub menu; You can press MENU button to go back to the upper menu or EXIT button to close the OSD.
PICTURE
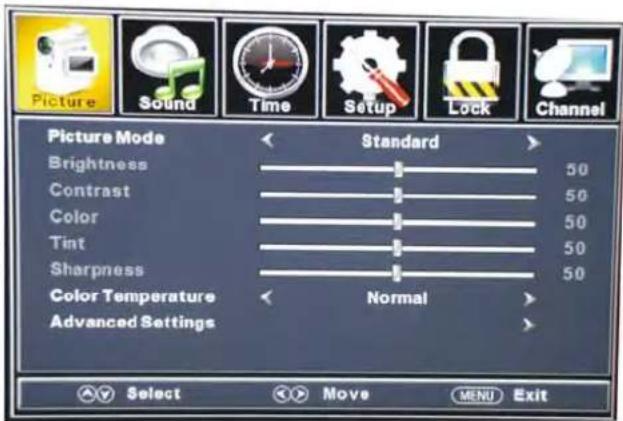
You can select the type of picture, which best corresponds to your viewing. Press the "MENU" button to enter the OSD menu .Then press “◀/▶” button to select the “PICTURE” menu.
-
Press “▼” button to select “Picture Mode”, press “◀/▶” button to select.
-
Press “▲/▼” button to select “Brightness” and press the “◀/▶” button to enter brightness adjustment menu to adjust brightness.
-
Press “▲/▼” button to select “Contrast” and press the “◀/▶” button to enter contrast adjustment menu to adjust contrast.
-
Press “▲/▼” button to select “Color” and press the “◀/▶” button to enter color adjustment menu to adjust color.
-
Press “▲/▼” button to select “Tint” and press the “◀/▶” button to enter hue adjustment menu to adjust tint.
Note: The 'Tint' item is used in NTSC mode only.
-
Press “▲/▼” button to select “Sharpness” and press the “◀/▶” button to enter sharpness adjustment menu to adjust sharpness.
-
Press “▲/▼” button to select “Color Temperature” and press the “◀/▶” button to select.
-
Press “▲/▼” button to select “Advanced Setting” and press the “ENTER/▶” button to enter sub-menu.
a. Press “▲/▼” button to select “Aspect Ratio” and press the “◀/▶” button to select.
b. Press “▲/▼” button to select “Noise Reduction” and press the “◀/▶” button to select.
c. Press “▲/▼” button to select “Dynamic Contrast” and press the “◀/▶” button to select “On” or “Off”.

SOUND
You can select the type of sound, which best corresponds to your listening.
Press the
"MENU" button to enter the OSD
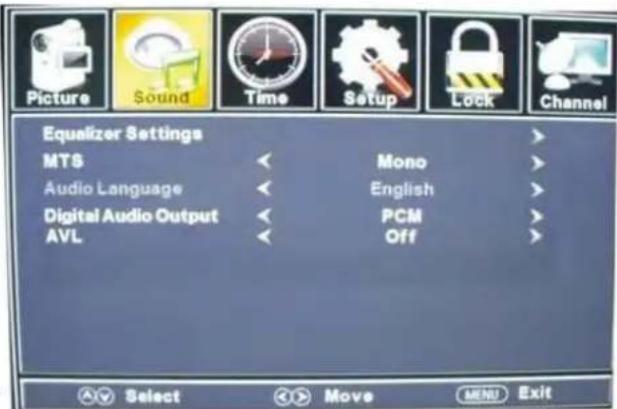
menu .Then press “◀/▶” button to select the “SOUND” menu.
- Press “▼” button to select “Equalizer Settings” and press the “ENTER/▶” button to enter sub-menu.
a. Press “▲/▼” button to select “Equalizer Mode”. Press “◀/▶” button to select.
b. Press “▲/▼” button to select “150Hz”. Press “◀/▶” button to select.
c. Press “▲/▼” button to select “500 Hz”. Press “◀/▶” button to select.
d. Press “▲/▼” button to select “1K Hz”. Press
“◀/▶” button to select.
e. Press “▲/▼” button to select “5K Hz”. Press“◀/▶” button to select.
f. Press “▲/▼” button to select “10K Hz”. Press “◀/▶” button to select
g. Press “▲/▼” button to select “Balance”. Press “◀/▶” button to select

Note: The b、c、d、e、f、g function it is only available in USER mode.
- Press “▲/▼” button to select “MTS” and press the “◀/▶” button to adjust.
Note: It is only available in ATV.
- Press “▲/▼” button to select “Audio Language” and press the “◀/▶” button to adjust.
Note: It is only available in DTV.
-
Press “▲/▼” button to select “Digital Audio Output” and press the “◀/▶” button to adjust.
-
Press “▲/▼” button to select “AVL” and press the “◀/▶” button to select “On” or “Off”.
TIME
Press the “MENU” button to enter the OSD menu. Then press “◀/▶” button to select the “TIME” menu.
- Press “▼” button to select “Sleep Timer” and press the “◀/▶” button to enter sleep timer adjustment menu to adjust sleep timer.

-
Press “▲/▼” button to select “Time Zone” and press the “◀/▶” button to enter time zone adjustment menu to select the local time zone.
-
Press “▲/▼” button to select “Daylight Saving Time” and press the “◀/▶” button to select “On” or “Off”.
-
Press “▲/▼” button to select “Time Format” and press the “◀/▶” button to select “12-hour” or “24-hour”.
-
Press “▲/▼” button to select “Auto Clock” and press the “◀/▶” button to select “On” or “Off”.
-
Press “▲/▼” button to select “Clock” and press the “ENTER/▶” button to adjust.
SETUP
Press the “MENU” button to enter the OSD menu .Then press “◀/▶” button to select the “Setup” menu.
- Press “▼” button to select “OSD Language” and press the “◀/▶” button to select the OSD
language which you desire.
-
Press “▲/▼” button to elect “Transparency” and press the “◀/▶” button to select.
-
Press “▲/▼” button to select “OSD Timeout” the “◀/▶” button to adjust OSD timeout.
-
Press “▲/▼” button to select “Closed Caption” and press the “ENTER/▶” button to enter sub-menu.


a. Press “▲/▼” button to select “CC Mode” the “◀/▶” button to adjust.
b. Press “▲/▼” button to select “Analog CC” the “◀/▶” button to adjust.
c. Press “▲/▼” button to select “Digital CC” the “◀/▶” button to adjust.
d. Press “▲/▼” button to select “Option” the “ENTER/▶” button to enter sub-menu.
Note: The c、d function it is only available in DTV.
Note: The option is adjust the digital closed captioning setting.

(a). Press “▲/▼” button to select “Mode” the “◀/▶” button to adjust.
(b). Press “▲/▼” button to select “Font Style” the “◀/▶” button to adjust.
(c). Press “▲/▼” button to select “Font Size” the “◀/▶” button to adjust.
(d). Press “▲/▼” button to select “Font Edge Style” the “◀/▶” button to adjust.
(e). Press “▲/▼” button to select “Font Edge Color” the “◀/▶” button to adjust.
(f). Press “▲/▼” button to select “FG Color” the “◀/▶” button to adjust.
(g). Press “▲/▼” button to select “BG Color” the “◀/▶” button to adjust.
(h). Press “▲/▼” button to select “FG Opacity” the “◀/▶” button to adjust.
(i). Press “▲/▼” button to select “BG Opacity” the “◀/▶” button to adjust.
Note: All the option it is not available in Custom.
- Press “▲/▼” button to select “Input Label” and press the “ENTER/▶” button to enter sub-menu.
Note: The source label is Create labels for the devices connected to your TV.
- Press “▲/▼” button to select “OtherSettings” and press the “ENTER/▶” button to enter sub-menu.

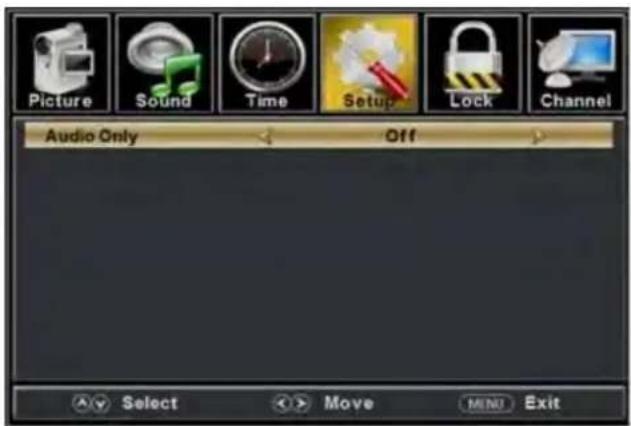
a. Press “▲/▼” button to select “Audio Only” the “◀/▶” button to select “On” or “Off”.
b. Press “▲/▼” button to select “Blue Screen” the “◀/▶” button to select “On” or “Off”.
- Press “▲/▼” button to select “Restore Default” and press the “ENTER/▶”, Press “◀/▶” button selecting “Yes” to restore all setting to default setting
default.
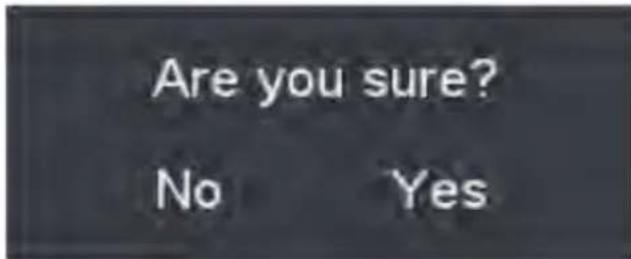
- Press “▲/▼” button to select “Setup wizard” and press the
"ENTER" button to enter sub-menu.
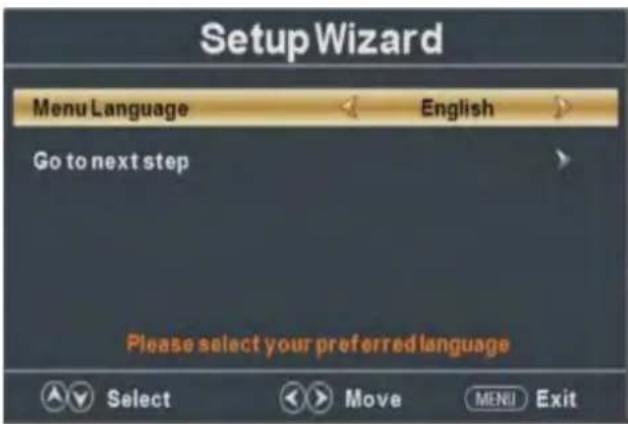
a. Press “▲/▼” button to select “Menu Language” and press the “◀/▶” button to select language.
b. Press “▲/▼” button to select “Go to next step” and press the “ENTER/▶” button to enter next step.

c. Press “▲/▼” button to select “Time Zone” and press the “◀/▶” button to select time zone.
d. Press “▲/▼” button to select “Daylight Saving Time” and press the “◀/▶” button to select “On” or “Off”.
e. Press “▲/▼” button to select “Time Format” and press the “◀/▶” button to select “12-hour” or “24-hour”.
f. Press “▲/▼” button to select “Go to next step” and press the “ENTER/▶” button to enter next
step.

g. Press “▲/▼” button to select “Air/Cable” and press the “◀/▶” button to select “Air” or “Cable”.
h. Press “▲/▼” button to select “Go to next step” and press the “ENTER/▶” button to start auto scan.

Note: Searching platform will take a long time. Please be patient!
LOCK
Press the “MENU” button to enter the OSD menu .Then press “◀/▶” button to select the “Lock” menu.
- Press “▼” button to select “Enter Password” and press select digital button to enter.
Note: The default password is "0000"
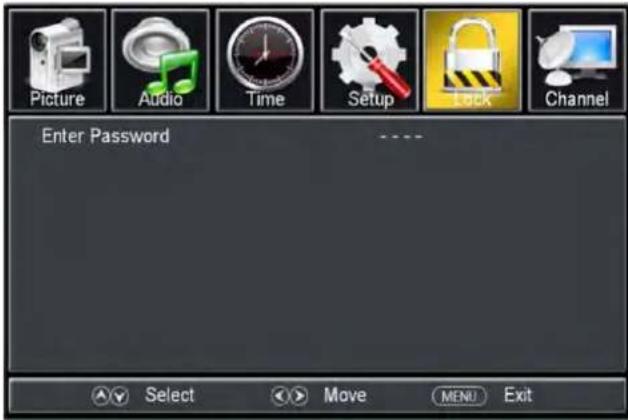
- Press ▼ / ▲ button to select “Change Password”, then press “ENTER/▶” button to adjust the value.
If the password is changed, all of the passwords in the menu will be changed at the same time.
Note: If you forget your password, you can use "1470" to enter any menu locked.
-
Press “▲/▼” button to select “System Lock” and press the “◀/▶” button to select “On” or “Off”.
-
Press ▼ / ▲ button to

select "Input Lock", then press "ENTER/▶" button to enter sub-menu.
a. Press “▲/▼” button to select “TV” and press the “◀/▶” button to select “Block” or “Unblock”.
b. Press “▲/▼” button to select “AV” and press the “◀/▶” button to select “Block” or “Unblock”.
c. Press “▲/▼” button to select “Component” and press the “◀/▶” button to select “Block” or “Unblock”.
d. Press “▲/▼” button to select “HDMI” and press the “◀/▶” button to select “Block” or “Unblock”.
e. Press “▲/▼” button to select “PC” and press the “◀/▶” button to select “Block” or “Unblock”.
f. Press “▲/▼” button to select

“Media” and press the “◀/▶” button to select “Block” or “Unblock”.
- Press “▲/▼” button to select “US Rating” and press “ENTER/▶” button to enter sub-menu.
a. Press “▲/▼” button to select “TV” and press “ENTER/▶” button to enter sub-menu.
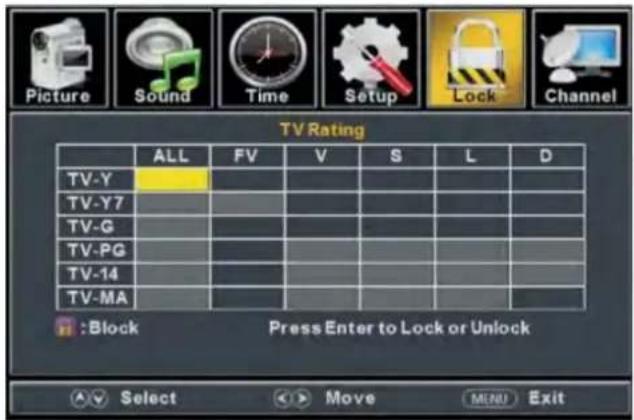
Press “▲/▼” button to select and press “ENTER” to block or unblock.
b. Press “▲/▼” button to select “MPAA” and press the “◀/▶” button to select “Off/G/PG/PG-13/R/NC-17/X”.
- Press “▲/▼” button to select “Canada Rating” and press “ENTER/▶” button to enter sub-menu.
a. Press “▲/▼” button to select “Canada English” and press the “◀/▶” button to select “Off/C/C8+/G/PG/14+/18+”.
b. Press “▲/▼” button to select “Canada French” and press the “◀/▶” button to select “Off/G/8ans+/13ans+/16ans+/18ans+”.
- Press “▲/▼” button to select “RRT Setting” and press “ENTER/▶” button to enter sub-menu.

Note: The item is available only when current stream has downloadable rating data.
- Press “▲/▼” button to select “Reset RRT” and press “ENTER/▶” button to reset.
Channel
Press the “MENU” button to enter the OSD menu .Then press “◀/▶” button to select the “Channel” menu.
-
Press “▼” button to select “AIR/CLABLE” and press the “◀/▶” button to select Cable or AIR.
-
Press “▲/▼” button to select “Auto Scan” and press the “ENTER/▶” button enter then press" ◀/▶ " button button to select "YES" and press "ENTER" to do auto scan.

- Press “▲/▼” button to select “Favorite” and press the “ENTER/▶” button to enter.
- Press “▲/▼” button to select “Channel list” and press the “ENTER/▶” button to enter.
- Press “▲/▼” button to select “Show/Hide” and press the “ENTER/▶” button to enter.
- Press “▲/▼” button to select “Channel Number” and press the “◀/▶” button to adjust.
- Press “▲/▼” button to select “Channel Label” and press the “ENTER/▶” button to enter.
PC Setting
Press the “MENU” button to enter the OSD menu. Then press “◀/▶” button to select the “Setup” menu. And then press “▼” button to select “PC Setting” and press the “ENTER/▶” button to enter sub-menu.

- Press “▲/▼” button to select “H-Pos” and press the “◀/▶” button to adjust.
- Press “▲/▼” button to select “V-Pos” and press the “◀/▶” button to adjust.
- Press “▲/▼” button to select “Clock” and press the “◀/▶” button to adjust.
- Press “▲/▼” button to select “Phase” and press the “◀/▶” button to adjust.
- Press “▲/▼” button to select “Auto” and press the “ENTER/▶” button to do auto adjust.
Note: The pictures in regard to function are provided for reference purposes only.
How do I Clean the TV?
IMPORTANT
- The power cable has to be removed from the socket before cleaning the TV.
- Do not use volatile solvent (alcohol, rosin, and toluene) to clean the TV. These types of chemicals might damage the housing and the LED glass.
Cleaning the bezel and remote control
- Use a 100% cotton cloth or micro-fiber cloth for cleaning.
- If the remote control or bezel is dirty to the point where you cannot simply dry wipe it, please lightly dampen the wiping material (the wiping material cannot be dripping wet, because if water drips into the panel it will cause malfunction and possible permanent damage to the panel which will not be covered under the warranty) with clean water and wipe again. Wipe the display with a dry micro-fiber cloth or 100% cotton cloth afterwards.
Please Note :
- Make sure you wring the water out of the cloth before cleaning the bezel or remote in order to prevent water from penetrating into the electronics.
Cleaning the Screen
- Use a 100% cotton cloth or micro-fiber cloth for cleaning.
- The LED screen glass is extremely fragile. Do not scrape it with any material. Do not press or tap the screen to avoid cracking. When the screen is dirty to the point where you cannot simply dry wipe it, please lightly dampen the wiping material with clean water and wipe again. Wipe the display with a dry micro-fiber cloth or 100% cotton cloth afterwards.
Troubleshooting
The following table contains the common problems and the solutions to these problems. Please check this list before you contact the technicians.
| Problems | Solutions |
| NO PICTURE | Connect power cord correctly. |
| Turn on power. | |
| Connect video cable correctly. | |
| Select the input signal source with proper cable connection with the source button. | |
| ABNORMAL COLORS | Match the colors on the cables to the ports off the back of the television. I.E. red cable to red colored port. |
| PICTURE IS TOO DARK | Adjust your contrast, brightness and lamp settings from the OSD Menu. For adjust controls |
| AUDIO ONLY NO PICTURE | Make sure you have connected both your video and audio cables. |
| The TV's tuner signal must not be lower than 65%. | |
| PICTURE ONLY NO AUDIO | Make sure the audio cable is connected. |
| Readjust your volume via the remote control. | |
| The TV's tuner signal must not be lower than 65%. | |
| REMOTE CONTROL DOES NOT WORK | Turn off the TV, unplug it from the socket. Remove the batteries out of the remote for 30 minutes. Press the remote buttons and the power button randomly for a good 2 seconds, and then reinstall the batteries. Try the remote to see if it works. For battery removal instructions. |
| The TV's remote sensor is also housed in the same place as the power indicator light. Please make sure there is line of sight from the remote control's front sensor to the remote sensor of the TV. | |
| CANNOT RECEIVE SUFFICIENT CHANNELS THROUGH THE ATSC/NTSC TUNER | The TV's tuner signal must not be lower than 65%. Change the direction of your antenna and rescan your channels. If you have cable call up your cable company and ask about signal strength of your local cable. |
| NO COLOR | Please adjust your picture setup and make sure the saturation and the RGB are not turned all the way down. For adjustment controls. |
| The TV's tuner signal must not be lower than 65%. Check your signal. | |
| WEAK SIGNAL OR NO PROGRAM SYMBOL ON SCREEN | The TV's tuner signal must not be lower than 65%. Change the direction of your antenna and rescan your channels. If you have cable call up your cable company and ask about signal strength of your local cable. |
| TV'S UNIVERSAL REMOTE CODE | This television follows NEC's universal remote code. To find the actual code you must read through your own universal remote's guide book. |
| TV CHANNELS ARE BLOCKED | Check your auto lock function's settings inside the OSD. You may have locked up some channels but forgot about them. |
| UNIVERSAL REMOTE CODE | This TV follows NEC's universal remote code. Please check your hand book for NEC's codes then apply them. |
| THE TV TURNS ON OR OFF SLOWLY AND THE SCREEN SHOWS UP SLOWLY | This TV is a High Definition liquid crystal display panel TV. It requires a few more seconds than normal TVs to power up and show the picture. |
| NO SOUND ON PC | Make sure you have a 3.5 mm mini-jack cable connected from your pc's sound output to the TV's VGA STEREO INPUT. |
| HDCP VIDEO SAYS NO HDCP SUPPORT | Reboot your HDCP video device but turning them off and unplugging the power cord. Wait up to 8 minutes to plug the power back in to see if it works or not. |
| HDCP VIDEO HAS NO AUDIO | Make sure you have a 3.5 mm mini-jack cable connected from your HDCP video device's sound output to the TV's VGA STEREO INPUT. If your HDCP video device uses RCA AUDIO jacks, you'll need to obtain a RCA audio converted into 3.5 mm mini-jack cable. |
| CANNOT GET 1360X768 ON PC VGA | Make sure the TV is recognized as plug and play monitor. Try updating your video card's drivers as well. If that does not help, most likely you'll need to upgrade your video card to a newer one. |
| PICTURE IS DISTORTED OR HAS ABNORMAL SOUND | This might be from interference from large electrical appliances, cars, motorcycles, or fluorescent lights. If the TV is close to the wall, try moving the TV to another room in your house to see if the problem still occurs. |
| PICTURE DOES NOT COVER THE ENTIRE SCREEN | If you're using HDMI or a TV digital channel make sure you use the ASPECT button to switch to 16:9 format. If you are using VGA, use the AUTO ADJUST function to adjust to the screen. Please Note : If you are using regular analog TV, AV, or component in 480i resolution, use the ASPECT button to switch to 16:9 in order to fill up the screen. Please Note : This note this feature will distort the picture. |
| PICTURE QUALITY IS HORRIBLE!! | For best image quality, view HD widescreen programs where possible. If HD content is not available view "Standard Definition" from a digital source. Standard, analog TV will always be noticeable inferior to HD because your TV has video that is many times better than old TV's and so you can see interference and deficiencies you did not KNOW you had. |
| PICTURE HAS PIXELS THAT ARE ALWAYS DISPLAYING THE SAME COLOR | Your TV is manufactured using an extremely high level of precision technology, however, sometimes some pixels of your TV may not display. Pixels defects within industry specifications are inherent to this type of product and do not constitute a defective product. |
| I CANNOT CHANGE THE TIME MANUALLY | Your TV syncs time automatically according to your local TV channel. This function only works while the TV's tuner is connected to an ANTENNA. |
| BIG BLACK BOX IN THE MIDDLE OF SCREEN | You have turned on closed captioning and are using TEXT1 - TEXT4. Change the setting to CC1 or turn off closed captioning and the box will disappear. |
| SWITCHING A CHANNEL OR SOURCE CHANGES THE VOLUME | Different channels and inputs will sometimes have this effect because the channel signal's own volume is already loud. There is no way remove this completely. The TV has an AUTO VOLUME LEVEL function that can combat this type of effect. Please make sure that function is turned on. |
| THERE IS NOISE OR TRASH PIXELS ON THE SCREEN | When your TV's resolution is higher than the digital channel's broadcast resolution, the signal is up-converted to match your TV's resolution. Up-converting can cause this type of effect. |
| TIPS FOR HIGH DEFINITION USERS | The TV is an ideal platform for viewing High Definition Content. The best image quality can be achieved by HDMI, YPbPr (Component), then VGA. However, due to variances in broadcast practices, it is possible some image distortions can occur. |
| TIPS FOR LETTERBOX CONTENT USERS | Letterboxed (Widescreen) versions of DVD movies are most commonly formatted for standard 4:3 TVs. The TV has the capability of expanding this content so the entire screen is filled at the expense of the image proportion. To use this function press the aspect button on the remote control and cycle among the available options. |
| I CANNOT FIND THE VOLUME AND CHANNEL CHANGING BUTTONS | The buttons are represented by the ▲▼◀▶ buttons located on the remote control. ▲▼ changes the channels and ◀▶ changes the volume. |
| TV TURNS OFF AUTOMATICALLY AFTER 5 MINUTES | The TV features a power saving mode which will automatically turn off the TV, if there's no signal provided for more than 5 minutes. |
| MY TV PICTURE IS VERY DIM | Check to see if you are under POWER SAVING mode for your picture mode. Keep pressing the PICTURE button on the remote control to cycle out of POWER SAVING. |
Specifications
| Display panel | |
| Item | Illustration |
| Active Area / Screen Size Diagonal 39 inches | |
| 1 neercsediW oitaR tcepsA 6:9 | |
| Pixel Pitch | 0.176 (H) x RGB x 0.530 (V) um per one triad |
| Max. of Pixels (Resolution) | FHD(1920 x 1080 pixels) resolution |
| Brightness | 280 nits (Typical) |
| Contrast 1500:1 (Typical) with Auto Contrast Enhancement | |
| Response Time | 8 ms (gray to gray) |
| Viewing Angle | Typical 178/178 Degree(Horizontal/Vertical) |
| Lamp Life of Backlight | >30,000hrs |
| TV DISPLAY | |
| Dimension | 35.00" x 20.76" x 3.83" (without stand)35.00" x 23.32" x 8.95 " (with stand) |
| Weight | 24.96lbs |
| Power input | AC 100 – 240V, 60/50 Hz, 3A(Max.) |
| Function | |
| (1)Video | |
| De-interlace | 3D |
| Frame recover | 3:2 |
| Noise reducing core technology | 3D |
| Aspect ratio | Wide, Normal, Cinema, Zoom |
| Gamma | Fixed Gamma |
| Lamp adjust | Yes |
| Picture mode | Standard / soft / Power Saving / User/Dynamic |
| Video adjust | Brightness / Contrast / Color / Tint / Sharpness |
| (2)Audio | |
| Sound Mode | Music/Standard/ Movie/User/Sport |
| seY lortnoC emuloV otuA | |
| enoT | 150Hz/500Hz/1KHz/5KHz/10KHz/Balance |
| )xaoc( seY tuO LAIX&O | |
| Speakers | 6 watt per channel |
| (3) General | |
| Hybrid TV Tuner | NTSC / ATSC / QAM (Digital Cable Ready) |
| Channel auto scan | Yes |
| Sleep timer | Off/5mins/10mins/15mins/30mins/60mins/90mins/120mins/180mins/240mins |
| rewop ybdnatS | W1 doU |
| Timing support-Video | 480i / 480p / 720p / 1080i / 1080p |
| PC timing | 1920*1080 @60 Hz (NATIVE)1024*768@60800*600@60640*480@60720x400@70 |
| (4)NTSC/ATSC | |
| NTSC | Sound: Mono / Stereo / SAP |
| Favorite Channel | |
| V-chip | |
| Closed caption(CC1-CC4, Text 1-Text 4) | |
| ATSC | Favorite Channel |
| V-chip | |
| Video input format: 1080i, 720p, 480p, 480i | |
| Analog closed caption:(CC1-CC4, Text 1-Text 4)Digital closed caption:(Service 1-Service 6) | |
| (5)I/O | |
| 1 input x TV Tuner (NTSC/ATSC),1 input x AV,1 input x YPbPr(audio shared with AV)3 inputs x HDMI/HDCP (optional, HDCP audio shared with VGA Audio In),1 input x VGA,1 input x VGA Audio In,1 output x COAX1AL (digital audio) out,1 output x Audio Left/Right out1 output x Headphone out, | |
*The product's specifications may change without notice or obligation.
**This manual's pictures and words are for references only and are subject to change without notice or obligation.
FCC Compliance Statement
This device complies with Part 15 of the FCC Rules.
Operation is subject to the following conditions:
This device may not cause harmful interference
This device must accept any interference received, including interference that my cause undesired operation.
Please Note: This equipment has been tested and found to comply with the limits for a Class B digital device, pursuant to part 15 of the FCC Rules. These limits are designed to provide reasonable protection against harmful interference in a residential installation. This equipment generates uses and can radiate radio frequency energy and, if not installed and used in accordance with the instructions, may cause harmful interference to radio communications. However, there is no guarantee that interference will not occur in a particular installation. If this equipment does cause harmful interference to radio or television reception, which can be determined by turning the equipment off and on, the user is encouraged to try to correct the interference by one or more of the following measures:
- Reorient or relocate the receiving antenna.
- Increase the separation between the equipment and the receiver.
- Connect the equipment into an outlet on a circuit different from that to which the receiver is connected.
Caution: To comply with the limits for an FCC Class B computing device, always use the signal cord and power cord supplied with this unit.
The Federal communications Commission warns that changes or modifications to the unit not expressly approved by the party responsible for compliance could void the user's authority to operate the equipment.
European Notice
Products with the CE marking comply with both the EMC Directive (89/336/EEC), (93/68/EEC) and the Low Voltage Directive (72/23/EEC) issued by the Commission of the European Community.


- Contents
- Introduction
- INSTALLATION
- Warning
- Caution
- Important Information
- Television Antenna Connection Protection
- External Television Antenna Grounding
- Lightning Protection
- Power Lines
- Attacting or Removing the Stand
- Installing Batteries to the Remote Control
- Identifying Front and Rear Panel
- Front View
- Rear View Mounting Pattern
- Connection Suggestions
- Please Note:
- Main unit description
- Control Panel Button Function
- TV Terminal Connections
- Remote control
- OSD basic adjustment
- Installation Guide
- PICTURE
- SOUND
- TIME
- Press the “MENU” button to enter the OSD menu. Then press “◀/▶” button to select the “TIME” menu.
- SETUP
- LOCK
- Channel
- PC Setting
- How do I Clean the TV?
- IMPORTANT
- Cleaning the bezel and remote control
- Please Note :
- Cleaning the Screen
- Troubleshooting
- Specifications
- FCC Compliance Statement
- European Notice
Brand : CURTIS
Model : Proscan PLDED3996A
Category : Television