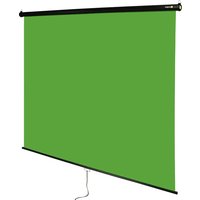
WM-CG-710 - Projection screen Angler - Free user manual and instructions
Find the device manual for free WM-CG-710 Angler in PDF.


| Product Type | Uncategorized Electronic Device |
| Brand | Angler |
| Model | WM-CG-710 |
| Dimensions | 120 x 70 x 25 mm |
| Weight | 200 g |
| Power Supply | 3.7V Li-ion rechargeable battery |
| Charging Interface | USB Type-C |
| Battery Capacity | 1500 mAh |
| Main Functions | Recording, Playback, Data Transfer, Bluetooth Connectivity |
| Display | 1.5-inch LCD screen |
| Memory Storage | Supports microSD up to 32GB |
| Connectivity | Bluetooth 4.2, USB |
| Operating Temperature | 0°C to 45°C |
| Maintenance & Cleaning | Wipe with a soft, dry cloth. Do not use solvents. |
| Safety Precautions | Keep away from water and extreme heat. Do not disassemble. |
| Spare Parts & Repairability | Battery, USB cable, and screen available. Repairs by authorized service. |
| General Information | Designed for portable use. Includes quick start guide. |
Frequently Asked Questions - WM-CG-710 Angler
User questions about WM-CG-710 Angler
0 question about this device. Answer the ones you know or ask your own.
Ask a new question about this device
Download the instructions for your Projection screen in PDF format for free! Find your manual WM-CG-710 - Angler and take your electronic device back in hand. On this page are published all the documents necessary for the use of your device. WM-CG-710 by Angler.
USER MANUAL WM-CG-710 Angler
Retractable Green Screen
WM-CG-7579 WM-CG-710
INSTRUCTIONS

natural_image
Green rectangular projector screen with black frame and cable, no visible text or symbols
angler®
Thank you for choosing Angler.
Angler's retractable green screen is a portable solution for studios and meeting and conference rooms where space is at a premium, and a green screen needs to be deployed in seconds. There are two sizes available — one for full-body shots in a studio or extra-large space, and one for half-body images in an apartment or small space. The sturdy metal case is equipped with keyholes for wall mounting, and hooks for ceiling or light-stand suspension if you need a screen in the middle of an office floor. The auto-stop mechanism locks the screen at the desired length and retracts just like a window shade with a slight pull down.
This screen provides photographers and directors with a smooth, wrinkle-free polyester fabric that absorbs light and prevents glare for even edge-to-edge illumination across the screen. Use the chroma green backdrop to digitally insert the background of your choice with most green-screen software.
Precautions
Please read and follow these instructions, and keep this manual in a safe place.
Do not attempt to disassemble or repair the equipment—doing so will void the warranty, and Angler will not be responsible for any damage.
Make sure the screen is mounted securely before proceeding.
Check the weight limitations of the supporting structure and mounting components to ensure you do not exceed the lowest weight capacity.
Examine the front and back of the screen for dirt and debris before rerolling.
▶ Follow the cleaning instructions in this manual.
All images are for illustrative purposes only.
Overview


Wall Mounting Instructions
- Measure the distance between the keyholes at the back of the screen's end caps. Use that measurement to mark the locations of the mounting holes on the wall. Use a level to make sure it's even.
Note: Drywall is not strong enough to support the backdrop for repeated use. For a more secure wall mount, sink the screws into wall studs or fortify your wall by adding a mounting plate, wood blocking, or bracing.
- Drill holes in the marked locations for wall anchors, molly bolts, or toggle bolts. If you're using wall anchors, tap the anchors into the holes.
Note: Many wall anchors and molly bolts are self-tapping and don't require a drill for installation.
-
Insert screws (for wall anchors), molly bolts, or toggle bolts into the holes. Leave 1/8-inch of each screw out of the wall. Make sure they're secure before mounting the screen.
-
Align the screen's mounting holes with the mounting screws, and seat the screen onto the screws.

natural_image
Close-up of a hand holding a black mechanical clamp with a metal hook, showing a small component inserted (no text or symbols visible)
natural_image
Close-up of a black handheld device with a yellow 'A' logo and a hanging tag, showing a green downward arrow (no text or symbols on the device itself)Ceiling Mounting Instructions
Use chains to suspend the screen from a ceiling.
- Measure the distance between the hooks on the screen's end caps. Use that measurement to determine how far apart the chains should be.
- Use eye hooks or similar fasteners to attach the chains to the ceiling.
- Use chain connectors like carabiners or threaded quick links to attach the ceiling mount hooks to the chains.

natural_image
Close-up of a black industrial crane hook with a yellow letter 'A' on its side, no visible text or symbols beyond the label.Wall Extension Bracket Mounting
You can also use chains to suspend the screen from a pair of wall extension brackets. Mount the brackets to the wall, and then use the Ceiling Mounting Instructions above to hang the screen from the brackets.
Operation
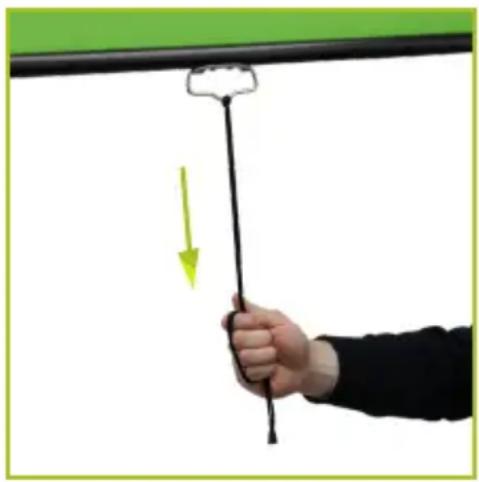
Pull the screen down with the lanyard or the handle. When the screen is at the desired length, slightly raise the screen to allow the auto-lock to engage.
Retract the screen by using the handle or lanyard to pull it down approximately 1 to 2 inches to disengage the auto-lock, and slowly guide the screen back into the case.
natural_image
Hand holding a black string with a green arrow indicating downward motion (no text or symbols)Important! To ensure the screen does not sustain damage during use:
- Pull the screen straight down and not at an angle to the wall.
• Gently pull the screen down, and slowly guide it up when you retract it.
Do not let 'er rip. - Don't let the screen scrape against the case.
- Pull from the handle, and not from the screen material itself.
- Do not touch the screen.
Maintenance
Clean the screen material with soap and water on a soft cloth. When the screen is not in use, retract it into its case to keep the surface clean.
Specifications
| WM-CG-7579 WM-CG-710 | ||
| TYPE MANUAL MANUAL | ||
| SCREEN DIMENSIONS | 6.25 × 6.6 FT.(190.1 × 201 CM) | 6.9 × 9.9 FT.(211.1 × 302.3 CM) |
| SCREEN COLOR CHROMA GREEN CHROMA GREEN | ||
| MATERIAL POLYESTER POLYESTER | ||
| CASE DIMENSIONS (H × W × D) | 4.1 × 78.5 × 2.9 IN.(10.4 × 199.4 × 7.4 CM) | 3.7 × 86.75 × 3.2 IN.(9.5 × 220.3 × 8.2 CM) |
| WEIGHT 10.6 LB. (4.8 KG) | 14.2 LB. (6.4 KG) | |
One-Year Limited Warranty
This Angler product is warranted to the original purchaser to be free from defects in materials and workmanship under normal consumer use for a period of one (1) year from the original purchase date or thirty (30) days after replacement, whichever occurs later. The warranty provider's responsibility with respect to this limited warranty shall be limited solely to repair or replacement, at the provider's discretion, of any product that fails during normal use of this product in its intended manner and in its intended environment. Inoperability of the product or part(s) shall be determined by the warranty provider. If the product has been discontinued, the warranty provider reserves the right to replace it with a model of equivalent quality and function.
This warranty does not cover damage or defect caused by misuse, neglect, accident, alteration, abuse, improper installation or maintenance. EXCEPT AS PROVIDED HEREIN, THE WARRANTY PROVIDER MAKES NEITHER ANY EXPRESS WARRANTIES NOR ANY IMPLIED WARRANTIES, INCLUDING BUT NOT LIMITED TO ANY IMPLIED WARRANTY OF MERCHANTABILITY OR FITNESS FOR A PARTICULAR PURPOSE. This warranty provides you with specific legal rights, and you may also have additional rights that vary from state to state.
To obtain warranty coverage, contact the Angler Customer Service Department to obtain a return merchandise authorization (“RMA”) number, and return the defective product to Angler along with the RMA number and proof of purchase. Shipment of the defective product is at the purchaser’s own risk and expense.
For more information or to arrange service, visit www.anglerlights.com or call Customer Service at 212-594-2353.
Product warranty provided by the Gradus Group.
www.gradusgroup.com
Angler is a registered trademark of the Gradus Group.
© 2021 Gradus Group LLC. All Rights Reserved.

ANGLER®
A Gradus Group Brand
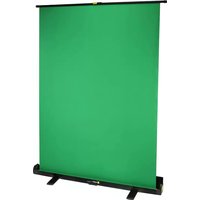
Brand : Angler
Model : WM-CG-710
Category : Projection screen