RHTMF221X - Fridge Robinhood - Free user manual and instructions
Find the device manual for free RHTMF221X Robinhood in PDF.

| Product Type | Freestanding Refrigerator |
| Model | RHTMF221X |
| Brand | Robinhood |
| Total Capacity | 221 Liters |
| Refrigerator Capacity | 180 Liters |
| Freezer Capacity | 41 Liters |
| Energy Efficiency Class | F |
| Annual Energy Consumption | 220 kWh/year |
| Noise Level | 42 dB(A) |
| Product Dimensions (H x W x D) | 1850 x 600 x 650 mm |
| Weight | 62 kg |
| Power Supply | 220-240 V, 50 Hz |
| Power Consumption | 150 W |
| Climate Class | N-ST |
| Refrigerant | R600a |
| Number of Shelves | 4 adjustable glass shelves |
| Door Type | Reversible door |
| Interior Light | LED |
| Thermostat | Mechanical rotary |
| Defrost | Automatic (refrigerator), Manual (freezer) |
| Shelving Material | Tempered glass |
| Compressor Type | Standard |
| Warranty | 2 years |
Frequently Asked Questions - RHTMF221X Robinhood
User questions about RHTMF221X Robinhood
0 question about this device. Answer the ones you know or ask your own.
Ask a new question about this device
Download the instructions for your Fridge in PDF format for free! Find your manual RHTMF221X - Robinhood and take your electronic device back in hand. On this page are published all the documents necessary for the use of your device. RHTMF221X by Robinhood.
USER MANUAL RHTMF221X Robinhood
Description: ROBINHOOD TOP MOUNT FRIDGE/FREEZER 221L
Model Numbers: RHTMF221W and RHTMF221X
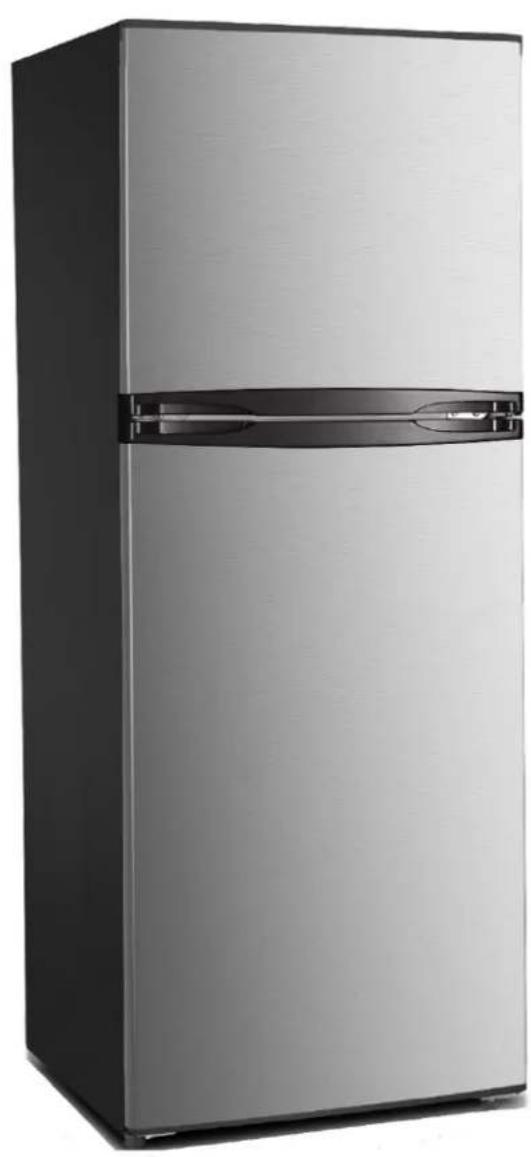
natural_image
Exterior view of a modern stainless steel refrigerator with black handle (no text or symbols visible)Model may vary slightly from images pictured
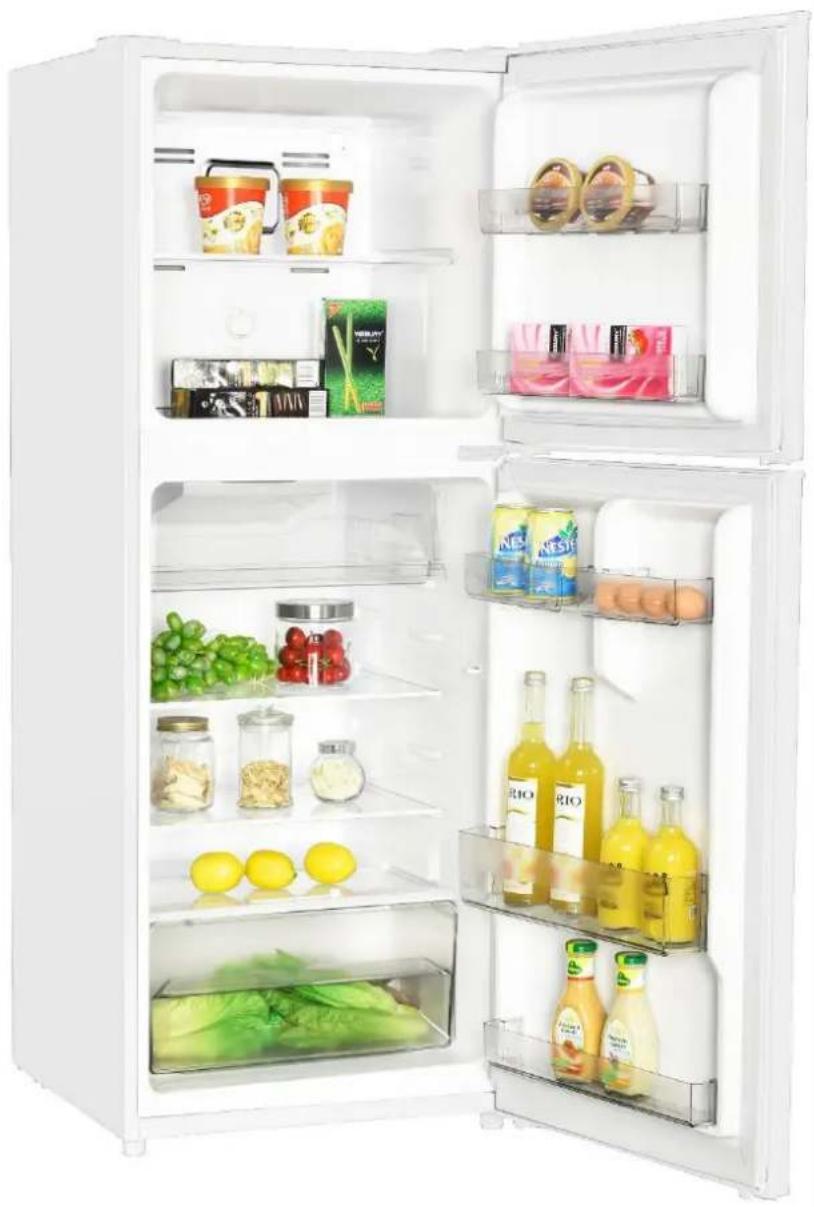
natural_image
Interior view of a modern white refrigerator with open doors showing food compartments including beverages, snacks, and drinks (no visible text or labels)Content
Congratulations!
Thank you for choosing one of our appliances. Before you use the appliance, we strongly recommend that you read through the whole user manual which provides important safety instructions and description of the product and the proper use of its functions.
To avoid the ever-present risks involved with using an electrical appliance it is vital that the appliance is installed correctly and that you read the safety instructions carefully to avoid misuse and hazards. It is important that you retain these instructions and your proof of purchase along with any other important documents about this product for future reference.
Due to continual product development, Robinhood reserves the right to alter specifications or appearances without notice.
Important Safety Instructions .... 3
Appliance Details....4
Installation Instructions....5
Operating Instructions 9
Cleaning and Maintenance 10
Technical Information 12
Warranty Certificate (New Zealand) 13
Warranty Certificate (Australia).... 14
Disposal Information
- Most of the packing materials are recyclable. Please dispose of these materials through your local recycling depot or by placing them in appropriate collection containers.
- If you wish to discard this product, please contact your local authorities and ask for the correct method of disposal.
- Refrigerant and cyclopentane foaming material used for the refrigerator are flammable. Therefore when the refrigerator is scraped, it shall be kept away from any fire source and be recovered by a special recovering company with corresponding qualification other than be disposed by combustion, so as to prevent damage to the environment or any other harm.
- When the refrigerator is scraped, disassemble the doors, and remove gasket of door and shelves, put the doors and shelves in a proper place, so as to prevent trapping hazard.
Important Safety Instructions
READ CAREFULLY AND KEEP FOR FUTURE REFERENCE.
To reduce the risk of fire, electric shock, injury to persons when using your appliance, follow basic precautions, including the following:
-
If the supply cord of this equipment is damaged, it must only be replaced by the manufacturer or its service agent or a similarly qualified person in order to avoid a hazard.
-
This appliance is designed for indoor use only and must be in a dry location.
-
Disconnect the power supply when any maintenance is carried out, including changing light bulbs.
-
This appliance is not intended for use by persons (including children) with reduced physical, sensory or mental capabilities, or lack of experience and knowledge, unless they have been given supervision or instruction concerning use of the appliance by a person responsible for their safety. Children should be supervised to ensure that they do not play with the appliance.
-
The appliance is not intended to be operated by means of an external timer or separate remote control system.
-
WARNING - Ensure that the ventilation openings, in the appliance enclosure or in the built-in structure, are not obstructed. Follow the installation requirements in this manual. Avoid prolonged exposure to direct sunlight. Avoid open flames and sources of ignition.
-
WARNING - Do not damage the refrigerant circuit. Do not modify this appliance.
-
WARNING – Do not use mechanical device or other means to accelerate the defrosting process, other than those recommended by the manufacturer. Do not use sharp or metal objects to clean ice from appliance.
-
WARNING - Do not use electrical appliances inside the food storage compartments of the appliance, unless they are of the type recommended by the manufacturer.
-
During transportation, installation and servicing of the appliance ensure that none of the components of the refrigerant circuit are damaged.
-
Do not store explosive substances such as aerosol cans with a flammable propellant in this appliance.
-
WARNING: When positioning the appliance, ensure the supply cord is not trapped or damage.
-
The refrigerant isobutene (R600a) contained within the refrigerant circuit of the appliance is a natural gas with a high level of environmental compatibility, which is nevertheless flammable.
-
Do not place hot items on plastic areas of appliance. Do not refreeze food once defrosted. Store pre-packed frozen food in accordance to the manufactures instructions. Take care when freezing liquids as sealed containers can explode under pressure.
-
Do not locate multiple portable socket-outlets or portable power supplies at the rear of the appliance.
-
This appliance is intended to be used in household and similar applications such as:
-
Staff kitchen areas in shops, offices and other working environments;
• Farm houses and by clients in hotels, motels and other residential type environments; - Bed & breakfast type environments;
- Catering and similar non-retail applications.
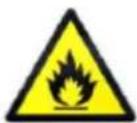
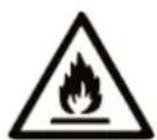
WARNING: Risk of fire / flammable materials
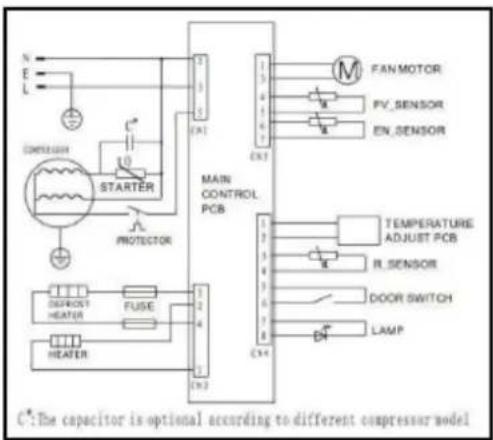
Appliance Details
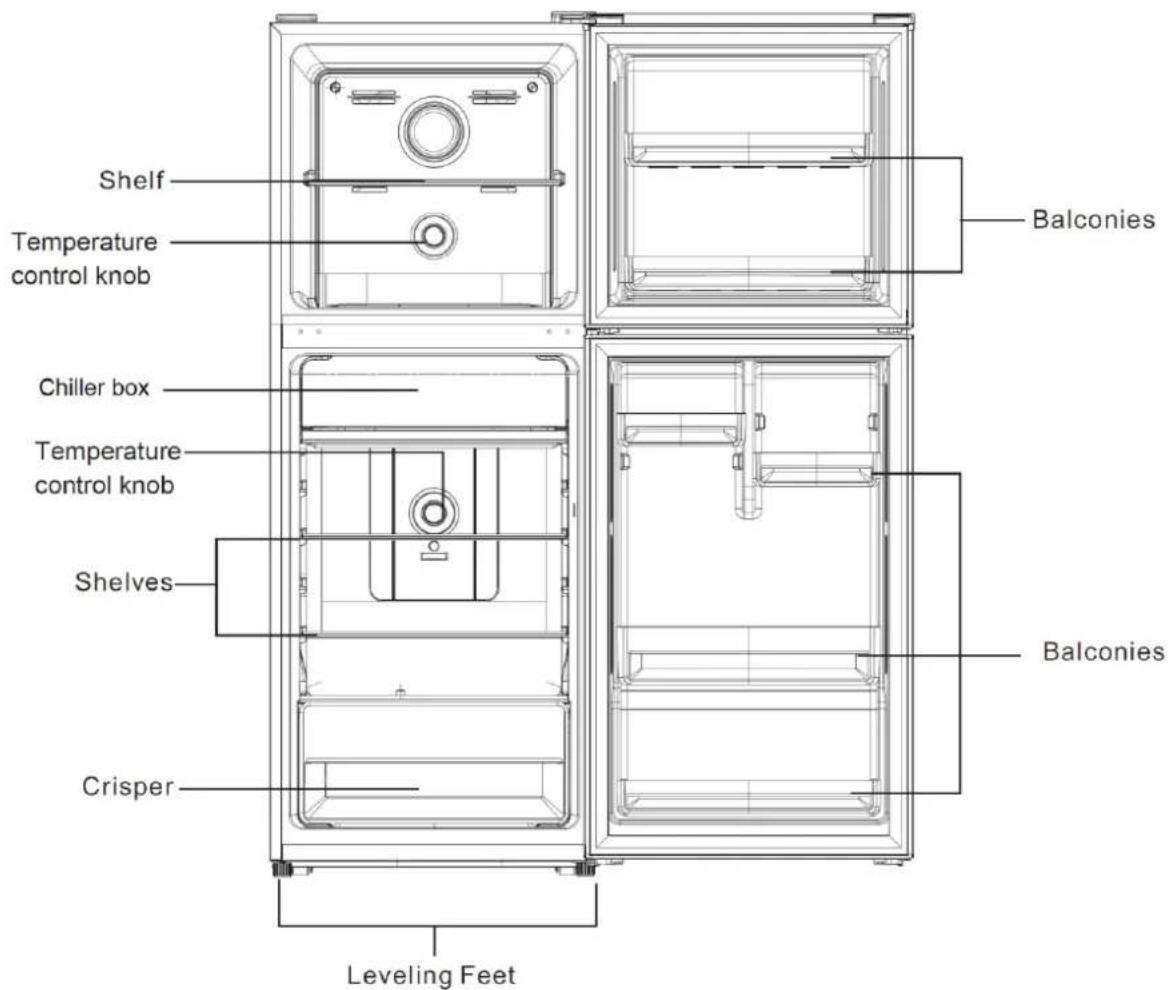
NOTE: The picture above is for reference only.
Dimensions (WxDxH): 545mm x 595mm x 1417mm.
Weight: 46kg
Contents of packaging:
1 x Left Hinge Cover

natural_image
Technical line drawing of a mechanical component with a central connector (no text or symbols)1 x Ice Box
natural_image
Pure diagram of a 3x4 grid layout with no text, numbers, or symbols1 x Egg Tray
1 x Instruction Manual
Installation
Unpacking the appliance
Remove the external & internal packaging.
When unpacking the appliance please check for any damage. If damage is found, do not connect to the power source and contact the Authorised Service Provider. Check that the shelving shown on the appliance details diagram are all present:
Before connecting the appliance to the power source, let it stand upright for approximately 4 hours.
This will reduce the possibility of a malfunction in the cooling system from handling during transportation. Remove any protective film from the outer surface.
Clean the interior surface with lukewarm water using a soft cloth.
Installing the Refrigerator
This appliance is designed to be free standing only, and should not be recessed or built-in.
Place your appliance on a solid, level floor that is strong enough to support the appliance when it is fully loaded. Use the adjustable feet at the bottom of the appliance to compensate for any unevenness of the floor.
Allow at least 5 cm of space around the sides of the appliance, which allows the proper air circulation, and at least 10cm above and behind the unit. Note the door opens to 135^
Locate the appliance away from direct sunlight and sources of heat (stove, heater, radiator, etc.). Direct sunlight may affect the acrylic coating and heat sources may increase electrical consumption. Extreme cold ambient temperatures may also cause the appliance not to perform properly. Avoid locating the appliance in moist areas.
Plug the appliance into an exclusive, properly installed-grounded wall outlet. Do not under any circumstances cut or remove the third (ground) prong from the power cord. Any questions concerning power and/or grounding should be directed toward a certified electrician or an Authorised Service Centre.
After plugging the appliance into a wall outlet (220-240V 50Hz), allow the unit to cool down for 4 hours before placing food in the freezer or refrigeration compartments. This appliance is designed to work in ambient temperatures up to 43°C. If moving the appliance, avoid tilting the appliance more than 45°. At no time should the appliance be turned upside down.
Adjusting the door
The door can be adjusted to open from either the left or right-hand side. Follow the instructions below (this is structured to transfer the door hinges from the right-hand side to the left-hand side). Note the appliance should be leaning back (not over 45°) to help with door removal. Ensure the appliance is unplugged and empty. This is a 2-person exercise:
- Remove the upper covers (2 screws).
- Unscrew the right top hinge and remove the upper door. Place door in a safe position.
- Unscrew the middle hinge and remove the lower door. Place door in a safe position.
natural_image
Technical line drawing of a mechanical bracket or mounting bracket (no text or symbols)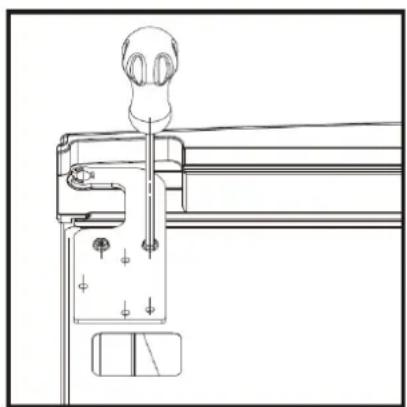
natural_image
Technical line drawing of a mechanical clamp or bracket assembly (no text or symbols)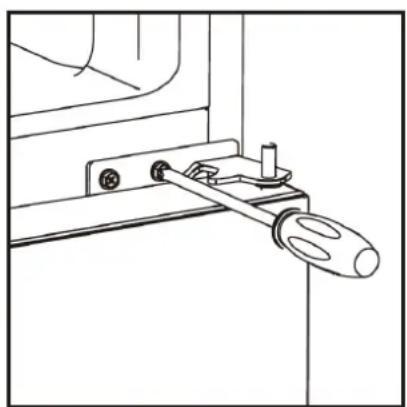
natural_image
Line drawing of a mechanical clamp or lever assembly (no text or symbols)Installation
Reverse Door
Warning: This is a technical procedure and requires laying the product down and raising it again. It is recommended only to be carried out by persons comfortable with technical procedures and who are physically able to lift 15kgs of weight. If unsure use 2 people to lift the product.
*** ENSURE THE PRODUCT IS NOT CONNECTED TO THE ELECTRICAL POWER WHEN CARRYING OUT THIS PROCEDURE ***
The product could be permanently damaged if this procedure is carried out with the refrigerator operating. Any damage caused by not following all instructions in the procedure correctly could affect the product warranty.

When working around cut sheet metal edges use appropriate gloves or protection to eliminate the change of receiving a laceration.
Tools required: Philips screwdriver, Flat bladed screwdriver, Hexagonal spanner.
- Ensure the unit is unplugged and empty.
- To take the door off, it is necessary to tilt the unit backwards. You should rest the unit on something solid so that it will not slip during the door reversing process.
• All parts removed must be saved to do the reinstallation of the door. - Do not lay the unit flat as this may damage the coolant system.
-
It's better that 2 people handle the unit during assembly.
-
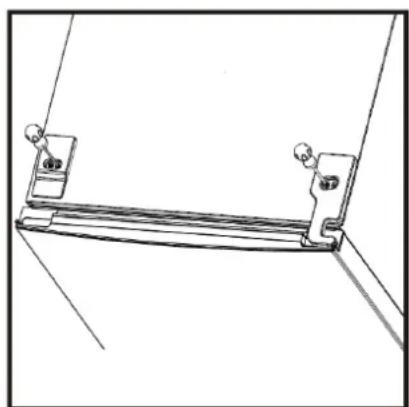
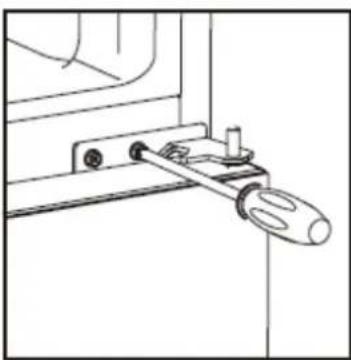
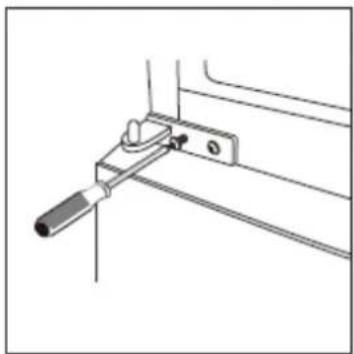
Closed upper door, take out the screw from the top hinge covers by cross screwdriver.
Take off hinge cover, then unscrew top hinge and take off upper door.
natural_image
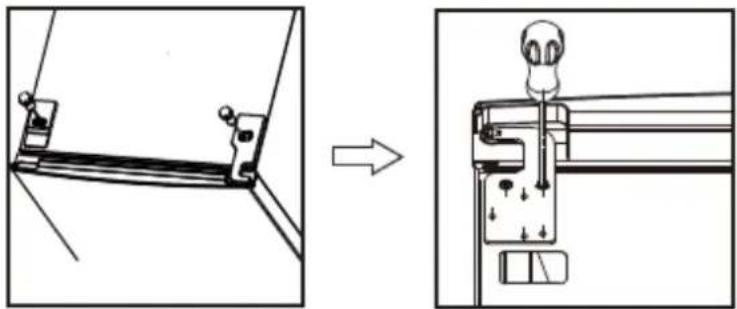
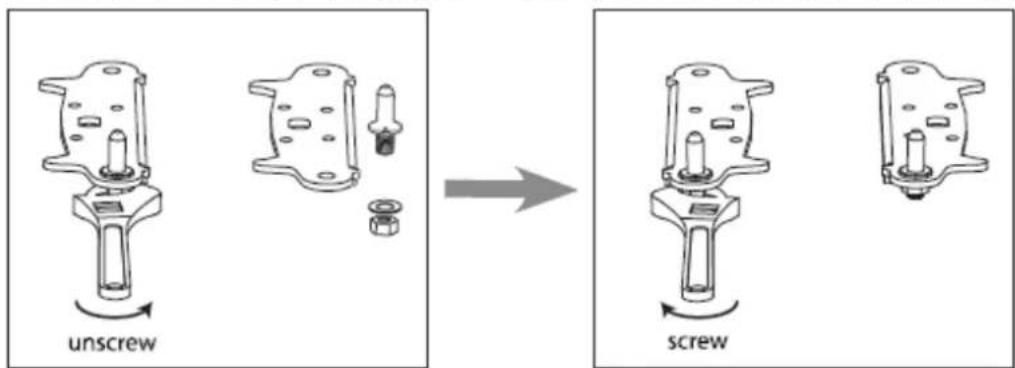
Technical diagram showing a mechanical assembly before and after modification, with no visible text or symbols.Unplug the temperature sensor from inside the top hinge cover and put the sensor back into the unit as shown below. Remove the door carefully and safely place to protect it from damage.
natural_image
Diagram showing a vehicle climbing a slope before and after change, with no text or symbols present.Installation
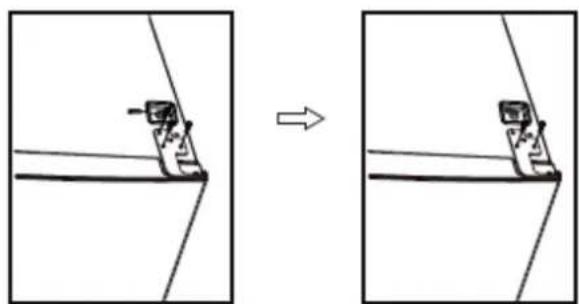
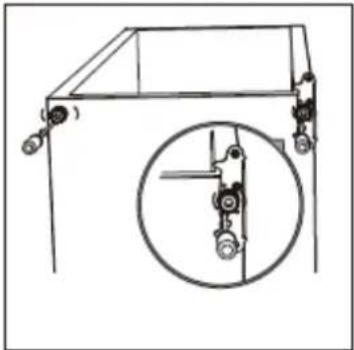
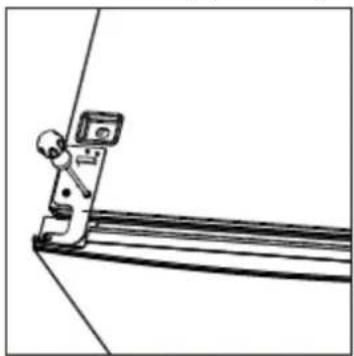
- Remove the pin with a screwdriver and flip the hinge bracket. Then refit the pin to hinge bracket.
natural_image
Diagram showing two mechanical components with a 180° angle label, no text or symbols present- Unscrew from the middle hinge by cross screwdriver, then take off the lower door.
natural_image
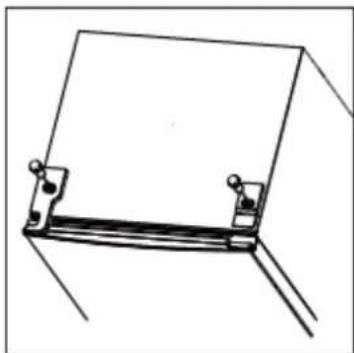
Line drawing of a mechanical lever assembly with a handle and pivot (no text or symbols)- Laying down the refrigerator, take out the adjusting feet as below, then unscrew the lower hinge by cross screwdriver.
natural_image
Technical line drawing of a mechanical device with a magnified inset showing internal components (no text or symbols)- Unscrew and remove the bottom hinge pin, turn the bracket over and replace it.
Installation
- Refit the bracket fitting the bottom hinge pin. Replace both adjustable feet. Transfer the lower door to the property position.
natural_image
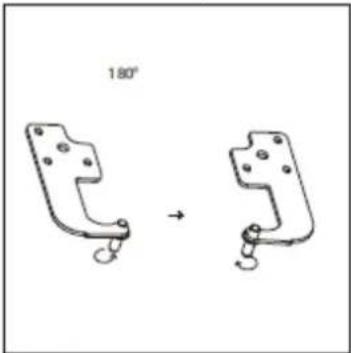
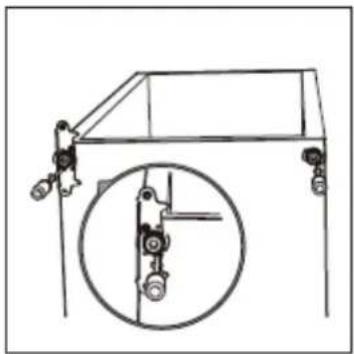
Technical line drawing of a vehicle suspension system with a magnified inset showing internal components (no text or labels)- Make the middle hinge reverse the direction 180^ C, then transfer it to the left property position. Make the middle hinge pin in the upper hole of the lower door, then tight the screws.
natural_image
Technical line drawing of a mechanical clamp or bracket assembly (no text or symbols)- Install the upper door, fix the upper door hinge onto the cabinet.
natural_image
Simple line drawing of a person climbing a ladder with a camera on top (no text or symbols)- Take left hinge cover from necessary bag and install it with top hinge. Then install hole cover at the right side.
natural_image
Simple line drawing of a mechanical bracket or frame structure (no text or symbols)Operating Instruction
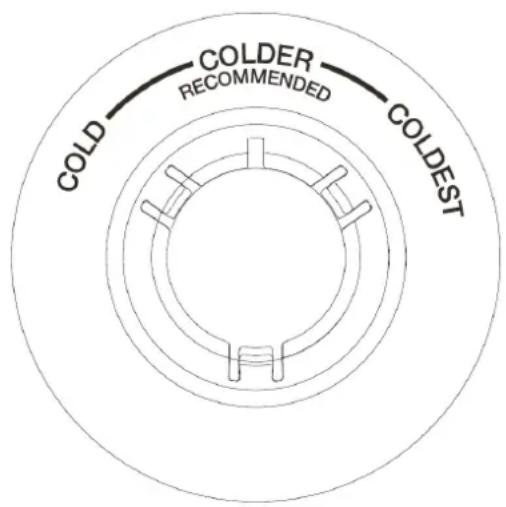
This appliance has two control knobs (one for the freezer compartment and one for the refrigerator). The freezer control has three settings (cold, colder & coldest), with the centre setting being the recommended general use setting. The refrigerator control has an extra setting (off) which turns off the refrigerator and freezer. Once plugged into the power supply, turn both temperature control knobs to the coldest setting and allow the appliance to run for 2-3 hours before placing any food inside. Adjust the control knobs to the colder setting and monitor (adjust up or down to suit the food inside, the room temperature, introduction of large amounts of warm food, number of times door is opened etc).
FREEZER CONTROL KNOB
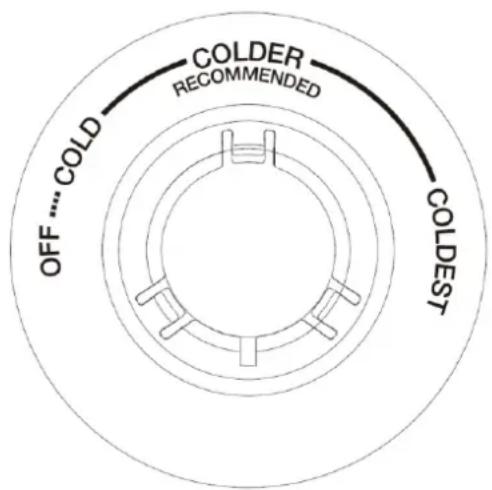
REFRIGERATOR CONTROL KNOB
The humidity inside the crisper compartment can be adjusted depending on what is being stored at that time. Move the regulator on the crisper to the left to decrease humidity or right to increase humidity.
Fruits

Vegetables
The freezer compartment is suitable for freezing fresh food and storing frozen food for long periods of time. The freezing process takes approximately 24 hours; during this time do not add any extra fresh food to the freezer compartment.
The fridge door shelve positions can be adjusted by slightly raising and removing. The glass shelve positions can be adjusted by angling the rear section slightly up and then pulling forward.
During use, moisture from the air & food can collect inside the appliance forming a layer of ice. Ice will limit the transfer of heat out of the appliance. If this becomes more than 2mm thick, the appliance should be defrosted.
Turn the refrigerator control knob to off & remove any food from the freezer compartment and refrigerator. Open the doors. Allow the ice to melt and let water collect in the tray under the freezer compartment. Discard any water and ice and replace tray. To speed up the process, a bowl of warm water ( 50^ ) can be placed inside the compartment. Do not scrape ice from the compartment walls & do not use any other heating devices (as it is a safety hazard and may damage the appliance).
Cleaning and maintenance
Cleaning the appliance
Upon installation of your new appliance, it is recommended that it be cleaned thoroughly, and cleaned once a month after that.
To clean the appliance, first turn the refrigerator control knob to off, turn off the power, unplug from the power socket and remove all food and shelving.
Wash the inside with a damp warm cloth containing a water and baking soda solution. The solution should be about 2 tablespoons of baking soda to a quart of water.
Wash the shelving with a mild detergent solution.
Be sure to keep the door gasket (seal) clean to keep the unit running efficiently.
The outside of the appliance should be cleaned with mild detergent and warm water.
Dry the interior and exterior with a soft cloth.
It is recommended that the unit be cleaned each time it is defrosted to help keep the unit odour free and running efficiently.
Do not use oils, abrasive cleaners, petroleum products, acids or alkaline detergents, as they can damage the appliance.
Moving the appliance
Remove all the food.
Securely tape down all loose items inside your freezer.
Tape the doors shut.
Be sure the appliance stays in the upright position during transportation.
Energy Saving tips
Don't open the doors too frequently.
The appliance should be located in the coolest area of the room, away from heat producing appliances or heating ducts, and out of the direct sunlight.
Let hot foods cool to room temperature before placing in the appliance. Overloading the appliance forces the compressor to run longer. Foods that cool or freeze too slowly may lose quality, or spoil.
Be sure to wrap foods properly, and wipe containers dry before placing them in the appliance. This cuts down on frost build-up inside the freezer and bad odours.
The freezer compartment should not be lined with aluminium foil, wax paper, or paper towels. Liners interfere with cold air circulation, making the freezer less efficient.
Organize and label food to reduce door openings and extended searches. Remove as many items as needed at one time, and close the door as soon as possible.
When adding fresh food, try to add it to the bottom of the freezer, surrounded by food that is already frozen. After adding fresh food to the freezer, allow 24 hours for it to be fully frozen before adding any extra fresh food
Troubleshooting
| PROBLEM | POSSIBLE CAUSE |
| Appliance does not operate. | Not plugged in.The circuit breaker tripped or a blown fuse. |
| Compressor turns on and off frequently. | The room temperature is hotter than normal.A large amount of food has been added to the freezer.The door is open too often, or not fully closed.The temperature control is not set correctly.The door gasket does not seal properly.The appliance does not have the correct clearances.The appliance has recently been disconnected for a period of time. Four hours are required for the freezer to cool down completely. |
| Temperature inside the appliance is too warm. | Temperature control is set too warm. Turn the control to a cooler setting and allow several hours for the temperature to stabilize.Door is kept open too long or opened too frequently. Open the door less.The door is not closed completely.The door gasket does not seal properly.A large amount of warm or hot food might have been stored recently.Wait until the appliance has had a chance to reach its selected temperature.The appliance has recently been disconnected for a period of time. Four hours are required for the freezer to cool down completely. |
| Temperature inside the appliance is too cold. | Temperature control is set too cold. Turn the control to a warmer setting and allow several hours for the temperature to stabilize. |
| Popping or cracking sound when compressor comes on. | Metal parts undergo expansion and contraction, as in hot water pipes.This is normal. Sound will level off or disappear as freezer continues to run. |
| Bubbling or gurgling sound, like water boiling. | Refrigerant (used to cool appliance) is circulating throughout the system.This is normal. |
| Vibrations. | Check to assure that the appliance is level.Floor is uneven or weak. Appliance rocks on the floor when it is moved slightly. Be sure floor can adequately support appliance. Level the appliance by adjusting the adjustable feet.The appliance is touching the wall. Re-level the appliance and move it from the wall.See "Installation Instructions". |
| Moisture forms on inside freezer walls. | Weather is hot and humid, which increases internal rate of frost build-up.This is normal.Door is slightly open.Door is kept open too long, or is opened too frequently. Open the door less often.The door is not sealed properly. |
| Moisture forms on outside of appliance. | Door is slightly open, causing cold air from inside the freezer to meet warm moist air from outside. |
| The door will not close properly. | The appliance is not level.The gasket is dirty. |
NOTE: Any electrical repairs to this appliance must conform to your local, state and federal laws.
Please contact the service centre if in any doubt before undertaking any of the above.
Always disconnect the unit from the power source when opening the unit.
Product rating
Appliance:
RHTMF221W: 220-240V \~50Hz
RHTMF221X: 220-240V \~50Hz

Robinhood
Model No. RHTMF221W
REFRIGERATOR
Gross volume: 221 litres
Storage volume: 197 litres
Climate class: T
Group: 5T
220-240V\~50Hz
Rated current: 1.2A
Protective classification of electric
shock resistance: I
Defrost power: 150W
Refrigerant: R600a (51g)
Insulated blowing gas: Cyclophane
Made in China
Caution: Risk of fire

Robinhood
Model No. RHTMF221X
REFRIGERATOR
Gross volume: 221 litres
Storage volume: 197 litres
Climate class: T
Group: 5T
220 - 240V \~50Hz
Rated current: 1.2A
Protective classification of electric
shock resistance: I
Defrost power: 150W
Refrigerant: R600a (51g)
Insulated blowing gas: Cyclophane
Made in China
Caution: Risk of fire
Terms and Conditions
The following conditions apply in respect of the warranty given in this certificate:
- Monaco Corporation Limited ("Monaco") warrants the following Robinhood products against manufacturing defects and faulty materials, under normal use and subject to the exclusions in this certificate, for a period of:
Rangehood, Ovens, Cooktops, Dishwashers, Refrigerators - 24 months from date of original purchase for domestic use.
Uniduct - 12 months from date of original purchase for domestic use.
Ironing centre – 12 months from date of original purchase for domestic use.
Laundry Tub - 5 years on stainless bowl, 24 months on Tap, Cabinet and other components from the date of original purchase for domestic use.
"Original purchase", when used in this certificate, means purchase by the customer directly from Monaco or one of its approved suppliers.
-
This warranty is limited to the repair or replacement, at our option, within the warranty period of any component part which we at our discretion determine to contain faulty materials or a manufacturing defect in breach of this warranty. This warranty is subject to terms and conditions set out in this certificate.
-
The warranty only applies within New Zealand.
-
The customer must produce the original invoice or other purchase documentation as proof of the original purchase date.
Warranty exclusions
-
The warranty does not apply where, in Monaco's opinion:
The defect is caused by misuse, wear and tear, dirt, fire or accidental damage.
The product has been repaired or serviced by an unauthorised person.
The product was not installed in accordance with our instructions.
The product was purchased overseas or was not designed for use in New Zealand.
The product was not used, cleaned or cared for in accordance with our instructions.
The product was used outdoors. -
In addition, this warranty does not extend to damage or defects which in our opinion, directly or indirectly arise from or are due to:
Exposing the product to acidic or corrosive materials or chemicals such as dyes, solvents, denture cleaner or acetone; Using inappropriate household cleaning products such as abrasive cream or powder cleansers, furniture polish, bleach, mentholated spirits, drain cleaners, sugar soap, metal pads and strongly alkaline or acidic cleaners;
Heat damage, including from washing the product at high temperatures;
Impact or mishandling the product, including the impact caused by objects scraped along, thrown or dropped on the product surface or excessive weight being placed on the product;
Structural or support changes in or affecting the building or the application where the product has been installed; Failure to clean or maintain the product as recommended; or any other causes specified in the product information as being excluded from this warranty. -
Variations with the colour or gloss within the product or any ageing or fading of colour, shine or gloss level over time are not covered by this warranty. The warranty does not cover visual imperfections or blemishes in the surface and edges of the product that were not brought to your supplier's attention at the time you inspected the product.
-
Costs incurred on installation or removal of a product, or any reinstallation of a product, or any associated costs, are not covered by this warranty.
-
Monaco will not be liable for consequential or indirect loss or damage whatsoever and however arising out of or in connection with the supply, performance or removal of the product, including (but not limited to) loss of profit, loss of revenue, loss of contract, loss of goodwill or increased cost of workings, even if due to the negligence of Monaco or any of its approved suppliers, employees or agents.
-
Charcoal filters and light bulbs are not covered by this warranty
-
This warranty and the statements contained in this certificate or other documents given to you do not exclude, restrict or modify the application of any term implied into this warranty by statute, provided that (to the extent any statutory provision permits Monaco to limit its liability for a breach of an implied condition or warranty) Monaco's liability for such breach is limited to the payment of the cost of replacing the product, repairing the product or acquiring an equivalent product.
-
Subject to clause 5, our obligations under this warranty are limited to those set out in this certificate, and this warranty is expressly instead of all other warranties, express or implied, including any implied warranty of merchantability or fitness for a particular purpose and notwithstanding any course of dealing between the parties or custom and usage in trade to the contrary.
Terms and conditions are subject to change.
Warranty Certificate (Australia)
Terms and Conditions
If you are a consumer under the Australian Consumer Law, our goods come with guarantees that cannot be excluded under the Australian Consumer Law. You are entitled to a replacement or refund for a major failure and for compensation for any other reasonably foreseeable loss or damage. You are also entitled to have the goods repaired or replaced if the goods fail to be of acceptable quality and the failure does not amount to a major failure
- Shriro Australia Pty Limited ("Shriro") also warrants the following Robinhood products against manufacturing defects and faulty materials, under normal use and subject to the exclusions in this certificate, for a period of:
Rangehood, Ovens, Cooktops, Dishwashers, Refrigerators - 24 months from date of original purchase for domestic use.
Uniduct - 12 months from date of original purchase for domestic use.
Ironing centre - 12 months from date of original purchase for domestic use.
Laundry Tub - 5 years on stainless bowl, 24 months on Tap, Cabinet and other components from the date of original purchase for domestic use.
"Original purchase", when used in this certificate, means purchase by the customer directly from Shriro or one of its approved suppliers.
-
This warranty is limited to the repair or replacement, at our option, within the warranty period of any component part which we at our discretion determine to contain faulty materials or a manufacturing defect in breach of this warranty. This warranty is subject to terms and conditions set out in this certificate.
-
The warranty only applies within Australia.
-
For warranty service outside of capital city metropolitan area or 30 km from nearest authorised service agent you will be liable for reasonable travelling expenses and the cost of transport of the product or parts to and from the service agent
-
To make a claim under this warranty, you must produce the original invoice or other purchase documentation as proof of the original purchase date. You must send your claim to Shriro Australia Pty Limited, 104 Vanessa Street, Kingsgrove NSW 2208 within 7 days of any alleged defect or failure of the product first becoming apparent, you are responsible for the expense of making a claim under this warranty.
This warranty is given by:
Shriro Australia Pty Ltd
ABN 28 002 386 129
Telephone: 1800 648 556
Facsimile: 1800 628 577
Email: customercare@robinhood.com.au
www.robinhood.com.au
Attention Customer Services Manager
Warranty exclusions
- The warranty does not apply where, in Shriro's opinion:
The defect is caused by misuse, wear and tear, dirt, fire or accidental damage.
The product has been repaired or serviced by an unauthorised person.
The product was not installed in accordance with our instructions.
The product was purchased overseas or was not designed for use in Australia.
The product was not used, cleaned or cared for in accordance with our instructions.
The product was used outdoors.
-
All Robinhood Rangehoods are suitable for indoor use only and not suitable over BBQs or charcoal cookers designed for outdoor use.
-
In addition, this warranty does not extend to damage or defects which in our opinion, directly or indirectly arise from or are due to: exposing the product to acidic or corrosive materials or chemicals such as dyes, solvents, denture cleaner or acetone; using inappropriate household cleaning products such as abrasive cream or powder cleansers, furniture polish, bleach, mentholated spirits, drain cleaners, sugar soap, metal pads and strongly alkaline or acidic cleaners; heat damage, including from washing the product at high temperatures;
impact or mishandling the product, including the impact caused by objects scraped along, thrown or dropped on the product surface or excessive weight being placed on the product; structural or support changes in or affecting the building or the application where the product has been installed; failure to clean or maintain the product as recommended; or any other causes specified in the product information as being excluded from this warranty.
-
Variations with the colour or gloss within the product or any ageing or fading of colour, shine or gloss level over time are not covered by this warranty. The warranty does not cover visual imperfections or blemishes in the surface and edges of the product that were not brought to your supplier's attention at the time you inspected the product.
-
We will not be responsible under this warranty for, nor pay the costs of, removing the existing product, or reinstalling the new product, or any associated costs or damages.
-
Charcoal filters and light bulbs are not covered by this warranty
The benefits given by this warranty are in addition to other rights and remedies of consumers under any law in relation to the goods which cannot be excluded.
This warranty certificate is not intended to create a contract between Shriro Australia Pty Limited and the purchaser.
- Content
- Congratulations!
- Disposal Information
- Important Safety Instructions
- READ CAREFULLY AND KEEP FOR FUTURE REFERENCE.
- Appliance Details
- Contents of packaging:
- Installation
- Unpacking the appliance
- Installing the Refrigerator
- Adjusting the door
- Reverse Door
- Operating Instruction
- Fruits
- Vegetables
- Cleaning and maintenance
- Cleaning the appliance
- Moving the appliance
- Energy Saving tips
- Robinhood
- Model No. RHTMF221W
- Model No. RHTMF221X
- Terms and Conditions
- Warranty exclusions
- Warranty Certificate (Australia)
Brand : Robinhood
Model : RHTMF221X
Category : Fridge