
RHFS66WSB - Oven Robinhood - Free user manual and instructions
Find the device manual for free RHFS66WSB Robinhood in PDF.

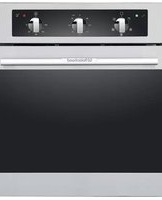
| Product Type | Built-in Electric Oven |
| Model | RHFS66WSB |
| Brand | Robinhood |
| Overall Dimensions (H x W x D) | 595 x 595 x 575 mm |
| Cutout Dimensions (H x W x D) | 590 x 560 x 550 mm |
| Net Weight | Approx. 35 kg |
| Power Supply | 220-240 V, 50/60 Hz |
| Total Power Consumption | ~3.5 kW |
| Oven Capacity | 67 liters |
| Number of Functions | 8 cooking modes |
| Main Functions | Fan forced, Grill, Pizza, Defrost, Bottom heat, Top heat, Turbo, Light |
| Temperature Range | 50°C - 250°C |
| Timer | Digital, up to 23:59 h |
| Display | LED digital display |
| Control Type | Touch control + rotary knobs |
| Interior Light | Yes, halogen |
| Cooling Fan | Yes, integrated |
| Cleaning Type | Hydrolytic (steam clean) or manual |
| Door Type | Drop-down, double glazed |
| Safety Features | Child lock, automatic shut-off, cool touch door |
| Energy Efficiency Class | A+ |
| Included Accessories | 1 wire rack, 1 baking tray, 1 grill rack |
| Color | Stainless Steel (SS) / Black (B) |
| Warranty | 2 years parts and labor |
| Spare Parts Availability | Available through authorized service centers |
| Repair Index (if applicable) | 8.5 / 10 |
Frequently Asked Questions - RHFS66WSB Robinhood
User questions about RHFS66WSB Robinhood
0 question about this device. Answer the ones you know or ask your own.
Ask a new question about this device
Download the instructions for your Oven in PDF format for free! Find your manual RHFS66WSB - Robinhood and take your electronic device back in hand. On this page are published all the documents necessary for the use of your device. RHFS66WSB by Robinhood.
USER MANUAL RHFS66WSB Robinhood
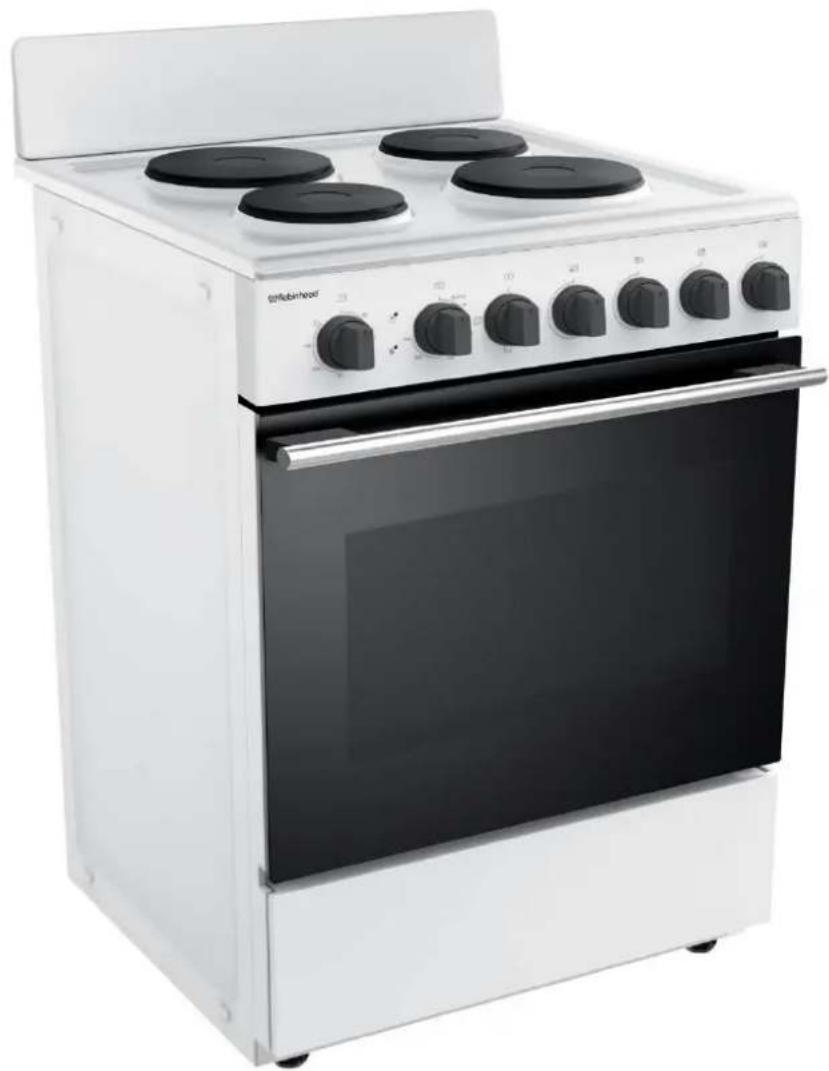
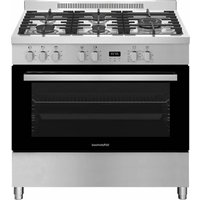
Description: Robinhood Freestanding Cooker 60cm White Model Number: RHFS66WSB
natural_image
Exterior view of a modern white electric stove with four burners and a black oven (no visible text or symbols)RHFS60WSB
Congratulaons!
Thank you for choosing one of our freestanding ovens. We are content that you will now be able to meet your cooking needs. Before you use the oven we strongly recommend that you read through the whole user manual which provides important safety instrucons and descripon of the product and the proper use of its funcons.
To avoid the ever-present risks involved with using an electrical appliance it is vital that the oven is installed correctly and that you read the safety instrucons carefully to avoid misuse and hazards. It is important that you retain these instrucons and your proof of purchase along with any other important documents about this product for future reference.
Due to connual product development, Robinhood reserves the right to alter specicaons or appearances without noce.
IMPORTANT SAFETY INSTRUCTIONS 1-2
APPLIANCE DETAILS....3
ELECTRICAL CONNECTION....4
LAMP REPLACEMENT....5
INSTALLATION....6-7
OPERATING INSTRUCTIONS....8-11
CLEANING....12
WARRANTY CERTIFICATE (NEW ZEALAND) 13
DISPOSAL INFORMATION
- Most of the packing materials are recyclable. Please dispose of these materials through your local recycling depot or by placing them in appropriate collecon containers.
-
If you wish to discard this product, please contact your local authorities and ask for the correct method of disposal.
-
This appliance is not intended for use by persons (including children) with reduced physical, sensory or mental capabilities, or lack of experience or knowledge, unless they have been given supervision or instrucon concerning the use of the appliance by a person responsible for their safety. Children should be supervised to ensure that they do not play with the appliance.
- Aer removing the packaging, make sure to check if there is any damage to the appliance. If there is any damage, never aempt to use the appliance and immediately contact your Authorized Service Centre. As packaging materials can be dangerous to children, they need to be collected immediately and put out of reach.
- In certain circumstances electrical appliances may be a danger hazard. Check the conformity of voltage and power sengs, which are specied on the informaon scker aached to the appliance and/or packaging, with the usage conditions available.
- Do not place heavy objects in or on these appliances, or use for storage, or let children play or swing from the doors. These appliances are designed for cooking food only.
- This appliance is designed for domesc household use only and for the cooking of domesc food products. Use as a commercial appliance will void the warranty. It should not be used in a marine environment or outdoors and must be fully built in. Do not use the appliances until fully installed.
- If the electrical supply cord is damaged, either when being installed or aer installaon, it must be replaced by the manufacturer or similarly qualified persons in order to prevent a hazard.
- Means for disconncon with a suitable – isolang switch must be incorporated in the xed wiring in accordance with the wiring rules.
- The electrical conncon must be accessible aer installaon. The appliance must be electrically isolated before any maintenance can be performed, which includes changing a lamp.
- Electrical conncon must be made as per local wiring rules and regulaons. Do not disconnect the appliance with wet hands or bare feet, and do not disconnect the power cord with extreme force.
- For ovens, the appliance needs sucient air circulaon while it is operang. Carefully read the part of this manual, where installaon procedures are explained, and make sure the relevant condions are sased.
- Ensure that the kitchen is well venlated or mechanical venlaon is in use while cooking in this appliance.
- Do not store or use ammable materials or aerosols near the oven. Items made from aluminium, plasc or plasc lm should also be kept away from the appliance, as they may fuse to the surface.
- Never line the oven boom with aluminium foil, as the consequent accumulation of heat could compromise the cooking and even damage the enamel.
- WARNING – Accessible parts may become hot during use. To avoid burns young children should be kept away. The oven will become hot during and directly aer use. Do not touch any components during this me, as they may be hot and can cause burns. Do not touch the heang elements inside the oven to avoid burns. Use heat resistant cooking gloves where-ever possible when moving food and cooking utensils in and out of the oven.
- Cleaning may only be commenced on the appliance once it has cooled down and turned o. Do not use a steam jet or any other high pressure cleaning equipment to clean the appliance.
- Wash all accessories in hot soapy water or in a dishwasher, wipe dry with a paper or cloth towel. If you use your oven for an extended period of me, condensaon may form. Dry it using a so dry cloth.
- When the appliance is not being used, the knobs and buons must be kept in the 'OFF' posion.
- Where this appliance is installed in a caravan, it shall NOT be used as a space heater.
- Do not modify this appliance.
-
Do not use harsh abrasive cleaners or sharp metal scrapers to clean the oven door glass as they can scratch the surface, which may result in the glass shaering. Clean the glass door using warm damp cloth and dry it with a so cloth.
-
All cabinetry and materials used in the installaon must be able to withstand a minimum temperature of 50^ C above the ambient temperature of the room it is located in, whilst in use. Certain types of vinyl or laminate kitchen furniture are particularly prone to heat damage or discolouration at temperatures below the guidelines given above. Any damage caused by the appliance being installed without adhering to the temperature limits set out above will be the liability of the owner.
-
The appliance must be installed and put in operaon by an authorised technician under the conditions provided by the manufacturer in this manual. The manufacturer cannot be held responsible for any damage that might occur due to faulty installaon.
-
The values indicated in the cooking guide seconds are values obtained in a laboratory environment according to relevant standards. These values may vary according to the usage and environmental conditions of the product.
-
When you rst run your oven, a certain smell will emanate from the insulaon materials and the heater elements. For this reason, before using your oven, run it empty at maximum temperature for 45 minutes. At the same me, you need to venlate the environment in which the oven is installed.
-
Do not leave the oven while cooking with solid or liquid oils. There may be aming up on condions of extreme heang. Never pour water onto the ames occurring from oil. Immediately turn the oven o and cover the saucepan or fry pan with a lid or re blanket in order to smother the ame.
-
Do not leave anything on the door when they are open. You may unbalance the product or break the griller door. Do not allow children to play, swing or sit on the doors.
-
The appliance is not suitable for use with an external timer or a separate remote control system.
-
The appliance must not be installed behind a decorative door in order to avoid overheang. The oven range must not be placed on a base.
Warning
- Ensure that the appliance is switched o before replacing the lamp to avoid the possibility of electric shock.
- Danger of re: Do not store items on the cooking surfaces.
- CAUTION: The cooking process has to be supervised. A short term cooking process has to be supervised connuously.
- Unaended cooking on a hob with fat or oil can be dangerous and may result in a re.

Cauon, possibility of Ing
An-p restraints
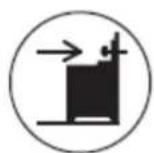
WARNING: In order to prevent pping of the appliance, this stabilising means must be installed.
RHFS60WSB Electrical Details:
Rated Voltage: 220-240V / 380-415V 3N 50-60 Hz
Rated Power: 8000W
This informaon can be found on the rang plate (data label) axed to the appliance.
| Hotplate | Rang |
| 145 mm (RR, LF) | 1000 W x 2 |
| 180 mm (RF, LR) | 1500 W x 2 |
| Oven | Rang |
| Top Element | 950 W |
| Boom element | 1100 W |
| Grill Element | 2000 W |
| Lamp Power | Rang |
| Oven Lamp | 220-240 V, 25W, Type: E14 |
Dimensions:
| Relevant sizes: | Depth (mm) | Width (mm) | Height (mm) |
| External oven size: | 600 | 600 | 890 |

Local Authority Requirements
Installaon is only permied by an authorized person, and carried out according to instrucons provided by the manufacturer. Incorrect installaon might cause harm and damage which the manufacturer accepts no responsibility.
Electrical Installaon
Before carrying out the conncon to the power supply, the voltage rang of the appliance (stamped on the appliance idencaon plate) must be checked for correspondence to the available mains supply voltage, and the mains electric wiring should be capable of handling the oven's power rang (also indicated on the idencaon plate).
NOTE: For connecons to the mains power supply, never use adapters, reducons or mulple power points as these may overheat and catch re. Means for disconncon with a suitable and approved – isolang switch must be incorporated in the xed wiring in accordance with the wiring rules.
Aer having installed the appliance, the switched outlet must always be in an accessible posion.
The electrical safety of this appliance can only be guaranteed if the oven is correctly and eciently earthed. The manufacturer declines all responsibility for damage resulting from a system which has not been earthed.
WARNING: It is essenal to use speci so wire or speci groupware bought from the manufacturer or maintenance department to replace if the electrical so wire has been broken.
Fing a Power Supply Cable
Connecng appropriate power supply terminal board / connector block:
- Using a screwdriver, prize open tabs of the Terminal board cover.
- Remove the wire clamp screw.
- Fasten the wires beneath the corresponding screw heads, using brass 'bridge' for single phase supply.
- Fasten cable clamp screw and close the cover of the terminal board.
- The ac power supply should be single phase 220-240 V or 3 phase 380-415 V, 50-60 Hz.

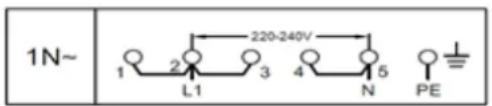

| Wire cross-sectional area(mm2) Connection mode | L1 | L2 | L3 | N | E |
| Single phase 1N~ | Min. 2.5mm | — | — | Min. 2.5mm | Min. 2.5mm |
| Three phase 3N~ | Min. 2.5mm | Min. 2.5mm | Min. 2.5mm | Min. 2.5mm | Min. 2.5mm |
The supply cable should be posioned so that it does not reach a temperature of more than 75^ C with respect to the room temperature, anywhere along its length.
Disconnect the oven from the power supply before aempng to replace the lamp. Remove the glass cover of the lamp-holder by rotang an-clockwise. Remove the lamp and replace with a lamp resistant to high temperatures (300°C), with the following characteristics:
• Voltage: 220-240V
- Waage: 25W
- Type: G9
Replace the glass cover and reconnect the appliance to the mains power.
natural_image
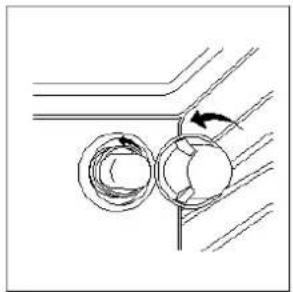
Diagram of a mechanical assembly with rotating components and hatching patterns (no text or symbols)NOTE: Should you experience any diculty please contact your nearest Authorised Service Centre.
SHELF PLACEMENT WARNING:
To ensure the oven shelves operate safely, correct placement of the shelves between the side rail is imperave. Shelves and the pan only can be used between the rst and h layers. The shelves should be used with the right direcon, it will ensure that during careful removal of the shelf or tray, hot food items should not slide out.

natural_image
Technical line drawing of a mechanical assembly with an arrow indicating direction (no text or symbols present)
Any adjacent furniture must be able to withstand a minimum temperature rise of 85^ C above the ambient temperature of the room it is located in, during periods of use. The power supply to the appliance must be switched o before any adjustments or maintenance work is done on it.
Preparaon for Installaon and Use
Manufactured with best quality parts and materials, this modern, functional and praccal oven with cooktop will meet your needs in all respects. Make sure to read the manual to obtain successful results so as not to experience any problems in the future. The informaon given below contains rules that are necessary for correct poisoning and service operaons. They should be read without fail, especially by the technician who will posion the appliance.
Installaon of Oven
The oven can be placed close to other furniture on the condion that the oven is at least 10mm higher than the level of the surrounding furniture. Do not place the oven near a refrigerator.
When choosing a place for the oven, ensure that there are no ammable or combustible materials in close vicinity, such as curtains, oil, cloth etc. These can quickly catch re.
There must be at least a 2 cenmetre clear space between the back cover of oven and any wall for air circulaon. Furniture surrounding the oven must be made of materials resistant to temperatures 85^ C above ambient temperature or more.
The oven is designed to t between kitchen cabinets spaced over 550mm apart. The space either side of the oven needs only be sucient to allow withdrawal of the oven for servicing. It can be used with cabinets on one side or both sides as well as in a corner seng. It can also be used free-standing.
Installaon Steps
- Determine the posion for the oven and an-lt plate.
- Securely x the an-lt plate to the oor with the appropriate fasteners.
- Fasten the stability bolt bracket to the front frame with the two screws supplied.
- Posion the oven into the an-lt plate and mark the posion of the stability bolt hole.
- Remove the oven and drill the bolt hole at the marked locaon. Use a 10mm masonry or wood drill bit. When drilling into concrete, ensure a minimum hole depth of 30mm.
- Reposition the oven back into the an-lt plate, aligning the stability bolt bracket with the 10mm drilled hole. Slide the bolt through the bracket into the hole.
- Slide the oven back into the an-lt plate unl there is a 2cm gap between the rear of the oven and the wall.
- Check the height and level of the oven. If required, pull the oven back out and adjust the leveling feet.
- Connect the electricity supply but do not turn on unl installaon is complete.
NOTE: Only a qualified person should install the appliance, according to the instrucons provided. The manufacturer and supplier deny all responsibility for improper installaon, which may cause harm to people and animals and damage to property. The power supply must be disconnected before any adjustments or maintenance work is done on the appliance.
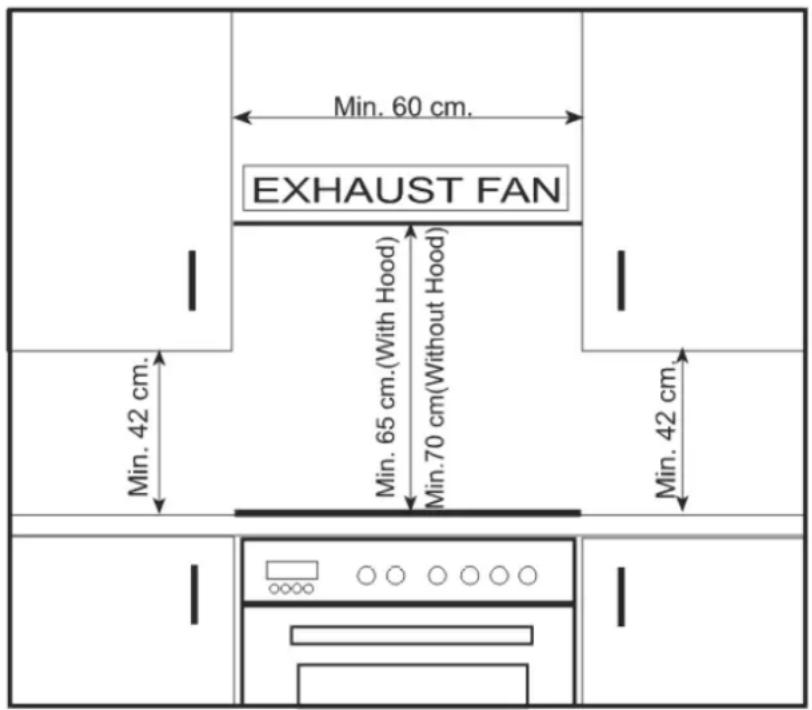
Choosing a Locaon for the Appliance
There are several points to pay aenon to when choosing a locaon for your freestanding oven. Make sure to take into account our recommendaons below in order to prevent any problems or dangerous situaons.
- When choosing a locaon for the oven, ensure that there are no ammable or combustible materials in the vicinity which can quickly catch re, such as curtains, oil, cloth etc.
- Furniture surrounding the cooktop must be made of materials resistant to temperatures above 85 C^ .
- The required changes to wall cabinets and exhaust fans/rangehoods above a built-in cooktop, as well as minimum heights from the oven board, are shown in the image below. Accordingly, the exhaust fan/rangehood should be at a minimum height of 65 cm from the cooking surface of the cooktop. Take note that the instrucon manual for the rangehood may specify a dierent minimum distance. If so, the greater distance must be used.
- If there is no exhaust fan/rangehood, the height should not be less than 70 cm.
Descripon of Oven
A. Cooktop
B. Solid Hotplate
C. Control Panel
D. Baking Pan
E. Baking Rack
F. Adjustable Feet

Control Panel

flowchart
graph TD
    A["Timer Control"] --> B["Oven Temperature Seng"]
    B --> C["Oven Funcon"]
    C --> D["Hob Control Knobs"]
    D --> E["End"]
Oven Funcons
 | Oven Lamp: Enables the user to observe the progress of cooking without opening the door. The Oven lamp will be acvated for all cooking funcons. |
 | Convenonal cooking: The top and boom work together to provide conveconal cooking. |
 | Boom heat: A concealed element in the boom of the oven provides a more concentrated heat to the base of food. |
 | Top heat: The top element of cooker works provides gentle heat. |
 | Radiant grilling: The inner grill element switches on and o to maintain temperature. |
 | Double grilling: The inside radiant element and top element are working. |
The oven temperature seng knob can only be rotated clockwise from the OFF posion.
Turn oven funcon control knob to select the cooking funcon required. Then turn oven temperature control clockwise to the required oven temperature
The red oven temperature pilot light will immediately illuminate and will automatically go o when oven temperature reaches the temperature seng. You may then turn the mer to set the cooking me you want.

The mechanical mer can be set from 1-120 minutes. To use the mer, the mer knob must be wound up by turning the knob one full turn clockwise then turn it back to the desired me so that the number of minutes on the knob matches the reference mark on the panel. When the mer reaches its o posion when coking is complete a buzzer will sound.
Turn the knobs to the o posion when the oven or hobs are not in use.
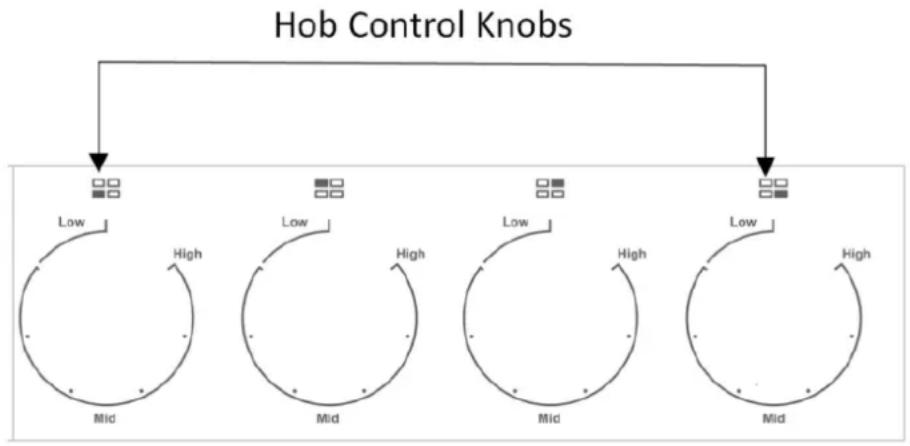
Hob Control
Note: Always ensure that all controls are in the OFF posion, when the appliance is not in use.
Note: Under no circumstances should the hob be used with aluminium foil in contact with the hob surface. Do not leave a hotplate switched on without a pan as this wastes energy and may shorten the life of the hotplate.
CONTROL SETTINGS GUIDE
The knobs for the hobs can be rotated in either direcon to provide variable heat control Turn the hobs control knobs clockwise from OFF posion to increase power, there are 6 posions for dierent power rang. Turn the control to 6 for fast cooking. To cook more slowly or simmer, turn the control to a lower seng according to the size of the saucepan and the amount of liquid. The two small Hotplates are special for smaller pans, low temperature cooking and simmering. This is provided only as a recommend sengs guide it also depends on the type of pan used and the quality of food.
flowchart
graph TD
    A["Top Left"] --> B["Low"]
    A --> C["High"]
    D["Top Right"] --> E["Low"]
    D --> F["High"]
    G["Bottom Left"] --> H["Low"]
    G --> I["High"]
    J["Bottom Right"] --> K["Low"]
    J --> L["High"]
Using the Hotplates
Safety warnings
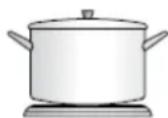
- Do not use pots or pans which are unsteady, as these can p over.
- Do not use mats, heat diusers or wok stands. These will cause a temperatre build-up which can damage the cook top.
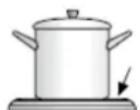
- Do not let cooking pots overhang the sides or front of the hob or get too close to the control knobs.
- Do not use if the ceramic glass top is cracked or broken.
- Do not leave aluminium foil on the hot ceramic hotplates. (Permanent damage will occur).
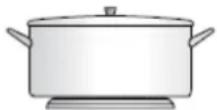
Choosing Cooking Pots
• Always use pots and pans with at booms. Uneven or thin booms will waste energy and cook slowly.
• Always use pots and pans which are slightly larger than the hotplate. Small pans waste energy.
- Only put dry pots and pans on the hotplates.
- Do not use pots and pans which are too large. Pans which overhang the hotplate more than 50 mm can damage the hob.
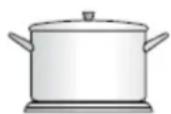
GOOD
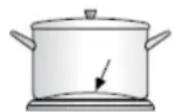
BAD
(recessed base)
BAD
(convex base)
BAD
(undersize)
BAD
(oversize)
BAD
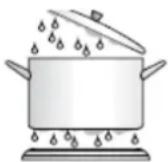
(moisture on hotplate)
BAD
(no utensil)
Solid hotplates
- The strong solid-cast hotplates give wide contact for fast, ecient cooking.
- The hotplates are sealed all around which means that spilt liquids do not go under the hotplates.

NOTE: Cleaning and maintenance operaons must only be carried out when the oven and cooktop are cool. The appliance should be isolated from your mains supply before commencing any cleaning process.
Before starng to clean your oven or cooktop, be sure that all control buons are o and your appliance is cooled o.
Do not use cleaning materials containing parcles that might scratch the enamelled and painted parts of your oven. Use cream cleaners or liquid cleaners, which do not contain parcles. As these cleaners may damage the surfaces, do not use causc creams, abrasive cleaning powders, rough wire wool or hard tools. Before using the cleaning materials check whether they are appropriate and recommended for use by the manufacturer on your oven. In the event of any excess liquids spilling over your oven surface during cleaning, clean up immediately so as to prevent possible damage to the enamel or metal surface. Do not use steam cleaners for cleaning the oven.
Cleaning the Oven
You will obtain best results if you clean the oven interior while the oven is slightly warm. Wipe the oven with a so cloth that had been dampened in soapy water aer each use, then wipe it with a wet cloth once more and then dry it. It may be required to use a liquid cleaning material from me to me and completely clean the oven. Do not clean with dry and powder cleansers.
Cleaning the Cooktop
Any residues that are le on the cooktop surface from cleaning agents may damage it. You should remove any residues with water and a lile washing up.
Abrasive cleaners or sharp objects will damage the cooktop surface. The cooktop should be cleaned using water and a lile washing up liquid.
Although it is easier to clean some deposits whilst the cooktop surface is sill warm, you should take extra care not to burn yourself. It is recommended to only clean the cooktop when cold.
Aer Each Use
- Wipe the appliance over with a damp cloth and a little washing up liquid.
- Dry the appliance by rubbing the surface with a clean cloth.
- For non-stainless steel cooktop surfaces, a mild, non abrasive cream cleaner may only be used.
MAINTAINING THE SOLID PLATES
If something is spilt onto the plate itself, then it can be removed using a so brush, plasc or nylon scourers and warm water.
To keep the solid plates in good condion, you should put a lile olive oil onto a kitchen towel and rub it onto the surface of the plate. The next me the plate is used, it may produce a lile smoke.
Alternatively you can use a hotplate cleaner; these products can normally be found at larger supermarkets and hardware stores. The cleaning agent instrucons should be followed when using these products.
IMPORTANT: If the solid plates are not maintained regularly with olive oil or a hotplate cleaner, then they may rust.
Terms and Conditions
The following conditions apply in respect of the warranty given in this cercate:
- Monaco Corporaon Limited ("Monaco") warrants the following Robinhood products against manufacturing defects and faulty materials, under normal use and subject to the exclusions in this cercate, for a period of:
• Rangehood, Ovens, Cooktops, Dishwashers, Refrigeraon - 24 months from date of original purchase for domesc use.
- Uniduct – 12 months from date of original purchase for domestic use.
- Ironing centre – 12 months from date of original purchase for domesc use.
- Sinks sets—5 years on stainless steel sink including draining bench from date of original purchase for domestic use, 6 months on all stainless steel accessories, including wire rack, colander and tray from date of original purchase for domesc use.
• Laundry Tub - 5 years on stainless bowl, 24 months on Tap, Cabinet and other components from the date of original purchase for domesc use.
"Original purchase", when used in this cercate, means purchase by the customer directly from Monaco or one of its approved suppliers.
-
This warranty is limited to the repair or replacement, at our opon, within the warranty period of any component part which we at our discreon determine to contain faulty materials or a manufacturing defect in breach of this warranty. This warranty is subject to terms and conditions set out in this cercate.
-
The warranty only applies within New Zealand.
-
The customer must produce the original invoice or other purchase documentaon as proof of the original purchase date.
Warranty exclusions
-
The warranty does not apply where, in Monaco's opinion:
-
The defect is caused by misuse, wear and tear, dirt, re or accidental damage. The product has been repaired or serviced by an unauthorised person.
- The product was not installed in accordance with our instrucons.
-
The product was purchased overseas or was not designed for use in New Zealand. The product was not used, cleaned or cared for in accordance with our instrucons.
• The product was used outdoors. -
In addition, this warranty does not extend to damage or defects which in our opinion, directly or indirectly arise from or are due to:
-
Exposing the product to acidic or corrosive materials or chemicals such as dyes, solvents, denture cleaner or acetone; Using inappropriate household cleaning products such as abrasive cream or powder cleansers, furniture polish, bleach, mentholated spirits, drain cleaners, sugar soap, metal pads and strongly alkaline or acidic cleaners;
• Heat damage, including from washing the product at high temperatures; - Impact or mishandling the product, including the impact caused by objects scraped along, thrown or dropped on the product surface or excessive weight being placed on the product;
• Structural or support changes in or aecting the building or the application where the product has been installed; -
Failure to clean or maintain the product as recommended; or any other causes specified in the product informaon as being excluded from this warranty.
-
Variaons with the colour or gloss within the product or any ageing or fading of colour, shine or gloss level over me are not covered by this warranty. The warranty does not cover visual imperfections or blemishes in the surface and edges of the product that were not brought to your supplier's aenon at the me you inspected the product.
- Costs incurred on installaon or removal of a product, or any reinstallaon of a product, or any associated costs, are not covered by this warranty.
- Monaco will not be liable for consequential or indirect loss or damage whatsoever and however arising out of or in conneccon with the supply, performance or removal of the product, including (but not limited to) loss of prot, loss of revenue, loss of contract, loss of goodwill or increased cost of workings, even if due to the negligence of Monaco or any of its approved suppliers, employees or agents.
- Charcoal filters and light bulbs are not covered by this warranty
- This warranty and the statements contained in this cercate or other documents given to you do not exclude, restrict or modify the application of any term implied into this warranty by statute, provided that (to the extent any statutory provision permits Monaco to limit its liability for a breach of an implied condition or warranty) Monaco's liability for such breach is limited to the payment of the cost of replacing the product, repairing the product or acquiring an equivalent product.
- Subject to clause 5, our obligaons under this warranty are limited to those set out in this cercate, and this warranty is expressly instead of all other warranes, express or implied, including any implied warranty of merchantability or tness for a parcular purpose and notwithstanding any course of dealing between the pares or custom and usage in trade to the contrary.
Terms and conditions are subject to change.
New Zealand
Monaco Corporaon Ltd
Telephone: (09) 415 6000
Facsimile: (09) 415 7400
Email:
enquiries@robinhood.co.nz
www.robinhood.co.nz

- RHFS60WSB
- Congratulaons!
- DISPOSAL INFORMATION
- Warning
- RHFS60WSB Electrical Details:
- Local Authority Requirements
- Electrical Installaon
- Fing a Power Supply Cable
- SHELF PLACEMENT WARNING:
- Preparaon for Installaon and Use
- Installaon of Oven
- Installaon Steps
- Choosing a Locaon for the Appliance
- Descripon of Oven
- Control Panel
- Hob Control
- CONTROL SETTINGS GUIDE
- Using the Hotplates
- Safety warnings
- Choosing Cooking Pots
- Solid hotplates
- Cleaning the Oven
- Cleaning the Cooktop
- Aer Each Use
- MAINTAINING THE SOLID PLATES
- Terms and Conditions
- Warranty exclusions
Brand : Robinhood
Model : RHFS66WSB
Category : Oven