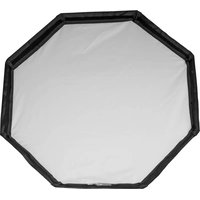
OctaPlus 5 - Studio lighting Chimera - Free user manual and instructions
Find the device manual for free OctaPlus 5 Chimera in PDF.


| Product Type | Portable Multimedia Device |
| Brand | Chimera |
| Model | OctaPlus 5 |
| Dimensions (W x H x D) | 250 x 170 x 8 mm |
| Weight | 500 g |
| Display Size | 10.1 inches |
| Display Resolution | 1920 x 1200 pixels |
| Processor | Octa-core 2.0 GHz |
| RAM | 4 GB |
| Internal Storage | 64 GB (expandable via microSD) |
| Battery Capacity | 6000 mAh |
| Power Input | 5V / 2A via USB-C |
| Operating System | Android 11 |
| Connectivity | Wi-Fi 802.11 a/b/g/n/ac, Bluetooth 5.0, GPS |
| Rear Camera | 8 MP with autofocus |
| Front Camera | 5 MP |
| Sensors | Accelerometer, Gyroscope, Proximity, Ambient Light |
| Audio | Stereo speakers, 3.5 mm headphone jack |
| Cleaning & Care | Wipe with a soft, dry cloth. Do not use solvents. |
| Safety Notices | Do not expose to extreme temperatures or moisture. |
| Repairability | Battery and storage are replaceable by qualified service. |
| Spare Parts Availability | Contact authorized service centers for genuine parts. |
Frequently Asked Questions - OctaPlus 5 Chimera
User questions about OctaPlus 5 Chimera
0 question about this device. Answer the ones you know or ask your own.
Ask a new question about this device
Download the instructions for your Studio lighting in PDF format for free! Find your manual OctaPlus 5 - Chimera and take your electronic device back in hand. On this page are published all the documents necessary for the use of your device. OctaPlus 5 by Chimera.
USER MANUAL OctaPlus 5 Chimera
OctaPlus™ Lightbank Care and Use Instructions
natural_image
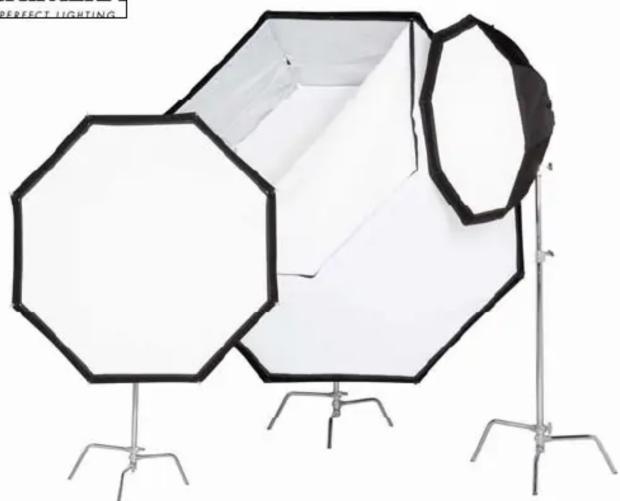
Photography setup with three octagonal lighting units mounted on stands, no visible text or symbolsLightbank Assembly for the OctaPlus 3 ^™ and OctaPlus5 ^™
Insert Poles into Pole Sleeves- Insert rounded pole-ends into pole sleeves located in inside "corners" of the OctaPlus™ Lightbank. Guide each pole carefully through the pole sleeve until it is snug at the opposite end of the sleeve. Note: On the
OctaPlus 5 ^TM , the adaptor tips for the OctaPlus
57 ^TM will push through the grommet hole and be exposed (see details on next page).


Mount Your OctaPlus™ Ring on the Stand – We strongly recommend that a stand adapter (CHIMERA® model #3770) be used with the OctaPlus 5 and 57™ Lightbanks so that the weight is not supported by the lighting instrument. A stand adapter, while helpful, is not essential for the OctaPlus 3™ Lightbank. Mount your Speed Ring to the light stand using the 3770 stand adaptor or the mounting method of your choice. For your safety and the security of your lighting instrument, if at all possible, mount your lighting instrument to the OctaPlus™ Ring after mounting the assembled OctaPlus™ Lightbank on the stand.
Erect the OctaPlus™ on the OctaPlus™ Ring- Start with one of upper holes; insert exposed pole-end extending from Lightbank into hole on outside edge of Speed Ring. Pole ends must be seated fully in bottom of holes. Repeat the pole insertion until all the poles are in place. Many users feel it is easiest to insert the poles directly opposite each other. This helps even out the tension on the OctaPlus™ Lightbank as it is assembled.


Install the Baffle and Front Screen – The interior baffle is attached to the inside of the OctaPlus™ Lightbank just in front of the lighting instrument. Attach one of the Velcro® tabs on the baffle to one of the Velcro® tabs on the pole sleeves. The next attachment should be made directly opposite the first. Continue with the attachment of the tabs working in this opposite attachment method until all eight tabs are installed. Working in this method will assure a much tighter fitting baffle for more even light distribution. Reposition the tabs, if necessary, to make sure the baffle is centered in the OctaPlus™ Lightbank.

natural_image
Top-down view of a hexagonal octagonal object with metallic surfaces (no text or symbols)
When installing the front screen, the CHIMERA® label should be facing the outside. Take one of the eight sides of the front screen and line the "back" edge of the Velcro® hook up with the back edge of the Velcro® pile strip just inside the front of the OctaPlus™ Lightbank. Press the two strips together and then move to the next edge of the front screen and line it up the same way. Continue attaching the edges in a circular fashion around the Lightbank. Keep the front screen as taut and smooth best possible light distribution.
Removing OctaPlus™ from the OctaPlus™ Ring - - Allow the light to cool completely before removing the OctaPlus™ Lightbank. For longest life, remove the front screen and baffle from the OctaPlus™ Lightbank and fold them neatly. Starting with one of the poles, grasp pole in palm of hand and place thumb on the OctaPlus™ Ring. Grip the pole on opposite side with your other hand for additional leverage. Apply backward pressure on pole to center it in its mounting hole and slide to pole out of the hole. Repeat until all poles are free.

Folding and Storing the OctaPlus™ Lightbank - Once the OctaPlus™ Lightbank is removed from the OctaPlus™ Ring, fold it flat then fold it over again. Roll the Lightbank into a tight cylinder and place it in the storage sack along with the other components. You may choose to leave the poles in place in the OctaPlus™ Lightbank. If you are storing the OctaPlus™ Lightbank for a greater length of time it is better to remove the poles. Make sure your CHIMERA® OctaPlus™ Lightbank is not wet, damp or soiled before storing.
CHIMERA® OctaPlus 57™ Care and Use Instructions
Adding the OctaPlus 57™ Extension Kit – Assemble the OctaPlus 5™ Lightbank according to the instructions above (with or without the front screen depending on the diffusion preferred). Then begin the OctaPlus 57™ assembly by slipping the OctaPlus 57™ extension poles into the extension skirt pole

sleeves. Make sure the end with the rounded tip is in front. Once all of the poles are in their sleeves, fit the rear end of the OctaPlus 57 ^™ extension poles over the adapter tips of the OctaPlus 5 ^™ poles protruding through the grommet holes. It is easiest to start at the top of the OctaPlus ^™ Lightbank and work your way to the bottom, moving back and forth as you
go. Once the poles are assembled, press the Velcro® strips between the OctaPlus 5™ and OctaPlus 57™ skirt together to seal the OctaPlus 57™ Lightbank into one unit. Then, seal the Velcro® straps at each extension pole intersection.

natural_image
Close-up of hands performing a medical procedure on a patient's foot, no visible text or symbolsNext, add the OctaPlus 57 ^TM front screen using the front screen instructions above. Most of the time users remove and store the OctaPlus 5 ^TM front screen; however there may be times when you prefer to use the OctaPlus 5 ^TM front screen in combination with the OctaPlus 57 ^TM front screen for an extra soft light.
CAUTION NOTES:
This is a professional product for use in moderate temperature environments. Failure to follow these safety precautions could create a hazardous condition.
- Do not leave Lightbank unattended while in use.
- Open top and bottom flaps completely to allow air flow.
- Excessive heat and/or moisture may damage Lightbank.
- Do not use Lightbank in wet conditions.
- Always use light fixture's protective screen. Screen must be of fine mesh size to prevent hot shards of glass or quartz from contacting Lightbank in event of bulb explosion. Damage or fire caused by exploding bulb is not covered by CHIMERA® warranty.
Please visit the CHIMERA® web site, www.chimeralighting.com, for additional care, use and repair information.
CHIMERA® 1812 VALTEC LANE, BOULDER, COLORADO 80301 USA
TOLL FREE 888-444-1812 PHONE 303-444-8000 FAX 303-444-8303
EMAIL: salesinfo@chimeralighting.com WEB SITE: www.chimeralighting.com

CHIMERA
PERFECT LIGHTING

Brand : Chimera
Model : OctaPlus 5
Category : Studio lighting