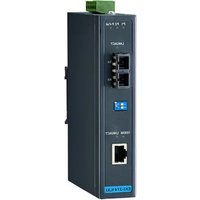
EKI-2741LX-BE - Optical converter Advantech - Free user manual and instructions
Find the device manual for free EKI-2741LX-BE Advantech in PDF.


| Product Type | Industrial Managed Ethernet Switch |
| Model | EKI-2741LX-BE |
| Number of Ports | 4 x 10/100Base-T(X) + 2 x 100Base-FX (SFP) |
| Fiber Optic Connector | LC (SFP slots) |
| Dimensions (W x H x D) | 105 x 135 x 41 mm |
| Weight | 0.5 kg |
| Power Input | 12-48 VDC (terminal block) |
| Power Consumption | 6 W typical |
| Mounting | DIN-rail or wall mount |
| Operating Temperature | -40 to 85°C |
| Humidity | 5% to 95% (non-condensing) |
| Switching Capacity | 1.2 Gbps |
| MAC Address Table Size | 2K |
| Management Features | Web, CLI, SNMP v1/v2c/v3, RMON, LLDP |
| VLAN Support | 802.1Q VLAN (up to 256 groups) |
| Safety Standards | CE, FCC, UL 508, IEC 61000-6-2/4 |
| Protection | Overload, reverse polarity, ESD |
| Maintenance | Clean with dry cloth. No user-serviceable parts inside. |
| Spare Parts | Optional SFP modules, power adapters (not included) |
| Warranty | 5 years (standard) |
| Package Contents | Switch, terminal block, DIN-rail kit, quick start guide |
Frequently Asked Questions - EKI-2741LX-BE Advantech
User questions about EKI-2741LX-BE Advantech
0 question about this device. Answer the ones you know or ask your own.
Ask a new question about this device
Download the instructions for your Optical converter in PDF format for free! Find your manual EKI-2741LX-BE - Advantech and take your electronic device back in hand. On this page are published all the documents necessary for the use of your device. EKI-2741LX-BE by Advantech.
USER MANUAL EKI-2741LX-BE Advantech
10/100/1000Base-T to SFP
(mini-GBIC) Type Fiber
Optic Media Converter
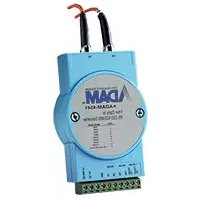
EKI-2741SX
10/100/1000Base-T to
1000Base-SX SC Type
Fiber Optic Media
Converter
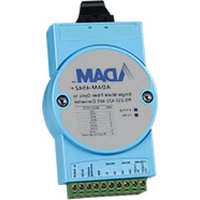
EKI-2741LX
10/100/1000Base-T to
1000Base-LX SC Type
Fiber Optic Media
Converter
User Manual
Copyright
The documentation and the software included with this product are copyrighted 2007 by Advantech Co., Ltd. All rights are reserved. Advantech Co., Ltd. reserves the right to make improvements in the products described in this manual at any time without notice. No part of this manual may be reproduced, copied, translated or transmitted in any form or by any means without the prior written permission of Advantech Co., Ltd. Information provided in this manual is intended to be accurate and reliable. However, Advantech Co., Ltd. assumes no responsibility for its use, nor for any infringements of the rights of third parties, which may result from its use.
Acknowledgements
Intel and Pentium are trademarks of Intel Corporation.
Microsoft Windows and MS-DOS are registered trademarks of Microsoft Corp.
All other product names or trademarks are properties of their respective owners.
Part No.
Printed in China
1st Edition
May 2007
Product Warranty (2 years)
Advantech warrants to you, the original purchaser, that each of its products will be free from defects in materials and workmanship for two years from the date of purchase.
This warranty does not apply to any products which have been repaired or altered by persons other than repair personnel authorized by Advantech, or which have been subject to misuse, abuse, accident or improper installation. Advantech assumes no liability under the terms of this warranty as a consequence of such events.
Because of Advantech's high quality-control standards and rigorous testing, most of our customers never need to use our repair service. If an Advantech product is defective, it will be repaired or replaced at no charge during the warranty period. For out-of-warranty repairs, you will be billed according to the cost of replacement materials, service time and freight. Please consult your dealer for more details.
If you think you have a defective product, follow these steps:
- Collect all the information about the problem encountered. (For example, CPU speed, Advantech products used, other hardware and software used, etc.) Note anything abnormal and list any onscreen messages you get when the problem occurs.
- Call your dealer and describe the problem. Please have your manual, product, and any helpful information readily available.
- If your product is diagnosed as defective, obtain an RMA (return merchandise authorization) number from your dealer. This allows us to process your return more quickly.
- Carefully pack the defective product, a fully-completed Repair and Replacement Order Card and a photocopy proof of purchase date (such as your sales receipt) in a shippable container. A product returned without proof of the purchase date is not eligible for warranty service.
- Write the RMA number visibly on the outside of the package and ship it prepaid to your dealer.
Declaration of Conformity
CE
This product has passed the CE test for environmental specifications. Test conditions for passing included the equipment being operated within an industrial enclosure. In order to protect the product from being damaged by ESD (Electrostatic Discharge) and EMI leakage, we strongly recommend the use of CE-compliant industrial enclosure products.
FCC Class A
This equipment has been tested and found to comply with the limits for a Class A digital device, pursuant to Part 15 of the FCC Rules. These limits are designed to provide reasonable protection against harmful interference when the equipment is operated in a commercial environment. This equipment generates, uses and can radiate radio frequency energy and, if not installed and used in accordance with the instruction manual, may cause harmful interference to radio communications. Operation of this equipment in a residential area is likely to cause harmful interference in which case the user will be required to correct the interference at his own expense.
Technical Support and Assistance
Step 1. Visit the Advantech web site at www.advantech.com/support where you can find the latest information about the product.
Step 2. Contact your distributor, sales representative, or Advantech's customer service center for technical support if you need additional assistance. Please have the following information ready before you call:
- Product name and serial number
- Description of your peripheral attachments
- Description of your software (operating system, version, application software, etc.)
- A complete description of the problem
- The exact wording of any error messages
Safety Instructions
- Read these safety instructions carefully.
- Keep this User's Manual for later reference.
- Disconnect this equipment from any AC outlet before cleaning. Use a damp cloth. Do not use liquid or spray detergents for cleaning.
- For plug-in equipment, the power outlet socket must be located near the equipment and must be easily accessible.
- Keep this equipment away from humidity.
- Put this equipment on a reliable surface during installation. Dropping it or letting it fall may cause damage.
- The openings on the enclosure are for air convection. Protect the equipment from overheating. DO NOT COVER THE OPENINGS.
- Make sure the voltage of the power source is correct before connecting the equipment to the power outlet.
- Position the power cord so that people cannot step on it. Do not place anything over the power cord.
- All cautions and warnings on the equipment should be noted.
- If the equipment is not used for a long time, disconnect it from the power source to avoid damage by transient overvoltage.
- Never pour any liquid into an opening. This may cause fire or electrical shock.
- Never open the equipment. For safety reasons, the equipment should be opened only by qualified service personnel.
-
If one of the following situations arises, get the equipment checked by service personnel:
a. The power cord or plug is damaged.
b. Liquid has penetrated into the equipment.
c. The equipment has been exposed to moisture.
d. The equipment does not work well, or you cannot get it to work according to the user's manual.
e. The equipment has been dropped and damaged.
f. The equipment has obvious signs of breakage. -
DO NOT LEAVE THIS EQUIPMENT IN AN ENVIRONMENT WHERE THE STORAGE TEMPERATURE MAY GO BELOW -40°C (-40°F) OR ABOVE 85°C (185°F). THIS COULD DAMAGE THE EQUIPMENT. THE EQUIPMENT SHOULD BE IN A CONTROLLED ENVIRONMENT.
Safety Precaution - Static Electricity
Follow these simple precautions to protect yourself from harm and the products from damage.
- To avoid electrical shock, always disconnect the power from your PC chassis before you work on it. Don't touch any components on the CPU card or other cards while the PC is on.
- Disconnect power before making any configuration changes. The sudden rush of power as you connect a jumper or install a card may damage sensitive electronic components
Contents
Chapter 1 Overview....2
1.1 Introduction....2
1.1.1 Fast Fiber Converters Module 2
1.1.2 Dual Power Input 2
1.1.3 Flexible Mounting 2
1.1.4 Advanced Protection 2
1.1.5 Wide Operating Temperature 2
1.1.6 Easy Troubleshooting....2
1.2 Features....3
1.3 Specification 4
1.4 Packing List 6
1.5 Safety Precaution 6
Chapter 2 Installation....8
2.1 LED Indicators 8
Table 2.1: EKI-2741F/SX/LX LED Definition.....8
2.2 DIP-Switch 9
Table 2.2: EKI-2741series DIP-Switch Definition......9
2.3 Dimensions (units: mm) 10
Figure 2.1: Front View of EKI-2741 series....10
Figure 2.2: Side View of EKI-2741 series .....11
Figure 2.3: Rear View of EKI-2741 series .....12
Figure 2.4: Top View of EKI-2741 series .....13
2.4 Mounting....14
2.4.1 Wall mounting.... 14
Figure 2.5: Combine the Metal Mounting Kit......14
2.4.2 DIN-rail Mounting....15
Figure 2.6: Installation to DIN-rail Step 1....15
Figure 2.7: Installation to DIN-rail Step 2....16
2.5 Network Connection 17
Figure 2.8: Transceiver to the SFP module .....17
Figure 2.9: Transceiver Inserted....17
Figure 2.10: LC connector to the transceiver .....18
Figure 2.11: Remove LC connector ....18
Figure 2.12: Pull out from the SFP module....19
2.6 Power Connection 20
Figure 2.13: Pin Assignment of the Power Connector 20
Chapter 3 Troubleshooting ......22
Appendix A Pin Assignment & Wiring .....24
Figure A.1: RJ-45 Pin Assignment....24
Figure A.2: EIA/TIA-568B 24
Figure A.2: EIA/TIA-568A 24
Overview
Sections include:
- Introduction
- Features
- Specifications
- Packing List
- Safety Precaution
Chapter 1 Overview
1.1 Introduction
The EKI-2741 is designed to convert Gigabit Ethernet networks to Gigabit fiber networks by transparently converting Ethernet signals to optic signals. The advantages of fiber optics are wide bandwidth, EMI immunity and long-distance transmission capability. Therefore, EKI-2741 is an ideal solution for "fiber to building" applications at central offices or local sites. EKI-2741 supports MDI/MDIX auto detection, so you don't need to use crossover wires. Furthermore, the EKI-2741 can work normally from -10 \~ 60°C and accepts a wide voltage range from +12 \~ 48 V DC . Besides, it also provides 3,000 V DC surge (EFT) protection against over-voltage, so it is suitable for harsh operating environments.
1.1.1 Fast Fiber Converters Module
The EKI-2741F/SX/LX provides you with one Fiber connector for your fiber optic cable and one Ethernet RJ-45 port (Auto MDI/MDIX) for your 1000Base-TX copper cable connection. There are two DIP-switches to set the operation mode for UTP, Fiber ports and link loss forwarding function.
1.1.2 Dual Power Input
To reduce the risk of power failure, the EKI-2741F/SX/LX provide +12 \~ 48 V _DC dual power inputs. If there is power failure, EKI-2741F/SX/LX will automatically switch to the secondary power input.
1.1.3 Flexible Mounting
EKI-2741F/SX/LX are extremely compact and can be mounted on a DIN-rail or a panel, so it is suitable for any space-constrained environment.
1.1.4 Advanced Protection
The power line of EKI-2741F/SX/LX supports up to 3,000 V_DC EFT protection, which secure equipment against unregulated voltage and make systems safer and more reliable. Meanwhile, 4,000 V_DC ESD protections for Ethernet ports make EKI-2741F/SX/LX more suitable for harsh environments.
1.1.5 Wide Operating Temperature
The operating temperature of the EKI-2741F/SX/LX is between -40 \~ 75 °C (wide operating temperature model) or -10 \~ 60 °C (standard model). With such a wide range, you can use the EKI-2741F/SX/LX in some of the harshest industrial environments that exist.
1.1.6 Easy Troubleshooting
LED indicators make troubleshooting quick and easy. The 10/100/1000 Base-TX port has 2 LEDs that display the link status, transmission speed and collision status. Also the three power indicators P1, P2 and P-Fail help you diagnose immediately.
1.2 Features
- Provides 1 x SFP (mini-GBIC) type connector (EKI-2741F)
- Provides 1 x 1000Base-SX or 1000Base-LX SC type connector (EKI-2741SX/LX)
- Provides 1 x 10/100/1000Mbps Ethernet ports with RJ-45 connector
• Supports full/half duplex flow control
• Supports MDI/MDI-X auto-crossover
• Supports surge (EFT) protection 3,000 V DC for power line
• Supports 4,000 V DC Ethernet ESD protection - Embedded with a switch controller, supports auto-negotiation
• Supports store & forward transmission
• Supports redundant +12 \~ 48 V _DC power input - Provides flexible mounting: DIN-rail, Wall Mounting
- Supports operating temperatures from -40 \~ 75 °C (wide operating temperature model) or -10 \~ 60 °C (standard model)
Communications
| Standard | IEEE 802.3, 802.3ab, 802.3u, 802.3x, 802.3z |
| LAN | 10/100/1000Base-TX, 1000Base-SX, 1000Base-LX |
| Transmission Distance | Multi-Mode Fiber: 550m (EKI-2741SX)Single-Mode Fiber: 10km (EKI-2741LX) or SFP (mini-GBIC) Fiber: Up to 110km (EKI-2741F)Ethernet: Up to 100 meters (STP or UTP) |
| Transmission Speed | Up to 1000 Mbps |
Interface
| Connectors | Fiber : 1 x SFP(mini-GBIC) fiber connector(EKI-2741F)1 x SC type fiber connector (EKI-2741SX/LX)1 x RJ-45 |
6-pin removable screw terminal (power & relay)
Fiber port: LNK/ACT
Port Alarm, LFP
LED Indicators
Power
| Power Consumption | 5.28 W (EKI-2741F) |
| 5.18 W (EKI-2741SX) | |
| 5.30 W (EKI-2741LX) | |
| Power Input | 2 x Unregulated +12 ~ 48 V_DC |
| Fault Output | 1 Relay Output |
Mechanism
| Dimensions (WxDxH) | 37 x 95 x 140 mm |
| Enclosure | IP30, Metal shell with solid mounting kits |
| Mounting | DIN-rail, wall |
Protection
| ESD (Ethernet) | 4,000 V_DC |
| Surge (EFT for power) | 3,000 V_DC |
| Reverse Polarity | Yes |
| Overload | 0.9A@12 V_DC (25 °C) |
Environment
Operating Temperature
Storage Temperature
Operating Humidity
Storage Humidity
-10\~60°C (14\~140°F)
Wide temp. model: -40 \~ 75 °C (-40 \~ 167°F)
-40 \~ 85 °C (-40 \~ 185°F)
5 \~ 95% (non-condensing)
0 \~ 95% (non-condensing)
Certifications
Safety
EMC
EN55022, Class A,
EN61000-3-2/3
EN55024
IEC61000-4-2/3/4/5/6/8/11/12
EN61000-6-2
Free Fall
Shock
Vibration
UL, 60950-1, CAN/CSA-C22.2 No.60950
U.S.A.: FCC Part 15 CISPR 22
EU: EN55011, EN61000-6-4
IEC60068-2-32
IEC60068-2-27
IEC60068-2-6
1.4 Packing List
• 1 x EKI-2741F or EKI-2741SX or EKI-2741LX Industrial Ethernet Switch
- 1 x eAutomation Industrial Communication CD-ROM with software, and User manual
- 2 x Wall Mounting Bracket and Screws
• 1 x DIN-rail Mounting Bracket and Screws
• 1 x EKI-2741F/SX/LX Startup Manual
• 1 x DC Jack Cable φ 2.0/150mm
1.5 Safety Precaution
Attention IF DC voltage is supplied by an external circuit, please use a protection device on the power supply input.
Installation
Sections include:
- LED Indicators
- Dimensions
- Mounting
• Network Connection - Power Connection
Chapter 2 Installation
In this chapter, you will be given an overview of the EKI-2741F/SX/LX hardware installation procedures.
2.1 LED Indicators
There are few LEDs display the power status and network status located on the front panel of EKI-2741F/SX/LX, each of them has its own specific meaning as the table below.
| Table 2.1: EKI-2741F/SX/LX LED Definition | |||
| LED | Color | Description | |
| P1 | Green | On Power input 1 is active | |
| Off Power input 1 is inactive | |||
| P2 | Green | On Power input 2 is active | |
| Off Power input 2 is inactive | |||
| P-Fail | Red | On Power input 1 or 2 has failed | |
| Off Power input 1 and 2 are both functional, or no power input | |||
| LNK/ACT (fiber port) Green | On Connected to network | ||
| Flashing Networking is active | |||
| Off Not connected to network | |||
| 1000M (RJ-45) | Yellow | On Link to 1000M bps network | |
| Off Not connected to network | |||
| LNK/ACT (RJ-45) Green | On Connected to network | ||
| Flashing Networking is active | |||
| Off Not connected to network | |||
The DIP-Switch is used to configure operation mode for LFP (Link Fault Pass-Through) and operation mode for UTP/Fiber port. The default value of DIP-switch is OFF.
Table 2.2: EKI-2741 series DIP-Switch Definition
| S/W No Status Description | ||
| 1 | ON Enables Port/Power Alarm | |
| OFF Disable Port/Power Alarm | ||
| 2 | ON | Enables LFP |
| OFF | Disables LFP | |
Link Fault Pass-Through (DIP-Switch 2): When LFP is enabled, it allows UTP link failures to be reported to the fiber side and also allows Fiber link failures to be reported to the UTP side. Therefore, a link loss forwarding feature is provided in both UTP and Fiber side.
Note Please don't change the DIP-switch setting when UTP or fiber port is transmitting or receiving data. It may cause some data error. Besides, if you change the DIP-switch setting, please power off the converter and power on again to make the setting effective.
2.3 Dimensions (units: mm)

Figure 2.1: Front View of EKI-2741 series

Figure 2.2: Side View of EKI-2741 series

Figure 2.3: Rear View of EKI-2741 series
The terminal block of power & relay is located on the top side. Please refer to page 16 for pin assignment.

natural_image
Top-down schematic of a room layout with furniture and fixtures (no text or symbols)Figure 2.4: Top View of EKI-2741 series
2.4 Mounting
The EKI-2741F/SX/LX support two mounting methods: DIN-rail & Wall.
2.4.1 Wall mounting
EKI-2741F/SX/LX can be wall-mounted by using the included mounting kit. Then, hang on the EKI-2741F/SX/LX to the nails on the wall.
First, use the screws included in the package to combine the EKI-2741F/SX/LX and metal mounting kit. And then you can install the device firmly via the components, please see Figure 2.5 as below.

natural_image
3D rendering of a black industrial electronic device with mounting base and control panel (no visible text or symbols)Figure 2.5: Combine the Metal Mounting Kit
2.4.2 DIN-rail Mounting
You can also mount EKI-2741F/SX/LX on a standard DIN-rail by below steps.
The DIN-rail kit is screwed on the industrial switch when out of factory. If the DIN-rail kit is not screwed on the industrial switch, please screw the DIN-rail kit on the switch first.
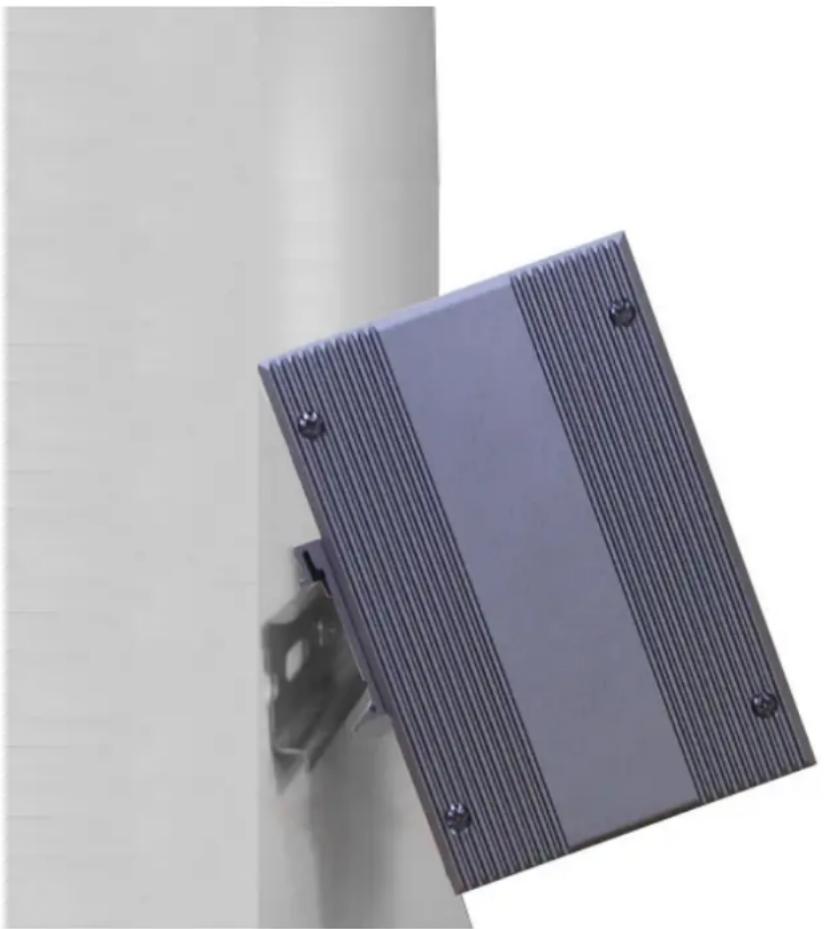
First, hang the EKI-2741F/SX/LX to the DIN-rail with angle of inclination. See figure 2.6.
natural_image
Close-up of a metallic heating element mounted on a wall, showing vertical ribbed structure and mounting bracket (no text or symbols visible)Figure 2.6: Installation to DIN-rail Step 1
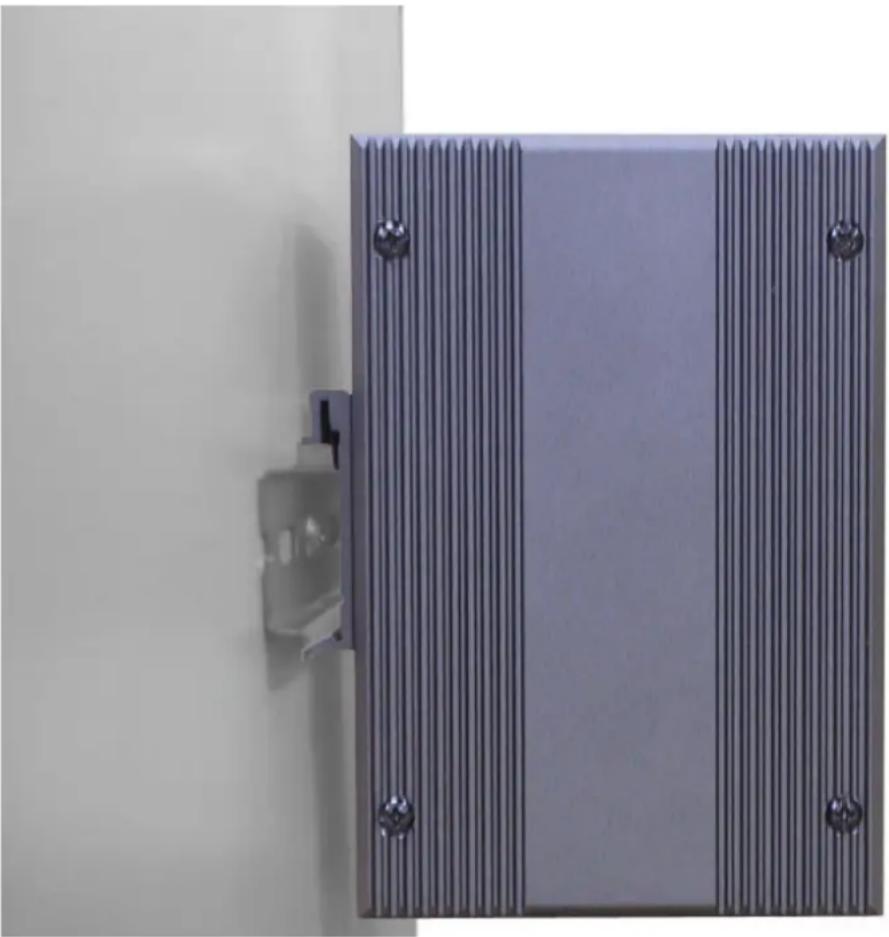
Then, let the device down straight to slide over the rail smoothly. See Figure 2.7
natural_image
Exterior view of a wall-mounted industrial enclosure with vertical slats and mounting holes (no text or symbols visible)Figure 2.7: Installation to DIN-rail Step 2
2.5 Network Connection
- Twisted-pair segment can use unshielded twisted pair (UTP) or shielded twisted pair (STP) cabling. The cable between the link partner (switch, hub, workstation, etc.) and the converter, must be less than 100 meters (328 ft.) long and comply with the IEEE 802.3ab 1000Base-T standard for Category 5e or above.
- Fiber segment using single-mode connector type must use 9/125 µm single-mode fiber cable. You can connect two devices in the distance of 10 km.
- Fiber segment using multi-mode connector type must use 50/125 or 62.5/125 um multi-mode fiber cable. You can connect two devices up to 550m distances.
- The small form-factor pluggable (SFP) is a compact optical transceiver used in optical communications for both telecommunication and data communication applications.
To connect the transceiver and LC cable, please follow the steps shown below:
First, insert the transceiver into the SFP module. Notice that the triangle mark is the bottom of the module.

Figure 2.8: Transceiver to the SFP module

natural_image
Close-up of a blue network switch with an Ethernet port, labeled 'LINK/ACT' and '5000M', showing no readable text beyond labels.Figure 2.9: Transceiver Inserted
Second, insert the fiber cable of LC connector into the transceiver.

Figure 2.10: LC connector to the transceiver
To remove the LC connector from the transceiver, please follow the steps shown below:
First, press the upper side of the LC connector from the transceiver and pull it out to release.

Figure 2.11: Remove LC connector
Second, push down the metal loop and pull the transceiver out by the plastic part.

Figure 2.12: Pull out from the SFP module
2.6 Power Connection
The EKI-2741F/SX/LX support dual +12 48V_DC power inputs and power-fail relay output.
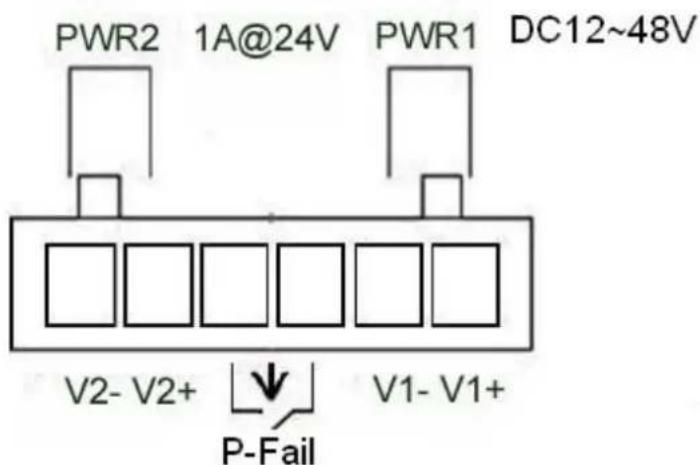
Figure 2.13: Pin Assignment of the Power Connector
You can connect an alarm indicator, buzzer or other signaling equipment through the relay output. The relay opens if power input 1 or 2 fails (“Open” means if you connect relay output with an LED, the light would be off).
CHAPTER
[NO TEXT]
Troubleshooting
Chapter 3 Troubleshooting
1. Power Input
Verify that is using the right power cord/adapter (+12\~48 V_DC ), please don't use the power adaptor with DC output voltage higher than 48V, or it will burn this converter down.
2. Cable
Select the proper UTP/Fiber cable to construct your network. The single-mode converter must use single-mode fiber cable. Please check that you are using the right cable.
3. DIP Switch
Check the configuration DIP-switch. It must be setting in the same operation mode with the link partner.
4. Diagnosing LED Indicators
The switch can be easily monitored through panel indicators, which describes common problems user may encounter and where user can find possible solutions, to assist in identifying.
If the power indicator does not light up when the power cord is plugged in, user may have a problem with power cord. Then check for loose power connections, power losses or surges at power outlet. If user still cannot resolve the problem, contact the local dealer for assistance.
If the Industrial switch LED indicators are normal and the connected cables are correct but the packets still cannot transmit, please check your system's Ethernet devices configuration or status.
Pin Assignment & Wiring
Appendix A Pin Assignment & Wiring
It is suggested to adopt ELA/TIA as the wiring of the RJ-45.

Figure A.1: RJ-45 Pin Assignment

Figure A.2: EIA/TIA-568B
- White, Orange
- Orange
- White, Green
- Blue
- White, Blue
- Green
- White, Brown
- Brown

Figure A.2: EIA/TIA-568A
- White, Green
- Green
- White, Orange
- Blue
- White, Blue
- Orange
- White, Brown
- Brown
- EKI-2741SX
- EKI-2741LX
- Copyright
- Acknowledgements
- Product Warranty (2 years)
- Declaration of Conformity
- CE
- FCC Class A
- Technical Support and Assistance
- Safety Instructions
- Safety Precaution - Static Electricity
- Contents
- Chapter 1 Overview....2
- Chapter 2 Installation....8
- Chapter 3 Troubleshooting ......22
- Appendix A Pin Assignment & Wiring .....24
- Overview
- Chapter 1 Overview
- Introduction
- Fast Fiber Converters Module
- Dual Power Input
- Flexible Mounting
- Advanced Protection
- Wide Operating Temperature
- Easy Troubleshooting
- Features
- Environment
- Operating Temperature
- Storage Temperature
- Operating Humidity
- Storage Humidity
- Certifications
- Safety
- EMC
- Free Fall
- Shock
- Vibration
- Packing List
- Safety Precaution
- Installation
- Chapter 2 Installation
- LED Indicators
- Dimensions (units: mm)
- Mounting
- Wall mounting
- DIN-rail Mounting
- Network Connection
- Power Connection
- [NO TEXT]
- Troubleshooting
- Chapter 3 Troubleshooting
- Power Input
- Cable
- DIP Switch
- Diagnosing LED Indicators
- Pin Assignment & Wiring
- Appendix A Pin Assignment & Wiring
Brand : Advantech
Model : EKI-2741LX-BE
Category : Optical converter