
TSS-4000 - Loudspeaker INFINITY - Free user manual and instructions
Find the device manual for free TSS-4000 INFINITY in PDF.


| Product Type | In-wall/on-wall speaker system (satellite and center) |
| Brand | Infinity |
| Model | TSS-4000 |
| Series | Total Speaker Solutions |
| Components | TSS-SAT4000 satellite speakers, TSS-CENTER4000 center channel |
| Mounting Type | Flush-mount (recessed) using TSS-FMK4000 kit |
| Installation Depth | Extends approximately 1 inch (2.54 cm) beyond wall surface |
| Included Accessories | 2 End Brackets, 2 Mounting Blocks, 4 #8 x 1\" Flat-Head Wood Screws, 4 #8 x 1-1/8\" Pan-Head Wood Screws, 2 1/4-20 x 3/4\" Flat-Head Machine Screws |
| Material | Metal brackets and mounting blocks; plastic frame |
| Color | Black or white (typical) |
| Recommended Wall Stud Spacing | Standard 16\" (40.64 cm) for center channel installation (with modification) |
| Sealing | Sealing strips included to cover openings |
| Gasket | Paper-covered gasket on frame for airtight fit |
| Frame | Snap-on frame with gasket |
| Screw Type | Machine screws for brackets; wood screws for mounting blocks and speaker assembly |
| End Bracket | Attaches to speaker ends for wall mounting |
| Mounting Block | Installed inside hole to anchor screws |
| Compatibility | Exclusively for TSS-SAT4000 and TSS-CENTER4000 speakers |
| Application | Home theater, stereo, multi-room audio |
| Safety Notes | Installation requires professional contractor for horizontal braces if needed; follow local building codes |
| Maintenance & Cleaning | Wipe with dry cloth; avoid moisture; do not disassemble speaker components |
| Reparability | Screws and brackets are replaceable; contact Infinity for service parts |
Frequently Asked Questions - TSS-4000 INFINITY
User questions about TSS-4000 INFINITY
0 question about this device. Answer the ones you know or ask your own.
Ask a new question about this device
Download the instructions for your Loudspeaker in PDF format for free! Find your manual TSS-4000 - INFINITY and take your electronic device back in hand. On this page are published all the documents necessary for the use of your device. TSS-4000 by INFINITY.
USER MANUAL TSS-4000 INFINITY
TOTAL SPEAKER SOLUTIONS
TSS-FMK4000
Owner's Guide
natural_image
Vertical metallic object with six circular cutouts, no visible text or symbolsINTRODUCTION
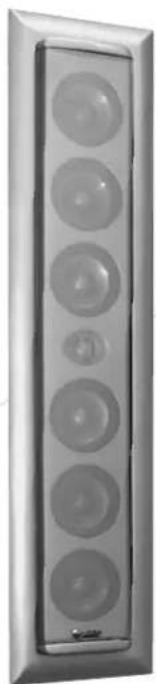
The TSS-FMK4000 allows you to recess a TSS-SAT4000 or TSS-CENTER4000 into the wall. When installed, the speaker will extend beyond the wall approximately 1."
Unpacking the Components
Finish unpacking the flush-mount kit and check the contents. If you suspect damage from transit, report it immediately to your dealer. Keep the shipping carton and packing materials for future use.
Contents
Please verify that the package contains the following items:
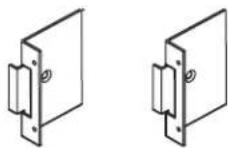
(2) End Brackets
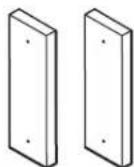
(2) Mounting Blocks

(4) #8 x 1" Flat-Head Wood Screws

(4) #8 x 1-1/8" Pan-Head Wood Screws

(2) 1/4-20 x 3/4" Flat-Head Machine Screws
Important Notes:
1) In order to horizontally flush-mount the TSS-CENTER4000 in a wall with standard 16" spacing between the studs, some modification to that area of the wall will be necessary. This type of installation will require a professional licensed contractor to install horizontal braces that comply with the customer's local building codes.
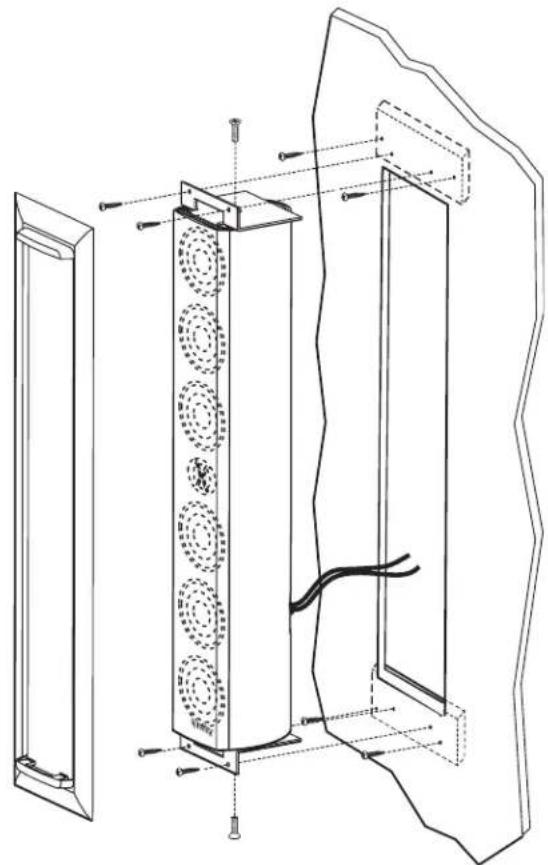
2) For a satellite installation, follow all the steps but cut the hole in a vertical direction, perpendicular to the floor. See exploded view on page 7.
Step One
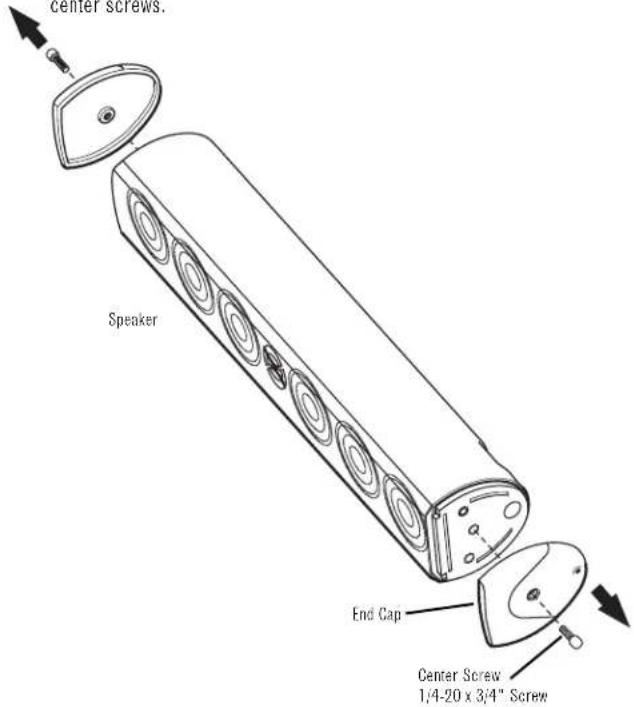
Remove both end caps of the speaker by unscrewing the single center screws.
Step Two
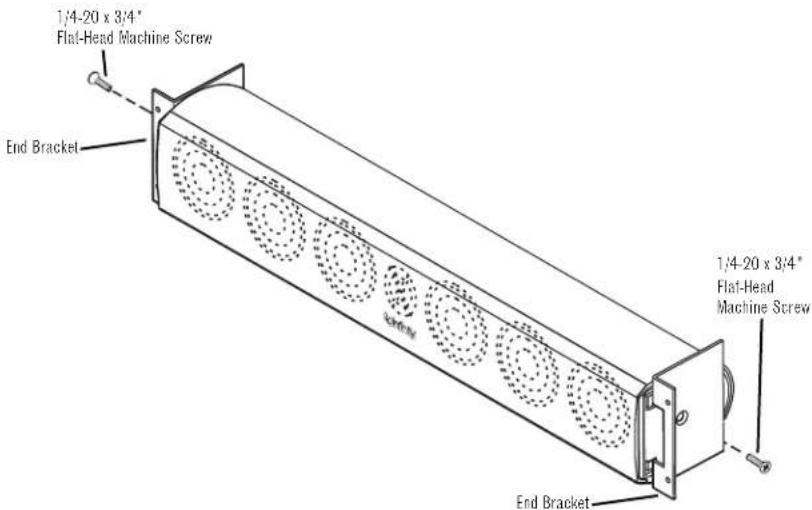
Attach both of the end brackets to the speaker ends with the 1/4-20 x 3/4" flat-head machine screw, as shown.
Step Three
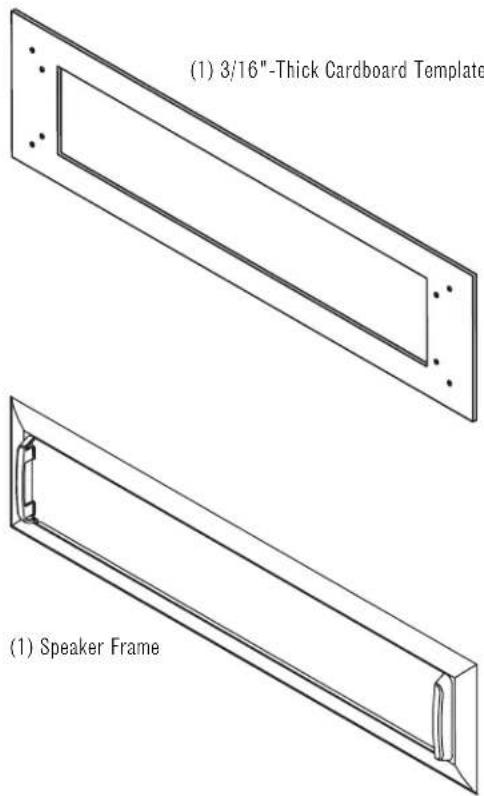
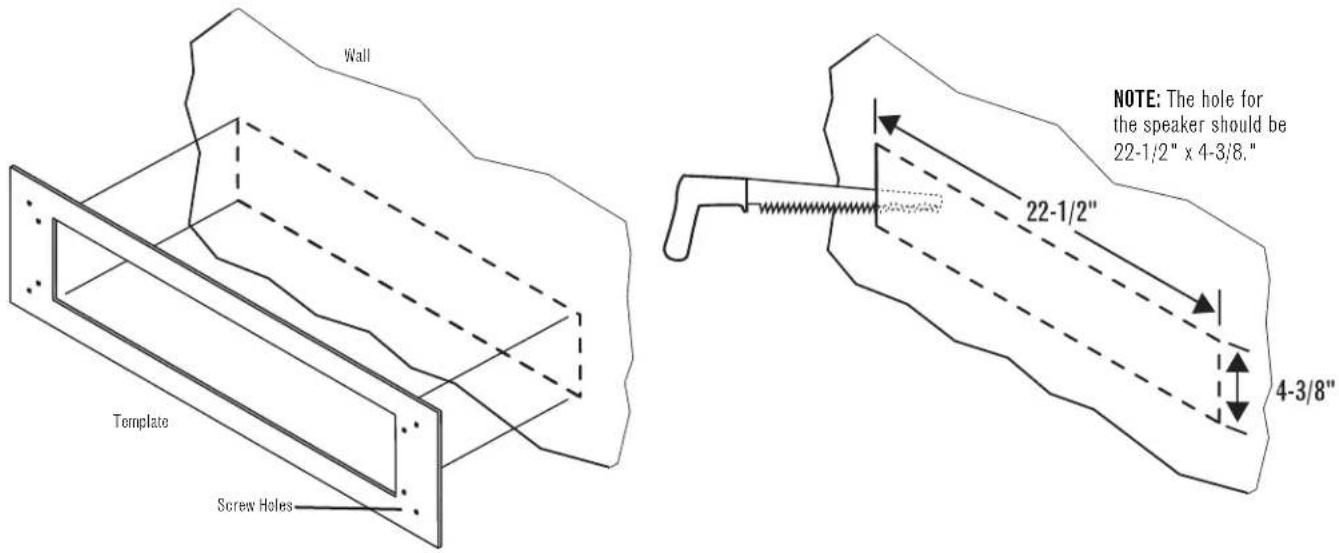
After you have found the correct placement on the wall for the speaker, use the template provided to draw the exact-sized hole required. Make sure to use a level when positioning the template to ensure that your installation is level. Then cut out the drywall to create the hole.
Step Four
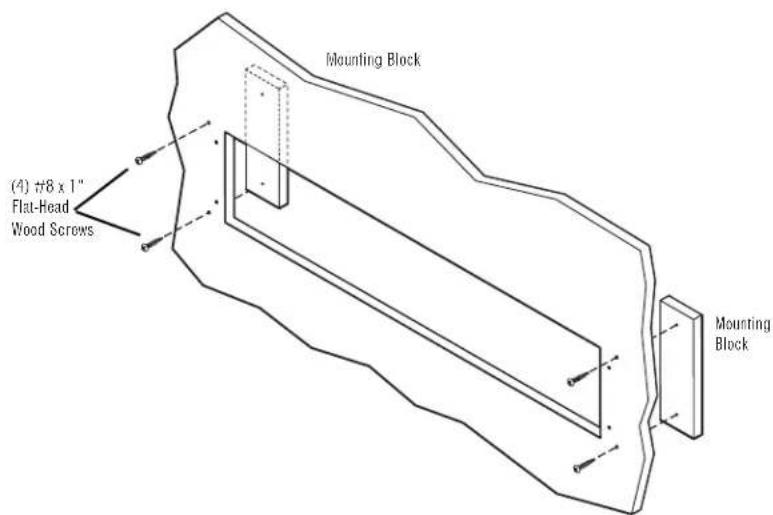
Place the mounting blocks inside the hole at either end. Use two #8 x 1" flat-head wood screws to secure them in place.
Step Five
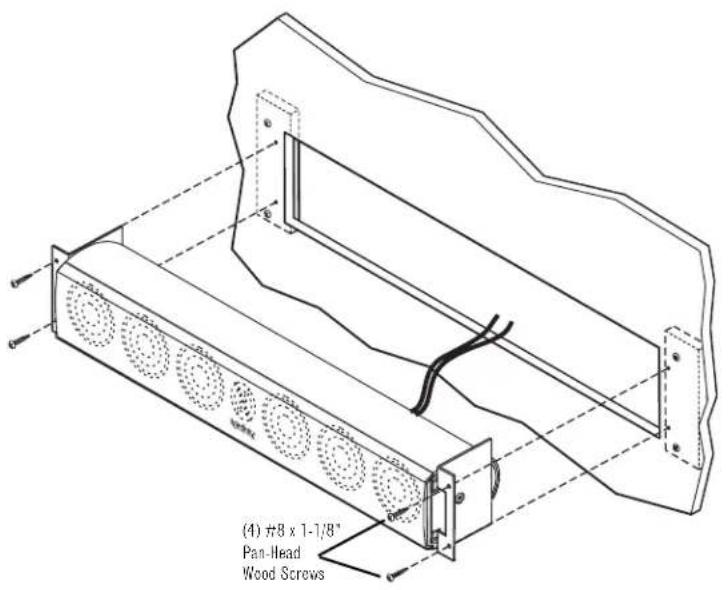
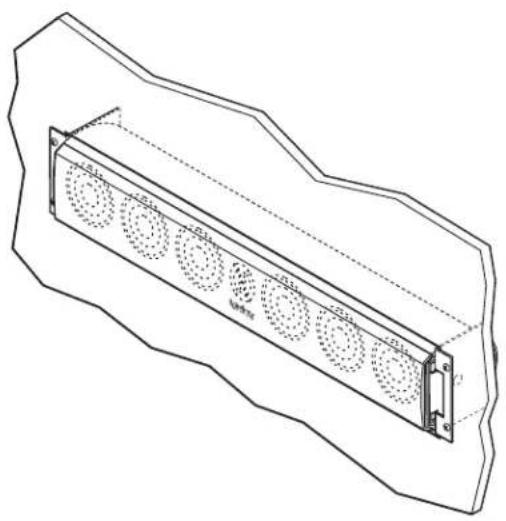
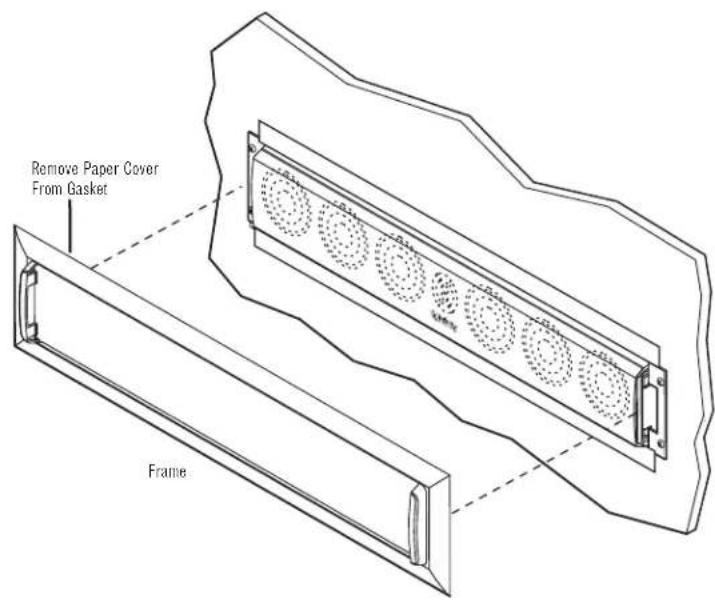
Attach speaker wires as described in the speaker's owner's manual and, using four #8 x 1-1/8" pan-head wood screws provided, screw the speaker assembly into place, making sure that the screws anchor themselves into the mounting blocks behind the drywall.
natural_image
Technical line drawing of a rectangular device with circular cutouts and mounting bracket (no text or symbols)Step Six
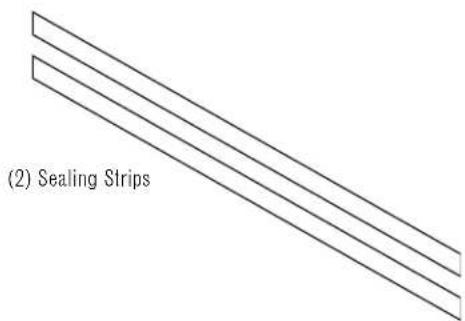
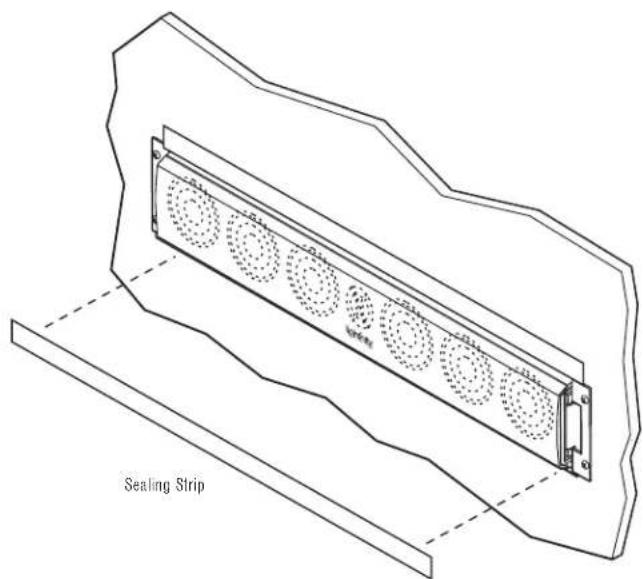
Apply the sealing strips to either side of the speaker to cover the remaining openings of the cutout in the drywall.
Step Seven
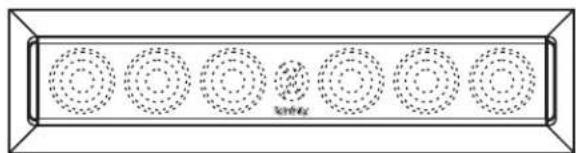
Remove the paper cover from the gasket on the speaker-facing side of the frame. Place the frame over the in-wall assembly and snap it into place.
natural_image
Pure diagram of concentric circles with dashed outlines, no text or symbols presentCenter Speaker In-Wall Installation
Satellite Installation Exploded View
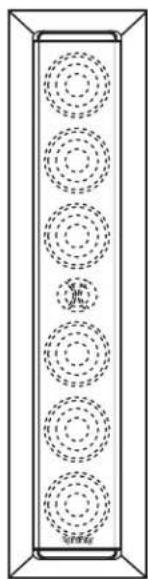
For satellite installation, repeat the steps but cut the hole in a vertical direction, perpendicular to the floor.
natural_image
Technical line drawing of a vertical cylindrical device with circular components and mounting brackets (no text or symbols)Satellite Speaker In-Wall Installation
natural_image
Vertical panel with six circular patterns arranged in a row, no text or symbols present
Infinity
TECHNOLOGY - PERFORMANCE - DESIGN
© 2004 Harman International Industries, Incorporated
Infinity Systems, 250 Crossways Park Drive Woodbury, NY 11797 USA 516.674.4INF (USA only)
www.infinitysystems.com
Infinity is a registered trademark, and Total Solutions is a trademark, of Harman International Industries, Incorporated
Part No. 400-OMIXKIT 10/04
H A Harman International Company
Infinity continually strives to update and improve existing products, as well as create new ones.
The specifications and construction details in this and related Infinity publications are therefore
subject to change without notice.
Brand : INFINITY
Model : TSS-4000
Category : Loudspeaker