Oak Hill D35155470 - Faucet Dxv - Free user manual and instructions
Find the device manual for free Oak Hill D35155470 Dxv in PDF.

| Product Type | Faucet |
| Brand | Dxv |
| Model | Oak Hill D35155470 |
| Category | Faucet |
| Material | Brass with chrome finish |
| Weight | Approximately 2.2 kg |
| Height | 35 cm |
| Spout Reach | 20 cm |
| Connection Size | 1/2" NPT |
| Handle Type | Single lever |
| Mounting Type | Deck mount (single hole) |
| Finish | Chrome |
| Flow Rate | 1.5 GPM (5.7 L/min) at 60 psi |
| Functions | Single lever control for temperature and flow; includes aerator for water efficiency |
| Maintenance | Clean with mild soap and water; avoid abrasive cleaners |
| Safety | Lead-free construction compliant with NSF/ANSI 61 |
| Spare Parts | Cartridge, aerator, handle |
| Repairability | Replaceable cartridge; easy access from top |
| Warranty | Limited lifetime warranty |
Frequently Asked Questions - Oak Hill D35155470 Dxv
User questions about Oak Hill D35155470 Dxv
0 question about this device. Answer the ones you know or ask your own.
Ask a new question about this device
Download the instructions for your Faucet in PDF format for free! Find your manual Oak Hill D35155470 - Dxv and take your electronic device back in hand. On this page are published all the documents necessary for the use of your device. Oak Hill D35155470 by Dxv.
USER MANUAL Oak Hill D35155470 Dxv
INSTALLATION INSTRUCTIONS
DXV
Oak Hill™
Wall-Mount Lavatory Faucet
Model D35155450 - Lever Handle Model D35155470 - Cross Handle
Thank you for selecting DXV. To ensure that your installation proceeds smoothly, please read these instructions carefully before you begin.
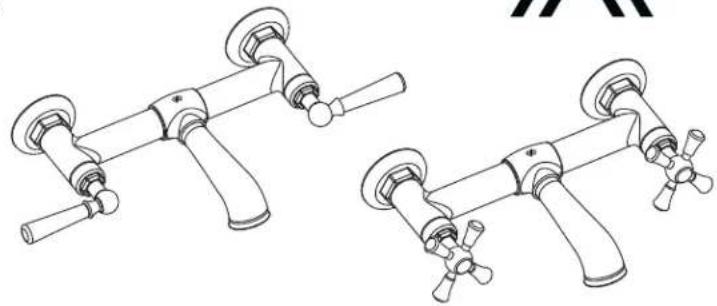
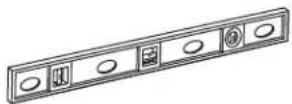
natural_image
Technical line drawing of two identical mechanical clamps with handle and lever arms (no text or symbols)RECOMMENDED TOOLS AND MATERIALS
Most of the procedures require the use of common tools and materials which are available from hardware and plumbing supply stores. It is essential that the tools and materials be on hand before work is begun.
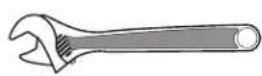
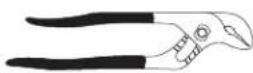
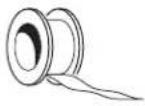
Adjustable Wrench Channel Locks Sealing Tape Level
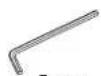
Hex wrench
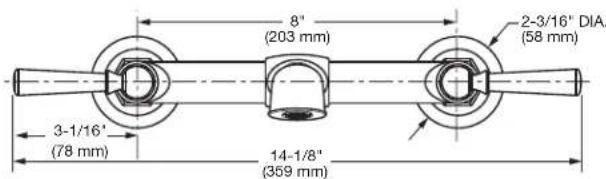
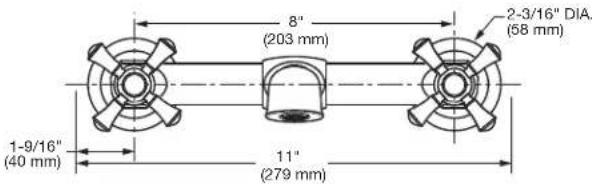
ROUGHING-IN DIMENSIONS:
- For reference
WALL INSTALLATION
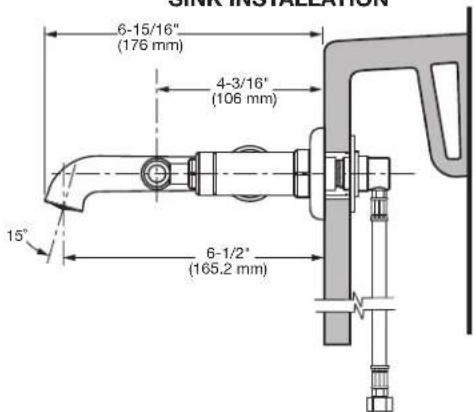
SINK INSTALLATION
In the United States:
DXV
One Centennial Avenue
Piscataway, New Jersey 08855
Attention: Director of Customer Care
For residents of the United States, warranty
information may also be obtained by calling
the following toll free number: (800) 227-2734
www.DXV.com
In Canada:
DXV
5900 Avebury Road
Mississauga, Ontario
L5R 3M3
Canada
Toll Free: 1-800-387-0369
Local: 905-306-1093
Fax: 1-800-395-1498
www.DXV.ca
In Mexico:
DXV
Via Morelos 330
Col. Santa Clara Coatitla
Ecatepec, Estado de México 55540
Toll Free: 01-800-8391200
www.DXV.mx
DXV SINK INSTALLATION
1 INSTALL MOUNTING WASHERS
• Install METAL WASHER (1) and RUBBER WASHER (2) onto each SUPPLY SHANK (3).
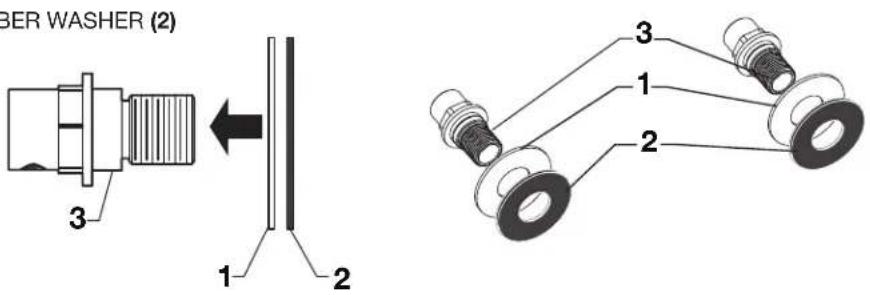
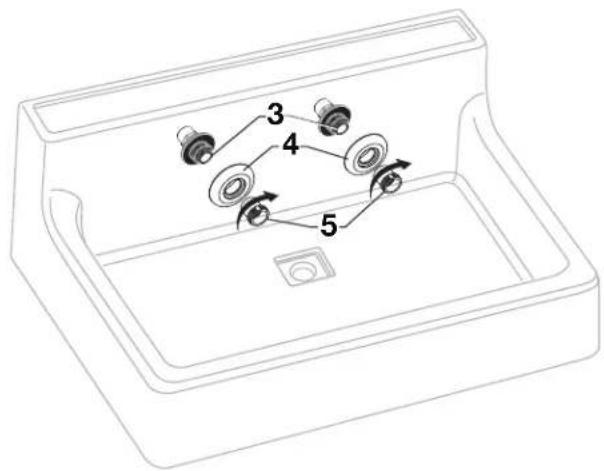
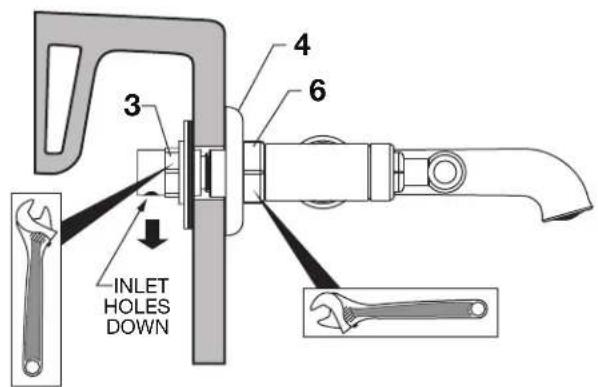
2 INSTALL SUPPLY SHANKS TO LAVATORY
- From behind the sink, insert SUPPLY SHANKS (3) with washers into the faucet holes.
• Install ESCUTCHEON (4) and ADAPTER NUT (5) onto each SUPPLY SHANK (3).
Hand tighten. These parts must be installed loosely and should be able to move around within the two sink holes. Keep Inlet Holes on SUPPLY SHANKS (3) facing down.

3 ATTACH FAUCET BODY
- Insert faucet inlets into previously installed ADAPTER NUTS and SUPPLY SHANKS.
- Gradually hand tighten MOUNTING NUTS (6) evenly. If they become too difficult to turn and are binding, please check the following:
— The mounting parts are not loose enough.
— One side has been over tightened too much and the body is uneven.

natural_image
Technical line drawing of a mechanical clamp assembly with labeled part 6 (no text or symbols beyond label)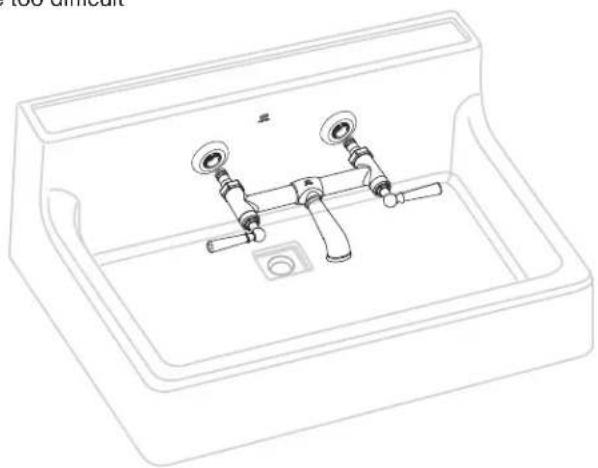
natural_image
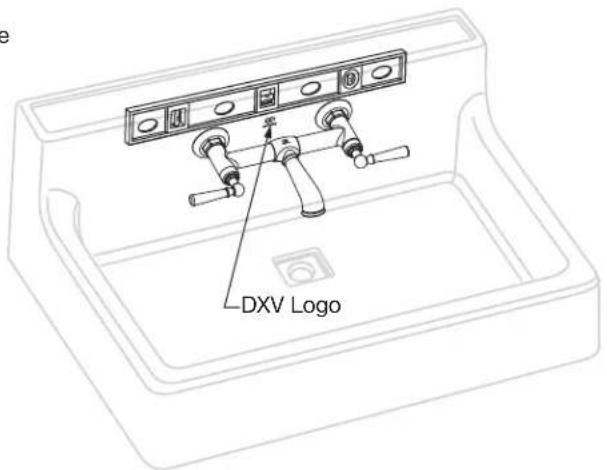
Line drawing of a bathroom sink with two fixtures and a central drain (no text or symbols)DXV SINK INSTALLATION
4 REALIGN MOUNTING PARTS
- Make sure both inlet holes on SUPPLY SHANKS (3) are still facing downward.
- Check that the faucet is level and make sure both MOUNTING NUTS (6) are fully threaded against the ESCUTCHEONS (4). Align faucet body with the DXV logo on sink.
— To fully tighten MOUNTING NUTS (6): turn faucet nut clockwise while holding SUPPLY SHANKS (3) nut.
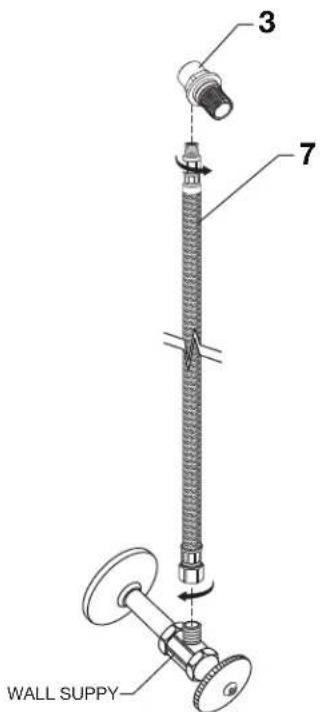
5 INSTALL SUPPLY HOSES
- Thread SUPPLY HOSES (7) into SUPPLY SHANK (3) inlet holes. Tighten with adjustable wrench.
- Connect SUPPLY HOSES (7) to Hot and Cold wall supplies. Loop SUPPLY HOSES (7) if necessary to avoid kinking.

natural_image
Technical line drawing of a mechanical device with threaded shaft and flange (no text or symbols)COLD
HOT
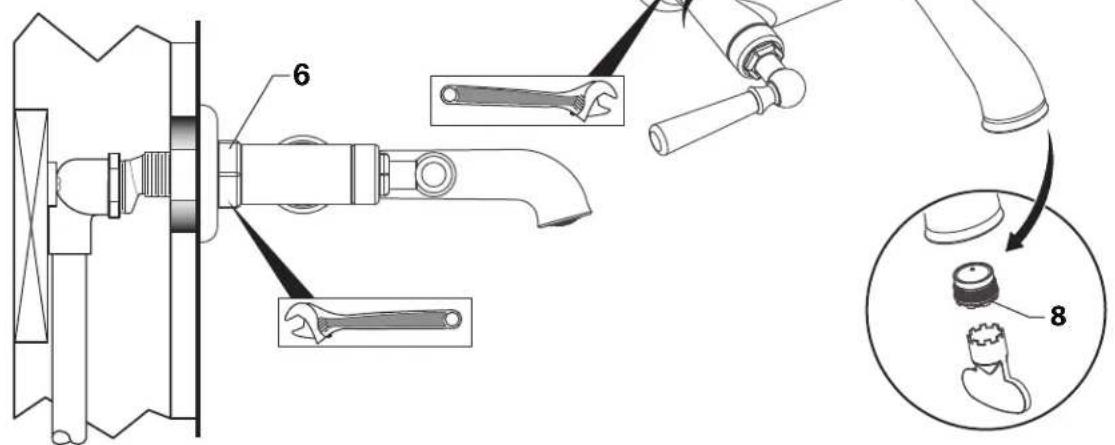
6 TEST INSTALLED FAUCET
- With HANDLES in OFF position, turn on water supplies and check all connections for leaks.
- Remove AERATOR (8) with the key provided.
- Operate HANDLES to flush water lines thoroughly.
• Re-install AERATOR (8) and tighten.
WALL-MOUNT INSTALLATION
1 WALL MOUNT INSTALLATION
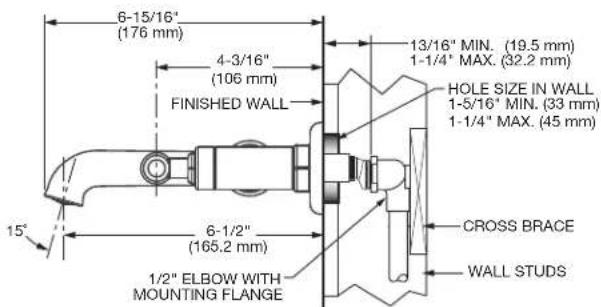
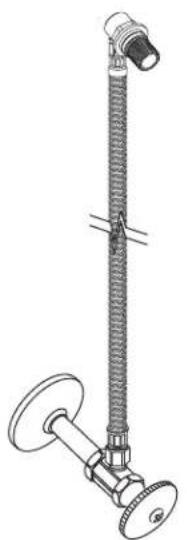
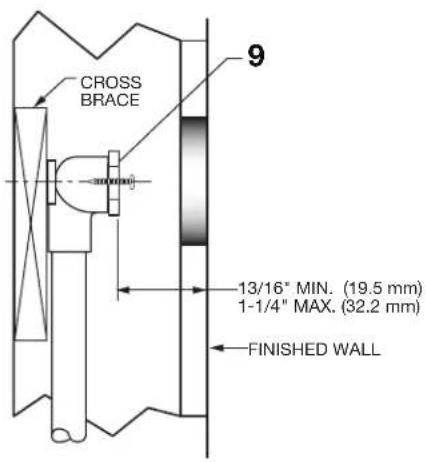
- Determine where the finished wall location will be. This measurement is very important! Note: The rough-in measurement from the end of the elbow to the finished wall is a minimum 13/16" (19mm) and a maximum of 1-1/4" (32.2mm).
- Determine the height of the faucet from the finished floor and mark the center line of each ELBOW (9) exactly 8" apart on the wood support. Attach the two ELBOWS (9) to the wood support with wood screws on each center line. Check that the ELBOWS (9) are level.
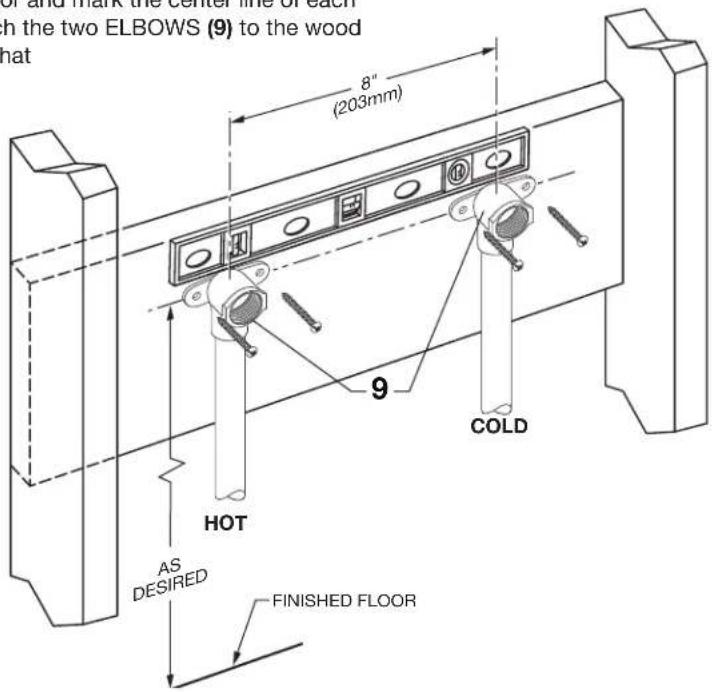
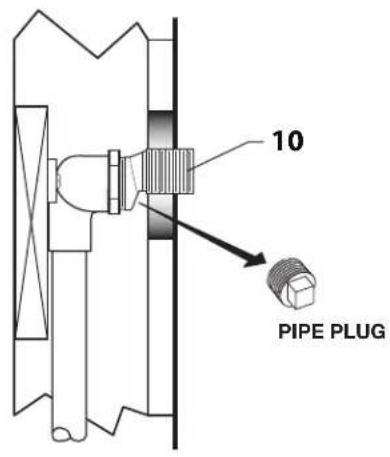
2 INSTALL PIPE PLUGS
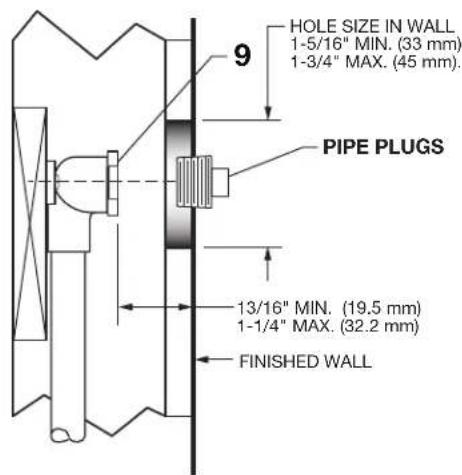
- Apply SEALING TAPE to PIPE PLUGS and thread into the ELBOWS (9). Test all concealed piping for leaks.
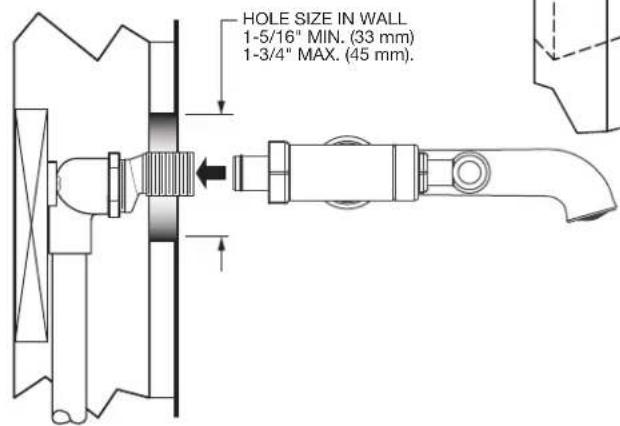
- Finish all wall construction. The faucet holes through the wall are 1-5/16" MIN. (33mm) and a 1-3/4" MAX. (45mm) with centers 8" apart.

WALL-MOUNT INSTALLATION
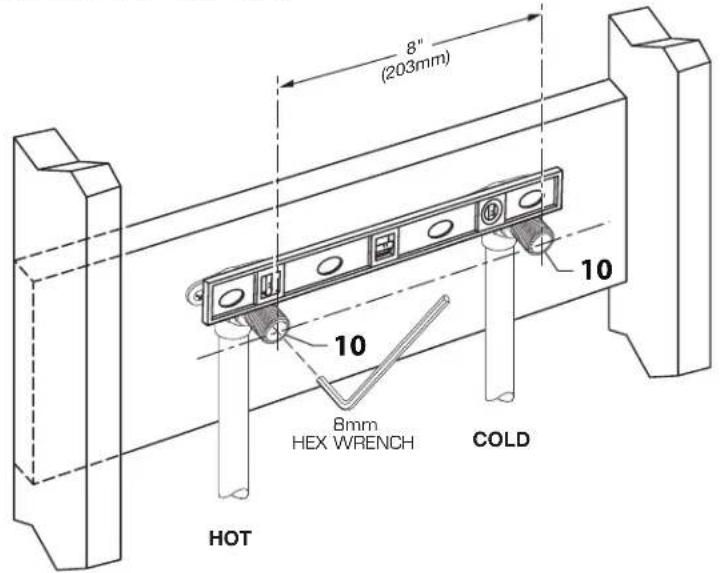
3 ALIGN OFFSET SHANKS
- Turn off water supplies. Remove the two PIPE PLUGS. Apply SEALING TAPE to the end of each OFFSET SHANK (10) and thread into each ELBOW (9) with a 8mm HEX WRENCH.
- Check that the OFFSET SHANKS (10) are level and centers are 8" (203mm) apart. Distance needs to be maintained accurately.
- Adjust each OFFSET SHANK (10) if needed with the 8mm HEX WRENCH until OFFSET SHANKS (10) are level.
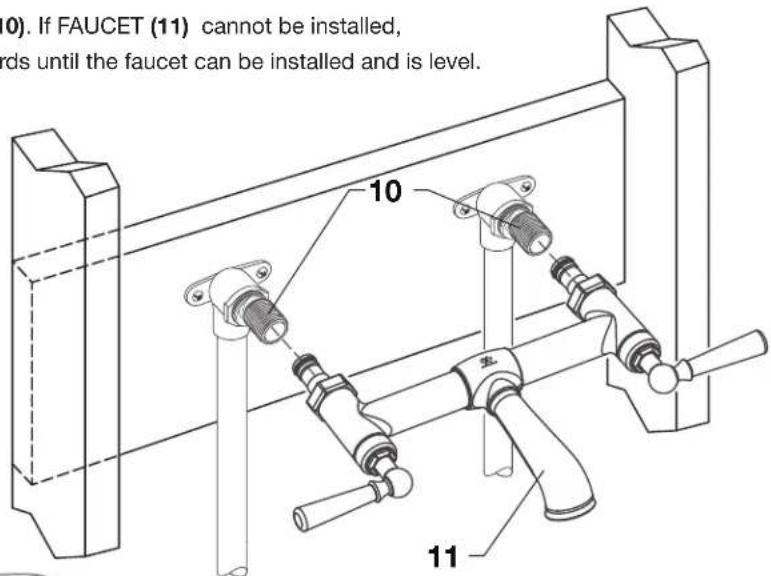
ALIGN FAUCET WITH SHANKS
- Insert FAUCET (11) inlets into OFFSET SHANKS (10). If FAUCET (11) cannot be installed, adjust both OFFSET SHANKS (10) inwards/outwards until the faucet can be installed and is level.
- Remove faucet.
WALL-MOUNT INSTALLATION
4 INSTALL ESCUTCHEONS AND ADAPTER NUTS
- Install ESCUTCHEON (4) and ADAPTER NUT (5) onto each OFFSET SHANK (10). Gradually tighten ADAPTER NUTS (5) until ESCUTCHEONS (4) are flush against the finished wall.
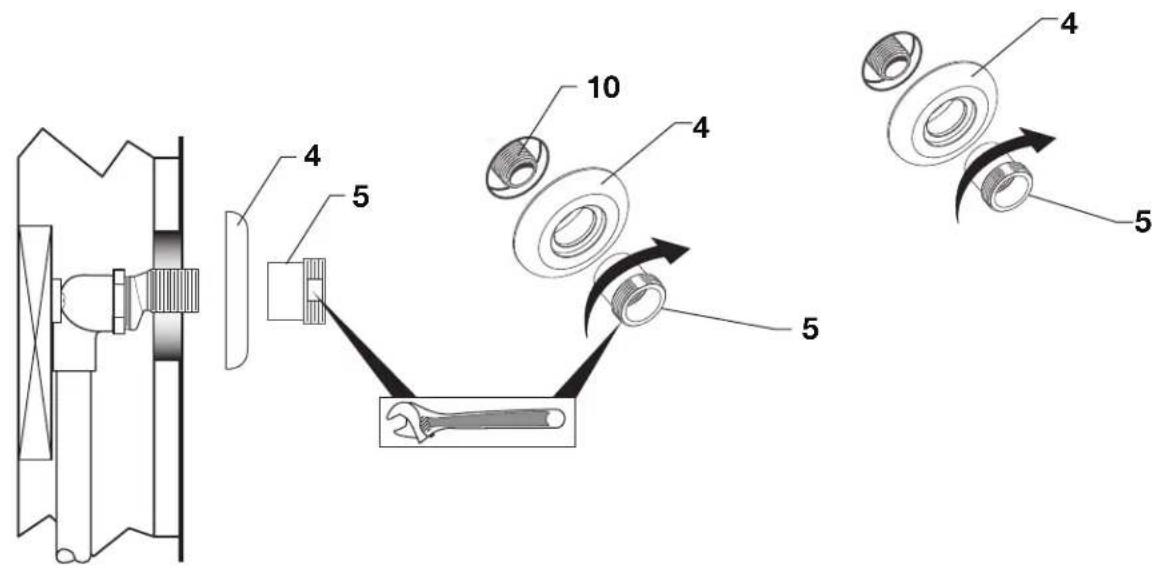
5 INSTALL FAUCET
- Insert faucet inlets into ADAPTER NUTS (5) and OFFSET SHANKS (10).
- Gradually tighten MOUNTING NUTS (6) evenly. If they become too difficult to turn and are binding, please check the following:
— One side has been tightened too much and the body is uneven.
— Loosen the tight side and gradually tighten MOUNTING NUTS (6) evenly. Tighten fully with adjustable wrench.
6 TEST INSTALLED FAUCET
- With HANDLES in OFF position, turn on water supplies and check all connections for leaks.
- Remove AERATOR (8) with the key provided.
- Operate HANDLES to flush water lines thoroughly.
- Re-install AERATOR (8) and tighten.

Replace the "YYY" with appropriate finish code
| POLISHED CHROME 100 |
| BRUSHED NICKEL 144 |
| PLATINUM NICKEL 150 |
| SATIN BRASS 427 |
Oak Hill™ Wall-Mount Lavatory Faucet
MODEL NUMBERS
Lever Handle D35155450 Cross Handle D35155470
