KAWWASHT12A - Washing machine Kogan - Free user manual and instructions
Find the device manual for free KAWWASHT12A Kogan in PDF.


| Product Type | 12kg Top Load Washing Machine |
| Model | KAWWASHT12A & KAWWASHT12B |
| Capacity | 12 kg (dry clothes) |
| Dimensions (W x D x H) | 68.0 x 69.5 x 106.5 cm |
| Weight | 64 kg |
| Power Supply | 230-240 V, 50 Hz |
| Rated Power | 450 W |
| Water Pressure Range | 30 – 800 kPa |
| Wash Programs | Sport, Cotton, Coloured, Rapid, Bed & Bath, Delicate |
| Temperature Settings | Cold, Warm, Hot |
| Delay Start | Up to 24 hours |
| Child Lock | Yes (lid open alarm) |
| Ultrasonic Function | Yes (default enabled) |
| Safety Features | Earthed plug, automatic shutdown, unbalance adjustment |
| Water Supply | Hot and cold water inlet hoses |
| Drain Hose Height | 80 – 120 cm from floor |
| Lint Filter Cleaning | Monthly |
| Drain Pump Filter Cleaning | Monthly |
| Spare Parts Availability | Contact help.Kogan.com for support |
| Repairability | Contact help.Kogan.com for service |
Frequently Asked Questions - KAWWASHT12A Kogan
User questions about KAWWASHT12A Kogan
0 question about this device. Answer the ones you know or ask your own.
Ask a new question about this device
Download the instructions for your Washing machine in PDF format for free! Find your manual KAWWASHT12A - Kogan and take your electronic device back in hand. On this page are published all the documents necessary for the use of your device. KAWWASHT12A by Kogan.
USER MANUAL KAWWASHT12A Kogan
natural_image
Front view of a white Kogan washing machine with control panel and buttons (no visible text or symbols on the device body)12KG TOP LOAD WASHING MACHINE
KAWWASHT12A & KAWWASHT12B
Safety & Warnings 3
Overview 6
Installation 7
Operation 13
Cleaning & Care 21
Troubleshooting 24
Specifications 28
Notes 29
SAFETY & WARNINGS
Your safety and the safety of others is very important.
Read instructions in this guide before using this product. Retain this guide for future reference. Do not skip, substitute or modify any steps or procedures in this guide, as doing so could result in personal injury or product damage.
⚠️ Always read and follow all safety messages. This is the safety alert symbol.
This symbol alerts you to potential hazards that may kill or injure you or others.
All safety messages will be preceded by the safety alert symbol and the words "DANGER" or "WARNING." These words mean:
! Danger
You may be killed or seriously injured if you fail to follow the instructions immediately.
Warning
You may be killed or seriously injured if you fail to follow the instructions.
All safety messages will tell you what the potential hazard is, how you can reduce the risk of injury and what may happen if the instructions are not followed
IMPORTANT SAFETY INSTRUCTIINS
WARNING: To reduce the risk of fire, electric shock or injury to persons when using the washing machine, observe the following basic precautions:
- Read all the instructions before using the washing machine.
- Do not wash articles that have been previously cleaned in, washed in, soaked in with petrol, dry-cleaning solvents or other flammable or explosive substances as these substances give off vapours that might ignite or explode.
- Do not add petrol, dry-cleaning solvents or other flammable or explosive substances to the wash water. These substances give off vapours that might ignite or explode.
- Under certain conditions, hydrogen gas may be produced in a hot water system that has not been used for 2 weeks or more. HYDROGEN GAS IS EXPLOSIVE. If your hot water system has not been used for this length of time, turn on all hot water taps and let the water flow from each of them for several minutes before using the washing machine. This will release any accumulated hydrogen gas. As hydrogen gas is flammable, do not smoke or use an open flame during this time.
WARNING: To reduce the risk of fire, electric shock or injury to persons when using the washing machine, observe the following basic precautions:
- This appliance is not designed to be used by persons (including children) with reduced physical, sensorial or mental skills or inadequate experience or knowledge, unless they are supervised by another person who assumes responsible for their safety.
• Do not install your washing machine on carpets or rugs. - Before the washing machine is removed from service or discarded, remove the door or lid.
- Do not reach into the washing machine if the drum, tub or pulsator is moving.
• Do not tamper with the controls.
• This appliance is for household use only. - Do not install or store the washing machine where it will be exposed to the weather or a humid environment.
- The power cable must be plugged into a mating, 3 prong, earthing-type outlet, earthed in accordance with local laws and regulations.
- Do not repair or replace any part of the washing machine or attempt any service work unless specifically recommended in this user guide. You must clearly understand the work involved and have the necessary skills to carry it out. If you are in doubt, contact help.Kogan.com for support or contact a licenced professional for advice.
- A damaged or loose wire or plug should not be used otherwise electric shock, short circuit or fire may take place. If any of the electrical wires show signs of damage, cease use immediately and contact help.Kogan.com for support.
- Do not damage, alter, bend, pull, twist or forcibly handle any of the wires. Do not place weight on or trap the wire. Damaged wires may cause electric shock or fire.
- Power supply must be unplugged with dry hands before performing and maintenance or repair.
- Please unplug the unit when not using the unit for a long period of time. Electric shock or leakage may occur due to deformation of plastic parts of the unit.
- Please turn off the water tap when not using the unit.
• To prevent damages caused by water leakage:
Do not bend, pull or twist the power cord excessively. When the plug is inserted or removed, the fingers must grip the plug insulation part to apply force. Do not touch the metal insert of the plug in order to avoid electric shock. - For people with long hair, take care and ensure any hair is not to caught in the gap when closing the door.
-
Thoroughly wipe the power plug if any dirt is on the prongs or around the base of the prongs. Failure to do so may cause a fire.
-
If the power cable is damaged, cease use immediately and contact help.Kogan.com for support.
- Strictly follow the installation instructions to ensure safety.
• Children should be supervised to ensure that they do not play with the appliance.
• This appliance is intended to be used in household and similar applications such as:
o staff kitchen areas in shops, offices and other working environments
o farm houses
- by clients in hotels, motels and other residential type environments
o bed and breakfast type environments
o areas for communal use in blocks of flats or in launderettes
Fire Hazard:
- Do not wash items that are wet with petrol, solvents or any other products that give off vapour or gas likely to ignite or explode.
- Do not install the washing machine close to sources of heat or flames, such as ovens or heaters. Never place candles or similar objects (light bulbs, etc.) on the washing machine.
• Failure to follow these instructions may cause death, explosion or fire.
Electric Shock Hazard
- Connect this appliance to an earthed outlet. Do not eliminate the earth connection of the outlet.
• Do not use adapters.
• Do not use extension cables. - Failure to follow these instructions may cause death, explosion or electric shock.
OVERVIEW
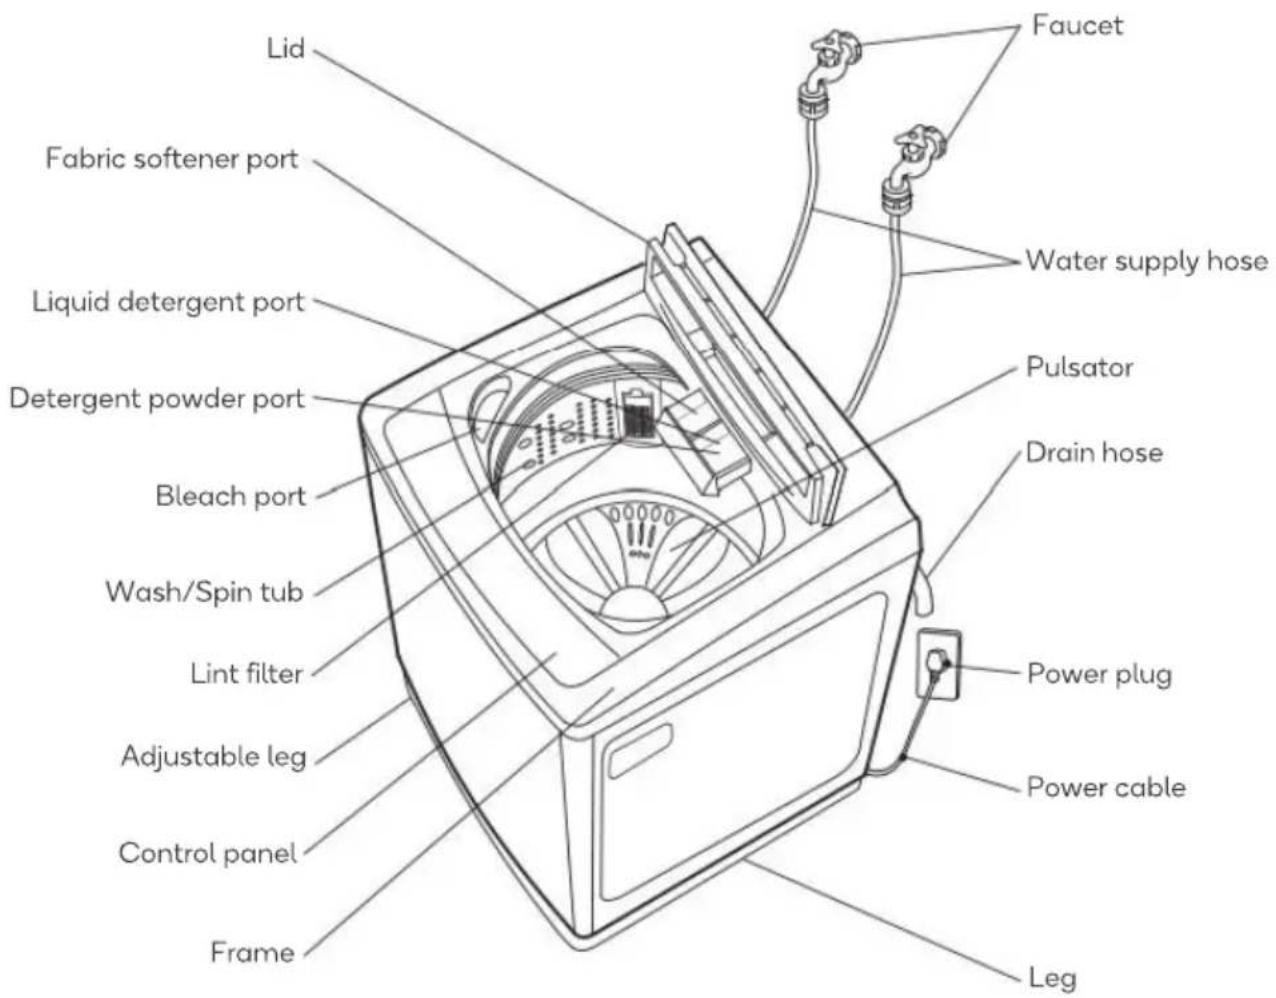
Parts Supplied
natural_image
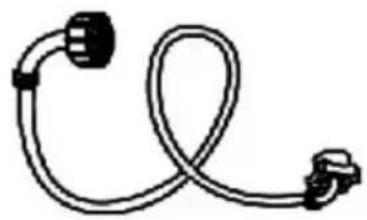
Simple line drawing of a coiled cable or hose with two connectors (no text or symbols)Cold water supply hose
natural_image
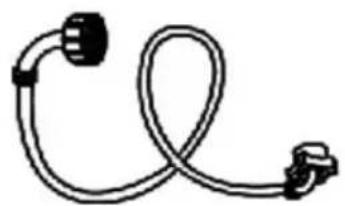
Simple line drawing of a coiled cable or hose with two connectors (no text or symbols)Hot water supply hose
natural_image
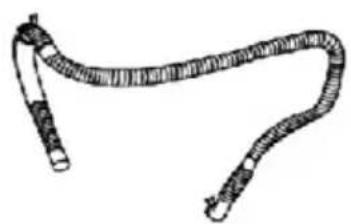
Illustration of a coiled, segmented worm-like structure (no text or symbols)Drain hose
INSTALLATION
WARNING: Excessive Weight Hazard.
- Two or more people are required to move and install the washing machine.
-
Attempting to do this on your own may result in back or other injury.
-
The washing machine must be installed in a dry place out of direct sunlight. During the winter it must not be exposed to low temperatures.
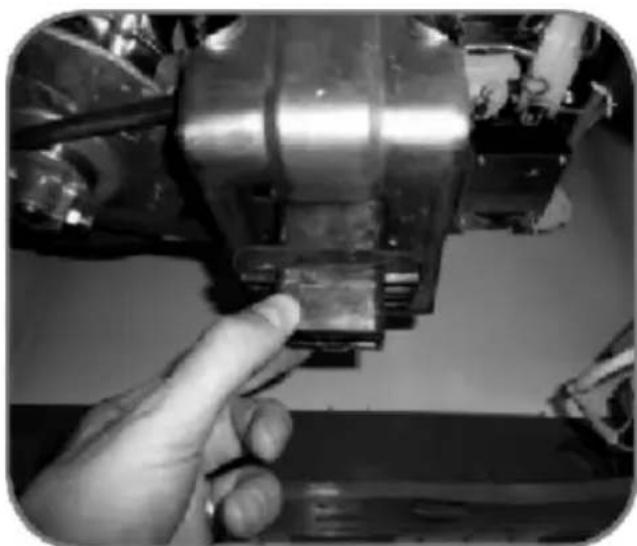
• The entire packaging must be removed; otherwise the washing machine will not work. - When removing the packaging, ensure to remove the plastic piece located at the bottom of the washing machine.
natural_image
Close-up of a hand adjusting a mechanical component with a metallic housing (no visible text or symbols)• The opening on the base must not be obstructed by carpet.
Location Requirements
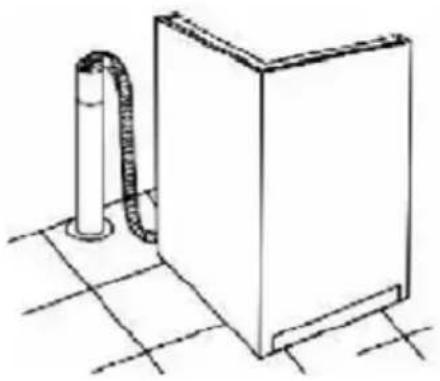
Place the washing machine on a flat, horizontal surface at least 10cm away from walls or other furniture or objects.
natural_image
Simple line drawing of a cabinet with a pipe attached to the front panel, placed on tiled floor (no text or symbols)IMPORTANT:
The washing machine must not be installed outdoors. Never install the washing machine on rugs, carpets or steps.
Level the Washing Machine
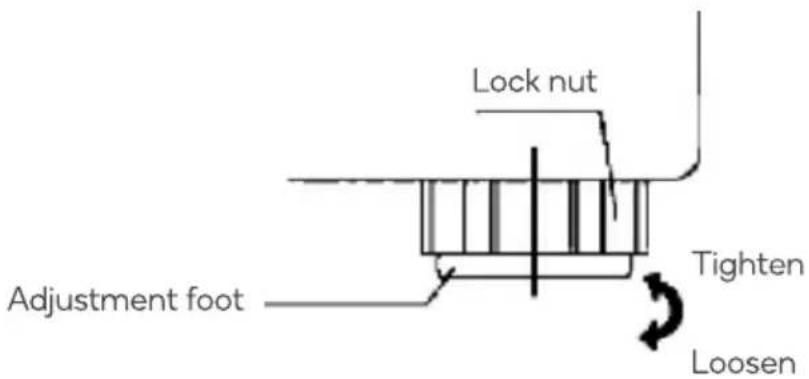
Level the washing machine as follows to avoid vibration and noise:
- Level the washing machine by loosening the adjustable foot and tightening it to avoid wobbling and/or movement during the washing and spinning operations.
- After the washing machine has been levelled, tighten the lock nut to fix the foot in place.
Notes:
If the washing machine is not correctly levelled, excessive vibrations may occur. This may cause it to stop automatically without finishing the spin.
Using the Rear Wheel
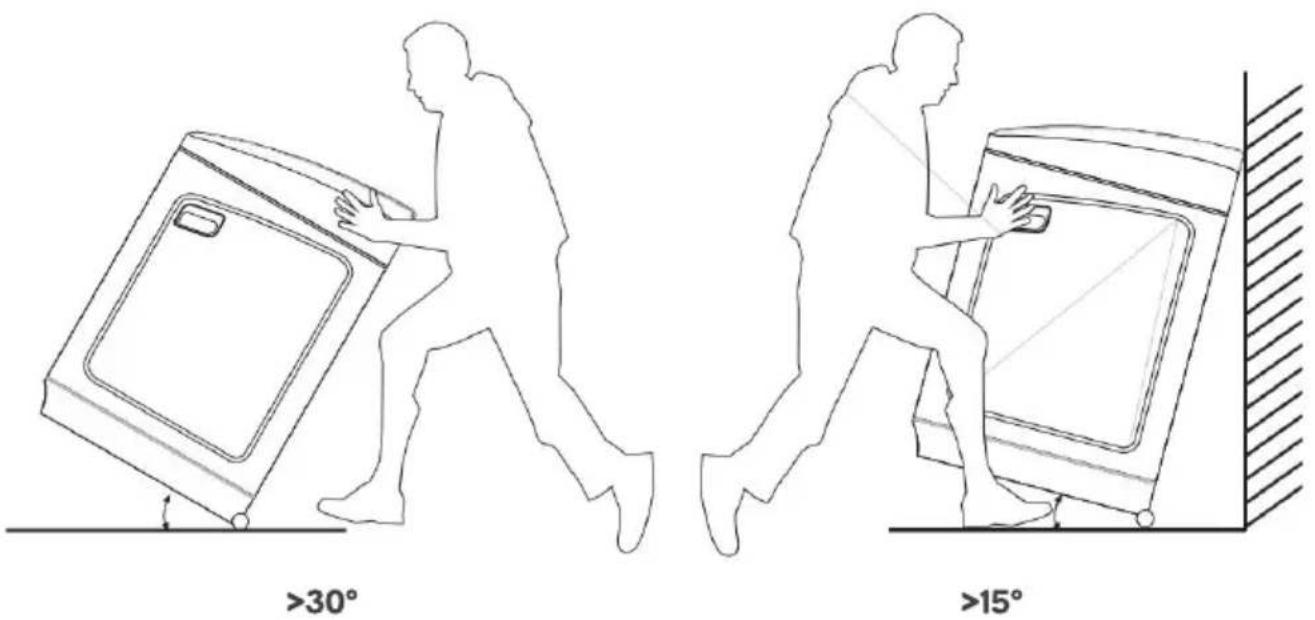
- Using the rear wheel will make moving the washing machine easier. Carefully tilt the washing machine about 30 degrees, push forward or pull backward while firmly holding the washing machine on both sides.
- The rear wheel is not suitable for uneven ground. Doing so may cause damage to the rear wheel.
- Do not tilt the washing machine too hard, doing so may cause personal injury.
Water Inlet Hoses
Use the RED water inlet hose for hot water and the BLUE inlet hose for cold water. Check that the water supply pressure is between 30 and 800 kPa (approximately between 2 and 80 metres of water column).
Notes:
The washing machine must be connected to the water taps using new inlet hoses (supplied with the washing machine).
Do not reuse old hoses.
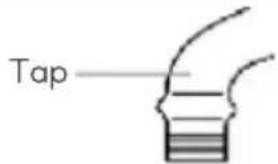
- Check that the water tap is working.
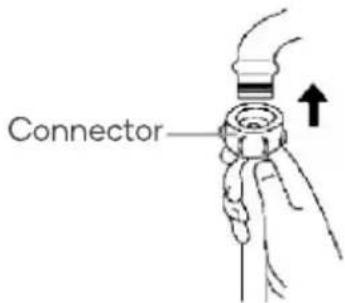
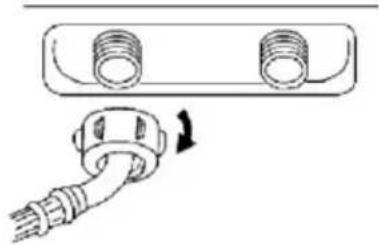
- Attach the connector to the water tap.
Note: Do not use water at a temperature above 60^ C.
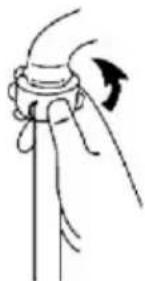
- Screw the coupling on by hand until it is pressed firmly against the washing machine.
- Pull down on the hose to make sure that it is connected correctly.
natural_image
Simple line drawing of a hand holding a knob with an arrow indicating rotation (no text or symbols)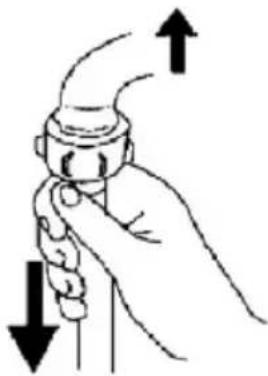
natural_image
Illustration of a hand holding a tool with directional arrows indicating movement (no text or symbols)- Attach the other end of the hose to the washing machine's water inlet.
- Repeat steps 1 – 4 for the remaining inlet hose.
natural_image
Diagram showing a cable being inserted into a connector with two threaded connectors (no text or symbols present)Notes:
After installing the hoses, turn on the water tap to check for leakages before turning on the washing machine. If the water pressure is too high, close the tap a little to prevent water leakages.
Drain Hose
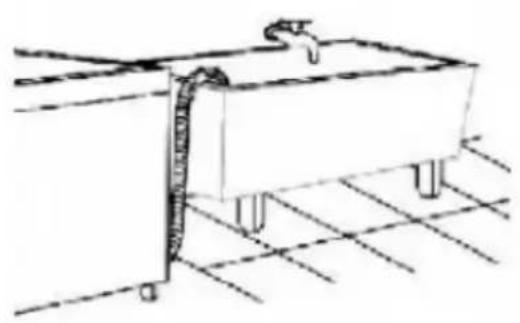
- The drain hose must be positioned at least 80cm but no more than 120cm above the bottom of the washing machine.
- The side of the washing machine has a support for attaching the drain hose. Use a standpipe or the laundry sink to fix the drain hose.
natural_image
Line drawing of a rectangular basin with a pipe inserted into it, supported by two legs (no text or symbols)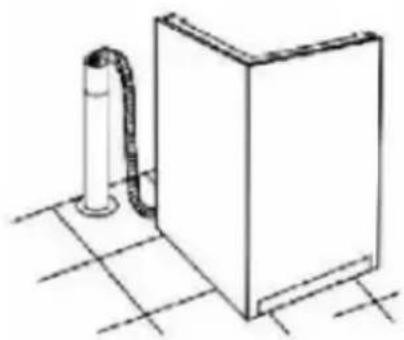
natural_image
Simple line drawing of a cylindrical pipe attached to a rectangular box on a grid floor (no text or symbols)WARNING:
It is recommended to keep the hose fixed permanently to avoid problems and to avoid having to connect the hose every time you use the washing machine. Clogging of the drain hose may prevent the washing machine form draining.
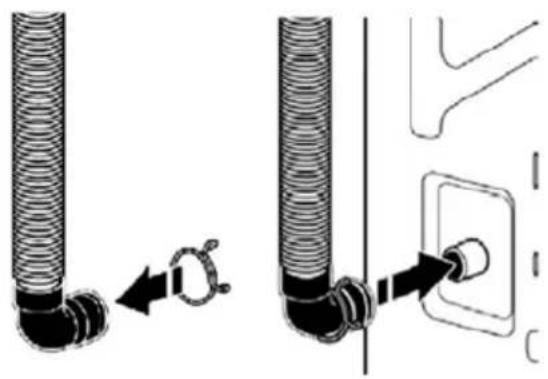
- Attach the drain hose to the drain port. If the clamp is not already in place on the elbow end of the drain hose, slide it over the end as shown. Squeeze the clamp with pliers and slide the black elbow end of the drain hose onto the black drain port and secure with a clamp.
WARNING: Electric Shock Hazard
• Plug into an earthed 3-prong outlet. Do not remove the earth prong.
• Do not use an adapter.
• Do not use an extension cable.
• Failure to follow these instructions may result in death, fire or electric shock.
- A 15 or 20-amp fused electrical supply is required. A time-delay fuse or circuit breaker is recommended. It is recommended that a separate circuit breaker serving only this appliance be provided.
- This washing machine is equipped with a power supply cable with a 3 prong earthing plug.
- To minimize possible electric shock hazard, the power cord must be plugged into a mating, 3 prong earthing-type outlet, earthed in accordance with local laws and regulations. If a mating outlet is not available, it is the personal responsibility and obligation of the customer to have a properly earthed outlet installed by a qualified electrician.
- If regulations permit and a separate earth wire is used, it is recommended that a qualified electrician determine that the earth path is adequate.
- Check with a qualified electrician if you are not sure that the washing machine is properly earthed.
Note:
In the event of damage to the electrical wiring, it must be replaced with an original electrical cable by an authorized electrician. Contact help.Kogan.com for support.
WARNING:
- Incorrect connection of the equipment earth conductor may result in a risk of electric shock.
- Check with a qualified electrician or service engineer if you are in doubt as to whether the appliance is properly earthed.
- Do not modify the plug provided with the appliance. If the plug does not fit the socket, have a proper socket installed by a qualified electrician.
- This washing machine must be connected to an earthed permanent wiring system; otherwise an equipment earthing conductor must be run with the circuit conductors and connected to the equipment-earthing terminal or lead on the appliance.
OPERATION
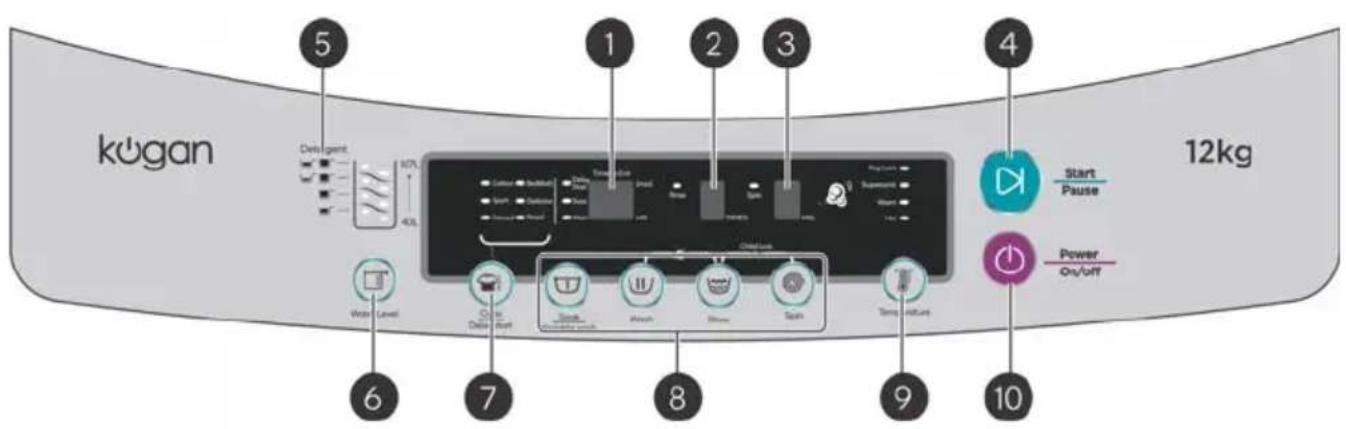
- Timer and Delay start indicators
| Display | Function | Example | |
| Delay StartSoakWash | 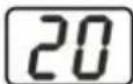 | Displays remaining time during washing | Remaining time is 20 mins. |
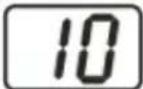 | When setting SOAK and WASH, displays the time set. | Washing time is 10 mins. | |
| Delay StartSoakWash | 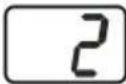 | Displays when the washing will be finished | Finish washing 2 hours later. |
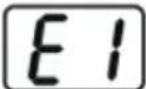 | When abnormal conditions occur, the display will indicate the warning. | Water is not flowing. | |
- Rinse indication
| Display | Function | Example |
 | Displays rinsing times | Rinsing 2 times |
- Spin indication
| Display | Function | Example |
 | Displays spinning time | Spinning time is 9 minutes |
4. Start/Pause
- Press this button to start the washer operation.
- During operation, press this button to stop the washer temporarily. Press it again to restart the washer operation.
- Press this button to cancel the end buzzer. Press and hold it for 4 seconds until a beep has acknowledged the command.
Note: This is not a Cancel button.
5. Detergent level
Indicates the detergent volume.
6. Water level
• You can choose the appropriate water level that matches the load size.
• Different water levels for washing or rinsing are optional.
7. Cycle and Delay start
- Press this button to cycle through the desired washing cycles (Cotton, Sport, Coloured Rapid cycle etc.).
- Press this button to delay start the finish time of washing.
Note: Delay start function cannot be used for delicate program.
8. Process

Soak
Variable wash
Wash

Rinse
Spin
- Press these buttons to set various wash processes.
- Press the "soak/variable wash" button before starting. 0 - 40 minutes soak time can be set. Note: This function could not be changed for Delicate or Bed & Bath cycle.
- Press the "soak/variable washes" button during washing/rinsing cycle, to adjust the wash water flow strength. Note: This function could not be changed for Delicate or Bed & Bath cycle.
Water flow level range: "H0, H1, H2, H3, H4 L1, L2, L3, L4"
o H0 - Standard water flow
o H4 - Highest water flow
o L4 - Lowest water flow
9. Temperature
Press the Temperature button to select between cold, warm or hot water.
10. Power
To turn the washing machine on, press the Power button. To turn the machine off, press the Power button again.
When washing has finished, the power will automatically be turned off after 5 seconds.
If the machine is turned on and has no user input within 10 minutes, the power will automatically be turned off.
Using the Washing Machine
- Before use, open the washing machine's lid.
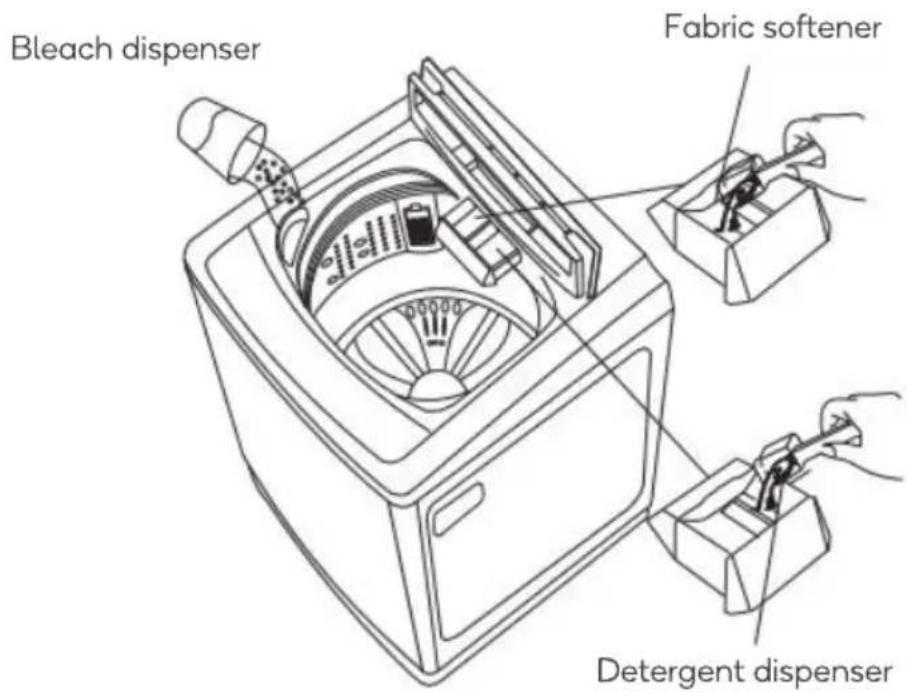
- Place a measured quantity of detergent in the detergent dispenser.
- Pour fabric softener into the left compartment of the detergent dispenser.
- Pour liquid bleach into the bleach dispenser.
- Place the clothes inside the basket and close the lid.
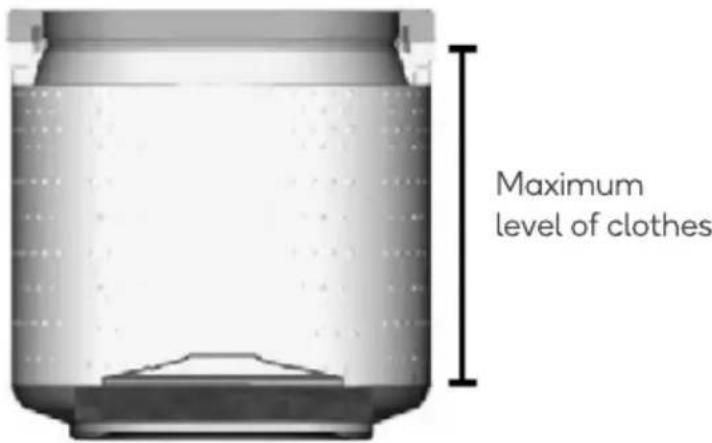
Place the items loose inside the basket and distribute them in a uniform manner, starting with the larger items. The smaller items should be positioned in the middle of the load to improve the stability of the washing machine and avoid vibrations during washing.
The items must not exceed the level shown in the illustration below.
-
Connect the washing machine and turn it on.
-
Turn on the taps connected to the water supply hoses.
-
Press the Power button.
-
Select the desired program and options.
-
Press the Start/Pause button. The washing machine will start working according to the selected program.
-
When the cycle ends, open the lid and remove the load. Close the door again.
The following cases do not represent problems:
- Water flows into the washing machine even after the wash or rinse has begun. This happens if the water level sensors detect that the clothes have absorbed an excessive amount of water. The washing machine will replenish the water level automatically to ensure a more effective wash
- Spinning is intermittent at the beginning of the spin cycle. This is done to achieve a better spin effect.
- During spinning (except for the final spinning process), the cycle returns to the wash cycle. This is done to redistribute the clothes inside the basket following an unbalance condition.
- The washing machine makes a noise after the wash cycle has been completed. The washing machine beeps at the end of the cycle to indicate that it has finished.
Program Table
| Program | Characteristics |
| Sport | ECO Cycle ideal for clothes that are sweaty but not heavily soiled |
| Cotton | ECO Cycle for normally soiled cotton, linen, sheets and mixed laundry loads |
| Coloured | ECO Cycle for coloured fabrics and heavily soiled laundry |
| Rapid | Rapid Cycle for small loads of 3-4 lightly soiled garments |
| Bed & Bath | Blankets, sheets, pillows and towels |
| Delicate | Recommended for underwear or children's clothes |
| Operation Status for the Program | ||||
| Program | Soaking Time(min.) | Washing Time(min.) | Rinse cycles | Spin Time(min.) |
| Sport | 10 | 15 | 2 | 6 |
| Cotton | 0 | 10 | 2 | 6 |
| Coloured | 0 | 15 | 2 | 6 |
| Rapid | 0 | 6 | 1 | 2 |
| Bed & Bath | 0 | 15 | 2 | 9 |
| Delicate | 0 | 5 | 2 | 3 |
Note: Total time may differ from display due to different water pressure
Temperature
You can set the wash temperature to "cold", "hot" or "warm" by pressing the Temperature button until the desired option is illuminated.
• For cold water neither light is on.
• For hot water the hot light is on.
• For warm water the warm light is on.
Load Volume and Quantity of Detergent
| Water Level | Detergent level indicator | Amount of detergent (g) | Load Weight (kg) | |
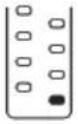 | 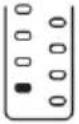 | 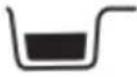 | 25~35 | 0~2.5 |
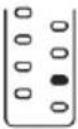 | 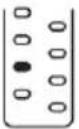 | 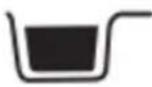 | 35~53 | 2.5~4.5 |
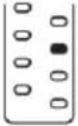 | 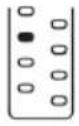 | 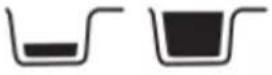 | 53~71 | 4.5~7.0 |
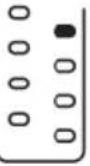 | 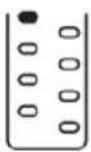 | 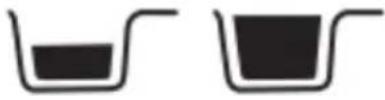 | 71~90 | 7.0~12.0 |
Notes:
• The required quantity of detergent varies according to the brand of detergent.
• If you think the water level is insufficient, try changing the water level selection.
Loading
Suggestions for loading
| Heavy work clothes | 2 jeans2 work trousers2 work shirts3 sports trousers4 sports tee-shirts | Mixed load | 2 sheets (queen size)2 tablecloths3 shirts4 bath towels3 tee-shirts4 pillowcases3 shorts6 face towels5 handkerchiefs |
| Towels | 8 bath towels4 hand towels6 face towels |
Delay start
- Press the Power button.
- Turn on the tap and connect the drain hose.
- Load the washing machine and pour in the detergent.
- Select the water level according to the laundry load to be washed.
- Select the functions and programs.
- Press the Cycle/Delay start button repeatedly until the Delay Start light is on.
- Press the Cycle/Delay start button to select the delay time in hours.
Note: Each time the button is pressed, the previously set time changes by one hour (through a 24-hour cycle).
Cancelling Delay Start
To cancel Delay start, press the Power button.
Child Lock Function:
When the Child lock function is enabled, the Washer will stop working automatically and an alarm will sound if the washer lid opened for more than 5 seconds during operation.
To enable the Child loc, press the Power button then press and hold the Rinse and Spin buttons till buzzer sounds.
To disable the child lock, press and hold the Rinse and Spin buttons till the buzzer sounds.
Ultrasonic function
The Ultrasonic function is on by default. To disable the ultrasonic function, press and hold the Wash and Rinse buttons at the same time for 4 seconds till the buzzer sounds.
Washing blankets
Ensure the blanket does not weigh more than 5kg.
- Dissolve the required amount of detergent in warm water (below 50^ C) outside the washing machine and then pour it into the washing machine.
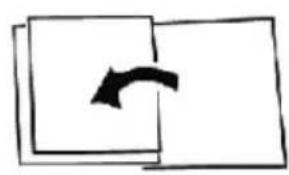
- Fold the blanket as shown in the figures below and place it inside the washing machine.
- Turn on the washing machine and press the Cycle button to select the "Bed & Bath" Cycle and water level 8.
- Press the Start/Pause button.
Note: Only blankets which have a "wash in water" label can be washed in this manner.
Blanket folding diagram
natural_image
Simple line drawing of two overlapping squares with a curved arrow in the top-right corner (no text or symbols)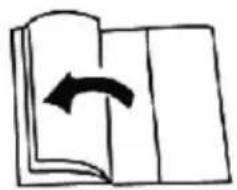
natural_image
Simple line drawing of an open book with a curved arrow indicating rotation (no text or symbols)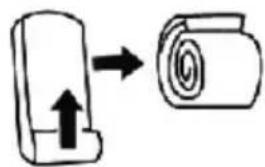
natural_image
Simple line drawing of a device with an upward arrow and a rolled-up package (no text or symbols)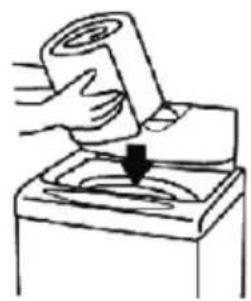
natural_image
Illustration of a hand pressing down on a cylindrical object with a downward arrow (no text or symbols)CLEANING & CARE
WARNING: Electric Shock Hazard.
- Disconnect the washing machine from the power outlet before performing any maintenance.
- Replace all components before connecting the washing machine to the power outlet.
- Failure to follow the instructions may cause death, fire or electric shock.
• Always turn off the water supply tap and disconnect the washing machine when it is not in use for a long time to avoid water leakage or accidents involving risk of fire.
External Cleaning
• Use a soft cloth to remove water and dust after every use of the washing machine.
- Do not use detergent, solvents or any other chemical products to avoid damaging the surfaces.
Cleaning the Hose Screen Filter
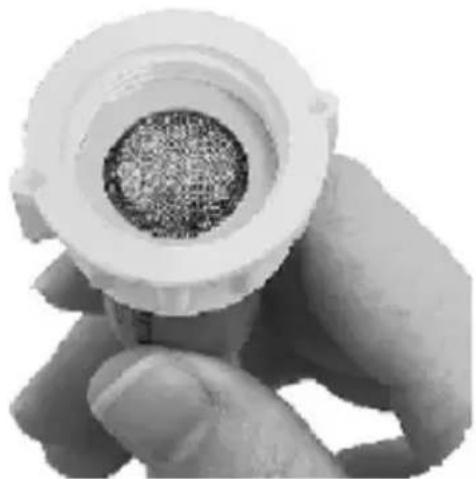
Sometimes it will be necessary to clean the hose screen filter with water. Turn off the water supply tap before removing the hose from the tap, then clean the screen filter.
After cleaning it, return the screen filter to its original position. This prevents water impurities from damaging the washing machine's water inlet.
natural_image
Close-up of a hand holding a white plastic mechanical component with a textured inner core (no visible text or symbols)Cleaning the Drain Pump Filter
natural_image
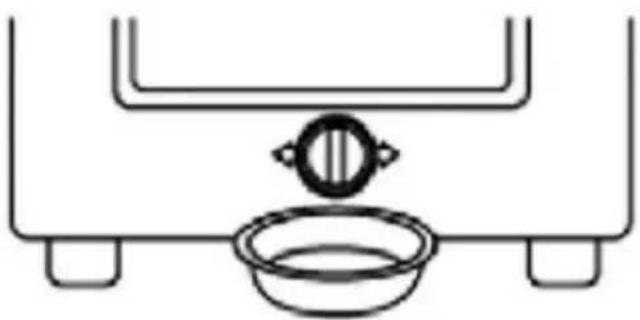
Simple line drawing of a kitchen sink with a bowl and a side table (no text or symbols)- Place a water container underneath the drain pump located on the rear of the washing machine.
natural_image
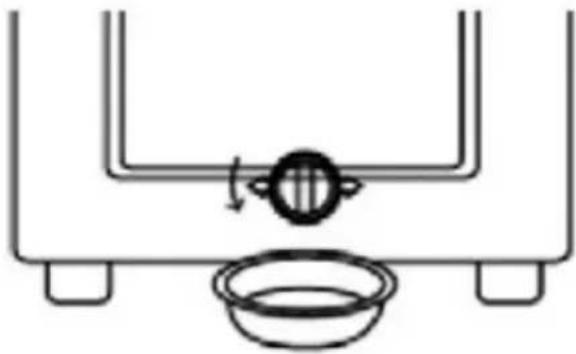
Simple line drawing of a laboratory apparatus with a bowl and a tube, no text or symbols present- Turn the pump lid anticlockwise.
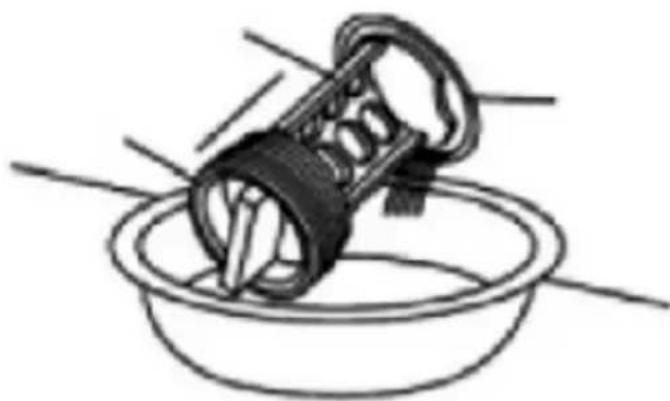
natural_image
Simple line drawing of a mechanical component inserted into a bowl (no text or symbols)- Remove the filter.
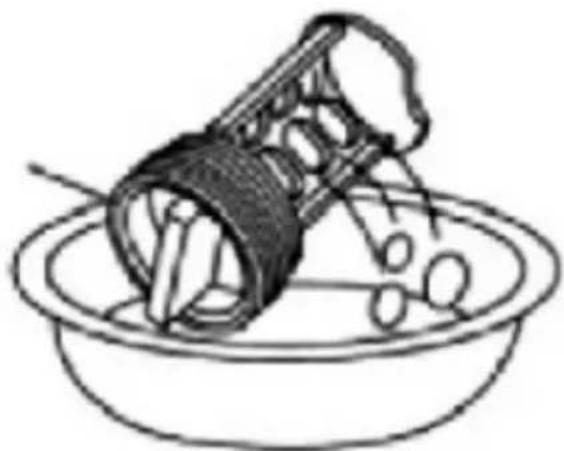
natural_image
Line drawing of a bowl containing a container with chopsticks and a spoon (no text or symbols)- Clean the filter.
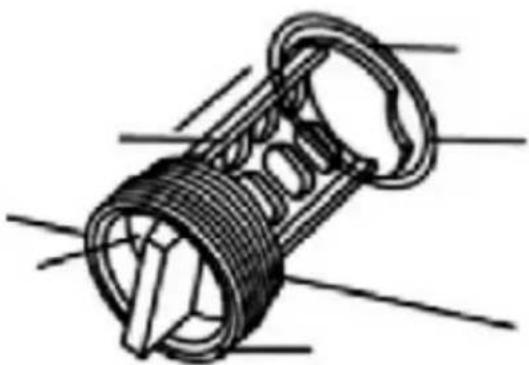
natural_image
Technical line drawing of a mechanical component with threaded ends and internal structure (no text or symbols)- Refit the filter onto the pump outlet.
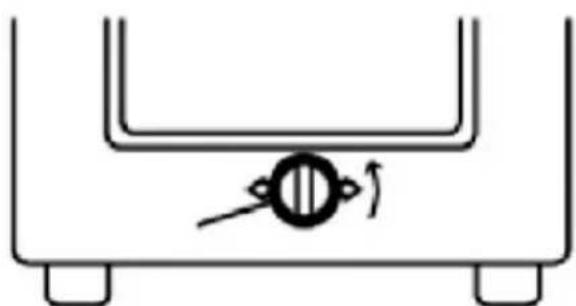
natural_image
Simple line drawing of a mechanical component with a circular feature and directional arrow (no text or symbols)- Secure the lid by screwing it anticlockwise.
Note: Clean the filter at least once a month.
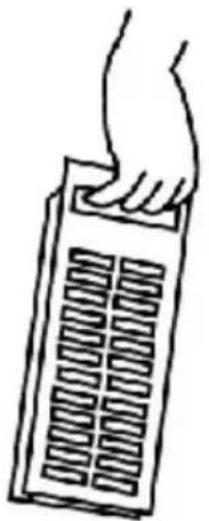
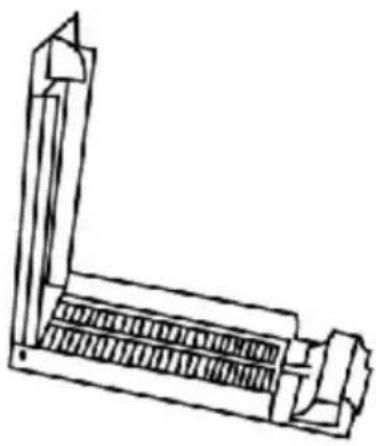
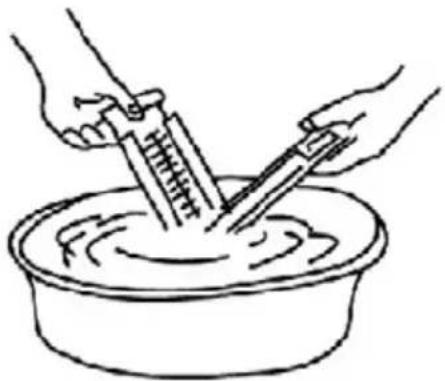
Cleaning the Lint Filter
The lint filter must be cleaned at least once a month. If the washing machine is used more frequently than usual, ensure the lint filter is checked and cleaned more frequently.
natural_image
Hand holding a rectangular object with grid pattern, no text or symbols visible- Remove the lint filter.
natural_image
Technical line drawing of a mechanical component with no visible text or symbols- Open the lint filter, remove any lint and debris then clean it with water.
natural_image
Line drawing of hands using syringes to wash in a basin (no text or symbols)- Replace the filter.
Note: Clean the lint filter at least once a month following the instructions above.
Disposal
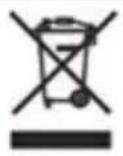
This marking indicates that this appliance should not be disposed with other house-hold wastes. To prevent possible harm to the environment or human health from uncontrolled waste disposal, recycle it responsibly to promote the sustainable reuse of material resources.
TROUBLESHOOTING
If a problem occurs, try following the instructions below:
| Problem | Cause | Solution |
| The controls are blank | The power cable is not connected. | Reconnect the power cable. |
| The circuit breaker is off. | Check the current power supply. | |
| The Start/Pause button was not pressed. | Press the Start/Pause button. | |
| Power outage. | Wait until the power supply returns. | |
| Water leaks from the inlet hose | The water inlet hose connector has not been tightened sufficiently. | Tighten the connector securely. |
| If using a universal connector between the water inlet hose and the water tap, it may not be tightened sufficiently. | Tighten the universal connector nut firmly. | |
| Water does not drain | The drain hose is not directed downwards or is positioned too high. | Position the drain hose between 80 - 120 cm from the floor. |
| The drain hose is kinked or bent. | Unbend and straighten the drain hose. | |
| Water does not flow into the washing machine. | There is no water supply. | Wait until the water supply is restored. |
| The tap has not been turned on. | Turn on the tap. | |
| The water inlet opening is clogged. | Clean the water inlet by following the instructions in the section entitled "Cleaning the hose screen filter" | |
| Spinning stops and water intake starts during spinning. | The load is not balanced inside the washing machine. | This is an automatic solution for spinning problems during the wash program.If the laundry load is too heavy or too light and is not well distributed at the end of the wash, this may cause the load to be unbalanced during spinning.Try removing some clothes and distributing them evenly, then restart the spin. |
| The machine does not spin. | The lid was opened during spinning. | Close the lid. |
| Spinning is not continuous. | This is done intentionally to achieve a better spinning effect. | This is normal. |
| Before using the washing machine there is water in the drain pump. | Water has remained from factory testing. | This is normal. |
Note: The washing machine does not work normally if the voltage is too high or too low. Disconnect the power cable until the correct voltage is provided.
If problems persist even after the above points have been followed, disconnect the washing machine and contact help.Kogan.com for support.
Fault Alarm Function
The washing machine is able to detect some faults and incorrect operation on its own and sound an alarm. The cause of the fault will be displayed on the screen. In this case, please check the table below.
Disconnect the washing machine and contact help.Kogan.com if the washing machine is still out of operation after checking the points below.
| Error | Error Code | Solution |
| Water does not flow into tub or water flow is slim | E1 | Turn on the water supply faucet.Check whether water supply has been cut off.Check whether the screen filter in water inlet is clogged.Check whether water is frozen.Check whether water pressure is too low.The height of drain hose is less than 800mm. |
| Water does not drain out | E2 | The height of drain hose is more than 200mm. Detach the drain hose from the hook hole.Check the drain hose for any obstructions.Check whether the drain hose is clogged.Check whether the drain rises too high off the ground. |
| The washer does not spin | E3 | Check whether the laundry is clumped on one side of tub. Check whether the washer is on the level surface. |
| E4 | Close the washer lid. | |
| Does not wash | E5 | Check whether the Child Lock is enabled.Check whether the washer lid is open. |
| Other troubles | EA or EC | Press the Power button to turn off the power, contact help.Kogan.com for support. |
Automatic Shutdown Function
- If the washing machine does not have any user input for 10 minutes after it has been turned on, it will automatically turn off.
- After operation, the alarm will sound once then the washing machine will shut down automatically.
Unbalance Adjustment Function
- If the washing machine is installed on an uneven floor, this may result in vibrations during spinning. To correct this, the washing machine has an unbalance adjustment function. When the washing machine is working, it automatically monitors the operation status. If excessive vibrations occur during spinning (except for the final spin process), the washing machine will start the unbalance adjustment program.
- The washing machine will attempt to perform the routine 3 times and if the problem persists the E3 alarm will sound.
SPECIFICATIONS
Maximum capacity 12kg (dry clothes)
Voltage Supply 230-240V
Frequency 50Hz
Rated Power 450W
Weight 64kg
External dimensions 68.0 x 69.5 x 106.5cm
Maximum water supply pressure 800kPa
Minimum water supply pressure 30kPa
NOTES
Need more information?
We hope that this user guide has given you the assistance needed for a simple set-up.
For the most up-to-date guide for your product, as well as any additional assistance you may require, head online to help.kogan.com
kogan.com
- 12KG TOP LOAD WASHING MACHINE
- SAFETY & WARNINGS
- Your safety and the safety of others is very important.
- ! Danger
- Warning
- IMPORTANT SAFETY INSTRUCTIINS
- WARNING: To reduce the risk of fire, electric shock or injury to persons when using the washing machine, observe the following basic precautions:
- Fire Hazard:
- Electric Shock Hazard
- OVERVIEW
- INSTALLATION
- WARNING: Excessive Weight Hazard.
- Location Requirements
- IMPORTANT:
- Level the Washing Machine
- Notes:
- Using the Rear Wheel
- Water Inlet Hoses
- Drain Hose
- WARNING:
- WARNING: Electric Shock Hazard
- Note:
- OPERATION
- Start/Pause
- Detergent level
- Water level
- Cycle and Delay start
- Process
- Temperature
- Power
- Using the Washing Machine
- The following cases do not represent problems:
- Temperature
- Loading
- Delay start
- Cancelling Delay Start
- Child Lock Function:
- Ultrasonic function
- Washing blankets
- Blanket folding diagram
- CLEANING & CARE
- WARNING: Electric Shock Hazard.
- External Cleaning
- Cleaning the Hose Screen Filter
- Cleaning the Drain Pump Filter
- Cleaning the Lint Filter
- Disposal
- TROUBLESHOOTING
- Fault Alarm Function
- Automatic Shutdown Function
- Unbalance Adjustment Function
- SPECIFICATIONS
- NOTES
- Need more information?
Brand : Kogan
Model : KAWWASHT12A
Category : Washing machine