KAPWDBIDETA - Toilets Kogan - Free user manual and instructions
Find the device manual for free KAPWDBIDETA Kogan in PDF.


| Product Type | Smart Wash & Dry Electric Bidet Toilet Seat |
| Brand | Kogan |
| Model | KAPWDBIDETA |
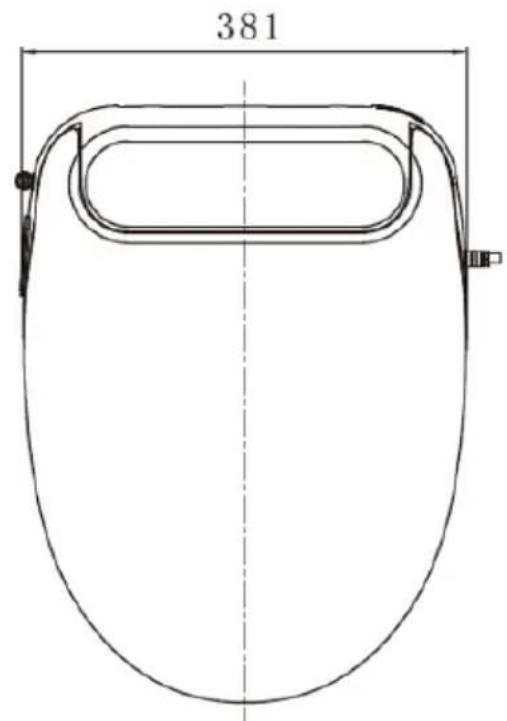
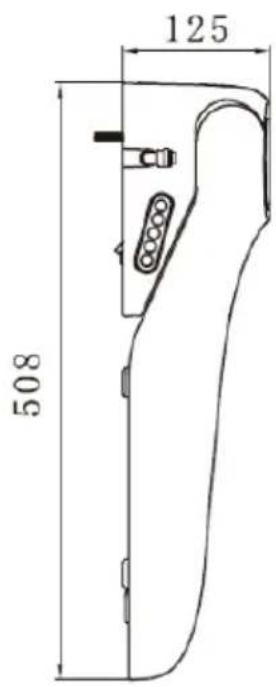
| Dimensions (L x W x H) | 508 x 381 x 125 mm |
| Rated Voltage | AC 220-240V, 50Hz |
| Rated Power | 1200W |
| Power Cord Length | 1.5m |
| Water Pressure Range | 0.06MPa (dynamic) – 0.75MPa (static) |
| Cleaning Modes | Rear wash, Front wash, Oscillating wash, Strong wash, Lady care, Child wash, One solution |
| Water Temperature Settings | 4 levels: Room temp, 33°C, 36°C, 39°C |
| Seat Temperature Settings | 4 levels: Room temp, 33°C, 36°C, 39°C (auto reduces after 10 min) |
| Warm Air Dryer Temperature Range | 4 levels: 32°C – 52°C |
| Nozzle Positions | Adjustable front/rear |
| Control Methods | Remote control (primary) and control panel on seat |
| Display | LED display showing power, water temp, seat temp, night light, power saving |
| Safety Features | Temperature control system, overheat protection, over-dry protection, water and electricity isolation, ground connection, RCD |
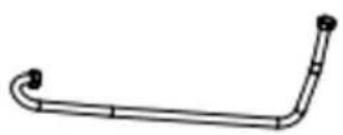
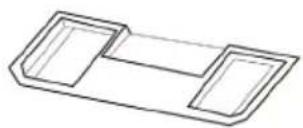
| Included Accessories | Bidet seat, remote control, stainless steel braided tube, T-valve with filter, seat bracket, spanner, mounting bolts, rubber gaskets, AAA batteries (x2), double-sided tape |
| Maintenance | Clean with mild detergent; nozzle self-cleaning; filter cleaning when water pressure low |
| Installation Requirements | Cold water supply only, ground outlet, leakage switch or insulating transformer, avoid freezing temperatures |
| Water Supply | Tap or drinkable well water only; pressure 0.06-0.75 MPa |
Frequently Asked Questions - KAPWDBIDETA Kogan
User questions about KAPWDBIDETA Kogan
0 question about this device. Answer the ones you know or ask your own.
Ask a new question about this device
Download the instructions for your Toilets in PDF format for free! Find your manual KAPWDBIDETA - Kogan and take your electronic device back in hand. On this page are published all the documents necessary for the use of your device. KAPWDBIDETA by Kogan.
USER MANUAL KAPWDBIDETA Kogan
natural_image
Line drawing of a computer mouse with a curved body and a small attached component (no text or symbols)SMART WASH & DRY ELECTRIC BIDET TOILET SEAT
KAPWDBIDETA
Safety & Warnings 3
Dimensions 7
Components 8
Overview 9
Installation 10
Operation 14
Cleaning & Care 21
Specifications 25
Troubleshooting 26
SAFETY & WARNINGS
Read all instructions before use and retain this user guide for future reference.
Read all following safety precautions carefully before use.
All images within this user guide are for reference only, refer to the actual product.
Symbols on the product and in this user guide:
 WARNING! WARNING! | Warning: Failure to follow instructions with this symbol may result in serious injury or death. |
 Caution Caution | Caution: Failure to follow instructions with this symbol may result in injury and property loss / damage. |
 | Forbidden: Statements with this symbol are forbidding an action as described. |
 | Alert: Statements with this symbol are alerting the user to an enforced, compulsory action. |
WARNING:

- Do not touch the electrical outlet with wet hands, or it may cause electric shock.
- Do not pour water, hot water or detergent on the top of the toilet or electrical outlet, as it may cause fire, electric shock, heat or short circuit. It may also cause injury and indoor water seepage due to damage of product.
- Never attempt to disassemble, repair or alter the product yourself, as it may cause fire, electric shock, heat or short circuit.
- Do not install the toilet in car, ship or any other moving object, as it may cause fire, electric shock, short circuit or fault. The ceramic, seat and main part may be damaged from falling due to motion.
• If the product is not working, stop using immediately. - Under the following conditions, immediately disconnect the power supply and turn off the water angle valve:
o Water leakage from pipe or inside of the product
- Crack or damage on the product
o Unusual sound or smell
○ Smoke
- Unusual heating
○ Block
- Fall out of the cushion
- The continued used of the product, by ignoring the above faults, may result in fire, electric shock, heat, short circuit, injury and indoor water seepage.
- Do not use any type of water except tap water or drinkable well water (underground water). Do not use seawater. Use of other waters may cause skin inflammation or fault.
- Do not touch the electrical plug during thunder, as it may cause electric shock.
- Do not let the water inlet soft pipe connect to the electrical plug and outlet, as it may cause fire, electric shock, heat, short circuit because of moisture condensation.
- Do not destroy or damage the power cable or plug.
- Do not damage, strike, yank, twist, excessively bend, bind, pinch or in any way alter the electrical cords. Do not place anything heavy on the cords. Failure to follow this instruction may cause fire, electric shock, heat and short circuiting.
- Do not use a loose or faulty electrical outlet or it may cause fire or short circuit.
- Do not use any power supply other than AC220-240V, 50Hz.
- Do not place fingers or anything else into the warm air outlet, and do not place objects or clothes on the air outlet or cover it. Failure to follow this may cause scalding, electric shock or fire damage to accessories.
- Keep open flames (matches, cigarettes, etc) away from the product at all times, as it may cause fire.
- The toilet seat will only function when the seating sensor on the seat ring detects that there is a person seated (you will hear a beep sound when seated).

Caution:
• Pay attention to low temperature scalding.
- Improper use of the seat warmer may cause low temp scalding. If sitting for a long time, turn the temp setting to “off”.
- Turn the seat temp setting to “off”, and warm air-dry temp to “low”, under following conditions:
- Being used by children, older people, or people who cannot adjust the temperature settings.
- People with disabilities who may be unable to adjust the temperature settings.
People who have taken medicine causing drowsiness (cold medication, sleeping pills, etc), under the effects of alcohol, or are otherwise inebriated.
- As this is an electrical product, do not install it in a location where it can easily get wet. If installed in bathroom, please also install ventilator to maintain the bathroom ventilation. Failure to do so may cause fire or electric shock.
- Do not install close to a bathtub.
- Ensure the product is connected to cold water supply, or it may cause body burn or machine fault.
- The product must be connected to the ground correctly. If not connected to the ground, it may cause electric shock. Only use with supplied 3-prong (grounded) electrical plug.
- Use only an electrical outlet with leakage switch (rated induced currents below 15mA) or insulating transformer (1.5kVA\~3kVA) to protect outlet loop. Failure to do so may cause fire or electric shock.
- Ensure the plug is firmly inserted into the wall outlet at all times, or it may cause fire, heat or short circuit.
- When removing the plug from wall outlet, remove by holding the plug. Do not pull on the cord.
- If the power soft wire is broken, cease use immediately and contact Kogan.com for replacement or repair.
- Turn off the power before doing any general maintenance or spot checks. Nozzle clean will require power to check.
- People in need of supervision or a guardian (people with disability, children, older people) must not be left unattended with the device.
- Do not let children play this product.
- Do not throw lit cigarettes, matches, or any other flaming material into the toilet.

General safety notices:
- Do not use the product when it is loosely fitted. The toilet and seat may separate and fall off, causing body injury.
- If damaged, do not touch broken area. Cease use and contact kogan.com for assistance.
- Do not impact forcefully, put heavy weight upon, crouch on, or stand on the product. This may cause product damage, personal injury, or indoor water seepage.
- Do not use the seat for anything other than what it was designed for. Do not pull the product by holding the seat or cover, and do not attempt to sit on it while it is not in position. Failure to do so result in product damage or injury.
- Use kitchen detergent (neutral) to clean the plastic parts (seat cover, etc) and water inlet soft hose. Do not use the following materials: bathroom detergent, house detergent, petrol, banana oil, cleaning powder, nylon brushes, etc. These products may damage the plastic parts, cause cracks, or may cause water leakage because of damaged soft hose.
- To avoid sudden water leakage, do not remove the water inlet filter when angle valve is open. Refer to Cleaning & Care section of this user guide.
- Do not crush or bend water inlet hose, as it may cause water leakage.
- If replacing another bidet, use the new hose supplied with this product. Do not reuse the previous hose, as it may cause water leakage.
- Do not pour hot water into toilet, as it may cause body injury or indoor water seepage due to toilet damage.
- Do not flush with large amount of toilet paper or other subjects except sewage and small amount toilet paper, as it may cause toilet damage. Do not flush tampons, condoms, or sanitary products.
- Do not lean on the toilet cover while using, it may damage the seat cover.
- Close the angle valve when water leaking
- When room temperature is below 0^ C, to avoid piping or soft hose damage, anti-freezing measures should be adopted. If water Inlet soft hose is frozen it may destroy main body or piping, leading to water leakage. To avoid damage, please pay attention to room temperature adjustment.
- When not in use for a long time, drain the inlet soft hose and disconnect from power. When next using, open the angle valve and let water connect first, or it may cause skin inflammation due to poor water quality. It may cause fire or overheating if the power supply is always connected.
- Confirm that the filter is screwed to correct position installed, prior to using. It may cause water leakage if not screwed tight.
- When the toilet drain outlet is blocked, cut off the power then clean the obstruction, otherwise sewage may overflow, causing indoor water seepage because of auto flush function.
- Flush the toilet after each use. Failure to do so may result in difficulty cleaning the toilet, blocked drain outlet or sewage overflow, resulting in indoor water seepage.
- After each use, if there is any mess on floor, always clean immediately to prevent corrosion or unhygienic build-up.
- Extended heating without sufficient water supply will lead to the heater becoming burned.
- Directly exposing the remote control to water may cause the remote to cease functioning.
DIMENSIONS
COMPONENTS
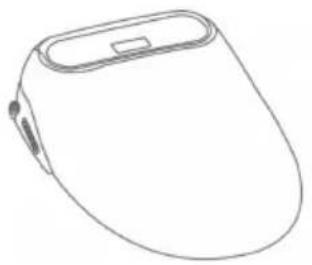
Ensure you have all of the components listed in this user guide before disposing of any packaging.
natural_image
Line drawing of a computer mouse (no text or symbols)Bidet
User guide
natural_image
Simple line drawing of a bent pipe or conduit with two ends (no text or symbols)Stainless steel braided tube
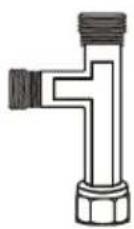
T-valve with filter
natural_image
Simple line drawing of a rectangular frame with two side compartments (no text or symbols)Seat bracket
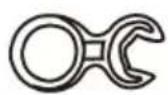
Spanner
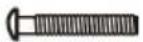
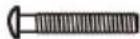
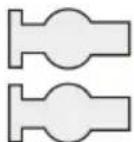
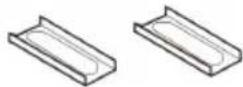

Metal gasket (x2)
Rubber gasket
Mounting bolts (x2)
Rubber sleeves (x2)
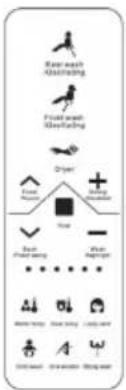
Remote control
natural_image
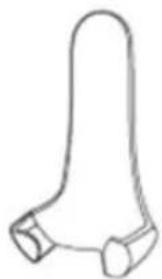
Simple line drawing of a symmetrical mechanical or architectural component (no text or symbols)bracket
natural_image
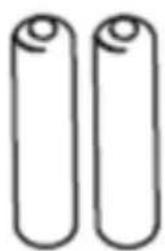
Two identical cylindrical objects with circular tops, no text or symbols presentAAA alkaline battery (x2)
Double sided tape
OVERVIEW
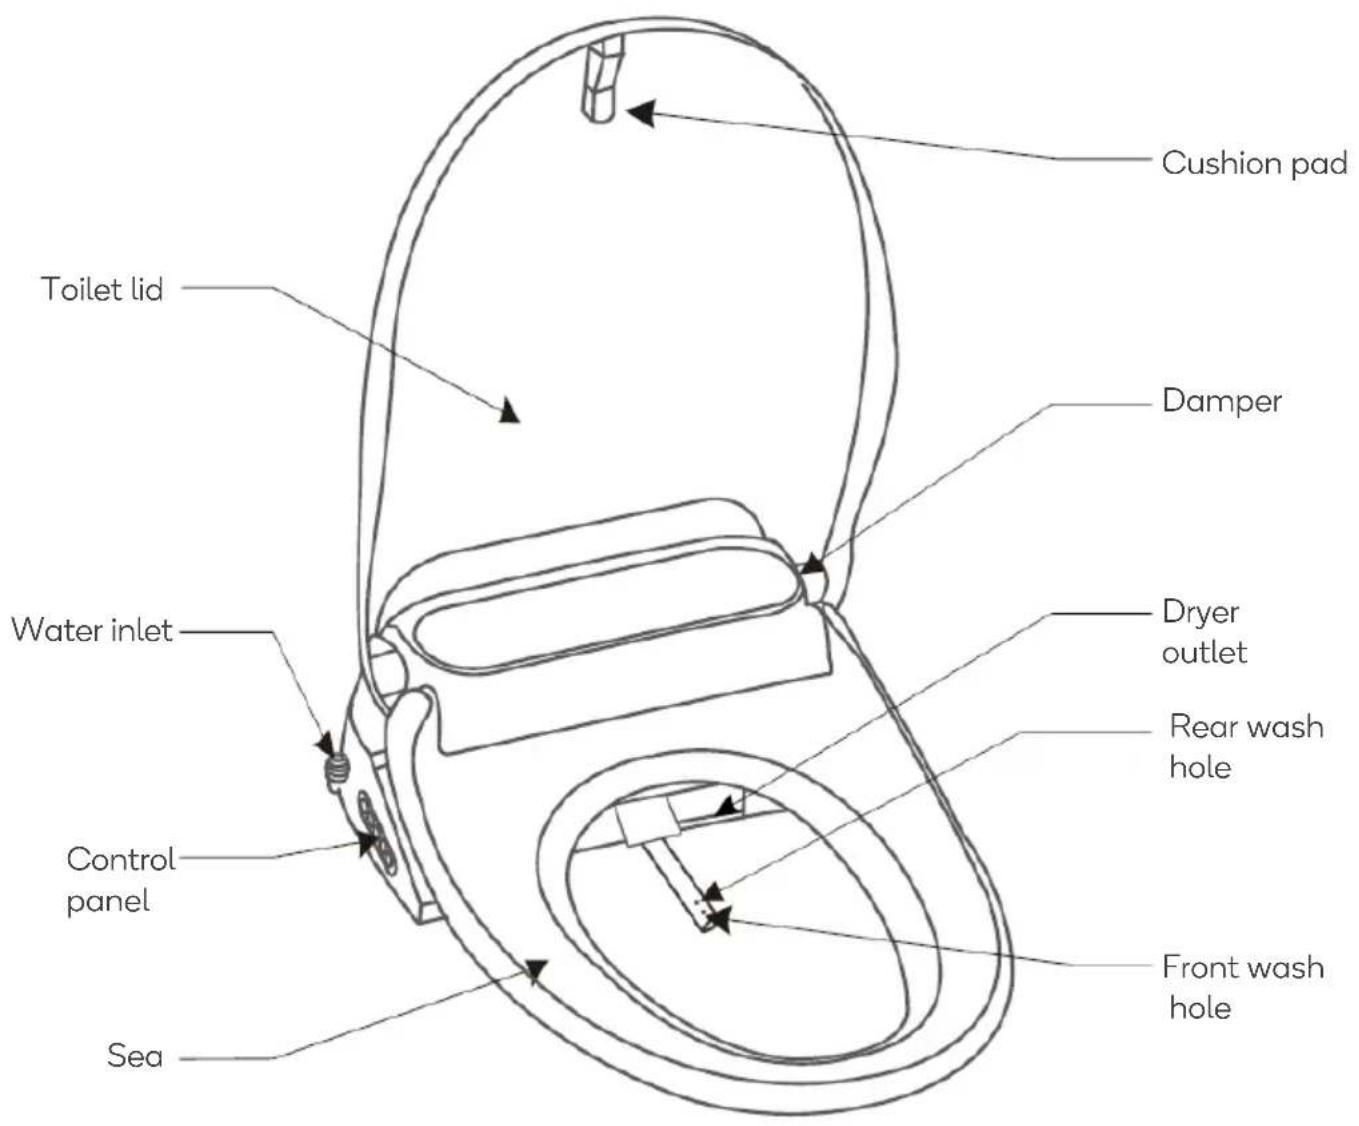
Note: Ensure the screen protector is removed prior to first use.
Precautions before Installation
- Before installation, ensure toilet wall, floor tiles & ceramic toilet have all been completed. The bathroom should have water and power supply available nearby the toilet.
- Water pressure should be between 0.06Mpa (flow) - 0.75MPa (Static), water temperature 5°C - 35°C.
- In case of transportation in subzero (freezing) condition, please put the product in a warm place and wait for any residual water to thaw before installing.
- Connect daily-use water pipe only. Use tap water or drinkable well water only. Do not connect to recycled water or industrial water supplies, due to possible contamination as this would cause jamming or internal damage.
- Be sure to use T-valve with filter.
- Do not connect to electricity and turn on before finishing installation.
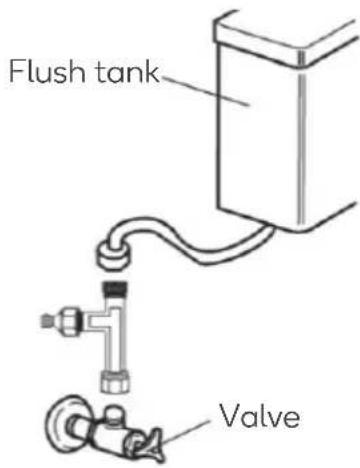
1. Installing T-valve with filter
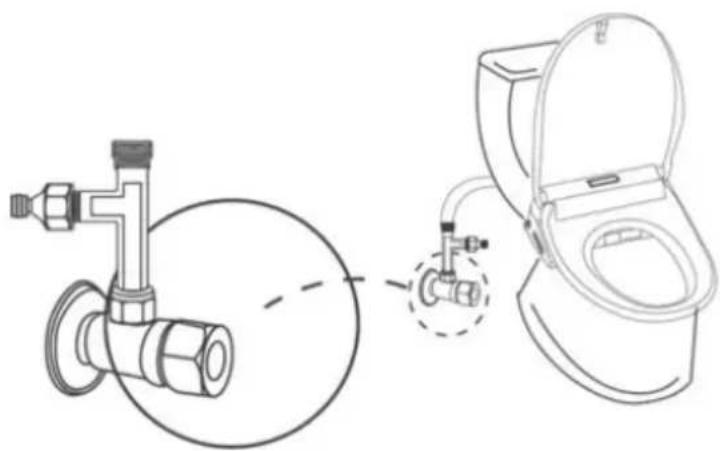
- Close inlet valve and remove water pipe (Figure 1).
- Connect T-valve with filter to the inlet valve (Figure 2).
- Connect the flush tank to the T-valve using the water piper (Figure 3).
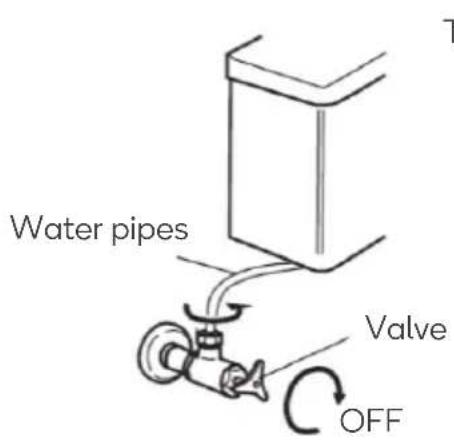
Figure 1
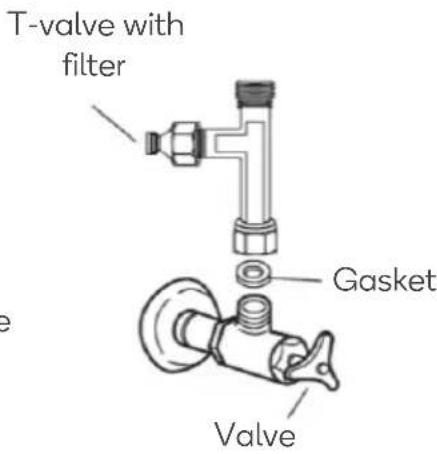
Figure 2 Figure 3
2. Bidet Installation
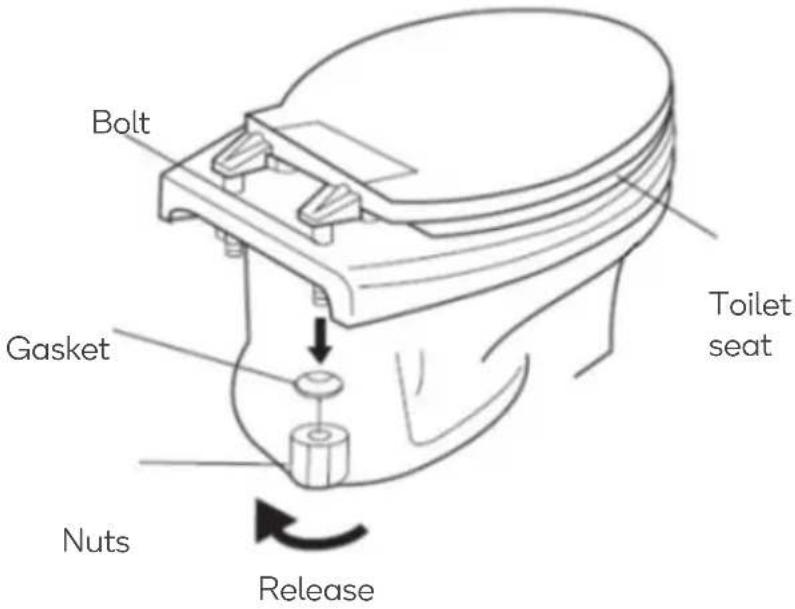
Remove original toilet seat:
- Loosen bolts with the spanner.
- Remove the nut and gasket.
- Remove the toilet seat.
Installing the seat bracket:
- Before the installation, place the product on the toilet bowl to check for correct fitment.
- Embed and install the rubber sleeve, seat bracket and metal gaskets as shown below.
- Insert the mounting bolts and tighten it so that the seat bracket cannot move.
- If the product does not match the toilet bowl ideally, loosen the mounting bolts, remove the metal gaskets, readjust the position of the seat bracket, then replace the metal gaskets and tighten the bolts.
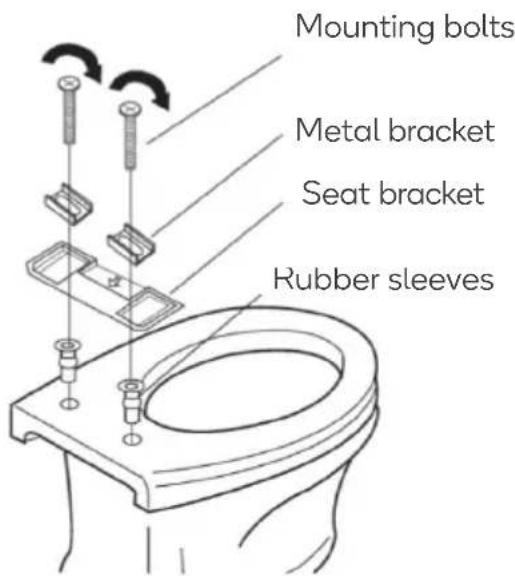
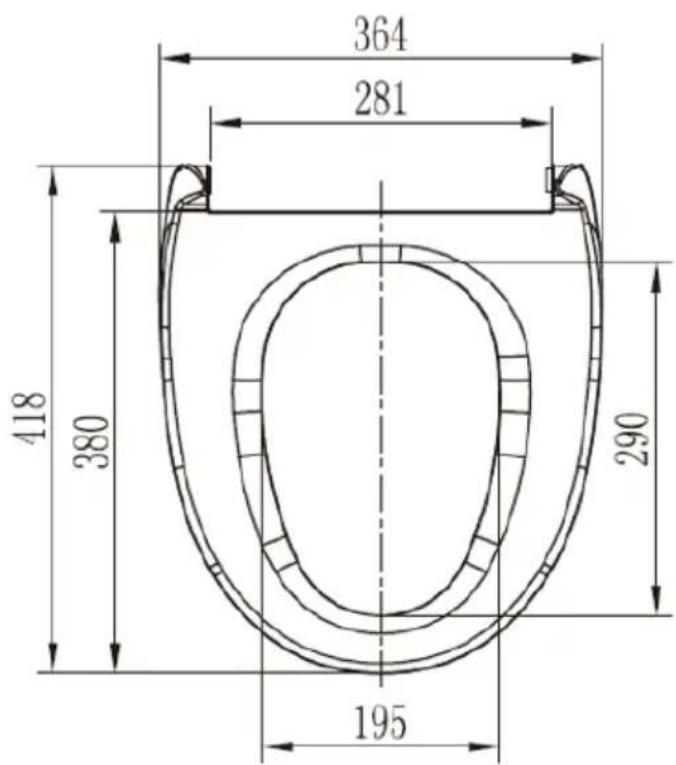
Note: The seat bracket can adjust the range between 130-170mm.
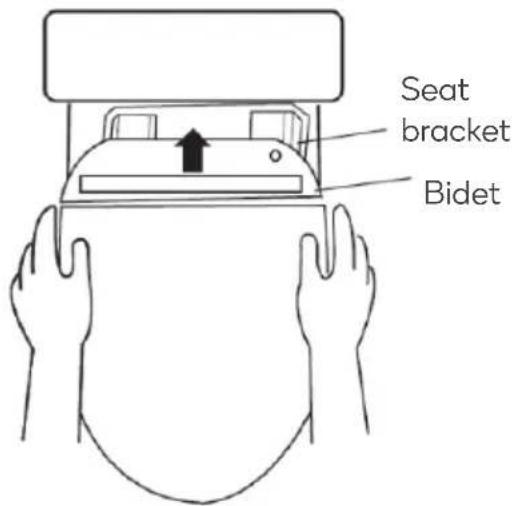
Installing the bidet:
- Aim the bottom card slot of the seat to the edge of seat bracket, slide in gently. You will hear a "click" sound when it is correctly placed.
- Ensure the bidet fits into the area before placing, then lift bidet to fit it in the correct position.
- Ensure the installation is correct before use. Long term uneven force will lead to cracking of the seat ring.
Note:
Do not forget to allow space for the power cable between the toilet and bidet.
3. Connecting the Inlet Pipe
- Connect the stainless steel braided tube to the T-valve.
- Connect the stainless steel braided tube to the bidet.
• Turn on the inlet valve after connecting to check the connectors for signs of leakage.
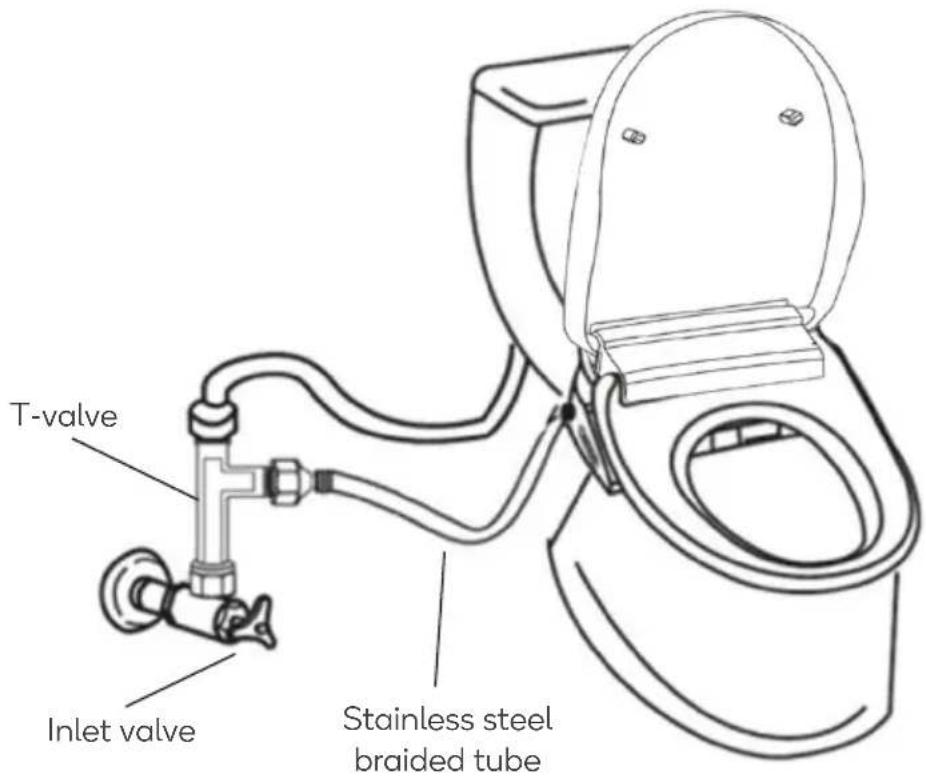
4. Installing the Remote Bracket
- Ensure the installation area is thoroughly cleaned and dry before proceeding.
- Apply the supplied double sided tape to the rear of the remote bracket.
- Adhere the remote control bracket to the wall, pressing firmly. Allow the remote bracket to bond for 15 minutes before placing the remote control in it.
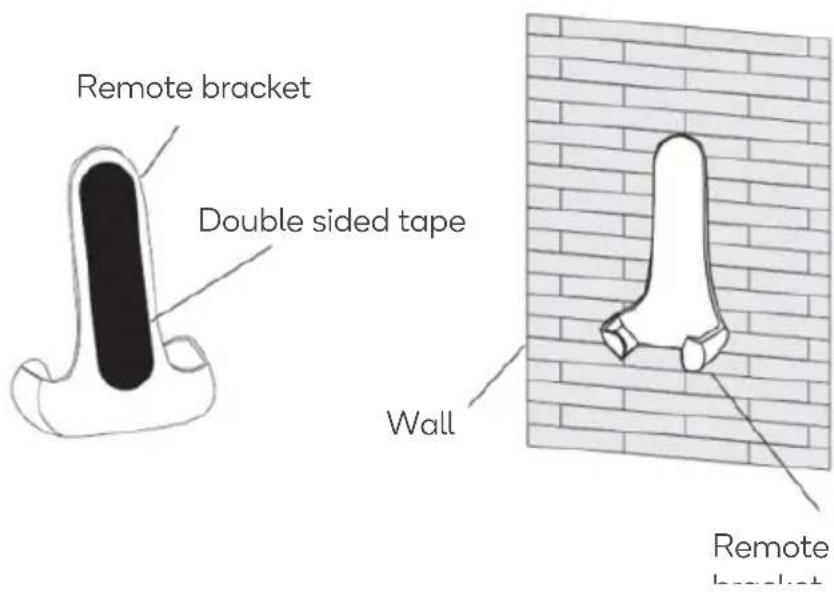
OPERATION
Preparation for Water Supply and Test for Operation
- Insert the power plug into the power outlet.
- When the indicator light is on, water starts to flow into the inner water tank. The process will take approximately 11 seconds. Water then sprays out from the nozzle. All indicator lights will then turn off with a sound.
- Press the power button on the toilet or on the remote control, the power indicator light or power icon on the LED display will turn on.
- Adjust the temperature of water and toilet seat to an appropriate level.
- Following the "Control & Display" instructions, using both the control panel and the remote control, test every operation.
- The toilet seat will only function when the seating sensor on the seat ring detects that there is a person seated (you will hear a beep sound when seated).
Preparation
-
Open the water-inlet valve.
-
Ensure the plug is inserted into the power socket. (The RCD is located in the power control board).
-
Confirm the power icon on the LED display is on.
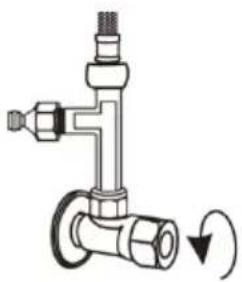
natural_image
Mechanical valve diagram showing fluid flow direction with no text or symbols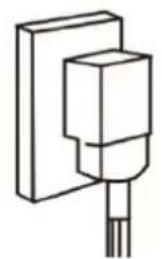
natural_image
Pure electrical circuit lines without any symbols
Power
- If the power light on the product indicator panel is not lit, all functions will be unavailable. Press the power button on the control panel to activate.

natural_image
Simple black circular button with a vertical line and curved arrow, resembling a power or activation symbol (no text or numbers)Controls & Display
This product is controlled mainly using the remote control, with the control panel serving as a secondary measure.
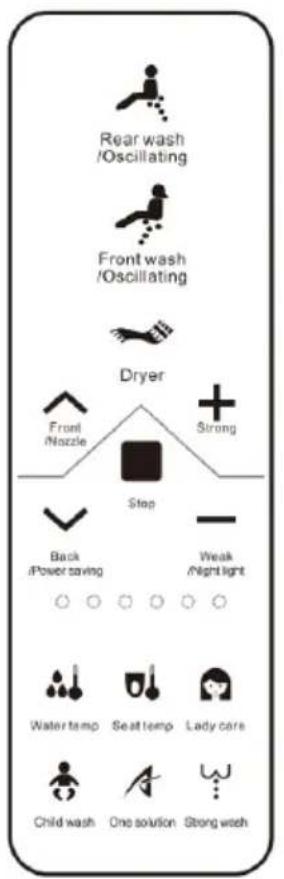
Remote control
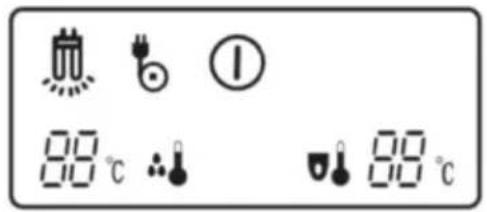
LED Display
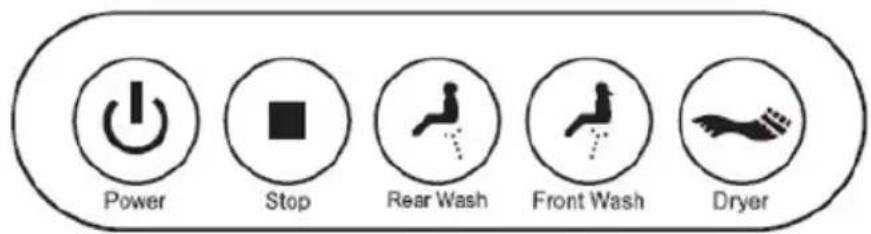
Control Panel
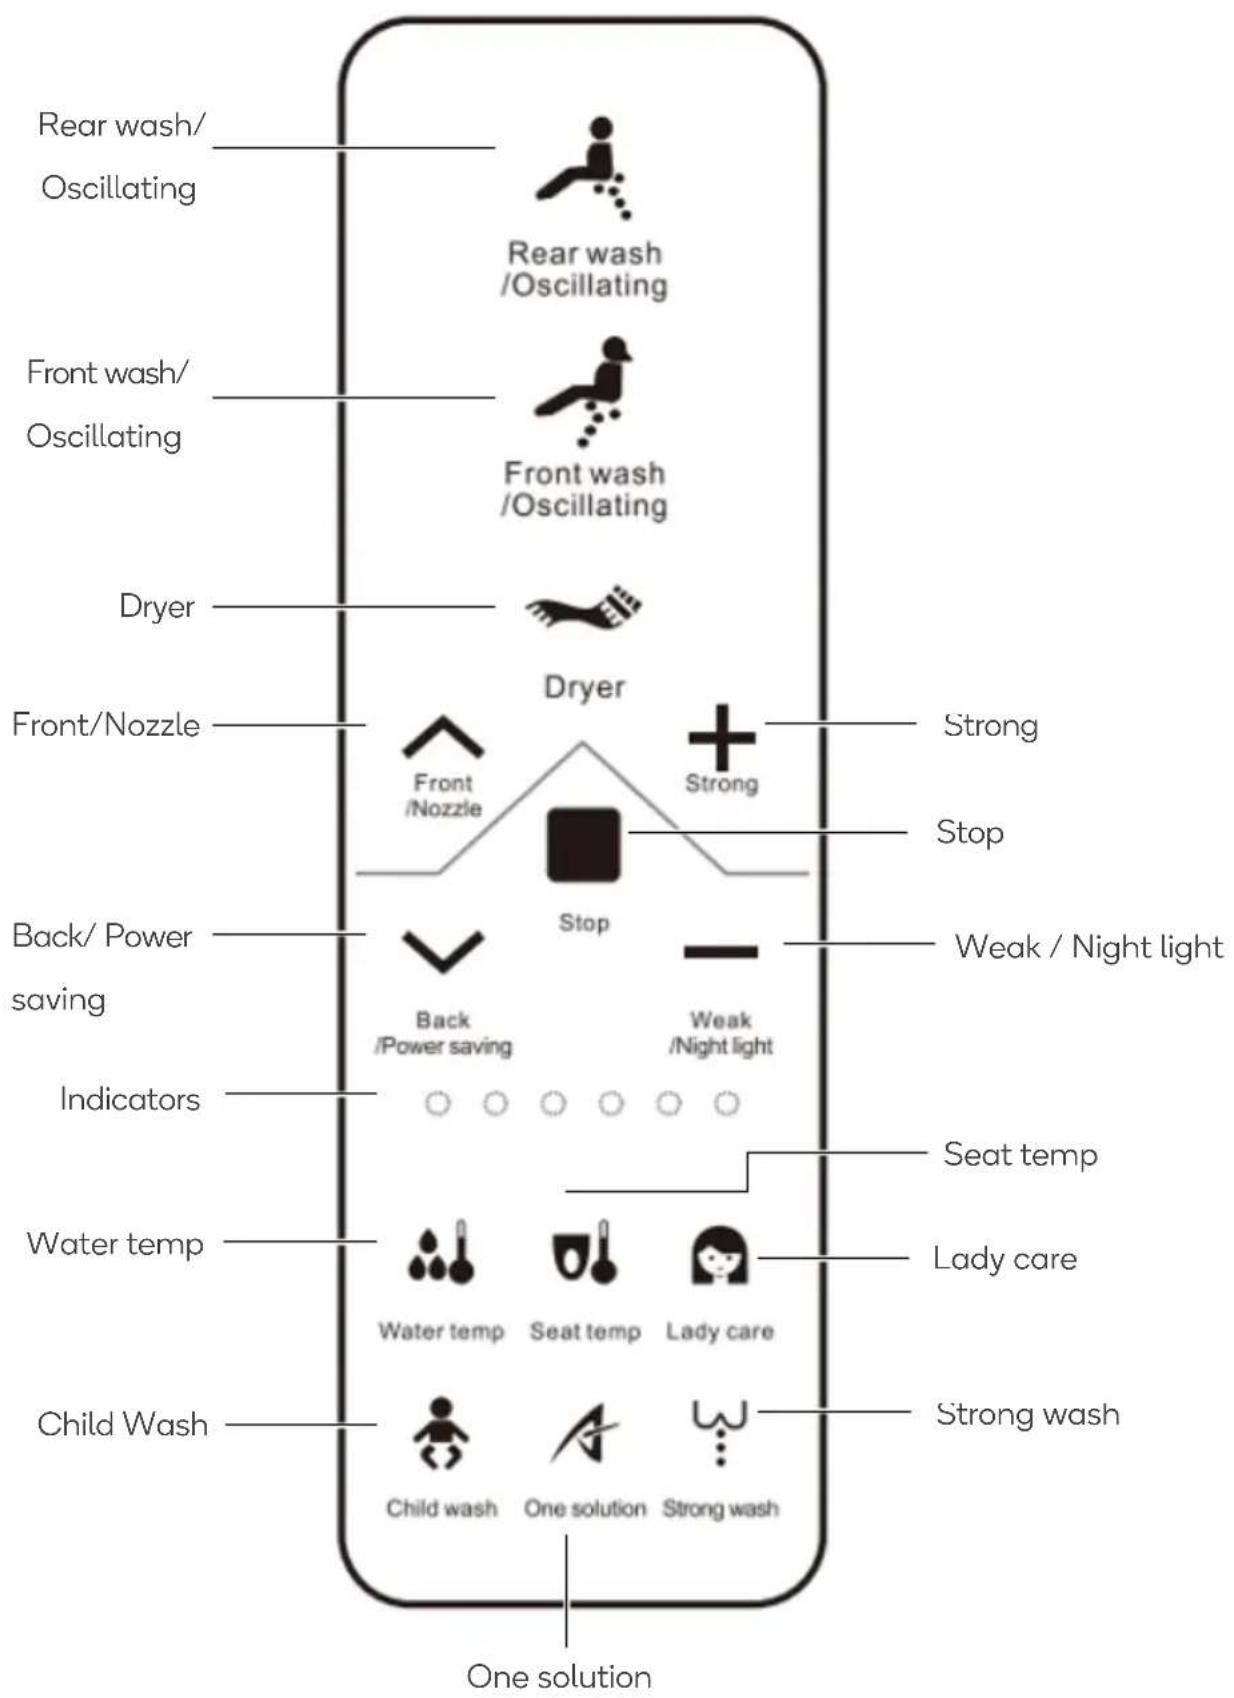
Rear wash/Oscillating:
Press this button and the rear wash nozzle will extend for operation. Press again to change to rear oscillating cleansing. The #1 indicator will blink on the remote control, while the nozzle repeatedly swings back and forth. Press again to stop oscillating cleansing and switch back to rear wash.
Front wash/Oscillating:
Press this button and front wash nozzle will extend for operation. Press again to change to front oscillating cleansing. The indicator #1 will blink on the remote control, while the nozzle repeatedly swings back and forth. Press again to stop oscillating cleansing and switch back to front wash.
Stop:
Stop the current operation. Press and hold this button for 3 seconds to shut down toilet seat.
Nozzle position adjustment:
Press the “Front” and “Rear” buttons to adjust the position of the nozzle. The nozzle position cannot be adjustment while oscillating.
Water pressure adjustment:
During wash operation press the "Strong" or "Weak" buttons to adjust the water pressure.
Dryer:
Press this button to start the warm air-drying operation. This operation automatic ends after 4 minutes or when the user presses the "Stop" button.
Warm air temperature adjustment:
Whilst drying, press the “Strong” or “Weak” buttons to adjust warm air temperature to suit your needs.
Nozzle self-cleaning:
Press the “Nozzle” button on remote control while in standby mode. The water will start to flow to clean the nozzle. Press this button repeatedly and the nozzle switches between rear and front cleansing.
Note:
Standby mode means that the toilet seat is in an operational state. The toilet seat is not in the state of washing, drying, nozzle self-cleaning, etc.
Water temperature adjustment:
The water temperature can be adjusted between 4 different levels. Press the “Water temp” button to cycle through the preset temperatures. The number indicators will display the current setting as shown below:
| Room temperature(No indicator) | 39°C(#1) | 36°C(#2) | 33°C(#3) |
Night light:
Press the "Night light" button whilst in standby; the #4 indicator will blink and the light will turn on. Pressing the button again will turn off the light.
Seat temperature adjustment:
The seat temperature can be adjusted between 4 different levels. Press the “Seat temp” button to cycle through the preset temperatures. The number indicators will display the current setting as shown below:
| Room temperature(No indicator) | 39°C(#4) | 36°C(#5) | 33°C(#6) |
Note: To prevent the low temp burn, the temperature will automatically reduce to below 35^ C after sitting on the seat for 10 minutes.
Power saving:
Press the “Power saving” button whilst in standby; the #3 indicator will blink and the toilet seat will go into power saving mode. Pressing the button again will cancel the operation.
Lady care:
Cleansing suitable for menstruation. Whilst in standby, press the “Lady care” button to begin operation. The nozzle extends out and the water temp is set to the highest level (39°C). Water temperature and pressure is not adjustable however the nozzle position can be adjusted to suit your needs. This operation automatic ends after 2 minutes or when the user presses the “Stop” button.
Child wash:
A warm water gentle cleansing suitable for children. Whilst in standby press the “Child wash” button. The front wash nozzle extends out with nozzle position at the front. The water pressure is low and the temperature is set at 36^ C. This operation automatic ends after 30 seconds or when the user presses the “Stop” button.
One solution:
Pressing "One solution" button will start the following operations in the order shown below:
Rear wash for 40 seconds
Oscillate wash for 20 seconds
Warm air dryer for 2 minutes
The user can end the operation at any time by pressing the "Stop" button.
Strong wash:
Whilst in standby, press “Strong wash” button. The nozzle extends out and the water pressure will be set to the highest mode. This operation automatic ends after 2 minutes or when the user presses the “Stop” button.
LED Display
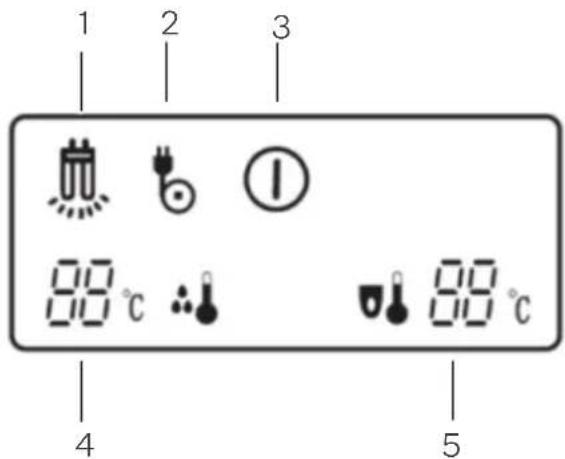
-
Night light: illuminates when the night light is on.
-
Power saving: illuminates when the power saving mode is on.
-
Power: illuminates when the power is on.
-
Water temp: When the water is heated, the temperature will be displayed in numerals. If an error occurs, the temperature figure will display letters:
o D: heater problem.
○ E: water temperature sensor problem.
o F: current water temperature is high.
- Seat temp: Displays the seat temperature.
CLEANING & CARE
Toilet bowl cleaning
- Ensure the power is switched off at the power outlet and plug removed prior to cleaning.
- Use a damp, soft cloth to wipe the toilet shelf and seat. Dirt should be cleaned as soon as possible. If it's difficult to clean, you can use a mild detergent.
Nozzle cleaning
- The power will need to be connected for nozzle cleaning.
- Press the Nozzle Cleaning button.
- Wait for the nozzle to extend and start the auto wash.
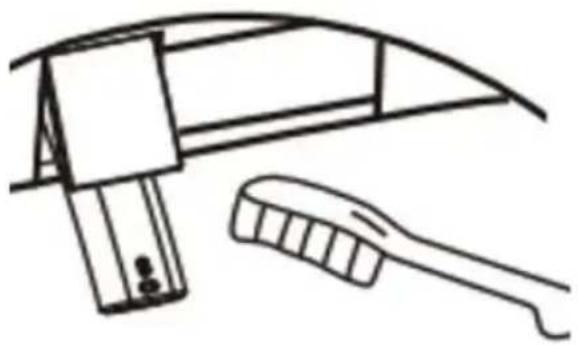
- Once the auto wash is complete, use a brush to gently clean the nozzle if necessary.
Note: Do not use a steel brush to clean the nozzle as doing so may cause damage.
natural_image
Line drawing of a mechanical device with a base and handle (no text or symbols)Cleaning the filter
When the water pressure becomes low or insufficient, the filter will need to be cleaned.
- Close the water inlet valve to stop the water supply.
natural_image
Line drawing of a toilet with a pipe fitting and a close-up view of the toilet's seat (no text or symbols)Note:
Do not remove the filter without closing the valve. Otherwise, water will spray out.
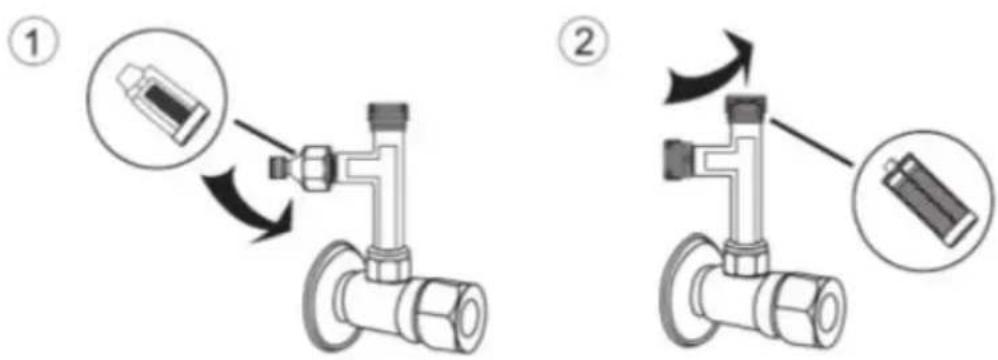
- Remove the T-valve filter.
Unscrew the connector using a spanner and then remove the filter. Refer to the images below.
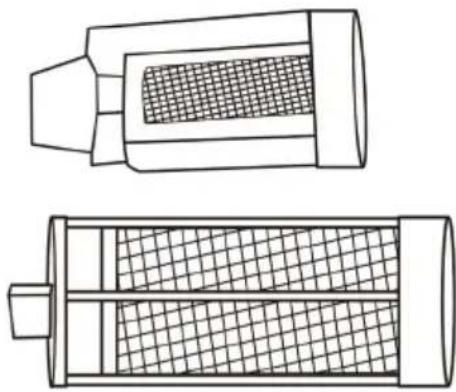
3. Clean the filter.
Remove the filter and clean it thoroughly. Rinse off dirt or clean the filter with a toothbrush.
natural_image
Technical line drawing of a cylindrical battery with internal grid structure (no text or symbols)Note:
- Do not use any cleaning agents. Clean it with water only.
- Do not use excessive force when cleaning, otherwise the filter will be deformed or damaged, affecting normal use.
4. Reattach the filter.
Reinstall the filter by following the removal steps in reverse order until complete.
Note:
Open the water inlet valve after installation and confirm there's no water
Extended periods without use
- If the bidet is not being used for an extended period of time. Turn off the inlet valve and power supply.
- Do not turn off the inlet valve and power if the room temperature will be lower than 0°C, your bidet will enter the anti-freeze program automatically.
Replacing the remote control batteries
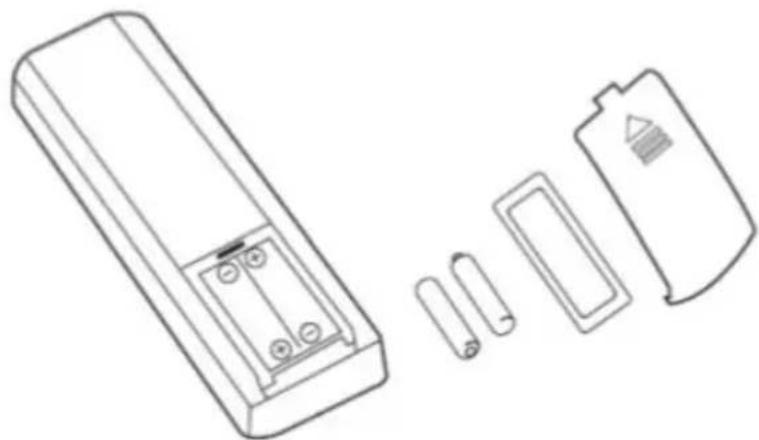
If the batteries are running low, the remote control can become unresponsive. You should replace the battery at this point.
Remove the battery compartment cover and discard the old batteries.
Insert x2 AAA alkaline batteries paying attention to the polarity symbols.
Replace the battery compartment cover.
natural_image
Line drawing of a remote control box with internal components and battery pack (no text or symbols)SPECIFICATIONS
| Rated voltage AC 220-240V, 50Hz | |
| Rated power consumption | 1200W (When the inflow water is 15 degrees, set the outflow temperature and strength to the maximum.) |
| Power cord length 1.5m | |
| Dimensions 508 x 381 x 125mm | |
| Cleansing and flushing | |
| Water pressure range | 0.06MPa (dynamic)-0.75MPa (Static) |
| Water pressure adjustment | Adjustable in 4 levels |
| Water temperature adjustment | Adjustable in 4 levels: 33°C, 36°C, 39°C (Room Temperature) |
| Safety device | Temperature control system; Over-heated protection mechanism; Over-dried protection mechanism; water and electricity isolation system. |
| General cleansing flow rates | 0.5-0.9L/min (Minimum required water pressures 15MPa) |
| Feminine cleansing flow rates | 0.5-0.9L/min (Minimum required water pressures 15MPa) |
| Seat heating | |
| Surface temperature | Adjustable in 4 levels: 33°C, 36°C, 39°C (Room Temperature) |
| Safety device | Temperature control system; Over-heated protection mechanism |
| Warm air dryer | |
| Warm air temperature | Adjustable in 4 levels from 32°C to 52°C |
| Safety service Temperature | reset switch/Temperature fuse |
TROUBLESHOOTING
| Buzzer | Buzz once: Received instruction from controller.Buzz twice: Auto operation when the user stands upBuzz three times or more: A malfunction has occurred.Note: Buzzer only works when operate on remote controller or side button or initialisation. |
| Problem | Possible Cause | Troubleshooting |
| No power. | The electrical outlet is not connected to power supply or the plug is not inserted to the bottom. | Check if the electrical outlet is connected to the power supply. Reconnect the bidet to power. |
| No water comes out while cleaning. | Low pressure of water supply. | Raise the water pressure. |
| Water inlet filter blocked. | Remove and clean the filter according to the instruction. | |
| Cleansing water in not warm enough. | Water temp setting is incorrect. | Readjust temperature. |
| Seat does not heat. | Seat temp setting is incorrect or the product is in power saving mode. | Readjust temperature. |
| Seat and cover are loose. | Fixed bolts are loose. | Tighten the bolts. |
| No response when pressing the key. | Key fault. | Reboot or contact Kogan.com for assistance. |
| Product ‘Buzz’ three times and then turns off. | The heater has entered self-protection mode. | Check whether the water supply to bidet is normal. Disconnect the power and wait 5 seconds and then turn on the power again. |
| Remote isn’t working. | Batteries are flat. | Replace the batteries. |
NOTES
Need more information?
We hope that this user guide has given you the assistance needed for a simple set-up.
For the most up-to-date guide for your product, as well as any additional assistance you may require, head online to help.kogan.com
kogan.com
- SMART WASH & DRY ELECTRIC BIDET TOILET SEAT
- SAFETY & WARNINGS
- WARNING:
- Caution:
- General safety notices:
- DIMENSIONS
- COMPONENTS
- OVERVIEW
- Precautions before Installation
- Installing T-valve with filter
- Bidet Installation
- Remove original toilet seat:
- Installing the seat bracket:
- Installing the bidet:
- Note:
- Connecting the Inlet Pipe
- Installing the Remote Bracket
- OPERATION
- Preparation for Water Supply and Test for Operation
- Preparation
- Controls & Display
- Rear wash/Oscillating:
- Front wash/Oscillating:
- Stop:
- Nozzle position adjustment:
- Water pressure adjustment:
- Dryer:
- Warm air temperature adjustment:
- Nozzle self-cleaning:
- Water temperature adjustment:
- Night light:
- Seat temperature adjustment:
- Power saving:
- Lady care:
- Child wash:
- One solution:
- Strong wash:
- LED Display
- CLEANING & CARE
- Toilet bowl cleaning
- Nozzle cleaning
- Cleaning the filter
- Clean the filter.
- Reattach the filter.
- Extended periods without use
- Replacing the remote control batteries
- SPECIFICATIONS
- TROUBLESHOOTING
- NOTES
- Need more information?
Brand : Kogan
Model : KAPWDBIDETA
Category : Toilets