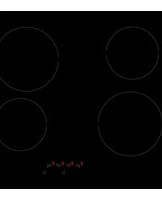
BCC64T - Cooker BLANCO - Free user manual and instructions
Find the device manual for free BCC64T BLANCO in PDF.


| Product Type | Ceramic Cooktop |
| Brand | BLANCO |
| Model | BCC64T / BCC604TB |
| Total Power | 6000 W |
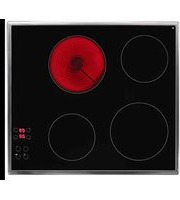
| Cooking Zones | 4 (Front Left: 1800 W, 190 mm; Rear Left: 1200 W, 155 mm; Rear Right: 1800 W, 190 mm; Front Right: 1200 W, 155 mm) |
| Control Type | Touch-sensitive keys with display |
| Power Supply | 230 V~ 50/60 Hz (1-phase) or 400 V~ 50/60 Hz (2-phase) |
| Connection Cable | 3 × 2.5 mm² (230 V) or 4 × 1.5 mm² (400 V) |
| Cut-out Dimensions | 560 × 490 mm |
| Automatic Cooking | Yes, with programmable time for each power level |
| Residual Heat Indicator | Yes, displays 'H' when zone is hot |
| Control Panel Lock | Yes, prevents accidental changes |
| Overheat Protection | Yes, automatic shut-off after extended use |
| Safety Features | Child lock, pan detection (empty pan shut-off), residual heat warning |
| Cleaning Instructions | Use damp cloth with mild detergent; avoid abrasive cleaners and steam cleaners |
| Warranty | 48 months (parts and labor) for domestic use; additional 36 months on sealed system for refrigeration (parts only) |
| Installation Requirements | Qualified electrician; 50 mm clearance from walls; 20 mm ventilation gap below; heat-resistant worktop (up to 75 °C) |
| Environment | Indoor use only; not as room heater |
| Weight | Not specified, but estimated 12 kg (typical for 4-zone ceramic cooktop) |
Frequently Asked Questions - BCC64T BLANCO
User questions about BCC64T BLANCO
0 question about this device. Answer the ones you know or ask your own.
Ask a new question about this device
Download the instructions for your Cooker in PDF format for free! Find your manual BCC64T - BLANCO and take your electronic device back in hand. On this page are published all the documents necessary for the use of your device. BCC64T by BLANCO.
USER MANUAL BCC64T BLANCO
Instructions for the Use and Care and Installation of

BCC64T
BCC604TB
Ceramic Cooktop
BLANCO
Thank you for your choosing Blanco. You will find that the clean lines and modern look of your Blanco appliance blends perfectly with your kitchen décor. It is easy to use and performs to a high standard. Blanco is committed to providing increasingly efficient products that are attractive, reliable, easy to use and respect the environment.
Of course we make every effort to ensure that our products meet all your requirements, and our Customer Relations department is at your disposal, to answer your questions and to listen to all your suggestions (see back cover of manual).
For important information such as instruction manuals and catalogues, please visit our website blanco-australia.com/support/instruction_manuals or blanco-australia.com/support/catalogues.
Please make sure you activate your appliance warranty by registering your warranty online at blanco-australia.com/warranty/ and retain all documents relating to the purchase of this appliance.
We value your opinion, so please let us know your thoughts about your new appliance. Simply go to the relevant appliance page of our website blanco-australia.com and click on "Write a Review".
If you want to know more about promotions, receive tips and tailor made content or connect with us on social media, like BlancoAU on Facebook and follow BlancoAU on Twitter.
We hope you'll enjoy special moments with your new appliance and remember, we're only one click away!

blanco-australia.com

BlancoAU

BlancoAU
TABLE OF CONTENTS
SAFETY 4-5
DESCRIPTION....6
DISPLAY....6-7
STARTING UP THE APPLIANCE....7
USE....7-8
COOKING ADVICE....8
MAINTENANCE....9
TROUBLE SHOOTING....9
INSTALLATION....10
TECHNICAL DATA....11
SAFETY WARNINGS
The appliance is not intended for use by persons (including children) with reduced physical, sensory or mental capabilities, or lack of experience and knowledge, unless they have been given supervised or instruction concerning use the appliance by a responsible person for their safety.
Young children should be supervised to ensure that do not play with the appliance.
If the supply cord is damaged, it must be replaced by the manufacturer or its service agent or a similarly qualified person in order to avoid a hazard.
Do not use a steam cleaner to clean this appliance.
WARNING: If the surface is cracked, switch off the appliance to avoid the possibility of an electric shock.
This appliance is not intended to be operated by means of external timer or separate remote control system.
If the electrical supply is restricted, means of all-pole disconnection must be accessible and incorporated in the fixed wiring in accordance with the wiring rules.
Danger of fire - Do not store items on the cooking surface.
CAUTION - The cooking process has to be supervised. A short term cooking process has to be supervised continuously.
WARNING - Unattended cooking on a cooktop with fat or oil can be dangerous and may result in a fire. Never try to extinguish a fire with water, but switch off the appliance and then cover the fire with a lid or fire blanket.
Do not modify this appliance.
Do not use as a room heater.
This appliance is meant for indoor use only.
Failure to follow these usage, installation and maintenance instructions could result in a safety hazard resulting in injury or death.
WARNINGS FOR USE:
The appliance is built to perform the following function, cooking and heating food.
Every other use is considered improper.
Never use this appliance as a room heater.
Do not attempt to change the technical characteristics of the appliance as it can be dangerous and can affect your appliance.
For disposal of this appliance, ensure it is done in a safe manor and following all local recycling guidelines.
SAFETY WARNINGS
WARNING FOR USE:
Do not touch the appliance with wet or damp hands or feet.
Do not use the appliance barefoot.
The manufacturer will not be liable for any damage resulting from improper, incorrect or unreasonable use
During, and immediately after operation, some parts of the appliance are very hot: avoid touching them.
Do Not leave heating elements on when not in use
If the ceramic glass is not cleaned immediately, there is a risk of residues becoming encrusted and they will be impossible to remove after the glass has cooled.
Before cooking for the first time, it is necessary to clean the glass as follows: switch on the front heating elements to the maximum for at least 30 minutes, heating pans full of water.
After 30 minutes, switch off the front heating elements and switch on the rear heating elements plus the central heating element, where possible, to the maximum. This is necessary to eliminate the "new smell" and to allow any humidity which may have formed during the production process to evaporate. This is necessary for the correct operation of the electronic circuits and the control panel. If the controls do not work properly when the 30 minutes are up, there is still some humidity inside, leave the heating elements on until all the humidity has completely evaporated, then switch off the appliance.
Connection to the mains
When cooktop is first connected to a power supply, a long beep will be heard. All LEDs and displays in the Touch Control will be turned ON for seconds. After an auto adjust period, the cooktop go into standby mode.
ENVIRONMENT PROTECTION
- The packaging material is ecological and can be recycled.
-
The worn appliances contain certain noble metals. Apply to the local government about the possibilities of recycling.
-
Don't dispose of your appliance with general household waste
- Get in touch with the waste collection centre of your local council that control the recycling of household appliances.

DESCRIPTION
Total power - 6000W
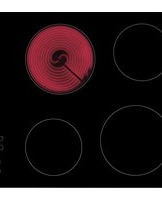
Front Left Cooking Zone
Nominal power - 1800W
Size 190mm Size - 155mm
Rear Left Cooking Zone
Nominal power - 1200W
Rear Right Cooking Zone
Nominal power - 1800W
Size - 190mm Size - 155mm
Front Right Cooking Zone
Nominal power - 1200W
* calculated according to the method of measuring performance (EN 60350-2).
Control panel
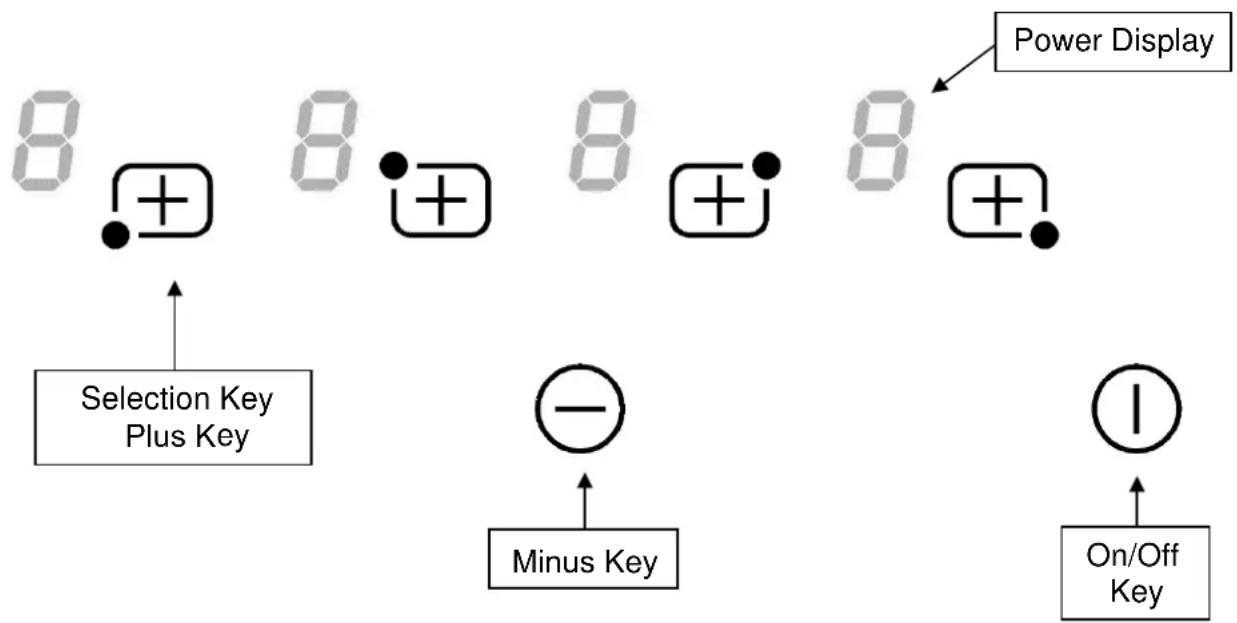
flowchart
graph TD
    A["8"] --> B["+"]
    C["8"] --> D["+"]
    E["8"] --> F["+"]
    G["8"] --> H["+"]
    I["Power Display"] --> J["Selection Key Plus Key"]
    K["-"] --> L["Minus Key"]
    M["+"] --> N["On/Off Key"]
DISPLAY
Sensitive touches
Your ceramic cooktop is equipped with electronic controls with sensitive touch keys. When your finger touches the key, the corresponding command is activated. This activation is validated by a control light, a letter or a number in the display and/or a “beep” sound.
Touch only one key at a time.
Display
| Display | Designation | Function |
| 0 | Zero | The heating zone is activated |
| 1...9 | Power level | Selection of the cooking level |
| A | Heat accelerator | Automatic cooking |
| E | Error message | Electronic failure |
| H | Residual heat | The heating zone is hot |
| L | Locking | The control panel is locked |
Residual heat indication
After the cooktop is switched off, the heating zone is still hot and indicates [H] on the display. The symbol [H] disappears when the heating zone may be touched safely. When the residual heat indicator light is on, don't touch the heating zone and don't put any heat sensitive object on them. There are risks of burn and fire.
STARTING UP THE COOKTOP
Before using your new cooktop
Clean your cooktop with a damp cloth, and then dry the surface thoroughly. Do not use detergent which risks causing blue-tinted colour on the glass surface.
Starting-up
If no action is made within 20 second the electronics return to stand by mode.
To start the cooktop, Press the On/Off Key, this will cause all displays to show "0". To stop or turn off the cooktop, press the On/Off Key. The displays will either show nothing, or "H" if the cooking zone is still hot.
To set a cooking setting for a cooking zone, hold down the Plus Key for the cooking zone you wish to use.
Once the Power Display for that zone is illuminated, increase the cooking zone setting by pressing the Plus Key (1-9), or decrease the cooking zone setting by pressing the Minus Key (9-1).
To stop a cooking zone, hold down the Plus Key for the cooking zone you wish to stop, then repress the Plus Key while pressing the Minus Key at the same time.
USE
Automatic cooking
All the cooking zones are equipped with an automatic “go and stop” cooking device. The cooking zone starts at full power during a certain time, then reduces automatically its power to the preselected level.
To begin automatic cooking, select a cooking zone and set the Power Display to 9. Once set at 9 repress the Plus Key, the Power Display will begin to flash "A". Using the Plus and Minus Keys, select the setting desired (See table below). Once set, the Power Display will flash "A" alternately with the cooking zone setting.
| Selected power | Automatic cooking time (Min:S) |
| 1 01:00 | |
| 2 03:00 | |
| 3 04:48 | |
| 4 06:30 | |
| 5 08:30 | |
| 6 02:30 | |
| 7 03:30 | |
| 8 04:30 | |
| 9 00:15 |
To stop automatic cooking, press the Plus Key of the relevant cooking zone, then press the Minus Key until to Power Display reads "0" or "H".
Control panel locking
To avoid modifying a setting of cooking zones, in particular within the framework of cleaning, the control panel can be locked (with exception to the On/Off Key).
To lock the cooktop, press the Minus Key and the Plus Key of the front left cooking zone simultaneously, then repress the Plus Key of the front left cooking zone. All Power Displays will now show "L".
To unlock the cooktop, press the On/Off Key if the cooktop is off, then press the Minus Key and the Plus Key of the front left cooking zone simultaneously, then repress the Minus Key.
Operating time
Each cooking zone is equipped with an operating time limitation: the cooking zone is automatically switched off after a certain time without any change of settings. This time is varying according to the selected power level as described in the table below.
| Power level | Max operating time (hours) |
| 1 | 6 |
| 2 | 6 |
| 3 | 5 |
| 4 | 5 |
| 5 | 4 |
| 6 | 1.5 |
| 7 | 1.5 |
| 8 | 1.5 |
| 9 | 1.5 |
COOKING ADVICE
Examples of power setting:
(The values below are indicative)
| 1 to 2 | Melting, Reheating | Sauces, butter, chocolate, gelatineDishes prepared beforehand |
| 2 to 3 | Simmering, Defrosting | Rice, pudding, sugar syrupDried vegetables, fish, frozen products |
| 3 to 4 | Steam | Vegetables, fish, meat |
| 4 to 5 | Water | Steamed potatoes, soups, pasta, fresh vegetables |
| 6 to 7 | Medium cooking, Simmering | Meat, liver, eggs, sausages, |
| 7 to 8 | Cooking | Potatoes, fritters, waffles |
| 9 | Frying, roasting, Boiling water | Steaks, omelettes, fried dishes, water |
MAINTENANCE AND CLEANING
Switch-off the cooktop before cleaning.
Do not clean the cooktop if the glass is too hot because they are risk of burn.
- Remove light marks with a damp cloth with washing up liquid diluted in a little water. Then rinse with cold water and dry the surface thoroughly.
- Highly corrosive or abrasive detergents and cleaning equipment likely to cause scratches must be absolutely avoided.
- Do not ever use any steam-cleaner or pressure washer.
- Do not use any object that may scratch the ceramic glass.
- Ensure that the cooktop is dry and clean. Ensure that there are no grains of dust on your ceramic cooktop or on the pan. Sliding rough saucepans will scratch the surface.
- Spillages of sugar, jam, jelly, etc. must be removed immediately. You will thus prevent the surface being damaged.
TROUBLESHOOTING
The cooktop or the cooking zone doesn't start-up:
- The cooktop is badly connected to the electrical system.
• The protection fuse has blown.
• The locking function is activated - The sensitive keys are covered by grease or water.
• An object is covering the control panel.
The symbol [E] displays :
- Call the After-sales Service.
One or all cooking zones cut-off:
• The safety system has engaged
- You forgot to cut-off the cooking zone for a long time.
• One or more sensitive keys are covered.
- The pan is empty and has overheated.
The automatic cooking system « go and stop » doesn't start-up:
• The cooking zone is still hot [H]
• The highest power level is set [9]
• The cooking level was engaged with [ - ]
The symbol [L] displays :
• Refer to the chapter control panel locking page.
The control panel displays [Er03] :
- An object or liquid covers the control keys. The symbol disappears as soon as the key is released or cleaned.
The control panel displays [ER21]:
- The cooktop is overheated, let it cool and then turnit on again.
The control panel displays [U400], [Er25] or [U4]:
- The cooktop is not connected to the network. Check the connection and reconnect the cooktop.
If one of the symbols above persists, contact the Service Centre.
INSTALLATION
The installation must be performed by a qualified electrical contractor. This contractor will take the entire responsibility of the installation. The installation has to comply with the legislation and the standards in force in your country.
How to stick the gasket:
The gasket supplied with the cooktop prevents the intrusion of liquids into the cabinet below. Its installation has to be done carefully, as described below.

Stick the gasket (2) two millimeters from the external edge of the glass, after removing the protection tape (3).
Fitting - installing:
• Cut out sizes of the worktop:
| Reference | Cut-size |
| BCC64T / BCC604TB | 560 x 490 mm |
- Ensure that there is a distance of 50 mm between the cooktop and the wall or sides.
- The hobs are classified as "Y" class for heat protection. Ideally the cooktop should be installed with plenty of space on either side. There may be a wall at the rear and tall units or a wall at one side. On the other side, however, no unit or divider must stand higher than the cooktop.
- The piece of furniture or the support in which the cooktop is to be fitted, as well as the edges of furniture, the laminate coatings and the glue used to fix them, must be able to resist temperatures of up to 75 °C.
- The mural rods of edge must be heat-resisting.
- If the cooktop is installed above another appliance, ensure there is a 20mm gap to allow for air ventilation.
- Ensure a gap of 20mm is left below the cooktop when installed for circulation.
- Do not store flammable material below the cooktop.
- Ensure gasket is correctly fitted before installing cooktop, failure to do so could lead to damage of the benchtop.
- The safety gap between the cooktop and the cooker hood placed above must respect the indications of the hood manufacturer. In case of absence of instructions respect a distance minimum of 650 mm.
- The connection cord should not be subjected, after building-in, to any mechanical constraint (for instance constraint given by a drawer installed below).
- WARNING: Use only cooktop guards designed by the manufacturer of the cooking appliance or indicated by the manufacturer of the appliance in the instructions for use as suitable or cooktop guards incorporated in the appliance. The use of inappropriate guards can cause accidents.
TECHNICAL DATA
- The installation of this cooktop and the connection to the electrical network should be entrusted only to an electrician perfectly to the fact of the normative regulations and which respects them scrupulously.
- Protection against the parts under tension must be ensured after the building-in.
- The data of connection necessary are on the stickers placed on the cooktop casing near the connection box.
- The connection to the mains power must be made using an earthed plug or via an omnipolar circuit breaking device with a contact opening of at least 3 mm.
- The electrical circuit must be separated from the network by adapted devices, for example: circuit breakers, fuses or contactors.
- If the cooktop is not fitted with an accessible plug, disconnecting means must be incorporated in the fixed installation, in accordance with the installation regulations.
•
Caution!
This cooktop has only to be connected to a network 230 V\~ 50/60 Hz.
Connect always the earth wire.
Respect the connection diagram.
The connection box is located underneath at the back of the cooktop casing. To open the cover use a medium screwdriver. Place it in the slits and open the cover.
| Mains | Connection | Cable diameter | Cable | Protection calibre |
| 230V~ 50/60Hz | 1 Phase + N | 3 × 2.5 mm2 | H 05 VV - FH 05 RR - F | 25 A * |
| 400V~ 50/60Hz | 2 Phases + N | 4 × 1.5 mm2 | H 05 VV - FH 05 RR - F | 16 A * |
* calculated with the simultaneous factor following the standard EN 60 335-2-6
Connection of the cooktop
Setting up the configurations:
For the various kinds of connection, use the brass bridges which are in the box next the terminal
Monophase 230V\~1P+N
Put a bridge between terminal 1 and 2.
Attach the earth to the terminate “earth”, the neutral N to terminal 4, the Phase L to one of the terminals 1 or 2.
Biphase 400V\~2P+N
Attach the earth to the terminate “earth”, the neutral N to terminal 4, the Phase L1 to the terminals 1 and the Phase L2 to the terminal 2.
Caution! Be careful that the cables are correctly engaged and tightened.
We cannot be held responsible for any incident resulting from incorrect connection or which could arise from the use of an appliance which has not been earthed or has been equipped with a faulty earth connection.
AUSTRALIAN & NEW ZEALAND APPLIANCE WARRANTY STATEMENT OF STANDARD WARRANTY CONDITIONS
AUSTRALIAN CUSTOMERS
Our goods come with guarantees that cannot be excluded under the Australian Consumer Law. You are entitled to a replacement or refund for a major failure and for compensation for any other reasonably foreseeable loss or damage. You are also entitled to have the goods repaired or replaced if the goods fail to be of acceptable quality and the failure does not amount to a major failure.
NEW ZEALAND CUSTOMERS
Nothing herein contained shall be construed in any way as excluding or limiting your rights under the Consumer Guarantee Act 1993.
OUR WARRANTY
This appliance is also covered by the manufacturer's warranty set out in this document (Our Warranty).
Our Warranty is for a period of forty eight (48) months from the date of purchase and for dishwasher & refrigeration appliances will have an additional thirty six (36) months after the first twenty four (24) months on the wash motor for dishwashers & on the Sealed System (PARTS only Compressor & condenser etc) for refrigeration appliances. The labour cost to replace these parts is the responsibility of the customer.
This is in addition to (and does not exclude, restrict or modify) any rights or remedies to which you may already be entitled under the Australian consumer Law or the New Zealand Consumer Guarantee Act 1993 relating to this appliance.
Our Warranty (which is subject to the conditions below) covers rectification free of charge of any fault arising from defective materials or components, or faulty workmanship. The appliance will be repaired or replaced at the option of Blanco, and all costs of installation, removal, cartage, freight travelling expenses and insurance are to be paid by the customer.
Our Warranty is subject to the following conditions:
- That the purchaser contact Blanco prior to any appliance repair.
- That the purchaser carefully follows all instructions provided with the appliance and complies with all relevant electrical & plumbing regulations in their State when installing the appliance.
- That the purchaser carefully follows the instructions provided in the owner's handbook relating to the proper use and care of the appliance and does not use the appliance for any purpose other than the DOMESTIC use for which it has been designed. If the appliance is used in commercial applications or for rental purposes, Our Warranty is limited to a warranty of Twelve (12) months covering all parts with Three (3) months on any labour cost of service or repair.
SERVICE AREA
The provision of service under Our Warranty is limited by the boundary / territory area of the nearest service centre. Travelling cost incurred for service outside this area is not covered by Our Warranty and service will incur commercial cost to be paid by the customer regulated by the number of kilometres travelled beyond the service area. These costs will be disclosed to you for acceptance by you prior to your claim being processed.
Microwave ovens must be returned to your nearest Authorised Service Centre for repair as they are a carry in serviceable appliance.
WHAT IS COVERED: By Our Warranty
During the warranty period, Blanco or its authorised Service Centre will at no extra charge, if your appliance is readily accessible without the need of special equipment and subject to the terms and conditions of this warranty, repair or replace any parts which it considers defective.
WHAT IS NOT COVERED: By Our Warranty
- Products installed damaged or incomplete or not in compliance with the relevant electrical & plumbing regulations in their State.
- Normal wear and tear e.g. cleaning, light globes, filters etc.
- Failure resulting from power surges and electrical storms.
- Insect or vermin infestation.
- Unauthorised repairs or use of non genuine Blanco parts.
- Any failure caused by the appliance not being used in accordance with the instruction and the installation manual provided with the
- appliance. Misuse or abuse, including failure to properly maintain or service.
- The clearing of blockages in pumps and hoses.
- Damage which occurs during delivery or installation.
- Claims to appliance surface coating due to liquid or solid spill-overs, accidental damage or damage caused from cleaning products not recommended by Blanco.
HOW TO CLAIM OUR WARRANTY
You will need to contact Blanco in Australia or New Zealand by using the contact details below.
IN AUSTRALIA
Blanco is distributed by Shriro Australia Pty Ltd
Locked Bag 5002, Kingsgrove, NSW, 2208 Phone:
1300 795 572 Fax: 1800 686 413
Email: customercare@shriro.com.au
Web: http://www.blanco-australia.com/
IN NEW ZEALAND
Blanco is distributed by Monaco Corporation
(Member of Shriro Australia Pty Ltd)
PO Box 4399, Shortland St, Auckland, 1140
Phone: 09 415 6000 Fax: 09 415 7060
Email: customercare@monacocorp.co.nz
Web: http://www.blanco.co.nz/
Note: Please complete the following details when you have unpacked the appliance and staple this card with the purchase invoice or sales docket.
Model No....
Date of Purchase....
Serial No....
Retailer....

- BLANCO
- TABLE OF CONTENTS
- SAFETY WARNINGS
- Connection to the mains
- ENVIRONMENT PROTECTION
- DESCRIPTION
- Front Left Cooking Zone
- Rear Left Cooking Zone
- Rear Right Cooking Zone
- Front Right Cooking Zone
- DISPLAY
- Sensitive touches
- Touch only one key at a time.
- Residual heat indication
- STARTING UP THE COOKTOP
- Before using your new cooktop
- Starting-up
- USE
- Automatic cooking
- Control panel locking
- Operating time
- COOKING ADVICE
- Examples of power setting:
- MAINTENANCE AND CLEANING
- Switch-off the cooktop before cleaning.
- TROUBLESHOOTING
- The cooktop or the cooking zone doesn't start-up:
- The symbol [E] displays :
- One or all cooking zones cut-off:
- The automatic cooking system « go and stop » doesn't start-up:
- The symbol [L] displays :
- The control panel displays [Er03] :
- The control panel displays [ER21]:
- The control panel displays [U400], [Er25] or [U4]:
- INSTALLATION
- Fitting - installing:
- TECHNICAL DATA
- Caution!
- Connection of the cooktop
- AUSTRALIAN & NEW ZEALAND APPLIANCE WARRANTY STATEMENT OF STANDARD WARRANTY CONDITIONS
- AUSTRALIAN CUSTOMERS
- NEW ZEALAND CUSTOMERS
- OUR WARRANTY
- SERVICE AREA
- WHAT IS COVERED: By Our Warranty
- WHAT IS NOT COVERED: By Our Warranty
- HOW TO CLAIM OUR WARRANTY
- IN AUSTRALIA
- IN NEW ZEALAND
Brand : BLANCO
Model : BCC64T
Category : Cooker