
BMS-1K - Bike accessory Impact - Free user manual and instructions
Find the device manual for free BMS-1K Impact in PDF.


| Brand | Impact |
| Model | BMS-1K |
| Type | Battery Management System (BMS) |
| Supported Battery Chemistry | Lithium-ion, LiFePO4 |
| Cell Configuration | 4S to 16S (series) |
| Voltage Range | 12 V to 48 V |
| Continuous Discharge Current | 100 A |
| Peak Discharge Current | 150 A (for 10 seconds) |
| Max Charging Current | 50 A |
| Balancing Current | 100 mA |
| Protection Features | Overcharge, Overdischarge, Short Circuit, Overcurrent, Temperature |
| Communication Interface | CAN Bus |
| Display | LED Indicators (Status, Fault) |
| Dimensions (L x W x H) | 120 mm x 80 mm x 15 mm |
| Weight | 200 g |
| Operating Temperature Range | -20 °C to 60 °C |
| Storage Temperature Range | -40 °C to 85 °C |
| Mounting Type | Screw Terminals |
| Standby Power Consumption | < 5 mA |
| Certifications | CE, RoHS |
| Warranty | 1 year |
Frequently Asked Questions - BMS-1K Impact
User questions about BMS-1K Impact
0 question about this device. Answer the ones you know or ask your own.
Ask a new question about this device
Download the instructions for your Bike accessory in PDF format for free! Find your manual BMS-1K - Impact and take your electronic device back in hand. On this page are published all the documents necessary for the use of your device. BMS-1K by Impact.
USER MANUAL BMS-1K Impact
BMS-1K
Bike Mounting Kit
INSTRUCTIONS
Introduction
Thank you for choosing Impact.
The Impact Bike Mounting Kit allows you to securely store bicycles weighing up to 33 pounds and hang them off the ground to create more space in your apartment, home, office, or garage. Use the Bike Mounting Kit with Impact's Deluxe Varipole Support System (sold separately) or any support stand with a tubing diameter measuring 40 to 45 mm. This adapter cradles your bike's top tube with vinyl-coated hooks that minimize scratches or dents, and enable you to angle your bike ±30°.
Precautions ⚠️
- Please read and follow the instructions, and keep this manual in a safe place.
- This device is to be installed on support tubing with a diameter measuring 40 to 45 mm.
- Do not exceed the recommended load limit of 33 pounds (15 kg).
- Keep the coupler away from water, oil, grease, or any element that may cause it to move or slide along the support tubing.
• Make sure to properly balance your bicycle on the Impact Bike Mounting Kit. Improperly balancing a bicycle can cause serious injury to your person and damage to your personal property.
• Make sure this product is intact and that there are no missing parts.
- Clean this product with only a soft, dry cloth.
• All images are for illustrative purposes only.
Overview
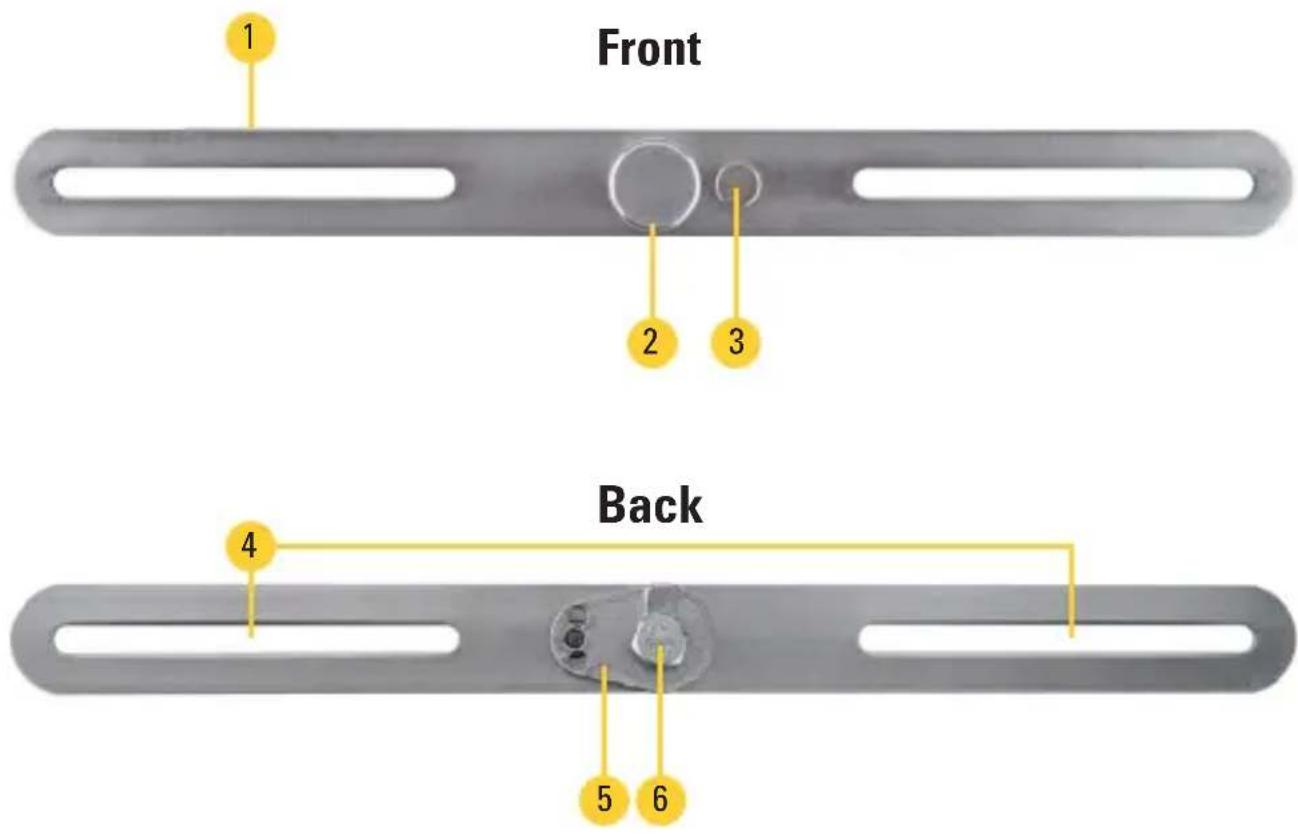
- Hang bar (BMS-BH)
- Tension knob
- Spring pin
- Hook slots
- Angle bracket
- Tension bolt
-
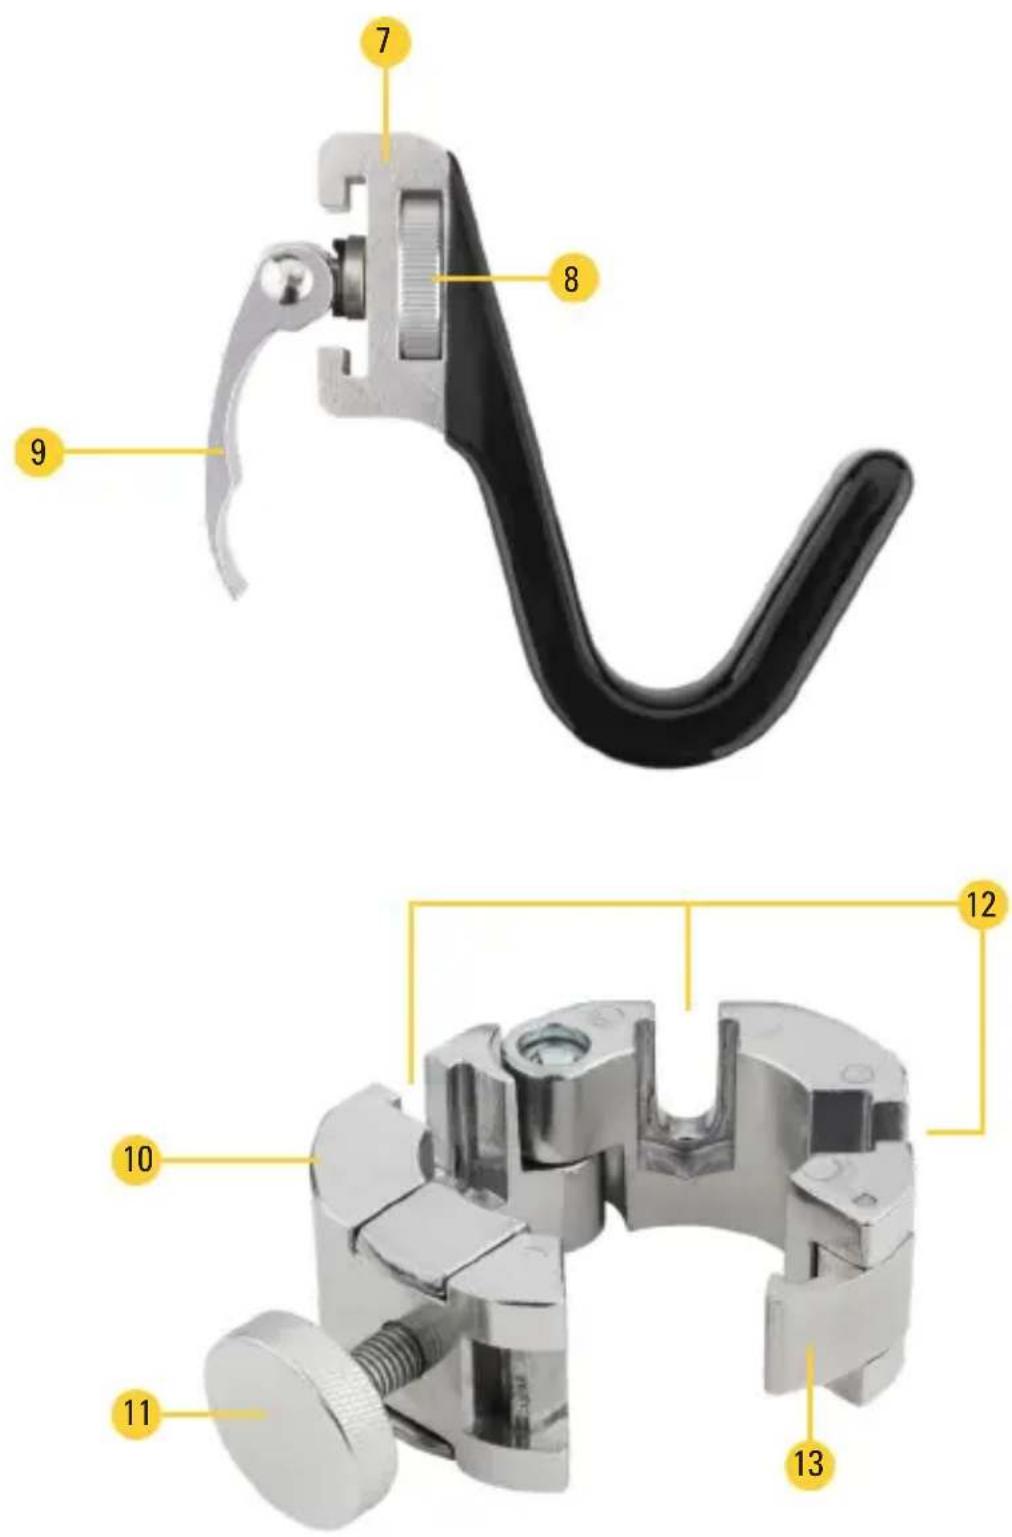
Frame hook (×2)
-
Hook tension wheel
- Locking handle
- 3-way multi-hang coupler
- Coupler tension knob
- Hang-bar slots (1, 2, 3)
- Latch
Warning! When loosening parts, be careful not to drop or lose any components.
Setup
Assembling the Hang Bar
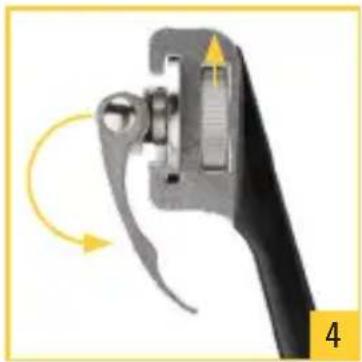
- Unscrew the frame hook's tension wheel and remove the locking handle.

- Slide the frame hook onto the hang bar with the tension knob and the hook facing the same direction. Make sure the spring pin is to the right of the knob.

- Reinstall the locking handle into the frame hook as shown.

- Rotate the hook's tension wheel so there's enough tension to press down the locking handle until secure.
- Install the second hook in the other hook slot. Important: Mount one hook per slot on each side. Do not position both hooks in the same slot.
If you need to adjust the hooks to fit your bike frame, loosen the hooks and slide them along the hang bar's slots. Make sure to tighten the hook's tension wheel and locking handle until secure.

Mounting the Multi-Hang Coupler
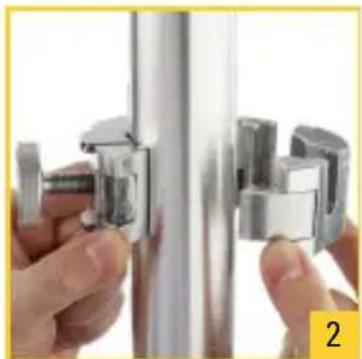
-
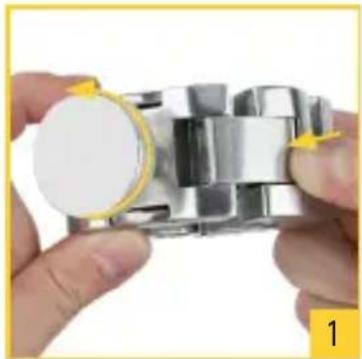
Press the coupler's latch to open the coupler, and loosen the coupler's tension knob to its maximum.
-
Wrap the coupler around the support tubing, and close the coupler until the latch locks and clicks. Make sure the hang bar slots are facing up.
-
Tighten the tension knob until secure.
Important: The coupler should not be able to slide up or down on the support tubing. Make sure the coupler's tension knob is tightened and secure.

Mounting the Hang Bar
- Loosen the hang bar's tension knob but do not loosen fully.

- Slide the tension bolt into one of the coupler's three slots as shown.

- Tighten the tension knob until secure.

Note: You can install two hang bars attached on opposite sides of the coupler.

Mounting a Bicycle
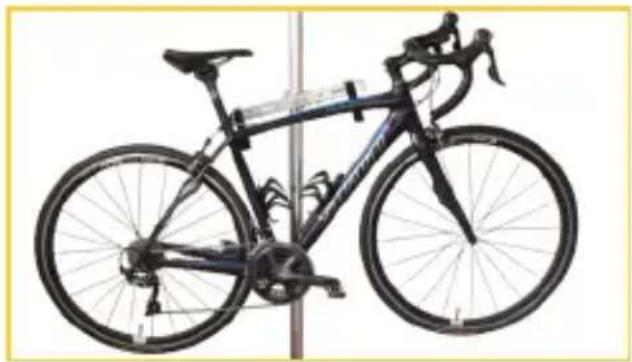
Place your bicycle into the frame hooks. Make sure the load is balanced.
Adjustments

Hang Bar ±30° Tilt Frame Hook Spacing

Specifications
Support tube diameter 40 to 45 mm
Max weight capacity 33 lb. (15 kg)
Frame hook width Max: 16.25 in. (41.3 cm)
Min: 6.6 in. (16.7 cm)
Compatible frame diameter Max: 2.1 in. (53.4 mm)
Min: 0.7 in. (17.8 mm)
Weight 2.8 lb. (1.3 kg)
One-Year Limited Warranty
This Impact product is warranted to the original purchaser to be free from defects in materials and workmanship under normal consumer use for a period of one (1) year from the original purchase date or thirty (30) days after replacement, whichever occurs later. The warranty provider's responsibility with respect to this limited warranty shall be limited solely to repair or replacement, at the provider's discretion, of any product that fails during normal use of this product in its intended manner and in its intended environment. Inoperability of the product or part(s) shall be determined by the warranty provider. If the product has been discontinued, the warranty provider reserves the right to replace it with a model of equivalent quality and function.
This warranty does not cover damage or defect caused by misuse, neglect, accident, alteration, abuse, improper installation or maintenance. EXCEPT AS PROVIDED HEREIN, THE WARRANTY PROVIDER MAKES NEITHER ANY EXPRESS WARRANTIES NOR ANY IMPLIED WARRANTIES, INCLUDING BUT NOT LIMITED TO ANY IMPLIED WARRANTY OF MERCHANTABILITY OR FITNESS FOR A PARTICULAR PURPOSE. This warranty provides you with specific legal rights, and you may also have additional rights that vary from state to state.
To obtain warranty coverage, contact the Impact Customer Service Department to obtain a return merchandise authorization (“RMA”) number, and return the defective product to Impact along with the RMA number and proof of purchase. Shipment of the defective product is at the purchaser’s own risk and expense.
For more information or to arrange service, visit www.impactstudiolighting.com or call Customer Service at 212-594-2353.
Product warranty provided by the Gradus Group.
www.gradusgroup.com
Impact is a registered trademark of the Gradus Group. © 2021 Gradus Group LLC. All Rights Reserved.

IMPACT®
A Gradus Group Brand
Brand : Impact
Model : BMS-1K
Category : Bike accessory