RVK-50 - Dash cam Parkmate - Free user manual and instructions
Find the device manual for free RVK-50 Parkmate in PDF.

User questions about RVK-50 Parkmate
0 question about this device. Answer the ones you know or ask your own.
Ask a new question about this device
Download the instructions for your Dash cam in PDF format for free! Find your manual RVK-50 - Parkmate and take your electronic device back in hand. On this page are published all the documents necessary for the use of your device. RVK-50 by Parkmate.
USER MANUAL RVK-50 Parkmate
natural_image
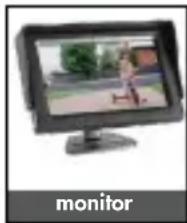
Digital display showing a child on a tricycle in front of a black monitor, with a small black camera nearby (no visible text or symbols)INSTALLATION / USER MANUAL


MODEL: RVK-50
www.parkmate.com.au
Thank you for purchasing Parkmate's RVK-50 Reversing System. We are certain that our product will give you trouble-free operation while providing you with a safety feature that enhances your driving experience. Our products, like most after-market safety enhanced devices, are designed to assist and aid the driver, not to replace the manual function of the person operating the vehicle.
Disclaimer: Parkmate's RVK-50 rear-view system is designed as a driver assistance device. Although this is a visual aid and will allow you to view what is behind the vehicle, it does not remove the responsibility of driving the vehicle from the driver. The legal responsibility and safe driving practise remains with the driver at all times. You have purchased this product with the understanding that its use is as an aid only. We highly recommend that you have this product professionally installed to ensure that it will provide the functions it is set out to perform.
RVK-50 Component List:
1 x Camera
1 x Monitor
1 x 6M Extension Cable
2 x Power Cable
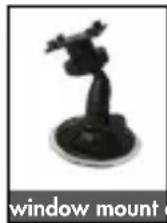
1 x Window Mount
1 x Dash Mount
natural_image
Computer monitor displaying a cartoon character on a grassy outdoor background (no text or symbols visible)


text_image
power cable extension cableImportant Notice:
- Please read this manual carefully before using the product.
- This unit is for vehicles with 12V DC only.
- Route wiring harness away from heat sources and electrical components.
- Wire connection points should be insulated
- Please install this unit in a professional manner
- Please perform tests after finishing the installation.
- Specifications subject to change without prior notice.
Specifications (Monitor):
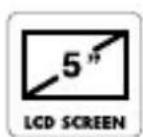
Display: 5.0" (16:9 ratio diagonal length)
Power: ≤3W
Power supply: 9 - 16V DC
Resolution: 480(W)*R.G.B.*272(H)
PAL/NTSC compatible
2 AV inputs (allows up to two cameras)
180° degree rotational swivel stand
Auto activation upon reverse gear engagement
Adjustable brightness
Specifications (Camera):
Resolution: 420 TV Lines
Effective pixels: PAL = 648 × 520
$$ \mathrm{NTSC} = 6 4 8 \times 4 8 8 $$
Power supply: 9 - 16V DC
Operating Temperature: -20°C - +70°C
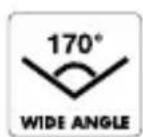
Horizontal Angle: 170^ degrees
Water-proof rating: IP67
Minimum Illumination: 0.5 Lux
Normal to Mirror image switching
Grid-line switching
Wiring Diagram:

flowchart
graph TD
    A["TV"] --> B["DC 12V"]
    B --> C["power"]
    C --> D["AV2"]
    C --> E["AV1"]
    D --> F["6M Cable"]
    E --> F
    G["Reversing Light"] --> H["power"]
    H --> I["Video"]
    I --> J["Green Wire = Gridline"]
    I --> K["White Wire = Minor Image"]
Front view option: RVK-50 functions as a rear view camera standard and also supports front view application. For front view application, you can cut the thin WHITE wire near the camera lead and restart power to see the image reversed.
Grid-line option: RVK-50 comes with parking grid-lines. To remove the grid-line application, you can cut the thin GREEN wire near the camera lead and restart power to show the removal of grid-lines on your screen.
Installation - Butterfly Mount
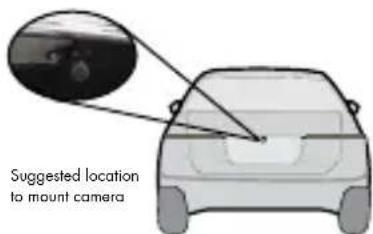
- Select a flat and centred location near the number plate lamp at the rear of the vehicle to mount camera.
text_image
Suggested location to mount camera
text_image
BumperIMPORTANT: When selecting this location it is highly recommended that the image transmitted by the camera show the rear bumper and area behind the vehicle.
natural_image
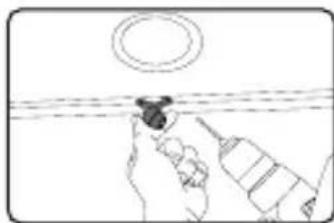
Simple line drawing of a hand using a tool to clean or inspect the surface, with no text or symbols present.- Attach tape to the bracket of the camera, and drill a small hole for the first screw.

natural_image
Line drawing of a hand holding a small object near a surface, with no visible text or symbols- Use a screw driver to fix the first screw, but don't tighten it yet.

natural_image
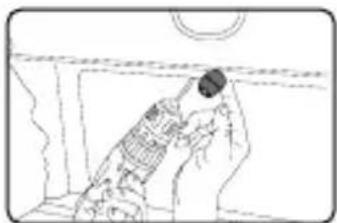
Line drawing of a hand holding a small object, no text or symbols present- Insert camera wire through newly drilled hole and mount securely in place.
natural_image
Line drawing of a person in a suit handling a device, no text or symbols present- Mark the position suitable for the second screw and drill a small hole for it.
natural_image
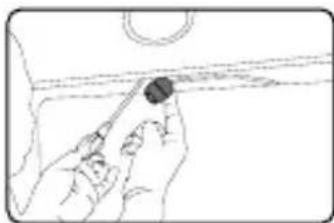
Line drawing of hands holding a tool near a curved surface (no text or symbols)- Fix the second screw and tighten both screws.
Installation Diagram:
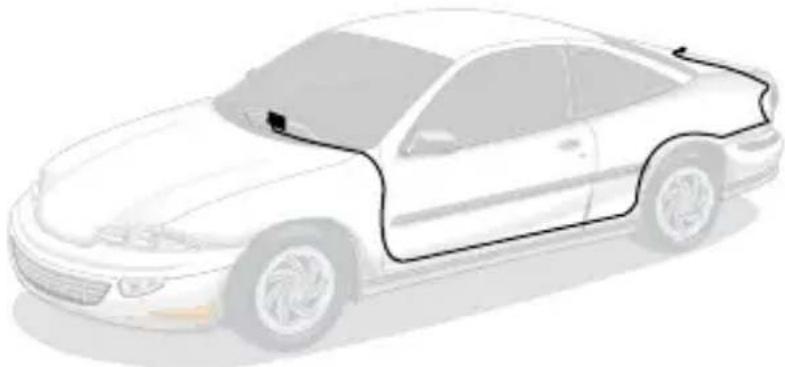
natural_image
Side view illustration of a sedan car with visible engine compartment and roof (no text or symbols)Testing
How to test:
- Apply the parking brakes.
- Turn Ignition on. (DO NOT TURN ON VEHICLE)
- Shift into reverse gear.
- Image should appear on the monitor.
Trouble Shooting:
| Problem Solution | |
| “No Signal” appears while reversing | 1. Check video input connections2. Check camera power connections |
| Video image is not sharp Check camera lens for debris | |
Maintenance:
Always keep camera clear from dirt and mud. Clean camera with a soft moist cloth.
To view the complete Parkmate range or for details on how to contact us, please visit our website at www.parkmate.com.au