MC 250 - Video projector Artograph - Free user manual and instructions
Find the device manual for free MC 250 Artograph in PDF.

| Brand | Artograph |
| Model | MC 250 |
| Product Type | Video Projector |
| Dimensions (W x D x H) | 8.3 x 6.1 x 2.8 inches |
| Weight | 2.2 lbs |
| Power Supply | AC 100-240V, 50/60 Hz |
| Lamp Type | LED |
| Lamp Life | Up to 20,000 hours |
| Resolution | SVGA (800 x 600) |
| Brightness | 1000 lumens |
| Contrast Ratio | 2000:1 |
| Inputs | VGA, Composite Video, HDMI |
| Outputs | Audio Out (3.5mm) |
| Focus | Manual |
| Keystone Correction | Manual (±15°) |
| Speaker | 1 x 2W |
| Maintenance | Clean air filter monthly |
| Safety | Do not stare into lens; place on stable surface |
| Spare Parts | Replacement lamp, air filter |
| Repair Information | Contact Artograph support for authorized service |
| Manual | Free download from notice-facile.com |
Frequently Asked Questions - MC 250 Artograph
User questions about MC 250 Artograph
0 question about this device. Answer the ones you know or ask your own.
Ask a new question about this device
Download the instructions for your Video projector in PDF format for free! Find your manual MC 250 - Artograph and take your electronic device back in hand. On this page are published all the documents necessary for the use of your device. MC 250 by Artograph.
USER MANUAL MC 250 Artograph
MC 250 PROFESSIONAL PROJECTOR
User's Guide
natural_image
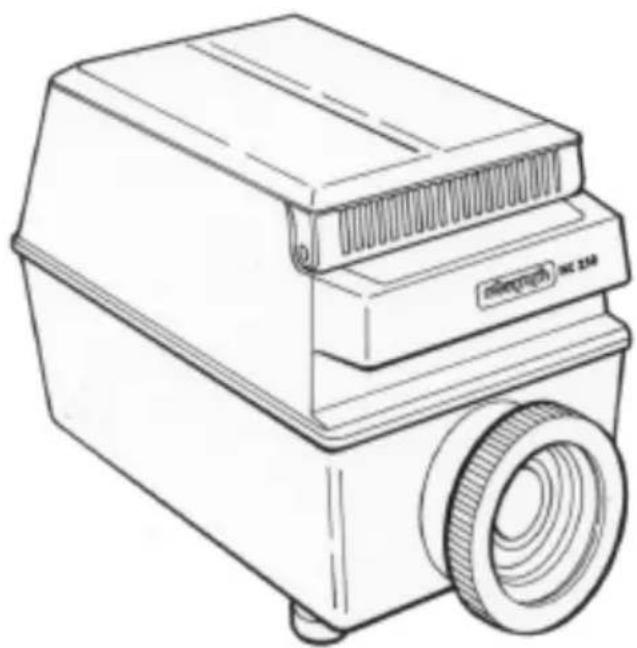
Line drawing of a portable projector with a circular lens and ventilation slots (no text or symbols)ARTOGRAPH®
2838 Vicksburg Lane North • Plymouth, MN 55447-1878 USA
Tel: 888.975.9555 • Email: info@artograph.com
Plug into your creativity at www.artograph.com
SAVE THESE INSTRUCTIONS
Thank You...
for purchasing an Artograph MC 250 projector. This projector has been designed with superb optics and projection characteristics, producing outstanding image quality and accuracy. The MC 250 will enlarge any image from photos to complex designs in full color and with infinite detail. Use it to view or trace photos and designs onto a wall, canvas or any vertical surface with outstanding results. As with any precision equipment, treat it with care and it will provide you with years of excellent performance. Should you need additional information or help with your projector, please contact your local dealer or Artograph, Inc.
UNPACKING
Upon removing the MC 250 from its packaging, check it over carefully for any hidden damage. IF DAMAGE IS FOUND, do not proceed until damage is reported to and inspected by the freight carrier or your place of purchase.
QUICK SETUP
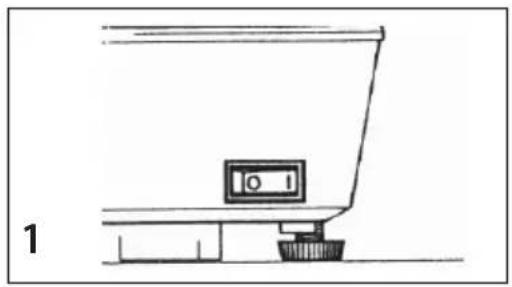
- Mount projector onto a fl at surface. Plug in power cord into a 110v receptacle and turn on switch. (Fig. 1)
- Lay copy face down onto glass copy area. Close cover. (Fig. 2)
- Adjust distance to projection area to achieve desired image size and rotate lens to focus. (Fig. 8)
DETAILED OPERATION
Please read this entire operation manual before operating the unit. Refer to the corresponding pictures to the instructions below.
Projection Room
For best results the projector should be used in a room where the lights can be turned completely off and no window light is present. The projector works similar to a fl ashlight, so the darker the room, the brighter and clearer the image will become. To achieve maximum enlargement of 15 times, a minimum distance of 15 feet is required. A 110v electrical receptacle should be near by.
Mounting Surface/Projection Area
To minimize distortion of the projected image, the MC 250 must be mounted upon a hard, fl at level surface so that the projector is pointed perpendicular to the projection area. The height of the surface will depend upon the image size and where the image needs to be projected. The MC 250 is equipped with adjustable front legs. These should only be used when viewing an image and not tracing, unless distortion is desired. When the front legs are extended and the projector is tilted up, the image will become distorted (keystoned).
natural_image
Simple line drawing of a kitchen counter with a monitor and base (no text or symbols)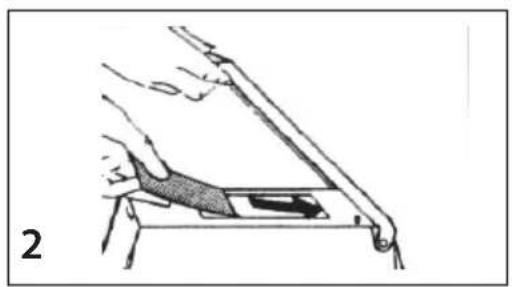
natural_image
Diagram of a hand holding a tool or device with a shaded area, no visible text or symbols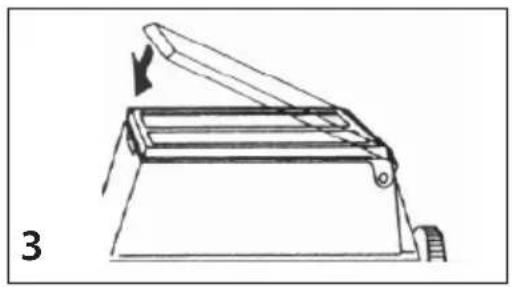
natural_image
Line drawing of a mechanical device with an arrow indicating motion, labeled '3' (no text or symbols on the diagram itself)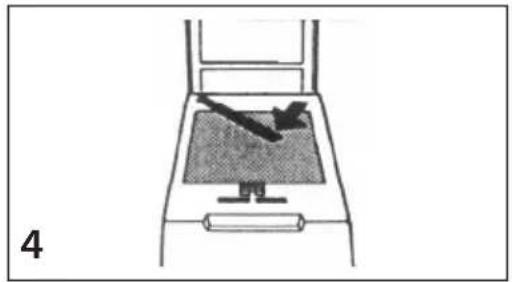
natural_image
Diagram of a device with a screen and handle, showing an arrow pointing to the screen area (no text or symbols present)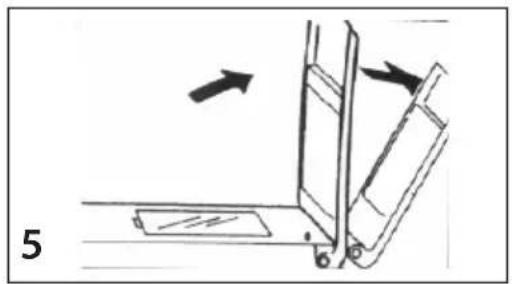
natural_image
Diagram of a mechanical device with arrows indicating motion, no text or symbols present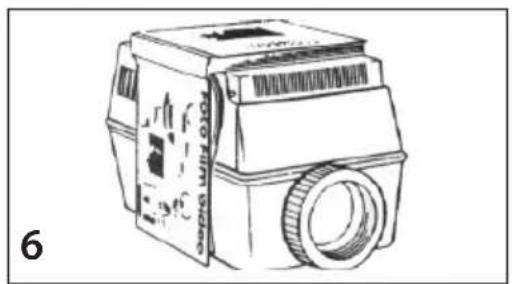
natural_image
Line drawing of a vintage camera with lens and control panel (no text or symbols)
natural_image
Diagram of a mechanical or optical setup with a beam splitter and diffuser beam, no visible text or symbolsLoading Copy (Figs. 2-6)
Raise the copy cover and place copy face down onto the glass surface, close the cover. To project oversize copy or books, the copy cover is removable. When removing the cover, however, it is necessary to ensure that the micro-switch is depressed to power on the lamp. The micro-switch is located on the top surface of the copy area.
Turn On Power (Fig. 1)
The power rocker switch is located on the lower backside of the unit. Once the power is on, the projection lamp will only turn on when the copy cover is closed or the micro-switch is depressed. A handy pilot lamp will glow when the power in on to provide convenient illumination in the darkened room.
Projection (Fig. 7)
The projected image size is dependent upon the distance between the projector and the projection surface. The MC 250 will enlarge the copy approximately from 3x up to 15x that of the original copy size. Refer to chart below for approximate distance:
| Enlargement: 3X | 5X | 10X | 15X | |
| Distance: | 3.7' | 5.5' | 10.1' | 14.7' |
For best results, in order to achieve a specific enlargement or size, project a known size original, such as a ruler or some markings on a piece of paper (e.g. 1/2" increments) and measure the resulting image size. Move the projector nearer or farther away to achieve desired size.
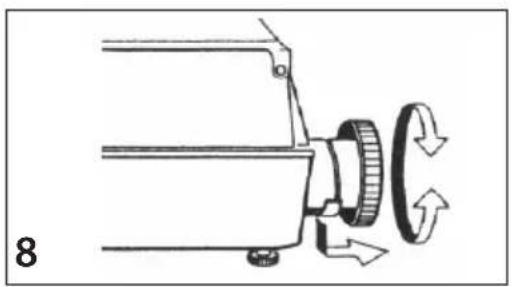
Focus (Fig. 8)
Rotate the lens to sharpen the image. When focusing extends the lens out of the projector, pull out the lens support that is positioned underneath the lens.
ILLUMINATION
The MC 250 is equipped with a special 300-watt Tungsten-Halogen lamp that is only available from Artograph or an Artograph dealer. In addition, the MC 250 is equipped with a fuse designed to protect the electrical system against bulb failure. When the lamp blows usually the fuse does too. Replacement lamp includes a fuse.
Lamp Specifications:
Artograph part #: 200-578
Average Life: 75 hours
Lumens: 7700
Volts: 120
Watts: 300
Halogen Lamp Replacement (Fig. 10-12)
Caution: Ensure that the projector is completely cooled and unplugged before attempting to replace the lamp.
Fig. 10. Move the lock (a) in direction of the arrow and remove the glass plate by lifting from the two recesses (b).
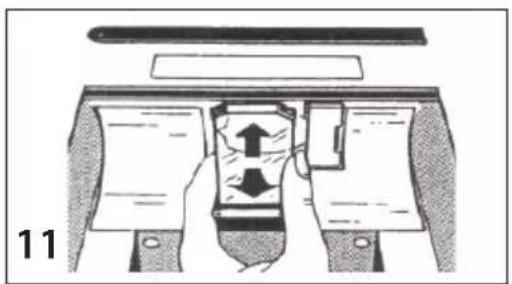
Fig. 11. Remove the heat protection filter by moving it slightly upwards and then drawing it downwards to the front to release it from the holder.
Fig. 12. Push the lamp slider to the left in the direction of the arrow. The lamp will be disconnected from its socket, remove from the unit.
natural_image
Mechanical assembly diagram showing a cam mechanism with rotating components and directional arrows (no text or symbols)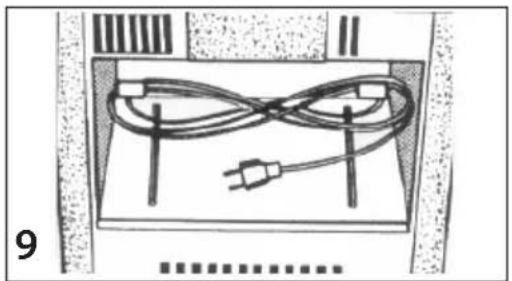
natural_image
Diagram of a cable rack with a power plug, no text or symbols present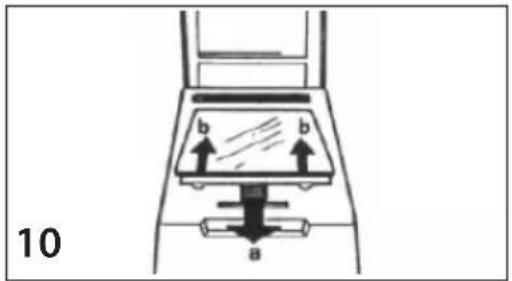
natural_image
Diagram of a mechanical device with hands holding parts, showing internal components and directional arrows (no text or symbols)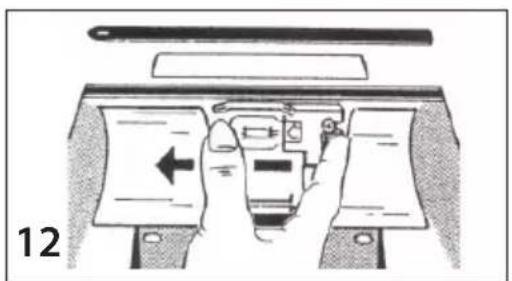
natural_image
Illustration of a hand pressing down on a device with a left-pointing arrow (no text or symbols)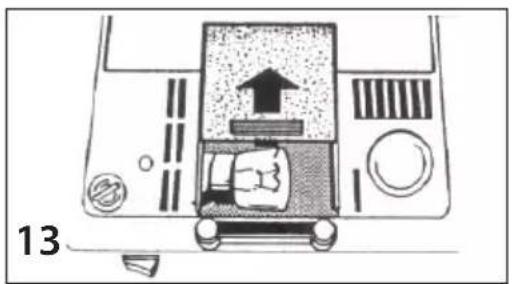
natural_image
Top-down diagram of a car's front view showing exhaust, wheels, and dashboard (no text or symbols)Insert a new Halogen lamp into the lamp slider. DO NOT TOUCH THE LAMP WITH YOUR BARE FINGERS! Oil from your fingers reduces the lamp life.
Move the lamp slider with the lamp to the right until it stops. The lamp is now inserted into the lamp socket. Replace the heat protection fi Iter and the top glass.
Pilot Lamp Replacement
(Fig. 13)
The pilot lamp is located in a compartment on the bottom side of the unit. Move the cover of the compartment in direction of the arrow. Now the lamp is visible and can be easily replaced.
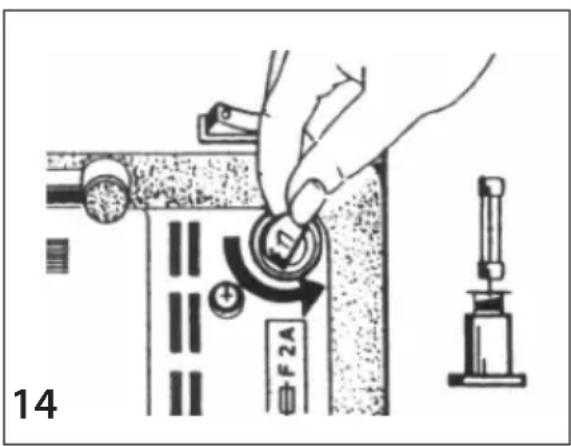
Changing the Fuse (Fig. 14)
The fuse socket is located on the bottom of the unit. It is unlocked by turning the screw top in a counter clockwise direction. Replace with F4A fuse.
Overheating Protection
The MC 250 is specially fitted with a thermal safety switch, which will turn off the lamp in the event of overheating (check to ensure that the ventilation slots have not been inadvertently covered). When the projector reaches a cooler operating temperature, the lamp is switched on automatically.
Projection Caution
Caution must be exercised whenever photos or heat sensitive materials are used in the projector. The MC 250 is designed to provide maximum illumination with a minimum of residual heat, however, with extended use; the top copy glass may attain temperatures sufficient to affect the quality of the heat sensitive materials. It is highly recommended that copies should be used for the projection of all valuable photos or art materials. Artograph will not be responsible for damage to any heat sensitive materials.
MAINTENANCE
Lens: Clean lens with any commercial lens cleaner and a soft cloth or lens tissue. NOTE: Apply cleaner to cloth. Never apply cleaner directly onto lens as it may seep into the lens.
Mirror: The MC 250 incorporates a special, front-surface mirror, which eliminates double imaging and enhances brightness. The silvered surface must be cleaned with care. Use a mild cleaning solution and a clean cloth or tissue. Do not scrub!
WARRANTY
ARTOGRAPH projectors are warranted to be free from defects in material and workmanship for ONE YEAR from the date of purchase by the consumer. Any part to the equipment found to be defective under normal installation and use during the warranty period will be repaired or replaced by ARTOGRAPH. The equipment should be returned, postage or freight prepaid, to ARTOGRAPH and must be accompanied by a proof of purchase. CONTACT OUR OFFICE, PRIOR TO RETURNING, FOR RETURN AUTHORIZATION. THIS WARRANTY DOES NOT APPLY TO LAMPS.
Equipment repaired or replaced under warranty will be returned postage or freight prepaid. The warranty for repaired or replacement parts shall be for the duration of the original warranty. This warranty does not apply to equipment which has been subject to abuse, accident, or alteration. The registration card should be filled out and returned within 10 days of purchase.
THIS WARRANTY IS IN LIEU OF ALL OTHER WARRANTIES, EXPRESSED OR IMPLIED, AND THE WARRANTIES OF MERCHANTABILITY AND FITNESS FOR A PARTICULAR PURPOSE AND HEREBY EXCLUDED BEYOND THE ONE-YEAR DURATION OF THE WARRANTY. Some states do not allow limitations on how long an implied warranty lasts, so the above limitation may not apply to you.
This warranty gives you specific rights and you may also have other rights which vary from state to state.
Artograph, Inc.
Plymouth, MN
If you need more information or help, please contact your local dealer, or contact Artograph at:
Toll-free: (888) 975-9555 Tel: (763) 553-1112
Fax: (763) 553-1262 Email: info@artograph.com
Plug into your creativity at www.artograph.com
Made in the USA