
JX-MP256FM - Mp3 player JWIN - Free user manual and instructions
Find the device manual for free JX-MP256FM JWIN in PDF.


| Product Type | Digital Audio Player with FM Stereo Radio |
| Model | JX-MP256FM |
| Memory | 256 MB internal flash |
| Battery | 1 x AAA alkaline (not included) |
| Playtime | Up to 10 hours (depending on usage) |
| Dimensions | Diameter 67mm (2.64in) x Height 22mm (0.86in) |
| Audio Output | 9mW x 2 @ 32 ohms (earphone output) |
| Signal-to-Noise Ratio | 56 dB |
| Supported Audio Formats | MP3, WMA, WMA DRM10, WAV |
| MP3 Bit Rate | 8 Kbps - 320 Kbps |
| WMA Bit Rate | 5 Kbps - 192 Kbps |
| FM Radio | Stereo, up to 20 presets, auto/manual tuning |
| Voice Recording | Built-in microphone, Fine/Long/VOR modes, WAV format |
| USB Interface | USB 2.0 (compatible with USB 1.1), acts as flash drive |
| Display | LCD with backlight, supports lyrics and ID3 tags |
| Equalizer | Natural, Rock, Pop, Classic, Jazz |
| Repeat Modes | Normal, Repeat One, Folder, Repeat Folder, Repeat All, Random, Intro |
| Power Off Timers | Off Time (up to 60s idle) and Sleep Time (up to 120 min) |
| Care Instructions | Avoid dust, moisture, high temperature, and strong magnetic fields |
| Safety Notes | Do not use earphones while driving; avoid high volume for long periods |
Frequently Asked Questions - JX-MP256FM JWIN
User questions about JX-MP256FM JWIN
0 question about this device. Answer the ones you know or ask your own.
Ask a new question about this device
Download the instructions for your Mp3 player in PDF format for free! Find your manual JX-MP256FM - JWIN and take your electronic device back in hand. On this page are published all the documents necessary for the use of your device. JX-MP256FM by JWIN.
USER MANUAL JX-MP256FM JWIN
User's Guide
JX-MP256FM
DIGITAL AUDIO PLAYER
WITH FM STEREO RADIO
FCC Warning
USER INFORMATION
Modifications not authorized by the ability to operate this device.
Note: This equipment has been tested and found to comply with the limits for a Class B digital device, pursuant to Part 15 of the FCC Rules. These limits are designed to provide reasonable protection against harmful interference in a residential installation. This equipment generates, uses, and can radiate radio frequency energy and, if not installed and used in accordance with the instructions, may cause harmful interference to radio communications. However, there is no guarantee that interference will occur in a particular installation. If this equipment is suspected in causing harmful interference to radio or television reception, it can be determined by turning the equipment off an on while observing the difference. If it is determined that the interference is caused by the unit, the user is encouraged to try to correct the interference by one or more of the following measures:
- If possible, reorient or relocate the receiving antenna on the affected unit.
- Increase the separation between the unit and the receiver.
- Connect the equipment into an electrical outlet different from that to which the receiver is connected.
- Consult the dealer or an experienced radio / TV technician for help.
Main functions of the player
• Supports music playback of MP3, WMA, WMA/DRM10 and WAV audio formats
Supports Digital Voice Recording (DVR)
• USB 2.0 general interface (compatible with USB 1.1) for file trans
- Offers a simple graphical interface for its operation, providing convenient and rapid navigation to various functions
- Serves as a mobile "hard disk" in its fun
- Performs file transfers with PCs operating in a Windows environment (Windows 98/98SE/Me/2000/XP
- Provides several repeat and replay functions
- Multi-EQ (Equalization) settings customize the quality of the music being listened to
- Battery power indication, with auto shutoff capability for convenience and low voltage indication
• Operation possible without a battery when USB-connected to a PC
- Convenient settings for auto off and sleep off conditions
- Backlighting available
• Support for MP3 ID tags and lyric synchronization function
- Allows for significant voice recording time, with 256 MBytes of available memory and two voice quality modes
Note: This unit may function incorrectly if subjected to radio-frequency interference. To resume normal operation, the source of the RFI must be removed, and it may be necessary to cycle the power off and back on, or to remove and reinstall the battery.
Note: The normal function of this product may be disturbed by external electrostatic discharge interference. If so, simply reset the product, if possible, or disconnect and reconnect it to its source of power to resume normal operation.
Notice
Safety and use
- Don't use and store the JX-MP256FM in dusty, wet, high temperature and/or ferromagnetic environments. Special attention should be paid when it is used near swimming pools, bathrooms, and kitchens.
- When exercising outdoors, especially running, this product should be firmly fixed on the body, so as not to cause a distraction.
- When connecting the unit to a computer, make sure the USB cable is connected properly and securely, per the instructions that follow.
- When the JX-MP256FM and the computer are communicating via the USB cable, the cable should not be twisted in order to prevent disconnection from either unit and therefore result in an interruption of the data transfer process.
- When you wish to disconnect the USB cable between the computer and the JX-MP256FM, be sure that any file transfer operation has been completed.
Notes on earphone usage
- Don't use the earphones while driving, order to avoid possible traffic accidents.
- Pay special attention to potentially dangerous places (e.g. highways, building sites) where using the earphones might be hazardous.
- Avoid using the earphones at high volume for long periods of time to avoid possible hearing loss.
Notes on battery usage
- To prevent possible leakage and corrosion, remove the battery from the JX-MP256FM if it is not to be used for a long time.
- If the battery should leak, remove the battery and clean the battery compartment as soon as possible and new batteries subsequently installed.
- High-powered alkaline batteries are strongly recommended. Less capable zinc carbon batteries will not provide the desired performance due to its shorter life span.
Contents
Specifications......2
Button and Function Locations
Installing the Battery ....4
Introduction......5
Operating Mode Summary......6
Setting Up Your System ......11
System Time.... 13
Backlight.... 14
Language 14
Power Off 15
Contrast.... 16
c y c l Q nline Device or operating 16
Memory Info 17
FW (Firmware Version)...... 17
DRM Time 17
Locking the System......19
Software Installation......19
Driver Installation......20
PC Connection....21
MP3 and WMA Audio....24
ID3 Tags 25
Ethics of Downloading......27
Digital Rights Management ...... 28
Music Player 30
Lyrics 33
Navigation.... 36
Folder Structure 41
More Music Player Options .....43
other motor vehicles, in FM Radio....45
Record Mode......49
Playback Mode ....51
USB Disk....53
Specifications
Memory: 256 MBytes
Battery: AAAAlkaline
S/N Ratio: 56 dB
Dimensions: 2.64in [67mm] (dia.) x 0.86in [22mm] (height)
Audio Output: 9mW x 2 @ 32Ω (Earphone Output)
File Types: MP3 / WMA / WAV (proprietary)
MP3 Bit Rate: from 8 Kbps to 320 Kbps
WMA Bit Rate: from 5 Kbps to 192 Kbps
Playtime: up to 10 hours
Components

Body

Driver disk
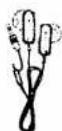
Cable earphones


USB cable

User's manual
Note: jWIN reserves the right to make improvements and/or changes to any component or accessory without notice to the public.
Button and function locations

Used to turn the unit ON and OFF, along with the functions of PLAY, PAUSING and STOPPING the playback of music and voice recordings. This button can also be used to exit from any menu and return to the most recent display.
Used to highlight the next selection on menus, and the next selection among music and voice files. Also used to "Fast Forward" audio during music and voice playback.
Used to highlight previous choice on menus, and the previous selection among music and voice files. Also used to "Fast Reverse" audio during music and voice playback.
M Used to select the unit's operating mode and to select the highlighted choice in any menu.
R Used to start voice recordings.
Volume ⊕ To increase playback volume and to increase voice playback speed.
Volume ⊖ To decrease playback volume and to decrease voice playback speed.
Installing the battery
IMPORTANT
Replace used batteries rapidly
(within
30 seconds) to
avoid losing the
system
current time
(see page 12)
If you fail to do
so, you will
have to reset
both the current
time and the
DRM time (see
page 17).
1
Turn the unit over and open the battery compartment cover by sliding it in the direction of the arrow. The cover will remain attached to the unit.

2
Place a single "AAA" alkaline battery
(for best results) in the battery
compartment, and make sure the
polarity is as indicated in the housing.
Be sure the HOLD function (see
page 18) is OFF by sliding the switch to
the left
Turning your unit ON: Press and hold the ⏻ button until the unit turns on.
Turning your unit OFF: Press and hold the 📋 button until the unit turns off.
Details follow.
-4- JX-MP256FM Digital Audio Player
Introduction
Congratulations on your purchase of the JX-MP256FM. The unit is designed with many great capabilities that should provide you with many conveniences, and countless hours of audio entertainment.
So, just what can your JX-MP256FM do?
It's all of these things: It's a(n)
- music player
• FM radio
• FM radio recorder and player
• voice recorder and player
• PC removable file storage device (i.e. USB flash drive) - pocket watch with time and date display,
along with many other special features that you display of song lyrics, a personalized setup menu, comparison record/playback, as well as VOR (Voice Operated Recording) recording (sometimes known as VOX).
JX-MP256 Digital Audio Player
Operating Mode Summary
Your JX-MP256FM has 6 operating modes (MUSIC PLAYER, FM RADIO,
VOICE RECORDER, VOICE REPLAY, SYSTEM, and USB), which are summarized
on the following pages. Later on you'll
| OPER. MODE FEATURES COMMENTS | ||
| MUSIC PLAYER | Your JX-MP256FM stores music for private listening with earphones or headphones | Music can be stored in your JX-MP256FM, if copied to it from your PCThe JX-MP256FM can play music that has been copied in the following digital formats: MP3, WMA, WMA DRM 10, and WAV |
| The Equalizer function allows you to change the music 's "pers better match its style (see pages 32, 44) | Music can be listened to in any one of the following seven different modes: t oNaturalRockPopClassicJazz | |
| The Repeat Function allows you to repeat a favorite song, a group of favorite songs, or a musical category (see page 44) | The following repeat sequences are available:Normal (No repeating)Repeat one (song)Repeat songs in a folderRepeat songs in several foldersRepeat all songsRandom playIntro play (plays first few seconds of each song) | |
JX-MP256FM Digital Audio Player
Operating Mode Summary (cond)
| FUNCTION | FEATURES | COMMENTS |
| MUSIC PLAYER ( control ) | Tempo changes (see page 44) | Music stored in your JX-MP256FM can be played back at different tempos (either faster or slower than normal) if desired, for lyric clarity, among other things. |
| Segment Repeat (see page 44) | If you have a favorite part of a song that you'd like to repeat, you can select it for replay at any time | |
| Support for ID3 tags or lyrics display (see page 33) | Normally, as your JX-MP256FM plays its stored music, it displays the current song title, the name, and, if available, the name of the albumAt your option, you can replace this information with the song's lyrics | |
| FM RADIO | Permits private listening to FM radio stations with earphones or headphones | The JX-MP256FM can store up to 20 FM stations and have them recalled, in sequence, at the touch of a button. Stations may be stored automatically, manually, or in any combination |
JX-MP256 Digital Audio Player
Operating Mode Summary Op(earnti'd) Mode Summary (
| FUNCTION FEATURES COMMENTS | FUNCTION | FEATURES | COMMENTS | ||
| FM RADIO (cont'd) | The location of FM stations can be stored in the JX-MP256FM and easily returned to with the press of a single button | Stations can be stored automatically, because the unit's Auto Search can scan the entire FM band and "memorize" the frequencies of up to the first 20 stations it finds with clear receptionFM stations can also be stored manually, if desired, as long as the total number stored doesn't exceed 20Any FM station(s) can easily be deleted from the stored group at any time | VOICEREPLAYSYSTEMatur | Listen to all your voice recordings through the Replay mode (see page 51)Allows you to determine how your JX-MP256FM will operate within the 10 "system" categories listed below, and on the next page. A brief summary has been provided for each category, but refer to the specific pages (11-17) for details.System TimeAllows setting and displaying the current date and timeBacklightAdjusts the brightness of the unit's LCD backlightLanguageSelects among English, Chinese, Japanese, or Korean as the language to be used in the device's menus and in the song lyrics it can displayPower Off TimersProvides a choice of OFF TIME and Sleep Time.OFF TIME is the number of seconds that will pass before the unit turns itself OFF when it's not being SLEEP TIME is used much like it would be in a clock radio. It refers to the number of minutes that the unit will operate before turning off, regardless of whether it's being used or not. | see page 13see page 14see page 14 |
| VOICE RECORDER | Using the unit's built-in microphone, you can record as many personal dictations or messages as necessary, up to the capacity of the unit's unused memoryYou can record at a high quality, but at the expense of memory; lower quality recordings save memoryYou can also record FM broadcasts that are currently playing | Each voice recording is given a unique name, and can be readily accessed and repeated at any timeWhen a recording is no longer needed, it can easily be deletedFour types of voice recordings are available:- Fine REC and Fine VOR for highest voice quality- Long REC and Long VOR for least use of memory | |||
JX-MP256FM Digital Audio Player
JX-MP256 Digital Audio Player
Operating Mode
Mode Summar
Setting Up Your System
FUNCTION FEATURES COMMENTS
| SYSTEM ( c o nContrats) | see page 16 | |
| All ows t he d i s p l ay adjusted | s contras | |
| Online DeviceWhen attached to the PC, determines how the unit is “seen” by the PC, either as a USB drive or a Windows Media Player device | see page 16 | |
| Memory InfoProvides both a numeric and visual indication of the amount of memory used for all files (i.e. music, voice, data) stored in the unit. | see page 17 | |
| FW VersionDisplays information identifying the unit’s firmware and issue date, which may be useful for upgrades and repairs | see page 17 | |
| DRM TimeRefers to Digital Rights Management, which is a system that can protect copyrighted music files as they circulate through the Internet. DRM time is used to determine the validity of the rental/subscribed music content. Once the DRM time is set (see page 17) it should not be necessary to set it again. | see page 17 | |
Let's Try It
- Be sure the HOLD switch is in the OFF position (see page 18)
- Turn on the player by pressing and holding the 🎨 button (see page 4) for several seconds. Note: This switch has multiple functions besides POWER ON/OFF. It's also used for PLAY, PAUSE, and STOP (see page 3).
- Next, press the M button (see page 3) for several seconds, or until the display changes to the Main Menu, seen below, at the right. Note that the unit's 6 operating modes are displayed with the indicators shown:
| MSC | Music Player | RPL | Voice Playback |
| FM | FM Radio | SYS | System Settings |
| REC | Voice Recorder | USB | Needed to restore and to interrupt USB communication between the player and your PC (see page 53) |

- You can practice "scrolling" through each operating mode icon by using either the or button and pressing each firmly and quickly, as you move from one selection to the other. These buttons permit you to choose selections within a category (e.g. MP3 songs, FM Radio, voice files), they allow you to skip forward or backward among audio files, or fast forward or fast reverse within voice recordings and MP3 and WMA songs and, of course, to select from among the menu entries above. Their use will be fully explained in subsequent pages.
Setting System Functions
A. System Time
1 For now, use either the 🔊 or ➤ button to highlight the SYS (System) icon. Once done, briefly press the Mode button Ⓜ to enter the list of SYS functions.
2 There are 11 menu selections in the SYS category. Again, use the 🎯 or 🎥 buttons to scroll through the selections. Highlight Sys.Time, and briefly press 📂
-12-
JX-MP256FM Digital Audio Player
A. System Time (conf)
3 The unit's display (at the left) will appears. For now, ignore the table, below.

Its top row represents the date, expressed in the YYYY-MM-DD format (here, the date shown is April 29, 2005). Its bottom row represents the time, expressed in 24-hour format (HH:MM:SS). In 12-hour format, this time is 8:32 PM, and 30 seconds.
To convert time expressed in 12-Hour format to the 24-Hour format, follow the rules at the right:
- Subtract 12 hours from any 12-hour time between 12:00 AM (midnight) and 12:59 AM, OR
-
Add 12 hours to any 12-hour time between 1:00 PM and 11:59 PM.
-
Add 12 hours to any 24-hour time between 00:00:00 (midnight) and 00:59:00, OR
- Subtract 12 hours from any 24-hour time between 13:00:00 and 23:59:59.
Some conversion examples are shown in the table, below.
| 12 Hour | 24 Hour |
| Midnight(12 AM) | 00:00:00 |
| 11:30:00 AM | 11:30:00 |
| 4:25:50 AM | 04:25:50 |
| 3:56:35 PM | 15:56:35 |
| 12 Hour | 24 Hour |
| Noon(12 PM) | 12:00:00 |
| 12:45:00 AM | 00:45:00 |
| 11:59:59 PM | 23:59:59 |
| 1:01:10 PM | 13:01:10 |
4 To change the unit's date and time, do the following:
a. With the unit's date and time displayed (see above), locate the Volume Control (see page 3) and press its ⊕ or the ⊖ buttons, until the 4-digit YEAR field begins blinking. Once done...
b. ...press either the 🎨 or ➤ buttons to change the year, as required. Once done ....
JX-MP256FM Digital Audio Player
A. System Time (cont'd)
...press the Volume Control's + button, to advance to the 2-digit MONTH field, which will now start the blink. Again, press either the 🔊 or ➤ button to select the month.
c. Repeat the process using the Volume Control's + button and the unit's 🔊 and 🔗 buttons to set the remaining fields:
• the DAY
• the HOUR (in 24-hour format)
• the MINUTE, and the
- SECOND
d. When done, press the M button to return to the menu selections in the SYS category.
Note: The unit will not automatically make changes for daylight saving time and leap years.
B. Backlight
The unit's blue backlight will illuminate the display at the touch of any key. The Backlight function determines how long the backlight will remain on after detecting a key press.
From the list of System functions, use either the 🔊 or ➤ button to highlight Backlight, and briefly press Ⓜ to enter this function.
Use the K or H keys to move the slider to the desired number of seconds (grouped in 3 second intervals) that the backlight will remain on, in the absence of another button press. Press M when done, or wait a moment and the unit will return to the System Setup menu.
C. Language
The language used in the unit's display is limited to English, Big 5 (Chinese), Japanese, and Korean.
Note: Big 5 is the character encoding standard most commonly used for traditional Chinese characters, and is employed by countries such as Taiwan, Hong Kong and Malaysia. The name Big 5 refers to the five companies that collaborated
-14-
JX-MP256FM Digital Audio Player
in its development. If you are not familiar with Chinese, do NOT, out of carelessness or curiosity, select Big 5, as the display content will appear in Chinese, and you may have problems returning to the language display of your choice.
Highlight your selection and press the Ⓜ button to confirm it.
D. Power Off
There are two Power Off schemes. One is called OFF TIME; the other is called SLEEP TIME. If you wish to set only the Sleep Time, proceed to page 16.
What is OFF Time?
When the unit is stopped and therefore inactive in any playback or record mode, it can be made to automatically shut itself off after a specified interval, up to a maximum of 60 seconds. By setting the OFF Timer, you prevent the unit from being inadvertently left on if it is forgotten about—the obvious result being the reduction of its battery life. Any unit turned off by the OFF Timer can easily be powered on again in the usual manner by pressing and holding the button for several seconds.
Setting the OFF TIME
- Highlight Power off in the System Settings menu, and press the Mutton to proceed.
- In the resulting display, be sure Off Time is selected; otherwise press the ➤ button to do so. Once done, press the Ⓜ button again to display the Off Time scale.
- Using the 📄 or 🔒 buttons, choose the number of seconds, up to 60, that you want the unit to be operational after it's been stopped or idle. Short settings help to conserve the battery; longer settings provide for greater convenience by keeping the unit from turning off too quickly.
Note: If you prefer that the unit never shut itself off when stopped or idle, select "0" on the Off Time scale. Doing so causes the unit to remain on until it is manually shut off (in the usual manner, by pressing the button for several seconds). Bear in mind that by selecting "0", you defeat the Off Time function, and if you then forget to turn the unit off manually, it will reduce battery life if you forget to turn the unit off when not in use. - Press the Ⓜ button to return to the System Settings menu.
JX-MP256FM Digital Audio Player
-15-
D. Power Off (cont'd)
What is SLEEP Time?
The unit's Sleep Time can be compared to radios and TVs. The Sleep Timer will, when its set time (up to 120 minutes) is reached, turn the unit off without regard to the state it's in—so any music, FM listening, recording, or other activity will end abruptly when the unit shuts off. The SLEEP Timer provides far longer time intervals than does the OFF Timer, but unlike the OFF Timer (which requires the unit to be idle to be turned off), the SLEEP Timer will be effective under all conditions.
Setting the SLEEP TIME
-
Be sure Power off is highlighted in the System Settings menu, and press the button to continue.
-
In the resulting display, be sure Sleep Time is selected by pressing the ➤ button to do so. Press the Ⓜ button again to display the Sleep Time scale.
-
By using the 🔊 or ➕ buttons, choose the number of minutes (up to 120) that you want the unit to operate before it unconditionally turns itself off.
Note: If you want the convenience of never having the unit shut off by itself, select "0" on the Sleep Time scale. Doing so defeats the sleep time function, and unless the OFF Timer has been set, a disabled SLEEP Timer will likely affect battery life if you forget to manually turn the unit off.
E. Contrast
Your JX-MP256FM allows you to set the display's contrast. From the System Setup menu, highlight Contrast, and press the M button. When the slider appears, use the K or ▶ button to choose the most suitable display contrast.
F. Online Device
When highlighted and selected, the OnlineDev . menu selection offers two choices as to how your JX-MP256FM can be used to exchange digital files with your PC. The most common choice will be USB Disk, in which your unit, when connected to your PC (see page 20), acts as a USB "flash drive", and will appear as another disk drive in Windows' "My Computer", having a drive letter (e.g. E:) of its own.
JX-MP256FM Digital Audio Player
As a "USB Disk", the JX-MP256FM is commonly used to receive MP3 and ordinary WMA files that are stored on your PC for playback by the unit. It can also be used to transfer any voice files (see page 49) that you create, to your PC, for storage on its hard disk. Sleep function found in many cycles
The other selection, known as MediaDev. (Media Device), is required when you wish to download WMA files that are subject to DRM (Digital Rights Management) restrictions (see pages 28-29). Such files, if you have them, will only play on your JX-MP256FM if they're transferred from Windows's Media Player, Version 10, which also requires that your operating system is Windows XP (as of this writing). A further discussion of WMA files with DRM restrictions can be found on page 28.
G. Memory Info
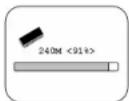
After highlighting Memory info, press the M button. After several seconds, the display will show a numeric and graphical representation of the amount of memory in use.
H. FW (Firmware) Version
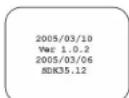
All devices like your JX-MP256FM contain a small computer program governing its operation, and because the program is "hard-wired" within the device, it's known as firmware. After highlighting FW Version, press the Ⓜ button.
The information displayed (typical of that shown at the right), is helpful in identifying the unit's firmware version(s) and its creation date—information which may be useful for upgrades and repairs.
I. DRM Time
Set the DRM (Digital Rights Management) time as you did the System Time (see page 14). Once done, it is not necessary to set the DRM time again, unless a dead battery causes the unit's clock to stop. If so, replace the battery, set the System Time and then the DRM time to match the System Time.
J. Exit
Highlighting Exit and pressing 📂 returns you to the Main Menu (see page 12). You can also reach the Main Menu by pressing the ⏻ button from within any of the above System setup selections.
JX-MP256FM Digital Audio Player
Locking the Unit
The JX-MP256FM has a HOLD function which, when active, prevents any "button-based" function from taking place. As long as the HOLD function is in effect,
the unit's current mode of operation canno
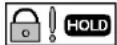
The HOLD function is activated by sliding the HOLD switch (see page 3) to the left. Once done, the HOLD function icon appears briefly.
When active, the HOLD function may be used to prevent:
- an unintended button press from turning the unit ON (say, while it was OFF in your pocket)
- an accidental interruption of any music being played, or a voice recording from being completed
If a button is pressed while the HOLD func be displayed.
- Release the HOLD function by sliding the HOLD switch to the right. Note: If the unit ever fails to turn ON or OFF when pressing the ⚪ button, check that the HOLD switch hasn't been in position.
Software Installation (Windows 98/98SE)
Your JX-MP256FM comes with a single CD-ROM containing small software programs, called "drivers", which make it possible for you once the two units are connected.
Note: If your PC's operating system is Windows XP, XP/SP2, Windows 2000, or Windows Me, it is NOT necessary to install any drivers from the CD-ROM, as these operating systems are already equipped with the necessary software. Use the CD-ROM ONLY for installations in Windows 98 and 98/SE.
Note: Do NOT connect your JX-MP256FM to your Windows 98/98SE PC until after the drivers are installed (see page 20 for connection instructions).
Installing Windows 98 and 98SE Drivers
- With your PC on, and Windows running, insert the CD-ROM driver disc into your PC's CD-ROM drive. If the installation program runs automatically, follow the on-screen instructions:
tion is in place the "Hold" function icon will - If the automatic installation sequence doesn't begin by itself, click on the Windows' Start button (usually at the lower left), click once on Run..., and enter the word Setup
in the Open: field. Then click on OK. er tently moved to the HOLD
- Follow the on-screen instructions until the driver is successfully installed. Once done, you will be asked to restart your PC.
- After the PC has rebooted, you can connect the JX-MP256FM, as described on page 20.
Completing the Driver Installation (Windows 98/98SE Only)

Follow these instructions only after installing the Windows 98/98SE drivers, as explained on page 19. Once done, and after you have rebooted your system:
Turn ON the JX-MP256FM:
- If not already ON, turn on the JX-MP256FM by pressing and holding the ▶ button until the unit begins to operate.
Set it for Operation as a USB Drive:
- If the Main Menu (see page 12) does not appear, press and hold the M button until the Main Menu is displayed. Once done, select the SYS icon by pressing either the K or N button until the SYS icon is highlighted. Then press M to enter the System Menu.
- Use the 📄 to scroll to the OnlineDev. menu selection and press 📄.
- There are two choices as to how your JX-MP256FM can be used to exchange digital files with your PC. Highlight USB Disk, and press 📄 to return to the System Setup menu. Now, whenever your unit is connected to your PC, it acts as a USB "flash drive", and will appear as another disk drive in Windows' "My Computer", having a drive letter (e.g. E:) of its own. Press 📄 to return to the Main Menu.
- As another drive in your system, Windows Explorer (not Internet Explorer) can be used to readily copy, delete, move, or exchange folders and files between your PC and the JX-MP256FM. If you are not comfortable using Windows Explorer, consult your Windows documentation, or a friend with the proper experience.
Connecting the JX-MP256FM to your PC (All Applicable Windows Versions)
Turn on the unit
- If not already on, turn ON the JX-MP256FM by pressing and holding the ▶ button. Choosing the type of online device for the unit
- If the Main Menu (see page 12) does not appear, press and hold the M button until the Main Menu is displayed. Once done, select the SYS icon by pressing either the K or ▶ button until the SYS icon is highlighted. Then press M.
- Use the ➤ to scroll to the OnlineDev. menu selection and press Ⓜ
4.There are two choices as to how your JX-MP256FM can be used to exchange digital files with your PC. The most common choice will be USB Disk, in which your unit, when connected to your PC, acts as a USB "flash drive", and will appear as another disk drive in Windows 'My Computer', having a drive letter (e.g. E:) of its own. In this case, Windows Explorer can be used to readily copy, delete, move, or exchange folders and files between your PC and the JX-MP256FM. If you are not comfortable using Windows Explorer, consult your Windows documentation, or a friend with the proper experience.
The other selection, known as MediaDev. (Media Device), is required when you wish to download WMA files that are subject to DRM (Digital Rights Management) restrictions (see pages 28-29). Such files, if you have them, will only play on your JX-MP256FM if they're transferred from Window's Media Player, Version 10, which at the time of this writing, also requires that your operating system is Windows XP (any version).
- Make your connections as shown on page 20. Such connections can be made and removed safely without first having to turn off your PC, or your JX-MP256FM.
Once connected, all present activity on the JX-MP256FM stops, and its LCD displays a connection icon. At this time, all of the unit's other functions are disabled (continued on page 22).
Connecting the JX-MP 2 5 6 F M to your PC (cont'd)
| 6. Double-click your PC* icon and check that a new drive icon ( called " Removable along with a new drive letter designation ( e.g. | 6. My Computer your PC's My Computer icon and check that a new drive icon is Dp rseks' ent li s apr d es iest li, d Media Device", rat * Better.) . |
| 7. Double-click on the Windows Explorer (not Internet Explorer) icon. In Windows XP/2000/Me, the Windows Explorer icon can be found in the Accessories group [click on Start, (All) Programs, Accessories, Windows Explorer). In Windows 98/98SE, the Windows Explorer icon can be found in the Program menu (click on Start, Programs, Windows Explorer).8. You can transfer files between the JX MP256FM and your computer in the same manner as if they were drives on the same PC.Note: If your songs are grouped in folders, you can transfer the folder structure directly, without having to isolate the song titles. | 7. Open Windows Media Player 10. Your JX-MP256FM will appear as an MTP Media Device, and not as a USB drive. Note: Knowledge of Windows Media Player 10, beyond the scope of this manual, is required to transfer files from the Media Player to your portable device. If necessary, consult your Windows documentation or any friends or associates who may be able to provide help.8. Transfer any files to your JX-MP256FM. |
Note 1: Do NOT remove the USB cable during any file transfer before the transfer is complete, otherwise the process will be interrupted and may lock up the unit, at
which point you'll have to reset it by then restoring it.
Note 2: The files stored in your JX-MP256FM are not dependent on the condition or the presence of a battery, and such files will be retained until they are deleted (see page 43).
-22-
JX-MP256FM Digital Audio Player
JX-MP256FM Digital Audio Player
MP3 and WMA Audio
Perhaps the most popular attribute of your JX-MP256FM is its small size and its ability to store and play a number of musical selections. Unlike the Voice Recorder, the music stored within the unit is not recorded with the microphone, but is transferred (downloaded) from electronic music files. Typically, most music files contain lots of content and, as a result, can be rather large—but because of today's technology, it's files into less than 1/10 their original size, without damaging them or affecting their "listen-ability". This small size not only makes them easy to store, but equally easy to distribute and obtain over the Internet.
File Formats
MP3s
The two most popular file types for compressed digital audio are called MP3 and WMA. MP3 (short for Motion Picture Experts Group – Audio Layer 3) is the file format chiefly responsible for the popularity of digital music on the Internet, and for the advent of the many popular audio players like your JX-MP256FM. Even though the size of an MP3 file is only about 10% the size of the file its content is derived from, its sound quality compares very favorably with the original, and MP3 files are recognized by virtually all media players.
WMAs
The other popular compressed audio file is called WMA (Windows Media Audio). According to Microsoft, the developer of the WMA format, WMA music is supposed to provide better sound in a smaller digital package than the equivalent MP3 files. While WMAs are not as popular as MP3s, certain WMA files have the ability to protect the artist because they allow musicians and their producers specify how their music is used by applying user rights to the electronic licenses that determine just how and where these WMA files may be distributed, played, and copied. This concept, known as Digital Rights Management (DRM), should be understood if you plan to download WMA music files that have restrictions on them. See page 28 for a discussion of DRM.
Sources of MP3s and WMAs
So where do you get your supply of digital music for your JX-MP256FM? One source is the music found on regular CDs, whose tracks, as previously stated, are substantially reduced in size once they are converted to the MP3 or WMA file formats.
This is done through the use of software applications that may already be resident in your computer. Such software includes a process called sipping in which the original
digital audio on a CD is transferred to your PC she desired format. Once done, it can easily be downloaded to your digital music player (see page 21), where it can be played.
Besides your own CDs, the Internet, of course, is clearly the chief source of digital music, where MP3s and WMAs can easily be found and made available for immediate downloading. Their relatively small file size, coupled with today's widespread use of high speed Internet connections, make acquiring compressed audio one of the most popular Internet activities. The Internet is filled with sites that provide free, legal music, along with many which allow you to acquire songs and complete albums for a nominal fee, and even those which use subscription services for that purpose. The scope of this manual doesn't permit a detailed through the use of Internet search engines, magazine articles and books on the subject, along with the help of friends and associates, you can soon be well on your way to obtaining lots of music for your JX-MP256FM.
MP3/WMA ID Tags
Many MP3 tracks available from the Internet com an ID3) that contains information about the track—most importantly:
• the Computer Filename (e.g. I Need You.mp3)
• the Track Title (e.g. I Need You)
• the Artist (e.g. America)
• the Album Name (e.g. America's Greatest Hits
Many ID tags contain additional information, which may include the year the song was released. its length (mm:ss), technical data about its Bit Rate and Sampling (see page 30) and sometimes even its lyrics. Because of the size of your player's LCD display, only the most important information will be presented—thus, the Title and the
MP 3 and WMA Audio ( conThe'Ethics of Downloading Music
Artist. If desired, the rest of the information (called properties) is best viewed from the PC on which the MP3 or WMA file resides.
Since MP3s and WMAs may not be equipped with ID3 information, the display will be missing certain data. At worst, the track will be identified only with its filename, and any other field will be blank.
Lyrics
Your JX-MP256FM can also display the lyrics to songs as they're playing, as a kind of miniature karaoke machine. Songs that display lyrics must be accompanied by a lyric text file, to be further discussed on page 33.
Organizing MP3 and WMA Music on Your PC
People who store MP3s and WMAs on their PCs usually place their songs into folders so that their music may be organized in a preferred manner, either according to a musical category (e.g. Rock 'n Roll, Oldies, R&B, Country, etc.), the songs of a single artist, or a particular album, by year, or by playlists (groups of favorite songs that seem to work well together).
There are many software programs available, which permit easy organization of your music files. Even without the benefit of such software, both Windows Explorer (not Internet Explorer) and Windows Media Player offer a detailed view of the relationship between the folders that hold your music, and the music files you wish to place within them.
When you transfer musical tracks to the JX-MP256FM, you can keep the same folder and file structure intact, and enjoy the same convenience and organization provided by your PC.
As the owner of this product, it's possible that you already have a collection of MP3s and/or WMAs in your PC that are ready to be downloaded. If so, you can skip to page 37. If you're not yet experienced in working with MP3 or WMA formats, or in transferring files between your PC and a USB device, information in this manual is intended to help you.
JX-MP256FM Digital Audio Player
Once it became apparent that the Internet was an ideal environment for obtaining and exchanging digital data, it wasn't surprising that a number of ethical questions would arise, and that abuses would take place. According to existing copyright law, purchased media products like music CDs or movies on DVD can only be copied for backup purposes, but whose content cannot be exchanged over the Internet, or in any other manner, without the permission and/or due compensation paid to its author(s) or creator(s). These points are summarized below:
Digital Ethics
In the United States, you CAN generally make copies of any music you buy
- if your copy is a backup of the original and intended for your own private use
- if you wish to change its format (e.g. to MP3 or WMA), and then download it to a portable music player (e.g. your JX-MP256FM)
• to change the order of the songs on the original version, and then copy the result to recordable media (e.g. a CD-R/RW disc or a cassette tape) for your own private use
• to make a compilation of your favorite songs for your own private use
You can also lend the original recording to a friend, who can listen to it but who CANNOT make copies for his/her personal use, or for distribution or sale to anyone else.
These restrictions have been implemented to protect the “artistic property” of the performers, composers, lyricists, and producers who provide us with musical entertainment. However, there is a happy medium. You no longer have to spend up to \$20 for a CD in a record store, unless you want to. The world of the Internet has brought forth a new type of market in which legal copies of individual songs or complete albums can be obtained far less expensively if they're downloaded to your PC. Once they're paid for, they can be downloaded, listened to, and copied (burned) to CD(s), as long as the above “digital ethics”, are observed. Microsoft, in their development of the WMA audio file technology, has employed further safeguards that govern the transfer of downloaded files to other computers and to portable devices, known as Digital Rights Management (DRM).
JX-MP256FM Digital Audio Player
Digital Rights Management (DRM)
Microsoft's DRM is a system that protects tAnumber of NYlineMgsh Steres and listcblow for your benefits. While there are ated via the Internet or other digital media by enablozenes of subrishes, the list acaintains only chose whose files are available as either while denying any illegal distribution. Generally, a DRM system protects such copyrighted MP3s and/or WMAs, as these are the formats that are compatible with your material through encryption so it can only be accessed by authorized users, or with a JX-MP256FM. Any other format you download, unless it's converted to MP3 or WMA "digital water mark" (or similar method) so (toalways a good idea doctetoss-of-quality issues), will not play on buy unit distributed.
(DRM) has been employed in newer WMA files to assure that those who developed and produced the work are not only properly compensated through the purchase, but that attempts to make illegal copies or otherwise improperly distribute the files are prevented. In effect, your concerns are not only whether the file will play on your computer, but where you can use the file after you get it. For WMA files governed by DRM restrictions, how you listen to your files can vary from artist to artist and even between online music stores providing such files. Consider the following issues:
- Windows WMA DRM supports time-limited playback of applicable digital media files. Licenses to play such files, obtained when the files are purchased, can specify the start date, the end date, and any other limits to the license's duration. If a user with an expired license tries to access a digital media file, the user will be directed back to the originating web site for another license.
- Windows WMA DRM also supports limiting the number of times an applicable file can be played under an existing license.
- It also supports limiting the number of copyrighted file transfers to portable devices and adds a right in the license to either enable or disable copying from your portable device to another computer or portable media. The license is bound to a unique ID on the portable device or media.
Before buying any WMA DRM files, find out:
- How many times can you copy your downloaded file (from one folder to another) on your PC's hard drive?
- On how many different PCs or portable devices (like your JX-MP256FM) can you copy the file?
- On how many CDs (or DVDs) can you copy the file and successfully listen to it on a standard CD player?
-28-JX-MP256FM Digital Audio Player
Online Music Stores
A member of Online MGsc Steres are listed below for your benefits. While there are a ted via dozens of such sites, that list acaintains only chose whose files are available as either while MP3s and/or WMAs, as these are the formats that are compatible with your JX-MP256FM. Any other format you download, unless it's converted to MP3 or WMA (to the always a good idea about to loss of quality issues), will not play on buy until i str bited.
Online Music Stores Compared
| Format | Store | Website |
| MP3 | eMusic | www.eMusic.com |
| MP3 | Music Rebellion | www.musicrebellion.com |
| WMA | Music.MSN.com | www.music.msn.com |
| WMA | Napster (see note) | www.napster.com |
| WMA | Wal-Mart | www.wal-mart.com |
| WMA | Musicmatch | www.musicmatch.com |
| WMA | MusicNow | www.musicnow.com |
| WMA | BuyMusic | www.buymusic.com |
Note: Napster is no longer the host of the peer-to-peer service that caused its legal problems and its ultimate demise. Today's Na company, and its service is entirely legal, as are all the services listed in the table.
Whatever sites you choose, especially the WMA is the policies governing downloads, the technical requirements for your hardware and software, and most importantly, be sure of the compatibility of your JX-MP256FM with the site's requirements. Because your unit is C compliant, it will likely pose no compatibility problems with any downloads originating from virtually all online music stores.
JX-MP256FM Digital Audio Player

Music Player
Playing music is probably the most fun you'll fortunately, it's also one of the easiest oper
Turn ON the JX-MP256FM:
- If not already ON, turn on the JX-MP256FM by pressing and holding the ▶ button, until the unit begins to operate.
Display the Main Menu
- Once ON, the unit will resume its operation by returning to its most recently used function. If the Main Menu (below) is NOT displayed, press and hold the M button until it appears.

Use the 🔊 or ➤ button to highlight the Music Player icon (shown at the left) and then press the Ⓜ button.
Music Player Display

At the left, the Music Player display shows the title of the first song being played (Chasing Rainbows), or to be played), along with some useful playback information. Note that the title will scroll to the left
At the display's upper left, the Music Player icon appears. This icon will change as different functions of the unit are employed.

Indicates information about the file being played. The bottom designation shows the File Type (either MP3 or WMA). The number above the File Type indicates the file's Bit Rate, which is the number of kbps (kilobits per second) being decoder. Said another way, the Bit Rate is the number of bits that is consumed by one second of audio. An MP3 file encoded at 128 kbps is generally considered to be close to CD quality, and should be quite suitable for all MP3 music played by your JX-MP256FM. The following table helps to put things in perspective when downloading or creating your own MP3s.
Music Player (cond)
| Format | Bit Rate | Original:MP3 Compression Ratio | File size per audio minute | Comments |
| WAV | does not apply | none (1:1) | 10 MBytes | CD-quality; equivalent to music recorded on a commercial CD |
| MP3 | 160 kbps | 9:1 | 1.5 MBytes | very low compression; excellent sound quality |
| 128 kbps | 11:1 | 1.0 MByte | the most popular MP3 Bit Rate; offers quality sound; hard to distinguish from the WAV file format | |
| 96 kbps | 15:1 | 700 KBytes | "near CD-quality" | |
| 64 kbps | 22:1 | 400 KBytes | similar to FM broadcast quality |

Indicates that the selection being played is in a folder 004 Within the selected folder, the top number indicates the designation of the file being played, while the bottom number indicates the total number of files in the folder. Here, the fourth of eight files in the designated folder is being played.

The battery indicator. As the battery becomes depleted, the dark area in the center will "shrink". A battery with very little power remaining is shown at the left.
STOPPED ■ These 3 symbols reflect what the JX-MP256FM is doing in the Music Player Mode, and one of them will appear at the lower left, depending on the conditions. When STOPPED, the indicator will display. If a selection is playing, then the indicator will be visible; finally, if the selection is paused, the indicator will be prominent. Note: The button is used to enter into each of the these three modes. The use of this button is explained on page 3.
Music Player (cont'd)
13 Indicates the current audio volume, which is expressed in a range from 0 to 30. See below for additional information on setting the volume.
NOR Indicates the Equalization setting, which can tailor the sound to your preferences. Your unit has five different settings (Natural, Rock, Pop, Classic, and Jazz), each of which gives the music unique tonal qualities—but it's usually best to wish to select the same setting for all the music you play, or you may want to change the equalization for specific selections. It's all up to you (see page 44).
00:07 The top line shows how long the current selection has been playing (in the mm:ss format; here, 7 seconds). The bottom line shows the selection's total length (here, 4 min., 34 sec.).
Playing Music
The Music Player is ready to play music anytime it is accessed from the Main Menu, and it will always return to the previously played selection, although when playing, the song will start at the beginning. Use the 🎧 button in the following ways to perform the stated actions:
| To: | Action | Display Indication |
| Start playback | Press ▶ and hold for 1 second | The display's ▪ changes to ▶. |
| Pause playback | Press ▶ once | The display's ▶ changes to ▶. |
| Resume playback from PAUSE | Press ▶ once | The display's ▶ changes to ▶. |
| Stop playback | Press ▶ and hold for 1 second | The display's ▶ changes to ▶. |
Adjusting the Volume
Increase the volume by pressing the ⊕ or⊖ buttons on the volume control, as required.
-32-
JX-MP256FM Digital Audio Player
Each press will move the displayable indicator one increment in the desired direction. Note: Listen at moderate volume to avoid damage to your hearing. Do not use the product while driving or cycling. Pay attention to your surroundings while listening.
The Music Player Display
A single line of type containing information about the current song will continually scroll across the display when the song is playing. Please note the following:
- If there is no ID3 Information (see page 25) accompanying the selection, the unit will display the song's title as it repeatedly scrolls while the song is playing. - If there is ID3 Information accompanying the selection, it will be displayed, along with the song's title, throughout the duration of the playback.
- If there are lyrics accompanying the song (discussed below), the unit will provide two lines for the display of any text, including any accompanying ID3 information, as well as the song's lyrics themselves.
Note: Once a musical selection that is accompanied by song lyrics begins playing, the JX-MP256FM will display the lyrics as soon as they start. However, if the lyrics don't begin immediately, the "non-lyric" time will be used to display, in two lines, the selection's ID3 information, if it exists. If not available, the ID3 information will be replaced by the song's filename, which will appear until the lyrics begin. Once the lyrics begin, however, no ID3 information will be displayed for the duration of the song.
Lyrics
Your JX-MP256FM supports lyric files (all such files must have the extension .LRC) while playing songs. As you'll see shortly, .LRC files are simple text files with a "time stamp" that preceded each line. Some prepared lyrics (.LRC files) may be obtained from the Internet through search engines (use the topic "LRC Lyric Files" (without the quotes) for a selection of sites and links to a variety of information. However, in the long run, doing it yourself may be more satisfying and more accurate.
How do I Create an .LRC file?
It's not hard to do. First, you'll need a copy of the song's lyrics you wish to display. Sometimes these are supplied with the CDs you purchase, but if not, lyrics can usually be obtained on the Internet through proper searches. These are NOT .LRC files,
JX-MP256FM Digital Audio Player
-33-
but simply ordinary song lyrics made available through many sources, most of which
provide them for free. Worst case, if you you may have to write them down as you listen to the song.
What follows are the partial lyrics to a This Happen to Me?", and they have been explained below.
How Could This Happen to Me?
How Could This Happen To Me.mp3
Tower of Power
Emilio Castillo
Stephen Kupka
Huey Lewis
[00:22.71] I was voted "Most Likely to Succeed",
[00:27.96]With the future looking so very, very bright, indeed.
[00:33.34] Somehow I succeeded to fail miserably....
[00:38.01] How could this happen? How could this happen, to me?
[00:44.06] Back in High School, I was the best that I could be.
[00:49.39] A "Straight A" student--all the girls were after me.
[00:54.74] I was even the captain of the football team.
[00:59.38]How could this happen? How could this happen, to me?
[01:05.34]Partly the reason, I trusted romance.
[01:10.78]Confused by the passion, blinded by love.
[01:16.20] If I only knew what I know today,
[01:21.52] Might be much different; it might be much the same.
[01:27.16] Can't believe it--they still think it's all my fault.
[01:32.54]What do they know? I was there, I did my part.
[01:37.93]What's more important, I did it straight from my heart.
[01:42.57] How could this happen? How could this happen, to me?
[01:48.23] Lady Luck took a powder and so did my so-called friends,
[01:54.11]The same ones who said, "Stick it cut till the bitter end."
[01:59.87]But who needs enemies with friends like that?
[02:04.04]How could this happen? How could this happen, to me?
The above represents a file written in the .LRC format that contains about half the lyrics in this song. Notice that the time stamp proceeding each line has the following format:
[mm:ss.hh] Each "time stamp" represents the time that has elapsed since the song
c a started, when the specific lyriclinebegins. For example the first-lyric linebeginsjusts our ce, short of 23 seconds after the song started. The last lyric line shown starts just after
2 minutes and 4 seconds since the song began. The format uses two digits to 991 Tower, of Power, Song, and Calu ed "How" Gould
e p that a colon(s) separates minutes and seconds, but a period ( ) separated seconds from hundredths of a second. You must also use square brackets, as shown.
Although it can be tedious, it's best to work with a digital stopwatch having split time
capability, if you're interested in displaying the lyrics accurately. If so, do the following:
-
Have the written or typed lyrics in front of you, arranged in a line-by-line format.
-
Set the stopwatch to zero.
-
Simultaneously start the music and the stopwatch.
-
As soon as the first lyric line begins, press the split button to stop the watch and quickly record the time in the [mm:ss.hh] format. Once done, press the split button again to resume the timekeeping.
-
As soon as the second lyric line begins, press the split button to stop the watch and quickly record the time, as before. Once done, press the split button again to resume the timekeeping.
-
Continue this pattern until the song's last line has been reached.
-
Using your PC, enter the information in the format shown on page 34 into a text editor like Windows Notepad. For best use of the JX-MP256FM's display as it displays your lyrics, do not enter a space after the right bracket. If it's easier, you can replace the hundredths digits in any line with 00. If you use a word processing program instead of Windows Notepad (like Wordpad, Word, or WordPerfect), you must save your work as an ASCII or TEXT file (.txt), with exactly the same name as the MP3 or WMA file on which it's based. Thus, the song lyrics on page 34 would be named How Could This Happen To Me.txt
-
You must then rename the text file so it has the .LRC extension. Renaming a file is a basic Windows function and your Windows documentation or its Help system will easily help you, if you don't know how. When it's done, your lyrics file will have the same name as the MP3 or WMA file on which it's based, followed by the .LRC extension, as in
How Could This Happen To Me.lrc
Navigation Within an Audio File
Your can jump around to various locations within the music and voice files in your JX-MP256FM by understanding a few simple
Listening to Musical Selections
| Function | Button | Method |
| Fast-forwarding through a playing audio file | Press and hold down the button. The unit will be silent as the audio content advances forward.To gauge the degree to which the file is being advanced, use the timer information, discussed on page 32. Releasing the button restores the audio at the new point in the file.If the button is still depressed when the end of the file is reached, the unit will not advance to the next track until the button is released. | |
| Fast-reversing through a playing audio file | Press and hold down the button. The unit will be silent as the audio contTo gauge the degree to which the file is being reversed, use the timer information, discussed on page 32. Releasing the button restores the audio at the new point in the file.If the button is still depressed when the beginning of the file is reached, the unit will not skip to the previous track.The current track will be replayed from the beginning when the button is released. | |
| Skipping ahead to the next audio file | Momentarily pressing the button causes the unit to skip to the beginning of the next track after a brief pause. | |
| Skipping backward to the previous audio file | Momentarily pressing the button causes the unit to skip to the beginning of the previous track after a brief pause. |
Folder Structure
Besides its function as a music player, your JX-MP256FM supports the storage of files c o n and the creation of folders in which such files may be placed. In addition to music (MP3 and WMA files) and voice (WAV files), general documents (e.g. reports, spreadsheets, graphics, presentations, mailing lists, etc.) can be stored in the unit and transported from place to place. As such, the JX-MP256FM also provides a convenient way to share digital photos with friends and family. Note: The unit's storage capacity of 256 MBytes is the limiting factor as to how many files can be kept. Before doing so, always check its current memory availability (see page 17). If the remaining memory capacity is not sufficient, it will be necessary to remove some files, either by deleting them or moving them back to your PC.

JX-MP256FM Digital Audio Player
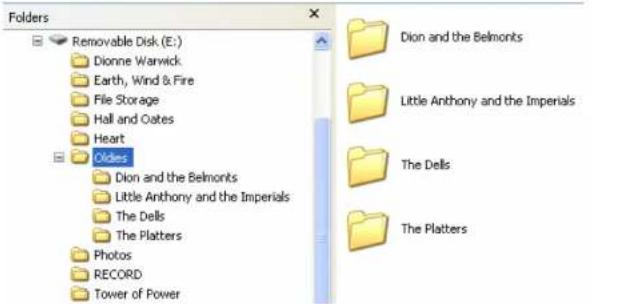
The folder structure on page 37 belongs to the JX-MP256FM, and was taken from a PC to which the unit was connected through up the folders in a portable device like the JX-MP256FM. Notice that the unit (while connected) has been assigned as a "Remo drive designation of (E):. In the unit's root directory, 9 folders have been created, and 5 of which are devoted to specific artists and bands (Dionne Warwick, Earth, Wind & Fire, Hall and Oates, Heart, and Tower of Power). Another folder, called Oldies, itself contains folders (as indicated by the + to its left). There are also three more folders created for non-musical purposes, and they are File Storage, Photos, and RECORD, for microphone recordings (see page 37). Notice that along with the 9 folders in the root directory, there are 3 "loose" music files (2MP3s and 1 avoid placing loose files in the root directory, but these were left there intentionally for purposes of illustration. From the attached PC, new folders can be created in the portable device, into which any "loose". When the Oldies folder is opened (by clicking on the + to its left), it is shown to contain 4 folders, as seen in the figure below. These four folders help to better divide the Oldies
JX-MP256FM Digital Audio Player
folder, and because they are at a level below the Oldies folder, they are called
It subfo/DeB, cable. It's typical of how one might set
There is no hard and fast rule as to how folders should be organized, and, in fact, some people do not use folders at all. Whatever your preference, bear in mind that when your
files are orderly, they're much easier to find,
In our example, all folders, except for Oldies (which has the four subfolders), contain files. For purposes of illustration, the following four figures show the files contained in the Dionne Warwick, Earth, Wind & Fire, The Platters, and Tower of Power folders.

JX-MP256FM Digital Audio Player

-40-JX-MP256FM Digital Audio Player

Navigating The Folder/File Structure
Once your acquire lots of music for your JX-MP256FM, you'll want to be able to easily
select any song at will. In the following two to the folder/file structure to readily make such s need to refer to the previous six figures, beginning on page 37.
Finding the Root Directory
On page 37, you'll notice that the root director contains 3 songs. To play these songs, your devi 1. Turn the unit ON, if necessary.
-
If it's not in the Music Player mode, press the M button for several seconds until the Main Menu appears, and select the MSC (Music) mode.
-
The last song played will appear on the display, and the unit will be in its STOPped position. Let's assume that it's Tower of Power root directory (shown on page 37), press the M button momentarily to go to the MUSIC ADMIN menu. IMPORTANT! Remember, the unit must be in the STOP mode before you can navigate through its folders.
JX-MP256FM Digital Audio Player
Navigating The Folder / Fi
- From the Music Admin menu, use either the 🔊 or ➕ button to highlight the Main Folder option, among the 9 options on the menu (only 3 are shown at any one time).
Note: The Main Folder refers to the folder that the player is currently "logged into". In our example, this would be "Tower of Power".
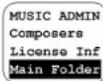
- Momentarily press M. The display will produce two folders: the Main Folder, followed by the folder below it.
Note 1: Because "Tower of Power" is the last folder on the list (see pages 37-41), there are no folders below it, so it appears alone.
Note 2: There are two types of folders that will not be displayed in the Music Player mode. They are:
• empty folders
- folders not containing music or voice (recording) files
- Use the ⬆ button to reverse through the list of folders until you reach the ROOT folder at the top. Note, again, that only two folders are shown, even though many more exist.
Note: At times, the ROOT folder may appear as a backslash [ ]

- Once the Root Folder is highlighted, press and hold the M button until the first "loose" song (if it exists) appears on the display. Use the procedures described on page 42 to play any songs that exists in the Root.
Entering a Folder From the Root Directory
-
From a song in the root directory that is STOPped, briefly press the M button to enter the MUSIC ADMIN menu.
-
Scroll to the Main Folder and briefly press the M button again The display will show that which appears above, on the right.
-
Use the button to scroll down to the directory of your choice. We will choose the Oldies folder, shown here at the right.


4. Again, press the M button to enter the list of subfolders below. The Oldies folder. Price gone scroll down to The Platters. Use The Pails
THE 3DLES folder. Once done, scroll down to the 14.5x25 folder and press and hold the M button, until the first of the two Platters songs appears in the display.
- Use the 📄 or 🔍 buttons to choose among the options available. Note: Always press the Ⓜ button momentarily to choose among the folders and subfolders. Press and hold the Ⓜ button when you enter a folder to listen to the music contained in it.
More Music Player Options
The Music Player has two option menus—one that is available when the player is stopped, and the other that is available when the unit is playing music. The tables below and on the next page lists all applicable functions in order. Press M to enter either menu.
| PLAYER STOPPED OR PAUSED | |
| MUSIC ADMIN MENU | COMMENTS |
| Playlist | The information contained in these categories is derived from the ID3 tags that may accompany the songs downloaded to the unit from your PC |
| Artists | |
| Album | |
| Genre | |
| Composers | |
| License Inf | |
| Main Folder | When selected, displays the current folder |
| Delete file | Deletes the current selected file (when stopped or paused). You must make and confirm your choice using the ➕ and ➖ buttons. |
| Delete all | Deletes all the files in the current folder |
| Exit | Exits the MUSIC ADMIN and returns to the current song (now stopped) |
Note that all of these functions can also be carried out from the PC attached to the unit. If the unit is storing folders and files containing non-music files, you can also view, copy, move, exchange, or delete them through the connection to your PC
Scroll among choices with the 🔊 or ➤ key. Make all choices with the Ⓜ button.
MUSIC PLAYING
| MUSIC PLAY MENU COMMENTS | |
| Repeat | Choose Repeat, and select among the following methods of repeating music: Normal/Repeat One/Folder/Repeat Folder/Repeat All/ Random/Intro (Intro plays only the first few seconds of each selection) |
| Equalizer | Choose Equalizer, and select among the following tonal characteristics: Natural, Rock, Pop, Classic Jazz |
| Tempo rate | Slows down or speeds up the musical selection in 8 steps in either direction. Choose "0" |
| Replay | Sometimes a song contains a catchy phrase that you may wish to hear over and over, whose lyrics might be hard to follow and you wish them repeated. The JX-MP256FM's Replay feature can be used exactly for those purposes. Follow these steps to use the Replay feature, which is also linked to Replay Times and Replay Gap, below. In fact, it's best to set the Replay Times and the Replay Gap before setting the Replay selection. Set those two options (on page 4 done.1. Be sure the music is playing. Press M and select Replay.2. Begin the song that has the passage you wish to repeat.3. Notice that a small "A" on the top of the display is blinking. When your hear the beginning of the passage, press A small "B" will now start to blink.4. When the end of the passage occurs, press the button. The "B" will go ou repeating immediately, and play back in the manner specified in Replay Times and Replay Gap on the next page. |
| MUSIC PLAYING (conf) | |
| MUSIC PLAY MENU COMMENTS | |
| Replay times | Press and enter Replay Times. Use either the or buttons to choose the number, between 1 and 10, which specifies the amount of times you want your selection replayed. Once that number is reached, the selection will no longer be repeated, unless you specify it again. The value set in Replay Times will remain set until changed. Proceed to Replay Gap, below. |
| Replay time may be there | Specify the number of seconds of silence, between 1 and 10, that will separate each replay. The value set in Replay Gap will remain set until changed. Return to Replay on page 44. |
| Exit | |

FM Radio
Your JX-MP256FM is equipped with an FM stereo radio that is capable of storing up to
5) , 20 FM radio-stations for retrieval at any time. Each station can be saved as a "preset station", either manually, or through the radio's Auto Search feature. In addition, the FM broadcast content can be recorded (see page 47).
Turn ON the JX-MP256FM:
- If not already ON, turn on the JX-MP256FM by pressing and holding the 📋 button.
Display the Main Menu
- Once ON, the unit will resume its operation by returning to the most recently used function. If the Main Menu (below) is NOT displayed, press and hold the M button until it appears.

Use the 📄 or ➕ button to highlight the FM Radio icon (shown at the left) and then press the Ⓜ button.
FM Radio (cont'd)
The FM Radio's display shows a linear scale that corresponds to an FM radio dial, with frequencies ranging from 87.9 MHz to 108 MHz. It shows the current station to which the radio is tuned.
whether or not the current station is being received in stereo, and the volume control setting, expressed from 1-30 (see page 32).
The radio's antenna is the wire used in the headphones attached to the unit. For best results in obtaining good reception, the wire should be left fully extended and not bunched or curled up and placed in a pocket.
Setting Stations
Up to 20 FM stations can be preset for easy recall, and they can be set both manually and automatically. Setting stations automatically allows the radio to scan the entire FM range and discern only the strongest stations, which it stores for later recall. Subsequently, you can manually add other stations missed by the scan, as long as the total number of stations does not exceed 20.
Using the Radio's Functions
With the unit in the FM Radio mode, press the M button to display the RADIO SET menu. The following table describes each of the FM Radio functions in logical order, rather than the order they appear in the menu.
| FM RADIO | |
| RADIO SET MENU | COMMENTS |
| Auto Search | Be sure to fully extend the headphone cable to get the best reception during the search. Highlight Auto Search, and press the 📄 button to begin the scan, which will take about one minute to complete. Once done, the JX-MP256FM will have stored the frequencies of up to the 20 best received stations. To play the stored stations, press and hold either the 🔊or 🔊 buttons for about one second. The unit will scan the dial in the direction chosen, and stop at the next stored station. To change the station, repeat the process until the desired station is reached. |
| FM RADIO (contd) | |
| RADIO SET MENU | COMMENTS |
| Auto Search (cont'd) | Stations can also be searched for manually by momentarily pressing either the button in the direction desired. Each such press changes the frequency by 0.05 MHz (50KHz). Use this technique to tune in stations that were not detected during the Auto Search. Stations selected in this manner can be saved (see below), as if they were part of the Auto Search, as long as the maximum of 20 stations haven't been exceeded. |
| Save | Once a station has been manually selected (as described above), it can be saved as if it was part of the Auto Search process. With the station playing, highlight Save in the menu, and press the button. |
| Record | Anything heard in the FM Radio mode can be recorded and stored in your JX-MP256FM. As with all recordings, check the memory allocation first (see page 17) and delete any unnecessary files if more capacity is required. To record a portion of an FM broadcast, do the following:1. Tune into the broadcast, and obtain the best reception possible by orienting the headphone/earphone wire as previously described.2. Press the button and select Record.3. Press the button again to enter the FM REC SET menu, which provides three selections:Main Folder can be ignored, because it confirms that you wish to place your FM recording in the VOICE folder, where all FM radio recordings must be stored.Select REC type to enter the REC type menu, where you can choose among four recording bit rates (see page 31). Keep in mind that while the higher bit rates provide for a better quality recording, they use |
| FM RADIO | |
| RADIO SET MENU COMMENTS | |
| Record (cont more)Memory. Lower bit rates use less memory, but offer lower quality. Highlight the desired bit rate, and press theMbutton to enter the recording function.To record:1. Press theRon momentarily. The STOP symbol [■] in the lower left of the display will become a [●] recording symbol.2. Your recording can be paused, if necessary, by momentarily pressing theRrecord button. Pausing the recording will produce the Pause [■] symbol in the lower left corner of the display.3. An elapsed time counter (hh:mm:ss) is located in the lower right of the display, and will blink whenever the recording is paused.To stop the recording:Press and hold theRbutton until the SAVING... appears in the display. Your recording will be saved in the RECORD folder and assigned a number and file name.Consult the Replay function (see page 51) for information. | |
| Delete | Allows the removal of any stored FM radio station. To use the Delete function:1. Tune to the station you wish to delete (you may have to exit the RADIO SET menu to return to the FM radio function).2. If necessary, press theMbutton to return to the RADIO SET menu, and select Delete. The selected station will be removed from the system's memory. |
| Delete all | Allows the removal of ALL stored FM radio stations. If used accidentally, you will have to run the Auto Search function to restore the unintentionally deleted stations. |
JX-MP256FM Digital Audio Player

Voice Record Mode
Your JX-MP256FM is equipped with a built-in microphone (see page 3) and can record personal dictations up to the capacity permitted by its unused available memory. In typical use, voice recordings may span anywhere from a few seconds to several minutes, and may deal with anything from personal reminders, ideas, "to do" lists, or even the contents of a dictated letter. When used as a voice recorder, the unit is intended as a personal device and not designed to record conversations or classroom lectures. Once a recording is complete, the unit assigns it a numeric designation (e.g. REC001.WAV), which is stored as an audio (.WAV) "file" the \ROOT\RECORD\VOICE folder, which is automatically created when you record your first .WAV file.
Turn ON the JX-MP256FM:
- If not already ON, turn on the JX-MP256FM by pressing and holding the button, until the unit begins to operate.
Display the Main Menu
- Once ON, the unit will resume its operation by returning to the most recently used function. If the Main Menu (below) is NOT displayed, press and hold the M button until it appears. Use the 🎯 or 🎯 button to highlight the RECord icon (shown at the left) and then press the Mton.

Use the 🔊 or ➕ button to highlight the RECord icon (shown at the left) and then press the Ⓜton.
- The RECORD function opens with the display on the right. Note the location of the file name, the date, the type of file (WAV), the bit rate (64K), and the record timer (00:00:00). Note, too the STOP [■] symbol in the lower left.

- Before doing any recording, press the M button to enter the Record Set menu. The functions of this menu are covered in the table on the next page.
JX-MP256FM Digital Audio Player
| RECORDER | |
| RECORD SET MENU COMMENTS | |
| Main Folder | The Main Folder entry can be ignored, because it only confirms that you wish to place your voice recordings in the \RECORD\VOICE folder, where all voice recordings must be stored. |
| REC type | Select REC type to enter the REC type menu, where you can choose among four recording qualities:Fine Record: High quality recording, larger file sizeLong Record: Lower quality recording, smaller file size (the resulting file has the.ACT extension)Fine VOR: High quality Voice Operated Recording, larger file size; (VOR) saves memory by recording only when a vocal input exists (similar to VOX)Long VOR: High quality Voice Operated Recording, smaller file size; as above for VOR (the resulting file has the .ACT extension)Highlight the desired recording mode, and press the M button to return to the recording function. |
To record your voice:
1. Press the R button momentarily. The STOP symbol [■] in the lower left of the display will become a [●] recording symbol.
2. Your recording can be paused, if necessary, by momentarily pressing the R record button. Pausing the recording will produce the Pause [1] symbol in the lower left of the display.
3. An elapsed time counter (hh:mm:ss) is located in the display's lower right, and will blink whenever the recording is paused.
Playback of voice recording is covered in the RPL (Voice Recording Playback) section beginning on the next page.

Voice Recording Playback (RPL)
All your recorded voice files are available for playback through the Playback Mode.
Turn ON the JX-MP256FM:
- If not already ON, turn on the JX-MP256FM by pressing and holding the ⏻ button, until the unit begins to operate.
Display the Main Menu
- Once ON, the unit will resume its operation by returning to its most recently used function. If the Main Menu (at the right) is NOT displayed, press and hold the M button until the menu appears.
- Use the 🔊 or ➤ button to highlight the Playback (RPL) icon, and then press and hold the Ⓜ button.
- The screen that is subsequently displayed permits listening to all voice and FM radio recordings from one easy vantage point. Use the buttons, as indicated in the following table, to navigate through the recorded files.
Listening to Vocal and FM Recordings
| Function | Button | Method |
| START Playback | Press and hold down the button to begin playback of the displayed recorded file. The PLAY symbolwill replace the STOP symboland appears in the lower left of the display. | |
| PAUSE Playback | Press the button momentarily to PAUSE the playback. The PAUSE symbolreplaces the PLAY symbol | |
| STOP Playback | Pressing this button for one second when the unit is in the PLAY or PAUSE mode will cause the unit to stop and display the STOP symbol. |
Listening to Vocal and FM Recordings (cond)
| Function Button Method | ||
| FAST FORWARDING through the playing file. | Pressing and holding this button causes the unit to accelerate forward through displayed recording. At this time, the sound will not be audible. Use the counter at the bottom of the display to keep track of the file's progress. Releasing the button returns the mode to PLAY, along with the audio.. | |
| FAST REVERSING through the playing file. | Pressing and holding this button causes the unit to accelerate backward through the displayed recording. At this time, the sound will not be audible. Use the counter at the bottom of the display to keep track of the file's reverse progress. Releasing the button returns the mode to PLAY, along with the audio. | |
| SKIPPING FORWARD to the next file(s) | Each momentary press of this button causes the unit to leave the current track and begin playing the next track. | |
| SKIPPING BACKWARD to the previous file(s) | Each momentary press of this button causes the unit to leave the current track and begin playing the previous track. | |

USB Disk
Whenever the JX-MP256FM is connected to your PC via the supplied USB cable, it automatically goes into the USB mode, regardless of what mode was previously in use. Thus, if your JX-MP256FM was in the FM Radio mode, it will be changed to the USB mode once the cable connection is made, canceling the unit's operation in any previously used mode.
To leave the USB function and re-enter another mode of operation, the USB cable can be unplugged, but it is not necessary. With the cable in place, you can enter the Main Menu by pressing and holding the M button until the Main Menu appears. At that point, the USB connection is lost (even though the cable is in place), and you can then choose among any of the six operating modes, including USB, by simply scrolling to the desired selection (with the or buttons), and pressing the M button.
To restore the USB connection, it's simply a matter of selecting the USB icon from the Main Menu (by pressing and holding the M button) and then selecting USB (with either the ◀ or ▶ buttons), and then entering the function (by briefly pressing M).
Once done, all the unit's resources USB.
Note: The unit can be operated with a weak or even a dead battery, whenever the USB cable is connected, since the PC is capable of supplying the unit's power in that mode. In fact, even when another Main Menu function is chosen (e.g. Music Player, FM Radio, or Voice Recorder), the unit can be powered by the USB cable, even though the USB function is not in effect.

- FCC Warning
- USER INFORMATION
- Main functions of the player
- Notice
- Safety and use
- Notes on earphone usage
- Notes on battery usage
- Contents
- Specifications
- Installing the battery
- IMPORTANT
- 1
- 2
- Introduction
- Operating Mode Summary
- Operating Mode Summary Op(earnti'd) Mode Summary (
- Operating Mode
- Mode Summar
- Setting Up Your System
- Let's Try It
- Setting System Functions
- System Time
- System Time (conf)
- System Time (cont'd)
- Backlight
- Language
- Power Off
- What is OFF Time?
- Setting the OFF TIME
- Power Off (cont'd)
- Contrast
- Online Device
- Memory Info
- FW (Firmware) Version
- DRM Time
- Exit
- Locking the Unit
- Software Installation (Windows 98/98SE)
- Installing Windows 98 and 98SE Drivers
- Completing the Driver Installation (Windows 98/98SE Only)
- Turn ON the JX-MP256FM:
- Set it for Operation as a USB Drive:
- Connecting the JX-MP256FM to your PC (All Applicable Windows Versions)
- Turn on the unit
- Connecting the JX-MP 2 5 6 F M to your PC (cont'd)
- MP3 and WMA Audio
- File Formats
- MP3s
- WMAs
- Sources of MP3s and WMAs
- MP3/WMA ID Tags
- MP 3 and WMA Audio ( conThe'Ethics of Downloading Music
- Lyrics
- Organizing MP3 and WMA Music on Your PC
- Digital Ethics
- Digital Rights Management (DRM)
- Online Music Stores
- Music Player
- Display the Main Menu
- Music Player Display
- Music Player (cont'd)
- Playing Music
- Adjusting the Volume
- The Music Player Display
- How do I Create an .LRC file?
- Navigation Within an Audio File
- Folder Structure
- Navigating The Folder/File Structure
- Finding the Root Directory
- Navigating The Folder / Fi
- Entering a Folder From the Root Directory
- Again, press the M button to enter the list of subfolders below. The Oldies folder. Price gone scroll down to The Platters. Use The Pails
- More Music Player Options
- FM Radio
- FM Radio (cont'd)
- Setting Stations
- Using the Radio's Functions
- Voice Record Mode
- Voice Recording Playback (RPL)
- USB Disk
Brand : JWIN
Model : JX-MP256FM
Category : Mp3 player