PSP3 - Subwoofer Metra - Free user manual and instructions
Find the device manual for free PSP3 Metra in PDF.


| Product Type | Subwoofer |
| Brand | Metra |
| Model | PSP3 |
| Speaker Size | 12 inches |
| Impedance | 4 ohms |
| Power Handling (RMS) | 200 watts |
| Power Handling (Peak) | 400 watts |
| Frequency Response | 30 Hz – 200 Hz |
| Sensitivity | 90 dB @ 1W/1m |
| Voice Coil | Single |
| Cone Material | Polypropylene |
| Surround Material | Rubber |
| Mounting Depth | 6 inches |
| Mounting Diameter | 11 inches |
| Enclosure Type | Sealed |
| Connections | Spring terminals |
| Weight | 12 lbs |
| Dimensions (Diameter x Depth) | 12.5 x 6.5 inches |
| Recommended Use | Car audio subwoofer |
| Maintenance | Clean with dry cloth |
| Safety Notes | Do not exceed power rating; avoid overloading |
| Spare Parts Availability | Contact Metra support |
| Warranty | 1 year limited |
Frequently Asked Questions - PSP3 Metra
User questions about PSP3 Metra
0 question about this device. Answer the ones you know or ask your own.
Ask a new question about this device
Download the instructions for your Subwoofer in PDF format for free! Find your manual PSP3 - Metra and take your electronic device back in hand. On this page are published all the documents necessary for the use of your device. PSP3 by Metra.
USER MANUAL PSP3 Metra
We would like to thank you for your purchase of the Precision Port™. The Precision Port™ was created for you, the audiophile, for clearer sound, greater SPL and better cosmetics.
INSTALLATION PROCESS
We recommend installation by a qualified installer if possible. If one is not available follow the instructions below.
- Calculate length of port needed:
$$ \mathrm{Lv} = \frac {8 4 6 6 . 4 \mathrm{R} ^ {2}}{(\mathrm{Vb}) \mathrm{Fb} ^ {2}} - 1. 4 6 3 \mathrm{R} \quad \begin{array}{l} \text { Lv } = \text { port length in inches } \ \text { Vb } = \text { volume of box in cubic feet } \ \text { Fb } = \text { tuning frequency } \ \text { R } = \text { radius of port (1 / 2 of port diameter) } \end{array} $$
-
Determine proper speaker & port placement before cutting any holes. The Precision Port™ can be placed as close as 1" from the inside wall of the enclosure although it is recommended to keep it as far away from the inside wall as possible.
-
Once placement has been determined cut the proper size hole. We have supplied a cut diagram to help with this step. Follow the instructions on the cut diagram for proper fit.
-
Trim center tube to 4" shorter than Lv from step one.
-
The Precision Port™ should be 1" longer than Lv when assembled.
-
If you want to use screws to attach the port to the enclosure use the guide marks on the back of the outside flare. The screw holes are numbered with a 3 or 4 for the number of screws you would like to use.
-
When the length has been achieved the Precision Port™ can be glued together using ordinary ABS adhesive or similar type glue. Once pieces are assembled with ABS adhesive, pieces can not be taken apart.
Assemble the Precision Port™ in the following manner.
-
Attach connecting rings to flared ends.
-
Slide flared ends, with connecting rings attached, over tube section.
-
Insert the Precision Port™ into enclosure and secure with adhesive and/or screws. It is recommended to use adhesive when screwing in port.
WARRANTY
The Precision port ^™ is warranted, to the original purchaser, for a period of 90 days from the date of purchase. This warranty is limited to any manufacturing defects. If such a defect is found contact the place from which you purchased this product.
CUT DIAGRAM
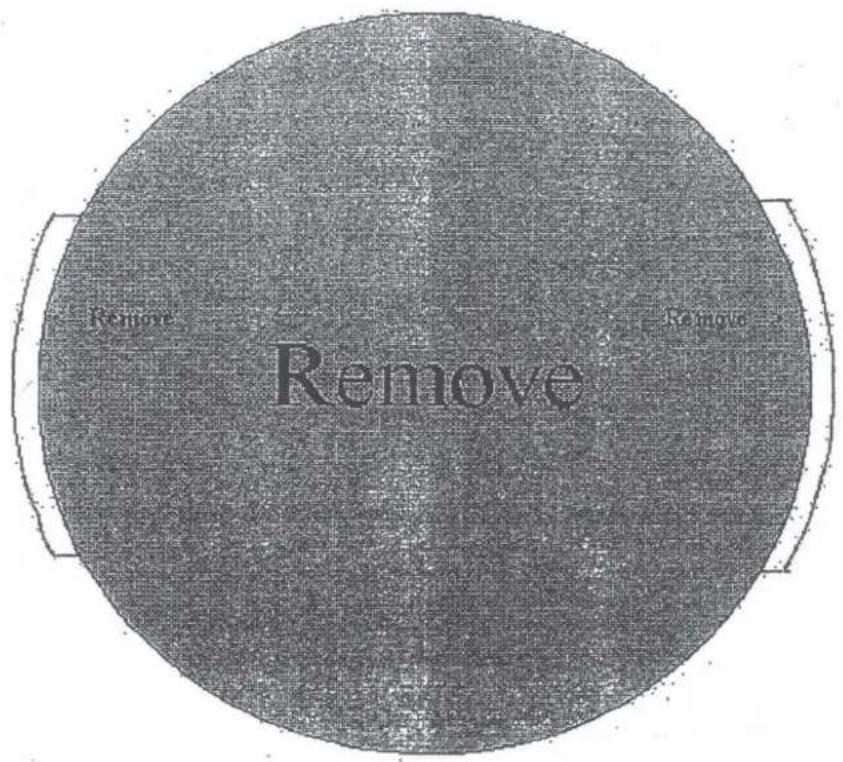
- Cutout the gray area and the two small slots on either side.
- Attach this template to the area on your enclosure where you want the port to be installed.
- Trace around the inside of the template
- Cut around the inside edge of the of the lines you traced
- Return to step 3 of the installation process
PRECISION SOUND PRODUCTS, INC.; PEARL CITY IL 61062

Brand : Metra
Model : PSP3
Category : Subwoofer