
FM80 Salmon - Scanner Newland - Free user manual and instructions
Find the device manual for free FM80 Salmon Newland in PDF.


| Product Type | Stationary Barcode Scanner |
| Image Sensor | Newland patented UIMG® computerized image recognition system |
| Supported Symbologies | 1D: Code11, Code128, Code39, GS1-128, AIM128, ISBT128, Codabar, Code93, UPC-A/UPC-E, Coupon, EAN-13, EAN-8, ISSN, ISBN, Interleaved2/5, Matrix2/5, Industrial2/5, ITF-14, ITF-6, Standard2/5, China Post 25, MSI-Plessey, Plessey, GS1 Databar Composite, GS1 Databar(RSS); 2D: PDF417, QR Code, Aztec, Data Matrix |
| Scan Mode | Advanced Sense Mode (sensor-activated), also programmable trigger modes |
| Indicators | Multi-colored LED: Blue (initialization/config), Green (good read), Cyan (config success), Purple (config error), Yellow (data transmission alarm), Red (module malfunction/low voltage) |
| Power Supply | DC 5V via adapter (5V/1.5A) or USB (min 500mA), power consumption 2.5W max |
| Interfaces | RS-232, USB HID Keyboard, USB CDC, HID POS (POS HID), IBM SurePOS (Tabletop/Handheld), PS/2; adaptive wired communication |
| Decode Session Timeout | 1 ms to 3,600,000 ms (default 3,000 ms) |
| Image Decoding Timeout | 1 ms to 3,000 ms (default 500 ms) |
| Sensitivity (Sense Mode) | 20 levels, default Medium |
| Operating Temperature | -20°C to 50°C |
| Storage Temperature | -40°C to 70°C |
| Humidity | 5% to 95% (non-condensing) |
| Mounting | Panel mount without bracket (cutout), optional bracket available |
| Eye Safety | LED-based illumination, safe for normal use |
| Maintenance | Clean scan window with soft cloth and alcohol; do not scratch or spray liquids |
| Configuration Methods | Programming barcodes, serial commands, or EasySet software (Windows) |
| Default Interface | USB HID Keyboard (U.S. layout) |
| In the Box | FM80 scanner, user manual; adapter and cable sold separately |
Frequently Asked Questions - FM80 Salmon Newland
User questions about FM80 Salmon Newland
0 question about this device. Answer the ones you know or ask your own.
Ask a new question about this device
Download the instructions for your Scanner in PDF format for free! Find your manual FM80 Salmon - Newland and take your electronic device back in hand. On this page are published all the documents necessary for the use of your device. FM80 Salmon by Newland.
USER MANUAL FM80 Salmon Newland
natural_image
Exterior view of a black rectangular electronic device with a transparent screen and 'Newland' branding, set against a teal background (no other text or symbols visible)FM80 Salmon
stationary scanner
user guide
Disclaimer
© 2020 Fujian Newland Auto-ID Tech. Co., Ltd. All rights reserved.
Please read through the manual carefully before using the product and operate it according to the manual. It is advised that you should keep this manual for future reference.
Do not disassemble the device or remove the seal label from the device, doing so will void the product warranty provided by Fujian Newland Auto-ID Tech. Co., Ltd.
All pictures in this manual are for reference only and actual product may differ. Regarding to the product modification and update, Fujian Newland Auto-ID Tech. Co., Ltd. reserves the right to make changes to any software or hardware to improve reliability, function, or design at any time without notice. The information contained herein is subject to change without prior notice.
The products depicted in this manual may include software copyrighted by Fujian Newland Auto-ID Tech. Co., Ltd or third party. The user, corporation or individual, shall not duplicate, in whole or in part, distribute, modify, decompile, disassemble, decode, reverse engineer, rent, transfer or sublicense such software without prior written consent from the copyright holders.
This manual is copyrighted. No part of this publication may be reproduced, distributed or used in any form without written permission from Newland.
Fujian Newland Auto-ID Tech. Co., Ltd. reserves the right to make final interpretation of the statement above.
Fujian Newland Auto-ID Tech. Co., Ltd.
3F, Building A, No.1, Rujiang West Rd., Mawei, Fuzhou, Fujian, China 350015
http://www.newlandaidc.com
Revision History
| Version | Description | Date |
| V1.0.0 | Initial release. | Sept. 16, 2020 |
Table of Contents
Revision History....3
Preface .... 1
Introduction....1
Explanation of Icons....1
Chapter 1 Getting Started....2
Introduction 2
Application Scenarios....2
Symbologies 2
Features....2
FM80 Scanner 3
Chapter 2 Installation....4
Introduction 4
General Requirements....4
Prevention of Water 4
Dust and Dirt....4
Ambient Environment....4
Optical Elements....5
Mounting 5
Ambient Light....7
Eye Safety....7
Chapter 3 Interfaces and Electrical Specifications ....8
Interface Pinouts....8
Adapter and DC Interface 9
Connect to the Host 10
Electrical Specifications 11
Chapter 4 Operating Instructions ....12
Introduction 12
Barcode Scanning....12
Status Indicator....13
Maintenance ....13
Chapter 5 EasySet....14
Chapter 6 System Settings....15
Introduction 15
Barcode Programming....15
Command Programming....15
EasySet Programming....15
Programming Barcode/ Programming Command/Function....16
Use of Programming Command....17
Command Syntax 17
Query Commands....17
Responses....18
Examples....18
Use of Programming Barcodes....19
Power On Beep....20
Good Read Beep 20
Good Read Beep Volume 21
Good Read Sound Effect....22
Scan Mode....23
Decode Session Timeout 24
Image Stabilization Timeout (Sense Mode)....25
Image Decoding Timeout 26
Surround GS1 Application Identifiers (AI's) with Parentheses....26
Sensitivity (Sense Mode) 27
Scanning Preference 29
Decode Area 29
Image Flipping 30
Bad Read Message 31
Set Bad Read Message 31
Default Settings....32
Factory Defaults....32
Custom Defaults 32
Query Product Information....32
Query Product Name 33
Query Firmware Version 33
Query Decoder Version....34
Query Hardware Version....34
Query Product Serial Number....34
Query Manufacturing Date....35
Query OEM Serial Number 35
Query Data Formatter Version....35
Chapter 7 RS-232 Interface....36
Introduction 36
Baud Rate 37
Parity Check....38
Data Bit 39
Stop Bit 39
Hardware Auto Flow Control 40
Chapter 8 USB Interface ....41
Introduction 41
USB HID Keyboard 42
USB Country Keyboard Types 43
Beep on Unknown Character....47
Emulate ALT+Keypad 48
Code Page....49
Unicode Encoding....51
Emulate Keypad with Leading Zero 51
ASCII Function Key Mapping Table (Continued)....54
Inter-Keystroke Delay 55
Caps Lock....56
Convert Case....57
Emulate Numeric Keypad 58
Fast Mode....60
Polling Rate 61
USB CDC....63
HID POS (POS HID Barcode Scanner)....63
Introduction 63
Access the Scanner with Your Program....63
Acquire Scanned Data....64
Send Command to the Scanner....64
IBM SurePOS (Tabletop)......65
IBM SurePOS (Handheld) 65
VID/PID 65
Adaptive Wired Communication....66
Chapter 9 Symbologies ....67
Introduction 67
Global Settings....67
Enable/Disable All Symbologies 67
Enable/Disable 1D Symbologies....67
Enable/Disable 2D Symbologies....68
Enable/Disable Postal Symbologies 68
1D Twin Code 69
Code 128....70
Restore Factory Defaults 70
Enable/Disable Code 128....70
Set Length Range for Code 128....71
EAN-8 72
Restore Factory Defaults....72
Enable/Disable EAN-8 72
Transmit Check Character 72
2-Digit Add-On Code....73
5-Digit Add-On Code....74
Add-On Code Required 75
Convert EAN-8 to EAN-13 75
EAN-13 76
Restore Factory Defaults 76
Enable/Disable EAN-13 76
Transmit Check Character 77
2-Digit Add-On Code....77
5-Digit Add-On Code....78
Add-On Code Required 78
EAN-13 Beginning with 290 Add-On Code Required....79
EAN-13 Beginning with 378/379 Add-On Code Required....79
EAN-13 Beginning with 414/419 Add-On Code Required....80
EAN-13 Beginning with 434/439 Add-On Code Required....80
EAN-13 Beginning with 977 Add-On Code Required....81
EAN-13 Beginning with 978 Add-On Code Required....81
EAN-13 Beginning with 979 Add-On Code Required....82
UPC-E 83
Restore Factory Defaults 83
Enable/Disable UPC-E....83
Transmit Check Character 84
2-Digit Add-On Code....84
5-Digit Add-On Code 85
Add-On Code Required 85
Transmit Preamble Character 86
Convert UPC-E to UPC-A 86
UPC-A 87
Restore Factory Defaults 87
Enable/Disable UPC-A....87
Transmit Check Character 87
2-Digit Add-On Code 88
5-Digit Add-On Code....89
Add-On Code Required 90
Transmit Preamble Character....90
Coupon 91
UPC-A/EAN-13 with Extended Coupon Code....91
Coupon GS1 Databar Output....92
Interleaved 2 of 5....93
Restore Factory Defaults 93
Enable/Disable Interleaved 2 of 5....93
Set Length Range for Interleaved 2 of 5....94
Check Character Verification 95
Febraban....96
Transmit Delay per Character 96
Transmit Delay per 12 Characters ....99
ITF-14 101
Restore Factory Defaults 101
Enable/Disable ITF-14 101
ITF-6 102
Restore Factory Defaults 102
Enable/Disable ITF-6 102
Matrix 2 of 5....103
Restore Factory Defaults....103
Enable/Disable Matrix 2 of 5....103
Set Length Range for Matrix 2 of 5....104
Check Character Verification ....105
Code 39 106
Set Length Range for Code 39....107
Check Character Verification 108
Transmit Start/Stop Character 109
Enable/Disable Code 39 Full ASCII ....109
Enable/Disable Code 32 (Italian Pharma Code) 110
Code 32 Prefix....110
Transmit Code 32 Start/Stop Character....111
Transmit Code 32 Check Character....111
Codabar 112
Restore Factory Defaults 112
Enable/Disable Codabar....112
Set Length Range for Codabar 113
Check Character Verification 114
Start/Stop Character 115
Code 93 116
Restore Factory Defaults 116
Enable/Disable Code 93....116
Set Length Range for Code 93 117
Check Character Verification 118
China Post 25 119
Restore Factory Defaults 119
Enable/Disable China Post 25 119
Set Length Range for China Post 25....120
Check Character Verification ....121
GS1-128 (UCC/EAN-128) 122
Restore Factory Defaults 122
Enable/Disable GS1-128 122
Set Length Range for GS1-128 123
GS1 Databar (RSS) 124
Restore Factory Defaults 124
Enable/Disable GS1 Databar....124
Transmit Application Identifier "01" 125
GS1 Composite (EAN·UCC Composite) 125
Restore Factory Defaults 125
Enable/Disable GS1 Composite 125
Enable/Disable UPC/EAN Composite....126
Code 11....126
Restore Factory Defaults 126
Enable/Disable Code 11 ....126
Set Length Range for Code 11....127
Check Character Verification ....128
Transmit Check Character 129
ISBN....130
Restore Factory Defaults ....130
Industrial 25 ......133
Restore Factory Defaults 133
Enable/Disable Industrial 25....133
Set Length Range for Industrial 25....134
Check Character Verification ....135
Standard 25 ...... 136
Restore Factory Defaults ....136
Enable/Disable Standard 25....136
Set Length Range for Standard 25....137
Check Character Verification ....138
Plessey 139
Restore Factory Defaults 139
Enable/Disable Plessey 139
Set Length Range for Plessey 140
Check Character Verification ....141
MSI-Plessey....142
Restore Factory Defaults 142
Enable/Disable MSI-Plessey....142
Set Length Range for MSI-Plessey....143
Check Character Verification ....144
Transmit Check Character 145
AIM 128....146
Restore Factory Defaults 146
Enable/Disable AIM 128....146
Set Length Range for AIM 128....147
ISBT 128....148
Restore Factory Defaults ....148
Enable/Disable ISBT 128....148
COOP 25 149
Restore Factory Defaults 149
Enable/Disable COOP 25 149
Set Length Range for COOP 25....150
Check Character Verification ....151
PDF417....152
Restore Factory Defaults....152
Enable/Disable PDF417....152
Set Length Range for PDF417....153
PDF417 Twin Code....154
PDF417 Inverse....155
Character Encoding ....155
PDF417 ECI Output....156
QR Code 157
Restore Factory Defaults 157
Enable/Disable QR Code....157
Set Length Range for QR Code....158
QR Inverse....159
Character Encoding....159
QR ECI Output....160
Aztec....161
Restore Factory Defaults 161
Enable/Disable Aztec Code 161
Set Length Range for Aztec Code 162
Read Multi-barcodes on an Image....163
Set the Number of Barcodes....164
Character Encoding ....165
Aztec ECI Output 165
Data Matrix....166
Restore Factory Defaults 166
Enable/Disable Data Matrix 166
Set Length Range for Data Matrix....167
Data Matrix Twin Code....168
Rectangular Barcode 169
Data Matrix Inverse....169
Character Encoding ....170
Data Matrix ECI Output....170
Chapter 10 Data Formatter ....171
Introduction 171
Add a Data Format....171
Programming with Barcodes....171
Programming with Serial Commands....174
Enable/Disable Data Formatter....175
Non-Match Error Beep 176
Data Format Selection 177
Change Data Format for a Single Scan 178
Clear Data Format 179
Query Data Formats 179
Formatter Command Type 6....180
Send Commands 180
Move Commands....183
Search Commands 185
Miscellaneous Commands....188
Chapter 11 Prefix & Suffix ....194
Introduction 194
Global Settings....195
Enable/Disable All Prefixes/Suffixes 195
Prefix Sequence....195
Custom Prefix 196
Enable/Disable Custom Prefix 196
Set Custom Prefix....196
AIM ID Prefix 197
Code ID Prefix....198
Restore All Default Code IDs 198
Modify Code ID 198
Custom Suffix....205
Enable/Disable Custom Suffix....205
Set Custom Suffix 205
Data Packing....206
Introduction 206
Data Packing Options 206
Terminating Character Suffix....208
Enable/Disable Terminating Character Suffix....208
Set Terminating Character Suffix 208
Chapter 12 Batch Programming....210
Introduction 210
Create a Batch Command....211
Create a Batch Barcode....211
Use Batch Barcode 212
Chapter 13 PS/2 Interface....213
Introduction 213
Appendix 214
Digit Barcodes....214
Save/Cancel Barcodes....217
Factory Defaults Table 218
AIM ID Table 225
Code ID Table 227
Symbology ID Number 228
ASCII Table 229
Unicode Key Maps....233
Preface
Introduction
This manual provides detailed instructions for setting up and using the NLS-FM80 fixed mount barcode scanner (hereinafter referred to as "the FM80" or "the scanner").
This guide provides programming instructions for the FM80. Users can configure the FM80 by scanning the programming barcodes included in this manual.
The FM80 has been properly configured for most applications and can be put into use without further configuration. Users may check Appendix: Factory Defaults Table for reference. Throughout the manual, programming barcodes marked with asterisks ( ^** ) are factory default values.
Explanation of Icons

This icon indicates something relevant to this manual.

This icon indicates this information requires extra attention from the reader.

This icon indicates handy tips that can help you use or configure the scanner with ease.
This icon indicates practical examples that can help you to acquaint yourself with operations.
Chapter 1 Getting Started
Introduction
The NLS-FM80 barcode scanner (hereinafter referred to as "the FM80" or "the scanner"), armed with the Newland patented UIMG ^® , a computerized image recognition system, blends image recognition algorithm & manufacturing, which significantly simplifies application design and delivers superior performance and solid reliability. The FM80 supports all mainstream 1D and standard 2D. It can read barcodes on commodities and mobile phones, featuring excellent scanning performance and easy installation.
Application Scenarios
The FM80 is mainly applied for the retail industry, such as supermarkets, convenience stores, tobacco and alcohol counters, commercial centers, etc.
Symbologies
The FM80 can easily read printed barcodes and on-screen barcodes, including:
| 1D | Code11, Code128, Code39, GS1-128(UCC/EAN12), AIM128, ISBT128, CodaBar, Code93, UPC-A/UPC-E,Coupon, EAN-13, EAN-8, ISSN, ISBN, Interleaved2/5, Matrix2/5, Industrial2/5, ITF-14, ITF-6, Standard2/5, China Post 25, MSI-Plessey, Plessey, GS1 Databar Composite, GS1 Databar(RSS) |
| 2D | PDF417, QR code, Aztec, Data Matrix |
Features
- Multi-colored LED indicator, alarm function and real-time feedback of device status
FM80 Scanner
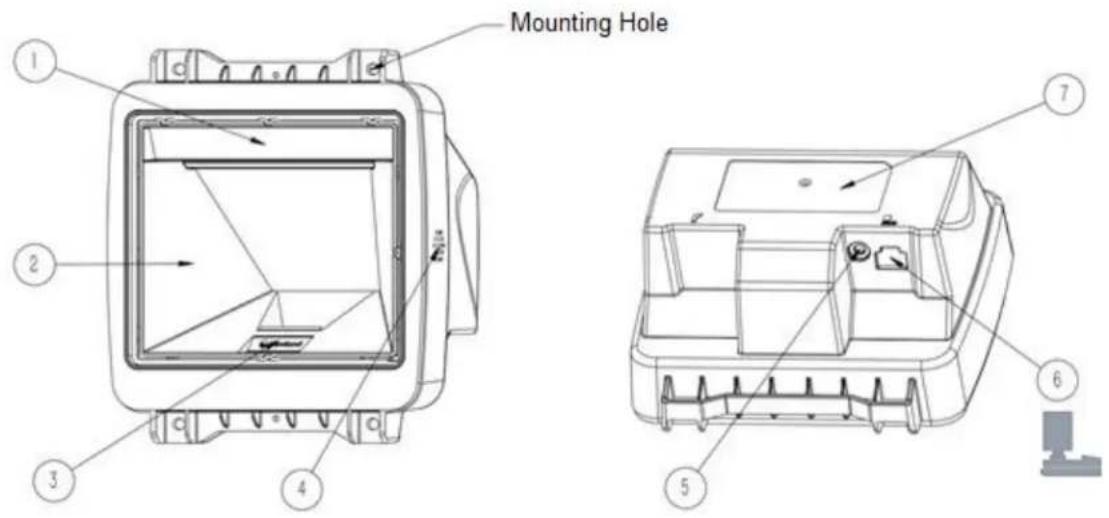
Figure 1-1
① Illumination LED
② Scan Window
③ Status indicator
④ Sound hole
⑤ Power DC port
⑥ Main interface
⑦ Position of label
Chapter 2 Installation
Introduction
This chapter mainly explains how to install the FM80.
Caution: Please do not disassemble the FM80 to avoid any damage to the device.
General Requirements
Prevention of Water
It is recommended to keep the scanner away from water when using it. Do not place cups filled with water and drink on the scanner and spray any liquid on the FM80.
Dust and Dirt
The FM80 should be used in a relatively clean environment and do not expose the device to dust and stain.
Ambient Environment
The following environmental requirements should be met to ensure good performance of the FM80.
Table 2-1
| Operating Temperature | -20°C to 50°C |
| Storage Temperature | -40°C to 70°C |
| Humidity | 5% to 95% (non-condensing) |
Optical Elements
The optical components of FM80 are integrated inside the device, and it is forbidden to disassemble or replace optical components.
During installation and use, do not scratch the window with sharp objects.
If the surface of the screen is contaminated, use a cloth with alcohol to wipe the surface.
Mounting
Without bracket
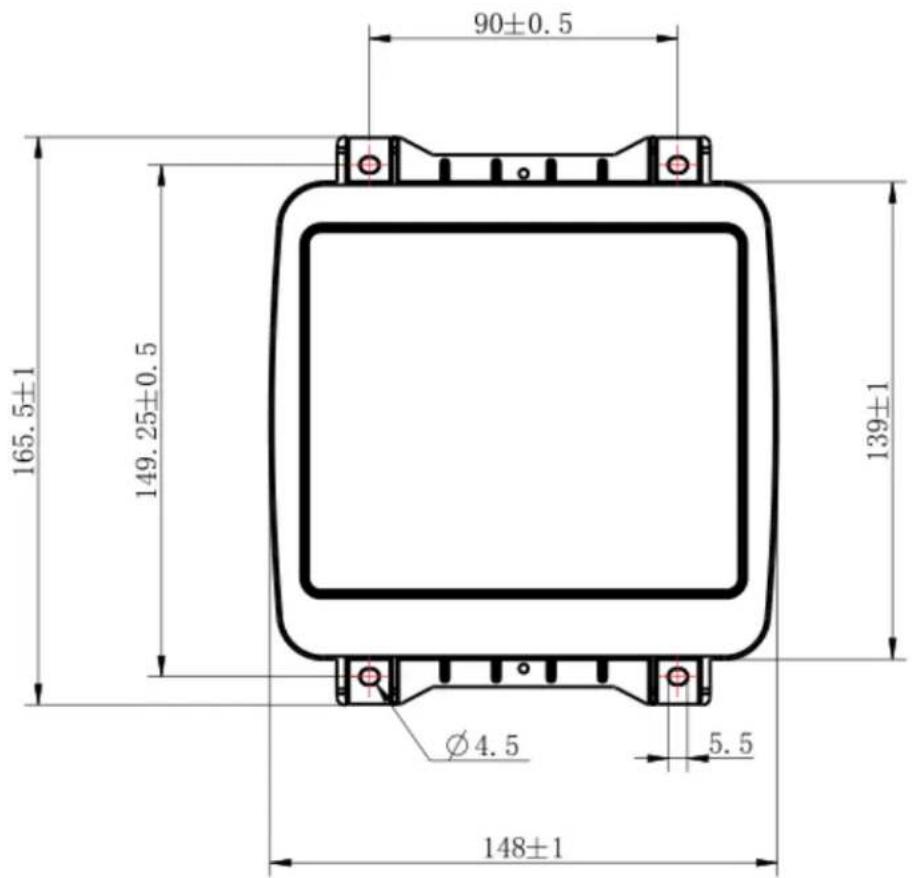
Figure 2-1
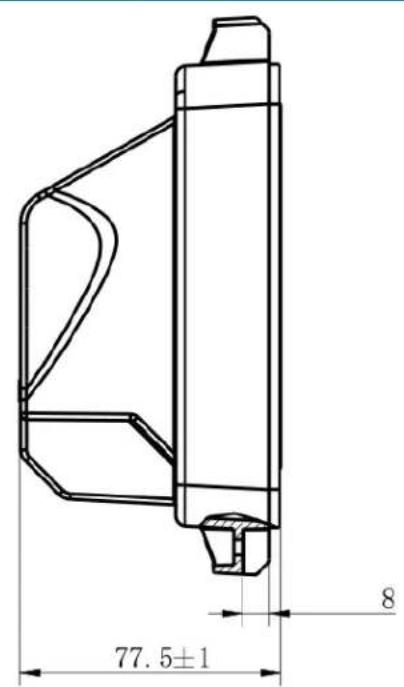
Figure 2-2
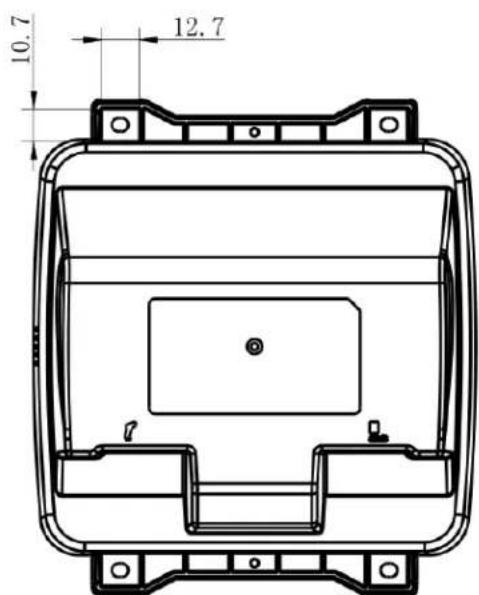
Figure 2-3
Ambient Light
The FM80 shows better performance with ambient light. However, high-frequency pulsed light can result in performance degradation.
Eye Safety
The FM80 uses an LED to produce illumination beam. The LED is bright, but testing has been done to demonstrate that the scanner is safe for its intended application under normal usage conditions.
Chapter 3 Interfaces and Electrical Specifications
Interface Pinouts
NLS-FM80 has two external physical interfaces:
The DC interface is used to connect the 5V DC adapter for the FM80. The RJ45 interface on the right side can be used to communicate with the host.
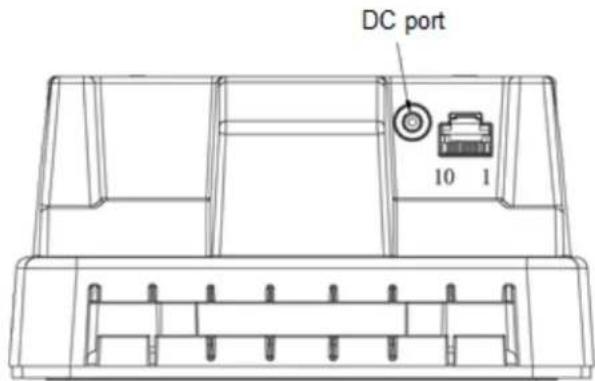
Figure 3-1
Adapter and DC Interface
The DC adapter for the FM80 has a power supply capability of 5V/1.5A.
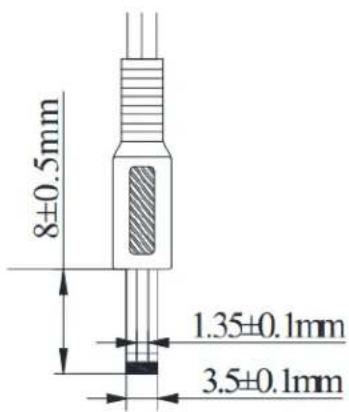
Figure 3-2
Note: This power adapter is optional, and it is not included in the default configuration. Customers need place additional orders.
Table 3-1
RJ45 interface
| PIN# | Signal | I/O | Function | Remark |
| 1 | EF_3V3 | O | Good read indicator/ for other functions | 3.3V level |
| 2 | EF_5V | O | Good read indicator/ for other functions | 5V level |
| 3 | VCC5V | I | 5V power input | |
| 4 | RS232_TX | O | RS-232 level TX output | to connect the host |
| 5 | RS232_RX | I | RS-232 level RX input | to connect the host |
| 6 | RS232_CTS | I | RS-232 level CTS input | to connect the host |
| 7 | RS232_RTS | O | RS-232 level RTS output | to connect the host |
| 8 | GND | Ground | Ground | |
| 9 | USB_D- | I/O | USB_D- | |
| 10 | USB_D+ | I/O | USB_D+ |
Connect to the Host
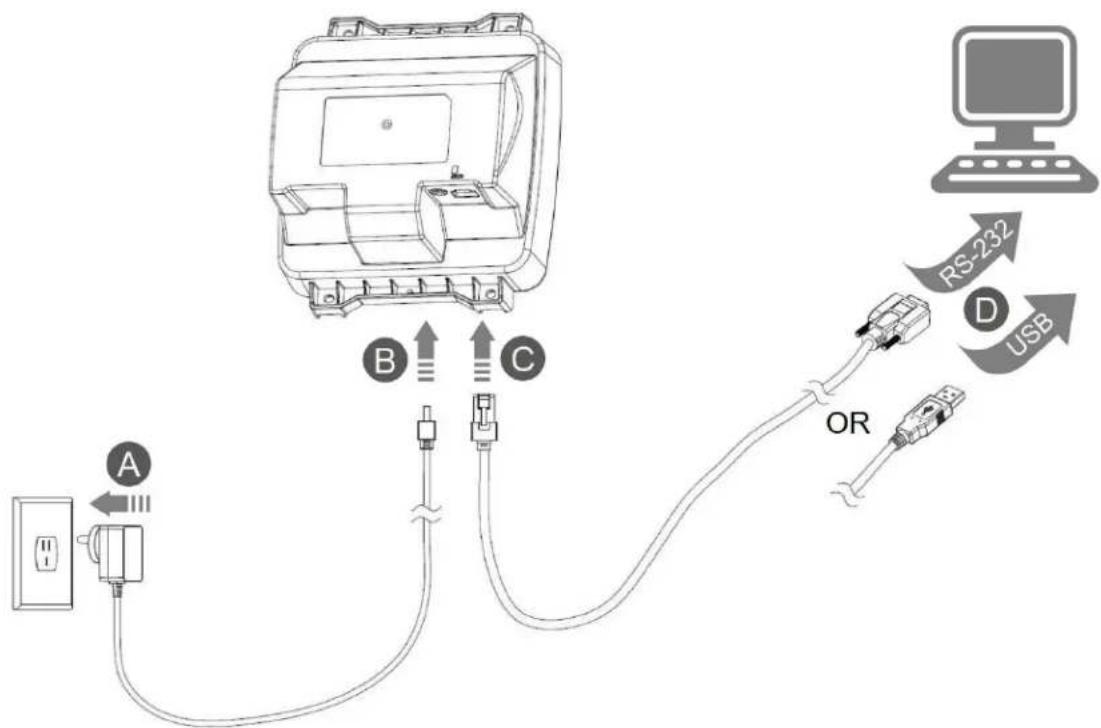
Figure 3-3
Power on
- For the FM80 with the adapter, connect the adapter first and power on the FM80 according to step A and step B in Figure
3-3. Then connect the data cable (USB data cable or RS-232 data cable) according to step C and step D. - For the FM80 without the adapter, it supports power supply via the USB port according to step C and step D.
- It is not allowed to connect the non-standard and damaged adapter and forbid conducting step B without step A.
- If you do not hear the power-on beep after powering the device on for more than 30 seconds, it means that the power supply is insufficient and the device will emit an alarm.
Power off
- For the FM80 with the adapter, disconnect the data cable (USB data cable or RS-232 data cable) firstly and then unplug the adapter.
- For the FM80 without the adapter, directly disconnect the data cable.
Electrical Specifications
| Parameter | Description |
| Voltage | AC input (adapter): 100~240Vac, 50~60HzDC input ( DC interface and RJ45 interface): 4.75~5.25V |
| Power Consumption | 2.5W (max)2W (typical)1.25W (standby) |
Note: When powering the FM80 via the RJ45 interface without the adapter, ensure that power supply has a load capacity of more than 500mA and the range of power supply voltage should be 5.0V ± 5% . The power input ripple must not exceed 150mV.
Chapter 4 Operating Instructions
Introduction
Use the FM80 after it is installed and make sure power-on and communication state is normal. The scanner adopts the sensor mode (default). When it is not used for a long time, the illumination LED will be off, and only the sensor LED will remain on. When the object appears on the window, the illumination LED will be automatically on and the scanner will start to decode the barcode and transmit the data.
Barcode Scanning
- Make sure that the scanner, the data cable, the host and power supply are properly connected and powered on normally.
- Place the barcode in the field of view and aim it at the scan window. The illumination LED will be activated, the red illumination area will appear and the decoding process will begin.
- When the good read beep sounds and the green LED is on, it indicates the decoding is successful. The scanner will transmit the decoded data to the host.
- The optimal scanning distance is about 7cm away from the scan window.
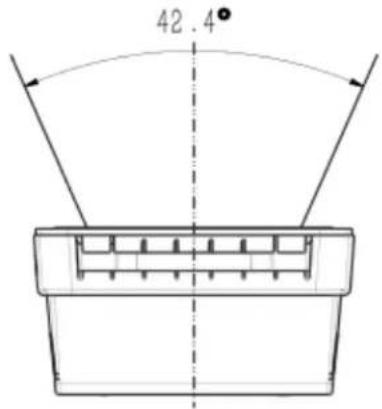
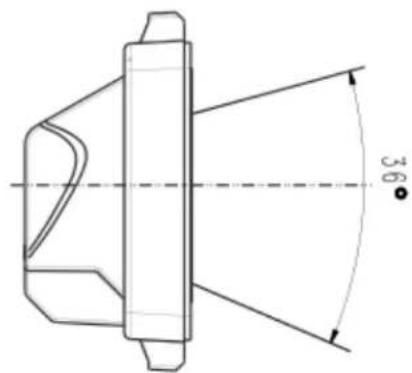
Figure 4-1
Status Indicator
Blue LED on: initialization or configuration process
Green LED on: It indicates successful decode
Cyan LED on: configuration is successful
Purple LED on: configuration error
Yellow LED on: The decoding is successful but an alarm is emitted due to data transmission failure. Please check if the data cable connection is loose.
Red LED on: An alarm occurs because of barcode scanning module malfunction. Please contact technical support.
Red LED flashes: An alarm for low input voltage. For the FM80 with the adapter, please check whether power supply of the adapter is normal. For the FM80 without the adapter, it may be because of insufficient power supply of the USB interface.
Maintenance
✨ The scan window should be kept clean.
Do not scratch the scan window.
Use the soft cloth to clean the window, such as eyeglass cleaning cloth.
Do not spray any liquid on the scan window.
Do not use any detergent to clean other parts of the device except for water and alcohol.
Note: The warranty DOES NOT cover damages caused by inappropriate care and maintenance.
Chapter 5 EasySet
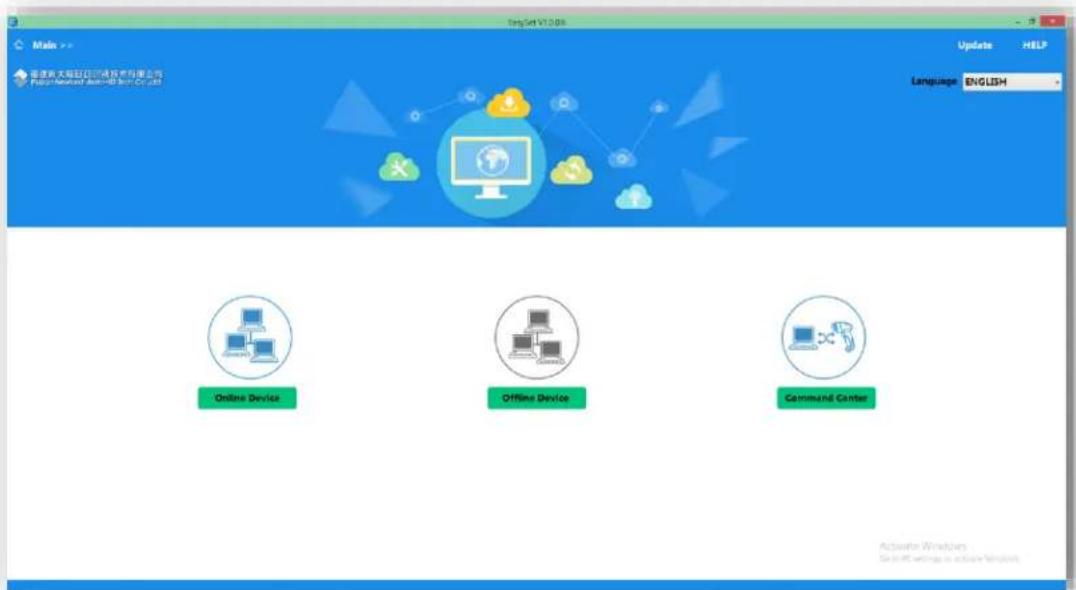
EasySet, developed by Fujian Newland Auto-ID Tech. Co., Ltd., is a configuration tool for Newland's 1D/2D handheld barcode scanner, fixed mount barcode scanners and OEM scan engines. Its main features include:
View device & configuration information of online device
Configure device
Update firmware of online device
Load/modify existing XML configuration file; save current settings to an XML file
✧ Create/print/save programming barcodes to a PDF or Word file
View/edit/save image stored on online device in the original image/BMP/JPG/TIFF format
Send serial commands to online device and receive device response
◆ Supported languages: Chinese and English.
EasySet supports 32-bit/64-bit Microsoft WinXP/Win7/Win 8/Win 8.1/Win 10 operating systems.
EasySet can communicate with device via one of the following interface: RS-232, USB COM Port Emulation (UFCOM driver required), USB CDC (UFCOM driver required), USB DataPipe (UFCOM driver required), USB HID-POS.
Chapter 6 System Settings
Introduction
There are three ways to configure the FM80: Barcode programming, command programming and Easyset programming.
Barcode Programming
The FM80 can be configured by scanning programming barcodes. All user programmable features/options are described along with their programming barcodes/commands in the following sections.
This programming method is most straightforward. However, it requires manually scanning barcodes. As a result, errors are more likely to occur.
Command Programming
The FM80 can also be configured by serial commands sent from the host device.
Users can design an application program to send those command strings to the scanners to perform device configuration.
For more information, refer to the Programming Guide Based on Newland Unified Commands Set.
EasySet Programming
Besides the two methods mentioned above, you can conveniently perform scanner configuration through EasySet too. EasySet is a Windows-based configuration tool particularly designed for Newland products, enabling users to gain access to decoded data and captured images and to configure scanners. For more information about this tool, refer to the EasySet User Guide.
Programming Barcode/ Programming Command/Function
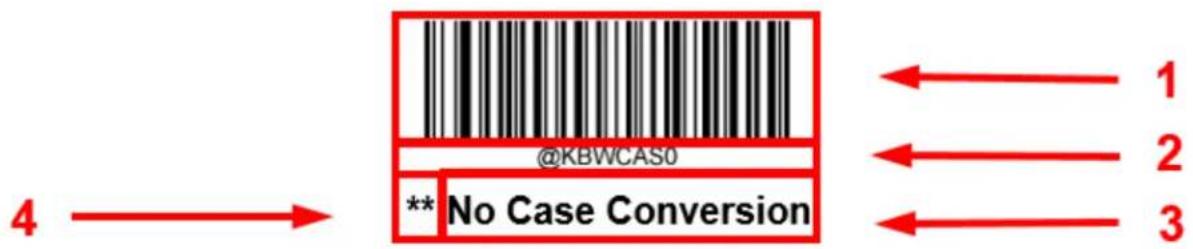
The figure above is an example that shows you the programming barcode and command for the Enter Setup function:
- The No Case Conversion barcode.
- The No Case Conversion command.
- The description of feature/option.
- ** indicates factory default settings.
Note: “@” included in the programming command indicates permanent setting which means the setting will not be lost by removing power from the scanner or turning off or rebooting it; whereas “#” included in the programming command indicates temporary setting which means the setting will be lost by removing power from the scanner or turning off or rebooting it.
Use of Programming Command
Besides the barcode programming method, the scanner can also be configured by serial commands (HEX) sent from the host device. All commands must be entered in uppercase letters.
Command Syntax
Prefix StorageType Tag SubTag {Data} [, SubTag {Data}] [, Tag SubTag {Data}] [...] Suffix
Prefix: "\~
StorageType: “@” (HEX: 40) or “#” (HEX: 23), 1 character. “@” means permanent setting which will not be lost by removing power from the scanner or rebooting it; “#” means temporary setting which will be lost by removing power from the scanner or rebooting it.
Tag: A 3-character case-sensitive field that identifies the desired command group. For example, all USB HID Keyboard configuration settings are identified with a Tag of KBW.
SubTag: A 3-character case-sensitive field that identifies the desired parameter within the tag group. For example, the SubTag for the keyboard layout is CTY.
Data: The value for a feature or parameter setting, identified by the Tag and SubTag.
Suffix: “;
Multiple commands can be issued within one Prefix/Suffix sequence. For configuration commands, only the Tag, SubTag, and Data fields must be repeated for each command in sequence. If an additional command is to be applied to the same Tag, then the command is separated with a comma (,) and only the SubTag and Data fields of the additional commands are issued. If the additional command requires a different Tag field, the command is separated from previous command by a semicolon (;).
Query Commands
For query commands, the entry in the Data field in the syntax above is one of the following characters means:
* (HEX: 2A) What is the scanner's current value for the setting(s).
& (HEX: 26) What is the factory default value for the setting(s).
^ (HEX: 5E) What is the range of possible values for the setting(s).
The value of the StoreType field in a query command can be either "@" (HEX: 40) or "#" (HEX: 23).
A query command with the SubTag field omitted means to query all the settings concerning a tag. For example, to query all the current settings about Code 11, you should enter 7E 01 30 30 30 30 40 43 31 31 2A 3B 03 (i.e. \~
Responses
Different from command sequence, the prefix of a response consists of the six characters of "
The scanner responds to serial commands with one of the following three responses:
When responding, the scanner echoes back the command sequence with the status character above inserted directly before each of the punctuation marks (the comma or semicolon) in the command.
Examples
Example 1: Enable Code 11, set the minimum and maximum lengths to 12 and 22 respectively.
Enter: 7E 01 30 30 30 30 40 43 31 31 45 4E 41 31 2C 4D 49 4E 31 32 2C 4D 41 58 32 32 3B 03 (\~
Response: 02 01 30 30 30 30 40 43 31 31 45 4E 41 31 06 2C 4D 49 4E 31 32 06 2C 4D 41 58 32 32 06 3B 03 (
Example 2: Query the current minimum and maximum lengths of Code 11.
Enter: 7E 01 30 30 30 30 40 43 31 31 4D 49 4E 2A 2C 4D 41 58 2A 3B 03 (\~
Response: 02 01 30 30 30 30 40 43 31 31 4D 49 4E 31 32 06 2C 4D 41 58 32 32 06 3B 03 (
Use of Programming Barcodes
Scanning the Enter Setup barcode can enable the scanner to enter the setup mode. Then you can scan a number of programming barcodes to configure your scanner. To exit the setup mode, scan the Exit Setup barcode or a non-programming barcode, or reboot the scanner.
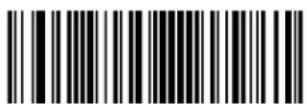
@SETUPE0
** Exit Setup
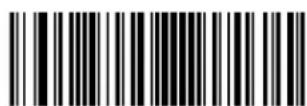
@SETUPE1
Enter Setup
Programming barcode data (i.e. the characters under programming barcode) can be transmitted to the host device. Scan the appropriate barcode below to enable or disable the transmission of programming barcode data to the host device.
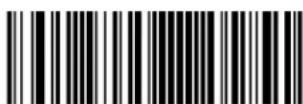
@SETUPT0
** Do Not Transmit Programming Barcode Data
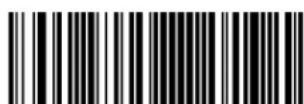
@SETUPT1
Transmit Programming Barcode Data
Power On Beep
The scanner can be programmed to beep when it is powered on. Scan the Off barcode if you do not want a power on beep.
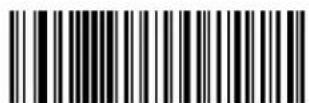
@PWBENA1
** On
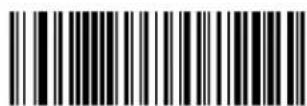
@PWBENA0
Off
Good Read Beep
Scanning the Off barcode can turn off the beep that indicates successful decode; scanning the On barcode can turn it back on.
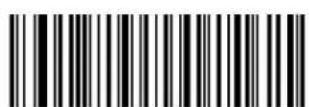
@GRBENA1
** On
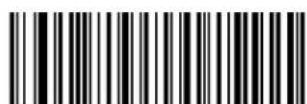
@GRBENA0
Off
Good Read Beep Volume
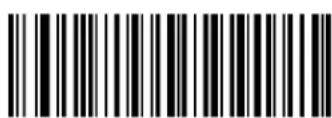
@GRBVLL1
** Loud
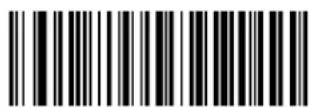
@GRBVLL2
Medium
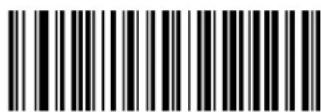
@GRBVLL3
Low
Good Read Sound Effect
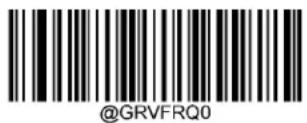
700Hz
1200Hz
1700Hz
2730Hz
Scan Mode
Advanced Sense Mode: The scanner activates a decode session every time it detects a barcode presented to it. The decode session will continue after a barcode is decoded. If the undecoded duration reaches decode session timeout, the scanner will enter the sensor mode. When the scanner detects a barcode presented to it, it will start the decode session again. If rereading of same barcode is required, remove the barcode and then show the barcode on the scan window again.
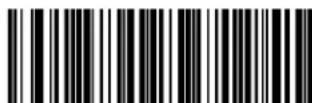
@SCNMOD15
Advanced Sense Mode
Decode Session Timeout
This parameter sets the maximum time decode session continues during a scan attempt. It is programmable in 1ms increments from 1ms to 3,600,000ms. When it is set to 0, the timeout is infinite. The default setting is 3,000ms.
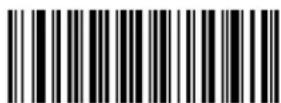
@ORTSET
Decode Session Timeout

Set the decode session timeout to 1,500ms:
- Scan the Enter Setup barcode.
- Scan the Decode Session Timeout barcode.
- Scan the numeric barcodes "1", "5", "0" and "0" from the "Digit Barcodes" section in Appendix.
- Scan the Save barcode from the "Save/Cancel Barcodes" section in Appendix.
- Scan the Exit Setup barcode.
Image Stabilization Timeout (Sense Mode)
This parameter defines the amount of time the scanner will spend adapting to ambient environment after it decodes a barcode and "looks" for another. It is programmable in 1ms increments from 0ms to 3,000ms. The default setting is 200ms.
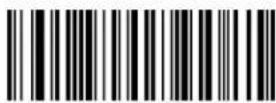
@SENIST
Image Stabilization Timeout

Set the image stabilization timeout to 800ms:
- Scan the Enter Setup barcode.
- Scan the Image Stabilization Timeout barcode.
- Scan the numeric barcodes "8", "0" and "0" from the "Digit Barcodes" section in Appendix.
- Scan the Save barcode from the "Save/Cancel Barcodes" section in Appendix.
- Scan the Exit Setup barcode.
Image Decoding Timeout
Image Decoding Timeout specifies the maximum time the scanner will spend decoding an image. This parameter is programmable in 1ms increments from 1ms to 3,000ms. The default timeout is 500ms.
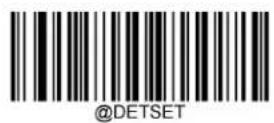
Image Decoding Timeout

Set the image decoding timeout to 1,000ms:
- Scan the Enter Setup barcode.
- Scan the Image Decoding Timeout barcode.
- Scan the numeric barcodes "1", "0", "0" and "0" from the "Digit Barcodes" section in Appendix.
- Scan the Save barcode from the "Save/Cancel Barcodes" section in Appendix.
- Scan the Exit Setup barcode.
Surround GS1 Application Identifiers (AI's) with Parentheses
When Surround GS1 AI's with Parentheses is selected, each application identifier (AI) contained in scanned data will be enclosed in parentheses in the output message.
** Do Not Surround GS1 AI's with Parentheses
Surround GS1 AI's with Parentheses
Example
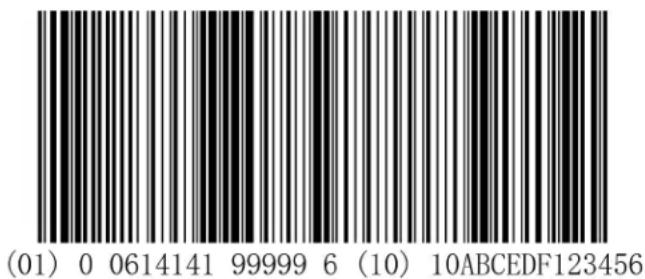
If Surround GS1 AI's with Parentheses is selected, the barcode above is output as (01)00614141999996(10)10ABCEDF123456.
If Do Not Surround GS1 AI's with Parentheses is selected, the barcode above is output as 01006141419999961010ABCEDF123456.
Sensitivity (Sense Mode)
Sensitivity specifies the degree of acuteness of the engine's response to changes in images captured. There are 20 levels to choose from. The smaller the value, the higher the sensitivity and the lower requirement in image change to trigger the engine. You can select an appropriate degree of sensitivity that fits the application environment. This feature is only applicable to the Sense mode.
@SENLVL14
Low Sensitivity
@SENLVL8
High Sensitivity
@SENLVL
Custom Sensitivity (Level 1-20)
@SENLVL11
** Medium Sensitivity
@SENLVL5
** Enhanced Sensitivity

Set the sensitivity to Level 10:
- Scan the Enter Setup barcode.
- Scan the Custom Sensitivity barcode.
- Scan the numeric barcodes "1" and "0" from the "Digit Barcodes" section in Appendix.
- Scan the Save barcode from the "Save/Cancel Barcodes" section in Appendix.
- Scan the Exit Setup barcode.
Scanning Preference
Screen Mode: Select this mode when reading barcodes on the screen.
@EXPLVL2
** Screen Mode
Decode Area
Whole Area Decoding: The scanner attempts to decode barcode(s) within its field of view, from the center to the periphery, and transmits the barcode that has been first decoded.
@CADENA0
** Whole Area Decoding
Image Flipping
@MIRROR0
** Do Not Flip
@MIRROR2
Flip Vertically
@MIRROR1
Flip Horizontally
@MIRROR3
Flip Horizontally & Vertically
Example of image not flipped

natural_image
Simple blue letter 'C' with a small circular mark, no text or symbols presentExample of image flipped vertically

natural_image
Simple blue 'C' logo on white background (no text or symbols)Example of image flipped horizontally

natural_image
Abstract blue angular symbol with a crescent and partial circle, no text or labels present.Example of image flipped horizontally & vertically

natural_image
Abstract blue crescent and spiral graphic design on white background (no text or symbols)Bad Read Message
Scan the appropriate barcode below to select whether or not to send a bad read message (user-programmable) when a good read does not occur before trigger release, or the decode session timeout expires, or the scanner receives the Stop Scanning command (For more information, see the "Serial Trigger Command" section in this Chapter).
@NGRENA0
** Bad Read Message OFF
@NGRENA1
Bad Read Message ON
Set Bad Read Message
A bad read message can contain up to 7 characters (HEX values from 0x00 to 0xFF). To set a bad read message, scan the Set Bad Read Message barcode, the numeric barcodes representing the hexadecimal values of desired character(s) and the Save barcode. The default setting is "NG".
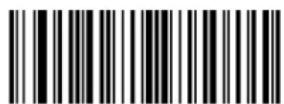
@NGRSET
Set Bad Read Message

Set the bad read message to "F" (HEX: 0x46):
- Scan the Enter Setup barcode.
- Scan the Set Bad Read Message barcode.
- Scan the numeric barcodes "4" and "6" from the "Digit Barcodes" section in Appendix.
- Scan the Save barcode from the "Save/Cancel Barcodes" section in Appendix.
- Scan the Exit Setup barcode.
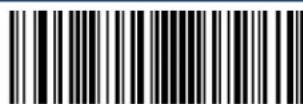
@SETUPE0
** Exit Setup
Default Settings
Factory Defaults
Scanning the following barcode can restore the scanner to the factory defaults.
You may need to reset all parameters to the factory defaults when:
✗ scanner is not properly configured so that it fails to decode barcodes.
◇ you forget previous configuration and want to avoid its impact.
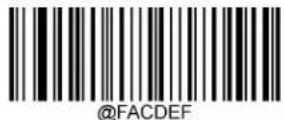
Restore All Factory Defaults
Custom Defaults
Scanning the Restore All Custom Defaults barcode can reset all parameters to the custom defaults. Scanning the Save as Custom Defaults barcode can set the current settings as custom defaults.
Custom defaults are stored in the non-volatile memory.
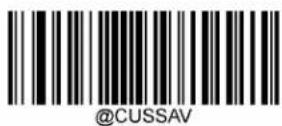
Save as Custom Defaults
Restoring the scanner to the factory defaults will not remove the custom defaults from the scanner.
Query Product Information
After scanning the barcode below, the product information (including product name, firmware version, decoder version, hardware version, product serial number, OEM serial number and manufacturing date) will be sent to the host device.

@SETUPE0
** Exit Setup
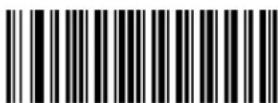
@QRYSYS
Query Product Information
Query Product Name
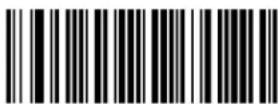
@QRYPDN
Query Product Name
Query Firmware Version
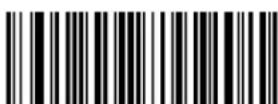
@QRYFWV
Query Firmware Version
Query Decoder Version
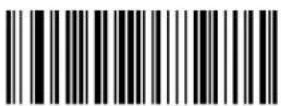
@QRYDCV
Query Decoder Version
Query Hardware Version
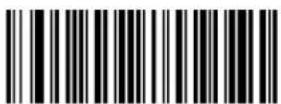
@QRYHWV
Query Hardware Version
Query Product Serial Number
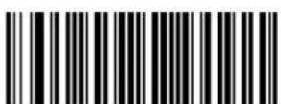
@QRYPSN
Query Product Serial Number
Query Manufacturing Date
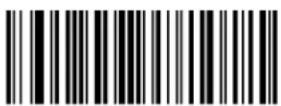
@QRYDAT
Query Manufacturing Date
Query OEM Serial Number
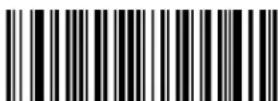
@QRYESN
Query OEM Serial Number
Query Data Formatter Version
@QRYDFM
Query Data Formatter Version
Chapter 7 RS-232 Interface
Introduction
When the scanner is connected to the RS-232 port of a host device, the scanner will automatically enable RS-232 communication. However, you need to set communication parameters (including baud rate, parity check, data bit and stop bit) on the scanner to match the host device so that two devices can communicate with each other.
@INTERF0
RS-232
Baud Rate
Baud rate is the number of bits of data transmitted per second. Set the baud rate to match the host requirements.
@232BAD8
115200
@232BAD7
57600
@232BAD6
38400
@232BAD5
19200
@232BAD4
14400
@232BAD3
** 9600
@232BAD2
4800
@232BAD1
2400
@SETUPE0
** Exit Setup
Parity Check
Set the parity type to match the host requirements.
Odd Parity: If the data contains an odd number of 1 bits, the parity bit value is set to 0.
Even Parity: If the data contains an even number of 1 bits, the parity bit value is set to 0.
None: Select this option when no parity bit is required.
@232PAR0
** None
@232PAR1
Even Parity
@232PAR2
Odd Parity
Data Bit
Set the number of data bits to match the host requirements.
@232DAT1
7 Data Bits
@232DAT0
** 8 Data Bits
Stop Bit
The stop bit(s) at the end of each transmitted character marks the end of transmission of one character and prepares the receiving device for the next character in the serial data stream. Set the number of stop bits to match the host requirements.
@232STP0
** 1 Stop Bit
@232STP1
2 Stop Bits
@SETUPE0
** Exit Setup
Hardware Auto Flow Control
If this feature is enabled, the scanner determines whether to transmit data based on CTS signal level. When CTS signal is at a low level which means the serial port's cache memory of receiving device (such as PC) is full, the scanner sends data through RS-232 port until CTS signal is set to high level by receiving device. When the scanner is not ready for receiving, it will set RTS signal to low level. When sending device (such as PC) detects it, it will not send data to the scanner any more to prevent data loss.
If this feature is disabled, reception/transmission of serial data will not be influenced by RTS/CTS signal.
@232AFL0
** Disable Hardware Auto Flow Control
@232AFL1
Enable Hardware Auto Flow Control

Before enabling this feature, make sure that RTS/CTS signal lines are contained in RS-232 cable. Without the signal lines, RS-232 communication errors will occur.
Chapter 8 USB Interface
Introduction
There are four options for USB connection:
USB HID Keyboard: The scanner's transmission is simulated as USB keyboard input with no need for command configuration or a driver. Barcode data could be entered by the virtual keyboard directly and it is also convenient for the host device to receive data.
USB CDC: It is compliant with the standard USB CDC class specifications defined by the USB-IF and allows the host device to receive data in the way as a serial port does. A driver is needed when using this feature.
HID POS (POS HID Barcode Scanner): It is based on the HID interface, with no need for a custom driver. It excels virtual keyboard and traditional RS-232 interface in transmission speed.
IBM SurePOS: It conforms to IBM (now Toshiba Global Commerce Solutions) 4698 USB scanner interface specifications.
When the scanner is connected to both USB and RS-232 ports on a host device, it will select the USB connection by default.
USB HID Keyboard
When the scanner is connected to the USB port on a host device, you can enable the USB HID Keyboard feature by scanning the barcode below. Then scanner's transmission will be simulated as USB keyboard input. The Host receives keystrokes on the virtual keyboard. It works on a Plug and Play basis and no driver is required.
@INTERF3
** USB HID Keyboard

If the host device allows keyboard input, then no extra software is needed for HID Keyboard input.
USB Country Keyboard Types
Keyboard layouts vary from country to country. The default setting is U.S. keyboard.
** U.S. (English)
Belgium
Brazil
@KBWCTY3
Canada (French)
Czechoslovakia
@KBWCTY5
Denmark
@KBWCTY6
Finland (Swedish)
@KBWCTY8
Germany/ Austria
@KBWCTY10
Hungary
@KBWCTY12
Italy
@KBWCTY14
Netherlands (Dutch)
@KBWCTY7
France
@KBWCTY9
Greece
@KBWCTY11
Israel (Hebrew)
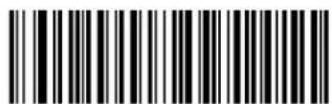
@KBWCTY13
Latin America/ South America
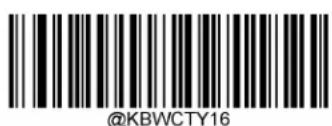
Poland
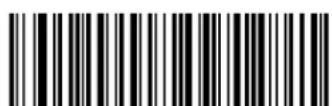
@KBWCTY15
Norway
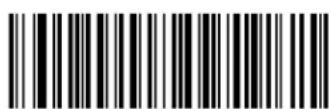
@KBWCTY18
@KBWCTY17
Portugal
Romania
@KBWCTY21
@KBWCTY19
Russia
Slovakia
@KBWCTY23
@KBWCTY22
Spain
Sweden
@SETUPE1
Enter Setup
@KBWCTY25
Turkey_F
@KBWCTY27
UK
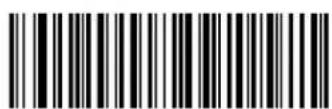
@KBWCTY24
Switzerland (German)
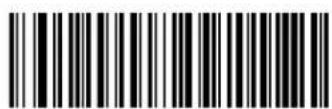
@KBWCTY26
Turkey_Q
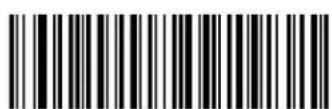
@KBWCTY28
Japan
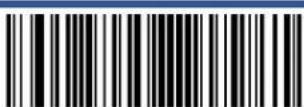
@SETUPE0
** Exit Setup
Beep on Unknown Character
Due to the differences in keyboard layouts, some characters contained in barcode data may be unavailable on the selected keyboard. As a result, the scanner fails to transmit the unknown characters.
Scan the appropriate barcode below to enable or disable the emission of beep when an unknown character is detected.
@KBWBUC0
** Do Not Beep on Unknown Character
@KBWBUC1
Beep on Unknown Character
Supposing French keyboard (Country Code: 7) is selected and barcode data "ADF" is being dealt with, the keyboard will fail to locate the "D" (0xD0) character and the scanner will ignore the character and continue to process the next one.
Do Not Beep on Unknown Character: The scanner does not beep and the Host receives "AF".
Beep on Unknown Character: The scanner beeps and the Host still receives "AF".
If Emulate ALT+Keypad ON is selected, Beep on Unknown Character does not function.
Emulate ALT+Keypad
When Emulate ALT+Keypad is turned on, any character whose ASCII value is greater than or equal to 0x20 is sent over the numeric keypad no matter which keyboard type is selected.
- ALT Make
- Enter the number corresponding to a desired character on the keypad.
- ALT Break
After Emulate ALT+Keypad ON is selected, you need to choose the code page with which the barcodes were created and to turn Unicode Encoding On or Off depending on the encoding used by the application software.
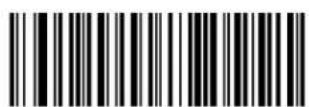
@KBWALTO
** Emulate ALT+Keypad OFF
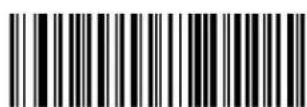
@KBWALT1
Emulate ALT+Keypad ON

Since sending a character involves multiple keystroke emulations, this method appears less efficient.
Supposing Emulate ALT+Keypad is ON, Unicode Encoding is Off, Code Page 1252 (West European Latin) is selected, and Emulate Keypad with Leading Zero is Off, barcode data "ADF" (65/208/70) is sent as below:
$$ " A" -" A L T M a k e" +" 0 6 5" +" A L T B r e a k" $$
$$ " \text { D }" --" \text { ALT Make }" +" 2 0 8" +" \text { ALT Break }" $$
$$ " F" --" A L T M a k e" +" 0 7 0" +" A L T B r e a k" $$

@SETUPE0
** Exit Setup
Code Page
Code pages define the mapping of character codes to characters. If the data received does not display with the proper characters, it may be because the barcode being scanned was created using a code page that is different from the one the host program is expecting. If this is the case, select the code page with which the barcodes were created by scanning the appropriate barcode below. For PDF417, QR Code, Aztec and Data Matrix, besides setting the code page, you also need to set the character encoding in the "Character Encoding" section in Chapter 6. This feature is only effective when Emulate ALT+Keypad is turned on.
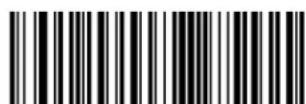
@KBWCPG0
** Code Page 1252 (West European Latin)
@KBWCPG2
Code Page 1250 (Central and East European Latin)
@KBWCPG4
Code Page 1254 (Turkish)
@KBWCPG1
Code Page 1251 (Cyrillic)
@KBWCPG3
Code Page 1253 (Greek)
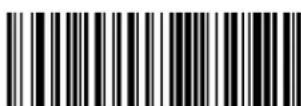
@KBWCPG5
Code Page 1255 (Hebrew)
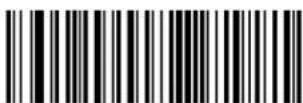
@KBWCPG6
Code Page 1256 (Arabic)
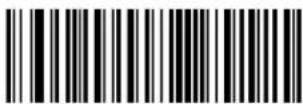
@KBWCPG8
Code Page 1258 (Vietnamese)
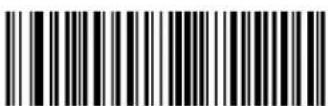
@KBWCPG10
Code Page 950 (Traditional Chinese, Big5)
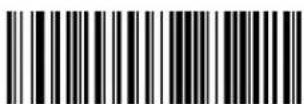
@KBWCPG7
Code Page 1257 (Baltic)
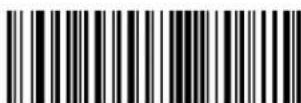
@KBWCPG9
Code Page 936 (Simplified Chinese, GB2312,GBK)
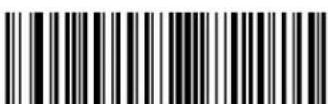
@KBWCPG12
Code Page 932 (Japanese, Shift-JIS)
Unicode Encoding
Different host program may use different character encodings for handling incoming barcode data. For instance, Microsoft Office Word uses Unicode encoding and therefore you should turn Unicode Encoding on, whereas Microsoft Office Excel or Notepad uses Code Page encoding and therefore you should turn Unicode Encoding off. This feature is only effective when Emulate ALT+Keypad is turned on.
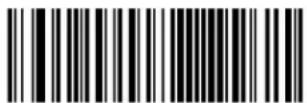
@KBWCPU0
** Off
@KBWCPU1
On
Emulate Keypad with Leading Zero
You may turn this feature on to send character sequences sent over the numeric keypad as ISO characters which have a leading zero. For example, ASCII A transmits as "ALT MAKE" 0065 "ALT BREAK". This feature is only effective when Emulate ALT+Keypad is enabled.
@KBWALZ1
** On
@KBWALZ0
Off
@SETUPE0
** Exit Setup
When Ctrl+ASCII Mode is selected, function characters (0x00 - 0x1F) are sent as ASCII sequences.
@KBWFKM0
** Disable
@KBWFKM1
Ctrl+ASCII Mode
@KBWFKM2
Alt+Keypad Mode

If Ctrl+ASCII Mode is selected and other parameters of USB HID Keyboard adopt factory defaults, barcode data "A
"A" - Keystroke "A"
"F" - Keystroke "F"
For some text editors, "Ctrl I" means italic convert. So the output may be "AF".
If Alt+Keypad Mode is selected and other parameters of USB HID Keyboard adopt factory defaults, the data above is sent as below:
"A" - Keystroke "A"
“F” - Keystroke “F”
ASCII Function Key Mapping Table
| ASCII Function | ASCII Value (HEX) | Function Key Mapping Disabled | Ctrl+ASCII |
| NUL | 00 | Null | Ctrl+@ |
| SOH | 01 | Keypad Enter | Ctrl+A |
| STX | 02 | Caps Lock | Ctrl+B |
| ETX | 03 | ALT | Ctrl+C |
| EOT | 04 | Null | Ctrl+D |
| ENQ | 05 | CTRL | Ctrl+E |
| ACK | 06 | Null | Ctrl+F |
| BEL | 07 | Enter | Ctrl+G |
| BS | 08 | Left Arrow | Ctrl+H |
| HT | 09 | Horizontal Tab | Ctrl+I |
| LF | 0A | Down Arrow | Ctrl+J |
| VT | 0B | Vertical Tab | Ctrl+K |
| FF | 0C | Delete | Ctrl+L |
| CR | 0D | Enter | Ctrl+M |
| SO | 0E | Insert | Ctrl+N |
| SI | 0F | Esc | Ctrl+O |
| DLE | 10 | F11 | Ctrl+P |
| DC1 | 11 | Home | Ctrl+Q |
| DC2 | 12 | PrintScreen | Ctrl+R |
| DC3 | 13 | Backspace | Ctrl+S |
| DC4 | 14 | tab+shift | Ctrl+T |
| NAK | 15 | F12 | Ctrl+U |
| SYN | 16 | F1 | Ctrl+V |
| ETB | 17 | F2 | Ctrl+W |
| CAN | 18 | F3 | Ctrl+X |
| EM | 19 | F4 | Ctrl+Y |
| SUB | 1A | F5 | Ctrl+Z |
| ESC | 11 | F6 | Ctrl+[ |
| FS | 1C | F7 | Ctrl+\ |
| GS | 1D | F8 | Ctrl+] |
| RS | 1E | F9 | Ctrl+6 |
| US | 1F | F10 | Ctrl+- |
ASCII Function Key Mapping Table (Continued)
The last five characters (0x1B\~0x1F) in the table above apply to US keyboard layout only. The following chart provides the equivalents of these five characters for other countries.
| Country | Ctrl+ASCII | |||||
| United States | Ctrl+[ | Ctrl+\ | Ctrl+] | Ctrl+6 | Ctrl+- | |
| Belgium | Ctrl+[ | Ctrl+< | Ctrl+] | Ctrl+6 | Ctrl+- | |
| Scandinavia | Ctrl+8 | Ctrl+< | Ctrl+9 | Ctrl+6 | Ctrl+- | |
| France | Ctrl+^ | Ctrl+8 | Ctrl+$ | Ctrl+6 | Ctrl+= | |
| Germany | Ctrl+Ä | Ctrl++ | Ctrl+6 | Ctrl+- | ||
| Italy | Ctrl+\ | Ctrl++ | Ctrl+6 | Ctrl+- | ||
| Switzerland | Ctrl+< | Ctrl+.. | Ctrl+6 | Ctrl+- | ||
| United Kingdom | Ctrl+[ | Ctrl+¢ | Ctrl+] | Ctrl+6 | Ctrl+- | |
| Denmark | Ctrl+8 | Ctrl+\ | Ctrl+9 | Ctrl+6 | Ctrl+- | |
| Norway | Ctrl+8 | Ctrl+\ | Ctrl+9 | Ctrl+6 | Ctrl+- | |
| Spain | Ctrl+[ | Ctrl+\ | Ctrl+] | Ctrl+6 | Ctrl+- | |
Inter-Keystroke Delay
This parameter specifies the delay between emulated keystrokes.
@KBWDLY0
** No Delay
@KBWDLY20
Short Delay (20ms)
@KBWDLY40
Long Delay (40ms)
Caps Lock
The Caps Lock On options can invert upper and lower case characters contained in barcode data. This inversion occurs regardless of the state of Caps Lock key on the host device's keyboard. To disable this feature, scan the appropriate Caps Lock OFF barcode below based on your keyboard.
@KBWCAP0
** Caps Lock OFF, Non-Japanese Keyboard
@KBWCAP2
Caps Lock OFF, Japanese Keyboard
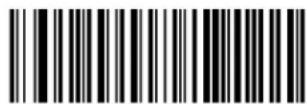
@KBWCAP1
Caps Lock ON, Non-Japanese Keyboard
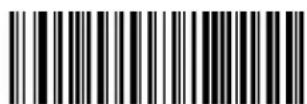
@KBWCAP3
Caps Lock ON, Japanese Keyboard

Emulate ALT+Keypad ON/ Convert All to Upper Case/ Convert All to Lower Case prevails over Caps Lock ON.
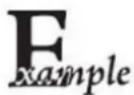
When the Caps Lock ON feature is selected, barcode data "AbC" is transmitted as "aBc".
Convert Case
Scan the appropriate barcode below to convert all bar code data to your desired case.
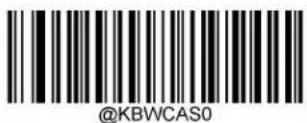
** No Case Conversion
Convert All to Upper Case
Convert All to Lower Case
Example
When the Convert All to Lower Case feature is enabled, barcode data "AbC" is transmitted as "abc".
CART
If Emulate ALT+Keypad ON is selected, Convert All to Lower Case and Convert All to Upper Case do not function.
Emulate Numeric Keypad
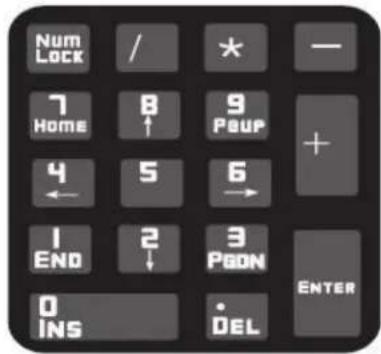
Do Not Emulate Numeric Keypad 1: Sending a number (0-9) is emulated as keystroke(s) on main keyboard.
Emulate Numeric Keypad 1: Sending a number (0-9) is emulated as keystroke(s) on numeric keypad. The state of Num Lock on the simulated numeric keypad is determined by its equivalent on the host device. If Num Lock on the host device is turned off, the output of simulated numeric keypad is function key instead of number.
Do Not Emulate Numeric Keypad 2: Sending “+”, “−”, “*” and “/” is emulated as keystroke(s) on main keyboard.
Emulate Numeric Keypad 2: Sending “+”, “-”, “*” and “/” is emulated as keystroke(s) on numeric keypad.
** Do Not Emulate Numeric Keypad 1
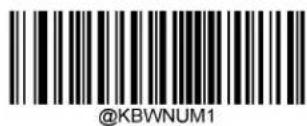
Emulate Numeric Keypad 1
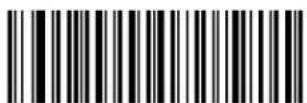
@KBWNCH0
** Do Not Emulate Numeric Keypad 2
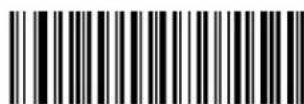
@KBWNCH1
Emulate Numeric Keypad 2
Emulate ALT+Keypad ON prevails over Emulate Numeric Keypad.
Supposing the Emulate Numeric Keypad 1 feature is enabled:
if Num Lock on the host device is ON, "A4.5" is transmitted as "A4.5";
if Num Lock on the host device is OFF, "A4.5" is transmitted as ".A":
- "A" is sent on main keyboard;
- "4" is sent as the function key "Cursor Move to Left";
- “.” is sent on main keyboard;
- "5" is not sent as it does not correspond to any function key.
Fast Mode
When Fast Mode On is selected, the scanner sends characters to the Host faster. If the Host drops characters, turn the Fast Mode off or change the polling rate to a bigger value.
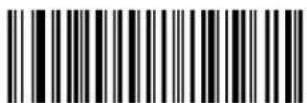
@KBWFAS0
** Fast Mode Off
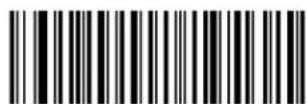
@KBWFAS1
Fast Mode On
Polling Rate
This parameter specifies the polling rate for a USB keyboard. If the Host drops characters, change the polling rate to a bigger value.
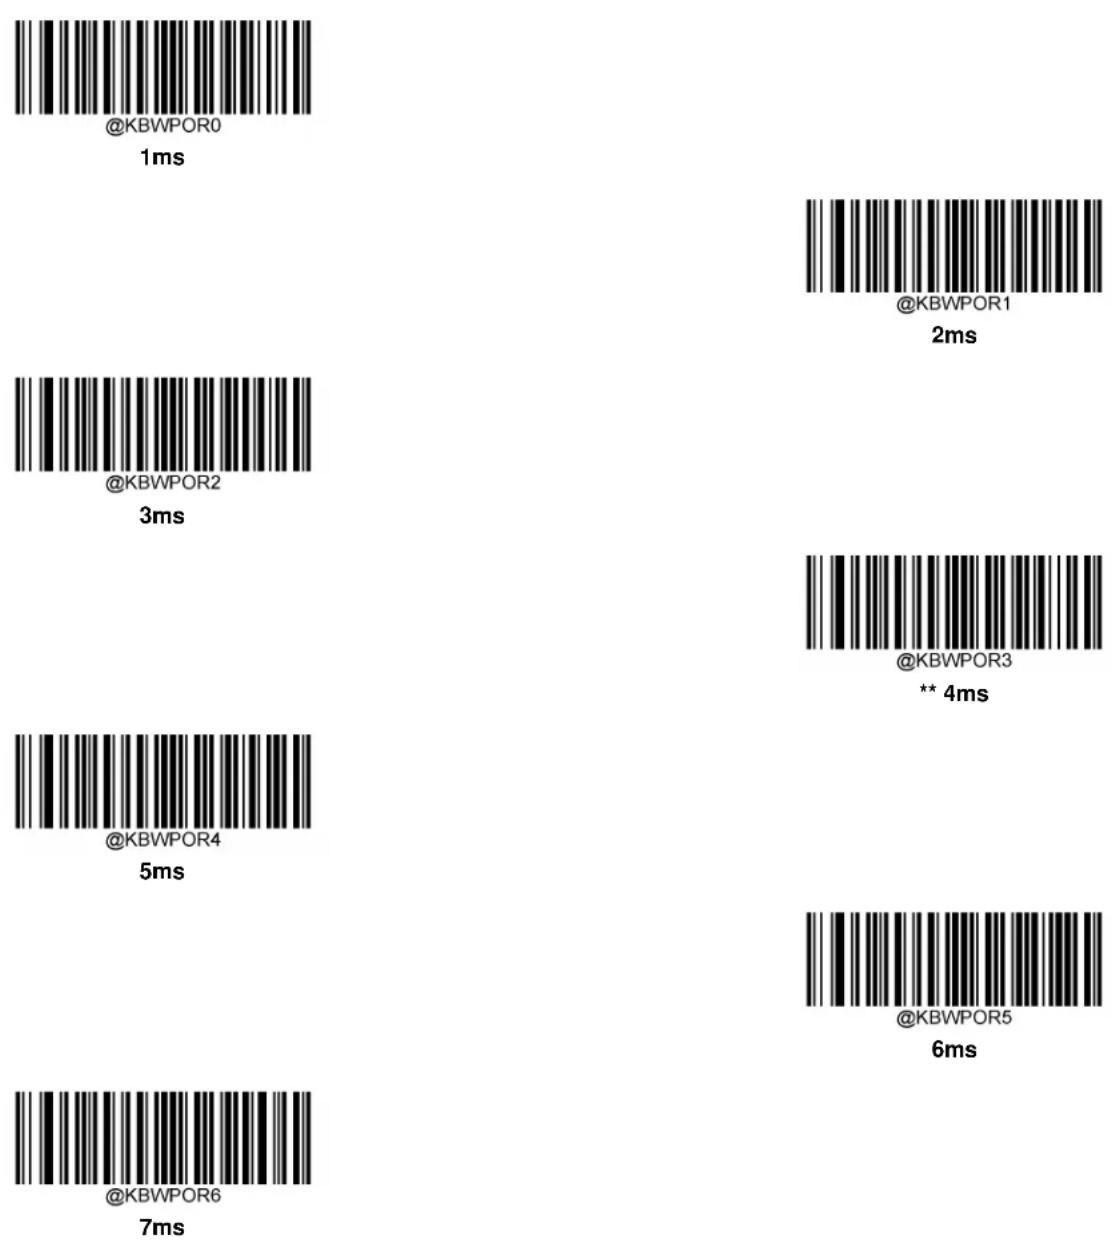
@SETUPE0
** Exit Setup
@KBWPOR8
9ms
@KBWPOR7
8ms
@KBWPOR9
10ms
USB CDC
If your scanner is connected to the USB port on a host device, the USB CDC feature allows the host device to receive data in the way as a serial port does. A driver is needed when using this feature. You may download it from our website at www.newlandaidc.com.
@INTERF8
USB CDC
HID POS (POS HID Barcode Scanner)
Introduction
The HID-POS interface is recommended for new application programs. It can send up to 56 characters in a single USB report and appears more efficient than keyboard emulation.
Features:
◇ HID based, no custom driver required.
◇ Way more efficient in communication than keyboard emulation and traditional RS-232 interface.
@INTERF5
USB HID-POS
Access the Scanner with Your Program
Use CreateFile to access the scanner as a HID device and then use ReadFile to deliver the scanned data to the application program. Use WriteFile to send data to the scanner.
For detailed information about USB and HID interfaces, go to www.USB.org.
Acquire Scanned Data
After a barcode is decoded, the scanner sends an input report as below:
| Bit | ||||||||
| Byte | 7 | 6 | 5 | 4 | 3 | 2 | 1 | 0 |
| 0 | Report ID = 0x02 | |||||||
| 1 | Barcode Length | |||||||
| 2-57 | Decoded Data (1-56) | |||||||
| 58-61 | Reserved | |||||||
| 62 | Newland Symbology Identifier or N/C: 0x00 | |||||||
| 63 | - | - | - | - | - | - | - | Decoded data continued |
Send Command to the Scanner
This output report is used to send commands to the scanner. All programming commands can be used.
| Bit | ||||||||
| Byte | 7 | 6 | 5 | 4 | 3 | 2 | 1 | 0 |
| 0 | Report ID = 0x04 | |||||||
| 1 | Length of command | |||||||
| 2-63 | Command (1-62) | |||||||
IBM SurePOS (Tabletop)
@INTERF6
IBM SurePOS (Tabletop)
IBM SurePOS (Handheld)
@INTERF7
IBM SurePOS (Handheld)
VID/PID
USB uses VID (Vendor ID) and PID (Product ID) to identify and locate a device. The VID is assigned by USB Implementers Forum. Newland's vendor ID is 1EAB (Hex). A range of PIDs are used for each Newland product family. Every PID contains a base number and interface type (keyboard, COM port, etc.).
| Product | Interface | PID (Hex) | PID (Dec) |
| FM80 | USB HID Keyboard | 3422 | 7458 |
| USB CDC | 3406 | 7430 | |
| HID POS | 3410 | 7440 | |
| IBM SurePOS (Tabletop) | 3420 | 7456 | |
| IBM SurePOS(Handheld) | 3421 | 7457 |
Adaptive Wired Communication
When this feature is on, the scanner can automatically adapt its communication configuration to the way it is connected to the host device: Automatically enable USB/serial communication when connected to the host device via USB/serial port, respectively.
Note: You must restart the scanner before this setting will take effect.
@AUTOUR0
Off
@AUTOUR1
** On
Chapter 9 Symbologies
Introduction
Every symbology (barcode type) has its own unique attributes. This chapter provides programming barcodes for configuring the scanner so that it can identify various symbologies. It is recommended to disable those that are rarely used to increase the efficiency of the scanner.
Global Settings
Enable/Disable All Symbologies
If the Disable All Symbologies feature is enabled, the scanner will not be able to read any non-programming barcodes except the programming barcodes.
Enable All Symbologies
Disable All Symbologies
Enable/Disable 1D Symbologies
Enable 1D Symbologies
Disable 1D Symbologies
** Exit Setup
Enable/Disable 2D Symbologies
@ALL2DC1
Enable 2D Symbologies
@ALL2DC0
Disable 2D Symbologies
Enable/Disable Postal Symbologies
@ALLPST1
Enable All Postal Symbologies
@ALLPST0
Disable All Postal Symbologies
1D Twin Code
1D twin code is two 1D barcodes of a symbology or of different symbologies paralleled vertically. Both barcodes must have similar specifications and be placed closely together.
There are 3 options for reading 1D twin code:
Single 1D Code Only: Read either 1D code.
✿ Twin 1D Code Only: Read both 1D codes. Transmission sequence: upper 1D code followed by lower 1D code.
Both Single & Twin: Read both 1D codes. If successful, transmit as twin 1D code only. Otherwise, try single 1D code only.
@A1DDOU0
** Single 1D Code Only
@A1DDOU2
Twin 1D Code Only
@A1DDOU1
Both Single & Twin
Code 128
If the scanner fails to identify Code 128 barcodes, you may first try this solution by scanning the Enter Setup barcode and then Enable Code 128 barcode.
Set Length Range for Code 128
The scanner can be configured to only decode Code 128 barcodes with lengths that fall between (inclusive) the minimum and maximum lengths. To accomplish it, you need to set the minimum and maximum lengths.
Set the Minimum Length (Default: 1)
Set the Maximum Length (Default: 48)

If minimum length is set to be greater than maximum length, the scanner only decodes Code 128 barcodes with either the minimum or maximum length. If minimum length is same as maximum length, only Code 128 barcodes with that length are to be decoded.

Set the scanner to decode Code 128 barcodes containing between 8 and 12 characters:
- Scan the Enter Setup barcode.
- Scan the Set the Minimum Length barcode.
- Scan the numeric barcode "8" from the "Digit Barcodes" section in Appendix.
- Scan the Save barcode from the "Save/Cancel Barcodes" section in Appendix.
- Scan the Set the Maximum Length barcode.
- Scan the numeric barcodes "1" and "2" from the "Digit Barcodes" section in Appendix.
- Scan the Save barcode from the "Save/Cancel Barcodes" section in Appendix.
- Scan the Exit Setup barcode.
EAN-8
If the scanner fails to identify EAN-8 barcodes, you may first try this solution by scanning the Enter Setup barcode and then Enable EAN-8 barcode.
Transmit Check Character
EAN-8 is 8 digits in length with the last one as its check character used to verify the integrity of the data.
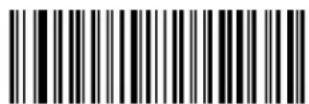
@EA8CHK2
** Transmit EAN-8 Check Character
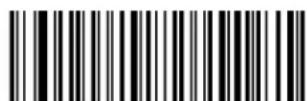
@EA8CHK1
Do Not Transmit EAN-8 Check Character

@SETUPE0
** Exit Setup
2-Digit Add-On Code
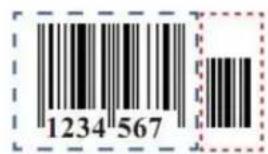
An EAN-8 barcode can be augmented with a two-digit add-on code to form a new one. In the example below, the part surrounded by blue dotted line is an EAN-8 barcode while the part circled by red dotted line is a two-digit add-on code.
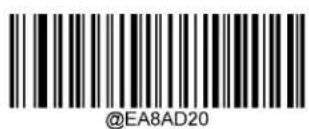
** Disable 2-Digit Add-On Code
Enable 2-Digit Add-On Code

Disable 2-Digit Add-On Code: The scanner decodes EAN-8 and ignores the add-on code when presented with an EAN-8 plus 2-digit add-on barcode. It can also decode EAN-8 barcodes without 2-digit add-on codes.
Enable 2-Digit Add-On Code: The scanner decodes a mix of EAN-8 barcodes with and without 2-digit add-on codes.
5-Digit Add-On Code
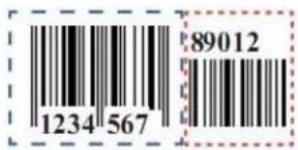
An EAN-8 barcode can be augmented with a five-digit add-on code to form a new one. In the example below, the part surrounded by blue dotted line is an EAN-8 barcode while the part circled by red dotted line is a five-digit add-on code.
@EA8AD50
** Disable 5-Digit Add-On Code
Enable 5-Digit Add-On Code

Disable 5-Digit Add-On Code: The scanner decodes EAN-8 and ignores the add-on code when presented with an EAN-8 plus 5-digit add-on barcode. It can also decode EAN-8 barcodes without 5-digit add-on codes.
Enable 5-Digit Add-On Code: The scanner decodes a mix of EAN-8 barcodes with and without 5-digit add-on codes.
Add-On Code Required
When EAN-8 Add-On Code Required is selected, the scanner will only read EAN-8 barcodes that contain add-on codes.
@EA8REQ0
** EAN-8 Add-On Code Not Required
@EA8REQ1
EAN-8 Add-On Code Required
Convert EAN-8 to EAN-13
Convert EAN-8 to EAN-13: Convert EAN-8 decoded data to EAN-13 format before transmission. After conversion, the data follows EAN-13 format and is affected by EAN-13 programming selections (e.g., Check Character).
Do Not Convert EAN-8 to EAN-13: EAN-8 decoded data is transmitted as EAN-8 data, without conversion.
@EA8EXP0
** Do Not Convert EAN-8 to EAN-13
@EA8EXP1
Convert EAN-8 to EAN-13
EAN-13
Enable/Disable EAN-13
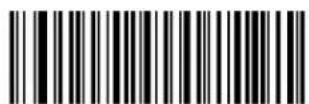
@E13ENA1
** Enable EAN-13
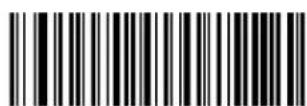
@E13ENA0
Disable EAN-13

If the scanner fails to identify EAN-13 barcodes, you may first try this solution by scanning the Enter Setup barcode and then Enable EAN-13 barcode.
Transmit Check Character
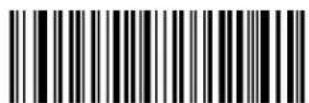
@E13CHK2
** Transmit EAN-13 Check Character
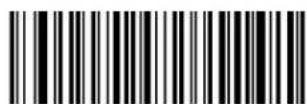
@E13CHK1
Do Not Transmit EAN-13 Check Character
2-Digit Add-On Code
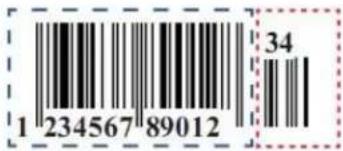
An EAN-13 barcode can be augmented with a two-digit add-on code to form a new one. In the example below, the part surrounded by blue dotted line is an EAN-13 barcode while the part circled by red dotted line is a two-digit add-on code.
@E13AD20
** Disable 2-Digit Add-On Code
@E13AD21
Enable 2-Digit Add-On Code

Disable 2-Digit Add-On Code: The scanner decodes EAN-13 and ignores the add-on code when presented with an EAN-13 plus 2-digit add-on barcode. It can also decode EAN-13 barcodes without 2-digit add-on codes.
Enable 2-Digit Add-On Code: The scanner decodes a mix of EAN-13 barcodes with and without 2-digit add-on codes.
@SETUPE0
** Exit Setup
5-Digit Add-On Code
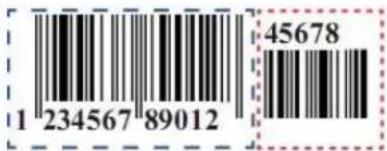
An EAN-13 barcode can be augmented with a five-digit add-on code to form a new one. In the example below, the part surrounded by blue dotted line is an EAN-13 barcode while the part circled by red dotted line is a five-digit add-on code.
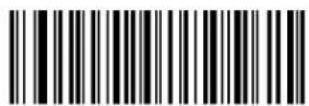
@E13AD50
** Disable 5-Digit Add-On Code
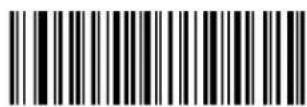
@E13AD51
Enable 5-Digit Add-On Code

Disable 5-Digit Add-On Code: The scanner decodes EAN-13 and ignores the add-on code when presented with an EAN-13 plus 5-digit add-on barcode. It can also decode EAN-13 barcodes without 5-digit add-on codes.
Enable 5-Digit Add-On Code: The scanner decodes a mix of EAN-13 barcodes with and without 5-digit add-on codes.
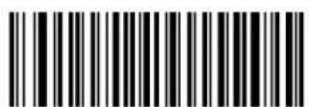
Add-On Code Required
When EAN-13 Add-On Code Required is selected, the scanner will only read EAN-13 barcodes that contain add-on codes.
@E13REQ0
** EAN-13 Add-On Code Not Required
@E13REQ1
EAN-13 Add-On Code Required
@SETUPE0
** Exit Setup
EAN-13 Beginning with 290 Add-On Code Required
This setting programs the scanner to require an add-on code (2-digit or 5-digit) on EAN-13 barcodes that begin with "290". The following settings can be programmed:
Require Add-On Code: All EAN-13 barcodes that begin with "290" must have a 2-digit or 5-digit add-on code. The EAN-13 barcode with the add-on code is then transmitted. If the required add-on code is not found, the EAN-13 barcode is discarded.
Do Not Require Add-On Code: If you have selected Require Add-On Code, and you want to disable this feature, scan Do Not Require Add-On Code. EAN-13 barcodes are handled, depending on your selection for the "Add-On Code Required" feature.
@E132900
** Do Not Require Add-On Code
@E132901
Require Add-On Code
EAN-13 Beginning with 378/379 Add-On Code Required
This setting programs the scanner to require an add-on code (2-digit or 5-digit) on EAN-13 barcodes that begin with a "378" or "379". The following settings can be programmed:
Require Add-On Code: All EAN-13 barcodes that begin with a "378" or "379" must have a 2-digit or 5-digit add-on code. The EAN-13 barcode with the add-on code is then transmitted. If the required add-on code is not found, the EAN-13 barcode is discarded.
Do Not Require Add-On Code: If you have selected Require Add-On Code, and you want to disable this feature, scan Do Not Require Add-On Code. EAN-13 barcodes are handled, depending on your selection for the "Add-On Code Required" feature.
@E133780
** Do Not Require Add-On Code
@E133781
Require Add-On Code
@SETUPE0
** Exit Setup
EAN-13 Beginning with 414/419 Add-On Code Required
This setting programs the scanner to require an add-on code (2-digit or 5-digit) on EAN-13 barcodes that begin with a "414" or "419". The following settings can be programmed:
Require Add-On Code: All EAN-13 barcodes that begin with a "414" or "419" must have a 2-digit or 5-digit add-on code. The EAN-13 barcode with the add-on code is then transmitted. If the required add-on code is not found, the EAN-13 barcode is discarded.
Do Not Require Add-On Code: If you have selected Require Add-On Code, and you want to disable this feature, scan Do Not Require Add-On Code. EAN-13 barcodes are handled, depending on your selection for the "Add-On Code Required" feature.
@E134140
** Do Not Require Add-On Code
@E134141
Require Add-On Code
EAN-13 Beginning with 434/439 Add-On Code Required
This setting programs the scanner to require an add-on code (2-digit or 5-digit) on EAN-13 barcodes that begin with a "434" or "439". The following settings can be programmed:
Require Add-On Code: All EAN-13 barcodes that begin with a "434" or "439" must have a 2-digit or 5-digit add-on code. The EAN-13 barcode with the add-on code is then transmitted. If the required add-on code is not found, the EAN-13 barcode is discarded.
Do Not Require Add-On Code: If you have selected Require Add-On Code, and you want to disable this feature, scan Do Not Require Add-On Code. EAN-13 barcodes are handled, depending on your selection for the "Add-On Code Required" feature.
@E134340
** Do Not Require Add-On Code
@E134341
Require Add-On Code
EAN-13 Beginning with 977 Add-On Code Required
This setting programs the scanner to require an add-on code (2-digit or 5-digit) on EAN-13 barcodes that begin with "977". The following settings can be programmed:
Require Add-On Code: All EAN-13 barcodes that begin with "977" must have a 2-digit or 5-digit add-on code. The EAN-13 barcode with the add-on code is then transmitted. If the required add-on code is not found, the EAN-13 barcode is discarded.
Do Not Require Add-On Code: If you have selected Require Add-On Code, and you want to disable this feature, scan Do Not Require Add-On Code. EAN-13 barcodes are handled, depending on your selection for the "Add-On Code Required" feature.
@E139770
** Do Not Require Add-On Code
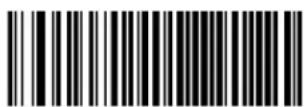
@E139771
Require Add-On Code
EAN-13 Beginning with 978 Add-On Code Required
This setting programs the scanner to require an add-on code (2-digit or 5-digit) on EAN-13 barcodes that begin with "978". The following settings can be programmed:
Require Add-On Code: All EAN-13 barcodes that begin with "978" must have a 2-digit or 5-digit add-on code. The EAN-13 barcode with the add-on code is then transmitted. If the required add-on code is not found, the EAN-13 barcode is discarded.
Do Not Require Add-On Code: If you have selected Require Add-On Code, and you want to disable this feature, scan Do Not Require Add-On Code. EAN-13 barcodes are handled, depending on your selection for the "Add-On Code Required" feature.
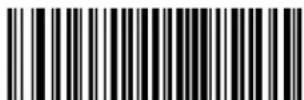
@E139780
** Do Not Require Add-On Code
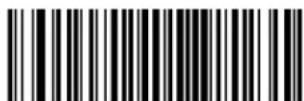
@E139781
Require Add-On Code
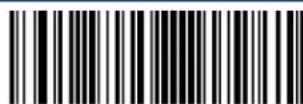
@SETUPE0
** Exit Setup
EAN-13 Beginning with 979 Add-On Code Required
This setting programs the scanner to require an add-on code (2-digit or 5-digit) on EAN-13 barcodes that begin with "979". The following settings can be programmed:
Require Add-On Code: All EAN-13 barcodes that begin with "979" must have a 2-digit or 5-digit add-on code. The EAN-13 barcode with the add-on code is then transmitted. If the required add-on code is not found, the EAN-13 barcode is discarded.
Do Not Require Add-On Code: If you have selected Require Add-On Code, and you want to disable this feature, scan Do Not Require Add-On Code. EAN-13 barcodes are handled, depending on your selection for the "Add-On Code Required" feature.
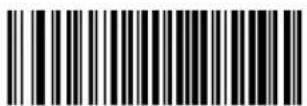
@E139790
** Do Not Require Add-On Code
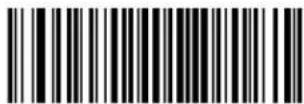
@E139791
Require Add-On Code
UPC-E
If the scanner fails to identify UPC-E0/UPC-E1 barcodes, you may first try this solution by scanning the Enter Setup barcode and then Enable UPC-E0/UPC-E1 barcode.
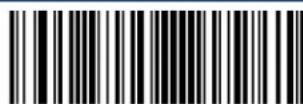
@SETUPE0
** Exit Setup
Transmit Check Character
UPC-E is 8 digits in length with the last one as its check character used to verify the integrity of the data.
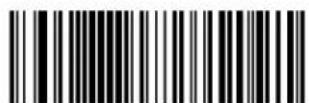
@UPECHK2
** Transmit UPC-E Check Character
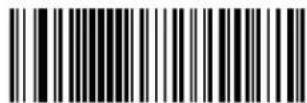
@UPECHK1
Do Not Transmit UPC-E Check Character
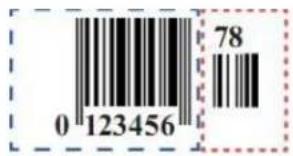
2-Digit Add-On Code
A UPC-E barcode can be augmented with a two-digit add-on code to form a new one. In the example below, the part surrounded by blue dotted line is a UPC-E barcode while the part circled by red dotted line is a two-digit add-on code.
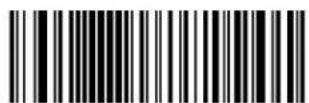
@UPEAD20
** Disable 2-Digit Add-On Code
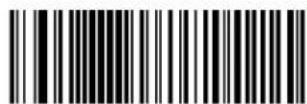
@UPEAD21
Enable 2-Digit Add-On Code

Disable 2-Digit Add-On Code: The scanner decodes UPC-E and ignores the add-on code when presented with a UPC-E plus 2-digit add-on barcode. It can also decode UPC-E barcodes without 2-digit add-on codes.
Enable 2-Digit Add-On Code: The scanner decodes a mix of UPC-E barcodes with and without 2-digit add-on codes.
@SETUPE0
** Exit Setup
5-Digit Add-On Code
A UPC-E barcode can be augmented with a five-digit add-on code to form a new one. In the example below, the part surrounded by blue dotted line is a UPC-E barcode while the part circled by red dotted line is a five-digit add-on code.
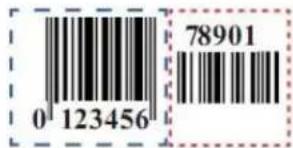
@UPEAD50
** Disable 5-Digit Add-On Code
@UPEAD51
Enable 5-Digit Add-On Code

Disable 5-Digit Add-On Code: The scanner decodes UPC-E and ignores the add-on code when presented with a UPC-E plus 5-digit add-on barcode. It can also decode UPC-E barcodes without 5-digit add-on codes.
Enable 5-Digit Add-On Code: The scanner decodes a mix of UPC-E barcodes with and without 5-digit add-on codes.
Add-On Code Required
When UPC-E Add-On Code Required is selected, the scanner will only read UPC-E barcodes that contain add-on codes.
@UPEREQ0
** UPC-E Add-On Code Not Required
@UPEREQ1
UPC-E Add-On Code Required
@SETUPE0
** Exit Setup
Transmit Preamble Character
Preamble characters (Country Code and System Character) can be transmitted as part of a UPC-E barcode. Select one of the following options for transmitting UPC-E preamble to the host device: transmit system character only, transmit system character and country code ("0" for USA), or transmit no preamble.
@UPEPRE1
** System Character
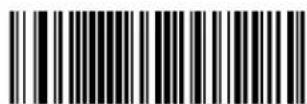
@UPEPRE0
No Preamble
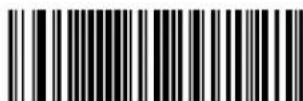
@UPEPRE2
System Character & Country Code
Convert UPC-E to UPC-A
Convert UPC-E to UPC-A: Convert UPC-E (zero suppressed) decoded data to UPC-A format before transmission. After conversion, the data follows UPC-A format and is affected by UPC-A programming selections (e.g., Preamble, Check Character).
Do Not Convert UPC-E to UPC-A: UPC-E decoded data is transmitted as UPC-E data, without conversion.
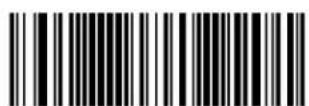
@UPEEXP0
** Do Not Convert UPC-E to UPC-A
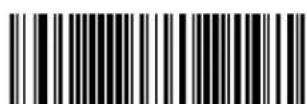
@UPEEXP1
Convert UPC-E to UPC-A
UPC-A
If the scanner fails to identify UPC-A barcodes, you may first try this solution by scanning the Enter Setup barcode and then Enable UPC-A barcode.
Transmit Check Character
UPC-A is 13 digits in length with the last one as its check character used to verify the integrity of the data.
@UPACHK2
** Transmit UPC-A Check Character
@UPACHK1
Do Not Transmit UPC-A Check Character
@SETUPE0
** Exit Setup
2-Digit Add-On Code
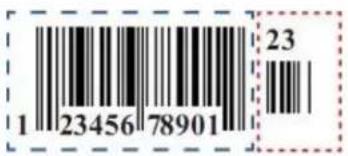
A UPC-A barcode can be augmented with a two-digit add-on code to form a new one. In the example below, the part surrounded by blue dotted line is a UPC-A barcode while the part circled by red dotted line is a two-digit add-on code.
@UPAAD20
** Disable 2-Digit Add-On Code
@UPAAD21
Enable 2-Digit Add-On Code

Disable 2-Digit Add-On Code: The scanner decodes UPC-A and ignores the add-on code when presented with a UPC-A plus 2-digit add-on barcode. It can also decode UPC-A barcodes without 2-digit add-on codes.
Enable 2-Digit Add-On Code: The scanner decodes a mix of UPC-A barcodes with and without 2-digit add-on codes.
5-Digit Add-On Code
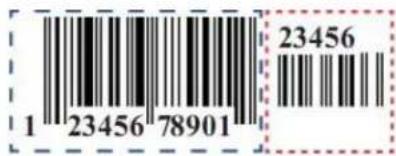
A UPC-A barcode can be augmented with a five-digit add-on code to form a new one. In the example below, the part surrounded by blue dotted line is a UPC-A barcode while the part circled by red dotted line is a five-digit add-on code.
** Disable 5-Digit Add-On Code
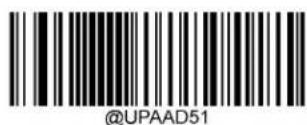
Enable 5-Digit Add-On Code

Disable 5-Digit Add-On Code: The scanner decodes UPC-A and ignores the add-on code when presented with a UPC-A plus 5-digit add-on barcode. It can also decode UPC-A barcodes without 5-digit add-on codes.
Enable 5-Digit Add-On Code: The scanner decodes a mix of UPC-A barcodes with and without 5-digit add-on codes.
Add-On Code Required
When UPC-A Add-On Code Required is selected, the scanner will only read UPC-A barcodes that contain add-on codes.
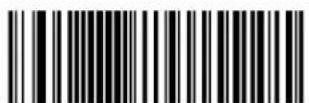
@UPAREQ0
** UPC-A Add-On Code Not Required
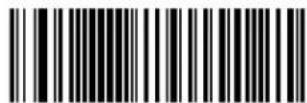
@UPAREQ1
UPC-A Add-On Code Required
Transmit Preamble Character
Preamble characters (Country Code and System Character) can be transmitted as part of a UPC-A barcode. Select one of the following options for transmitting UPC-A preamble to the host device: transmit system character only, transmit system character and country code ("0" for USA), or transmit no preamble.
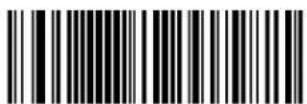
@UPAPRE0
** No Preamble
@UPAPRE1
System Character
@UPAPRE2
System Character & Country Code

@SETUPE0
** Exit Setup
Coupon
UPC-A/EAN-13 with Extended Coupon Code
The following three types of coupon code + extended coupon code are supported:
◇ UPC-A (starting with "5") + GS1-128
✿ UPC-A (starting with "5") + GS1 Databar
◇ EAN-13 (starting with "99") + GS1-128
Use the appropriate barcode below to enable or disable UPC-A/EAN-13 with Extended Coupon Code. When left on the default setting (Off), the scanner treats Coupon Codes and Extended Coupon Codes as single bar codes.
If you scan the Allow Concatenation code, when the scanner sees the coupon code and the extended coupon code in a single scan, it transmits both as separate symbologies. Otherwise, it transmits the first coupon code it reads.
If you scan the Require Concatenation code, the scanner must see and read the coupon code and extended coupon code in a single read to transmit the data. No data is output unless both codes are read.
@CPNENA0
** Off
@CPNENA1
Allow Concatenation
@CPNENA2
Require Concatenation

When using the UPC-A Coupon feature, please ensure that System Character or System Character & Country Code is selected for the "Transmit UPC-A Preamble Character" feature.
@SETUPE0
** Exit Setup
Coupon GS1 Databar Output
If you scan coupons that have both UPC and GS1 Databar codes, you may wish to scan and output only the data from the GS1 Databar code. Scan the GS1 Output On barcode below to scan and output only the GS1 Databar code data.
When GS1 Output Off is selected, coupons that have both UPC and GS1 Databar codes are transmitted depending on your selection for the "UPC-A/EAN-13 with Extended Coupon Code" feature.
@CPNGS10
** GS1 Output Off
@CPNGS11
GS1 Output On

When using the UPC-A Coupon feature, please ensure that System Character or System Character & Country Code is selected for the "Transmit UPC-A Preamble Character" feature.
Interleaved 2 of 5
Restore the Factory Defaults of Interleaved 2 of 5
Enable/Disable Interleaved 2 of 5
@I25ENA1
** Enable Interleaved 2 of 5
@I25ENA0
Disable Interleaved 2 of 5

If the scanner fails to identify Interleaved 2 of 5 barcodes, you may first try this solution by scanning the Enter Setup barcode and then Enable Interleaved 2 of 5 barcode.
Set Length Range for Interleaved 2 of 5
The scanner can be configured to only decode Interleaved 2 of 5 barcodes with lengths that fall between (inclusive) the minimum and maximum lengths. To accomplish it, you need to set the minimum and maximum lengths.
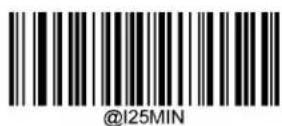
Set the Minimum Length (Default: 6)
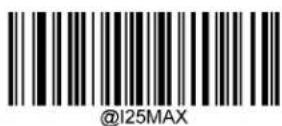
Set the Maximum Length (Default: 80)

If minimum length is set to be greater than maximum length, the scanner only decodes Interleaved 2 of 5 barcodes with either the minimum or maximum length. If minimum length is same as maximum length, only Interleaved 2 of 5 barcodes with that length are to be decoded.
Set the scanner to decode Interleaved 2 of 5 barcodes containing between 8 and 12 characters:
- Scan the Enter Setup barcode.
- Scan the Set the Minimum Length barcode.
- Scan the numeric barcode "8" from the "Digit Barcodes" section in Appendix.
- Scan the Save barcode from the "Save/Cancel Barcodes" section in Appendix.
- Scan the Set the Maximum Length barcode.
- Scan the numeric barcodes "1" and "2" from the "Digit Barcodes" section in Appendix.
- Scan the Save barcode from the "Save/Cancel Barcodes" section in Appendix.
- Scan the Exit Setup barcode.
Check Character Verification
A check character is optional for Interleaved 2 of 5 and can be added as the last character. It is a calculated value used to verify the integrity of the data.
✿ Disable: The scanner transmits Interleaved 2 of 5 barcodes as is.
Do Not Transmit Check Character After Verification: The scanner checks the integrity of all Interleaved 2 of 5 barcodes to verify that the data complies with the check character algorithm. Barcodes passing the check will be transmitted except the last digit, whereas those failing it will not be transmitted.
Transmit Check Character After Verification: The scanner checks the integrity of all Interleaved 2 of 5 barcodes to verify that the data complies with the check character algorithm. Barcodes passing the check will be transmitted, whereas those failing it will not be transmitted.
Since Interleaved 2 of 5 must always have an even number of digits, a zero may need to be added as the first digit when the check character is added. The check character is automatically generated when making Interleaved 2 of 5 barcodes.
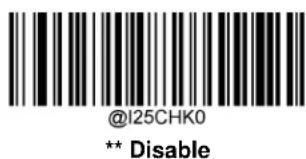
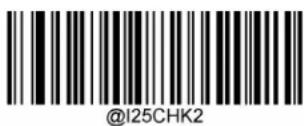
Transmit Check Character After Verification
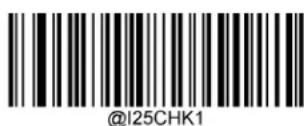
Do Not Transmit Check Character After Verification
If the Do Not Transmit Check Character After Verification option is enabled, Interleaved 2 of 5 barcodes with a length that is less than the configured minimum length after having the check character excluded will not be decoded. (For example, when the Do Not Transmit Check Character After Verification option is enabled and the minimum length is set to 4, Interleaved 2 of 5 barcodes with a total length of 4 characters including the check character cannot be read.)
Febraban
Transmit Delay per Character
Transmit Delay per Character applies to both Expanded and Unexpanded Febraban. This feature is available only when USB HID Keyboard is enabled.
@FEBSEN0
** Disable Transmit Delay per Character
@FEBSEN1
Enable Transmit Delay per Character
You may select an appropriate delay value from the options below as per your actual needs.
@FEBSDT0
0ms
@FEBSDT5
5ms
@FEBSDT10
10ms
@FEBSDT15
15ms
@FEBSDT20
20ms
@FEBSDT25
25ms
@FEBSDT30
30ms
@FEBSDT35
35ms
@FEBSDT40
40ms
@FEBSDT50
50ms
@FEBSDT60
60ms
@FEBSDT70
** 70ms
@FEBSDT45
45ms
@FEBSDT55
55ms
@FEBSDT65
65ms
@FEBSDT75
75ms
Transmit Delay per 12 Characters
Transmit Delay per 12 Characters applies to Expanded Febraban only. This feature is available only when USB HID Keyboard is enabled.
** Disable Transmit Delay per 12 Characters
Enable Transmit Delay per 12 Characters
You may select an appropriate delay value from the options below as per your actual needs.
@SETUPE1
Enter Setup
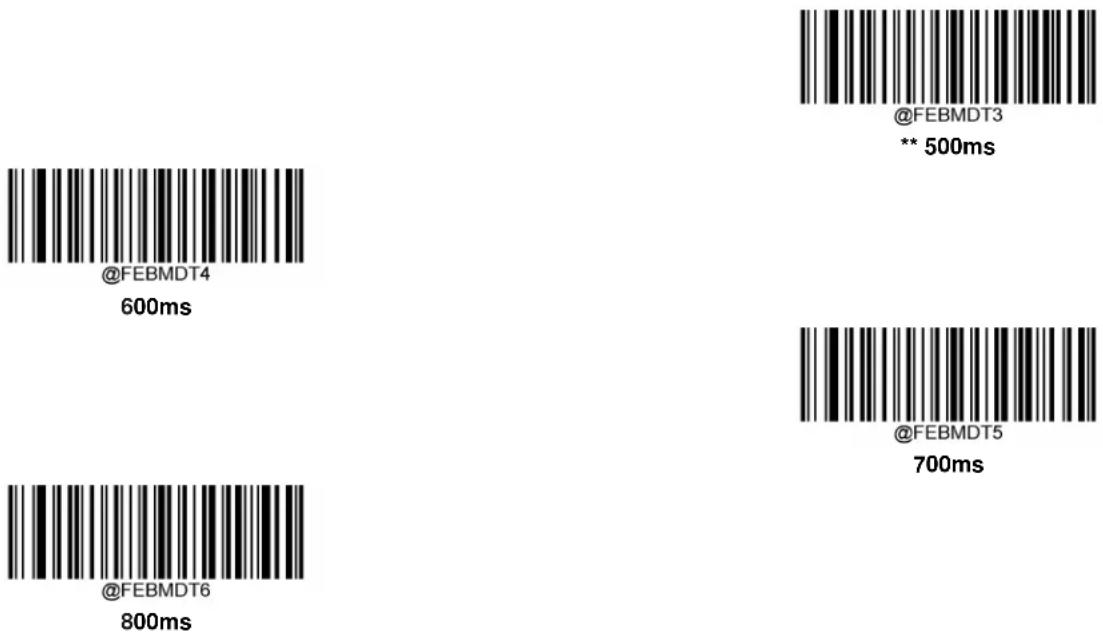
@FEBMDT7
900ms
@SETUPE0
** Exit Setup
ITF-14
ITF-14 is a special kind of Interleaved 2 of 5 with a length of 14 characters and the last character as the check character.
ITF-14 priority principle: Forthe Interleaved 2 of 5 barcodes with a length of 14 characters and the last character as the check character, the ITF-14 configurations shall take precedence over the Interleaved 2 of 5 settings.
@I14ENA2
Enable ITF-14 and Transmit Check Character
@I14ENA1
Enable ITF-14 But Do Not Transmit Check Character
An example of the ITF-14 priority principle: when ITF-14 is enabled and Interleaved 2 of 5 is disabled, the scanner only decodes Interleaved 2 of 5 barcodes with a length of 14 characters and the last character as the check character.
@SETUPE0
** Exit Setup
ITF-6
ITF-6 is a special kind of Interleaved 2 of 5 with a length of 6 characters and the last character as the check character.
ITF-6 priority principle: For the Interleaved 2 of 5 barcodes with a length of 6 characters and the last character as the check character, the ITF-6 configurations shall take precedence over the Interleaved 2 of 5 settings.
@IT6DEF
Restore the Factory Defaults of ITF-6
Enable/Disable ITF-6
@IT6ENA0
** Disable ITF-6
@IT6ENA2
Enable ITF-6 and Transmit Check Character
@IT6ENA1
Enable ITF-6 But Do Not Transmit Check Character

An example of the ITF-6 priority principle: when ITF-6 is enabled and Interleaved 2 of 5 is disabled, the scanner only decodes Interleaved 2 of 5 barcodes with a length of 6 characters and the last character as the check character.

@SETUPE0
** Exit Setup
Matrix 2 of 5
Restore the Factory Defaults of Matrix 2 of 5
Enable/Disable Matrix 2 of 5
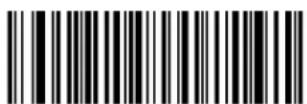
@M25ENA1
** Enable Matrix 2 of 5
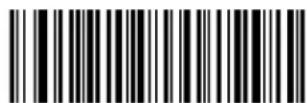
@M25ENA0
Disable Matrix 2 of 5

If the scanner fails to identify Matrix 2 of 5 barcodes, you may first try this solution by scanning the Enter Setup barcode and then Enable Matrix 2 of 5 barcode.
Set Length Range for Matrix 2 of 5
The scanner can be configured to only decode Matrix 2 of 5 barcodes with lengths that fall between (inclusive) the minimum and maximum lengths. To accomplish it, you need to set the minimum and maximum lengths.
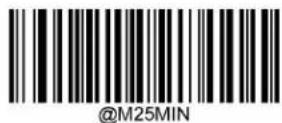
Set the Minimum Length (Default: 4)
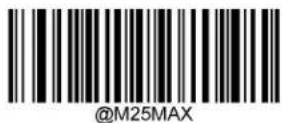
Set the Maximum Length (Default: 80)

If minimum length is set to be greater than maximum length, the scanner only decodes Matrix 2 of 5 barcodes with either the minimum or maximum length. If minimum length is same as maximum length, only Matrix 2 of 5 barcodes with that length are to be decoded.

Set the scanner to decode Matrix 2 of 5 barcodes containing between 8 and 12 characters:
- Scan the Enter Setup barcode.
- Scan the Set the Minimum Length barcode.
- Scan the numeric barcode "8" from the "Digit Barcodes" section in Appendix.
- Scan the Save barcode from the "Save/Cancel Barcodes" section in Appendix.
- Scan the Set the Maximum Length barcode.
- Scan the numeric barcodes "1" and "2" from the "Digit Barcodes" section in Appendix.
- Scan the Save barcode from the "Save/Cancel Barcodes" section in Appendix.
- Scan the Exit Setup barcode.
Check Character Verification
A check character is optional for Matrix 2 of 5 and can be added as the last character. It is a calculated value used to verify the integrity of the data.
◆ Disable: The scanner transmitsMatrix 2 of 5 barcodes as is.
Do Not Transmit Check Character After Verification: The scanner checks the integrity of all Matrix 2 of 5 barcodes to verify that the data complies with the check character algorithm. Barcodes passing the check will be transmitted except the last digit, whereas those failing it will not be transmitted.
Transmit Check Character After Verification: The scanner checks the integrity of all Matrix 2 of 5 barcodes to verify that the data complies with the check character algorithm. Barcodes passing the check will be transmitted, whereas those failing it will not be transmitted.
Since Matrix 2 of 5 must always have an even number of digits, a zero may need to be added as the first digit when the check character is added. The check character is automatically generated when making Matrix 2 of 5 barcodes.
** Disable
Do Not Transmit Check Character After Verification
Transmit Check Character After Verification
If the Do Not Transmit Check Character After Verification option is enabled, Matrix 2 of 5 barcodes with a length that is less than the configured minimum length after having the check character excluded will not be decoded. (For example, when the Do Not Transmit Check Character After Verification option is enabled and the minimum length is set to 4, Matrix 2 of 5 barcodes with a total length of 4 characters including the check character cannot be read.)
Code 39
If the scanner fails to identify Code 39 barcodes, you may first try this solution by scanning the Enter Setup barcode and then Enable Code 39 barcode.
Set Length Range for Code 39
The scanner can be configured to only decode Code 39 barcodes with lengths that fall between (inclusive) the minimum and maximum lengths. To accomplish it, you need to set the minimum and maximum lengths.
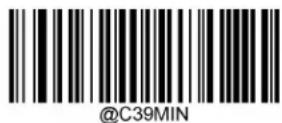
Set the Minimum Length (Default: 1)
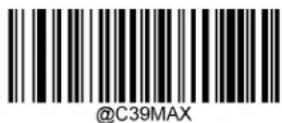
Set the Maximum Length (Default: 48)

If minimum length is set to be greater than maximum length, the scanner only decodes Code 39 barcodes with either the minimum or maximum length. If minimum length is same as maximum length, only Code 39 barcodes with that length are to be decoded.

Set the scanner to decode Code 39 barcodes containing between 8 and 12 characters:
- Scan the Enter Setup barcode.
- Scan the Set the Minimum Length barcode.
- Scan the numeric barcode "8" from the "Digit Barcodes" section in Appendix.
- Scan the Save barcode from the "Save/Cancel Barcodes" section in Appendix.
- Scan the Set the Maximum Length barcode.
- Scan the numeric barcodes "1" and "2" from the "Digit Barcodes" section in Appendix.
- Scan the Save barcode from the "Save/Cancel Barcodes" section in Appendix.
- Scan the Exit Setup barcode.
Check Character Verification
A check character is optional for Code 39 and can be added as the last character. It is a calculated value used to verify the integrity of the data.
✿ Disable: The scanner transmitsCode 39 barcodes as is.
Do Not Transmit Check Character After Verification: The scanner checks the integrity of all Code 39 barcodes to verify that the data complies with the check character algorithm. Barcodes passing the check will be transmitted except the last digit, whereas those failing it will not be transmitted.
Transmit Check Character After Verification: The scanner checks the integrity of all Code 39 barcodes to verify that the data complies with the check character algorithm. Barcodes passing the check will be transmitted, whereas those failing it will not be transmitted.
@C39CHK0
** Disable
@C39CHK2
Transmit Check Character After Verification
@C39CHK1
Do Not Transmit Check Character After Verification
If the Do Not Transmit Check Character After Verification option is enabled, Code 39 barcodes with a length that is less than the configured minimum length after having the check character excluded will not be decoded. (For example, when the Do Not Transmit Check Character After Verification option is enabled and the minimum length is set to 4, Code 39 barcodes with a total length of 4 characters including the check character cannot be read.)
Transmit Start/Stop Character
Code 39 uses an asterisk (*) for both the start and the stop characters. You can choose whether or not to transmit the start/stop characters by scanning the appropriate barcode below.
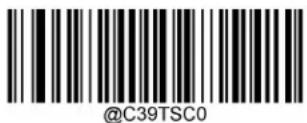
** Do Not Transmit Start/Stop Character
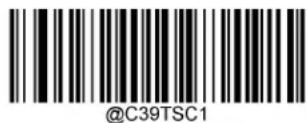
Transmit Start/Stop Character
Enable/Disable Code 39 Full ASCII
The scanner can be configured to identify all ASCII characters by scanning the appropriate barcode below.
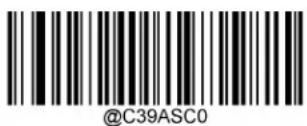
** Disable Code 39 Full ASCII
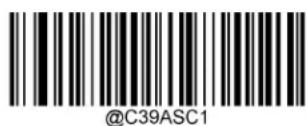
Enable Code 39 Full ASCII
Enable/Disable Code 32 (Italian Pharma Code)
Code 32 is a variant of Code 39 used by the Italian pharmaceutical industry. Scan the appropriate bar code below to enable or disable Code 32. Code 39 must be enabled and Code 39 check character verification must be disabled for this parameter to function.
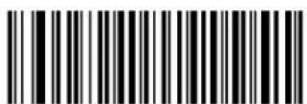
@C39E320
** Disable Code 32
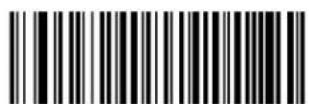
@C39E321
Enable Code 32
Code 32 Prefix
Scan the appropriate barcode below to enable or disable adding the prefix character "A" to all Code 32 barcodes. Code 32 must be enabled for this parameter to function.
@C39S320
** Disable Code 32 Prefix
@C39S321
Enable Code 32 Prefix
Transmit Code 32 Start/Stop Character
Code 32 must be enabled for this parameter to function.

@C39T320
** Do Not Transmit Code 32 Start/Stop Character
@C39T321
Transmit Code 32 Start/Stop Character
Transmit Code 32 Check Character
Code 32 must be enabled for this parameter to function.
@C39C320
** Do Not Transmit Code 32 Check Character
@C39C321
Transmit Code 32 Check Character
Codabar
If the scanner fails to identify Codabar barcodes, you may first try this solution by scanning the Enter Setup barcode and then Enable Codabar barcode.
Set Length Range for Codabar
The scanner can be configured to only decode Codabar barcodes with lengths that fall between (inclusive) the minimum and maximum lengths. To accomplish it, you need to set the minimum and maximum lengths.
Set the Minimum Length (Default: 2)
Set the Maximum Length (Default: 60)

If minimum length is set to be greater than maximum length, the scanner only decodes Codabar barcodes with either the minimum or maximum length. If minimum length is same as maximum length, only Codabar barcodes with that length are to be decoded.
Set the scanner to decode Codabar barcodes containing between 8 and 12 characters:
- Scan the Enter Setup barcode.
- Scan the Set the Minimum Length barcode.
- Scan the numeric barcode "8" from the "Digit Barcodes" section in Appendix.
- Scan the Save barcode from the "Save/Cancel Barcodes" section in Appendix.
- Scan the Set the Maximum Length barcode.
- Scan the numeric barcodes "1" and "2" from the "Digit Barcodes" section in Appendix.
- Scan the Save barcode from the "Save/Cancel Barcodes" section in Appendix.
- Scan the Exit Setup barcode.
Check Character Verification
A check character is optional for Codabar and can be added as the last character. It is a calculated value used to verify the integrity of the data.
✿ Disable: The scanner transmits Codabar barcodes as is.
Do Not Transmit Check Character After Verification: The scanner checks the integrity of all Codabar barcodes to verify that the data complies with the check character algorithm. Barcodes passing the check will be transmitted except the last digit, whereas those failing it will not be transmitted.
Transmit Check Character After Verification: The scanner checks the integrity of all Codabar barcodes to verify that the data complies with the check character algorithm. Barcodes passing the check will be transmitted, whereas those failing it will not be transmitted.
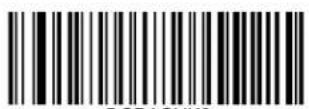
@CBACHK0
** Disable
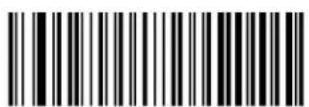
@CBACHK2
Transmit Check Character After Verification
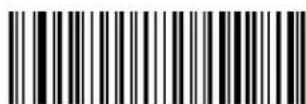
@CBACHK1
Do Not Transmit Check Character After Verification
If the Do Not Transmit Check Character After Verification option is enabled, Codabar barcodes with a length that is less than the configured minimum length after having the check character excluded will not be decoded. (For example, when the Do Not Transmit Check Character After Verification option is enabled and the minimum length is set to 4, Codabar barcodes with a total length of 4 characters including the check character cannot be read.)
Start/Stop Character
You can set the start/stop characters and choose whether or not to transmit the start/stop characters by scanning the appropriate barcode below.
@CBATSC0
** Do Not Transmit Start/Stop Character
@CBATSC1
Transmit Start/Stop Character
@CBASCF0
** ABCD/ABCD as the Start/Stop Character
@CBASCF1
ABCD/TN*E as the Start/Stop Character
@CBASCF2
abcd/abcd as the Start/Stop Character
@CBASCF3
abcd/tn*e as the Start/Stop Character
Code 93
If the scanner fails to identify Code 93 barcodes, you may first try this solution by scanning the Enter Setup barcode and then Enable Code 93 barcode.
Set Length Range for Code 93
The scanner can be configured to only decode Code 93 barcodes with lengths that fall between (inclusive) the minimum and maximum lengths. To accomplish it, you need to set the minimum and maximum lengths.
@C93MIN
Set the Minimum Length (Default: 1)
@C93MAX
Set the Maximum Length (Default: 48)

If minimum length is set to be greater than maximum length, the scanner only decodes Code 93 barcodes with either the minimum or maximum length. If minimum length is same as maximum length, only Code 93 barcodes with that length are to be decoded.
Set the scanner to decode Code 93 barcodes containing between 8 and 12 characters:
- Scan the Enter Setup barcode.
- Scan the Set the Minimum Length barcode.
- Scan the numeric barcode "8" from the "Digit Barcodes" section in Appendix.
- Scan the Save barcode from the "Save/Cancel Barcodes" section in Appendix.
- Scan the Set the Maximum Length barcode.
- Scan the numeric barcodes "1" and "2" from the "Digit Barcodes" section in Appendix.
- Scan the Save barcode from the "Save/Cancel Barcodes" section in Appendix.
- Scan the Exit Setup barcode.
Check Character Verification
Check characters are optional for Code 93 and can be added as the last two characters, which are calculated values used to verify the integrity of the data.
✿ Disable: The scanner transmits Code 93 barcodes as is.
Do Not Transmit Check Character After Verification: The scanner checks the integrity of all Code 93 barcodes to verify that the data complies with the check character algorithm. Barcodes passing the checks will be transmitted except the last two digits, whereas those failing them will not be transmitted.
Transmit Check Character After Verification: The scanner checks the integrity of all Code 93 barcodes to verify that the data complies with the check character algorithm. Barcodes passing the checks will be transmitted, whereas those failing them will not be transmitted.
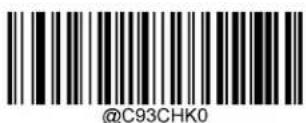
Disable
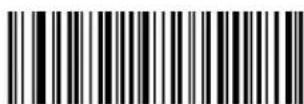
@C93CHK1
** Do Not Transmit Check Character After Verification
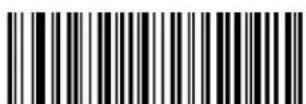
@C93CHK2
Transmit Check Character After Verification
If the Do Not Transmit Check Character After Verification option is enabled, Code 93 barcodes with a length that is less than the configured minimum length after having the two check characters excluded will not be decoded. (For example, when the Do Not Transmit Check Character After Verification option is enabled and the minimum length is set to 4, Code 93 barcodes with a total length of 4 characters including the two check characters cannot be read.)
China Post 25
Restore the Factory Defaults of China Post 25
Enable/Disable China Post 25
@CHPENA1
Enable China Post 25
@CHPENA0
** Disable China Post 25

If the scanner fails to identify China Post 25 barcodes, you may first try this solution by scanning the Enter Setup barcode and then Enable China Post 25 barcode.
Set Length Range for China Post 25
The scanner can be configured to only decode China Post 25 barcodes with lengths that fall between (inclusive) the minimum and maximum lengths. To accomplish it, you need to set the minimum and maximum lengths.
@CHPMIN
Set the Minimum Length (Default: 1)
@CHPMAX
Set the Maximum Length (Default: 48)

If minimum length is set to be greater than maximum length, the scanner only decodes China Post 25 barcodes with either the minimum or maximum length. If minimum length is same as maximum length, only China Post 25 barcodes with that length are to be decoded.
Set the scanner to decode China Post 25 barcodes containing between 8 and 12 characters:
- Scan the Enter Setup barcode.
- Scan the Set the Minimum Length barcode.
- Scan the numeric barcode "8" from the "Digit Barcodes" section in Appendix.
- Scan the Save barcode from the "Save/Cancel Barcodes" section in Appendix.
- Scan the Set the Maximum Length barcode.
- Scan the numeric barcodes "1" and "2" from the "Digit Barcodes" section in Appendix.
- Scan the Save barcode from the "Save/Cancel Barcodes" section in Appendix.
- Scan the Exit Setup barcode.
Check Character Verification
A check character is optional for China Post 25 and can be added as the last character. It is a calculated value used to verify the integrity of the data.
◆ Disable: The scanner transmits China Post 25 barcodes as is.
Do Not Transmit Check Character After Verification: The scanner checks the integrity of all China Post 25 barcodes to verify that the data complies with the check character algorithm. Barcodes passing the check will be transmitted except the last digit, whereas those failing it will not be transmitted.
Transmit Check Character After Verification: The scanner checks the integrity of all China Post 25 barcodes to verify that the data complies with the check character algorithm. Barcodes passing the check will be transmitted, whereas those failing it will not be transmitted.
@CHPCHK0
** Disable
@CHPCHK2
Transmit Check Character After Verification
@CHPCHK1
Do Not Transmit Check Character After Verification

If the Do Not Transmit Check Character After Verification option is enabled, China Post 25 barcodes with a length that is less than the configured minimum length after having the check character excluded will not be decoded. (For example, when the Do Not Transmit Check Character After Verification option is enabled and the minimum length is set to 4, China Post 25 barcodes with a total length of 4 characters including the check character cannot be read.)
@SETUPE0
** Exit Setup
GS1-128 (UCC/EAN-128)
If the scanner fails to identify GS1-128 barcodes, you may first try this solution by scanning the EnterSetup barcode and then Enable GS1-128 barcode.
Set Length Range for GS1-128
The scanner can be configured to only decode GS1-128 barcodes with lengths that fall between (inclusive) the minimum and maximum lengths. To accomplish it, you need to set the minimum and maximum lengths.
@GS1MIN
Set the Minimum Length (Default: 1)
@GS1MAX
Set the Maximum Length (Default: 48)

If minimum length is set to be greater than maximum length, the scanner only decodes GS1-128 barcodes with either the minimum or maximum length. If minimum length is same as maximum length, only GS1-128 barcodes with that length are to be decoded.

Set the scanner to decode GS1-128 barcodes containing between 8 and 12 characters:
- Scan the Enter Setup barcode.
- Scan the Set the Minimum Length barcode.
- Scan the numeric barcode "8" from the "Digit Barcodes" section in Appendix.
- Scan the Save barcode from the "Save/Cancel Barcodes" section in Appendix.
- Scan the Set the Maximum Length barcode.
- Scan the numeric barcodes "1" and "2" from the "Digit Barcodes" section in Appendix.
- Scan the Save barcode from the "Save/Cancel Barcodes" section in Appendix.
- Scan the Exit Setup barcode.
Enter Setup
GS1 Databar (RSS)
If the scanner fails to identify GS1 Databar barcodes, you may first try this solution by scanning the Enter Setup barcode and then Enable GS1 Databar barcode.
Transmit Application Identifier "01"
@RSSTAI1
** Transmit Application Identifier "01"
@RSSTAIO
Do Not Transmit Application Identifier "01"
GS1 Composite (EAN· UCC Composite)
If the scanner fails to identify GS1 Composite barcodes, you may first try this solution by scanning the Enter Setup barcode and then Enable GS1 Composite barcode.
@SETUPE0
** Exit Setup
Enter Setup
Enable/Disable UPC/EAN Composite
Enable UPC/EAN Composite
** Disable UPC/EAN Composite
Code 11
Set Length Range for Code 11
The scanner can be configured to only decode Code 11 barcodes with lengths that fall between (inclusive) the minimum and maximum lengths. To accomplish it, you need to set the minimum and maximum lengths.
@C11MIN
Set the Minimum Length (Default: 4)
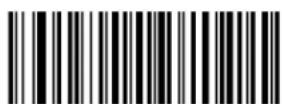
@C11MAX
Set the Maximum Length (Default: 48)

If minimum length is set to be greater than maximum length, the scanner only decodes Code 11 barcodes with either the minimum or maximum length. If minimum length is same as maximum length, only Code 11 barcodes with that length are to be decoded.
Set the scanner to decode Code 11 barcodes containing between 8 and 12 characters:
- Scan the Enter Setup barcode.
- Scan the Set the Minimum Length barcode.
- Scan the numeric barcode "8" from the "Digit Barcodes" section in Appendix.
- Scan the Save barcode from the "Save/Cancel Barcodes" section in Appendix.
- Scan the Set the Maximum Length barcode.
- Scan the numeric barcodes "1" and "2" from the "Digit Barcodes" section in Appendix.
- Scan the Save barcode from the "Save/Cancel Barcodes" section in Appendix.
- Scan the Exit Setup barcode.
Check Character Verification
Check characters are optional for Code 11 and can be added as the last one or two characters, which are calculated values used to verify the integrity of the data.
If the Disable option is enabled, the scanner transmits Code 11 barcodes as is.
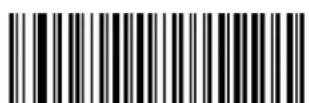
@C11CHK0
Disable
@C11CHK2
Two Check Characters, MOD11/MOD11

@C11CHK4
One Check Character, MOD11 (Len<=10)
Two Check Characters, MOD11/MOD11(Len>10)
@C11CHK1
** One Check Character, MOD11
@C11CHK3
Two Check Characters, MOD11/MOD9
@C11CHK5
One Check Character, MOD11 (Len<=10)
Two Check Characters, MOD11/MOD9 (Len>10)
Transmit Check Character
@C11TCK0
Do Not Transmit Code 11 Check Character
@C11TCK1
** Transmit Code 11 Check Character
If you select a check character algorithm and the Do Not Transmit Check Character option, Code 11 barcodes with a length that is less than the configured minimum length after having the check character(s) excluded will not be decoded. (For example, when the One Check Character, MOD11 and Do Not Transmit Check Character options are enabled and the minimum length is set to 4, Code 11 barcodes with a total length of 4 characters including the check character cannot be read.)
Enter Setup
ISBN
©ISSENA1
"Enable ISSN
(###)
Disable ISSN

If the scanner fails to identify ISSN barcodes, you may first try this solution by scanning the Enter Setup barcode and then Enable ISSN barcode.

SETUPE0
" Exit Setup
@SETUPE1
Enter Setup
Industrial 25
Restore the Factory Defaults of Industrial 25
Enable/Disable Industrial 25
Enable Industrial 25
** Disable Industrial 25
Set Length Range for Industrial 25
The scanner can be configured to only decode Industrial 25 barcodes with lengths that fall between (inclusive) the minimum and maximum lengths. To accomplish it, you need to set the minimum and maximum lengths.
@L25MIN
Set the Minimum Length (Default: 6)
@L25MAX
Set the Maximum Length (Default: 48)

If minimum length is set to be greater than maximum length, the scanner only decodes Industrial 25 barcodes with either the minimum or maximum length. If minimum length is same as maximum length, only Industrial 25 barcodes with that length are to be decoded.
Set the scanner to decode Industrial 25 barcodes containing between 8 and 12 characters:
- Scan the Enter Setup barcode.
- Scan the Set the Minimum Length barcode.
- Scan the numeric barcode "8" from the "Digit Barcodes" section in Appendix.
- Scan the Save barcode from the "Save/Cancel Barcodes" section in Appendix.
- Scan the Set the Maximum Length barcode.
- Scan the numeric barcodes "1" and "2" from the "Digit Barcodes" section in Appendix.
- Scan the Save barcode from the "Save/Cancel Barcodes" section in Appendix.
- Scan the Exit Setup barcode.
Check Character Verification
A check character is optional for Industrial 25 and can be added as the last character. It is a calculated value used to verify the integrity of the data.
◆ Disable: The scanner transmits Industrial 25 barcodes as is.
Do Not Transmit Check Character After Verification: The scanner checks the integrity of all Industrial 25 barcodes to verify that the data complies with the check character algorithm. Barcodes passing the check will be transmitted except the last digit, whereas those failing it will not be transmitted.
Transmit Check Character After Verification: The scanner checks the integrity of all Industrial 25 barcodes to verify that the data complies with the check character algorithm. Barcodes passing the check will be transmitted, whereas those failing it will not be transmitted.
@L25CHK0
** Disable
@L25CHK1
Do Not Transmit Check Character After Verification
@L25CHK2
Transmit Check Character After Verification
If the Do Not Transmit Check Character After Verification option is enabled, Industrial 25 barcodes with a length that is less than the configured minimum length after having the check character excluded will not be decoded. (For example, when the Do Not Transmit Check Character After Verification option is enabled and the minimum length is set to 4, Industrial 25 barcodes with a total length of 4 characters including the check character cannot be read.)
Standard 25
If the scanner fails to identify Standard 25 barcodes, you may first try this solution by scanning the Enter Setup barcode and then Enable Standard 25 barcode.
Set Length Range for Standard 25
The scanner can be configured to only decode Standard 25 barcodes with lengths that fall between (inclusive) the minimum and maximum lengths. To accomplish it, you need to set the minimum and maximum lengths.
@S25MIN
Set the Minimum Length (Default: 6)
@S25MAX
Set the Maximum Length (Default: 48)

If minimum length is set to be greater than maximum length, the scanner only decodes Standard 25 barcodes with either the minimum or maximum length. If minimum length is same as maximum length, only Standard 25 barcodes with that length are to be decoded.

Set the scanner to decode Standard 25 barcodes containing between 8 and 12 characters:
- Scan the Enter Setup barcode.
- Scan the Set the Minimum Length barcode.
- Scan the numeric barcode "8" from the "Digit Barcodes" section in Appendix.
- Scan the Save barcode from the "Save/Cancel Barcodes" section in Appendix.
- Scan the Set the Maximum Length barcode.
- Scan the numeric barcodes "1" and "2" from the "Digit Barcodes" section in Appendix.
- Scan the Save barcode from the "Save/Cancel Barcodes" section in Appendix.
- Scan the Exit Setup barcode.
Check Character Verification
A check character is optional for Standard 25 and can be added as the last character. It is a calculated value used to verify the integrity of the data.
◆ Disable: The scanner transmits Standard 25 barcodes as is.
Do Not Transmit Check Character After Verification: The scanner checks the integrity of all Standard 25 barcodes to verify that the data complies with the check character algorithm. Barcodes passing the check will be transmitted except the last digit, whereas those failing it will not be transmitted.
Transmit Check Character After Verification: The scanner checks the integrity of all Standard 25 barcodes to verify that the data complies with the check character algorithm. Barcodes passing the check will be transmitted, whereas those failing it will not be transmitted.
@S25CHK0
** Disable
@S25CHK2
Transmit Check Character After Verification
@S25CHK1
Do Not Transmit Check Character After Verification

If the Do Not Transmit Check Character After Verification option is enabled, Standard 25 barcodes with a length that is less than the configured minimum length after having the check character excluded will not be decoded. (For example, when the Do Not Transmit Check Character After Verification option is enabled and the minimum length is set to 4, Standard 25 barcodes with a total length of 4 characters including the check character cannot be read.)
Plessey
If the scanner fails to identify Plessey barcodes, you may first try this solution by scanning the Enter Setup barcode and then Enable Plessey barcode.
Set Length Range for Plessey
The scanner can be configured to only decode Plessey barcodes with lengths that fall between (inclusive) the minimum and maximum lengths. To accomplish it, you need to set the minimum and maximum lengths.
@PLYMIN
Set the Minimum Length (Default: 4)
@PLYMAX
Set the Maximum Length (Default: 48)

If minimum length is set to be greater than maximum length, the scanner only decodes Plessey barcodes with either the minimum or maximum length. If minimum length is same as maximum length, only Plessey barcodes with that length are to be decoded.
Set the scanner to decode Plessey barcodes containing between 8 and 12 characters:
- Scan the Enter Setup barcode.
- Scan the Set the Minimum Length barcode.
- Scan the numeric barcode "8" from the "Digit Barcodes" section in Appendix.
- Scan the Save barcode from the "Save/Cancel Barcodes" section in Appendix.
- Scan the Set the Maximum Length barcode.
- Scan the numeric barcodes "1" and "2" from the "Digit Barcodes" section in Appendix.
- Scan the Save barcode from the "Save/Cancel Barcodes" section in Appendix.
- Scan the Exit Setup barcode.
Check Character Verification
Check characters are optional for Plessey and can be added as the last two characters, which are calculated values used to verify the integrity of the data.
✿ Disable: The scanner transmits Plessey barcodes as is.
Do Not Transmit Check Character After Verification: The scanner checks the integrity of all Plessey barcodes to verify that the data complies with the check character algorithm. Barcodes passing the checks will be transmitted except the last two digits, whereas those failing them will not be transmitted.
Transmit Check Character After Verification: The scanner checks the integrity of all Plessey barcodes to verify that the data complies with the check character algorithm. Barcodes passing the checks will be transmitted, whereas those failing them will not be transmitted.
@PLYCHK0
** Disable
@PLYCHK2
Transmit Check Character After Verification
@PLYCHK1
Do Not Transmit Check Character After Verification

If the Do Not Transmit Check Character After Verification option is enabled, Plessey barcodes with a length that is less than the configured minimum length after having the check characters excluded will not be decoded. (For example, when the Do Not Transmit Check Character After Verification option is enabled and the minimum length is set to 4, Plessey barcodes with a total length of 4 characters including the check characters cannot be read.)
@SETUPE0
** Exit Setup
MSI-Plessey
If the scanner fails to identify MSI-Plessey barcodes, you may first try this solution by scanning the Enter Setup barcode and then Enable MSI-Plessey barcode.
Set Length Range for MSI-Plessey
The scanner can be configured to only decode MSI-Plessey barcodes with lengths that fall between (inclusive) the minimum and maximum lengths. To accomplish it, you need to set the minimum and maximum lengths.
@MSIMIN
Set the Minimum Length (Default: 4)
@MSIMAX
Set the Maximum Length (Default: 48)

If minimum length is set to be greater than maximum length, the scanner only decodes MSI-Plessey barcodes with either the minimum or maximum length. If minimum length is same as maximum length, only MSI-Plessey barcodes with that length are to be decoded.
Set the scanner to decode MSI-Plessey barcodes containing between 8 and 12 characters:
- Scan the Enter Setup barcode.
- Scan the Set the Minimum Length barcode.
- Scan the numeric barcode "8" from the "Digit Barcodes" section in Appendix.
- Scan the Save barcode from the "Save/Cancel Barcodes" section in Appendix.
- Scan the Set the Maximum Length barcode.
- Scan the numeric barcodes "1" and "2" from the "Digit Barcodes" section in Appendix.
- Scan the Save barcode from the "Save/Cancel Barcodes" section in Appendix.
- Scan the Exit Setup barcode.
Check Character Verification
Check characters are optional for MSI-Plessey and can be added as the last one or two characters, which are calculated values used to verify the integrity of the data.
If the Disable option is enabled, the scanner transmits MSI-Plessey barcodes as is.
@MSICHK0
Disable
@MSICHK2
Two Check Characters, MOD10/MOD10
@MSICHK1
** One Check Character, MOD10
@MSICHK3
Two Check Characters, MOD10/MOD11
Transmit Check Character
@MSITCK1
** Transmit MSI-Plessey Check Character
@MSITCK0
Do Not Transmit MSI-Plessey Check Character

If you select a check character algorithm and the Do Not Transmit Check Character option, MSI-Plessey barcodes with a length that is less than the configured minimum length after having the check character(s) excluded will not be decoded. (For example, when the One Check Character, MOD10 and Do Not Transmit Check Character options are enabled and the minimum length is set to 4, MSI-Plessey barcodes with a total length of 4 characters including the check character cannot be read.)
AIM 128
If the scanner fails to identify AIM 128 barcodes, you may first try this solution by scanning the Enter Setup barcode and then Enable AIM 128 barcode.
Set Length Range for AIM 128
The scanner can be configured to only decode AIM 128 barcodes with lengths that fall between (inclusive) the minimum and maximum lengths. To accomplish it, you need to set the minimum and maximum lengths.
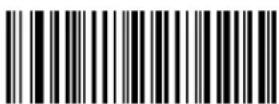
@AIMMIN
Set the Minimum Length (Default: 1)
@AIMMAX
Set the Maximum Length (Default: 48)

If minimum length is set to be greater than maximum length, the scanner only decodes AIM 128 barcodes with either the minimum or maximum length. If minimum length is same as maximum length, only AIM 128 barcodes with that length are to be decoded.
Set the scanner to decode AIM 128 barcodes containing between 8 and 12 characters:
- Scan the Enter Setup barcode.
- Scan the Set the Minimum Length barcode.
- Scan the numeric barcode "8" from the "Digit Barcodes" section in Appendix.
- Scan the Save barcode from the "Save/Cancel Barcodes" section in Appendix.
- Scan the Set the Maximum Length barcode.
- Scan the numeric barcodes "1" and "2" from the "Digit Barcodes" section in Appendix.
- Scan the Save barcode from the "Save/Cancel Barcodes" section in Appendix.
- Scan the Exit Setup barcode.
ISBT 128
If the scanner fails to identify ISBT 128 barcodes, you may first try this solution by scanning the Enter Setup barcode and then Enable ISBT 128 barcode.
COOP 25
If the engine fails to identify COOP 25 barcodes, you may first try this solution by scanning the Enter Setup barcode and then Enable COOP 25 barcode.
Set Length Range for COOP 25
The engine can be configured to only decode COOP 25 barcodes with lengths that fall between (inclusive) the minimum and maximum lengths. To accomplish it, you need to set the minimum and maximum lengths.
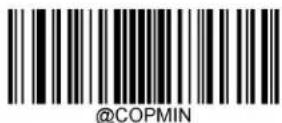
Set the Minimum Length (Default: 4)
Set the Maximum Length (Default: 80)

If minimum length is set to be greater than maximum length, the engine only decodes COOP 25 barcodes with either the minimum or maximum length. If minimum length is same as maximum length, only COOP 25 barcodes with that length are to be decoded.

Set the engine to decode COOP 25 barcodes containing between 8 and 12 characters:
- Scan the Enter Setup barcode.
- Scan the Set the Minimum Length barcode.
- Scan the numeric barcode "8" from the "Digit Barcodes" section in Appendix.
- Scan the Save barcode from the "Save/Cancel Barcodes" section in Appendix.
- Scan the Set the Maximum Length barcode.
- Scan the numeric barcodes "1" and "2" from the "Digit Barcodes" section in Appendix.
- Scan the Save barcode from the "Save/Cancel Barcodes" section in Appendix.
- Scan the Exit Setup barcode.
Check Character Verification
@COPCHK0
** Disable
@COPCHK2
Transmit Check Character After Verification
@COPCHK1
Do Not Transmit Check Character After Verification
PDF417
If the scanner fails to identify PDF417 barcodes, you may first try this solution by scanning the Enter Setup barcode and then Enable PDF417 barcode.
Set Length Range for PDF417
The scanner can be configured to only decode PDF417 barcodes with lengths that fall between (inclusive) the minimum and maximum lengths. To accomplish it, you need to set the minimum and maximum lengths.
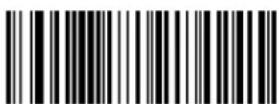
@PDFMIN
Set the Minimum Length (Default: 1)
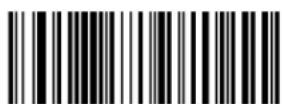
@PDFMAX
Set the Maximum Length (Default: 2710)

Minimum length is not allowed to be greater than maximum length. If you only want to read PDF417 barcodes with a specific length, set both minimum and maximum lengths to be that desired length.

Set the scanner to decode PDF417 barcodes containing between 8 and 12 characters:
- Scan the Enter Setup barcode.
- Scan the Set the Minimum Length barcode.
- Scan the numeric barcode "8" from the "Digit Barcodes" section in Appendix.
- Scan the Save barcode from the "Save/Cancel Barcodes" section in Appendix.
- Scan the Set the Maximum Length barcode.
- Scan the numeric barcodes "1" and "2" from the "Digit Barcodes" section in Appendix.
- Scan the Save barcode from the "Save/Cancel Barcodes" section in Appendix.
- Scan the Exit Setup barcode.
PDF417 Twin Code
PDF417 twin code is 2 PDF417 barcodes paralleled vertically or horizontally. They must both be either regular or inverse barcodes. They must have similar specifications and be placed closely together.
There are 3 options for reading PDF417 twin codes:
Single PDF417 Only: Read either PDF417 code.
✿ Twin PDF417 Only: Read both PDF417 codes.
Both Single & Twin: Read both PDF417 codes. If successful, transmit as twin PDF417 only. Otherwise, try single PDF417 only.
@PDFDOU0
** Single PDF417 Only
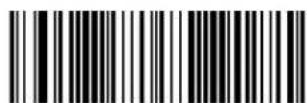
@PDFDOU1
Twin PDF417 Only
@PDFDOU2
Both Single & Twin
PDF417 Inverse
Regular barcode: Dark bars on a bright background.
Inverse barcode: Bright bars on a dark background.
@PDFINV0
** Decode Regular PDF417 Barcodes Only
@PDFINV2
Decode Both
@PDFINV1
Decode Inverse PDF417 Barcodes Only
Character Encoding
@PDFENC0
** Default Character Encoding
@PDFENC1
UTF-8
@PDFENC2
Automatically Select UTF-8 or Code Page
@SETUPE0
** Exit Setup
PDF417 ECI Output
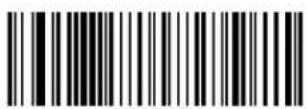
@PDFECIO
Disable PDF417 ECI Output
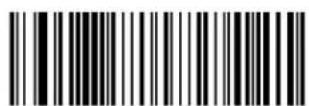
@PDFECI1
** Enable PDF417 ECI Output
QR Code
If the scanner fails to identify QR Code barcodes, you may first try this solution by scanning the Enter Setup barcode and then Enable QR Code barcode.
Set Length Range for QR Code
The scanner can be configured to only decode QR Code barcodes with lengths that fall between (inclusive) the minimum and maximum lengths. To accomplish it, you need to set the minimum and maximum lengths.
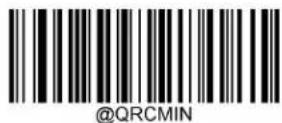
Set the Minimum Length (Default: 1)
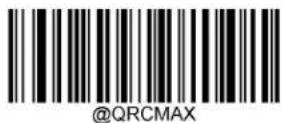
Set the Maximum Length (Default: 7089)

Minimum length is not allowed to be greater than maximum length. If you only want to read QR Code barcodes with a specific length, set both minimum and maximum lengths to be that desired length.

Set the scanner to decode QR Code barcodes containing between 8 and 12 characters:
- Scan the Enter Setup barcode.
- Scan the Set the Minimum Length barcode.
- Scan the numeric barcode "8" from the "Digit Barcodes" section in Appendix.
- Scan the Save barcode from the "Save/Cancel Barcodes" section in Appendix.
- Scan the Set the Maximum Length barcode.
- Scan the numeric barcodes "1" and "2" from the "Digit Barcodes" section in Appendix.
- Scan the Save barcode from the "Save/Cancel Barcodes" section in Appendix.
- Scan the Exit Setup barcode.
QR Inverse
Regular barcode: Dark bars on a bright background.
Inverse barcode: Bright bars on a dark background.
@QRCINV0
** Decode Regular QR Barcodes Only
** Enable QR ECI Output
Aztec
If the scanner fails to identify Aztec Code barcodes, you may first try this solution by scanning the Enter Setup barcode and then Enable Aztec Code barcode.
Set Length Range for Aztec Code
The scanner can be configured to only decode Aztec barcodes with lengths that fall between (inclusive) the minimum and maximum lengths. To accomplish it, you need to set the minimum and maximum lengths.
@AZTMIN
Set the Minimum Length (Default: 1)
@AZTMAX
Set the Maximum Length (Default: 3832)

Minimum length is not allowed to be greater than maximum length. If you only want to read Aztec barcodes with a specific length, set both minimum and maximum lengths to be that desired length.

Set the scanner to decode Aztec barcodes containing between 8 and 12 characters:
- Scan the Enter Setup barcode.
- Scan the Set the Minimum Length barcode.
- Scan the numeric barcode "8" from the "Digit Barcodes" section in Appendix.
- Scan the Save barcode from the "Save/Cancel Barcodes" section in Appendix.
- Scan the Set the Maximum Length barcode.
- Scan the numeric barcodes "1" and "2" from the "Digit Barcodes" section in Appendix.
- Scan the Save barcode from the "Save/Cancel Barcodes" section in Appendix.
- Scan the Exit Setup barcode.
Read Multi-barcodes on an Image
There are three options:
Mode 1: Read one barcode only.
Mode 2: Read fixed number of barcodes only.
Mode 3: Composite Reading. Read fixed number of barcodes first. If unsuccessful, read one barcode only.
@AZTMOD1
** Mode 1
@AZTMOD2
Mode 2
@AZTMOD3
Mode 3
Set the Number of Barcodes
@AZTMUL1
** 1
@AZTMUL3
3
@AZTMUL5
5
@AZTMUL7
7
@AZTMUL2
2
@AZTMUL4
4
@AZTMUL6
6
@AZTMUL8
8
Character Encoding
@AZTENC0
** Default Character Encoding
@AZTENC1
UTF-8
@AZTENC2
Automatically Select UTF-8 or Code Page
Aztec ECI Output
@AZTECIO
Disable Aztec ECI Output
@AZTECI1
** Enable Aztec ECI Output
Data Matrix
If the scanner fails to identify Data Matrix barcodes, you may first try this solution by scanning the Enter Setup barcode and then Enable Data Matrix barcode.
Set Length Range for Data Matrix
The scanner can be configured to only decode Data Matrix barcodes with lengths that fall between (inclusive) the minimum and maximum lengths. To accomplish it, you need to set the minimum and maximum lengths.
@DMCMIN
Set the Minimum Length (Default: 1)
@DMCMAX
Set the Maximum Length (Default: 3116)

Minimum length is not allowed to be greater than maximum length. If you only want to read Data Matrix barcodes with a specific length, set both minimum and maximum lengths to be that desired length.

Set the scanner to decode Data Matrix barcodes containing between 8 and 12 characters:
- Scan the Enter Setup barcode.
- Scan the Set the Minimum Length barcode.
- Scan the numeric barcode "8" from the "Digit Barcodes" section in Appendix.
- Scan the Save barcode from the "Save/Cancel Barcodes" section in Appendix.
- Scan the Set the Maximum Length barcode.
- Scan the numeric barcodes "1" and "2" from the "Digit Barcodes" section in Appendix.
- Scan the Save barcode from the "Save/Cancel Barcodes" section in Appendix.
- Scan the Exit Setup barcode.
Data Matrix Twin Code
Data Matrix twin code is 2 Data Matrix barcodes paralleled vertically or horizontally. They must both be either regular or inverse barcodes. They must have similar specifications and be placed closely together.
There are 3 options for reading Data Matrix twin codes:
Single Data Matrix Only: Read either Data Matrix code.
✿ Twin Data Matrix Only: Read both Data Matrix codes. Transmission sequence: left (upper) Data Matrix code followed by right (lower) Data Matrix code.
Both Single & Twin: Read both Data Matrix codes. If successful, transmit as twin Data Matrix only. Otherwise, try single Data Matrix only.
@DMCDOU0
** Single Data Matrix Only
@DMCDOU1
Twin Data Matrix Only
@DMCDOU2
Both Single & Twin
Rectangular Barcode
Data Matrix has two formats:
Square barcodes having the same amount of modules in length and width: 10*10, 12*12.... 144*144.
Rectangular barcodes having different amounts of models in length and width: 6*16, 6*14...14*22.
@DMCREC1
** Enable Rectangular Barcode
@DMCRECO
Disable Rectangular Barcode
Data Matrix Inverse
Regular barcode: Dark bars on a bright background.
Inverse barcode: Bright bars on a dark background.
@DMCINV0
** Decode Regular Data Matrix Barcodes Only
@DMCINV1
Decode Inverse Data Matrix Barcodes Only
@DMCINV2
Decode Both
Character Encoding
@DMCENC0
** Default Character Encoding
@DMCENC2
Automatically Select UTF-8 or Code Page
@DMCENC1
UTF-8
Data Matrix ECI Output
@DMCECIO
Disable Data Matrix ECI Output
@DMCECI1
** Enable Data Matrix ECI Output
Chapter 10 Data Formatter
Introduction
You may use the Data Formatter to modify the scanner's output. For example, you can use the Data Formatter to insert characters at certain points in barcode data or to suppress/replace/send certain characters in barcode data as it is scanned. Normally, when you scan a barcode, it gets outputted automatically; however, when you create a format, you must use a "send" command (see the "Send Commands" section in this chapter) within the format programming to output data. Multiple data formats can be programmed into the scanner. The maximum size of all data formats created is 2048 characters. By default, the data formatter is disabled. Enable it when required. If you have changed data format settings, and wish to clear all formats and return to the factory defaults, scan the Default Data Format code below.
@DFMDEF
Default Data Format
Add a Data Format
Data format is used to edit barcode data. When you create a data format, you must select one of the four labels (Format_0, Format_1, Format_2 and Format_3) for your data format, specify the application scope of data format (such as barcode type and data length) and include formatter commands. Multiple data formats may be created using the same label. When scanned data does not match your data format requirements, you will hear the non-match error beep (if the non-match error beep is ON).
There are two methods to program a data format: Programming with barcodes and programming with serial commands.
Programming with Barcodes
The following explains how to program a data format by scanning the specific barcodes. Scanning any irrelevant barcode or failing to follow the setting procedure will result in programming failure. To find the alphanumeric barcodes needed to create a data format, see the "Digit Barcodes" section in Appendix.
Step 1: Scan the Enter Setup barcode.
Step 2: Scan the Add Data Format barcode.
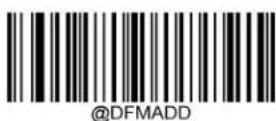
Add Data Format
Step 3: Select a label (Format_0 or Format_1 or Format_2 or Format_3).
Scan a numeric barcode 0 or 1 or 2 or 3 to label this data format Format_0 or Format_1 or Format_2 or Format_3.
Step 4: Select formatter command type.
Specify what type of formatter commands will be used. Scan a numeric barcode 6 to select formatter command type 6. (See the "Formatter Command Type 6" section in this chapter for more information)
Step 5: Set interface type
Scan 999 for any interface type.
Step 6: Set Symbology ID Number
Refer to the "Symbology ID Number" section in Appendix and find the ID number of the symbology to which you want to apply the data format. Scan three numeric barcodes for the symbology ID number. If you wish to create a data format for all symbologies, scan 999.
Step 7: Set barcode data length
Specify what length of data will be acceptable for this symbology. Scan the four numeric barcodes that represent the data length. 9999 is a universal number, indicating all lengths. For example, 32 characters should be entered as 0032.
Step 8: Enter formatter command
Refer to the "Formatter Command Type 6" section in this chapter. Scan the alphanumeric barcodes that represent the command you need to edit data. For example, when a command is F141, you should scan F141.
Step 9: Scan the Save barcode from the "Save/Cancel Barcodes" section in Appendix to save your data format.
Example: Program a Format_0 data format using formatter command type 6, Code 128 containing 10 characters applicable, send all characters followed by "A".
- Scan the Enter Setup barcode Enter the Setup mode
- Scan the Add Data Format barcode Add a data format
- Scan the 0 barcode Select Format_0 as the label
- Scan the 6 barcode Select formatter command type 6
- Scan the 9 barcode three times All interface types applicable
- Scan the barcodes 002 Only Code 128 applicable
- Scan the barcodes 0010 Only a length of 10 characters applicable
- Scan the alphanumeric barcodes F141 Send all characters followed by "A" (HEX: 41)
- Scan the Save barcode Save the data format
To streamline the programming process, you may as well generate a batch barcode by inputting the command (e.g. @DFMADD069990020010F141;) used to create a data format. See the "Use Batch Barcode" section in Chapter 9 to learn how to put a batch barcode into use.
When creating multiple data formats sharing a label, the formats are separated from each other by a vertical bar (|) in the batch command, e.g. @DFMADD069990029999F141|069990039999F142|169990049999F143;
Programming with Serial Commands
A data format can also be created by serial commands (HEX) sent from the host device. All commands must be entered in uppercase letters.
The syntax consists of the following elements:
Prefix: “\~
Storage type: “@” (HEX: 40) or “#” (HEX: 23), 1 character. “@” means permanent setting which will not be lost by removing power from the scanner or rebooting it; “#” means temporary setting which will be lost by removing power from the scanner or rebooting it.
Add Data Format Command: "DFMADD" (HEX: 44 46 4D 41 44 44), 6 characters.
Data format label: "0" (HEX: 30) or "1" (HEX: 31) or "2" (HEX: 32) or "3" (HEX: 33), 1 character. "0", "1", "2" and "3" represent Format_0, Format_1, Format_2 and Format_3 respectively.
Formatter command type: "6" (HEX: 36), 1 character.
Interface type: "999" (HEX: 39 39 39), 3 characters.
Symbology ID Number: The ID number of the symbology to which you want to apply the data format, 3 characters. 999 indicates all symbologies.
Data length: The length of data that will be acceptable for this symbology, 4 characters. 9999 indicates all lengths. For example, 32 characters should be entered as 0032.
Formatter commands: The command string used to edit data. For more information, see the "Formatter Command Type 6" section in this chapter.
Suffix: “;
Example: Program a Format_0 data format using formatter command type 6, Code 128 containing 10 characters applicable, send all characters followed by "A".
Enter: 7E 01 30 30 30 30 40 44 46 4D 41 44 44 30 36 39 39 39 30 30 33 39 39 39 39 46 31 34 31 3B 03
(\~
Response: 02 01 30 30 30 30 40 44 46 4D 41 44 44 30 36 39 39 39 30 30 33 39 39 39 39 46 31 34 31 06 3B 03
(
When creating multiple data formats sharing a label, the formats are separated from each other by a vertical bar (|) in the serial command.
Example: \~
Enable/Disable Data Formatter
When Data Formatter is disabled, the data format you have enabled becomes invalid.
@DFMENA0
** Disable Data Formatter
You may wish to require the data to conform to a data format you have created. The following settings can be applied to your data format:
Enable Data Formatter, Required, Keep Prefix/Suffix: Scanned data that meets your data format requirements is modified accordingly and gets outputted along with prefixes and suffixes (if prefix and suffix are enabled). Any data that does not match your data format requirements generates an error beep (if Non-Match Error Beep is turned ON) and the data in that barcode is not transmitted.
Enable Data Formatter, Required, Drop Prefix/Suffix: Scanned data that meets your data format requirements is modified accordingly and gets outputted without prefixes and suffixes (even if prefix and suffix are enabled). Any data that does not match your data format requirements generates an error beep (if Non-Match Error Beep is turned ON) and the data in that barcode is not transmitted.
Enable Data Formatter, Not Required, Keep Prefix/Suffix: Scanned data that meets your data format requirements is modified accordingly and gets outputted along with prefixes and suffixes (if prefix and suffix are enabled). Barcode data that does not match your data format requirements is transmitted as read along with prefixes and suffixes (if prefix and suffix are enabled).
Enable Data Formatter, Not Required, Drop Prefix/Suffix: Scanned data that meets your data format requirements is modified accordingly and gets outputted without prefixes and suffixes (even if prefix and suffix are enabled). Barcode data that does not match your data format requirements is transmitted as read along with prefixes and suffixes (if prefix and suffix are enabled).
@DFMENA1
Enable Data Formatter, Required, Keep Prefix/Suffix
@DFMENA2
Enable Data Formatter, Required, Drop Prefix/Suffix
@DFMENA3
Enable Data Formatter, Not Required, Keep Prefix/Suffix
@DFMENA4
Enable Data Formatter, Not Required, Drop Prefix/Suffix
Non-Match Error Beep
If Non-Match Error Beep is turned ON, the scanner generates an error beep when a barcode is encountered that does not match your required data format.
@DFMTON0
Non-Match Error Beep Off
@DFMTON1
** Non-Match Error Beep On

@SETUPE0
** Exit Setup
Data Format Selection
After enabling the Data Formatter, you can select a data format you want to use by scanning the appropriate barcode below.
@DFMUSE0
** Format_0
@DFMUSE1
Format_1
@DFMUSE2
Format_2
@DFMUSE3
Format_3
Change Data Format for a Single Scan
You can switch between data formats for a single scan. The next barcode is scanned using the data format selected here, then reverts to the format you have selected above.
For example, you may have set your scanner to use the data format you saved as Format_3. You can switch to Format_1 for a single trigger pull by scanning the Single Scan - Format_1 barcode below. The next barcode that is scanned uses Format_1, then reverts back to Format_3.
Note: This setting will be lost by removing power from the scanner, or turning off/rebooting the device.
@DFMSINO
Single Scan - Format_0
@DFMSIN1
Single Scan - Format_1
@DFMSIN2
Single Scan - Format_2
@DFMSIN3
Single Scan - Format_3
Clear Data Format
There are two methods to remove data format created from your scanner:
Delete one data format: Scan the Clear One barcode, a numeric barcode (0-3) and the Save barcode. For example, to delete Format_2, you should scan the Clear One barcode, the 2 barcode and the Save barcode
Delete all data formats: Scan the Clear All barcode.
@DFMCAL
Clear All
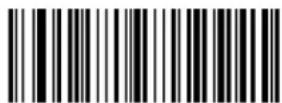
@DFMCLR
Clear One
Query Data Formats
You may scan the appropriate barcode below to get the information of data format(s) created by you or preset by manufacturer. For instance, if you have added Format_0 as per the example in the "Add a Data Format" section in this chapter, scanning the Query Current Data Formats barcode, you will get the result: Data Format0:069990020010F141;.
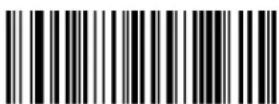
@DFMQCU
Query Current Data Formats
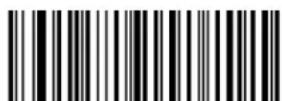
@DFMQFA
Query Preset Data Formats
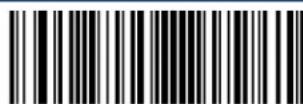
@SETUPE0
** Exit Setup
Formatter Command Type 6
When working with the Data Formatter, a virtual cursor is moved along your input data string. The following commands are used to both move this cursor to different positions, and to select, replace, and insert data into the final output. For the hex value of ASCII characters involved in the commands, refer to the "ASCII Table" in Appendix.
Send Commands
F1 Send all characters
Syntax=F1xx (xx: The insert character's hex value)
Include in the output message all of the characters from the input message, starting from current cursor position, followed by an insert character.
F2 Send a number of characters
Syntax=F2nnxx (nn: The numeric value (00-99) for the number of characters; xx: The insert character's hex value)
Include in the output message a number of characters followed by an insert character. Start from the current cursor position and continue for "nn" characters or through the last character in the input message, followed by character "xx."
F2 Example: Send a number of characters

1234567890ABCDEFGHIJ
Send the first 10 characters from the barcode above, followed by a carriage return.
Command string: F2100D
F2 is the "Send a number of characters" command
10 is the number of characters to send
0D is the hex value for a CR
The data is output as: 1234567890
F3 Send all characters up to a particular character
Syntax=F3ssxx (ss: The particular character's hex value; xx: The insert character's hex value)
Include in the output message all characters from the input message, starting with the character at the current cursor position and continuing to, but not including, the particular character "ss," followed by character "xx." The cursor is moved forward to the "ss" character.
F3 Example: Send all characters up to a particular character

1234567890ABCDEFGHIJ
Using the barcode above, send all characters up to but not including "D," followed by a carriage return.
Command string: F3440D
F3 is the "Send all characters up to a particular character" command
44 is the hex value for a "D"
0D is the hex value for a CR
The data is output as: 1234567890ABC
E9 Send all but the last characters
Syntax=E9nn (nn: The numeric value (00-99) for the number of characters that will not be sent at the end of the message)
Include in the output message all but the last "nn" characters, starting from the current cursor position. The cursor is moved forward to one position past the last input message character included.
F4 Insert a character multiple times
Syntax=F4xxnn (xx: The insert character's hex value; nn: The numeric value (00-99) for the number of times it should be sent)
Send "xx" character "nn" times in the output message, leaving the cursor in the current position.
E9 and F4 Example: Send all but the last characters, followed by 2 tabs

1234567890ABCDEFGHIJ
Send all characters except for the last 8 from the barcode above, followed by 2 tabs.
Command string: E908F40902
E9 is the "Send all but the last characters" command
08 is the number of characters at the end to ignore
F4 is the "Insert a character multiple times" command
09 is the hex value for a horizontal tab
02 is the number of time the tab character is sent
The data is output as: 1234567890AB
B3 Insert symbology name
Insert the name of the barcode's symbology in the output message, without moving the cursor.
B4 Insert barcode length
Insert the barcode's length in the output message, without moving the cursor. The length is expressed as a numeric string and does not include leading zeros.
B3 and B4 Example: Insert the symbology name and length

1234567890ABCDEFGHIJ
Send the symbology name and length before the barcode data from the barcode above. Break up these insertions with spaces. End with a carriage return.
Command string: B3F42001B4F42001F10D
B3 is the "Insert symbology name" command
F4 is the "Insert a character multiple times" command
20 is the hex value for a space
01 is the number of time the space character is sent
B4 is the "Insert barcode length" command
F4 is the "Insert a character multiple times" command
20 is the hex value for a space
01 is the number of time the space character is sent
F1 is the "Send all characters" command
0D is the hex value for a CR
The data is output as: Code128 20 1234567890ABCDEFGHIJ
Move Commands
F5 Move the cursor forward a number of characters
Syntax=F5nn (nn: The numeric value (00-99) for the number of characters the cursor should be moved ahead)
Move the cursor ahead "nn" characters from current cursor position.
F5 Example: Move the cursor forward and send the data

1234567890ABCDEFGHIJ
Move the cursor forward 3 characters, then send the rest of the barcode data from the barcode above. End with a carriage return.
Command string: F503F10D
F5 is the "Move the cursor forward a number of characters" command
03 is the number of characters to move the cursor
F1 is the "Send all characters" command
0D is the hex value for a CR
The data is output as: 4567890ABCDEFGHIJ
F6 Move the cursor backward a number of characters
Syntax=F6nn (nn: The numeric value (00-99) for the number of characters the cursor should be moved back)
Move the cursor back "nn" characters from current cursor position.
F7 Move the cursor to the beginning
Syntax=F7
Move the cursor to the first character in the input message.
EA Move the cursor to the end
Syntax=EA
Move the cursor to the last character in the input message.
Search Commands
F8 Search forward for a character
Syntax=F8xx (xx: The search character's hex value)
Search the input message forward for "xx" character from the current cursor position, leaving the cursor pointing to the "xx" character.
F8 Example: Send barcode data that starts after a particular character

Search for the letter "D" in barcodes and send all the data that follows, including the "D". Using the barcode above:
Command string: F844F10D
F8 is the "Search forward for a character" command
44 is the hex value for "D"
F1 is the "Send all characters" command
0D is the hex value for a CR
The data is output as: DEFGHIJ
F9 Search backward for a character
Syntax=F9xx(xx: The search character's hex value)
Search the input message backward for "xx" character from the current cursor position, leaving the cursor pointing to the "xx" character.
B0 Search forward for a string
Syntax=B0nnnnS (nnnn: The string length (up to 9999); S: The ASCII hex value of each character in the string)
Search forward for "S" string from the current cursor position, leaving cursor pointing to "S" string. For example, B0000454657374 will search forward for the first occurrence of the 4-character string "Test."
B0 Example: Send barcode data that starts after a string of characters

Search for the letters "FGH" in barcodes and send all the data that follows, including "FGH." Using the barcode above:
Command string: B00003464748F10D
B0 is the "Search forward for a string" command
0003 is the string length (3 characters)
46 is the hex value for "F"
47 is the hex value for "G"
48 is the hex value for "H"
F1 is the "Send all characters" command
0D is the hex value for a CR
The data is output as: FGHIJ
B1 Search backward for a string
Syntax=B1nnnnS (nnnn: The string length (up to 9999); S: The ASCII hex value of each character in the string)
Search backward for "S" string from the current cursor position, leaving cursor pointing to "S" string. For example, B1000454657374 will search backward for the first occurrence of the 4-character string "Test."
E6 Search forward for a non-matching character
Syntax=E6xx (xx: The search character's hex value)
Search the input message forward for the first non-“xx” character from the current cursor position, leaving the cursor pointing to the non-“xx” character.
E6 Example: Remove zeros at the beginning of barcode data
This example shows a barcode that has been zero filled. You may want to ignore the zeros and send all the data that follows. E6 searches forward for the first character that is not zero, then sends all the data after, followed by a carriage return. Using the barcode above:
Command string: E630F10D
E6 is the "Search forward for a non-matching character" command
30 is the hex value for 0
F1 is the "Send all characters" command
0D is the hex value for a CR
The data is output as: 37692
E7 Search backward for a non-matching character
Syntax=E7xx(xx: The search character's hex value)
Search the input message backward for the first non-"xx" character from the current cursor position, leaving the cursor pointing to the non-"xx" character.
Miscellaneous Commands
FB Suppress characters
Syntax=FBnnxxyy..zz (nn: The numeric value (00-15) for the number of suppressed characters; xxyy..zz: The hex value of the characters to be suppressed)
Suppress all occurrences of up to 15 different characters, starting at the current cursor position, as the cursor is advanced by other commands.
FB Example: Remove spaces in barcode data

345 678 90
This example shows a barcode that has spaces in the data. You may want to remove the spaces before sending the data. Using the barcode above:
Command string: FB0120F10D
FB is the "Suppress characters" command
01 is the number of the characters to be suppressed
20 is the hex value for a space
F1 is the "Send all characters" command
0D is the hex value for a CR
The data is output as: 34567890
E4 Replace characters
Syntax= E4nnxxx2yy1yy2...zz1zz2(nn: The total count of the number of characters (characters to be replaced plus replacement characters; xx1: The characters to be replaced, xx2: The replacement characters, continuing through zz1 and zz2)
Replace up to 15 characters in the output message, without moving the cursor.
E4 Example: Replace zeros with CRs in barcode data

1234056780ABC
If the barcode has characters that the host application does not want included, you can use the E4 command to replace those characters with something else. In this example, you will replace the zeros in the barcode above with carriage returns.
Command string: E402300DF10D
E4 is the "Replace characters" command
02 is the total count of characters to be replaced, plus the replacement characters (0 is replaced by CR, so total characters=2)
30 is the hex value for 0
0D is the hex value for a CR (the character that will replace the 0)
F1 is the "Send all characters" command
0D is the hex value for a CR
The data is output as: 1234
5678
ABC
BA Replace a string with another
Syntax=BAnnNN 1 SS 1 NN 2 SS 2
nn: The count of replacements to be made, if nn=00 or nn>=the number of occurrences of a string to be replaced, then replace all occurrences of that string.
NN_1 : The length of the string to be replaced, NN_1>0 .
SS _1 : The ASCII hex value of each character in the string to be replaced.
NN2: The length of replacement string, NN 2>=0. To replace string "SS1" with NUL (i.e. delete string "SS1"), you should set NN2 to 00 and leave out SS2.
SS2: The ASCII hex value of each character in the replacement string.
From the current cursor position, search forward for the occurrence of "SS 1 " string (of length "NN 1 ") and replace the string with "SS 2 " string (of length "NN 2 ") in the output message until every "SS _1 " string is replaced or the count of replacements made reaches "nn" times, without moving the cursor.
BA Example: Replace "23"s with "ABC"s in barcode data
cd123abc23bc12ab232
If the barcode has a string of characters that the host application does not want included, you can use the BA command to replace the string with something else. In this example, you will replace the "23"s in the barcode above with "ABC"s.
Command string: BA0002323303414243F100
BA is the "Replace a string with another" command
00 is the count of replacements to be made, 00 means to replace all occurrences of that string
02 is the length of the string to be replaced
32 is the hex value for 2 (character in the string to be replaced)
33 is the hex value for 3 (character in the string to be replaced)
03 is the length of the replacement string
41 is the hex value for A (character in the replacement string)
42 is the hex value for B (character in the replacement string)
43 is the hex value for C (character in the replacement string)
F1 is the "Send all characters" command
00 is the hex value for a NUL
The data is output as: cd1ABCabcABCbc12abABC2
BA Example: Remove only the first occurrence of "23"s in barcode data
If the barcode has a string of characters that the host application wants removed, you can use the BA command to replace the string with NUL. In this example, you will remove the first occurrence of "23" in the barcode above.
Command string: BA0102323300F100
BA is the "Replace a string with another" command
01 is the count of replacements to be made
02 is the length of the string to be replaced
32 is the hex value for 2 (character in the string to be replaced)
33 is the hex value for 3 (character in the string to be replaced)
00 is the length of the replacement string, 00 means to replace the string to be replaced with NUL
F1 is the "Send all characters" command
00 is the hex value for a NUL
The data is output as: cd1abc23bc12ab232
EF Insert a delay
Syntax=EFnnnn (nnnn: The delay in 5ms increments, up to 9999)
Inserts a delay of up to 49,995 milliseconds (in multiples of 5), starting from the current cursor position. This command can only be used with USB HID Keyboard.
EF Example: Insert a delay of 1s between the 5^th and 6^th character
Send the first 5 characters in a barcode, wait for 1s, then send the rest of the barcode data.
Command string: F20500EF0200E900
F2 is the "Send a number of characters" command
05 is the number of characters to send
00 is the hex value for a Null character
EF is the "Insert a delay" command
0200 is the delay value (5msX200=1000ms=1s)
E9 is the "Send all but the last characters" command
00 is the number of characters that will not be sent at the end of the message
B5 Insert key strokes
Syntax=B5nnssxx (nn: The number of keys pressed (without key modifiers); ss: the key modifier from the table below; xx: the key number from the "Unicode Key Maps" in Appendix.)
Insert a key stroke or combination of key strokes. Key strokes are dependent on your keyboard (see the "Unicode Key Maps" in Appendix). This command can only be used with USB HID Keyboard.
| Key Modifiers | |
| No Key Modifier | 00 |
| Shift Left | 01 |
| Shift Right | 02 |
| Alt Left | 04 |
| Alt Right | 08 |
| Control Left | 10 |
| Control Right | 20 |
For example, B501001F inserts an "a" on a U.S. style keyboard. B5 = the command, 01 = number of keys pressed (without the key modifier), 00 is No Key Modifier, and 1F is the "a" key. If an "A" were to be inserted, B501011F or B501021F would be entered.
If there are two keystrokes, the syntax would change from Syntax=B5nnssxx for one keystroke to Syntax=B5nnssxxssxx. An example that would insert "aA" is as follows: B502001F011F.
Note: Key modifiers can be added together when needed. Example: Shift Left + Alt Left + Control Left = 15.
Chapter 11 Prefix & Suffix
Introduction
A 1D barcode could contain digits, letters, symbols, etc. A 2D barcode could contain more data, such as Chinese characters and other multi-byte characters. However, in real applications, they do not and should not have all information we need, such as barcode type, data acquisition time and delimiter, in order to keep the barcodes short and flexible.
Prefix and suffix are how to fulfill the needs mentioned above. They can be added, removed and modified while the original barcode data remains intact.

Barcode processing procedure:
- Edit data with Data Formatter
- Append prefix/suffix
- Pack data
- Append terminating character
Global Settings
Enable/Disable All Prefixes/Suffixes
Disable All Prefixes/Suffixes: Transmit barcode data with no prefix/suffix.
Enable All Prefixes/Suffixes: Allow to append Code ID prefix, AIM ID prefix, custom prefix/suffix and terminating character to the barcode data before the transmission.
@APSENA0
** Disable All Prefixes/Suffixes
@APSENA1
Enable All Prefixes/Suffixes
Prefix Sequence
@PRESEQ0
** Code ID+ Custom +AIM ID
@PRESEQ1
Custom + Code ID + AIM ID
Custom Prefix
Enable/Disable Custom Prefix
If custom prefix is enabled, you are allowed to append to the data a user-defined prefix that cannot exceed 10 characters. For example, if the custom prefix is "AB" and the barcode data is "123", the Host will receive "AB123".
@CPRENA0
** Disable Custom Prefix
@CPRENA1
Enable Custom Prefix
Set Custom Prefix
To set a custom prefix, scan the Set Custom Prefix barcode then the numeric barcodes corresponding to the hexadecimal value of a desired prefix then the Save barcode.
Note: A custom prefix cannot exceed 10 characters.
@CPRSET
Set Custom Prefix

Set the custom prefix to "CODE" (HEX: 0x43/0x4F/0x44/0x45):
- Scan the Enter Setup barcode.
- Scan the Set Custom Prefix barcode.
- Scan the numeric barcodes "4", "3", "4", "F", "4", "4", "4" and "5" from the "Digit Barcodes" section in Appendix.
- Scan the Save barcode from the "Save/Cancel Barcodes" section in Appendix.
- Scan the Enable Custom Prefix barcode.
- Scan the Exit Setup barcode.

@SETUPE0
** Exit Setup
AIM ID Prefix
AIM (Automatic Identification Manufacturers) ID defines symbology identifier (For the details, see the "AIM ID Table" section in Appendix). If AIM ID prefix is enabled, the scanner will add the symbology identifier before the scanned data after decoding.
@AIDENA0
** Disable AIM ID Prefix
@AIDENA1
Enable AIM ID Prefix
AIM ID is not user programmable.
Enter Setup
Code ID Prefix
Code ID can also be used to identify barcode type. Unlike AIM ID, Code ID is user programmable. Code ID can only consist of one or two English letters.
** Disable Code ID Prefix
Enable Code ID Prefix
Restore All Default Code IDs
For the information of default Code IDs, see the "Code ID Table" section in Appendix.
Restore All Default Code IDs
Modify Code ID
See the examples below to learn how to modify a Code ID and restore the default Code IDs of all symbologies.
Modify PDF417 Code ID to be "p" (HEX: 0x70):
- Scan the Enter Setup barcode.
- Scan the Modify PDF417 Code ID barcode.
- Scan the numeric barcodes "7" and "0" from the "Digit Barcodes" section in Appendix.
- Scan the Save barcode from the "Save/Cancel Barcodes" section in Appendix.
- Scan the Exit Setup barcode.
Restore the default Code IDs of all symbologies:
- Scan the Enter Setup barcode.
- Scan the Restore All Default Code IDs barcode.
- Scan the Exit Setup barcode.
1D symbologies:
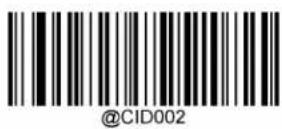
Modify Code 128 Code ID
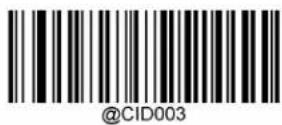
Modify GS1-128 Code ID
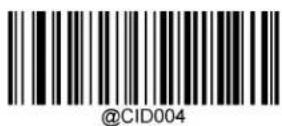
Modify EAN-8 Code ID
Modify EAN-13 Code ID
Modify UPC-E Code ID
Modify UPC-A Code ID
Modify Interleaved 2 of 5 Code ID
@CID010
Modify ITF-6 Code ID
@CID009
Modify ITF-14 Code ID
@CID011
Modify Matrix 2 of 5 Code ID
@CID013
Modify Code 39 Code ID
@CID015
Modify Codabar Code ID
@CID017
Modify Code 93 Code ID

@CID019
Modify China Post 25 Code ID
@CID020
Modify AIM 128 Code ID
@SETUPE0
** Exit Setup
@SETUPE1
Enter Setup
@CID022
Modify COOP 25 Code ID
@CID024
Modify ISBN Code ID
@CID026
Modify Standard 25 Code ID
@CID028
Modify Code 11 Code ID
@CID021
Modify ISBT 128 Code ID
@CID023
Modify ISSN Code ID
@CID025
Modify Industrial 25 Code ID
@CID027
Modify Plessey Code ID
@SETUPE0
** Exit Setup
@SETUPE1
Enter Setup
@CID030
Modify GS1 Composite Code ID
@CID029
Modify MSI-Plessy Code ID
@CID031
Modify GS1 Databar Code ID
@SETUPE0
** Exit Setup
2D symbologies:
@CID032
Modify PDF417 Code ID
@CID034
Modify Aztec Code ID
@CID033
Modify QR Code ID
@CID035
Modify Data Matrix Code ID
Custom Suffix
Enable/Disable Custom Suffix
If custom suffix is enabled, you are allowed to append to the data a user-defined suffix that cannot exceed 10 characters. For example, if the custom suffix is "AB" and the barcode data is "123", the Host will receive "123AB".
** Disable Custom Suffix
@CSUENA1
Enable Custom Suffix
Set Custom Suffix
To set a custom suffix, scan the Set Custom Suffix barcode then the numeric barcodes corresponding to the hexadecimal value of a desired suffix then the Save barcode.
Note: A custom suffix cannot exceed 10 characters.
@CSUSET
Set Custom Suffix

Set the custom suffix to "CODE" (HEX: 0x43/0x4F/0x44/0x45):
- Scan the Enter Setup barcode.
- Scan the Set Custom Suffix barcode.
- Scan the numeric barcodes "4", "3", "4", "F", "4", "4", "4" and "5" from the "Digit Barcodes" section in Appendix.
- Scan the Save barcode from the "Save/Cancel Barcodes" section in Appendix.
- Scan the Enable Custom Suffix barcode.
- Scan the Exit Setup barcode.
@SETUPE0
** Exit Setup
Data Packing
Introduction
Data packing is designed for a specific group of users who want to have the data packed before transmission. Data packing influences data format, so it is advised to disable this feature when it is not required.
Data Packing Options
✿ Disable Data Packing: Transmit decoded data in raw format (unpacketed).
✿ Enable Data Packing, Format 1: Transmit decoded data with the packet format 1 defined below.
Packet format 1: [STX + ATTR + LEN] + [AL_TYPE + DATA] + [LRC]
STX: 0x02
ATTR: 0x00
LEN: Barcode data length is expressed in 2 bytes ranging from 0x0000 (0) to 0xFFFF (65535).
AL_TYPE: 0x36
DATA: Raw barcode data.
LRC: Check digit.
LRC calculation algorithm: computation sequence: 0xFF+LEN+AL_TYPE+DATA; computation method is XOR, byte by byte.
✿ Enable Data Packing, Format 2: Transmit decoded data with the packet format 2 defined below.
Packet format 2: [STX + ATTR + LEN] + [AL_TYPE] + [Symbology_ID + DATA] + [LRC]
STX: 0x02
ATTR: 0x00
LEN: Barcode data length is expressed in 2 bytes ranging from 0x0000 (0) to 0xFFFF (65535).
AL_TYPE: 0x3B
Symbology_ID: The ID number of symbology, 1 byte.
DATA: Raw barcode data.
LRC: Check digit.
LRC calculation algorithm: computation sequence: 0xFF+LEN+AL_TYPE+Symbology_ID+DATA; computation method is XOR, byte by byte.
@PACKAG0
** Disable Data Packing
@PACKAG2
Enable Data Packing, Format 2
@PACKAG1
Enable Data Packing, Format 1
Terminating Character Suffix
Enable/Disable Terminating Character Suffix
A terminating character such as carriage return (CR) or carriage return/line feed pair (CRLF) can only be used to mark the end of data, which means nothing can be added after it.
@TSUENA0
Disable Terminating Character Suffix
@TSUENA1
** Enable Terminating Character Suffix
Set Terminating Character Suffix
To set a terminating character suffix, scan the Set Terminating Character Suffix barcode then the numeric barcodes corresponding to the hexadecimal value of a desired terminating character then the Save barcode.
Note: A terminating character suffix cannot exceed 2 characters.
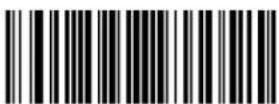
@TSUSET
Set Terminating Character Suffix
@TSUSET0D
** Set Terminating Character to CR (0x0D)
@TSUSET0D0A
Set Terminating Character to CRLF (0x0D,0x0A)

@SETUPE0
** Exit Setup
Set the terminating character suffix to 0x0A:
- Scan the Enter Setup barcode.
- Scan the Set Terminating Character Suffix barcode.
- Scan the numeric barcodes "0" and "A" from the "Digit Barcodes" section in Appendix.
- Scan the Save barcode from the "Save/Cancel Barcodes" section in Appendix.
- Scan the Enable Terminating Character Suffix barcode.
- Scan the Exit Setup barcode.
Chapter 12 Batch Programming
Introduction
Batch programming enables users to integrate a batch of commands into a single batch barcode.
Listed below are batch programming rules:
- Command format: Command + Parameter Value.
- Each command is terminated by a semicolon (;). Note that there is no space between a command and its terminator semicolon.
- Use the barcode generator software to generate a 2D batch barcode.
Example: Create a batch barcode for Illumination Always On, Sense Mode, Decode Session Timeout = 2s:
-
Input the commands:
@ILLSCN2;SCNMOD2;ORTSET2000; -
Generate a batch barcode.
When setting up a scanner with the above configuration, scan the Enable Batch Barcode barcode and then the batch barcode generated.
@BATCHS
Enable Batch Barcode
Create a Batch Command
A batch command may contain a number of individual commands each of which is terminated by a semicolon (;).
For more information, refer to the "Use of Programming Command" section in Chapter 3.
Create a Batch Barcode
Batch barcodes can be produced in the format of PDF417, QR Code or Data Matrix.
Example: Create a batch barcode for Illumination Always On, Sense Mode, Decode Session Timeout = 2s:
- Input the following commands:
@ILLSCN2;SCNMOD2;ORTSET2000;
- Generate a PDF417 batch barcode.
Enter Setup
Use Batch Barcode
To put a batch barcode into use, scan the following barcodes. (Use the example above.)
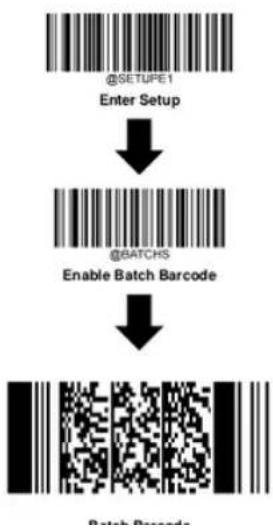
flowchart
graph TD
    A["@SETUPE1\nEnter Setup"] --> B["@BATCHS\nEnable Batch Barcode"]
    B --> C["Barcode"]
Chapter 13 PS/2 Interface
Introduction
When the scanner is connected to the PS/2 port of a host device, scan the PS/2 barcode below to enable the interface.
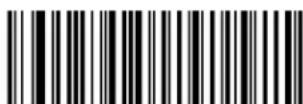
@INTERF4
PS/2
Appendix
Digit Barcodes
0\~9
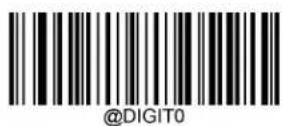
0
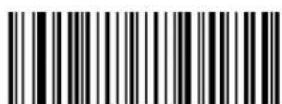
@DIGIT1
1
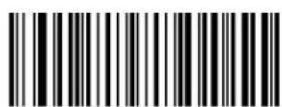
@DIGIT2
2
@DIGIT3
3
@DIGIT4
4
@DIGIT5
5
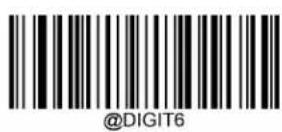
6
7
8
9
A\~F
A
B
C
D
E
F
Save/Cancel Barcodes
After reading numeric barcode(s), you need to scan the Save barcode to save the data. If you scan the wrong digit(s), you can either scan the Cancel barcode and then start the configuration all over again, or scan the Delete the Last Digit barcode and then the correct digit, or scan the Delete All Digits barcode and then the digits you want.
For instance, after reading the Maximum Length barcode and numeric barcodes "1", "2" and "3", you scan:
Delete the Last Digit: The last digit "3" will be removed.
Delete All Digits: All digits "123" will be removed.
✿ Cancel: The maximum length configuration will be cancelled. And the scanner is still in the setup mode.
@DIGSAV
Save
@DIGCAN
Cancel

@DIGDEL
Delete the Last Digit
@DIGDAL
Delete All Digits
Factory Defaults Table
| Parameter | Factory Default | Remark |
| System Settings | ||
| Barcode Programming | Disabled (Exit Setup) | |
| Programming Barcode Data | Do not transmit | |
| Power On Beep | On | |
| Good Read Beep | On | |
| Good Read Beep Volume | Loud | |
| Decode Session Timeout | 3,000ms. | 1-3,600,000ms; 0: Infinite |
| Image Stabilization Timeout (Sense Mode) | 200ms | 0-3,000ms |
| Image Decoding Timeout | 500ms | 1-3,000ms |
| Surround GS1 Application Identifiers (AI's) with Parentheses | Do Not Surround GS1 AI's with Parentheses | |
| Sensitivity (Sense Mode) | Medium | |
| Scanning Preference | Screen Mode | |
| Decode Area | Whole Area Decoding | |
| Specify Decoding Area | 40% top, 60% bottom, 40% left, 60% right | |
| Image Flipping | Do Not Flip | |
| Bad Read Message | Off | |
| NG | 1-7 characters | |
| Default Interface | USB HID Keyboard | |
| RS-232 Interface | ||
| Baud Rate | 9600 | |
| Parity Check | None | |
| Data Bits | 8 | |
| Stop Bits | 1 | |
| Hardware Auto Flow Control | Disabled | |
| USB Interface | ||
| USB Country Keyboard | US keyboard | USB HID Keyboard |
| Beep on Unknown Character | Off | USB HID Keyboard |
| Emulate ALT+Keypad | Off | USB HID Keyboard |
| Code Page | Code Page 1252 (West European Latin) | USB HID Keyboard |
| Unicode Encoding | Off | USB HID Keyboard |
| Emulate Keypad with Leading Zero | On | USB HID Keyboard |
| Function Key Mapping | Disable | USB HID Keyboard |
| Inter-Keystroke Delay | No Delay | USB HID Keyboard |
| Caps Lock | Caps Lock OFF, non-Japanese Keyboard | USB HID Keyboard |
| Convert Case | No Case Conversion | USB HID Keyboard |
| Emulate Numeric Keypad 1 | Off | USB HID Keyboard |
| Emulate Numeric Keypad 2 | Off | USB HID Keyboard |
| Fast Mode | Off | USB HID Keyboard |
| Polling Rate | 4ms | USB HID Keyboard |
| Adaptive Wired Communication | On | |
| Symbologies | ||
| Global Settings | ||
| 1D Twin Code | Single 1D Code Only | |
| Surround GS1 AI's with Parentheses | Do Not Surround GS1 AI's with Parentheses | |
| Code 128 | ||
| Code 128 | Enabled | |
| Maximum Length | 48 | |
| Minimum Length | 1 | |
| EAN-8 | ||
| EAN-8 | Enabled | |
| Check Character | Transmit | |
| 2-Digit Add-On Code | Disabled | |
| 5-Digit Add-On Code | Disabled | |
| Add-On Code | Not Required | |
| Convert EAN-8 to EAN-13 | Disabled | |
| EAN-13 | ||
| EAN-13 | Enabled | |
| Check Character | Transmit | |
| 2-Digit Add-On Code | Disabled | |
| 5-Digit Add-On Code | Disabled | |
| Add-On Code | Not Required | |
| EAN-13 Beginning with 290 Add-On Code Required | Do Not Require Add-On Code | |
| EAN-13 Beginning with 378/379 Add-On Code Required | Do Not Require Add-On Code | |
| EAN-13 Beginning with 414/419 Add-On Code Required | Do Not Require Add-On Code | |
| EAN-13 Beginning with 434/439 Add-On Code Required | Do Not Require Add-On Code | |
| EAN-13 Beginning with 977 Add-On Code Required | Do Not Require Add-On Code | |
| EAN-13 Beginning with 978 Add-On Code Required | Do Not Require Add-On Code | |
| EAN-13 Beginning with 979 Add-On Code Required | Do Not Require Add-On Code | |
| UPC-E | ||
| UPC-E0 | Enabled | |
| UPC-E1 | Disabled | |
| Check Character | Transmit | |
| 2-Digit Add-On Code | Disabled | |
| 5-Digit Add-On Code | Disabled | |
| Add-On Code | Not Required | |
| Transmit Preamble Character | System Character | |
| Convert UPC-E to UPC-A | Disabled | |
| UPC-A | ||
| UPC-A | Enabled | |
| Check Character | Transmit | |
| 2-Digit Add-On Code | Disabled | |
| 5-Digit Add-On Code | Disabled | |
| Add-On Code | Not Required | |
| Transmit Preamble Character | No Preamble | |
| Coupon | ||
| UPC-A/EAN-13 with Extended Coupon Code | Disabled | |
| Coupon GS1 DataBar Output | Disabled | |
| Interleaved 2 of 5 | ||
| Interleaved 2 of 5 | Enabled | |
| Maximum Length | 80 | |
| Minimum Length | 6 | No less than 4 |
| Check Character Verification | Disabled | |
| Febraban | ||
| Febraban | Disabled | |
| Transmit Delay per Character | Disabled | |
| 70ms | ||
| Transmit Delay per 12 Characters | Disabled | |
| 500ms | ||
| ITF-14 | ||
| ITF-14 | Disabled | |
| ITF-6 | ||
| ITF-6 | Disabled | |
| Matrix 2 of 5 | ||
| Matrix 2 of 5 | Enabled | |
| Maximum Length | 80 | |
| Minimum Length | 4 | No less than 4 |
| Check Character Verification | Disabled | |
| Code 39 | ||
| Code 39 | Enabled | |
| Maximum Length | 48 | |
| Minimum Length | 1 | |
| Check Character Verification | Disabled | |
| Start/Stop Character | Do not transmit | |
| Code 39 Full ASCII | Disabled | |
| Code 32 Pharmaceutical (PARAF) | Disabled | |
| Code 32 Prefix | Disabled | |
| Code 32 Start/Stop Character | Do not transmit | |
| Code 32 Check Character | Do not transmit | |
| Codabar | ||
| Codabar | Disabled | |
| Maximum Length | 60 | |
| Minimum Length | 2 | |
| Check Character Verification | Disabled | |
| Start/Stop Character | Do not transmit | |
| ABCD/ABCD | ||
| Code 93 | ||
| Code 93 | Disabled | |
| Maximum Length | 48 | |
| Minimum Length | 1 | No less than 1 |
| Check Character Verification | Do Not Transmit Check Character After Verification | |
| China Post 25 | ||
| China Post 25 | Disabled | |
| Maximum Length | 48 | |
| Minimum Length | 1 | |
| Check Character Verification | Disabled | |
| GS1-128 (UCC/EAN-128) | ||
| GS1-128 | Enabled | |
| Maximum Length | 48 | |
| Minimum Length | 1 | |
| GS1 Databar | ||
| GS1 Databar | Enabled | |
| Application Identifier "01" | Transmit | |
| EAN•UCC Composite | ||
| GS1 Composite | Enabled | |
| UPC/EAN Composite | Disabled | |
| Code 11 | ||
| Code 11 | Disabled | |
| Maximum Length | 48 | |
| Minimum Length | 4 | No less than 4 |
| Check Character Verification | One Check Character, MOD11 | |
| Check Character | Transmit | |
| ISBN | ||
| ISBN | Disabled | |
| Set ISBN Format | ISBN-10 | |
| ISSN | ||
| ISSN | Enabled | |
| Industrial 25 | ||
| Industrial 25 | Disabled | |
| Maximum Length | 48 | |
| Minimum Length | 6 | No less than 4 |
| Check Character Verification | Disabled | |
| Standard 25 | ||
| Standard 25 | Enabled | |
| Maximum Length | 48 | |
| Minimum Length | 6 | No less than 4 |
| Check Character Verification | Disabled | |
| Plessey | ||
| Plessey | Disabled | |
| Maximum Length | 48 | |
| Minimum Length | 4 | No less than 4 |
| Check Character Verification | Disabled | |
| MSI-Plessey | ||
| MSI-Plessey | Disabled | |
| Maximum Length | 48 | |
| Minimum Length | 4 | No less than 4 |
| Check Character Verification | One Check Character, MOD10 | |
| Check Character | Transmit | |
| AIM 128 | ||
| AIM 128 | Enabled | |
| Maximum Length | 48 | |
| Minimum Length | 1 | |
| ISBT 128 | ||
| ISBT 128 | Enabled | |
| COOP 25 | ||
| COOP 25 | Disabled | |
| Maximum Length | 80 | |
| Minimum Length | 4 | |
| Check Character Verification | Disabled | |
| PDF417 | ||
| PDF417 | Enabled | |
| Maximum Length | 2710 | |
| Minimum Length | 1 | |
| PDF417 Twin Code | Single PDF417 Only | |
| PDF417 Inverse | Decode Regular PDF417 Barcodes Only | |
| Character Encoding | Default Character Encoding | |
| PDF417 ECI Output | Enabled | |
| QR Code | ||
| QR Code | Enabled | |
| Maximum Length | 7089 | |
| Minimum Length | 1 | |
| QR Inverse | Decode Regular QR Barcodes Only | |
| Character Encoding | Default Character Encoding | |
| QR ECI Output | Enabled | |
| Aztec | ||
| Aztec Code | Enabled | |
| Maximum Length | 3832 | |
| Minimum Length | 1 | |
| Read Multi-barcodes on an Image | Mode 1 | |
| Character Encoding | Default Character Encoding | |
| Aztec ECI Output | Enabled | |
| Data Matrix | ||
| Data Matrix | Enabled | |
| Maximum Length | 3116 | |
| Minimum Length | 1 | |
| Data Matrix Twin Code | Single Data Matrix Only | |
| Rectangular Barcode | Enabled | |
| Data Matrix Inverse | Decode Regular Data Matrix Barcodes Only | |
| Character Encoding | Default Character Encoding | |
| Data Matrix ECI Output | Enabled | |
| Data Formatter | ||
| Data Formatter | Disabled | |
| Non-Match Error Beep | On | |
| Data Format Selection | Format_0 | |
| Prefix & Suffix | ||
| All Prefixes/Suffixes | Disabled | |
| Prefix Sequence | Code ID+ Custom +AIM ID | |
| Custom Prefix | Disabled | |
| AIM ID Prefix | Disabled | |
| Code ID Prefix | Disabled | |
| Custom Suffix | Disabled | |
| Data Packing | Disable Data Packing | |
| Terminating Character Suffix | Enabled (0x0D) | |
AIM ID Table
| Symbology | AIM ID | Possible AIM ID Modifiers (m) |
| Code 128 | ]C0 | |
| GS1-128 (UCC/EAN-128) | ]C1 | |
| EAN-8 | ]E4 | |
| EAN-8 with Addon | ]E3 | |
| EAN-13 | ]E0 | |
| EAN-13 with Addon | ]E3 | |
| UPC-E | ]E0 | |
| UPC-E with Addon | ]E3 | |
| UPC-A | ]E0 | |
| UPC-A with Addon | ]E3 | |
| Interleaved 2 of 5, Febraban | ]Im | 0, 1, 3 |
| ITF-14 | ]Im | 1, 3 |
| ITF-6 | ]Im | 1, 3 |
| Matrix 2 of 5 | ]X0 | |
| Code 39 | ]Am | 0, 1, 3, 4, 5, 7 |
| Codabar | ]Fm | 0, 2, 4 |
| Code 93 | ]G0 | |
| China Post 25 | ]X0 | |
| AIM 128 | ]C2 | |
| ISBT 128 | ]C4 | |
| ISSN | ]X0 | |
| ISBN | ]X0 | |
| Industrial 25 | ]S0 | |
| Standard 25 | ]R0 | |
| Plessey | ]P0 | |
| Code 11 | ]Hm | 0, 1, 3 |
| MSI Plessey | ]Mm | 0, 1 |
| GS1 Composite | ]em | 0-3 |
| GS1 Databar (RSS) | ]e0 | |
| COOP 25 | ]X0 | |
| PDF417 | ]Lm | 0-2 |
| QR Code | ]Qm | 0-6 |
| Aztec | ]zm | 0-9, A-C |
| Data Matrix | ]dm | 0-6 |
Note: "m" represents the AIM modifier character. Refer to ISO/IEC 15424:2008 Information technology – Automatic identification and data capture techniques – Data Carrier Identifiers (including Symbology Identifiers) for AIM modifier character details.
Code ID Table
| Symbology | Code ID |
| Code 128 | j |
| GS1-128 (UCC/EAN-128) | j |
| EAN-8 | d |
| EAN-13 | d |
| UPC-E | c |
| UPC-A | c |
| Interleaved 2 of 5, Febraban | e |
| ITF-14 | e |
| ITF-6 | e |
| Matrix 2 of 5 | v |
| Code 39 | b |
| Codabar | a |
| Code 93 | i |
| China Post 25 | X |
| AIM 128 | X |
| ISBT 128 | X |
| ISSN | g |
| ISBN | B |
| Industrial 25 | I |
| Standard 25 | f |
| Plessey | n |
| Code 11 | H |
| MSI Plessey | m |
| GS1 Composite | y |
| GS1 Databar (RSS) | R |
| COOP 25 | X |
| PDF417 | r |
| QR Code | s |
| Aztec | z |
| Data Matrix | u |
Symbology ID Number
| Symbology | ID Number |
| Code 128 | 002 |
| GS1-128 (UCC/EAN-128) | 003 |
| EAN-8 | 004 |
| EAN-13 | 005 |
| UPC-E | 006 |
| UPC-A | 007 |
| Interleaved 2 of 5, Febraban | 008 |
| ITF-14 | 009 |
| ITF-6 | 010 |
| Matrix 2 of 5 | 011 |
| Code 39 | 013 |
| Codabar | 015 |
| Code 93 | 017 |
| China Post 25 | 019 |
| AIM 128 | 020 |
| ISBT 128 | 021 |
| COOP 25 | 022 |
| ISSN | 023 |
| ISBN | 024 |
| Industrial25 | 025 |
| Standard25 | 026 |
| Plessey | 027 |
| Code11 | 028 |
| MSI-Plessey | 029 |
| GS1 Composite | 030 |
| GS1 Databar (RSS) | 031 |
| PDF417 | 032 |
| QR Code | 033 |
| Aztec | 034 |
| Data Matrix | 035 |
ASCII Table
| Hex | Dec | Char | |
| 00 | 0 | NUL | (Null char.) |
| 01 | 1 | SOH | (Start of Header) |
| 02 | 2 | STX | (Start of Text) |
| 03 | 3 | ETX | (End of Text) |
| 04 | 4 | EOT | (End of Transmission) |
| 05 | 5 | ENQ | (Enquiry) |
| 06 | 6 | ACK | (Acknowledgment) |
| 07 | 7 | BEL | (Bell) |
| 08 | 8 | BS | (Backspace) |
| 09 | 9 | HT | (Horizontal Tab) |
| 0a | 10 | LF | (Line Feed) |
| 0b | 11 | VT | (Vertical Tab) |
| 0c | 12 | FF | (Form Feed) |
| 0d | 13 | CR | (Carriage Return) |
| 0e | 14 | SO | (Shift Out) |
| 0f | 15 | SI | (Shift In) |
| 10 | 16 | DLE | (Data Link Escape) |
| 11 | 17 | DC1 | (XON) (Device Control 1) |
| 12 | 18 | DC2 | (Device Control 2) |
| 13 | 19 | DC3 | (XOFF) (Device Control 3) |
| 14 | 20 | DC4 | (Device Control 4) |
| 15 | 21 | NAK | (Negative Acknowledgment) |
| 16 | 22 | SYN | (Synchronous Idle) |
| 17 | 23 | ETB | (End of Trans. Block) |
| 18 | 24 | CAN | (Cancel) |
| 19 | 25 | EM | (End of Medium) |
| 1a | 26 | SUB | (Substitute) |
| 1b | 27 | ESC | (Escape) |
| 1c | 28 | FS | (File Separator) |
| 1d | 29 | GS | (Group Separator) |
| Hex | Dec | Char |
| 1e | 30 | RS (Request to Send) |
| 1f | 31 | US (Unit Separator) |
| 20 | 32 | SP (Space) |
| 21 | 33 | ! (Exclamation Mark) |
| 22 | 34 | " (Double Quote) |
| 23 | 35 | # (Number Sign) |
| 24 | 36 | $ (Dollar Sign) |
| 25 | 37 | % (Percent) |
| 26 | 38 | & (Ampersand) |
| 27 | 39 | ` (Single Quote) |
| 28 | 40 | ( (Left/ Opening Parenthesis) |
| 29 | 41 | ) (Right/ Closing Parenthesis) |
| 2a | 42 | * (Asterisk) |
| 2b | 43 | + (Plus) |
| 2c | 44 | , (Comma) |
| 2d | 45 | - (Minus/ Dash) |
| 2e | 46 | . (Dot) |
| 2f | 47 | / (Forward Slash) |
| 30 | 48 | 0 |
| 31 | 49 | 1 |
| 32 | 50 | 2 |
| 33 | 51 | 3 |
| 34 | 52 | 4 |
| 35 | 53 | 5 |
| 36 | 54 | 6 |
| 37 | 55 | 7 |
| 38 | 56 | 8 |
| 39 | 57 | 9 |
| 3a | 58 | : (Colon) |
| 3b | 59 | ; (Semi-colon) |
| 3c | 60 | < (Less Than) |
| 3d | 61 | = (Equal Sign) |
| 3e | 62 | > (Greater Than) |
| 3f | 63 | ? (Question Mark) |
| 40 | 64 | @ (AT Symbol) |
| 41 | 65 | A |
| 42 | 66 | B |
| 43 | 67 | C |
| 44 | 68 | D |
| 45 | 69 | E |
| 46 | 70 | F |
| 47 | 71 | G |
| 48 | 72 | H |
| 49 | 73 | I |
| 4a | 74 | J |
| 4b | 75 | K |
| 4c | 76 | L |
| 4d | 77 | M |
| 4e | 78 | N |
| 4f | 79 | O |
| 50 | 80 | P |
| 51 | 81 | Q |
| 52 | 82 | R |
| 53 | 83 | S |
| 54 | 84 | T |
| 55 | 85 | U |
| 56 | 86 | V |
| 57 | 87 | W |
| 58 | 88 | X |
| 59 | 89 | Y |
| 5a | 90 | Z |
| 5b | 91 | [ (Left/ Opening Bracket) |
| 5c | 92 | \ (Back Slash) |
| 5d | 93 | ] (Right/ Closing Bracket) |
| 5e | 94 | ^ (Caret/ Circumflex) |
| 5f | 95 | _ (Underscore) |
| 60 | 96 | ' (Grave Accent) |
| 61 | 97 | a |
| 62 | 98 | b |
| 63 | 99 | c |
| 64 | 100 | d |
| 65 | 101 | e |
| 66 | 102 | f |
| 67 | 103 | g |
| 68 | 104 | h |
| 69 | 105 | i |
| 6a | 106 | j |
| 6b | 107 | k |
| 6c | 108 | l |
| 6d | 109 | m |
| 6e | 110 | n |
| 6f | 111 | o |
| 70 | 112 | p |
| 71 | 113 | q |
| 72 | 114 | r |
| 73 | 115 | s |
| 74 | 116 | t |
| 75 | 117 | u |
| 76 | 118 | v |
| 77 | 119 | w |
| 78 | 120 | x |
| 79 | 121 | y |
| 7a | 122 | z |
| 7b | 123 | { (Left/ Opening Brace) |
| 7c | 124 | | (Vertical Bar) |
| 7d | 125 | } (Right/ Closing Brace) |
| 7e | 126 | ~ (Tilde) |
| 7f | 127 | DEL (Delete) |
Unicode Key Maps
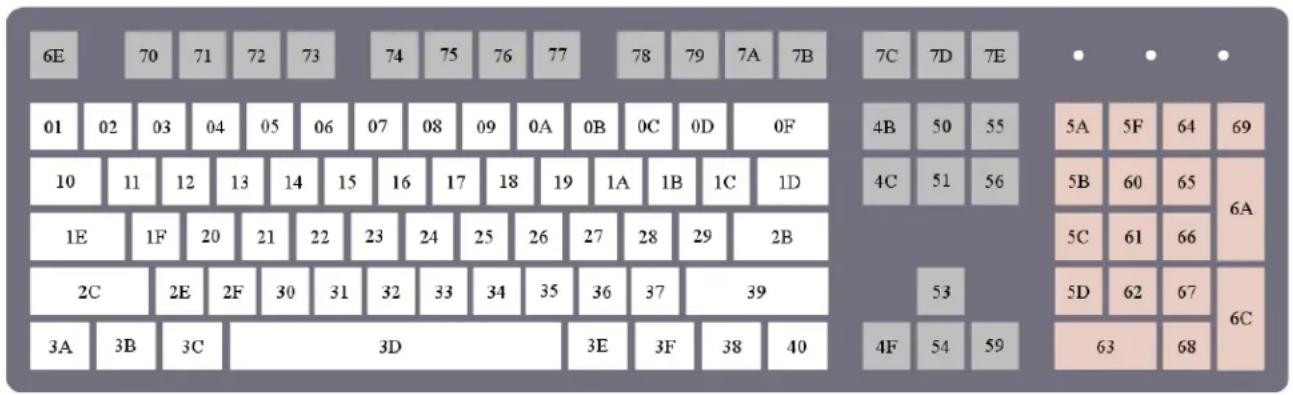
104 Key U.S. Style Keyboard
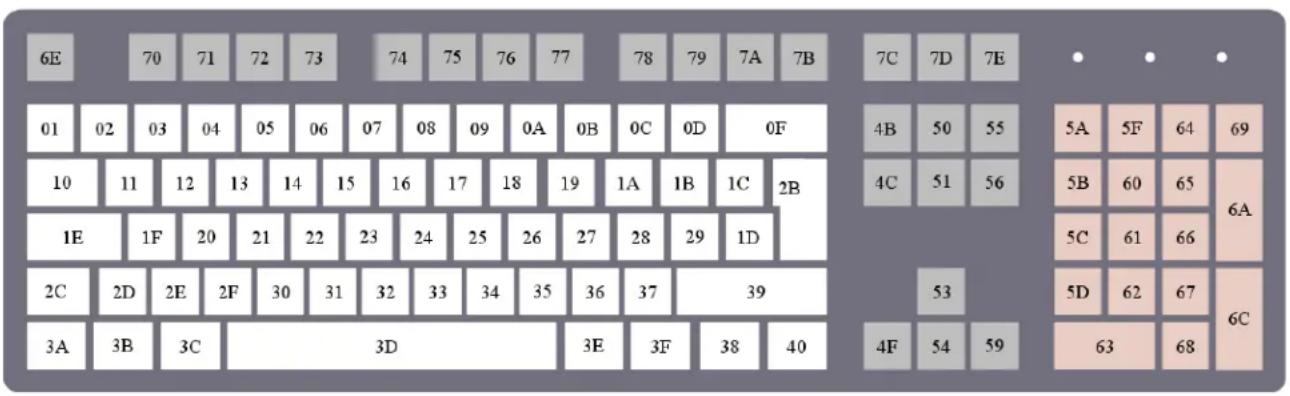
105 Key European Style Keyboard

Newland
SCANNING MADE SIMPLE
- FM80 Salmon
- stationary scanner
- user guide
- Disclaimer
- Table of Contents
- Revision History....3
- Preface .... 1
- Chapter 1 Getting Started....2
- Chapter 2 Installation....4
- Chapter 3 Interfaces and Electrical Specifications ....8
- Chapter 4 Operating Instructions ....12
- Chapter 5 EasySet....14
- Chapter 6 System Settings....15
- Introduction 15
- Programming Barcode/ Programming Command/Function....16
- Use of Programming Command....17
- Use of Programming Barcodes....19
- Power On Beep....20
- Good Read Beep 20
- Scan Mode....23
- Decode Session Timeout 24
- Image Stabilization Timeout (Sense Mode)....25
- Image Decoding Timeout 26
- Surround GS1 Application Identifiers (AI's) with Parentheses....26
- Sensitivity (Sense Mode) 27
- Scanning Preference 29
- Decode Area 29
- Image Flipping 30
- Bad Read Message 31
- Default Settings....32
- Query Product Information....32
- Chapter 7 RS-232 Interface....36
- Chapter 8 USB Interface ....41
- Chapter 9 Symbologies ....67
- Chapter 10 Data Formatter ....171
- Chapter 11 Prefix & Suffix ....194
- Chapter 12 Batch Programming....210
- Chapter 13 PS/2 Interface....213
- Appendix 214
- Preface
- Introduction
- Explanation of Icons
- Chapter 1 Getting Started
- Application Scenarios
- Symbologies
- Features
- Chapter 2 Installation
- General Requirements
- Prevention of Water
- Dust and Dirt
- Ambient Environment
- Optical Elements
- Mounting
- Ambient Light
- Eye Safety
- Chapter 3 Interfaces and Electrical Specifications
- Interface Pinouts
- Adapter and DC Interface
- Connect to the Host
- Power on
- Power off
- Chapter 4 Operating Instructions
- Barcode Scanning
- Status Indicator
- Maintenance
- Chapter 5 EasySet
- Chapter 6 System Settings
- Barcode Programming
- Command Programming
- EasySet Programming
- Programming Barcode/ Programming Command/Function
- Use of Programming Command
- Command Syntax
- Query Commands
- Responses
- Examples
- Use of Programming Barcodes
- Power On Beep
- Good Read Beep
- Scan Mode
- Decode Session Timeout
- Set the decode session timeout to 1,500ms:
- Image Stabilization Timeout (Sense Mode)
- Set the image stabilization timeout to 800ms:
- Image Decoding Timeout
- Set the image decoding timeout to 1,000ms:
- Surround GS1 Application Identifiers (AI's) with Parentheses
- Sensitivity (Sense Mode)
- Set the sensitivity to Level 10:
- Scanning Preference
- Decode Area
- Image Flipping
- Bad Read Message
- Set Bad Read Message
- Set the bad read message to "F" (HEX: 0x46):
- Default Settings
- Factory Defaults
- Custom Defaults
- Query Product Information
- Chapter 7 RS-232 Interface
- Baud Rate
- Parity Check
- Data Bit
- Stop Bit
- Hardware Auto Flow Control
- Chapter 8 USB Interface
- USB HID Keyboard
- USB Country Keyboard Types
- Beep on Unknown Character
- Emulate ALT+Keypad
- Code Page
- Unicode Encoding
- Emulate Keypad with Leading Zero
- ASCII Function Key Mapping Table (Continued)
- Inter-Keystroke Delay
- Caps Lock
- Convert Case
- Emulate Numeric Keypad
- Fast Mode
- Polling Rate
- USB CDC
- HID POS (POS HID Barcode Scanner)
- Access the Scanner with Your Program
- Acquire Scanned Data
- Send Command to the Scanner
- IBM SurePOS (Tabletop)
- IBM SurePOS (Handheld)
- VID/PID
- Adaptive Wired Communication
- Chapter 9 Symbologies
- Global Settings
- Enable/Disable All Symbologies
- Enable/Disable 1D Symbologies
- 1D Twin Code
- Code 128
- Set Length Range for Code 128
- Set the scanner to decode Code 128 barcodes containing between 8 and 12 characters:
- EAN-8
- Transmit Check Character
- 2-Digit Add-On Code
- 5-Digit Add-On Code
- Add-On Code Required
- Convert EAN-8 to EAN-13
- EAN-13
- EAN-13 Beginning with 290 Add-On Code Required
- EAN-13 Beginning with 378/379 Add-On Code Required
- EAN-13 Beginning with 414/419 Add-On Code Required
- EAN-13 Beginning with 434/439 Add-On Code Required
- EAN-13 Beginning with 977 Add-On Code Required
- EAN-13 Beginning with 978 Add-On Code Required
- EAN-13 Beginning with 979 Add-On Code Required
- UPC-E
- Transmit Preamble Character
- Convert UPC-E to UPC-A
- UPC-A
- Coupon
- UPC-A/EAN-13 with Extended Coupon Code
- Coupon GS1 Databar Output
- Interleaved 2 of 5
- Set Length Range for Interleaved 2 of 5
- Check Character Verification
- Febraban
- Transmit Delay per Character
- Transmit Delay per 12 Characters
- ITF-14
- ITF-6
- Enable/Disable ITF-6
- Matrix 2 of 5
- Set Length Range for Matrix 2 of 5
- Transmit Check Character After Verification
- Code 39
- Set Length Range for Code 39
- Set the scanner to decode Code 39 barcodes containing between 8 and 12 characters:
- Transmit Start/Stop Character
- Enable/Disable Code 39 Full ASCII
- Enable/Disable Code 32 (Italian Pharma Code)
- Code 32 Prefix
- Transmit Code 32 Start/Stop Character
- Transmit Code 32 Check Character
- Codabar
- Set Length Range for Codabar
- Set the scanner to decode Codabar barcodes containing between 8 and 12 characters:
- Start/Stop Character
- Code 93
- Set Length Range for Code 93
- Set the scanner to decode Code 93 barcodes containing between 8 and 12 characters:
- China Post 25
- Set Length Range for China Post 25
- Set Length Range for GS1-128
- Set the scanner to decode GS1-128 barcodes containing between 8 and 12 characters:
- GS1 Composite (EAN· UCC Composite)
- Set Length Range for Code 11
- Set the scanner to decode Code 11 barcodes containing between 8 and 12 characters:
- ISBN
- Set Length Range for Industrial 25
- Set the scanner to decode Industrial 25 barcodes containing between 8 and 12 characters:
- Standard 25
- Set Length Range for Standard 25
- Set the scanner to decode Standard 25 barcodes containing between 8 and 12 characters:
- Plessey
- Set Length Range for Plessey
- Set the scanner to decode Plessey barcodes containing between 8 and 12 characters:
- MSI-Plessey
- Set Length Range for MSI-Plessey
- Set the scanner to decode MSI-Plessey barcodes containing between 8 and 12 characters:
- AIM 128
- Set Length Range for AIM 128
- Set the scanner to decode AIM 128 barcodes containing between 8 and 12 characters:
- COOP 25
- Set Length Range for COOP 25
- PDF417
- Set Length Range for PDF417
- Set the scanner to decode PDF417 barcodes containing between 8 and 12 characters:
- PDF417 Twin Code
- PDF417 Inverse
- Character Encoding
- QR Code
- Set Length Range for QR Code
- Set the scanner to decode QR Code barcodes containing between 8 and 12 characters:
- QR Inverse
- Aztec
- Set Length Range for Aztec Code
- Set the scanner to decode Aztec barcodes containing between 8 and 12 characters:
- Read Multi-barcodes on an Image
- Aztec ECI Output
- Data Matrix
- Set Length Range for Data Matrix
- Set the scanner to decode Data Matrix barcodes containing between 8 and 12 characters:
- Data Matrix Twin Code
- Rectangular Barcode
- Data Matrix Inverse
- Data Matrix ECI Output
- Chapter 10 Data Formatter
- Add a Data Format
- Programming with Barcodes
- Programming with Serial Commands
- Enable/Disable Data Formatter
- Non-Match Error Beep
- Data Format Selection
- Change Data Format for a Single Scan
- Clear Data Format
- Query Data Formats
- Formatter Command Type 6
- Send Commands
- F1 Send all characters
- F2 Send a number of characters
- F2 Example: Send a number of characters
- F3 Send all characters up to a particular character
- F3 Example: Send all characters up to a particular character
- E9 Send all but the last characters
- F4 Insert a character multiple times
- B3 Insert symbology name
- B4 Insert barcode length
- Move Commands
- F5 Example: Move the cursor forward and send the data
- F6 Move the cursor backward a number of characters
- F7 Move the cursor to the beginning
- EA Move the cursor to the end
- Search Commands
- B0 Search forward for a string
- B0 Example: Send barcode data that starts after a string of characters
- B1 Search backward for a string
- E6 Search forward for a non-matching character
- E6 Example: Remove zeros at the beginning of barcode data
- E7 Search backward for a non-matching character
- Miscellaneous Commands
- FB Suppress characters
- FB Example: Remove spaces in barcode data
- E4 Replace characters
- E4 Example: Replace zeros with CRs in barcode data
- BA Replace a string with another
- cd123abc23bc12ab232
- BA Example: Remove only the first occurrence of "23"s in barcode data
- EF Insert a delay
- EF Example: Insert a delay of 1s between the 5th and 6th character
- B5 Insert key strokes
- Chapter 11 Prefix & Suffix
- Prefix Sequence
- Custom Prefix
- Enable/Disable Custom Prefix
- Set Custom Prefix
- Set the custom prefix to "CODE" (HEX: 0x43/0x4F/0x44/0x45):
- AIM ID Prefix
- Code ID Prefix
- Restore All Default Code IDs
- Modify Code ID
- Modify PDF417 Code ID to be "p" (HEX: 0x70):
- Restore the default Code IDs of all symbologies:
- Custom Suffix
- Enable/Disable Custom Suffix
- Set Custom Suffix
- Set the custom suffix to "CODE" (HEX: 0x43/0x4F/0x44/0x45):
- Data Packing
- Data Packing Options
- Terminating Character Suffix
- Enable/Disable Terminating Character Suffix
- Set Terminating Character Suffix
- Set the terminating character suffix to 0x0A:
- Chapter 12 Batch Programming
- Create a Batch Command
- Create a Batch Barcode
- Use Batch Barcode
- Chapter 13 PS/2 Interface
- Appendix
- Digit Barcodes
- Save/Cancel Barcodes
- Newland
Brand : Newland
Model : FM80 Salmon
Category : Scanner