
Griddler Compact GR-35 - Grill CUISINART - Free user manual and instructions
Find the device manual for free Griddler Compact GR-35 CUISINART in PDF.


| Product Type | Indoor Electric Grill and Griddle |
| Model | Griddler Compact GR-35 |
| Brand | Cuisinart |
| Cooking Surface | Removable non-stick plates (grill and griddle) |
| Plate Material | Die-cast aluminum with non-stick coating |
| Power | 1200 Watts |
| Voltage | 120V AC, 60Hz |
| Dimensions (L x W x H) | 13.5 x 10.5 x 6.5 inches |
| Weight | 7.5 lbs |
| Cord Length | 30 inches |
| Temperature Control | Adjustable thermostat with variable heat settings |
| Indicator Lights | Power and Ready lights |
| Floating Hinge | Yes, adjusts to food thickness |
| Cool-Touch Handle | Yes |
| Dishwasher Safe Parts | Plates and drip tray are dishwasher safe |
| Safety Features | Auto shut-off after 30 minutes of inactivity |
| Warranty | 3-year limited warranty |
| Included Accessories | Drip tray, instruction manual |
| Care and Cleaning | Wipe exterior with damp cloth; wash plates in dishwasher |
Frequently Asked Questions - Griddler Compact GR-35 CUISINART
User questions about Griddler Compact GR-35 CUISINART
0 question about this device. Answer the ones you know or ask your own.
Ask a new question about this device
Download the instructions for your Grill in PDF format for free! Find your manual Griddler Compact GR-35 - CUISINART and take your electronic device back in hand. On this page are published all the documents necessary for the use of your device. Griddler Compact GR-35 by CUISINART.
USER MANUAL Griddler Compact GR-35 CUISINART
natural_image
Exterior view of a stainless steel grating with a black handle and control knob (no visible text or symbols)Cuisinart® Griddler® Compact
GR-35
For your safety and continued enjoyment of this product, always read the instruction book carefully before using.
CONTENTS
Important Safeguards 2
Parts and Features 3
Before the First Use. 3
The Griddler® Compact Does it All .... 5
Assembly Instructions 5-6
Operating Instructions.... 6-7
User Maintenance 7
Cleaning and Care 7
Storage....7
Warranty....8
IMPoRtAnt SAFEGUARDS
-
READ ALL INSTRUCTIONS.
-
Do not touch hot surfaces; use handles or knobs.
-
To protect against fire, electric shock, and injury to persons, DO NOT IMMERSE CORD OR PLUG in water or other liquids.
-
This appliance should not be used by or near children.
-
Unplug from outlet when not in use and before cleaning. Allow to cool before putting on or taking off parts, and before cleaning appliance.
-
Do not operate any appliance with a damaged cord or plug, or after the appliance has malfunctioned or has been damaged in any manner. Return the appliance to the nearest Customer Service Center for examination, repair or adjustment.
-
The use of accessory attachments not recommended by Cuisinart may result in fire, electric shock, or risk of injury to persons.
-
Do not use outdoors.
-
Do not let power cord hang over edge of table or counter, or touch hot surfaces.
-
Do not place on or near hot gas or electric burner, or in a heated oven.
-
Unplug the unit when finished using.
-
Do not use appliance for other than intended use.
-
Extreme caution must be exercised when moving an appliance containing hot oil or other hot liquids.
-
To disconnect, turn control to OFF setting, then remove plug from wall outlet.
-
WARNING: TO REDUCE THE RISK OF FIRE OR ELECTRIC SHOCK, ONLY AUTHORIZED PERSONNEL SHOULD DO REPAIRS.
SAVE tHESE InStRUCtlonS FoR HoUSEHoLD USE onLY
SPECIAL CORD SET INSTRUCTIONS
A short power-supply cord is provided to reduce the risks resulting from becoming entangled in or tripping over a longer cord. Longer extension cords may be used if care is exercised in their use.
If a long extension cord is used, the marked electrical rating of the extension cord should be at least as great as the electrical rating of the appliance, and the longer cord should be arranged so that it will not drape over the countertop or tabletop where it can be pulled on by children or animals, or tripped over.
NOTICE
This appliance has a polarized plug (one blade is wider than the other) to reduce the risk of electric shock. This plug will fit in a polarized outlet only one way. If the plug does not fit fully in the outlet, reverse the plug. If it still does not fit, contact a qualified electrician. Do not modify the plug in any way.
PARTS AND FEATURES
1. Base and Cover
Solid construction with stainless steel self-adjusting cover
2. Panini-Style Handle
Sturdy cast-metal handle adjusts cover to accommodate thickness of food
3. Removable and Reversible Cooking Plates
Nonstick and dishwasher safe for easy cleanup
a. Grill Side: Perfect for grilling steak, burgers, chicken and vegetables
b. Griddle Side: Prepare flawless pancakes, eggs, bacon and seared scallops
4. Indicator Lights
Signal Power On and Ready to Cook
5. Temperature Knob
Choose Low, Medium or High
6. Drip Tray
Collects grease and can be removed from base for easy cleanup (dishwasher safe)
7. Cleaning/Scraping Tool
Helps clean grill/griddle plates after cooking
8. Plate Release Buttons
Push in to release and remove cooking plates
9. Hinge Release Lever
Allows the cover to lie back for cooking in the flat position
All parts that come in contact with food are BPA free
BEFORE THE FIRST USE
Remove all packaging materials and any promotional labels or stickers from your grill. Be sure all parts (listed under Parts and Features above) of your new appliance have been included before discarding any packaging materials. You may want to keep the box and packing materials for use at a later date.
Before using your Cuisinart ^® Griddler ^® Compact for the first time, wipe the base, cover and temperature knob with a damp cloth. Thoroughly clean cooking plates, drip tray and cleaning/scraping tool. The plates, drip tray and cleaning/scraping tool are dishwasher safe. Refer to Assembly Instructions (page 5) for plate removal.

THE GRIDDLER® COMPACT DOES IT ALL
The Griddler® Compact is the ultimate kitchen appliance, offering you five separate cooking options. Simply flip the reversible cooking plates and adjust the hinge to use as a Contact Grill, Panini Press, Full Grill, Full Griddle, or Half Grill/Half Griddle. See Assembly Instructions and Operating Instructions (pages 5–7).
Contact Grill
Use the Griddler® Compact as a Contact Grill to cook burgers, boneless pieces of meat and thin cuts of meat and vegetables.
The Contact Grill function works best when you want to cook something in a short amount of time or when you are looking for a healthy method of grilling. When cooked on the Contact Grill, food will cook quickly because you are grilling both sides of the food at the same time. The ribs on the grill plates combined with the grease spout at the rear of the plate allow the grease to drip from the meat and drain off the plates.
When the Griddler® Compact is used as a Contact Grill, the grill side of the plates is recommended.
Rest the cover on top of the food until it has reached the desired cooked temperature.
The Griddler® Compact was designed with a unique handle and hinge that allow the cover to adjust to the thickness of the food.

natural_image
Close-up of a mechanical device with a curved handle and textured surface (no visible text or symbols)You can easily grill anything with even results, from a thinly-sliced potato to a thin sirloin steak.
When cooking more than one food item in the Contact Grill, it is important that the thickness of food items be consistent so the cover will close evenly on the food.
Panini Press
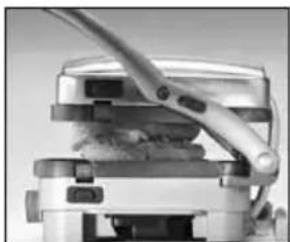
Use the Griddler® Compact as a Panini Press to grill sandwiches, breads and quesadillas.
natural_image
Close-up of a mechanical device with a lever and base mount (no visible text or symbols)The word “panini” is Italian for grilled sandwiches. Panini can include any combination of ingredients such as vegetables, meat and cheese layered between two pieces of fresh-baked bread. The sandwich is then pressed between two grill or griddle plates to toast the bread and warm the sandwich. Experiment making a variety of savory or sweet sandwiches for any meal. We recommend using fresh-baked bread to produce the best tasting panini. Popular breads used for panini are focaccia (a flat bread frequently baked with rosemary, salt and onion on top), michetta (a small round roll with a crisp crust), ciabatta (a rectangular bread with a slightly domed crust) and thick slices of classic Italian bread.
When the Griddler® Compact is used as a Panini Press, the grill side of the plates is recommended. We recommend the grill side of the plates because traditional-style panini sandwiches have grill marks on the bread. However, depending upon the type of sandwich you are preparing, you may wish to use the griddle side of the plates or any combination of the two.
The Griddler® Compact functions as a Panini Press in the same manner that it functions as a Contact Grill. The Griddler® Compact was designed with a unique handle and hinge that allow the cover to adjust to the thickness of the sandwich you
are preparing, and to rest there evenly. Light pressure can be applied to the handle to press and heat the sandwich to your liking. When cooking two or more panini, it is important that the thickness of the sandwiches be consistent so the cover will close evenly on the panini.
Full Grill
Use the Griddler® Compact as a Full Grill to cook burgers, steak, poultry (we do not recommend cooking bone-in

natural_image
Black plastic tray case with ribbed top and side slots (no text or symbols visible)chicken, since it does not cook evenly on an open grill), fish and vegetables.
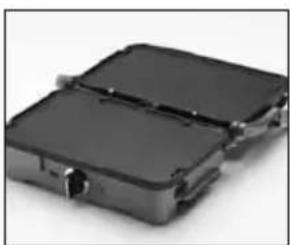
"Full Grill" refers to using the Griddler® Compact with the cover lying flat, creating a double, flat cooking surface. In this position, the foods you are grilling will have to be turned over for cooking.
When the Griddler® Compact is used as a Full Grill, the grill side of the plates should be used.
Cooking on the Full Grill is the most versatile method of using the Griddler® Compact. With the Full Grill, you have double the surface area (150 sq. inches) for grilling. You have the option of cooking different types of foods on separate plates without combining their flavors, or cooking large amounts of the same type of food.
The Full Grill position also accommodates different cuts of meat with varying thicknesses, allowing you to cook each piece to your liking.
Full Griddle
Use the Griddler® Compact as a Full Griddle to cook pancakes, eggs, French toast, hash browns and breakfast meats.
natural_image
Exterior view of a black plastic enclosure with two compartments (no text or symbols visible)When you use the Griddler® Compact as a Full Griddle, open the cover so it lies flat, creating a double, flat cooking surface. In this position, the foods you are preparing will have to be turned over for cooking. When using this cooking function, the griddle side of the plates should be used.
Cooking on the Full Griddle is a wonderful way to prepare breakfast for two or for a small family. The large surface area allows you to cook a variety of different foods at the same time, or large amounts of your favorite food.
Half Grill/Half Griddle
Use the Griddler® Compact as a Half Grill/Half Griddle in order to create full meals like bacon and eggs or steak and potatoes at the same time.
When using the Griddler® Compact as a Half Grill/Half Griddle, simply place the unit in the flat position and insert one plate with the grill side facing up and another plate with the griddle side facing up.

natural_image
Black plastic heat exchanger housing with ventilation slots and a handle (no text or symbols visible)ASSEMBLY INSTRUCTIONS
Place Griddler® Compact on a clean, flat surface where you intend to cook. The Griddler® Compact can be positioned in three ways:
Closed Position -
Upper plate/cover rests flat on lower plate/base. This is your starting and heating position and when using the Contact Grill or Panini Press functions.

natural_image
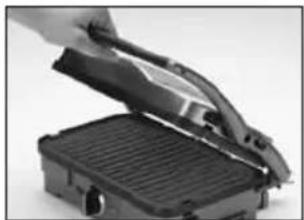
Exterior view of a modern office building (no signage)Open Position – Upper plate/cover is open and in the 100° position. Open the cover to this position before using the Griddler® Compact as a Contact Grill or Panini Press.
To adjust the
Griddler® Compact to this position, simply lift the handle until you feel it come to a locking position. The unit will stay in this position until you close the cover or continue to open it to the flat position.
natural_image
Close-up of a hand opening a black plastic grater with a tray, no visible text or symbolsThe cover will stay in the open position until you lower the handle for cooking. When this is done, the hinge will release itself so that the upper plate lies flat on the top of the
food you are preparing. This allows you to cook your food evenly from both top and bottom. When you lift the handle to open the Griddler® Compact after cooking, the cover will remain in the flat position, parallel to the lower plate. In order to lock the cover back into the open position, you must close the Griddler® Compact, without any food in place, and open it again.

natural_image
Close-up of a mechanical device with a curved tool handle and textured base (no visible text or symbols)Flat Position -
Upper plate/cover is level with lower plate/base. The upper and lower plates line up to create one large cooking surface. The Griddler® Compact is in this position when it is used as a Full Grill, Full Griddle or Half Grill/Half Griddle.

natural_image
Black rectangular electronic device with metallic clamps and a central connector (no visible text or symbols)- To adjust the Griddler® Compact to this position, locate the hinge release lever on the right arm.
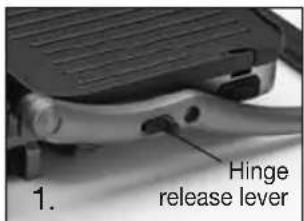
- With your left hand on the handle, use your right hand to slide the lever toward you. Push the handle back until the cover

natural_image
Close-up of hands holding a dark object on a metal frame, no visible text or symbolsrests flat on the counter. The unit will stay in this position until you lift the handle and cover to return it to the closed position.
If the Griddler® Compact is already in the open position and you wish to adjust it to the flat position, pull the handle slightly toward you and then lift the hinge release lever. Push the handle back until the cover rests in the flat position. Pulling the handle forward slightly before lifting the hinge release lever will take some of the pressure off the hinge and you will be able to adjust the Griddler® Compact more easily.
To insert cooking plates
Adjust the Griddler® Compact to the flat position with the temperature knob directly in front of you. Insert one plate at a time. Each plate

natural_image
Close-up of hands operating a flat-screen computer with a black cover (no visible text or symbols)is designed to fit in either the upper housing or the lower housing of the Griddler® Compact.
If you are facing the Griddler® Compact, the drip spout should be at the rear of the plate. Locate the metal brackets at the center of the housing. Tilt the back end of the plate and line up the cutouts at the back of the plate with the metal brackets. Slide the plate underneath the brackets and push down the front end of the plate. It will snap into place. Turn the Griddler® Compact around and insert the second plate on either its grill or griddle side into the upper housing as you did with the first plate.
To remove cooking plates
- Once the Griddler® Compact has cooled, adjust to the flat position. Locate the plate release buttons on one side of the unit. Press firmly on will pop up slightly

natural_image
Close-up of a hand pressing a button on a black plastic tray (no visible text or symbols)- Grasp the plate with two hands, slide it out from under the metal brackets, and lift it out of the base. Press on the other plate release button cooking plate in the

natural_image
Close-up of hands installing or adjusting a black electronic device with a grid-patterned cover (no visible text or symbols)To position drip tray
One side of the base has a slot provided for the drip tray. Slide the drip tray into the base according to the instruction on the tray.

natural_image
Close-up of a hand inserting a black plastic clip into a mechanical device (no visible text or symbols)Grease from the food will run off the plates through the grease spout and into the drip tray. Grease should be safely disposed of after the Griddler® Compact has cooled down completely. The drip tray can be cleaned in the dishwasher.
OPERATING INSTRUCTIONS
Once the Griddler® Compact is assembled properly, plug the cord into a standard electrical outlet. You are now ready to begin cooking. When the temperature knob is turned to Low, Medium or High, the red indicator light will illuminate to indicate that the power is on.
If you intend to use the Griddler® Compact in the flat position, but you do not need the entire surface, it is recommended to use the bottom plate.
We recommend you preheat in the closed position. It may take up to 7 minutes to reach operating temperature, depending on the temperature level that was set. When the thermostat has reached operating temperature, the green indicator light will indicate that the Griddler® Compact is ready for cooking. During operation, the light will continue to turn on and off as the thermostat regulates the temperature. This is normal.
The temperature knob is used to set and maintain the temperature of the cooking surface. You may vary the setting of the temperature knob at any time during cooking, and may wish to do so depending on the types of foods on the cooking plate. Refer to the Helpful Cooking Chart in the recipe book section (pages 3–4) for recommendations.
Always exercise caution when handling the Griddler® Compact during cooking, as the housing will become hot during use. To open the Griddler® Compact, grasp the black plastic area of the handle. This part of the handle stays cool to the touch while cooking. The arms are made of die-cast aluminum and will become hot during use. Do not touch them during or immediately following cooking.
The cover is made of stainless steel and will become very hot and should not be touched during or immediately following cooking. If you need to adjust the cover, be sure to use oven mitts to prevent burns.
The lower housing is made of plastic, and while it will become very warm, it will not burn you. If you need to move the Griddler® Compact during cooking, be sure to handle it from the base only while wearing oven mitts. Do not touch the cover.
Allow the Griddler® Compact to cool down before handling (at least 30 minutes).
NOTE: The first time you use the Griddle® Compact, it may have a slight odor and may smoke a bit. This is normal and common to appliances with nonstick surfaces.
The Griddler® Compact comes with a black cleaning/scraping tool. This can be used for cleaning both the grill and griddle sides of the plates after you have finished cooking and the unit has cooled down completely (at least 30 minutes). Using the cleaning/ scraping tool on a hot surface for too long will cause the plastic to melt.
USER MAINTENANCE
- Never use metal utensils, as they will scratch the nonstick plates. Instead, use only wooden or heat-proof plastic utensils.
- Never leave plastic utensils in contact with the hot grill plates. This includes the provided cleaning/scraping tool.
- In between recipes, use a wooden or heat-proof plastic utensil to scrape excess food buildup through grease channels and into drip cup, then wipe off any residue with a paper towel before proceeding with next recipe.
- Allow the Griddler® Compact to cool down completely (at least 30 minutes) before cleaning.
CLEANING AND CARE
CAUTION: BEFORE CLEANING APPLIANCE, MAKE SURE IT IS UNPLUGGED AND HAS COOLED DOWN COMPLETELY.
Once you have finished cooking, turn the temperature knob to the OFF position and unplug the power cord from the wall outlet. Allow the unit to cool down for at least 30 minutes before handling.
Use the cleaning/scraping tool to remove any leftover food from the cooking plates. The cleaning/scraping tool can be washed by hand or in the dishwasher.
Dispose of grease from the drip tray once cooled. The drip tray can be cleaned by hand or in the dishwasher.
Press the plate release buttons to remove plates from the housing. Be sure that the plates have cooled completely before handling (at least 30 minutes). The cooking plates can be washed in the dishwasher. Do not use metal objects such as knives or forks for cleaning. Do not use a scouring pad for cleaning; the nonstick coating can be damaged.
If you have been cooking seafood, wipe the cooking plates with lemon juice to prevent the seafood flavor from transferring to the next recipe.
The housing base, cover and temperature knob can be wiped clean with a soft, dry cloth. For tough stains, dampen cloth. Never use an abrasive cleaner or harsh pad.
STORAGE
Always make sure the Griddler® Compact is cool and dry before storing.
The power cord can be wrapped around the back of the base for storing.
WARRANTY
Limited Three-Year Warranty
This warranty is available to consumers only. You are a consumer if you own a Cuisinart® Griddler® Compact that was purchased at retail for personal, family or household use. Except as otherwise required under applicable law, this warranty is not available to retailers or other commercial purchasers or owners. We warrant that your Cuisinart® Griddler® Compact will be free of defects in materials and workmanship under normal home use for 3 years from the date of original purchase.
We recommend that you visit our website, www.cuisinart.com for a fast, efficient way to complete your product registration. However, product registration does not eliminate the need for the consumer to maintain the original proof of purchase in order to obtain the warranty benefits. In the event that you do not have proof of purchase date, the purchase date for purposes of this warranty will be the date of manufacture.
CALIFORNIA RESIDENTS ONLY
California law provides that for In-Warranty Service, California residents have the option of returning a nonconforming product (A) to the store where it was purchased or (B) to another retail store that sells Cuisinart products of the same type. The retail store shall then, according to its preference, either repair the product, refer the consumer to an independent repair facility, replace the product, or refund the purchase price less the amount directly attributable to the consumer's prior usage of the product. If neither of the above two options results in the appropriate relief to the consumer, the consumer may then take the product to an independent repair facility, if service or repair can be economically accomplished. Cuisinart and not the consumer will be responsible for the reasonable cost of such service, repair, replacement, or refund of nonconforming products under warranty. California residents may also, according to their preference, return nonconforming products directly to Cuisinart for repair or, if necessary, replacement by calling our Consumer Service Center toll-free at 800-726-0190. Cuisinart will be responsible for the cost of the repair, replacement, and shipping and handling of such nonconforming products under warranty.
BEFORE RETURNING YOUR CUISINART PRODUCT
If your Cuisinart® Griddler® Compact should prove to be defective within the warranty period, we will repair or, if we think necessary, replace it. To obtain warranty service, please call our Customer Service Center toll-free at 1-800-726-0190 or write to: Cuisinart, 7811 North Glen Harbor Blvd, Glendale, AZ 85307. To facilitate the speed and accuracy of your return, enclose \$10.00 for shipping and handling. (California residents need only supply a proof of purchase and should call 1-800-726-0190 for shipping instructions.) Please be sure to include your return address, description of the product's defect, product serial number, and any other information pertinent to the return. Please pay by check or money order. NOTE: For added protection and secure handling of any Cuisinart product that is being returned, we recommend you use a traceable, insured delivery service. Cuisinart cannot be held responsible for in-transit damage or for packages that are not delivered to us. Lost and/or damaged products are not covered under warranty.
Your Cuisinart® Griddler® Compact has been manufactured to the strictest specifications and has been designed for use only with authorized accessories and replacement parts. This warranty expressly excludes any defects or damages caused by accessories, replacement parts or repair service other than those authorized by Cuisinart. This warranty does not cover any damage caused by accident, misuse, shipment or other than ordinary household use. This warranty excludes all incidental or consequential damages. Some states do not allow the exclusion or limitation of these damages, so these exclusions may not apply to you. You may also have other rights, which vary from state to state.
Important: If the nonconforming product is to be serviced by someone other than Cuisinart's Authorized Service Center, please remind the servicer to call our Consumer Service Center at 1-800-726-0190 to ensure that the problem is properly diagnosed, the product is serviced with the correct parts, and to ensure that the product is still under warranty.
Cuisinart®
SAVOR THE GOOD LIFE®

Coffeemakers
Food Processors

Toasters
Slow
Cookers
Cookware

Toaster Ovens
Cuisinart offers an extensive assortment of top quality products to make life in the kitchen easier than ever. Try some of our other countertop appliances and cookware, and Savor the Good Life®.
www.cuisinart.com
Cuisinart®
Recipe Booklet
Instruction
Booklet
Reverse Side
natural_image
Plated dish of a rolled-up corn kernel with red peppers, bell peppers, and cilantro garnish (no text or symbols visible)RECIPES
HELPFUL COOKING CHART 3-4
SAFE INTERNAL TEMPERATURE CHART.... 4
BREAKFAST
Traditional Pancakes 5
Breakfast Panini 5
Grilled Steak and Eggs 6
STARTERS/SIDES
Grilled Portobello Mushrooms ..... 6
Grilled Vegetable, Pear and Roquefort Salad 7
Easy Quesadillas for Two ..... 7
MAINS
Grilled Reubens 8
Smoked Turkey, Roasted Pepper and Swiss Panini with Pesto Mayo 8
Grilled BLT with Cheddar ..... 9
Sliders. 9
Parmesan Turkey Burgers ..... 10
Black Bean Cakes 10
Shrimp Grilled Three Ways
Grilled Pesto Shrimp 11
Grilled Citrus Ginger Shrimp ..... 11
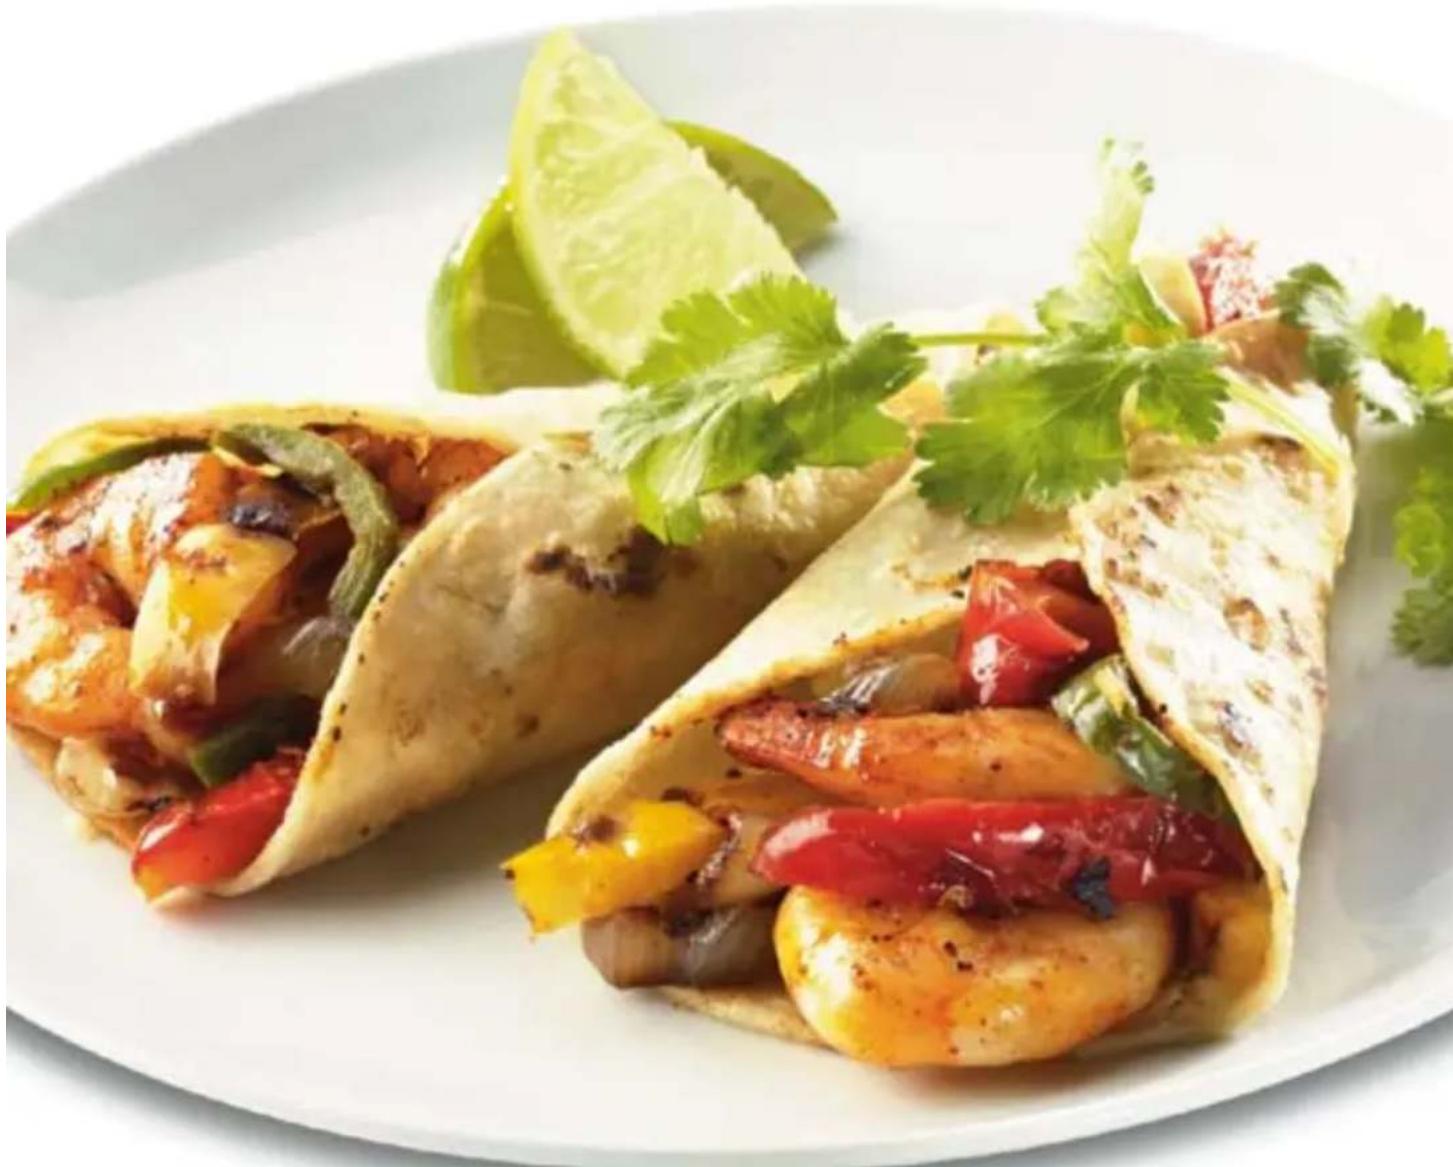
Grilled Mexican Shrimp ..... 12
Grilled Herb Chicken 12
Tenderloin for Two 13
DESSERTS
Grilled Strawberry Shortcakes .... 13
Chocolate Griddle Cakes ..... 14
HELPFUL COOKING CHART
If you are cooking meats that are 2 inches thick, use the closed position. Cooking times are approximate and depend on thickness of foods being cooked. To be safe, use an instant read thermometer and refer to the USDA's safe internal temperature chart, page 4.
| Food Preparation | Plate/Position | Temperature and Time | |
| Bacon Lay in a single layer. | Grill or Griddle; flat position. | High, until desired doneness. | |
| Beef, boneless steak | Up to 2 inches thick. Season to taste. Drain off marinade well if marinated before grilling. | Grill; closed or flat. | High, in the closed position, 3 to 10 minutes. High, in the flat position, for 3 to 6 minutes per side, depending on the thickness. |
| Beef, fillets | 1 to 2 inches thick. Season to taste. Drain off marinade well if marinated before grilling. | Grill; closed or flat. | High, 8 to 12 minutes in the closed position. High, 4 to 6 minutes per side in the flat position, up to 12 minutes in total depending on thickness. |
| Beef, hamburgers | Shape meat into burgers of even weight and thickness. | Grill; closed or flat. | High, 5 to 8 minutes to degree of desired doneness. |
| Chicken, boneless, skinless breast halves | 1⁄2 to 3⁄4-inch thick. All chicken grilled at one time should be same thickness. | Grill or Griddle; closed or flat. | High, in the closed position, for 7 to 9 minutes. If grilling in the flat position, cook on High for 8 to 10 minutes per side. (Juices will run clear with no signs of pink when done.) |
| Chicken, boneless, skinless thighs | Spread to even thickness, remove all visible fat. | Grill or Griddle; closed or flat. | High, in the closed position, 8 to 10 minutes. If grilling in the flat position, cook on High for 8 to 10 minutes per side. (Juices will run clear with no signs of pink when done.) |
| Fish steaks (sword, tuna, salmon/boned) | 3⁄4 to 1 inch thick. Season to taste. Drain off marinade well if marinated before grilling. | Grill or Griddle; closed or flat. | High, in the closed position, 6 to 71⁄2 minutes. If grilling in the flat position, cook on High for 7 to 8 minutes per side. |
| Ham steaks | Dry thoroughly with paper towels; remove bone if there is one. | Grill or Griddle; closed or flat. | Medium until heated through, 3 to 5 minutes. |
| Hot dogs, cooked sausages | Splitting your hot dogs or sausages gives them a deeper grilled flavor. | Grill or Griddle; closed or flat. | High, in the closed position, 3 to 4 minutes if grilling split hot dogs or sausages. Whole sausages take 6 to 10 minutes in the closed position. If grilling in the flat position, always split the hot dogs or sausages. Flip after 3 to 4 minutes. |
| Food Preparation Plate Temperature and Time | |||
| Lamb medallions, boneless | 3⁄4 inch thick. Season to taste. Drain off marinade well if marinated before grilling. | Grill or Griddle; flat. | High, 3 to 4 minutes per side, depending on thickness. |
| Pork loin chops, boneless | 1⁄2 to 1 inch thick. All chops grilled at one time should be same thickness. | Grill or Griddle; flat. | High, 4 to 9 minutes per side, depending on the thickness of the chops. Internal temperature of 160°F. Pale pink interior. Grilling too long will result in dry meat. |
| Pork tenderloin | Cut into 3⁄4-inch thick medallions. Season to taste. | Grill or Griddle; flat. | High, 4 minutes per side, depending on thickness. Should be slightly pink in appearance. Grilling too long will result in dry meat. |
| Portobello mushrooms | 1⁄2-inch thick slices. | Grill or Griddle; closed or flat. | Medium, 6 to 8 minutes, until nicely browned. |
| Sausages, uncooked | Prick links with tines of fork or tip of paring knife. | Grill or Griddle; closed or flat. | High; grill for 14 to 18 minutes in the closed position, depending on thickness of sausage. |
| Scallops, sea | Remove tough “foot” (muscle) and discard. Dry well. Season to taste. | Grill or Griddle; flat position only. | High, 2 to 3 minutes per side. Do not overcook or scallops will be tough. |
| Shrimp | Shell and de-vein. Dry well. Season to taste. | Grill or Griddle; flat position only. | High, 1 to 2 minutes per side. |
| Turkey cutlets | 1⁄2 inch thick. Season to taste. | Grill or Griddle; flat. | Medium, 3 to 4 minutes per side, depending on thickness. |
SAFE INTERNAL TEMPERATURES (per the USDA)
| Food Type | Internal Temperature (°F) | |
| Beef | Ground | 160° |
| Steak and roasts - medium | 160° | |
| Steak and roasts - medium rare | 145° | |
| Chicken, turkey | Breasts | 170° |
| Ground, stuffing and casseroles | 170° | |
| Whole bird, legs, thighs and wings | 170° | |
| Fish, shellfish Any type 145° | ||
| Lamb | Ground | 160° |
| Steak and roasts - medium | 160° | |
| Steaks and roasts - medium rare | 145° | |
| Pork | Chops, fresh (raw) ham ground, ribs and roasts | 160° |
| Fully cooked ham (to reheat) | 140° | |
BREAKFAST
Traditional Pancakes
This is a great all-purpose pancake recipe – try the chocolate swirl variation for a fun treat.
Griddler® Compact position: Flat Plate side: Griddle
Makes about sixteen 4-inch pancakes
2 large eggs
1 cup reduced-fat milk
12 teaspoon pure vanilla extract
1¼ cups unbleached, all-purpose flour
1 tablespoon baking powder
1 tablespoon granulated sugar
12 teaspoon table salt
2 tablespoons unsalted butter, melted and cooled
- Insert plates on griddle side. Set the Cuisinart® Griddler® Compact between Medium and High and preheat.
- Put the eggs, milk and vanilla extract into a small bowl and whisk to blend until smooth; reserve. Combine flour, baking powder, sugar and salt in a separate, medium bowl. Stir with a whisk to blend. Add the egg/milk mixture and stir until just blended. Stir in the melted, cooled butter. Do not over-mix.
- Open preheated unit to extend flat. Using a 14 -cup measure, drop batter onto preheated griddle. Cook pancakes until bubbles form, about 2 minutes; flip and cook until done, about 2 minutes longer. Transfer to warm plates to serve. As you finish each batch of pancakes, you can keep them warm on a wire rack placed on a baking sheet in a low oven (200°F). Repeat until all the batter is used.
Nutritional information per serving (2 pancakes): Calories 160 (32% from fat) • carb. 21g • pro. 5g • fat 6g • sat. fat 3g • chol. 70mg • sod. 410mg • calc. 169mg • fiber 1g
Variation:
Chocolate Swirl pancakes: Prepare batter as above, adding an extra 14 cup of milk. Pour about 14 of the batter into a separate mixing bowl and whisk in 1 tablespoon of unsweetened cocoa powder and 13 cup melted semisweet chocolate chips.
Once griddle is hot, drop plain batter onto griddle using 14 -cup measure. Immediately drop dollops of the chocolate batter on top center of plain batter in 1 teaspoon amounts. Swirl chocolate into regular batter using either the teaspoon itself or a wooden toothpick to create different swirls and designs.
Cook as above, about 2 minutes per side, flipping once bubbles form and pop.
Breakfast Panini
A delicious and simple breakfast sandwich – perfect for a breakfast on the go.
Griddler® Compact position: Flat and Closed Plate side: Griddle
Makes 2 sandwiches
4 to 6 bacon slices
2 large eggs
freshly ground pepper
2 croissants or sandwich-size English muffins, sliced horizontally
2 slices Cheddar, thinly sliced (Swiss, Provolone or American cheese may be substituted)
- Place bacon slices on the griddle plates in the flat position. Insert plates on griddle side. Set the Cuisinart® Griddler® Compact between Medium and High and preheat. Cook until bacon is completely cooked through, about 4 to 5 minutes per side. Remove and reserve on paper towels to drain. Carefully wipe any excess grease from the griddle and turn heat down to Medium.
- Gently crack eggs right onto griddle and sprinkle with freshly ground pepper. Once set, flip egg until cooked easy or until desired doneness. Remove and place on croissant bottom, top each with bacon and slices of cheese to cover. Finish with croissant top.
- Place sandwiches on bottom plate and carefully, with oven mitts, adjust the grill to close. Carefully grill sandwich in closed position until cheese is melted, about 2 minutes.
Nutritional information per sandwich: Calories 383 (48% from fat) • carb. 25g • pro. 24g • fat 20g • sat. fat 10g • chol. 262mg • sod. 920mg • calc. 177mg • fiber 1g
Grilled Steak and Eggs
A hearty breakfast for two.
Griddler® Compact position: Flat
Plate side: Griddle and Grill
Makes 2 servings
2 boneless rib-eye steaks (about 8 ounces each)
2 teaspoons extra virgin olive oil
1 / 4 teaspoon kosher salt
14 teaspoon freshly ground black pepper
1 teaspoon unsalted butter
4 large eggs
- Fit the Cuisinart® Griddler® Compact with one plate on its griddle side and the other on its grill side and preheat to High.
- Coat each steak with the olive oil and season with the salt and pepper. Reserve.
- Once the unit has preheated, grill the steaks 4 to 5 minutes per side for medium rare, or until desired doneness.
- After the steaks have been cooking for about 3 minutes, place the butter on the griddle side. Once melted, crack 2 eggs right onto the griddle plate and cook until desired doneness, either sunny side up or over easy. Reserve and cook remaining two.
Nutritional information per serving:
Calories 568 (46% from fat) • carb. 1g • pro. 72g
- fat 28g • sat. fat 11g • chol. 604mg • sod. 429mg
• calc. 61mg • fiber 0g
STARTERS/SIDES
Grilled
Portobello Mushrooms
The grilled portobello can also be used as a panini filling.
Griddler® Compact position: Closed
Plate side: Grill
Makes 2 servings
14 cup extra virgin olive oil
2 tablespoons white balsamic vinegar (or white wine vinegar)
1 tablespoon water
1 garlic clove, finely chopped
1 tablespoon onion or shallot, finely chopped
1 teaspoon dried thyme
12 teaspoon kosher salt
14 teaspoon freshly ground black pepper
2 large portobello mushrooms,
about 6 to 8 ounces, thickly sliced
(about 34 inch)
- Put the olive oil, vinegar, water, garlic, onion, thyme, salt and pepper in a food processor fitted with the metal chopping blade. Process until emulsified. Pour over the mushrooms; toss gently to coat. Let stand 10 to 15 minutes.
- Insert plates on grill side. Preheat the Cuisinart® Griddler® Compact to High. When the unit is hot, arrange one half of the mushrooms on the bottom grill, cut side down. Close; grill for 2 minutes. Remove; reserve on platter. Repeat with the remaining mushrooms.
- Serve warm or chilled.
Nutritional information per serving (1 mushroom):
Calories 156 ( 74% from fat) • carb. 7g • pro. 3g
- fat 14g • sat. fat 2g • chol. 0mg • sod. 299mg
• calc. 21mg • fiber 2g
Grilled Vegetable, Pear & Roquefort Salad
This colorful salad provides a big impact when it comes to flavor.
Griddler® Compact position: Flat Plate side: Grill
Makes 2 servings
6 eggplant slices, cut into 14 -inch rounds
6 yellow squash slices, cut into 14 -inch rounds
6 zucchini slices, cut into 14 -inch rounds
8 red bell pepper slices, cut 14 inch thick
2 teaspoons extra virgin olive oil
12 teaspoon kosher salt
14 teaspoon freshly ground black pepper
1 firm, ripe pear, peeled, cored and cut into 12 -inch wedges
1½ to 2 ounces Roquefort extra virgin olive oil for drizzling
-
Insert plates on grill side. Preheat the Cuisinart® Griddler® Compact to High.
-
Put all of the vegetables into a large bowl; toss with the olive oil, salt and pepper.
-
Once preheated, arrange 12 of the vegetables evenly spaced on both sides of the preheated grill. Grill 2 minutes per side. Reserve on a platter; cover with foil to keep warm. Repeat with the remaining vegetables.
-
Grill pears, about 10 minutes per side, until just tender.
-
Add pears to vegetable platter; top with Roquefort and drizzle with extra virgin olive oil. Serve immediately or at room temperature.
Nutritional information per serving: Calories 110 (44% from fat) • carb. 13g • pro. 4g • fat 6g • sat. fat 3g • chol. 10mg • sod. 490mg • calc. 88mg • fiber 4g
Easy Quesadillas for Two
We cannot think of a simpler yet more satisfying snack.
Griddler® Compact position: Flat and Closed Plate side: Grill
Makes 2 servings
1 medium red or yellow bell pepper (about 4 ounces), thinly sliced lengthwise
1 small jalapeño, seeded and thinly sliced lengthwise
1 small red onion, (about 4 ounces), thinly sliced
12 teaspoon kosher salt
1 / 4 teaspoon freshly ground pepper
1 teaspoon chili powder
2 tablespoons olive oil
2 large flour tortillas
3 ounces Monterey Jack, shredded
-
Insert plates on grill side. With the unit closed, preheat the Cuisinart® Griddler® Compact to High.
-
Put the pepper, jalapeño and onion into a mixing bowl and toss with the salt and pepper, chili powder and olive oil.
-
Once grill has preheated, grill vegetables, turning every 2 minutes until soft and slightly golden. Remove and reserve.
-
Place both tortillas on a flat work surface. Divide the grilled vegetables and distribute evenly on bottom half of the tortillas. Layer shredded cheese on top, leaving a 12 -inch border around the edge of the tortilla to prevent any cheese from melting out. Fold empty portion of tortilla over the filling.
-
Carefully close grill and turn heat down between Medium and High. Place 1 quesadilla on bottom half of grill and close top. Grill closed for about 2 to 3 minutes, until golden grill marks are visible and cheese is melted. Repeat with remaining quesadilla.
-
Serve immediately. Quesadillas may also be cut into wedges for serving.
Nutritional information per serving:
Calories 443 (60% from fat) • carb. 31g • pro. 13g
- fat 30g • sat. fat 10g • chol. 38mg • sod. 1264mg
• calc. 381mg • fiber 2g
MAINS
Grilled Reubens
Classic deli made easy with the Griddler® Compact.
Griddler® Compact position: Closed Plate side: Grill
Makes 2 sandwiches
4 slices rye bread
2 ounces corned beef, thinly sliced
2 teaspoons Russian or Thousand Island dressing
14 cup sauerkraut, well drained
1 ounce Swiss cheese, sliced
12 tablespoon unsalted butter, melted (optional)
- Insert plates on grill side. Preheat the Cuisinart® Griddler® Compact to High.
- Prepare sandwiches. Lay two slices of rye bread down on a work surface. Place 1 ounce of corned beef on each slice of bread and spread 1 teaspoon of dressing on each. Place 2 tablespoons of sauerkraut on each sandwich and top each with Swiss cheese. Place remaining bread on top of sandwich. If using, lightly brush tops with melted butter.
- Once grill has preheated, place sandwiches on the lower grill plate and close. Grill for about 4 to 5 minutes, until bread is evenly golden and toasted and the cheese melted.
- Cut sandwiches on a diagonal and serve.
Nutritional information per sandwich:
Calories 314 (36% from fat) • carb. 35g • pro. 14g
- fat 12g • sat. fat 5g • chol. 41mg • sod. 1011mg
• calc. 161mg • fiber 5g
Smoked Turkey, Roasted Pepper & Swiss Panini with Pesto Mayo
Griddler® Compact position: Closed Plate side: Grill
Makes 2 panini
1½ tablespoons light or regular mayonnaise
1 tablespoon prepared pesto
4 slices crusty country bread or artisan wheat bread (about 6 x 3½ x ½ inch)
2 teaspoons extra virgin olive oil or melted butter
4 ounces smoked turkey breast, thinly sliced
1 roasted red pepper, well drained, cut into 12 -inch strips
2 ounces Swiss cheese, very thinly sliced
2 ounces red onion, very thinly sliced (optional)
- Insert plates on grill side. Preheat the Cuisinart® Griddler® Compact to Medium while assembling panini. Combine mayonnaise and pesto. Lightly brush one side of each slice of bread with the olive oil/butter. Lay 4 slices of bread on the work surface, oiled side down. Spread lightly with pesto mayonnaise. Build the sandwiches in this order: smoked turkey, roasted pepper, cheese and onion (if using), using equal amounts of each item on each sandwich. Top with the remaining sliced bread that has been spread lightly with the pesto mayonnaise, oiled side up.
- Arrange sandwiches evenly spaced on the bottom grill plate of the preheated unit; close, applying light pressure to handle for about 30 seconds. Grill panini for 3 to 4 minutes. Cut in half on the diagonal; serve warm.
Nutritional information per panini:
Calories 383 (61% from fat) • carb. 17g • pro. 20g
- fat 26g • sat. fat 8g • chol. 60mg • sod. 1211mg
• calc. 267mg • fiber 2g
Grilled BLT with Cheddar
Griddler® Compact position: Flat and Closed Plate side: Grill
Makes 2 sandwiches
4 to 6 slices bacon
4 slices sourdough bread
1 tomato (approximately 4 ounces), sliced
pinch kosher salt
pinch freshly ground black pepper
2 teaspoons mayonnaise
1 large handful arugula (approximately 34 ounce)
2 ounces Cheddar, sliced
- Insert plates on grill side. Preheat the Cuisinart® Griddler® Compact to High.
- Once the grill has preheated, extend flat. Place the bacon on the heated grill. Cook until bacon is completely cooked through, about 4 to 5 minutes per side. Once cooked, remove and reserve on paper towels to drain. Carefully wipe any excess fat from the grill plates and turn heat down between Medium and High.
- Layer cooked bacon evenly on two pieces of the bread. Layer the tomato on top, sprinkling each lightly with salt and pepper. Evenly spread half the mayonnaise on each sandwich and top with arugula. Finally, layer both with cheese and then top with the remaining bread.
- Place sandwiches on the bottom grill plate and close, lightly pressing on the handle. Grill until cheese has melted and sandwiches are evenly grilled and golden, about 5 minutes.
- Slice each sandwich in half and then serve immediately.
Nutritional information per sandwich:
Calories 383 (61% from fat) • carb. 17g • pro. 20g
- fat 26g • sat. fat 8g • chol. 60mg • sod. 1211mg
• calc. 267mg • fiber 2g
Sliders
These mini burgers are a great hors d'oeuvre idea, too.
Griddler® Compact position: Closed Plate side: Grill
Makes 6 burgers (2 to 3 servings)
12 pound ground chuck
14 small onion, finely chopped or grated
pinch kosher salt
pinch freshly ground black pepper
6 miniature hamburger buns
- Insert plates on grill side. Preheat the Cuisinart® Griddler® Compact to High.
- Put the meat, onion, salt and pepper into a medium bowl. Mix gently with hands, being sure not to over-mix. Divide the meat into 6 individual rounds (about 34 ounce each). Form into patties, about 2 inches in diameter.
- Once the grill has preheated, arrange the mini burgers on the bottom grill. Close, applying light pressure to handle for about 10 seconds. Grill for about one minute. Remove the burgers and place each in a bun.
- Serve immediately.
Note: For toasted buns, halve and grill in the closed position for about 30 to 45 seconds to desired doneness. Remove and reserve, then grill burgers.
Nutritional information per slider:
Calories 178 ( 45% from fat) • carb.15g • pro. 9g
• fat 9g • sat. fat 3g • chol. 27mg • sod. 189mg
• calc. 48mg • fiber 1g
Parmesan Turkey Burgers
A healthy alternative to the beef burger.
Griddler® Compact position: Closed
Plate side: Grill
Makes two 6-ounce burgers
^3/_4 pound turkey (7% fat works best)
1 12 tablespoons green onion, finely chopped
1½ tablespoons Italian parsley, finely chopped
2 tablespoons Parmesan, freshly grated
18 teaspoon freshly ground black pepper
14 teaspoon garlic powder
14 teaspoon kosher salt
-
Place turkey in a large bowl with all ingredients. Using clean hands, combine and mix well, but do not overwork the meat. Divide and shape into 2 burgers. If not grilling immediately, leave wrapped in refrigerator.
-
Insert plates on grill side. Preheat the Cuisinart® Griddler® Compact to High.
-
Once preheated, place the burgers evenly spaced on the grill and cover. Cook for about 8 to 10 minutes, until well grilled and the juices run clear. The internal temperature of the meat should be 170^ F when tested with an instant read thermometer.
-
Serve hot on grilled buns or English muffins.*
*Note: If grilling buns, do so right before grilling burgers.
Nutritional information per burger: Calories 279 (51% from fat) • carb. 1g • pro. 32g • fat 16g • sat. fat 5g • chol. 139mg • sod. 505mg • calc. 86mg • fiber 0g
Black Bean Cakes
Beans make a nutritious and delicious alternative to meat!
Griddler® Compact position: Flat
Plate side: Griddle
Makes 6 cakes
4 green onions, thinly sliced
2 medium garlic cloves, finely chopped
12 medium red or yellow pepper, finely diced
2 teaspoons extra virgin olive oil, divided
14 teaspoon kosher salt
1 can (15-ounce) black beans, well drained
1 teaspoon chopped fresh cilantro
14 teaspoon freshly ground black pepper
14 teaspoon ground cumin
1 teaspoon fresh lime juice
-
Insert plates on griddle side. Preheat the Cuisinart® Griddler® Compact to High.
-
Toss the onions, garlic, pepper, oil and salt together in a mixing bowl.
-
Once the griddle has preheated, open the unit to extend flat and evenly distribute the vegetables between the griddle plates. Cook until vegetables are slightly soft and browned, about 5 minutes.
-
While vegetables are cooking, pulse 1 cup of the beans in a food processor so that they are roughly puréed.
-
Once vegetables are done, return them to the mixing bowl with both the whole and puréed beans and mix well with the cilantro, remaining spices and lime juice. Form bean mixture into 14 -cup patties. Carefully wipe the griddle with paper towels and then wipe them again with the remaining olive oil.
-
Place bean cakes evenly spaced on the griddle plates and cook about 5 to 6 minutes on High.
Note: We recommend serving with sour cream, salsa and guacamole.
Nutritional information per cake: Calories 268 (8% from fat) • carb. 41g • pro. 17g
- fat 3g • sat. fat 0g • chol. 0mg • sod. 818mg
• calc. 74mg • fiber 16g
Grilled Pesto Shrimp
Dinner in literally minutes with prepared pesto on hand.
Griddler® Compact position: Flat Plate side: Grill
Makes 2 servings
12 pound large shrimp, shelled and deveined, tails still attached (about 12 to 14 shrimp)
3 to 4 tablespoons prepared pesto, homemade or store bought lemon wedges for serving
- Stir pesto and shrimp together in a bowl and let marinate for about 5 to 15 minutes.
- While shrimp are marinating, insert the plates on the grill side. Preheat the Cuisinart® Griddler® Compact to High.
- Open the unit to extend flat and arrange the shrimp on both the upper and lower plates. Grill for about 6 minutes, turning the shrimp occasionally so that they do not burn.
- Remove from grill. Drizzle with fresh lemon juice before serving.
Nutritional information per serving: Calories 157 (65% from fat) • carb. 3g • pro. 11g • fat 11g • sat. fat 2g • chol. 71mg • sod. 265mg • calc. 78mg • fiber 1g
Grilled Citrus Ginger Shrimp
Griddler® Compact position: Flat Plate side: Grill
Makes 2 servings
1 garlic clove, finely chopped
1 teaspoon ginger, freshly grated
2 tablespoons fresh lime juice (about 1 lime)
13 to 12 cup fresh orange juice (about 1 large juice orange)
1 tablespoon honey
2 tablespoons dry white wine
2 tablespoons extra virgin olive oil
12 pound large shrimp, shelled and deveined, tails still attached (about 12 to 14 shrimp)
- In a medium stainless steel bowl, whisk together the garlic, ginger, lime and orange juices, honey, white wine and olive oil. Stir in the shrimp to coat well and let marinate for about 10 minutes.
- While shrimp are marinating, insert the plates on the grill side. Preheat the Cuisinart ^® Griddler ^® Compact to High.
-
Open the unit to extend flat and arrange the shrimp on both the upper and lower plates. Grill for about 6 minutes, turning the shrimp occasionally so that they do not burn. Brush shrimp with marinade each time they are turned.
-
Remove from grill and serve immediately.*
*If desired, put any remaining marinade in a small saucepan and place over medium heat. Bring to a boil; reduce slightly and serve over shrimp.
Nutritional information per serving: Calories 143 (26% from fat) • carb. 17g • pro. 9g • fat 4g • sat. fat 1g • chol. 64mg • sod. 64mg • calc. 34mg • fiber 0g
Grilled Mexican Shrimp
This easy marinade yields the perfect shrimp to serve in your favorite Mexican dish – like fajitas or burritos!
Griddler® Compact position: Flat Plate side: Grill
Makes 2 servings
8 sprigs fresh cilantro
1 tablespoon fresh lime juice
1 tablespoon chili powder
14 teaspoon cayenne pepper
2 garlic cloves, smashed
1 jalapeño, seeded and sliced
1 tablespoon extra virgin olive oil
12 pound large shrimp, shelled and deveined, tails still attached (about 12 to 14 shrimp)
18 teaspoon kosher salt fresh lime wedges for serving
-
In a medium stainless steel bowl, stir together the cilantro, lime juice, chili powder, cayenne, garlic, jalapeño and olive oil. Stir in the shrimp to coat well and let marinate for 1 hour in the refrigerator.
-
Once shrimp are marinated, insert the plates on the grill side. Preheat the Cuisinart® Griddler® Compact to High.
-
Open the unit to extend flat, sprinkle shrimp with salt and arrange on both the upper and lower plates. Grill for about 6 minutes, turning the shrimp occasionally so that they do not burn.
-
Remove from grill. Drizzle with fresh lime juice before serving.
Nutritional information per serving: Calories 134 (53% from fat) • carb. 7g • pro. 10g • fat 8g • sat. fat 1g • chol. 64mg • sod. 240mg • calc. 51mg • fiber 2g
Grilled Herb Chicken
This delicious all-purpose grilled chicken is great in salads, wraps and sandwiches, but also stands well on its own.
Griddler® Compact position: Closed Plate side: Grill
Makes 2 servings
3 tablespoons extra virgin olive oil juice from one lemon
1 garlic clove, finely chopped
12 teaspoon dried thyme
12 teaspoon dried rosemary
12 teaspoon dried sage
12 teaspoon kosher salt
14 teaspoon freshly ground black pepper
2 boneless chicken breasts (pounded to 12 - to 34 -inch thickness)
-
Whisk olive oil, lemon juice, garlic, dried herbs and spices together in a mixing bowl. Add the chicken and toss to coat. Cover and let marinate in refrigerator for about 30 minutes.
-
While chicken is marinating, insert the plates on the grill side. Preheat Cuisinart ^® Griddler ^® Compact to High.
-
Once preheated, place chicken breasts on the lower half of the grill. Close and grill until cooked through and juices run clear (about 15 to 20 minutes, depending on thickness of chicken).
Nutritional information per serving: Calories 328 (28% from fat) • carb. 2g • pro. 55g • fat 10g • sat. fat 2g • chol. 137mg • sod. 681mg • calc. 38mg • fiber 0g
Tenderloin for Two
Griddler® Compact position: Closed Plate side: Grill
Makes 2 servings
Fillet:
2 pieces tenderloin steak, each cut about 34 to 1 inch thick (approximately 34 to 1 pound)
1 tablespoon olive oil
3 large garlic cloves, crushed
1 generous teaspoon fresh oregano, roughly chopped
12 teaspoon kosher salt freshly ground black pepper
Gorgonzola Butter:
2 tablespoons unsalted butter, room temperature
1 tablespoon crumbled Gorgonzola pinch freshly ground black pepper
- Place steaks in a shallow dish and toss well with olive oil, garlic and oregano; cover and refrigerate. The steaks should marinate at least 4 hours and up to overnight.
- While steaks are marinating, prepare the Gorgonzola butter. Mix the butter, Gorgonzola and pepper together well, using a food processor or by hand, mashing together with a fork. Place butter in a small dish to refrigerate.
- Remove steaks from refrigerator about 30 to 45 mintues before grilling to bring slightly to room temperature. Insert the plates on the grill side. Preheat the Cuisinart® Griddler® Compact to High.
- Sprinkle the steaks well on each side with salt and pepper.
- Once preheated, place steaks on bottom grill plate and close grill lightly. Grill for about 8 to 9 minutes for medium rare. Allow steaks to rest 5 minutes so that internal juices are able to rest and evenly distribute before serving. As they are resting, place a large pat of Gorgonzola butter on each steak.
- Serve immediately.
Nutritional information per serving with butter: Calories 598 (76% from fat) • carb. 2g • pro. 32g
• fat 50g • sat. fat 21g • chol. 60mg • sod. 472mg
• calc. 75mg • fiber 1g
DESSERTS
Grilled Strawberry Shortcakes
Griddler® Compact position: Closed and Flat Plate side: Grill
Makes 6 servings
12 cup heavy cream, chilled
1½ teaspoons granulated sugar, divided
^3/4 pound firm strawberries, hulled and halved
1 teaspoon chopped fresh mint
6 slices pound cake, about 34 inch thick
1 12 tablespoons unsalted butter, softened fresh mint for garnish
- Insert the plates on the grill side. Preheat the Cuisinart® Griddler® Compact to Medium.
- While the grill is preheating, prepare the whipped cream. Put the cream and 12 teaspoon of sugar into a chilled mixing bowl. Using a hand mixer, whip the cream to medium-stiff peaks. Reserve.
- Put the strawberries into a medium mixing bowl with remaining teaspoon sugar, salt and mint; toss to combine.
- Once the grill has preheated, open the unit to extend flat and spoon the strawberry mixture onto the grill plate. Cook, turning once, about 2 minutes per side, until softened and fragrant. Remove and reserve, scraping as much of the sugar off of the grill plate as possible.
- While the strawberries are cooking, brush the pound cake with the softened butter. Place on the lower grill plate, very carefully close the grill, and cook about 1½ to 2 minutes, until medium grill marks are achieved.
- To assemble: Top the grilled pound cake with the strawberries and juices, a dollop of whipped cream and a sprig of fresh mint.
Nutritional information per serving:
Calories 260 (60% from fat) • carb. 26g • pro. 3g
- fat 17g • sat. fat 11g • chol. 117mg • sod. 183mg
• calc. 35mg • fiber 1g
Chocolate Griddle Cakes
These griddle cakes make a great foundation for any dessert topping, from ice cream to whipped cream to grilled fruit. Mmmmm, delicious!
Griddler® Compact position: Flat Plate side: Griddle
Makes twelve to fourteen 4-inch Griddle Cakes
^3/_4 cup unbleached, all-purpose flour
14 cup cocoa powder, sifted
12 teaspoon sea salt
1 / 2 teaspoon baking soda
3 tablespoons granulated sugar
1 cup buttermilk less 2 tablespoons
1 large egg
2 tablespoons unsalted butter, melted and cooled to room temperature
1 / 4 teaspoon pure vanilla extract
3 tablespoons unsalted butter, melted
2 teaspoons light brown sugar
2 firm bananas, each cut into 2-inch slices
- Insert the plates on the griddle side. Preheat the Cuisinart® Griddler® Compact to High.
- While the griddle is preheating, combine the flour, cocoa powder, salt, baking soda, and granulated sugar in a medium bowl. Stir with a whisk to blend.
- Combine the buttermilk, egg, 2 tablespoons melted butter and vanilla extract. Whisk to combine. Add the buttermilk/egg mixture to the dry ingredients and stir until just blended. Do not over-mix.
- Prepare the bananas. In a small mixing bowl, mix the 3 tablespoons melted butter and light brown sugar together until well combined. Add bananas and toss to coat.
-
Once griddle has preheated, open the unit to extend flat, place banana pieces on griddle plates and cook until light golden and just softened, about 5 minutes per side. Remove and reserve. Carefully wipe griddle plates clean with paper towel.
-
Using a 14 -cup measure, drop griddle cake batter evenly onto the griddle plates. Cook pancakes until bubbles form, about 3 to 4 minutes; flip and cook until done, about 2 minutes longer. Remove.
- Serve cooked bananas on top of griddle cakes. For extra indulgence, top with a dollop of freshly whipped cream and drizzle with chocolate sauce.
Nutritional information per serving
(based on 7 servings):
Calories 194 (44% from fat) • carb. 23g • pro. 4g
- fat 9g • sat. fat 6g • chol. 54mg • sod. 240mg
• calc. 48mg • fiber 1g


- Cuisinart® Griddler® Compact
- CONTENTS
- IMPoRtAnt SAFEGUARDS
- SAVE tHESE InStRUCtlonS FoR HoUSEHoLD USE onLY
- SPECIAL CORD SET INSTRUCTIONS
- NOTICE
- PARTS AND FEATURES
- Base and Cover
- Panini-Style Handle
- Removable and Reversible Cooking Plates
- Indicator Lights
- Temperature Knob
- Drip Tray
- Cleaning/Scraping Tool
- Plate Release Buttons
- Hinge Release Lever
- All parts that come in contact with food are BPA free
- BEFORE THE FIRST USE
- THE GRIDDLER® COMPACT DOES IT ALL
- Contact Grill
- Panini Press
- Full Grill
- Full Griddle
- Half Grill/Half Griddle
- ASSEMBLY INSTRUCTIONS
- Closed Position -
- To adjust the
- Flat Position -
- To insert cooking plates
- To remove cooking plates
- To position drip tray
- OPERATING INSTRUCTIONS
- USER MAINTENANCE
- CLEANING AND CARE
- CAUTION: BEFORE CLEANING APPLIANCE, MAKE SURE IT IS UNPLUGGED AND HAS COOLED DOWN COMPLETELY.
- STORAGE
- WARRANTY
- Limited Three-Year Warranty
- CALIFORNIA RESIDENTS ONLY
- BEFORE RETURNING YOUR CUISINART PRODUCT
- Cuisinart®
- Recipe Booklet
- RECIPES
- BREAKFAST
- STARTERS/SIDES
- MAINS
- Shrimp Grilled Three Ways
- DESSERTS
- HELPFUL COOKING CHART
- Traditional Pancakes
- large eggs
- Variation:
- Breakfast Panini
- to 6 bacon slices
- croissants or sandwich-size English muffins, sliced horizontally
- slices Cheddar, thinly sliced (Swiss, Provolone or American cheese may be substituted)
- Grilled Steak and Eggs
- Grilled
- Portobello Mushrooms
- Grilled Vegetable, Pear & Roquefort Salad
- Easy Quesadillas for Two
- Grilled Reubens
- Smoked Turkey, Roasted Pepper & Swiss Panini with Pesto Mayo
- Grilled BLT with Cheddar
- Sliders
- Parmesan Turkey Burgers
- Black Bean Cakes
- Grilled Pesto Shrimp
- Grilled Citrus Ginger Shrimp
- Grilled Mexican Shrimp
- Grilled Herb Chicken
- Tenderloin for Two
- Fillet:
- Gorgonzola Butter:
- Grilled Strawberry Shortcakes
- Chocolate Griddle Cakes
Brand : CUISINART
Model : Griddler Compact GR-35
Category : Grill