
CS27600 - Heating Lasko - Free user manual and instructions
Find the device manual for free CS27600 Lasko in PDF.


| Type | Ceramic tower heater |
| Brand | Lasko |
| Model | CS27600 |
| Power | 1500W (high), 750W (low) |
| Voltage | 120V, 60Hz |
| Heating element | Ceramic |
| Thermostat | Adjustable thermostat |
| Oscillation | Wide-angle oscillation |
| Remote control | Yes, with full-function remote |
| Timer | 1-7 hour timer |
| Safety features | Overheat protection, tip-over switch |
| Cool touch housing | Yes |
| Dimensions | 10.5 x 10.5 x 26.5 inches |
| Weight | 8.5 lbs |
| Color | Black/Silver |
| Cord length | 6 feet |
| Control type | Digital display with touch buttons |
| Warranty | 3 years limited |
| Filter | Washable dust filter |
Frequently Asked Questions - CS27600 Lasko
User questions about CS27600 Lasko
0 question about this device. Answer the ones you know or ask your own.
Ask a new question about this device
Download the instructions for your Heating in PDF format for free! Find your manual CS27600 - Lasko and take your electronic device back in hand. On this page are published all the documents necessary for the use of your device. CS27600 by Lasko.
USER MANUAL CS27600 Lasko
Ceramic Pedestal Heater
with Remote Control
Instruction Manual
Used for Model: CS27600
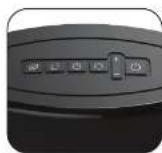
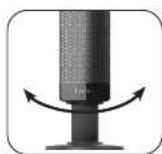
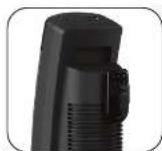
Register Your Product Today www.lasko.com/product-registration/ You will benefit from: - Efficient and enhanced support - Future product updates
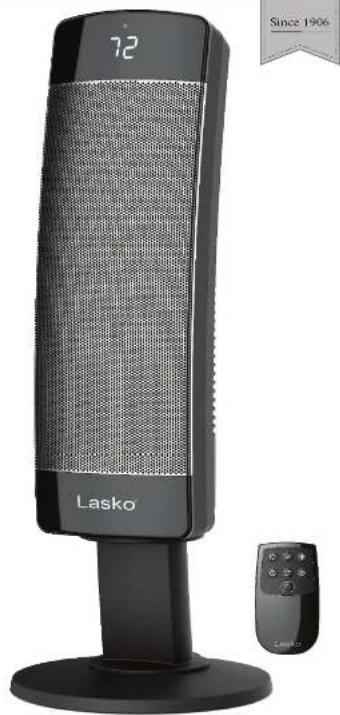
natural_image
Lasko portable temperature water heater with digital display and remote control (no text or symbols on main body)Have a Question? Need a Part?
Please Do Not Return Product to Store! Contact Links Customer Service: (000) 233-0288 Monday-Friday 5AM - 6PM EST. Valid in the USA, its Territories, and CANADA Only
READ AND SAVE THESE INSTRUCTIONS
Read carefully before attempting to assemble, install, operate or maintain the product described. Protect yourself and others by observing uniformly information. Failure to comply with instructions could result in personal injury and/or property damage. This Heater is intended for use as supplemental heat. This Heater is for residential use only. It is not intended to be used in commercial, industrial or agricultural settings.


WARNING


IMPORTANT SAFETY INSTRUCTIONS
When using electrical appliances, these instructions and warnings should always be followed to reduce the risk of fire, electrical shock and injury to persons:

Read all instructions before using this Heater.


WARNING


CAUTION
• Always place the Heater on a stable, flat, level surface when operating, to avoid the chance of the Heater overturning. Locates the Power Cord so the Heater or other objects are not resting on it. DO NOT run Power Cord under carpeting. DO NOT cover Power Cord with throw rugs, runners, or similar coverings as this may cause cord to overheat. Arrange Power Cord away from room traffic and where it will not be tripped over.
- This Heater is HOT when in use. To avoid burns, do not let bare skin touch hot surfaces. Always use handle when moving this Heater. Keep combustible materials, such as furniture, pillows, bedding, papers, clothes and curtains at least 3 feet 0.9 mi from the front of the Heater and keep them at least 1 foot 0.3 mi from the sides and rear.
- This Heater is not intended for use in wet or damp locations. This Heater is not intended for use in bathrooms, laundry areas and similar indoor locations. NEVER locate a Heater where it may fall into a bathtub or other water container.
• DO NOT use Heater outdoors.
• This Heater is not suitable for use in agricultural facilities including areas where livestock, poultry or other animals are continued. Please refer to National Electric
This heater is not suitable for use in agricultural resources including areas where it is outside, possibly or other animals are confined. It also offers to be a natural license Code (NEC) Article 547-7 (2008), or applicable state or local codes or standards relating to electrical requirements for Agricultural Buildings. THIS Heater DOES NOT MEET THE REQUIREMENTS OF NEC ARTICLE 547-7 (2008).
• This Heater is not suitable for use in hazardous locations. Please refer to National Electric Code (NEC) Article 500 or applicable state or local codes or standards relating to electrical requirements for Hazardous locations. THIS Heater DOES NOT MEET THE REQUIREMENTS OF NEC ARTICLE 500 (2008).
- Romato controls for other appliances or electronic equipment can sometimes interfere with the operation of this Heater. If this occurs, move the Heater to another location.
- Keep Heater remote control unit away from chairs and your bed where it may be set or laid upon and inadvertently turn on the Heater.
SAVE THESE INSTRUCTIONS
Rev. D 4/22 2 CS27600ES
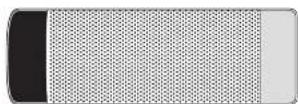
Partes Incluidas
1
2


①
Cuerpo
②
Tornillos Mariposa
③
Rev. D 4/22 6 CS27600ES
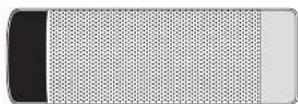
Parts Included
1
2


①
Body
②
Thumb Screws
③
Column Support A
④
Column Support B
⑤
Remote Control
⑥
Support Base
7
Support Base B
6 7
Assembly
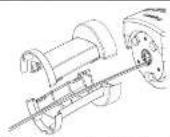
Place the Power Supply Cord through the Column Support and snap together, insert into bottom of Body.
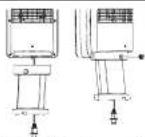
- Turn Body lape down and twist clockwise to look. Use Thumb Screw to secure column to Body.
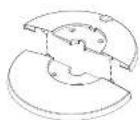
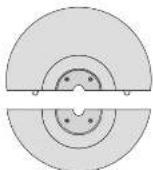
- Push the Bosses on Support Base B Into the Boss Slots on Support Base A.
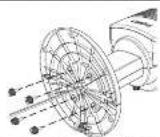
Attach the Base Assembly to the Column Support Assembly with (4) Thumb Screws.
Controls
Power Button
Turn Heater ON/OFF by pressing the Power Button.
Timer Button The timer can be set for up to 8 hours. Continue pressing the Timer Button to reach the desired time setting. Light turns red when activated.
* Automatic Temperature Control Press to Diagram the desired room temperature
Press to Decrease the desired room temperature.
Oscillation Button Press to Start/Stop the Base Oscillation function.
[Non-Text]
L
-
○
H L
7
⊕
* FOR MORE DETAILED DESCRIPTION OF AUTOMATIC TEMPERATURE CONTROL, SEE PAGE 4
SAVE-SMART® FUNCTION
Press (g) to activate the Save-Smart ^® Function.
1. Set the temperature to reach temperature using the () and (-) functions (Note: The default Save-Smart temperature of 72^ ).
2. When you reach the temperature at which you want to set the unit, the set temperature will flash several times and then the display will return to indicate the current more temperature and will be found in showing on the main temperature as shown.
3. When the air temperatures are less than the sat temperatures, the Hoster will run in HIGH heat.
4. Once the thermostat reaches the set temperature the Heater will automatically switch to LOW heat to save energy.
5. When the air temperature reaches -P^2 above the set temperature, the Heater will turn off. The Heater will cycle off and on in the LOW mode to maintain the set temperature. All this happens automatically with Lasiko Save Smart Technology. To deactivate the Save-Smart function, press Save-Smart again or (i) for continuous windflow heat.
Rev. D 4/22 3 CS27600ES
AUTOMATIC TEMPERATURE CONTROL
The automatic temperature function will only operate in High heat mode. You cannot set the temperature automatically when the unit is in the Low heat mode. 1. To set the room at a specific temperature press the (+) or (−) buttons to the desired temperature. The display will now reflect the (20) and the temperature will be flashing. The Heater is now in Auto Temperature Mode.
-
When you reach the temperature at which you want to set the unit, the set temperature will flash several times and then the display will return to indicate the current room temperature and will gradually change as the room temperature changes. NOTE: the temperature display does not indicate the temperature of the heated air being emitted by the Heater.
-
Once the room temperature reaches 2 degrees above the set temperature, the Heater will shut off. Once the room temperature reaches 1 degree below the set temperature, the Heater will turn back on and continue to cycle off and on to maintain the set temperature.
-
This function will cancel if the (O) button is pressed. The Heater will now be in High heat (III) and run continuously.
NOTE: It is normal for the Heater "lan" to run for approximately 15 seconds when the Heater shuts off after reaching the set temperature. Press the and (buttons at the same time to change the display to * Celeus. Press the same two buttons together again to change the display back to * Fahnhelt.
SAFETY FEATURE
-
A thermal overload protector is built in to prevent overheating.
-
If an overhost temperature is reached, the Heater will automatically shut off. It can only resume operation when the user resets the unit.
To Reset Heater:
-
Unplug the Heater and wait 10 minutes for the Heater to cool down.
-
After the Heater has cooled down, plug the unit into a 120V- electrical outlet and follow the operation instructions described in this manual.
TROUBLE SHOOTING TIPS
If your Heater shuts off unexpectedly or fails to operate, the previously mentioned safety feature may have been activated to prevent overheating.
-
Be sure the power cord is plugged into a working electrical outlet.
-
Make certain the batteries in the remote control are now and properly installed.
-
Check your Temperature setting. The Master may be off because it has reached the desired temperature setting.
-
If your Heater runs for several minutes and shuts off repeatedly, your Heater may require cleaning. See Maintenance section below.
SERVICING: For servicing, other than general user maintenance, please contact Customer Service at (800) 233-0268, Monday through Friday, from 8am-5pm Eastern.
STORAGE: Store the Heater with these instructions in the original carton in a cool, dry place.
DISPOSITION: Corrugated packaging materials are recyclable. For environmentally responsible disposal of this product, contact your local waste service provider or visit www.1800recycling.com ^4 .
MAINTENANCE
⚠ WARNING
To reduce the risk of electrical shock and fire please observe the following instructions.
Cleaning the Heater regularly will help to maintain its efficiency.
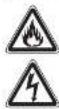
Always unplug the cord before moving, servicing or cleaning.
- NEVER place the Heater in or near water. DO NOT IMMERSE HEATER IN WATER.
Clean the Heater only with a vacuum equipped with a brush attachment; the vacuum will remove
the lint and dirt from the surface of the Heater.
Vacuum intake grills every two weeks; this will help to maintain the optimum Heater performance.
- Use a toothbrush or other soft bristle brush to gently loosen any dirt not removed by the vacuum.
- NEVER attempt to take apart the Heater.
Clean the body of the heater with a salt cloth only.
- NEVER use ALCOHOL or SOLVENTS such as gasoline, benzene, paint thinner, or other harsh cleaners.
LASKO PRODUCTS. LLC LIMITED WARRANTY VALID IN THE USA ITS TERRITORIES. AND CANADA ONLY
WHAT THIS WARRANTY COVERS: This product is warranted against defects in workmanship and/or materials.
HOW LONG THIS WARRANTY LASTS: This warranty extends only to the original purchaser of the product and lasts for three (3) years from the date of original purchase or
until the original purchaser of the product sales or transfers the product, whenever that occurs.
WHAT LASKO WILL DO: Lasko will, at its sole option, repair or replace any part or parts that proves to be detective or replace the whole product with the same or comparable model. For all warranty claims, the product must be returned to Lasko Products, LLC at customer expense with proof of purchase within the warranty period. Contact the Lasko customer service department to obtain a Return Authorization ("RA"). DO NOT return products without an RA or the warranty claim will not be processed.
WHAT THIS WARRANTY DOES NOT COVER: This warranty does not apply if the product was damaged or failed because of accident, improper handling or operation, or damage to damage, abuse, misuse, enough/obstruct repairs made or ultimately, or the use of the product for commercial or nonresidential services. This warranty does not cover any liability and any liability whatsoever arising from any loss arising from any loss arising from any loss arising from any loss arising from any loss arising from any loss arising from any loss arising from any loss arising from any loss arising from any loss arising from any loss arising from any loss arising from any loss arising from any loss arising from any loss arising from any loss arising from any loss arising from any loss arising from any loss arising from any loss arising from any loss arising from any loss arising from any loss arising from any loss arising from any loss arising from any
Some stories and provisions do not allow limitations on how long an implied warranty tests, or the exclusion or limitation of incidental or consequential damages, so these or limitations may not apply to you. This warranty gives you specific legal rights. You may also have other rights which vary from state to state and province to province. Proof of purchase is required before a warranty claim will be accepted.
CUSTOMER SERVICE:
Toll-Free (800) 233-0269. Email: producthelp@lasko.com
Our Customer Service team is available to assist you with product and service questions, and replacement parts. They can be reached Monday through Friday,
your model number available, as well as the type and style (located on the underside of your product).
Customer Service Dept, 820 Lincoln Ave., West Chester, PA 1960
PARTS FOR DISCONTINUED, OBSOLETE AND CERTAIN OTHER PRODUCTS MAY NOT BE AVAILABLE. DUE TO SAFETY REASONS, MANY ELECTRONIC COMPONENTS AND MOST HEATER COMPONENTS ARE NOT AVAILABLE TO CONSUMERS FOR INSTALLATION OR REPLACEMENT.
Manual printed in China
Lasko
natural_image
Lasko temperature sensor with digital display and remote control (no text or symbols on device body)Brand : Lasko
Model : CS27600
Category : Heating