SkyScout 93980 - Instrument d'observation CELESTRON - Free user manual and instructions
Find the device manual for free SkyScout 93980 CELESTRON in PDF.

| Product Type | Personal Planetarium / Star Identification Device |
| Brand | Celestron |
| Model | SkyScout 93980 |
| Dimensions | Approx. 5.2 x 2.4 x 1.5 inches (132 x 61 x 38 mm) |
| Weight | Approx. 6.7 oz (190 g) including batteries |
| Power Source | 2 AA batteries (not included) |
| Display | Backlit LCD screen |
| Built-in Database | Over 6,000 celestial objects (stars, constellations, planets, deep-sky objects) |
| GPS | Integrated GPS receiver for automatic location and time setting |
| Audio Guide | Provides audio descriptions via built-in speaker or earphone jack |
| Identification Mode | Point at any celestial object for instant identification |
| Tour Mode | Automatic tour of the best objects visible from your location |
| Connectivity | USB port for firmware updates |
| Mounting | 1/4-20 tripod socket on bottom |
| Operating Temperature | 0°C to 40°C (32°F to 104°F) |
| Maintenance & Cleaning | Clean lens with soft, lint-free cloth; store in dry place; remove batteries if not used for long periods |
| Safety Precautions | Never look at the sun through the device; avoid pointing at bright light sources |
| Included Accessories | User manual, earphones, USB cable, carrying case |
| Spare Parts Availability | Batteries and earphones widely available; contact Celestron for other parts |
| Repairability | Designed for repair by authorized service centers; user-replaceable batteries only |
Frequently Asked Questions - SkyScout 93980 CELESTRON
User questions about SkyScout 93980 CELESTRON
0 question about this device. Answer the ones you know or ask your own.
Ask a new question about this device
Download the instructions for your Instrument d'observation in PDF format for free! Find your manual SkyScout 93980 - CELESTRON and take your electronic device back in hand. On this page are published all the documents necessary for the use of your device. SkyScout 93980 by CELESTRON.
USER MANUAL SkyScout 93980 CELESTRON
-
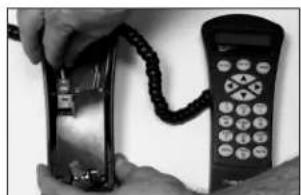
Insert the hand control cable connector into the SkyScout Connect's hand control port.
-
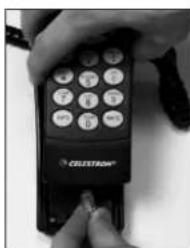
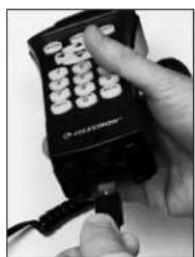
Insert the SkyScout Connect's interface connector into the RS232 port at the bottom of the hand control.
-
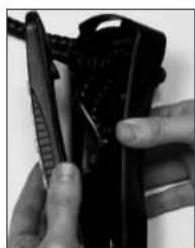
Seat the hand control's cord in a concentric pattern within the open space inside the SkyScout Connect.
-
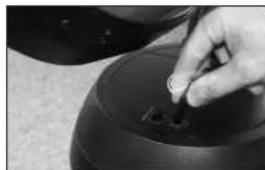
Align the SkyScout Connect's bottom tabs into the bottom holes of the hand control, and press in the top of the hand control until it snaps into the SkyScout Connect. Make sure the hand control cord is seated securely inside the unit.
-
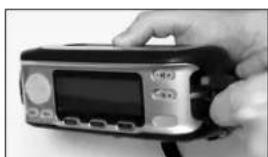
Insert the USB connector (smaller end) into the SkyScout's USB port and insert the larger USB connector into the USB port located on the bottom of the SkyScout Connect.
-
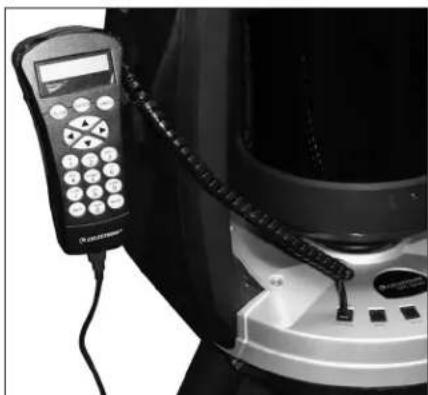
Attach the SkyScout Connect's coiled cable into the telescope's hand control or AUX port.
natural_image
Close-up of hands holding a telephone handset and a keypad, no visible text or symbolsInstallation 1
natural_image
Close-up of hands holding a black CRUSTRON mobile phone with keypad (no visible text or symbols on device)Installation 2
natural_image
Close-up of hands holding a black mechanical device with a handle (no visible text or symbols)Installation 3
natural_image
Hand holding a handheld electronic device with a screen and buttons (no visible text or symbols)Installation 5a
natural_image
Close-up of hands using a handheld remote control device to press or install a cable (no visible text or symbols)Installation 5b
natural_image
Close-up of a hand placing a small object into a black cylindrical container (no visible text or symbols)Installation 6
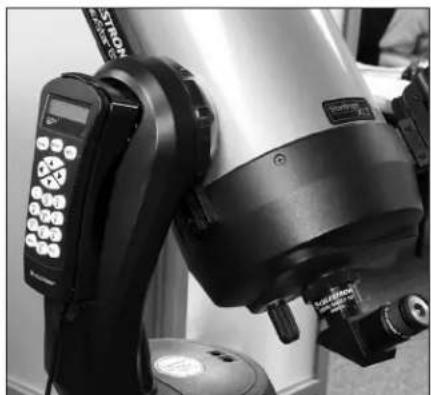
NOTE: The SkyScout Connect will attach directly inside the fork arm for all NexStar SE series. For CPC owners, use the supplied plastic holder and attach to the fork arm. For Advanced Series and CGE owners, use the supplied holder and strap to attach unit to the tripod leg.
natural_image
Close-up of a robotic arm with digital display and control buttons (no visible text or symbols)NexStar ^® SE Series CPC
natural_image
Close-up of a black and white photo of a portable air conditioner with a digital display and attached cable (no visible text or symbols)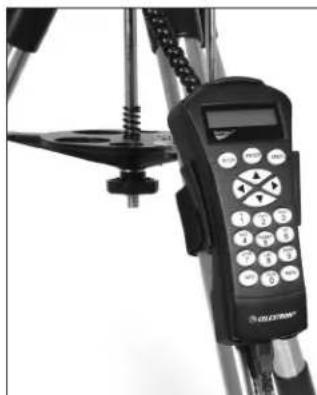
natural_image
Close-up of a tripod-mounted device with a digital display and control panel (no visible text or symbols)^® GPS Series Advanced/CGE ^TM Series
Power-On Operation
- Power on your telescope and then power on the SkyScout (Telescope must be powered on FIRST), the "HC" and "SS" LEDs will blink to indicate that the SkyScout Connect is linking.
- When both LEDs stop blinking, the SkyScout Connect has established a link with the hand control and SkyScout.
- Begin the telescope alignment procedure as described in your telescope's owner's manual.
SkyScout as a GPS Accessory
Before use, verify the correct firmware is installed (Version 1.28.12 or higher). If not, go to www.celestron.com/skyscout/ and download the latest firmware.
For non-GPS telescopes or mounts, the SkyScout Connect can be used as a GPS accessory and will allow the GPS time and location to be downloaded from the SkyScout to the telescope or mount.
The GPS must be enabled to “On” in the hand control Utilities menu once the telescope is powered on. If the SkyScout has not acquired the GPS time and location, the hand control will not display the correct time. The hand control will update this information once GPS is acquired.
SkyScout Operation
When the SkyScout Connect is communicating with the SkyScout, a telescope icon on the SkyScout's LCD screen will be displayed. This will enable the “Point Telescope” menu item to be displayed on an object’s information screen. By selecting “Point Telescope” feature, the SkyScout will direct the telescope to slew to the selected object.
"Point Telescope" Operation
- Ensure the telescope is properly aligned and both LED lights on the SkyScout Connect are solid red.
- Using the SkyScout, select the Identify feature to identify an object and press the Target button. Hit Select and "Point Telescope" will be highlighted in the object menu screen. Hit Select again and the telescope will slew to the selected object.
- For locating an object, choose the Locate feature and locate the selected object. Press the down arrow button to highlight "Point Telescope" and press Select. The telescope will then slew to the selected object.
HELPFUL HINT: It is ok to disconnect the SkyScout from the SkyScout Connect and use it independently once connection is established. To reestablish connection, simply replug the SkyScout to continue “Point Telescope” operation.
Troubleshooting
- If the “HC” LED indicates an error (continues to blink without connecting), check the SkyScout Connect’s interface cable and the RS232 port connection on the bottom of the hand control. To clear the error, check and make sure the cable is seated properly and power-cycle the telescope.
- If the “SS” LED indicates an error (continues to blink without connecting), check the USB cable and make sure it’s connected properly. To clear the error, remove the USB cable, power-cycle the SkyScout and reconnect the USB cable.
- If the telescope is not pointing to an object accurately, make sure the time zone and Standard or Daylight Savings Time is identical for both the SkyScout and telescope. If not, change the settings in your telescope's hand control under Setup Time-Site in the Scope Setup menu.
Warranty: Two year limited warranty. See the Celestron Accessory Catalog (#93980) for complete warranty details or contact Celestron