VMAXFlex DW-VF81T - Video recorder Digital Watchdog - Free user manual and instructions
Find the device manual for free VMAXFlex DW-VF81T Digital Watchdog in PDF.


| Product Type | Digital Video Recorder (DVR) |
| Brand | Digital Watchdog |
| Model | VMAXFlex DW-VF81T |
| Video Input | 8 channels BNC |
| Compression | H.265 / H.264 |
| Recording Resolution | Up to 1080p per channel |
| Hard Drive Capacity | Supports up to 2 SATA HDDs (max 10TB each) |
| Remote Access | Yes, via web browser or mobile app |
| Network | 1x RJ45 10/100/1000 Mbps |
| Audio | 8 channels input, 1 output |
| Alarm | 8 inputs, 1 output |
| USB | 2x USB 2.0 |
| Dimensions | 440 x 250 x 45 mm (1U rackmount) |
| Weight | Approx 3.5 kg |
| Power Supply | DC 12V, 4A external adapter |
| Power Consumption | Less than 15W |
| Operating Temperature | 0°C to 40°C |
| Storage Temperature | -10°C to 60°C |
| Humidity | 10% to 90% non-condensing |
| Certifications | FCC, CE, UL |
| Maintenance | Keep clean, ensure proper ventilation, check fan periodically |
| Spare Parts | Power adapter, remote control, SATA cables |
| Repair | Contact authorized Digital Watchdog service center |
| Safety | Use only supplied power adapter; do not expose to moisture |
Frequently Asked Questions - VMAXFlex DW-VF81T Digital Watchdog
User questions about VMAXFlex DW-VF81T Digital Watchdog
0 question about this device. Answer the ones you know or ask your own.
Ask a new question about this device
Download the instructions for your Video recorder in PDF format for free! Find your manual VMAXFlex DW-VF81T - Digital Watchdog and take your electronic device back in hand. On this page are published all the documents necessary for the use of your device. VMAXFlex DW-VF81T by Digital Watchdog.
USER MANUAL VMAXFlex DW-VF81T Digital Watchdog
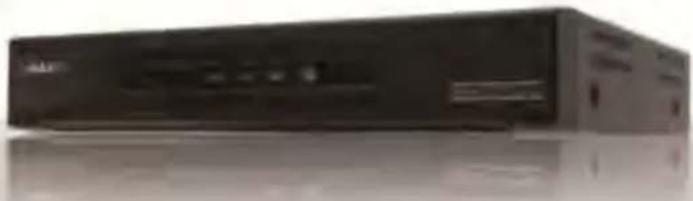
natural_image
Exterior view of a black electronic device (no visible text or symbols)H.264 Digital Video Recorder
User's Manual
VER.1.00
Future of Digital Video Recording at Hand
Safety Information
The safety information is provided for the wellness of the equipment and for the safety of the operator.
Please review and observe all instructions and warnings in this manual.
Note: Keep this manual handy every time you operate this equipment. Also, check with your dealer for further assistance and for the latest revision of this manual. Your dealer might provide you with a digital version of this manual. We also ask to keep the original box and packing materials in case of return and for long-term storage of the DVR unit.
Preparations before installation
To protect your DVR from damage and to optimize performance, be sure to keep the DVR away from dust, humidity, and areas with high voltage equipment such as a refrigerator.
Do not install or place equipment in areas where the air vents can be obstructed, such as in tight enclosures or small utility closet. Keeping the unit in a temperature-controlled room with ample regulated power is highly recommended. Do not overload the wall outlet, as this can result in the risk of fire or electric shock.
Uninterruptible power devices such as UPS power surge protectors are recommended, and the DVR units must at least be connected with UL, CUL, or CSA approved power surge protector. Avoid direct sun light and avoid heat.
FCC Information

This equipment has been tested and found to comply with the limits of Class A digital device, pursuant to part 15 of the FCC Rules. These limits are designed to provide reasonable protection against harmful interference when the equipment is operated in a commercial environment. This equipment generates, uses, and radiates radio frequency energy, and if not installed and used in accordance with the user manual, it may cause harmful interference to radio communications. Operation of this equipment in a residential area is likely to cause harmful interference, in which the user will be required to correct the
interference at his own expense. Changes or modifications not expressly approved by the party responsible for compliance could void the user's authority to operate the equipment under FCC rules.
UL Information
- For pluggable equipment, the socket-outlet shall be installed near the equipment and shall be easily accessible.
- If the battery is placed elsewhere in the equipment, there shall be a marking close to the battery or statement in the servicing instructions.
CAUTION
RISK OF EXPLOSION IF AN INCORRECT BATTERY TYPE IS USED.
DISPOSE OF USED BATTERIES ACCORDING TO THE INSTRUCTION.
THIS EQUIPMENT IS FOR INDOOR USE, AND ALL THE COMMUNICATION WIRING IS LIMITED TO INDOORS.
Contents
CHAPTER 1 : DVR USER MANUAL
1 GETTING STARTED 6
1.1 Checking Supplied Items 6
1.2 System Application Overview 7
1.3 System Startup and Shutdown 9
1.4 Front Panel 10
1.5 Rear Panel 11
1.6 IR Remote Controller 14
2 OPERATION 15
2.1 User Login 15
2.2 Live Display Mode 16
2.3 Freeze Mode 21
2.4 Call Monitor Operation 21
2.5 PTZ Operation 21
2.6 Instant Playback of Recorded Video 24
2.7 Clean Button During Playback 25
2.8 Search Recording Image 27
2.9 DST Setting and Screen Saver 32
3 SETTING 35
3.1 System 37
3.2 Device 44
3.3 Record 49
3.4 Network 56
3.5 Backup 61
3.6 Quick Setup 63
4 WEB SURVEILLANCE 64
4.1 Web Login 64
4.2 Web Configuration 64
4.3 Web Monitoring 666
4.4 Web Playback 68
CHAPTER 2 : ACS CLIENT SOFTWARE USER MANUAL
5 ACS (ADVANCE CLIENT SOFTWARE) USER GUIDE
71
5.1 Recommended PC Requirements 71
5.2 Install 72
5.3 Uninstall 74
5.4 Basic Operation 75
5.5 Advanced Operation 81
5.6 ACS Setup 85
CHAPTER 3 : MAC ACS CLIENT SOFTWARE USER MANUAL
6 MAC ACS USER GUIDE
91
6.1 Mac Requirements 91
6.2 Install 92
6.3 Basic Operation 94
CHAPTER 4 : MOBILE PHONE SOFTWARE USER MANUAL
7 MOBILE PHONE SOFTWARE USER GUIDE
103
7.1 iPhone Application Software 1033
7.2 Android Application Software 1077
7.3 Blackberry Application Software 1122
7.4 Using WAP+3G Connection 117
APPENDIX : SPECIFICATION
1200
Chapter 1
DVR USER MANUAL
1 GETTING STARTED
1.1 Checking Supplied Items
Make sure that you have the following items supplied with your DVR. If any of these items are missing or damaged, notify your vendor immediately. Do not dispose of the packing utilities in case of moving or storage purposes.
| Items | Photo | Quantity | |
| User Manual(DVR & Software)Quick Start Guide |  |  | 11 |
| CD (Manual & Software)Rubber Mount |  |  | 11 Set (4 Pieces) |
| 12V DC Adaptorand Power Cable |  |  | 11 |
| IR Remote ControllerBatteries |  |  | 12 |
| USB Mouse |  | 1 | |
1.2 System Application Overview
This section describes how to connect peripheral devices to the DVR according to your application.
Install the DVR on a flat surface. If required, attach a rubber mount for installation.
NOTE
Place the DVR into the rack require tow people to hold the DVR in place. Install the DVR in a location with good ventilation to prevent overheating.
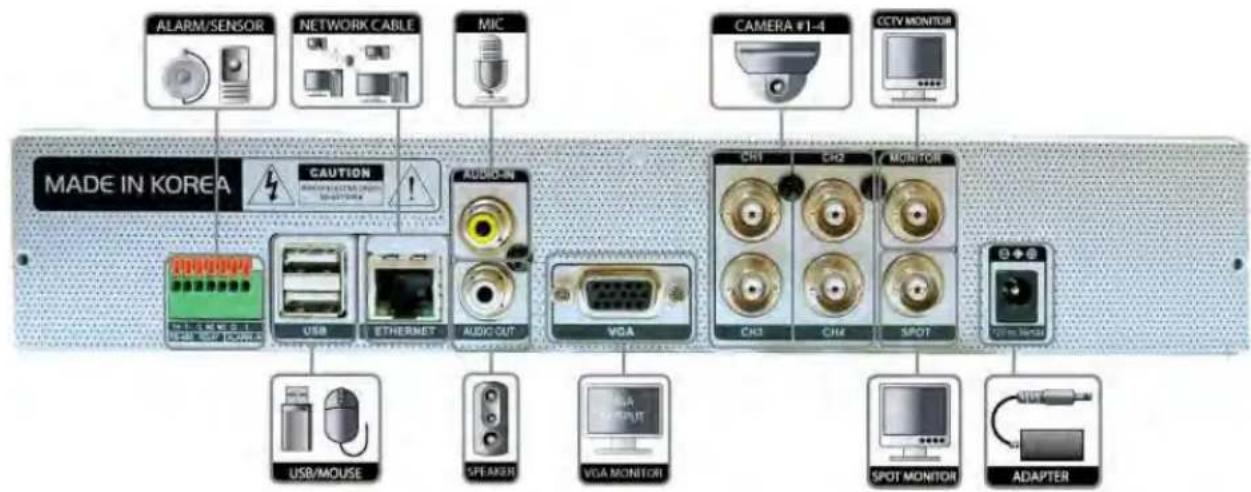
4 Channel DVR Compact Case Dimensions: 11.0" W x 1.9" H x 9.6" D
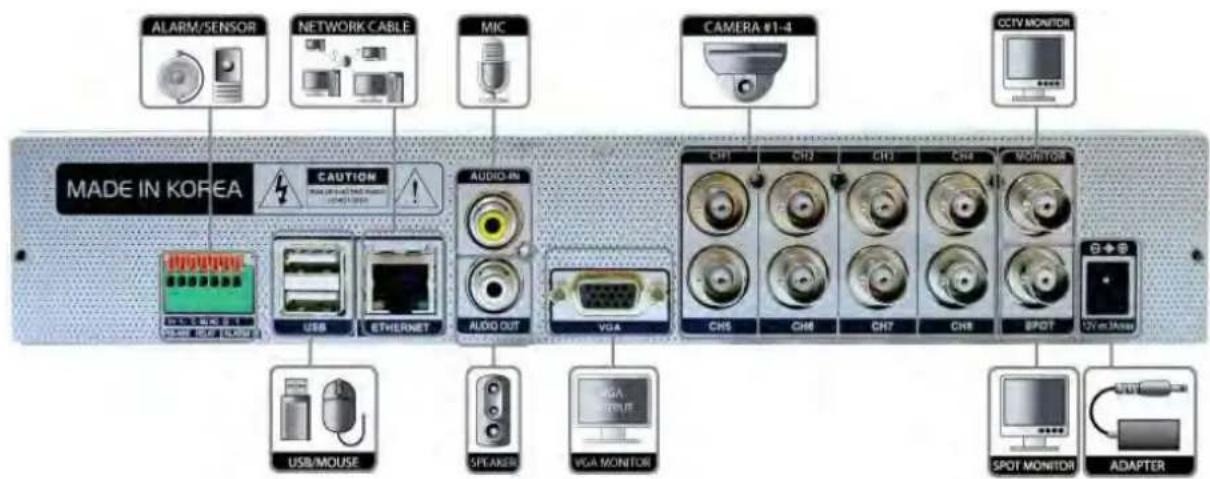
8 Channel DVR Compact Case Dimensions: 11.0" W x 1.9" H x 9.6" D
16 Channel DVR Compact Case Dimensions: 11.80" W x 2.16" H x 12.46" D
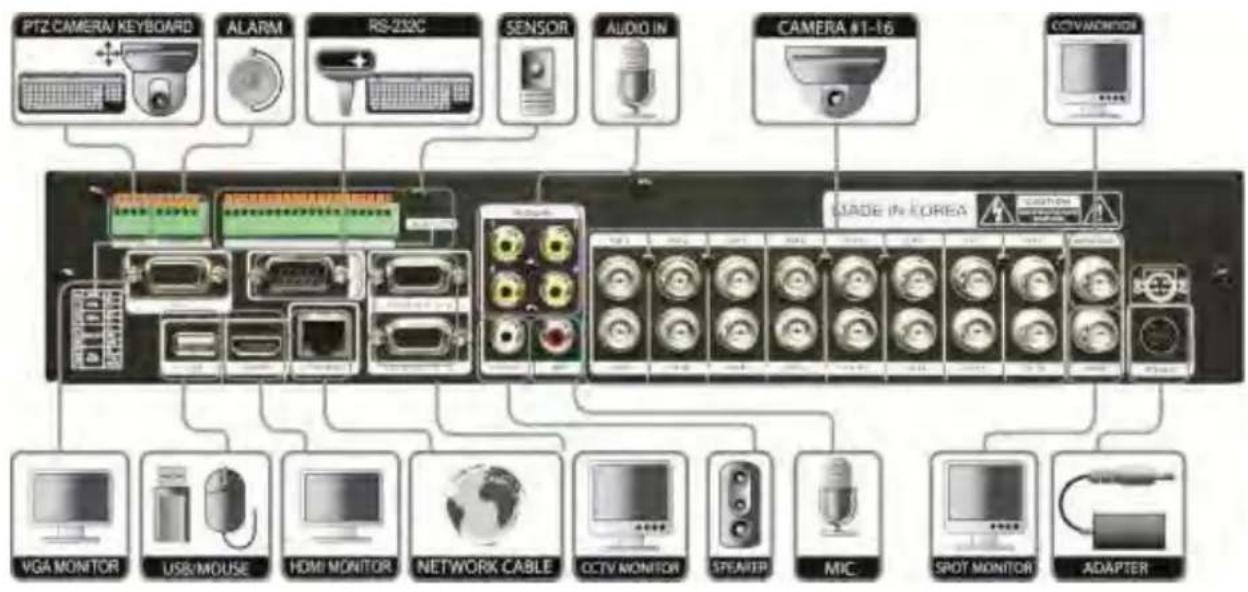
flowchart
graph TD
    A["PTZ CAMERA KEYBOARD"] --> B["ALARM"]
    B --> C["RS-232C"]
    C --> D["SENSOR"]
    D --> E["AUDIO IN"]
    E --> F["CAMERA 01-16"]
    F --> G["CCTV MONITOR"]
    H["VGA MONITOR"] --> I["USB/MOUSE"]
    J["HDMI MONITOR"] --> K["Network Cable"]
    L["STEAM/ER"] --> M["CCTV MONITOR"]
    N["MIC"] --> O["SPOT MONITOR"]
    P["ADAPTER"] --> Q["Switch"]
WARNING ※ When connecting the power supply to the DVR, it is strongly recommended to use a UPS (Uninterruptible Power Supply)
1.3 System Startup and Shutdown
1.3.1 System Startup
After connecting peripheral devices such as cameras, monitors, and a mouse to the DVR, connect the 12VDC 6.6Amps power supply to the power jack on the rear panel of the DVR.
The boot-up screen will display as shown below. Please wait until the boot-up process completes.

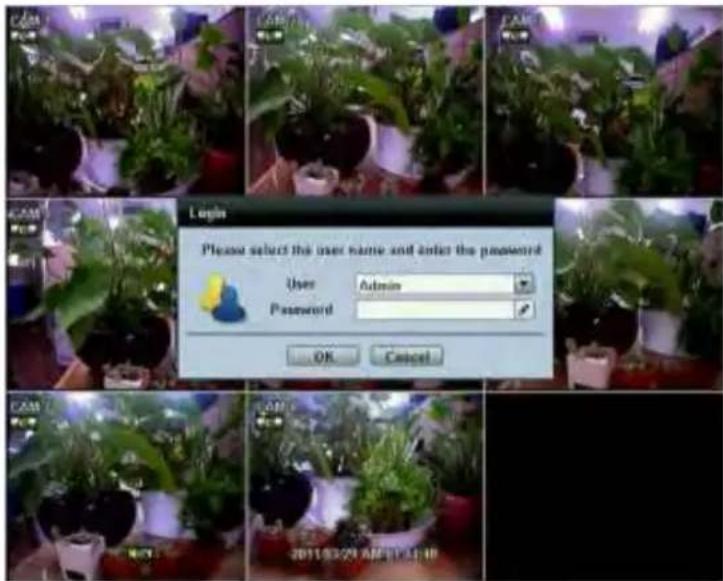
When boot-up process completes, [LOGIN] Window will appear. Select the user name and enter the password. Then, press [OK] button.
Default Login is "Admin", and the password box is blank.
NOTE
When changing the administrator (admin) password please make a note of it in safe place.
If you forgot your password contact your distributor, proof of purchase is required.
NOTE
A mouse is included. In case you need to replace it, it is highly recommended to choose a well-known brand, such as DELL, MICROSOFT, LOGITECH, or SAMSUNG.
1.4 Front Panel
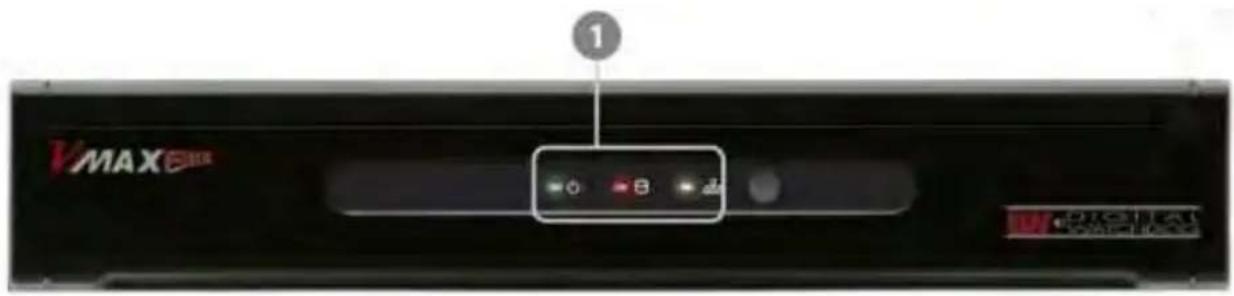
4/8 Channel DVR Compact Case
| No. | Items | Functions |
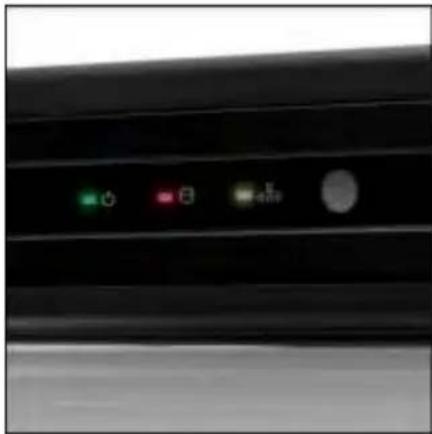
| 1 | LED Indicator | Indicate System StatusPower, Record, Network |
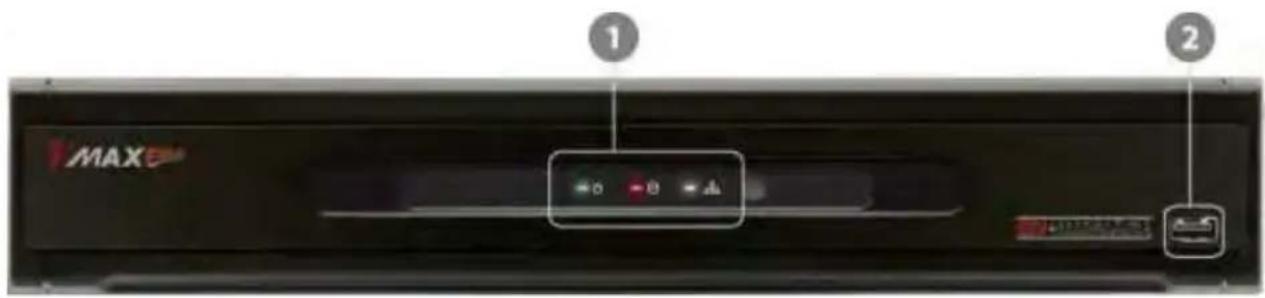
16 Channel DVR Compact Case
| No. | Items | Functions |
| 1 | LED Indicator | Indicate System StatusPower, Record, Network |
| 2 | USB Port | USB Port (Ver. 2.0) for Mouse Operation, Backup Device or Firmware Update |
1.4.1 IR Sensor Window (Remote Control Receiver)
To receive input signal from the IR Remote Control
1.5 Rear Panel
4 Channel DVR Compact Case
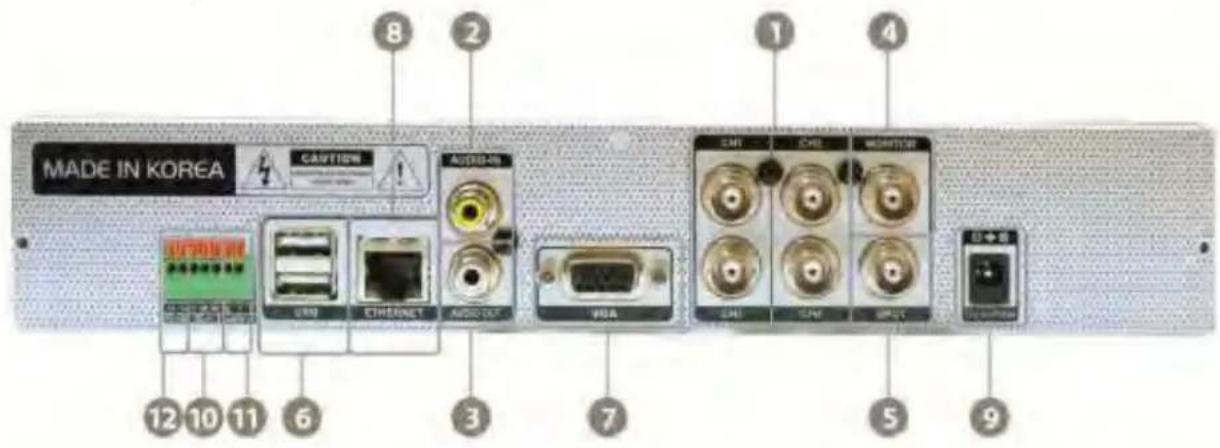
8 Channel DVR Compact Case
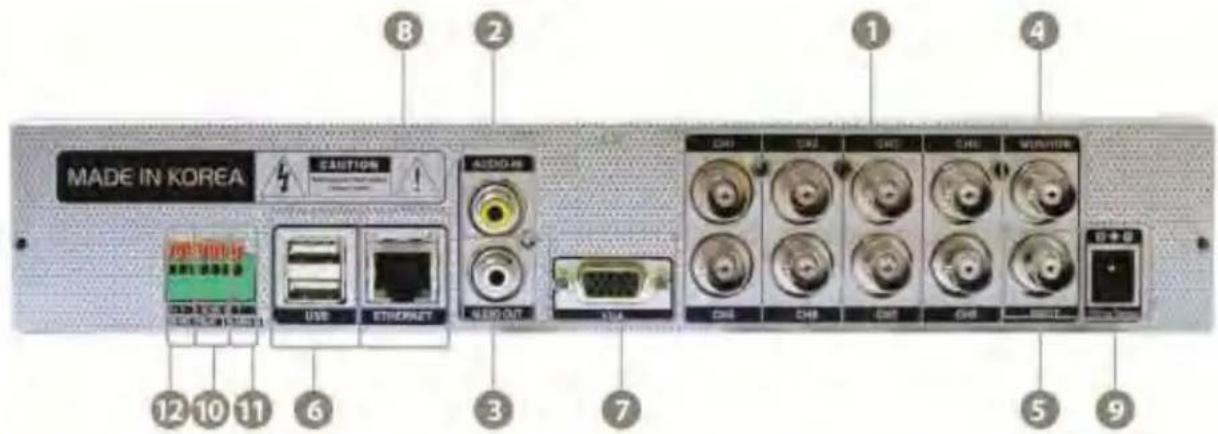
| No. | Name | Description |
| 1 | Video-In | Camera inputs (Supports NTSC/PAL) |
| 2 | Audio-In | Audio Input Device (with Amplifier) |
| 3 | Audio-Out | Audio Output Device (with Amplifier) |
| 4 | Video-Out | Main Composite Monitor Output |
| 5 | Spot-Out | Spot Composite Monitor Output |
| 6 | USB Port | USB 2.0 Port for Mouse Operation, Backup Device, or Firmware Update |
| 7 | VGA Port | VGA Monitor |
| 8 | LAN Port | 100Mbps RJ45 Ethernet Connection Terminal |
| 9 | Power Input | Power Supply Connection 12 VDC at 3.33Amps for 4Channel and 8Channel12VDC at 6.67Amps for 16Channel |
| 10 | Sensor Input | Sensor Input |
| 11 | Alarm Output | Alarm Output |
| 12 | RS-485 Port | PTZ Dome Camera or External Keyboard Controller connection |
16 Channel DVR Compact Case
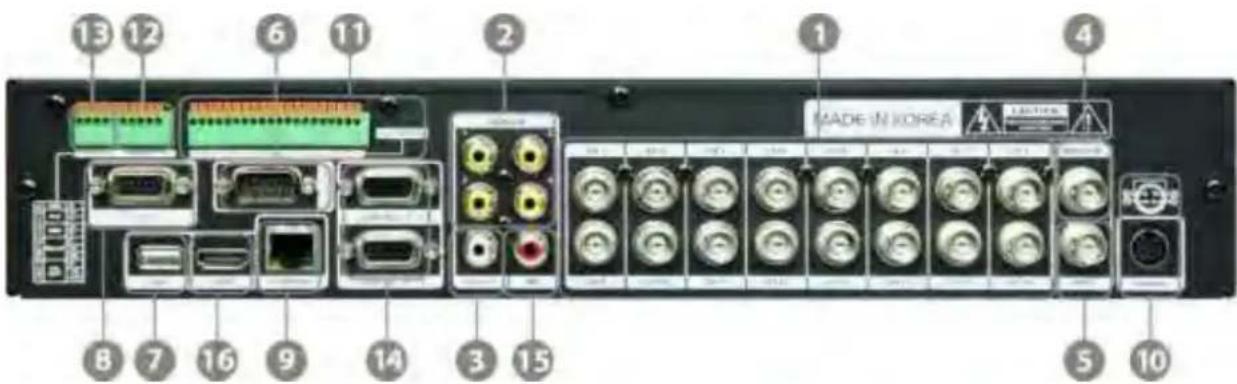
| No. | Name | Description |
| 1 | Video-In | Camera inputs (Supports NTSC/PAL) |
| 2 | Audio-In | Audio Input Device (with Amplifier) |
| 3 | Audio-Out | Audio Output Device (with Amplifier) |
| 4 | Video-Out | Main Composite Monitor Output |
| 5 | Spot-Out | Spot Composite Monitor Output |
| 6 | RS-232 Port | RS-232 Input Device (POS) |
| 7 | USB Port | USB Port (Ver 2.0) for Mouse Operation, Backup Device, or Firmware Update |
| 8 | VGA Port | VGA Monitor |
| 9 | LAN Port | 100Mbps RJ45 Ethernet Connection Terminal |
| 10 | Power Input | Power Connection for 12V DC at 6.67Amps Power Supply |
| 11 | Sensor Input | Sensor Input |
| 12 | Alarm Output | Alarm Output |
| 13 | RS-485 Port | PTZ Dome Camera or External Keyboard Controller connection |
| 14 | Loop Out | Loop Out Port |
| 15 | MIC-In | MIC input device |
| 16 | HDMI Port | HDMI Output |
NOTE Carefully check whether the specifications of the peripheral devices match the DVR's specifications.
1.5.1 Video-In
To connect the camera input to the corresponding channel marked on rear panel
NOTE Camera input voltage level is 1Vp-p±10%.
1.5.2 Audio-In
To connect audio input
1.5.3 Audio-Out
To connect audio output
NOTE Use of audio output with an amplifier is recommended.
1.5.4 Video-Out
To connect main composite monitor
1.5.5 Spot-Out
To connect composite spot monitor
1.5.6 VGA-Out
To connect a VGA monitor
1.5.7 USB Port (Version 2.0)
1) To backup recorded video, using a USB flash drive (USB Memory Stick or USB HDD)
2) To upgrade the firmware
3) To connect a mouse for system navigation
1.5.8 LAN Port
To connect RJ-45 jack for Ethernet connection
Consult network administrator or the internet service provider for proper network setting.
1.5.9 NTSC / PAL Selection
NTSC or PAL is automatically selected when the system boots up.
* Please connect cameras to DVR prior to boot-up.
1.5.10 RS-485 Terminal Block
Connect RS-485 cable for the control of PTZ camera or external keyboard controller.
1.5.11 Sensor Terminal Block
Connect sensors.
1.5.12 Alarm Terminal Block
Connect various alarm devices controlled by relay output.
NOTE
Support both N/O (Normal Open) and N/C (Normal Close) type of sensors. If connected sensor is not functioning, ensure wiring is correct. The connection method may differ according to the type of PTZ controller. Enquire to your vendor for guidance.
1.5.13 Power Input
After connecting peripheral devices such as cameras, monitors, and a mouse to the DVR, connect the 12VDC power supply to the power jack on the rear panel of the DVR.
1.6 IR Remote Controller
The IR remote control allows the use to operate the DVR without having to use the mouse.
To use IR Remote Controller, the ID of the IR Remote Controller must be same as the ID of the DVR.
Default ID # for DVR and IR Remote Controller is "1".
If you have more than one DVR, you can use one IR remote to control each DVR by setting a unique ID for each DVR.
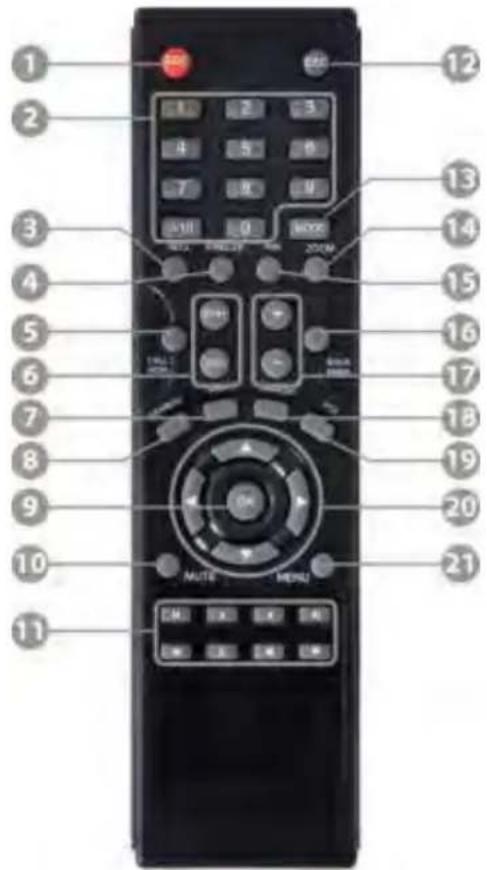
| No. | Functions |
| 1 | Start Instant Emergency Record |
| 2 | Numeric Buttons |
| 3 | Auto-Sequence on Live Display Mode |
| 4 | Freeze Button to Pause Live Video |
| 5 | Call Monitor Activation |
| 6 | Channel Selection |
| 7 | Instant Playback |
| 8 | Search Button |
| 9 | OK (Select) Button |
| 10 | Audio Mute |
| 11 | Playback Control on Search Mode(Fast Backward/Playback/Stop/Fast Forward) |
| 12 | Exit Menu Setup |
| 13 | Display Mode |
| 14 | Zoom B |
| 15 | PIP Mode |
| 16 | Bookmark |
| 17 | Zoom In & Out Button |
| 18 | Backup |
| 19 | PTZ Control |
| 20 | Directional Arrows Buttons (Up/Down/Right/Left) |
| 21 | Menu Setup |
2 OPERATION
2.1 User Login
The DVR has various configurations. The administrator can set the system password and can prevent the User(s) from making unauthorized changes to the configurations or recorded video
Default Login is "admin", and the password box is blank.
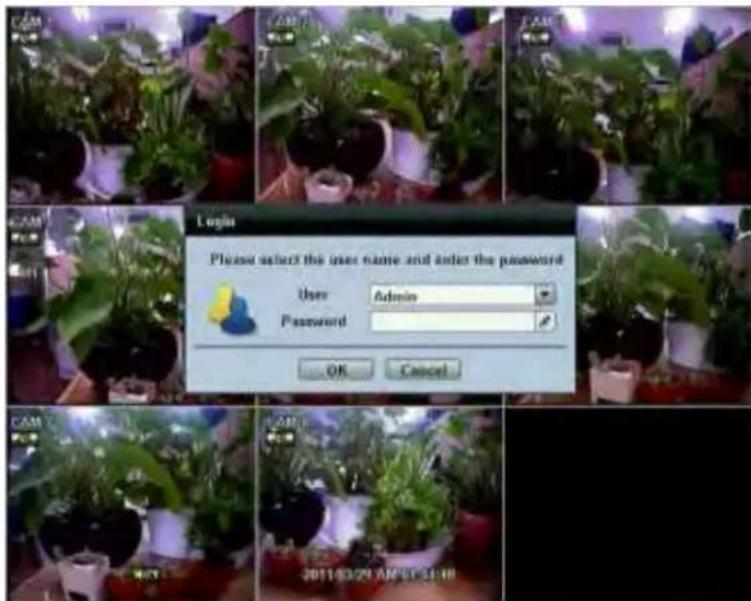
Use the virtual keyboard to enter the password if required
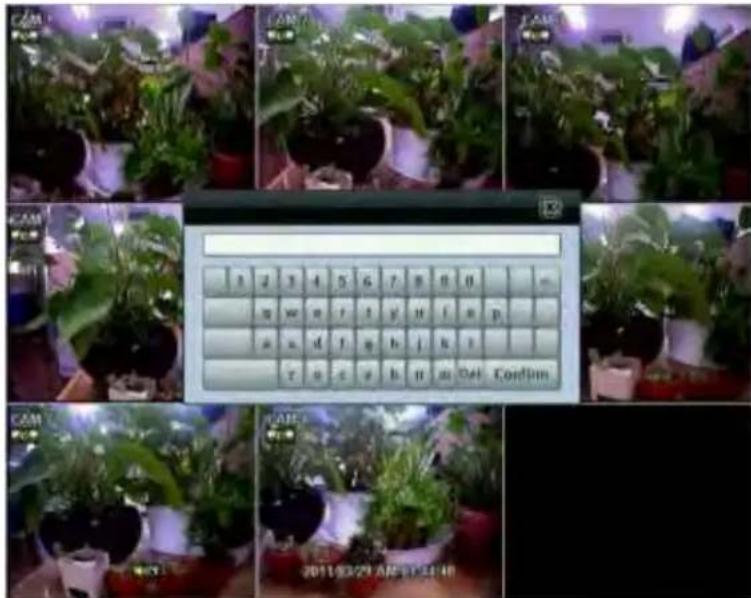
NOTE
1) [LOGIN] window will display on the monitor, until user logs in with the correct [User] and [Password].
2) If the system is set as [Auto Log-In], DVR does not require login. Refer to 4.1.2 User for details.
2.2 Live Display Mode
2.2.1 Channel Selection
After the camera channels are connected, the live real-time display mode is controlled through an easy remote control button operation.
The images can be seen on real-time by 1, 4, and PIP screen. Press the Up & Down Arrow buttons on the IR remote controller to change the display screen sequentially.
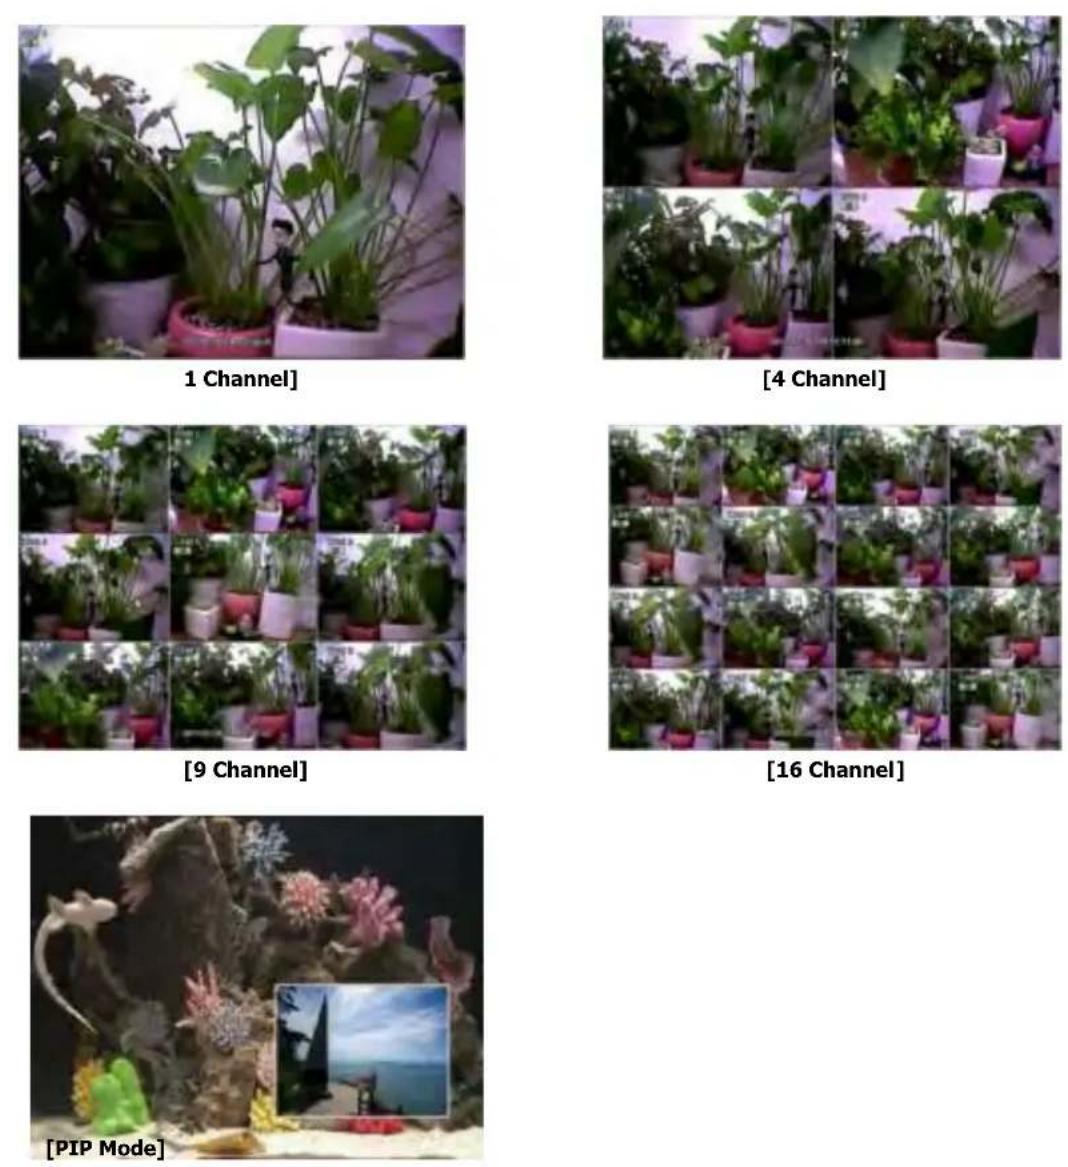
To select a channel by mouse, place the cursor on the desired channel and click the left mouse button. To return to previous screen mode, click the left mouse button again.
NOTE
To select a channel using the mouse, the user is required to perform a slow and clear click of the left mouse button.
Administrator user can set different level of authorization for each user. If a certain user is not allowed to view a certain live and playback channel, then no image appears on the display screen. Refer to 4.1.2 User for details on how to setup.
When a camera is disconnected, an alarm sound will be activated depending on the system settings.
natural_image
Grid of nine photos showing potted plants in various indoor settings, with a control panel at bottom (no readable text or symbols)2.2.2 Icons Description
| Icon Shown on Upper Right Corner | Icon Shown on Bottom Right Corner | ||
 | Continuous Recording |  | PTZ Camera |
 | Motion Detection Recording |  | No HDD, Smart Alarm & HDD Failure |
 | Sensor Activating Recording |  | Using PTZ |
 | Continuous+ Motion Recording |  | Sequence Mode |
 | Continuous + Sensor Activating Recording |  | Digital Zoom Mode |
 | Motion Detection + Sensor Activating Recording | ||
 | Continuous + Motion Recording + Sensor Activating Recording | ||
 | Emergency Recording | ||
 | Audio Channel | ||
2.2.3 Toolbar
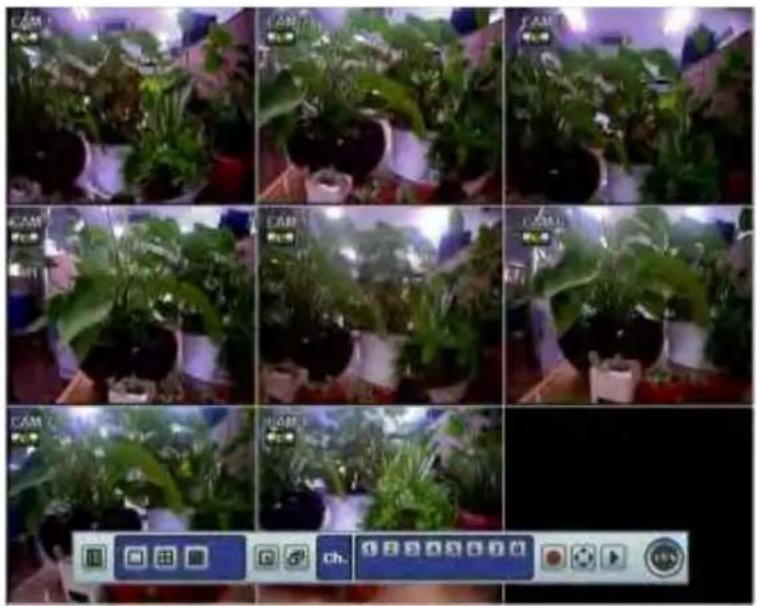
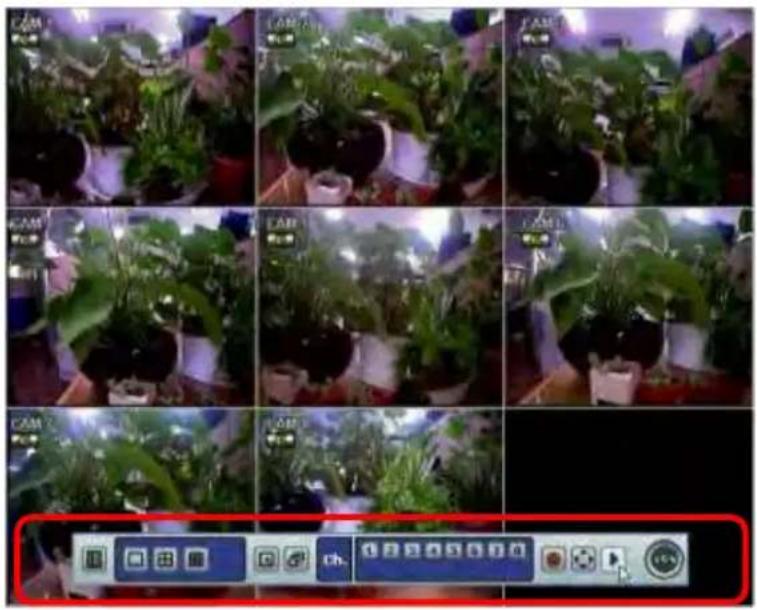
Move the mouse cursor to the bottom of the screen monitor during live mode and the menu bar will appear instantly, as shown below.
natural_image
Grid of nine identical photos showing potted plants in a greenhouse setting, with no visible text or symbols.
Instant (Emergency) Recording is useful to start recording when the user notices an unusual activity. In emergency recording, the system follows the [Panic Record] settings. The default settings for panic record is 30 (25) fps @ CIF Resolution for all channels. If you want to change the panic record settings for each channel, go to [RECORD > PANIC RECORD].


Click the
Click the
D
Display of the HDD usage. If it displays 60%, 60% of the HDD space has been used for recording.
NOTE
If there are no colored icon displayed on the top right corner of the live screen mode, the DVR is not recording any video. In this case, you need to check [RECORDING SCHEDULE] or [CAMERA] of the main setup menu.
2.2.4 Pop-up Menu
Place the mouse cursor anywhere on the screen and click the right button of the mouse to display the popup menu as shown below.
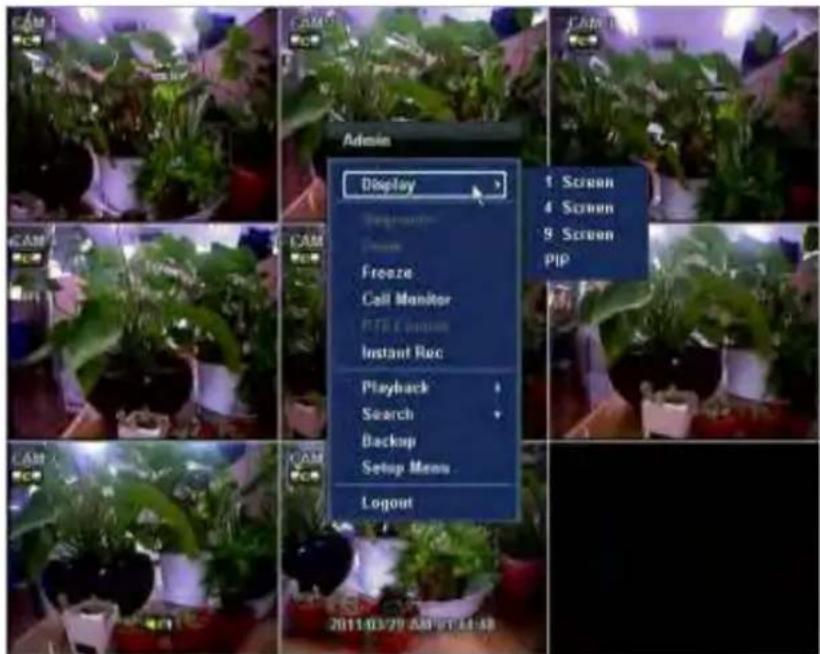
When [SEQUENCE] is selected, screen is shown on the bottom right corner of the screen, and the display screen will be changed sequentially.
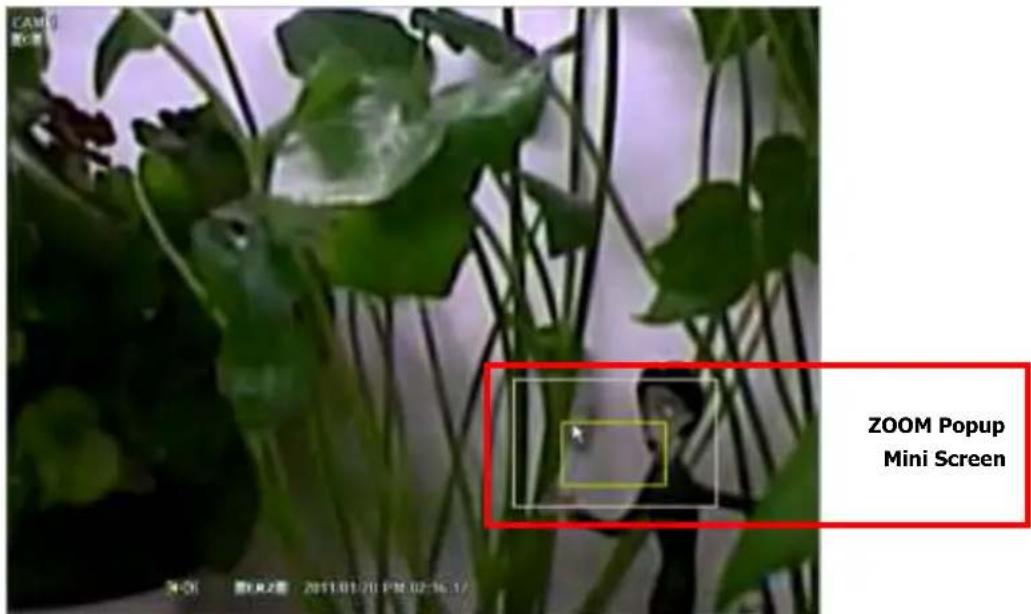
When [ZOOM] is selected, digital zoom function is activated, and ZOOM icon is shown on the bottom right corner of the screen. The [ZOOM] function is only available on full screen mode. In the zoom popup mini-screen, the user can use the mouse to drag a yellow box to the desired area of the camera to zoom. To return to Live display mode, click [ZOOM] again.
2.3 Freeze Mode
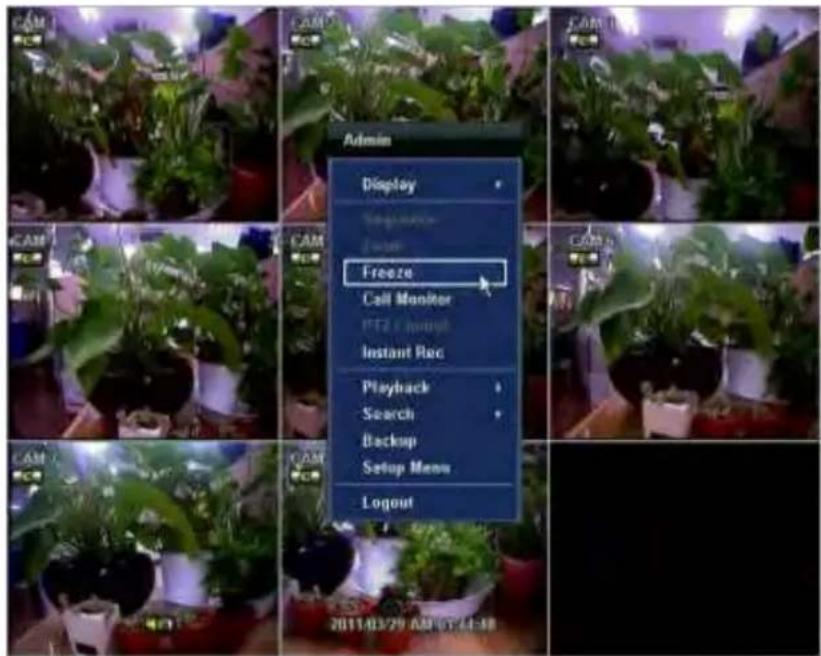
Click the right button on the mouse when viewing a live image and select the [FREEZE] option on the pop-up menu. In the Freeze mode, the image pauses; the date/ time information does not; and the system clock continues running. Press [FREEZE] to pause the live view. To resume the live view, press [FREEZE] again, or click the right button on the mouse and select the [FREEZE] option.
2.4 Call Monitor Operation
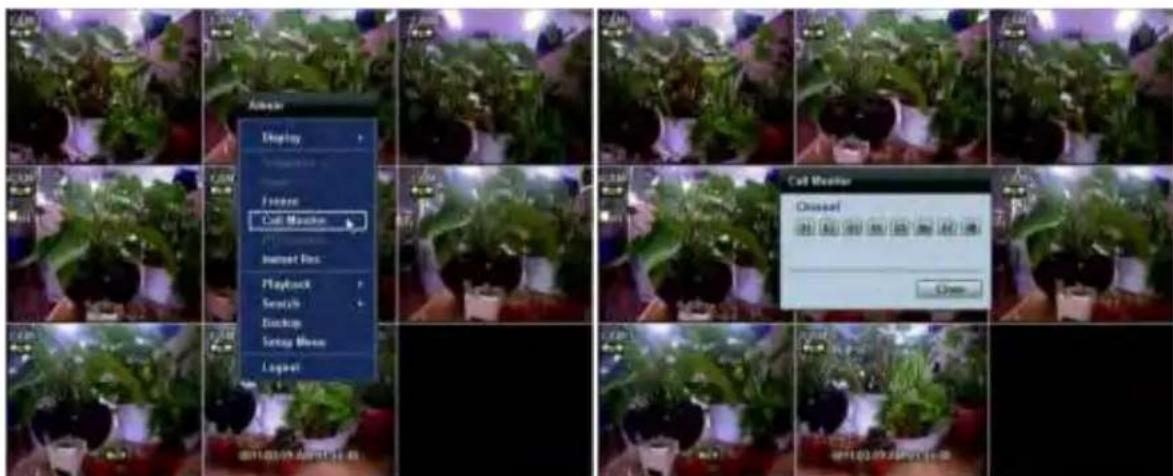
Click the right button on the mouse and select the [CALL MONITOR] option in order to enter Call Monitor Control mode. The numeric panel will pop up at the center of the screen.
Click the specific channel button on the numeric panel to display full screen mode out of assigned spot out channels.
- Press the [CLOSE] button on the bottom of the numeric panel to go back to the previously programmed Spot Monitor mode.
2.5 PTZ Operation
User can go to PTZ mode by clicking right button of mouse and selecting [PTZ CONTROL] in the pop-up menu as shown below or by selecting the button on the menu bar located on the bottom of the main screen.
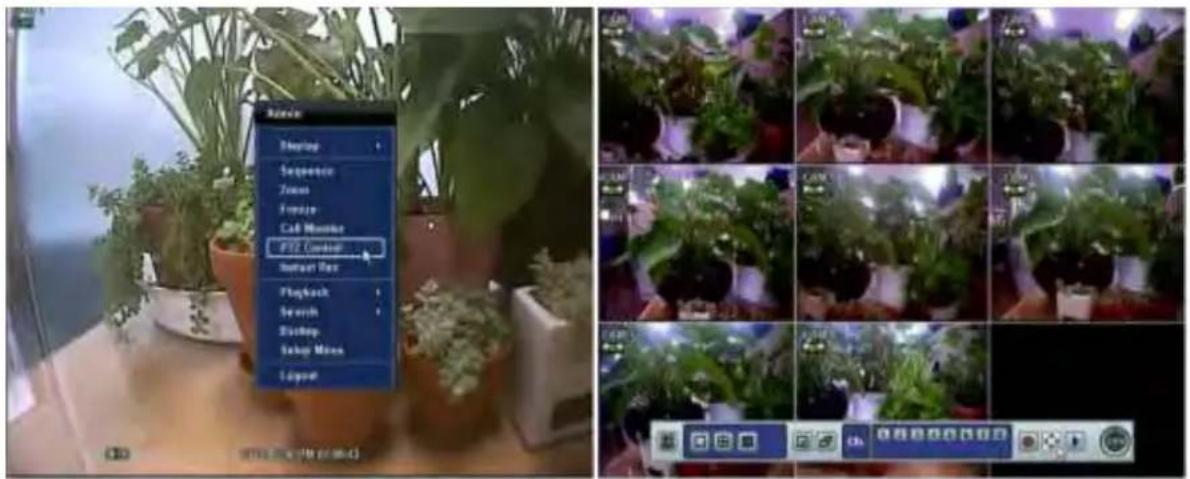
In PTZ mode, user can control PTZ operation with USB mouse.
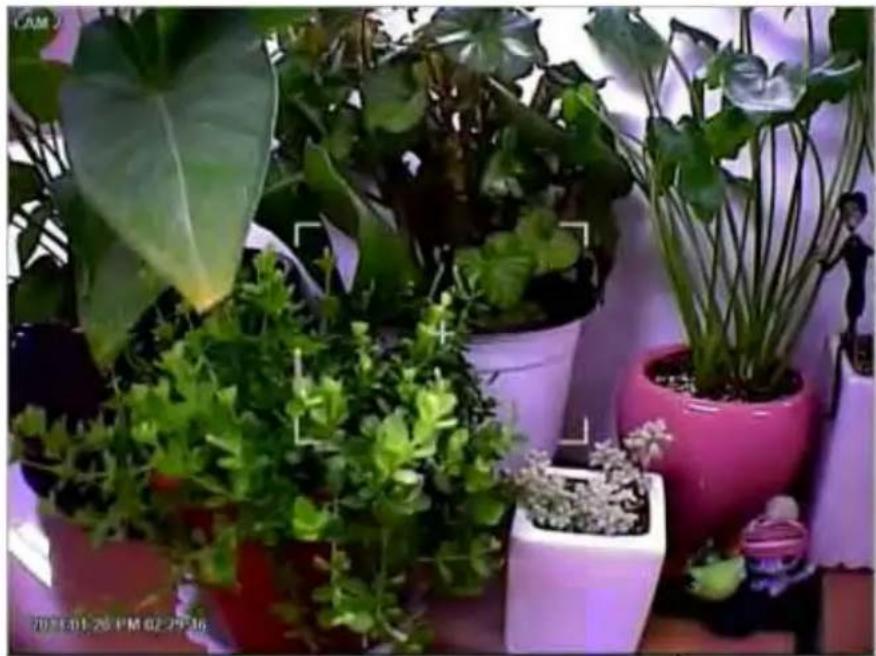
While pressing the left button of mouse, user can drag the mouse pointer to up/down or left/right to move pan/tilt position of the camera. If user moves the mouse pointer far away from the center position of the main screen, the PTZ camera moves at faster speed. The user can also zoom in/out by rolling the wheel of mouse up or down.
natural_image
Potted plants with green and brown leaves arranged in a room, no visible text or symbolsNOTE
Full PTZ functions are available by using USB mouse, IR remote control, or keyboard controller.
For focus control in PTZ screen mode, the user can right-click using the mouse to get the pop-up menu as shown below. Default mode is to [ZOOM]. The user can select [FOCUS] to switch the wheel function of mouse from zoom in/out to focus. This will change the default behavior of the mouse wheel.
The user can also select the [PRESET], [GUARD TOUR], or [EXIT PTZ CONTROL].
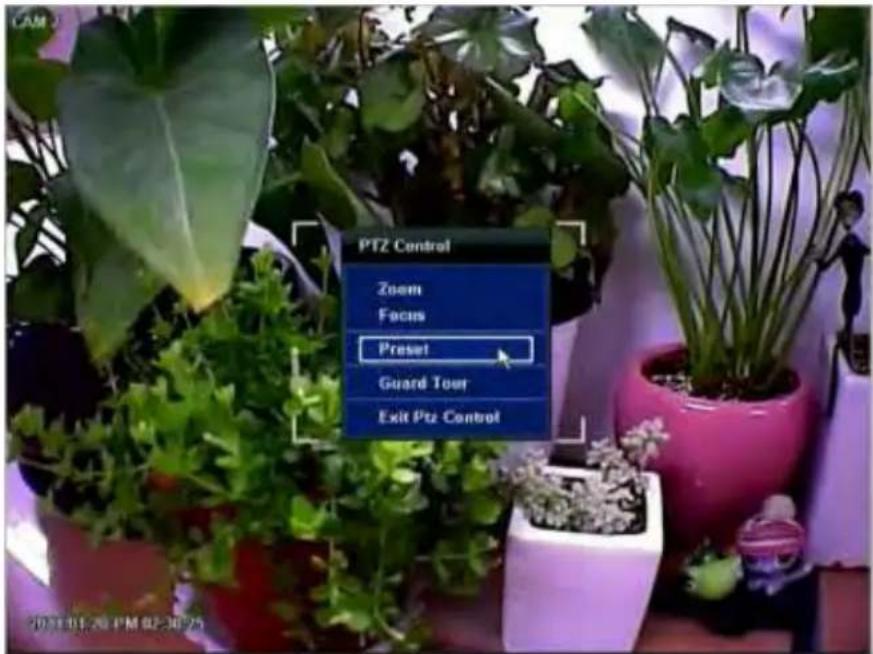
NOTE
User will see numeric pad to select Preset number. The preset is defined by setting a PTZ protocol in the setting menu. The maximum number of preset is 255, but the max supported by the PTZ may be less.
User can automatically switch PTZ camera positions to the defined preset settings by using [GUARD TOUR] function. The connected PTZ camera must support touring functions. [GUARD TOUR] on the pop-up menu is only enabled when the PTZ camera channel is changed to full screen. Please make sure that PTZ camera setting is correct; otherwise, [GUARD TOUR] is shown as disabled.
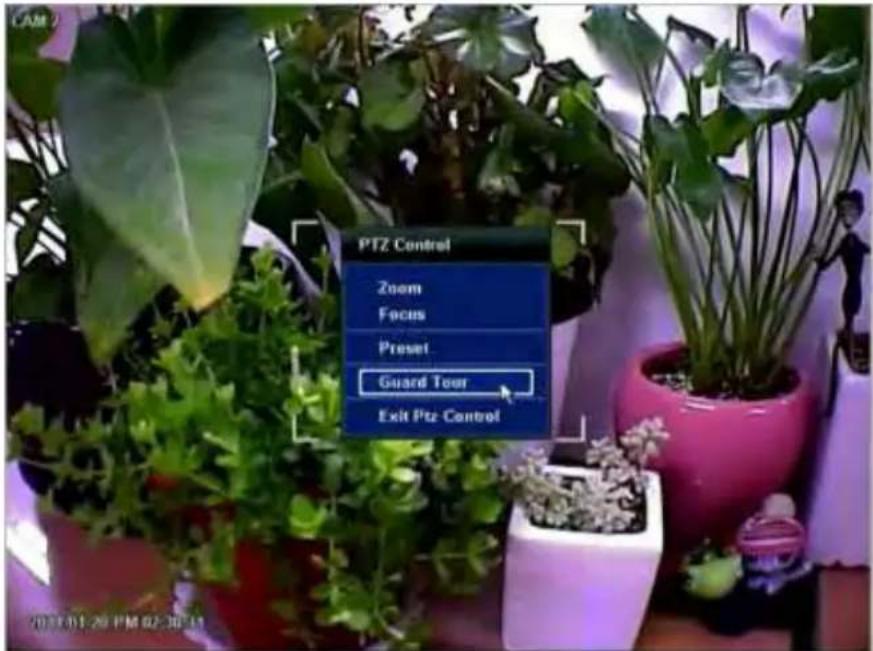
CAUTION
Depending on PTZ camera, some preset positions might be skipped if, for example, the PTZ camera cannot move _ mechanically or control focus within the interval time required by the DVR. In this case, it is recommended to increase the interval setting to a value that allows cameras to finish its Pan & Tilt.
2.6 Instant Playback of Recorded Video
To play a recorded image, press the [PLAY] button from the IR Remote Controller.
It is easy to use the USB mouse to playback recording files. The recorded files can be played backwards or forwards. Press the [REWIND] and [FAST FORWARD] buttons, and the playback speed can be controlled in steps of 2, 4, 8, 16, 32 times the real-time when playing backwards or forwards.
User can click the button to play the latest video clip automatically.
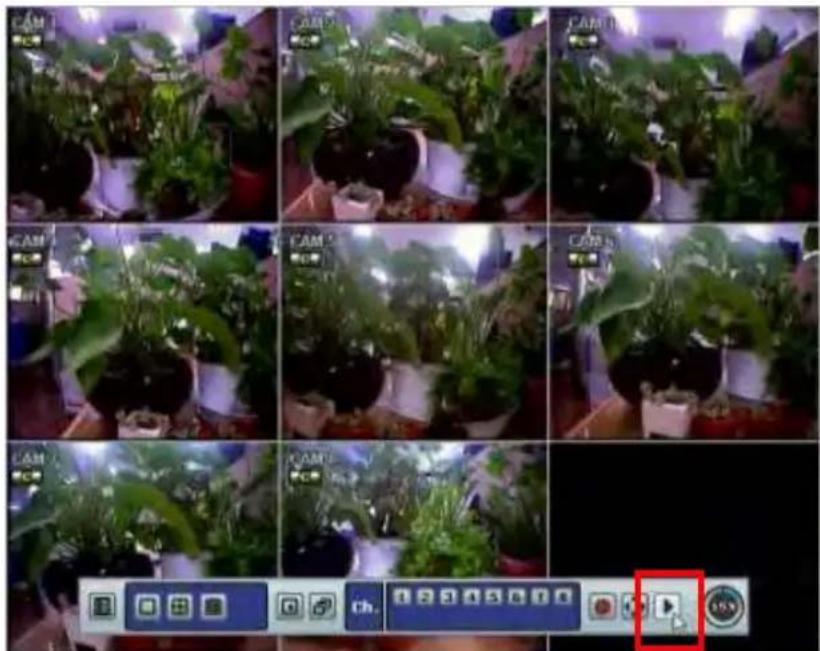
natural_image
Grid of nine identical photos showing potted plants in a greenhouse setting, with a blue play button overlay (no readable text or symbols)In playback screen, user can utilize various playback modes, make an instant manual backup (archive), go to calendar search mode, change channel, and change screen modes. By clicking the left mouse button in the colored-time bar, the user can jump to a different time in the recording. In addition, user can move the vertical search bar by dragging the bar back and forth and releasing it to search the desired time in detail.
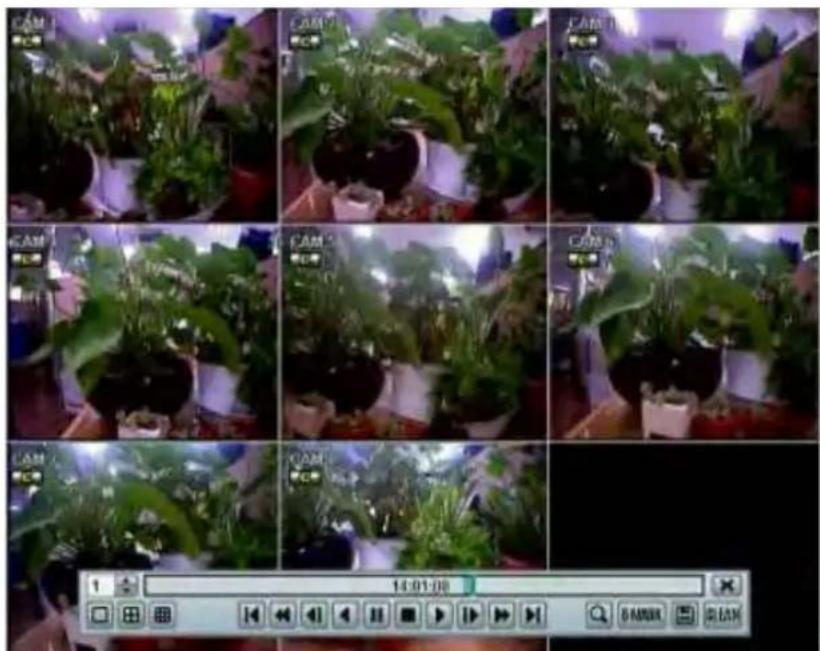
natural_image
Grid of nine photos showing potted plants in various indoor settings, captured from a video player interface (no visible text or symbols on the plants or background)[Playback Screen]
2.7 Clean Button During Playback
De-interlacing feature is required for smooth playback of video that is recorded in D1 (720x480/576) resolution.
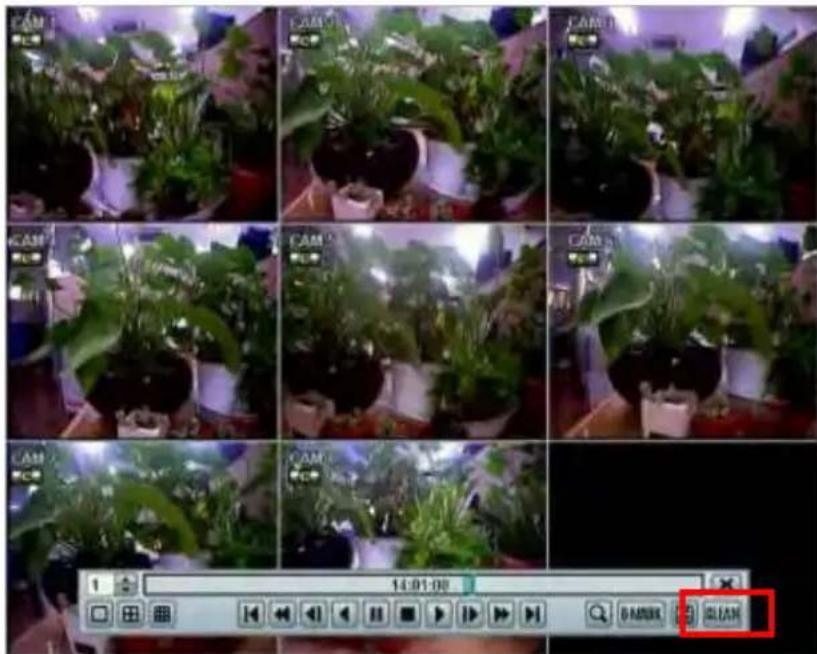
In playback mode, user can press [CLEAN] icon at the menu bar located in the bottom of the main screen. After clicking [CLEAN] icon, a blue circle forms around the icon, which means de-interlacing has been activated. After changing to de-interlacing mode, press the pause and step forward icon. User can get a better image as shown below. Click [CLEAN] icon again to inactivate this function.

natural_image
Close-up of blooming roses in red, pink, and yellow with green leaves (no text or symbols visible)[De-Interlace Image]

natural_image
Close-up of a floral arrangement with red, pink, and yellow flowers in a garden setting (no text or symbols visible)[Interlace Image]
2.8 Instant Backup (Quick Backup During Playback)
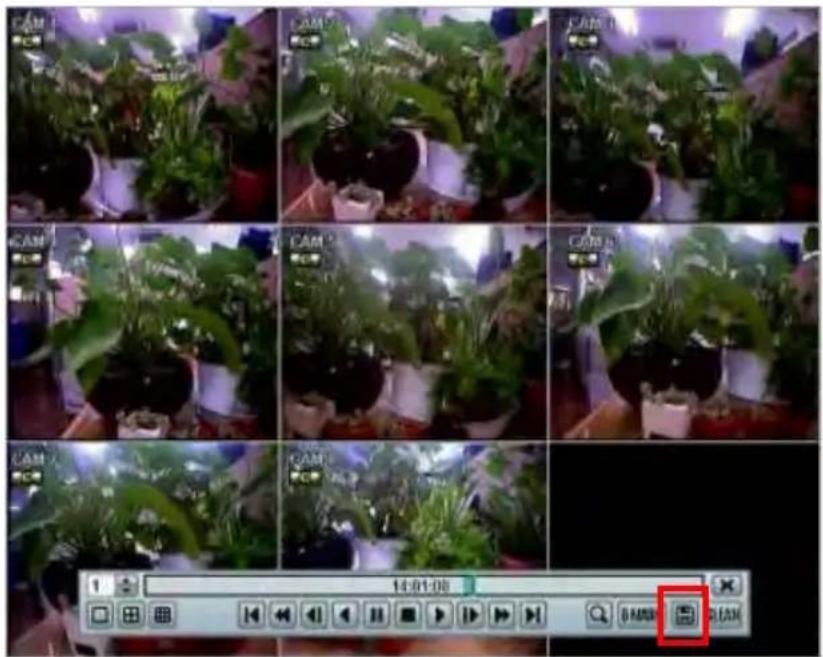
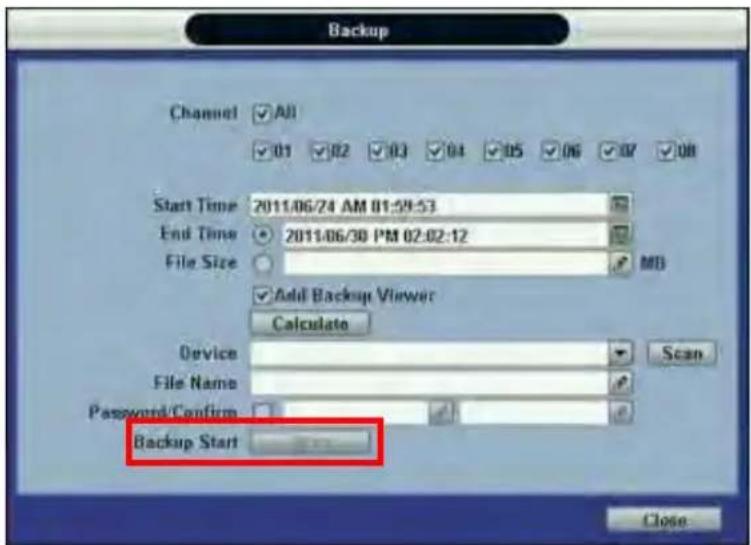
Press the Floppy Icon button. The Backup window will appear. Connect an appropriate USB flash drive and press [SCAN] button to get the system to recognize the device before archiving. Necessary file size will appear before the backup process begins.
Users can check the [AUTO PLAYER] box to include the viewer file. This function allows the user to play the video clip without having to install the software on the PC. Otherwise, the file backup format will be in the Manufacturer's Proprietary Format (PSF).
When the Backup process is completed, press [OK] button.
NOTE
The [HELP] button will help you understand how to setup several important settings. For example, if you need help on how to use the Backup function, click [HELP] button at the right bottom of the [BACKUP] menu.
2.9 Search Recording Image
2.9.1 Date/Time Search
Select [DATE/TIME] in Setup Menu to search for a certain file within the recorded video data.
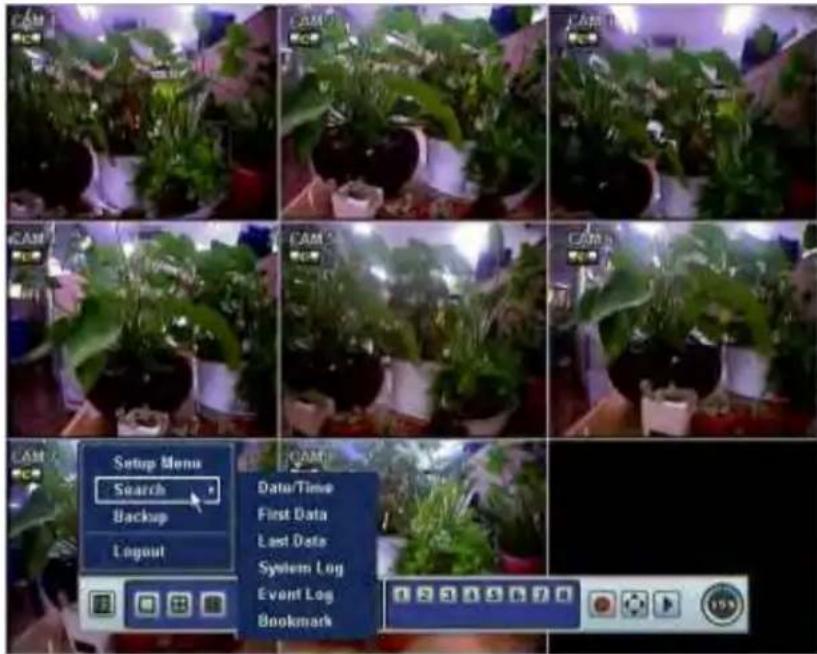
The calendar displays dates with recorded video data in RED color. Click one of the desired dates in Red. Then, the recorded data for the selected date will appear.
Once the recorded video data of the selected date appears, user can adjust the vertical search line to the time that user wants to search by dragging the mouse. As the vertical line is moving back and forth, user can see that the clock is changing simultaneously. Move the vertical line to the time you wish to play. Click [PLAY] button to play the selected video data.
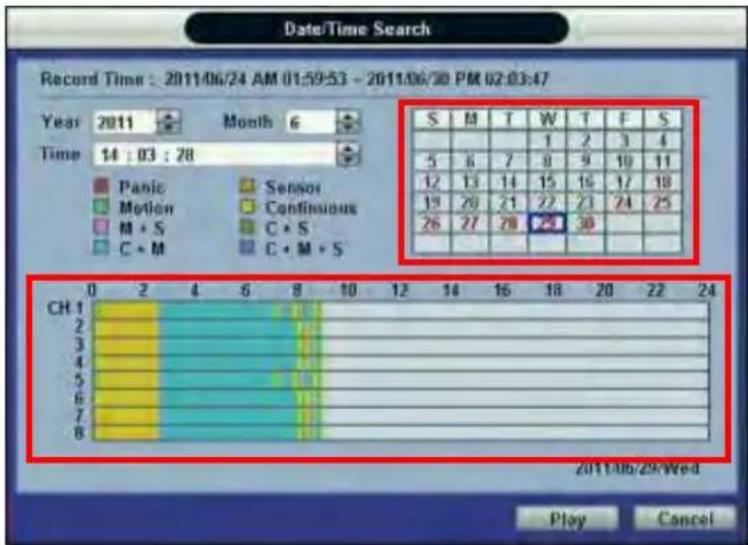
The colors of the time bar are different, depending on the recording mode.
NO COLOR No Recording
The DVR does not record, even though user sets a MODE of recording in [RECORD SETUP] tab.
| RED COLOR | Panic Recording |
| YELLOW COLOR | Continuous RecordingThe DVR records all the time for the set camera(s). |
| GREEN COLOR | Motion Detection RecordingThe DVR only records when it detects motion.Users can also set motion record configuration in the [MOTION ALARM] tab.If user sets the [MOTION ALARM] tab to [OFF] and sets the [SCHEDULE] tab to [MOTION], the system will record when motion is detected but not activated. |
| ORANGE COLOR | Sensor Activated RecordingThe system records when a sensor is triggered only during the dwell time as set in [SENSOR] of the [DEVICE] menu.If user sets [SENSOR] tab to [OFF] and sets [SCHEDULE] tab to [SENSOR], the system will not record even though a sensor is triggered. |
| SKY BLUE COLOR | C + M (Continuous + Motion Detection) RecordingThe DVR records continuously but will switch to the motion configuration specified in the [MOTION ALARM] tab of the [DEVICE] menu, if motion is detected within the motion area. The system will also send a Motion Event Message to the Advanced Client Software over the network.If user sets [MOTION ALARM] tab to [OFF] and sets [C + M] in the [SCHEDULE] tab, the system will always record as Continuous Recording even though the DVR detects a motion within the motion area. |
| DARK ORANGE COLOR | C + S (Continuous + Sensor Activated) RecordingThe DVR records continuously but will switch to the sensor configuration defined in the [SENSOR] tab of the [DEVICE] menu, if a sensor is triggered during dwell time. The system will also send a Sensor Event Message to the Advanced Client Software over the network.If user sets [SENSOR] tab to [OFF] and sets [C + S] in the [SCHEDULE] tab, the system will record as Continuous Recording even though a sensor is triggered. |
| PINK COLOR | M + S (Motion Detection + Sensor Activated) RecordingThe DVR records when motion is detected or when a sensor is triggered according to the [DEVICE] menu settings.If user sets the [MOTION] and [SENSOR] tab of the [DEVICE] menu to [OFF], the DVR will neither record nor notify the Advanced Client Software or Central Management System. |
| PURPLE COLOR | C + M + S (Continuous + Motion Detection + Sensor Activated) RecordingThe system records continuously but will switch to the motion configuration when motion is detected or the sensor configuration when a sensor is triggered. |
CAUTION Dark Blue Color
A Dark Blue Color in the Search Bar during playback mode indicates data recorded during DST (Daylight Savings Time).
2.9.2 First Data
Go to the first screen of the recorded videos. This is the oldest recorded video.
2.9.3 Last Data
Go to the last screen of the recorded video. This is the most recent recorded video.
2.9.4 Event Log
The Event Log Search finds particular events, quickly and easily.
Click button to playback the selected event data.
Copy the event list to a USB memory device in text file format. Insert the USB Memory Stick into the USB Port. Press [SCAN] button to detect the USB stick and then press [EXPORT] to copy the log information to the media.
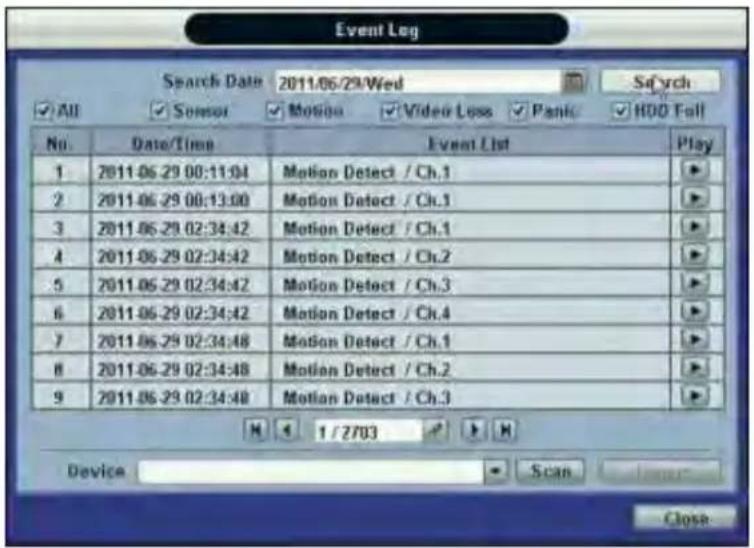
To see a particular event, click the arrow buttons on the Remote Controller to the desired time range.
The following are the categories indicated on the Event Viewer.
- Alarm by Sensor
- Alarm by Motion
- Alarm by Video Loss
- Alarm by HDD Full
NOTE
If the Alarm does not activate even after the alarm input setting has been made, check the alarm connection port of the DVR rear panel.
2.9.5 System Log
The System Log Search finds particular system log information, quickly and easily.
User can copy this event list to USB memory device in text file format.
![System Log Search Date 2011/06/30/Thu Search All System Setup Network No Data/Time Event List 1 2011/06/30 AM 10:48:26 System setup begin 2 2011/06/30 AM 10:48:32 System setup end 3 2011/06/30 AM 11:12:03 System Start [Logoul] 4 2011/06/30 AM 11:12:03 NET START 5 2011/06/30 AM 11:12:03 NET LINKUP_100M_FULL_DUPLEX 6 2011/06/30 AM 11:12:06 Update Static IP 192.168.0.46 7 2011/06/30 AM 11:12:06 Update DNS Server 203.248.252.2 8 2011/06/30 AM 11:13:36 NET LINKDOWN 9 2011/06/30 AM 11:13:36 NET RESTART M 1 / 3 P H Device Scan Close](/content/2026/05/1058035/images/6b27ebbb2eaea691d74799035d2e3b35242c639968b626cfc299a7e314ec230e.jpg)
Once export is completed, the user can find a folder titled with the exported date created in the USB thumb drive.
There is [system.log] file stored in the folder.
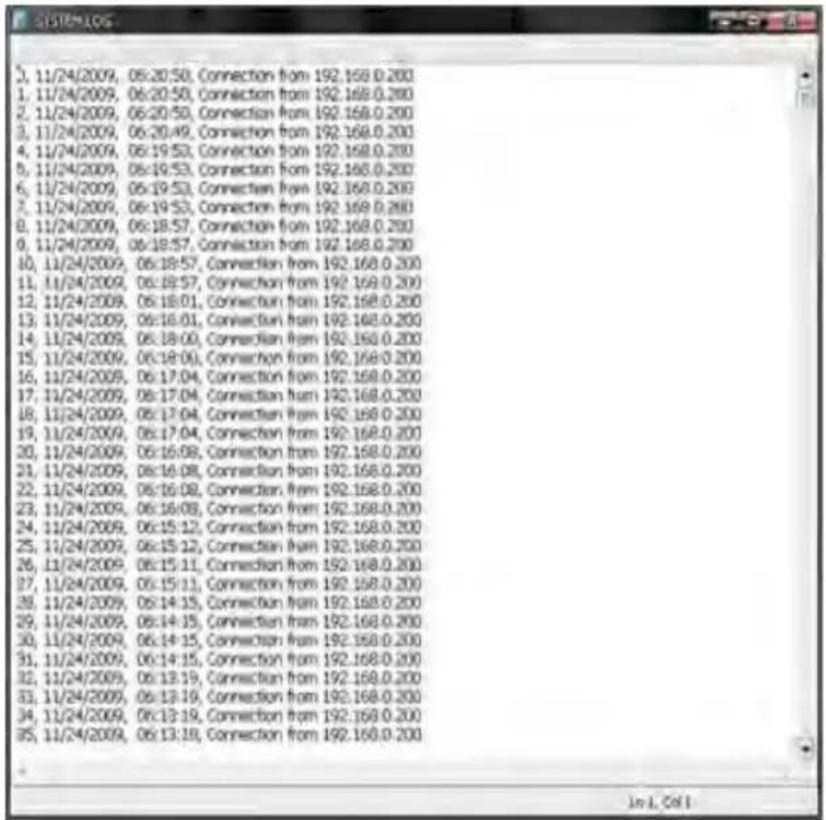
31 | Chapter 1 : DVR User's Manual
The following are the categories indicated on the system log viewer.
- Log by System
- Log by Setup
- Log by Network
NOTE
Each page of the [System Log] and [Event Log] Window displays 20 logs. User can view the next set of logs on another page by clicking the arrow icons.

2.9.6 Bookmark
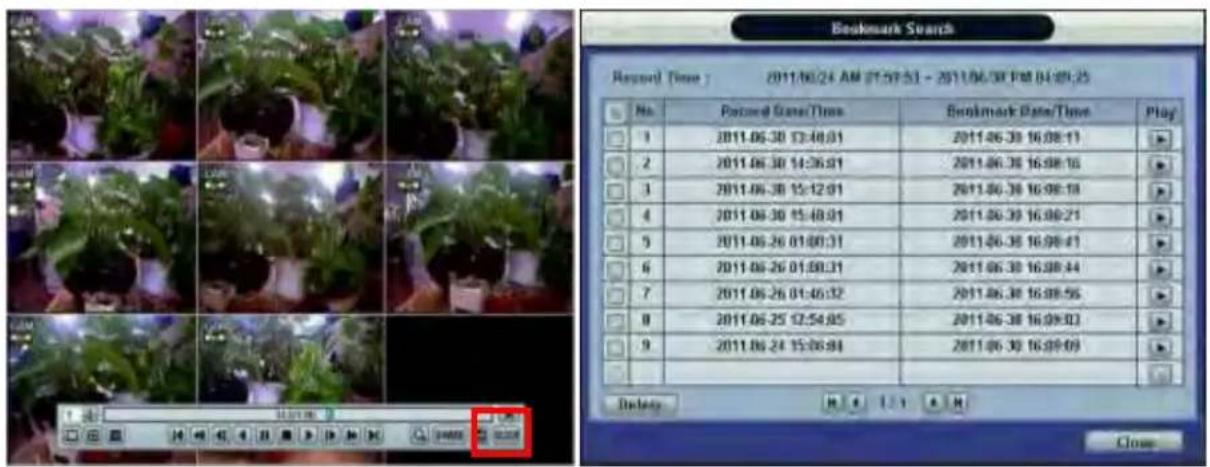
Go to the bookmark list to search the recorded video data in the bookmark list. Users can make their own bookmark list simply by clicking button during playback. When you do bookmark search, you can easily playback the bookmarked video by clicking button located right next to the list.
2.10 DST Setting and Screen Saver
DST starts at 2:00 local time on ^nd 2Sunday of March, and ends at 2:00 DST on ^st Sunday of November.
During DST (Daylight Saving Time), the DVR time clock adjusts to the regional time zone. The clock will shift by one hour after the DST settings start and will delay by one hour after DST finishes.
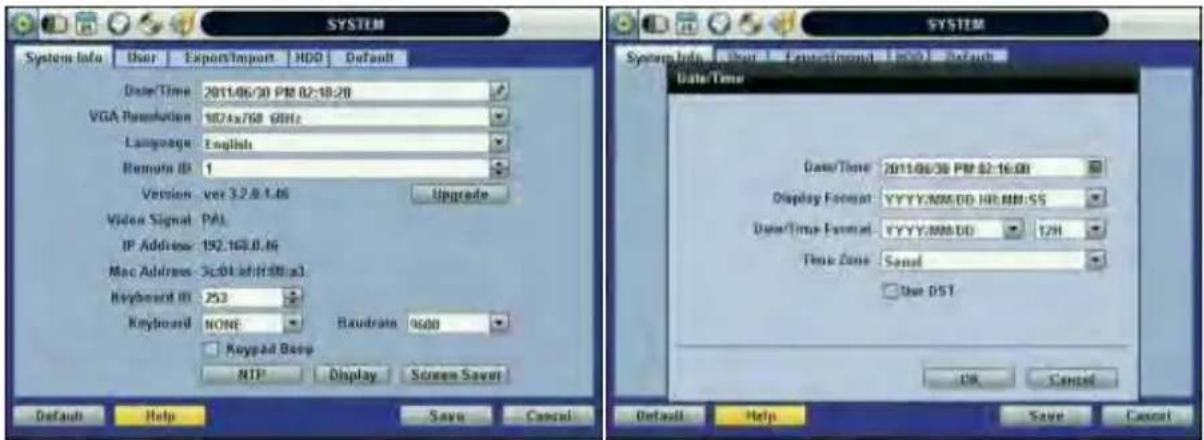
To make DST setting on the DVR, go to the menu [SYSTEM > SYSTEM INFO] and click [DATE/TIME]. User can setup DST "Begin & End" time after checking [USE DST] box.
When you return to search mode, you can clearly see there is no data in all channels for one hour, since the clock jumps from 2:00 to 3:00.
The clock jumps backward to 1:00 standard time on Sunday of November.
When DST finishes, there will be an hour of overlapped video. A Blue color indicates the overlapped video in the Search Bar during playback mode.
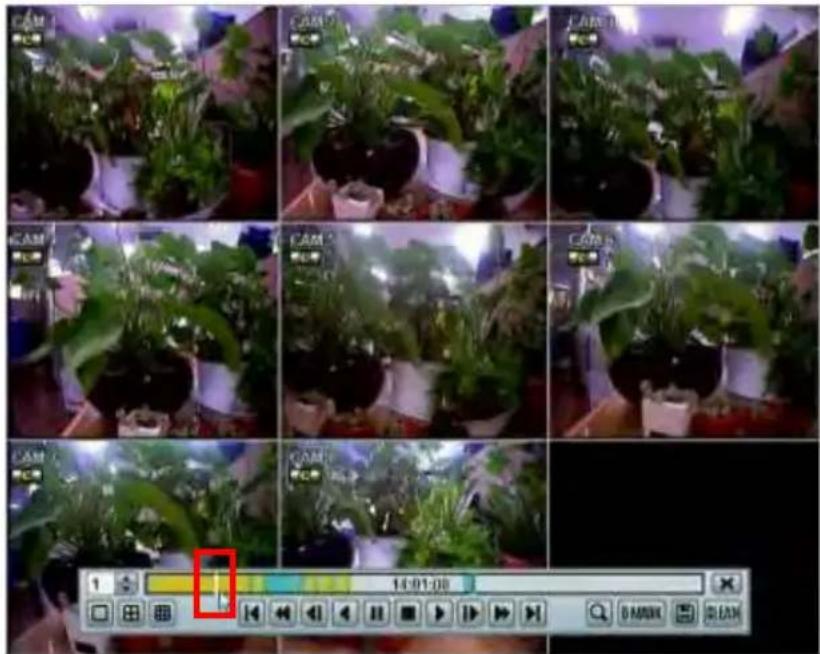
When user clicks on the overlapped video data, a message titled [Recorded Video Selection] will pop up. The user can then select whether to play DST Data or Non-DST Data. Click [OK] to play DST image. Click [CANCEL] to play Non-DST image.
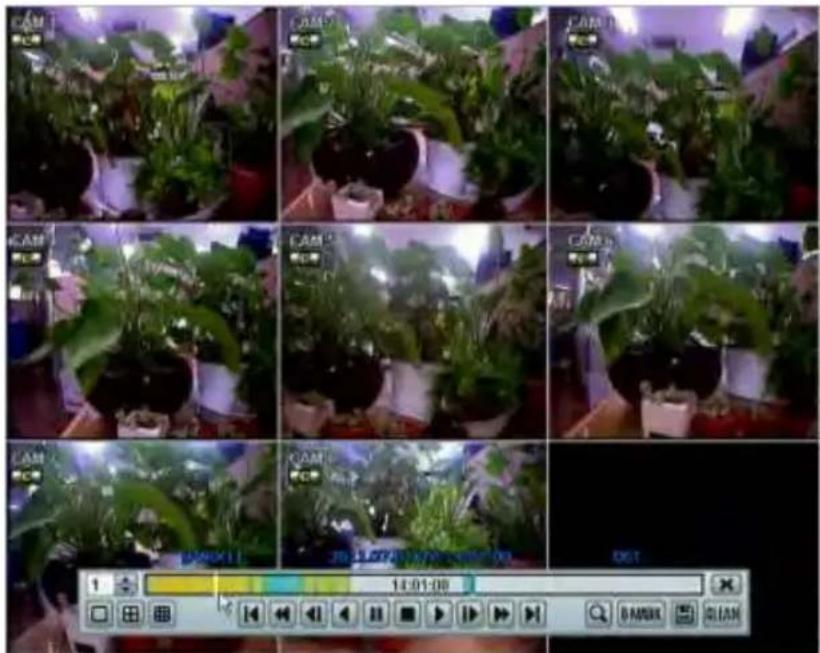
[DST Image]
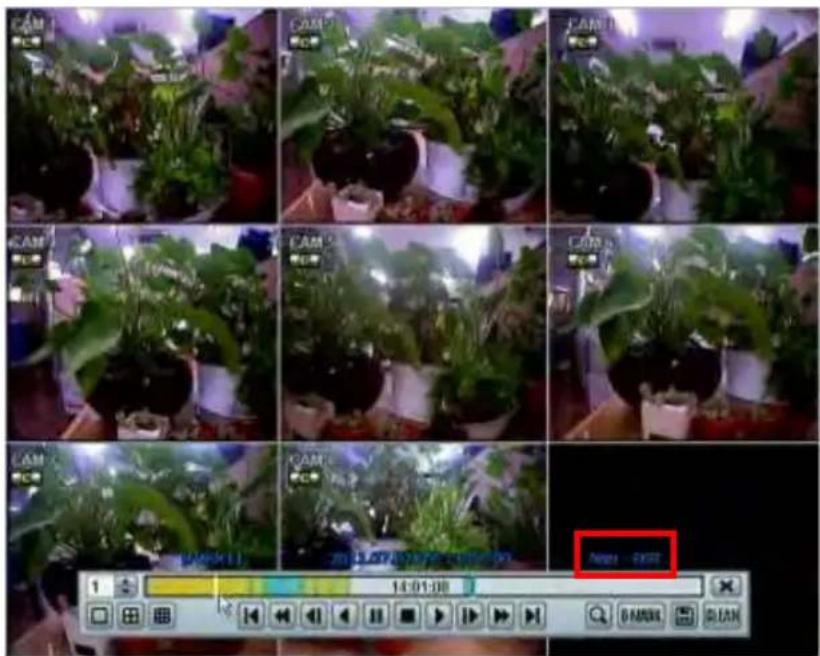
[Non-DST Image]
To set a screensaver on the DVR, go to the menu [SYSTEM > SYSTEM INFO] and click [SCREEN SAVER] to get the Screen Saver window as shown below. Users can select [CRT] and/or [VGA] by checking the boxes. Users can set the WAITING TIME for when the monitor will automatically turn off.
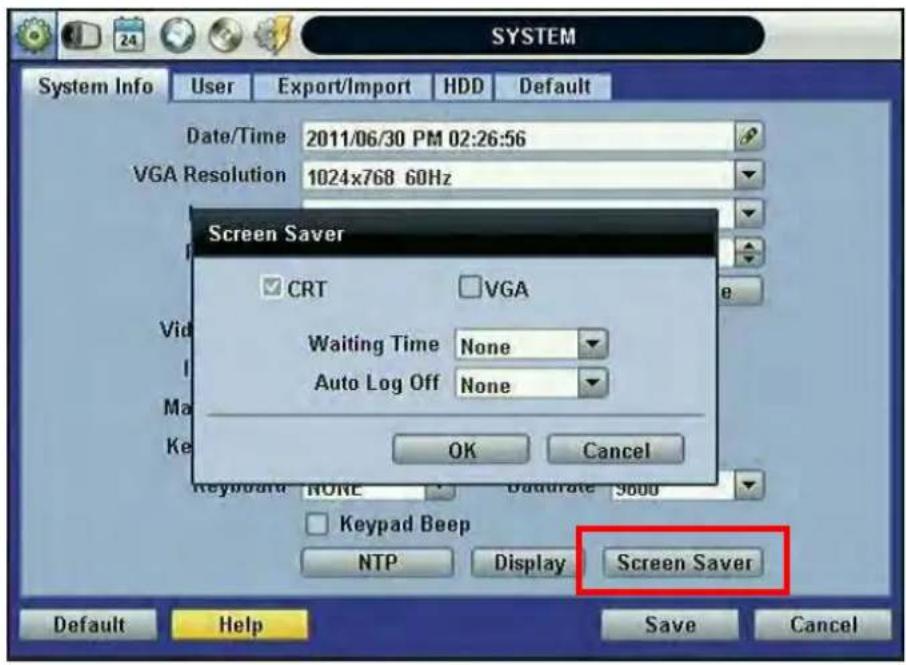
NOTE
WAITING TIME: Users can select the WAITING TIME from NONE,1,2,3,4,5,6,7,8,9,10,20,30,40,50, and up to 60 MIN.
The screen saver will not work when either WAITING TIME is set to "NONE" or both SPOT and VGA checkbox are unchecked. Screen saver may not work, during system upgrade, HDD format, or data backup process. The system continues to record while the monitor is turned off.
When it comes to the [AUTO LOGOFF] setting, refer to the USER setting.
3 SETTING
The General Setup Menu consists of the following submenus: System, Device, Record, Network, Backup, and Quick Setup.
Go to the Setup Menu by clicking the TOOL button on the menu bar or clicking the right mouse button.
Users can move mouse pointer from [SYSTEM] to [QUICK SETUP] icons to look around the sub-menus on the menu screen instantly. Click the left mouse button to select a desired category for editing.
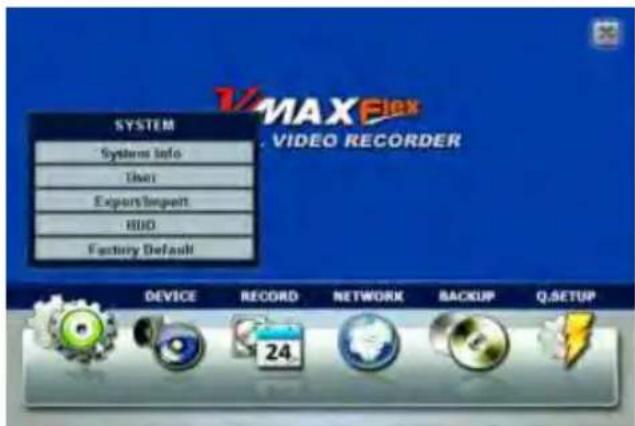
[SYSTEM]
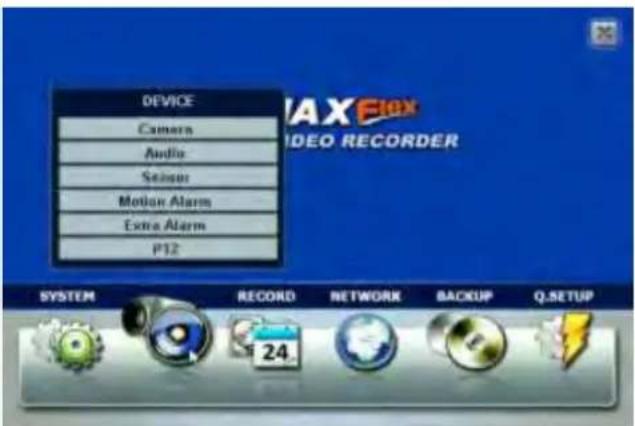
[DEVICE]
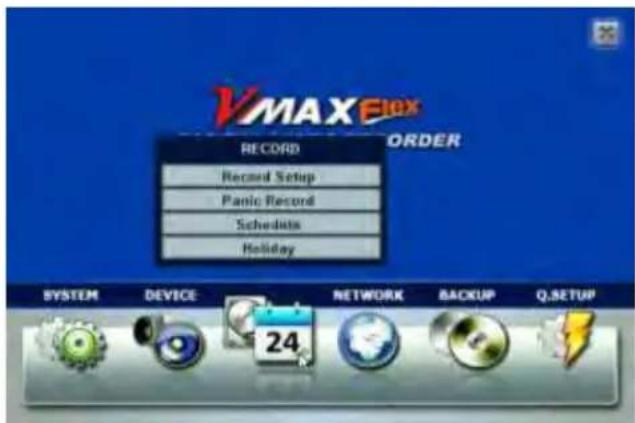
[RECORD]
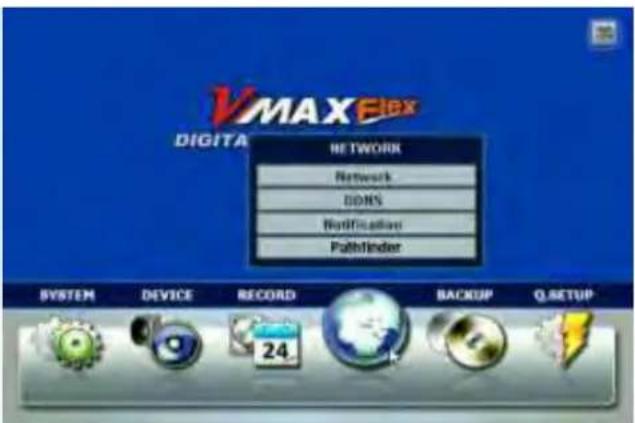
[NETWORK]
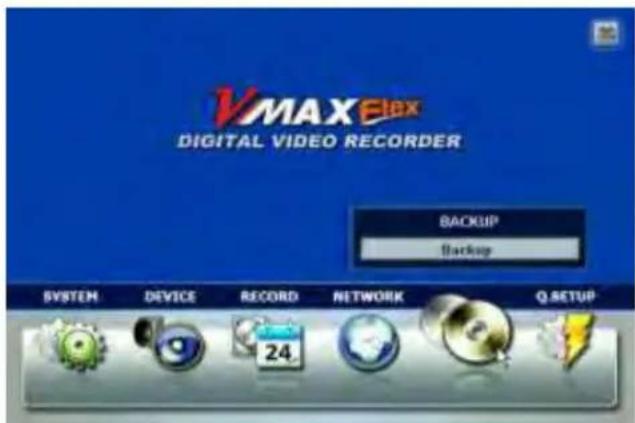
[BACKUP]
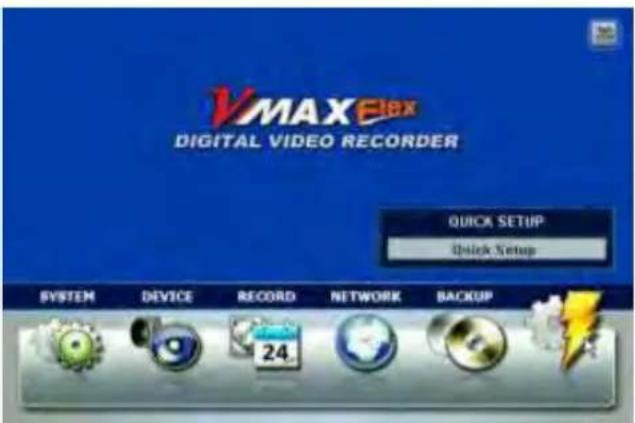
[QUICK SETUP]
| Main Menu | Sub Menu |
| SYSTEM | SYSTEM INFO |
| USER | |
| EXPORT/IMPORT | |
| HDD | |
| FACTORY DEFAULT | |
| DEVICE | CAMERA |
| AUDIO | |
| SENSOR | |
| MOTION ALARM | |
| EXTRA ALARM | |
| PTZ | |
| RECORD | RECORD SETUP |
| PANIC RECORD | |
| SCHEDULE | |
| HOLIDAY | |
| NETWORK | NETWORK |
| DDNS | |
| NOTIFICATION | |
| PATHFINDER | |
| BACKUP | BACKUP |
| QUICK SETUP | QUICK SETUP |
3.1 System
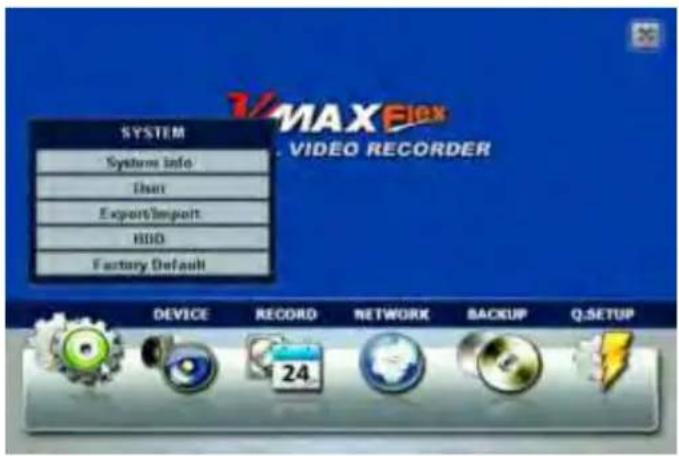
3.1.1 System Info
Click [SYSTEM INFO] to edit the Date, Time, VGA Resolution, Language, Remote ID, Keyboard ID, Baudrate, NTP, Display, and the Screen Saver. User can also upgrade the Firmware or view the Firmware Version, Video Signal, IP Address, and Mac Address.
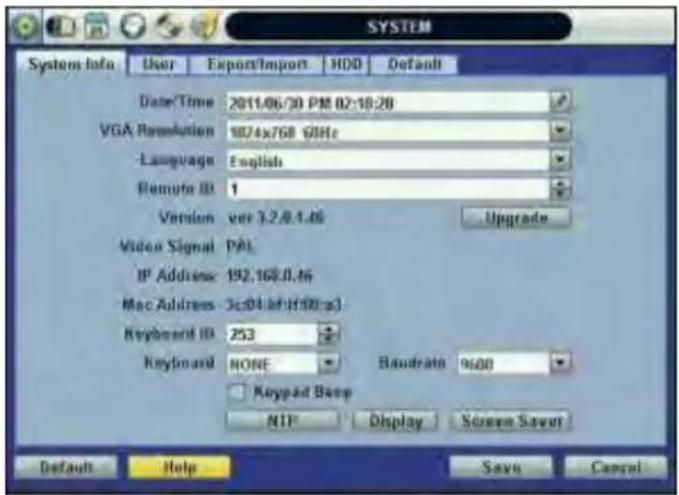
Mac address is a unique network identification number for each system.
NTSC/PAL is automatic. Make sure the cameras are connected to the DVR before turning the power on of the DVR.
Remote ID: The Remote ID should match the ID of the IR Remote Controller in order for the remote to function.
Keyboard ID: The Keyboard ID should match the selected DVR on the keyboard. In addition, the baud rate and Keyboard should match the selected keyboard controller.
NOTE
There are two types of TIME SYNC MODE.
1) Server Mode
The operating DVR is set as a Time Sync Server, which can synchronize the time clock of another DVR(s) connected over the same network environment.
2) Client Mode
The operating DVR is set as one of the client DVR(s). Input the IP Number of designated DVR, Advanced Client Software (ACS), or Central Management System (CMS), as a Time Sync Server in [SYNC SERVER]; and then its time clock is synchronized with Time Sync Server by the setup time in [SYNC CYCLE].
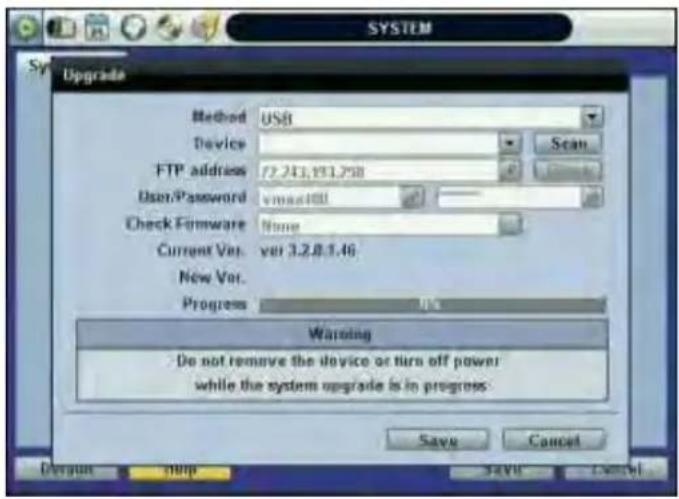
Upgrade: Users can easily upgrade the DVR via DVD, CD, USB, or FTP Server.
PROCEDURE How to upgrade system firmware by using USB memory stick
1) Insert the USB thumb-drive formatted by FAT32 in any USB port of DVR (compatible with USB 2.0).
2) Press the [SCAN] button and the brand or model name of the USB will display on the [DEVICE] field.
3) Click [OK] to confirm.
How to upgrade system firmware by using FTP server
1) Select FTP in the drop-down list and type the given FTP server IP address in the [HOST ADDRESS] field. There is no default username and password. The FTP server address is subject to change without prior notice.
2) Click [CHECK] button. DVR will detect the latest Firmware version from the FTP server. If there is a new firmware, DVR will ask if you want to upgrade it or not.
3) Click [OK] to confirm it and then click [START] to start upgrading.
CAUTION
It is recommended to format the HDD after finishing the firmware upgrade because the data recorded by previous firmware may cause malfunction of DVR due to the difference in format.
It is possible to send the system firmware back to factory default. This may be useful if some of the functions do not work properly after a firmware upgrade. It is highly recommended to check all functions and menus after a firmware upgrade for proper layout and performance.
Click the [DISPLAY] button to set Status Display Time Out, Setup Menu Time Out, Sequence Mode Interval, PIP Interval, Spot Monitor Interval, and Transparency.
[TRANSPARENCY] is the transparency level of the menu screen. 0% means no transparency at all.
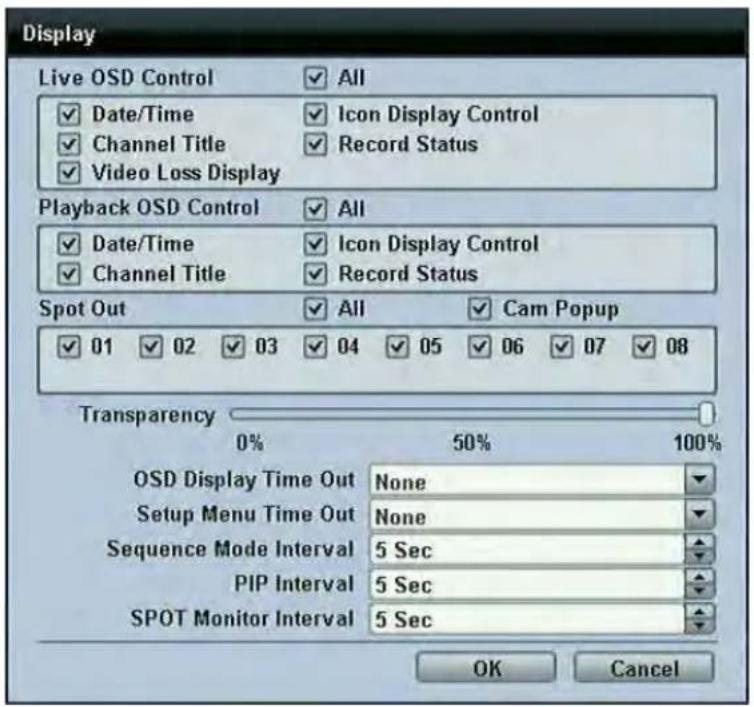
You may hide or unhide Live or Playback Status Display by checking the box.
NOTE
DVRs support the following video resolutions: 800x600, 1024x768, 1280x1024, 1280x720, and more.
User must set the proper resolution according to the monitor resolution.
3.1.2 User
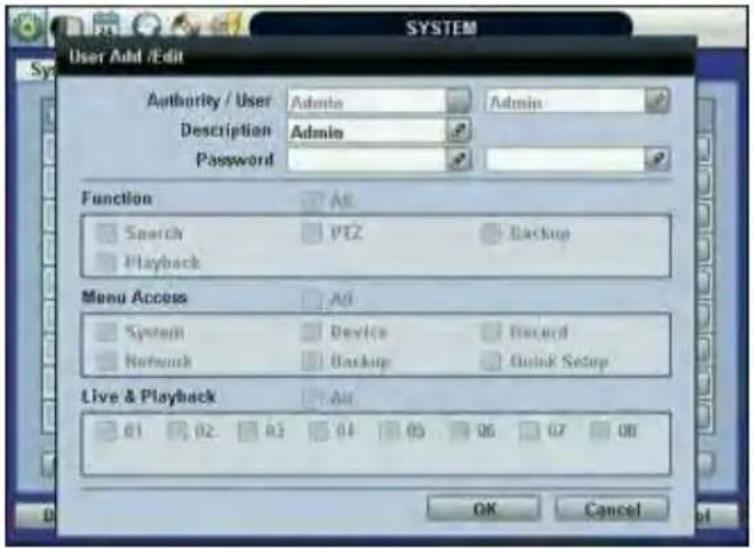
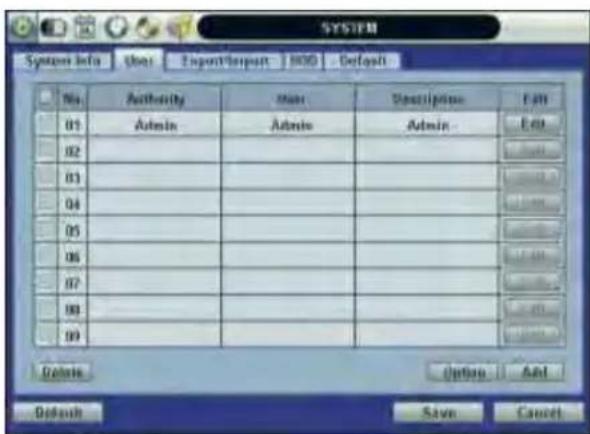
"Admin" with no factory default password is always the main user of the DVR. Admin should change the password of the DVR for extra security.
Admin can add new users with different permission levels in areas of Function, Menu Access, and Live & Playback.
[FUNCTION] consists of Search, PTZ, Backup, and Playback.
[MENU ACCESS] consists of System, Device, Record, Network, Backup, and Quick Setup.
[LIVE & PLAYBACK] consists of the different camera channels.
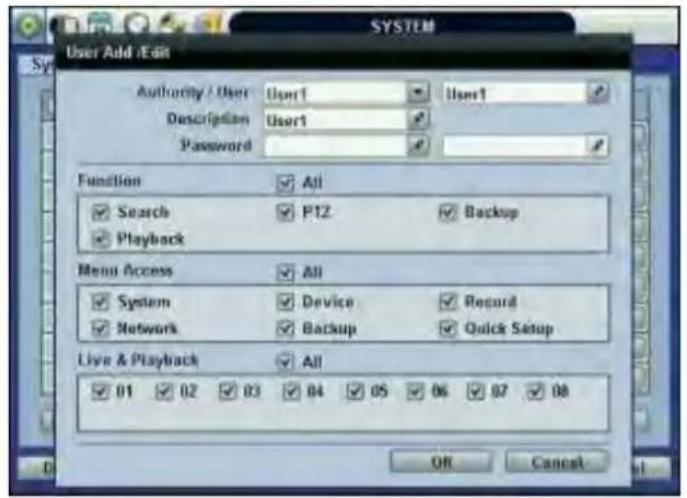
NOTE
Each DVR can have up to 9 users, including the Administrator.
The DVR can be set so user does not lock or require login.
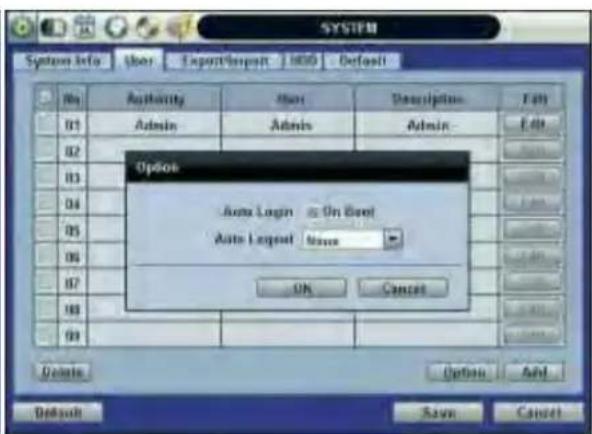
If user checks [ON BOOT], DVR will not ask for an ID and Password input when the system reboots.
If user sets a time for [AUTO LOGOUT], the DVR will automatically go to the live display mode. To control the DVR again, user has to input the ID and Password.
3.1.3 Export/Import
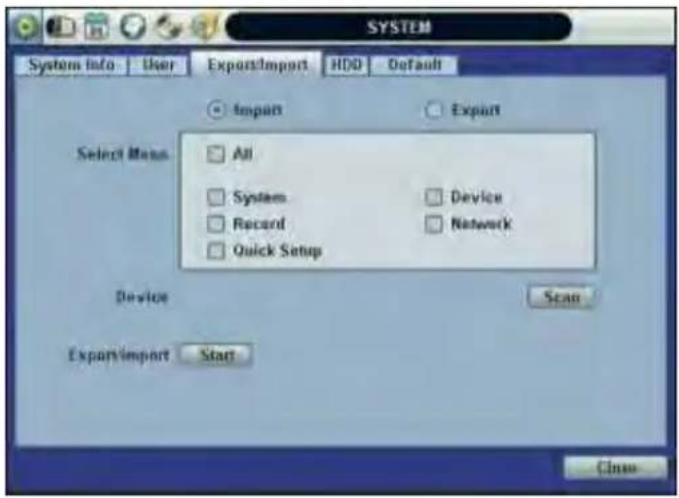
Users can copy and paste the system configuration values in this menu.
EXPORT enables user to copy the settings for the DVR to any USB memory devices.
IMPORT enables user to recall the settings saved from other systems using CD/DVD/USB memory devices. During the import process, make sure that the firmware version of source DVR is the same as the destination DVR.
Select [EXPORT] or [IMPORT] option. Select which system configuration values to export/import. Click [SCAN] to find a device connected to the system and click [START] to begin the process.
3.1.4 HDD
[HDD] tab displays the HDD information. SATA HDD is used for the VMAXFlex.
HDD Full When HDD is full, the DVR can overwrite old data or stop recording. Check [OVERWRITE] or [REC STOP].
HDD Clear: This button is used to format a new HDD or an existing HDD. Check the box next to the DVR you wish to format and click [HDD Clear] button.
The maximum number of built-in HDD units varies across DVR models.*
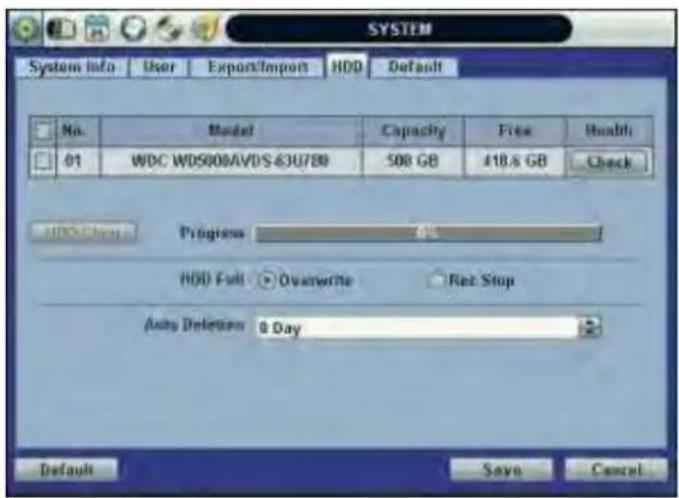
Health: Click the [CHECK] button below Health to view the [Health Check] window. [Health Check] displays the model, size, temperature, and lifetime of the HDD.
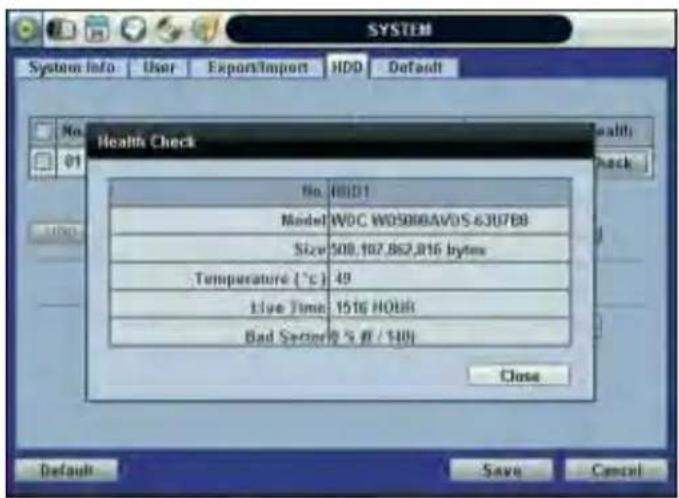
If system resources are busy with task, such as making a network connection or performing video playback during the format process, the format may fail. If the format fails, reboot the system resources and then try to format again.
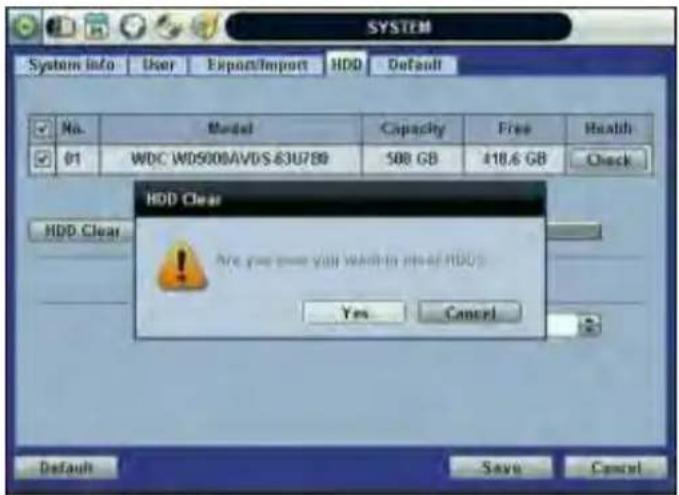
[Format Completed]
NOTE 1) Formatting may take around 2 minutes for 250GB, 3 minutes for 500GB, or 4 minutes for 750GB. 2) The system always reserves a maximum of 5GB of space in each built-in HDD to utilize The memory for archiving effectively.
3.1.5 Factory Default
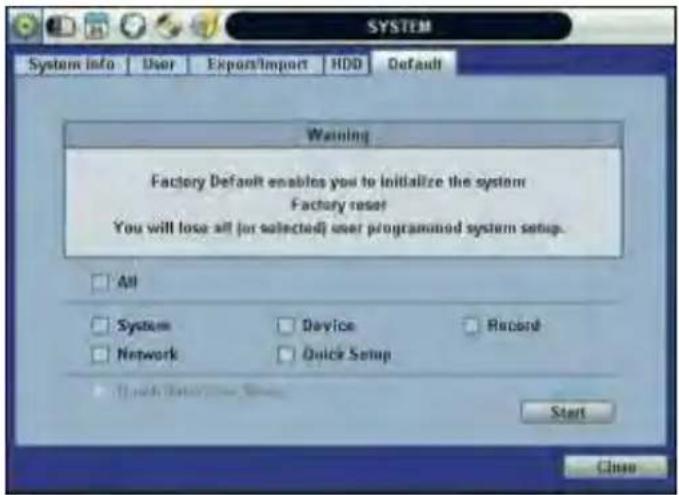
With an authorized password, users can get the system back to factory default configuration.
NOTE
Once the user clicks the [START] button and enters the admin password, all the configuration values made by the user will be deleted. The system settings will be sent to factory defaults, but the recorded video data will not be erased.
3.2 Device
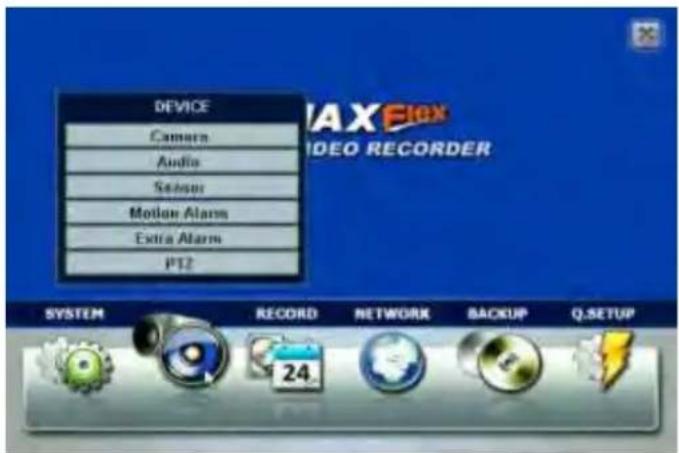
The [DEVICE] button consists of the following submenus: Camera, Audio, Sensor, Motion Alarm, Extra Alarm, and PTZ.
3.2.1 Camera
The [CAMERA] tab enables user to change camera settings. Users can change Title, Covert, Brightness, Contrast, Color, Sensitivity, Audio Mapping, and Motion Area Setting for each camera.
Covert: This function, also called "hidden camera," hides camera display and playback as if there were no camera recording. Covert applies to both Live and Playback View.
The default motion area setup is the entire camera area.
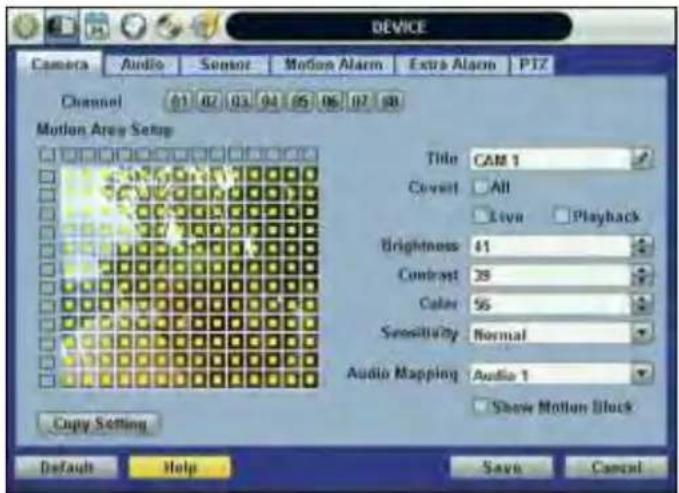
3.2.2 Audio
Users can select the audio input and output during live display and match the audio input to a designated channel. (Please refer to Section 4.3.1 Camera Record for more details.
User can raise or drop the volume by using the volume control panel.
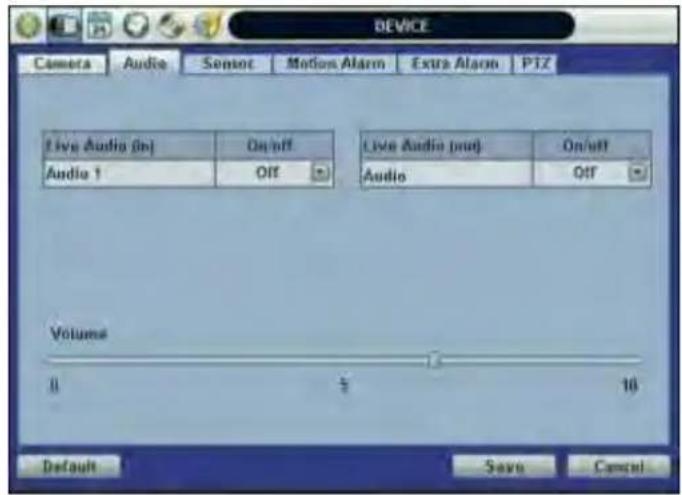
NOTE
User can listen to the audio on both live display and playback mode depending on the setting. In addition, user can listen to the audio for both live display and playback mode through the network using Advanced Client Software (ACS), Central Management System (CMS), and/or Internet Explorer web browser.
3.2.3 Sensor
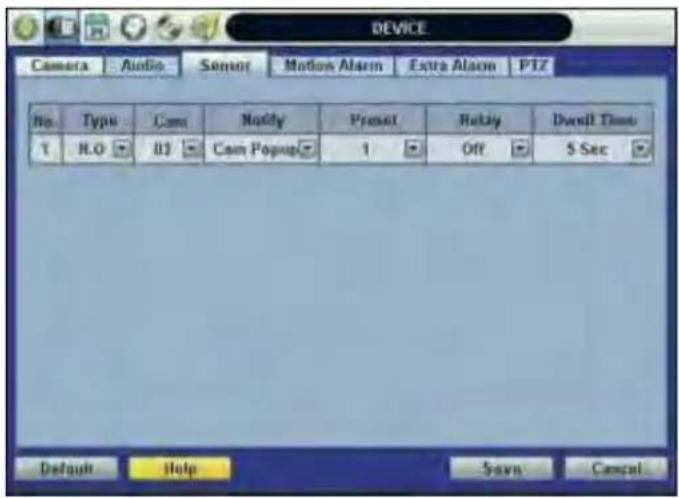
- Type: Select from [OFF], [N.O], and [N.C].
- Cam: Select the associated camera.
- Notify: Click the down arrow button below Notify to select how to be alerted when a sensor is activated or a motion is triggered. The system can generate a buzzer sound and/or popup the screen of the camera in alarm.
CAUTION Relay contact can handle up to 24V/1A of other devices. If connected to a circuit that is Over 24V/1A, the system may experience problems.
- Preset: User can select which camera to move to a specific preset position, when a sensor is triggered. User should setup the preset position. Look at PTZ Menu 4.2.6 for details. Multi-preset can be set with a single PTZ camera, so users can cover a multi-preset zone with a single PTZ camera.
- Relay: Turn on or turn off the Relay Output.
- Dwell Time: Set the time of recording when a sensor is activated. During the Dwell Time, cameras will record according to the frame and alarm (relay) output set. The recording stops, and alarm output turns off when the dwell time elapses.
NOTE [SENSOR] here means the alarm connected to the DVR, which is triggered by physical sensor input.
NOTE If the sensor does not operate properly, check the setting of the sensor type (N/O or N/C). The alarm might not function if the actual connecting sensor type and the sensor type in the system setting are inconsistent.
NOTE [CAMERA POP-UP] means that multi-screen live video mode will be switched automatically to single channel mode, when an alarm is triggered. This single channel video will be the channel triggered by alarm.
3.2.4 Motion Alarm
[MOTION ALARM] records only when DVR S/W triggers motion detection within the defined motion area.
If user sets Intensive to [ON], the DVR records at the maximum recording speed upon motion detection. Video will record for the selected post-alarm dwell time, and pre-alarm video will record for the specified time. The selected sensor-out channel sends an alarm signal.
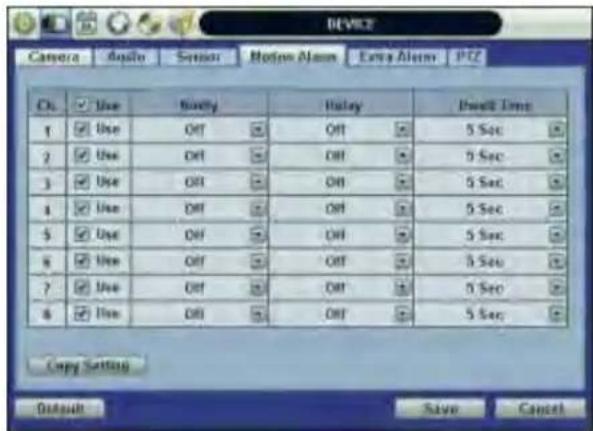
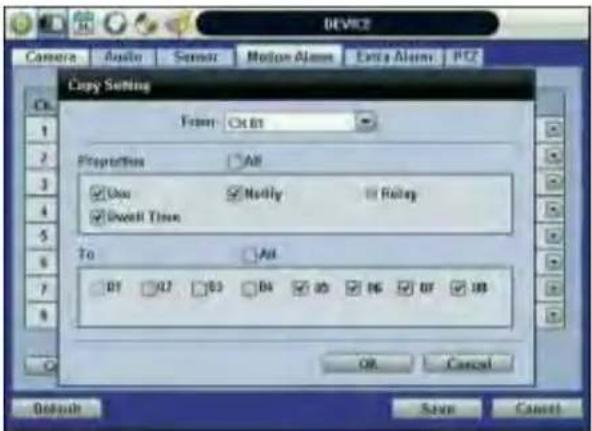
Copy Settings: Upon pressing [COPY SETTINGS] button, the [COPY SETTINGS] window will appear. Use this function to copy the settings of a single camera to the other cameras. Select the camera to copy from, the properties you would like to copy and the sensor numbers to apply the settings to. Click [OK] button.
NOTE
[Motion Alarm] here means alarm triggered by motion detection set by motion menu of DVR.
3.2.5 Extra Alarm
SMART is an alarm signal triggered when the HDD is about to be out of operation. SMART Alarm is created by the HDD and is captured by the DVR. If the HDD does not create this alarm, then the DVR cannot capture and output the signal.
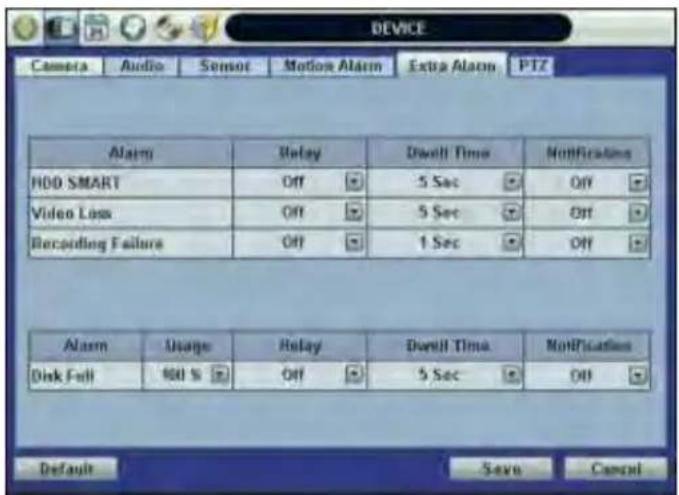
Users can set the percentage for HDD Usage. When Usage is set to 50%, DVR will notify the user with a camera popup or a beep sound when the HDD is 50% full.
3.2.6 PTZ
Full control of PTZ cameras is available in this menu.
Please refer to Section 3.3 PTZ Operation for details.
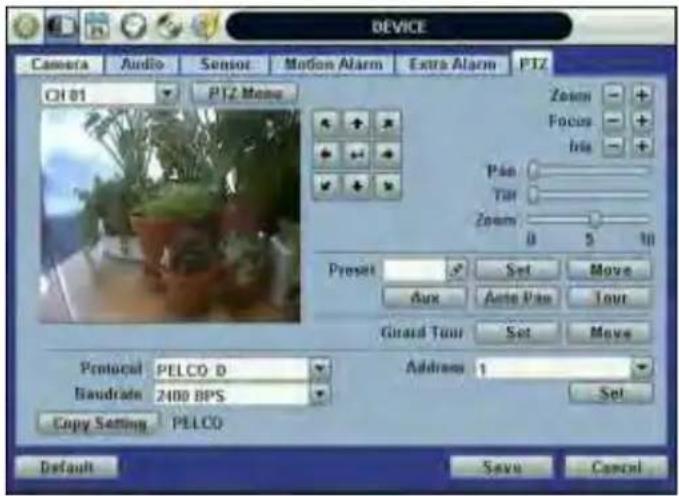
- PTZ Menu (Depending on the model of PTZ camera): If selected, the OSD menu of PTZ camera is imported and shown on the DVR monitor allowing the user to control the full PTZ settings.
- Preset: 1 to 255 Presets are supported.
- Protocol: Select the proper protocol of the connected PTZ camera.
- Address: Set the PTZ driver address of the connected camera.
- Baud rate: Select baud rate level from 1,200bps up to 115,200bps.
- Check the below items for proper PTZ operation.
1 Check if the protocol of the connected PTZ camera is correct.
2 Check if the communication settings, including the baud rate, of the connected PTZ camera are in accordance with the assigned value for that PTZ protocol.
3 Check if the address of the connected PTZ camera is correct.
4 Check if the wiring to the PTZ controllers is correct.
PROCEDURE
How to Setup PTZ Camera with Pelco-D Protocol (example)
1 Make sure the serial communication with the PTZ camera is through the RS-485 port.
2Select [PELCO-D] at the protocol list, and set the address.
3 Select Baud Rate to be the same as the PTZ camera.
4 Click the [SAVE] button to confirm this configuration.
3.3 Record
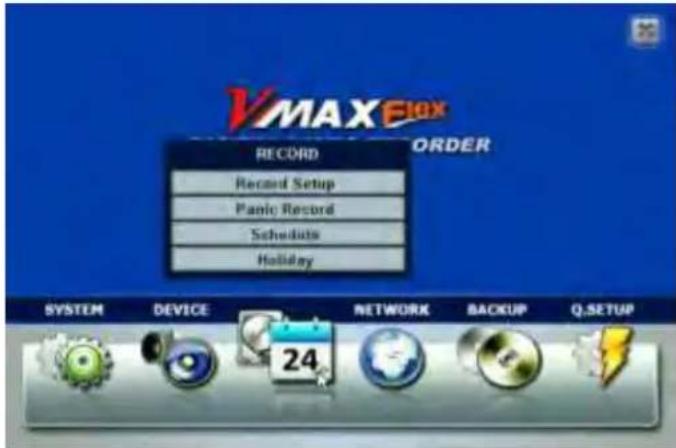
Configure various record settings such as Continuous, Event, and Panic for each individual camera channel in the Record Setup Menu. Network Stream settings are configured independently from the record settings in this menu as well. Therefore, the user can optimize the bandwidth used by configuring the resolution, FPS, and image quality separately.
There are four sub menus in the RECORD menu—Record Setup, Panic Record, Schedule, and Holiday.
3.3.1 Record Setup
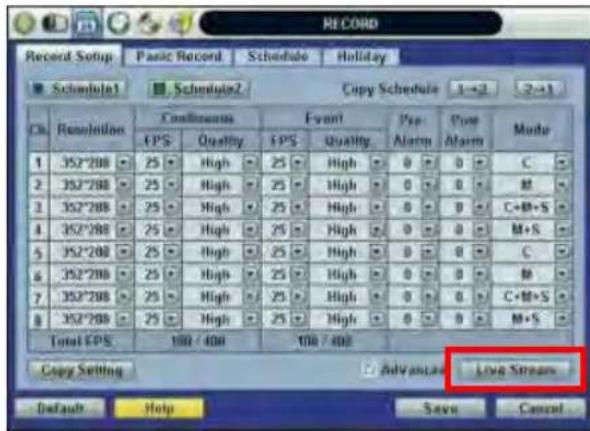
Configure record settings such as Resolution, FPS, Quality, Pre/Post Alarm, and Record Type for Normal Recording (Continuous) and Event Recording (Alarm or Motion). Configure for each channel or use the [COPY SETTINGS] button to apply the same settings to all cameras.
First, select the Record Mode for each camera channel.
Mode "C" (Continuous) disables Event Recording, and the DVR uses the settings for Continuous Recording.
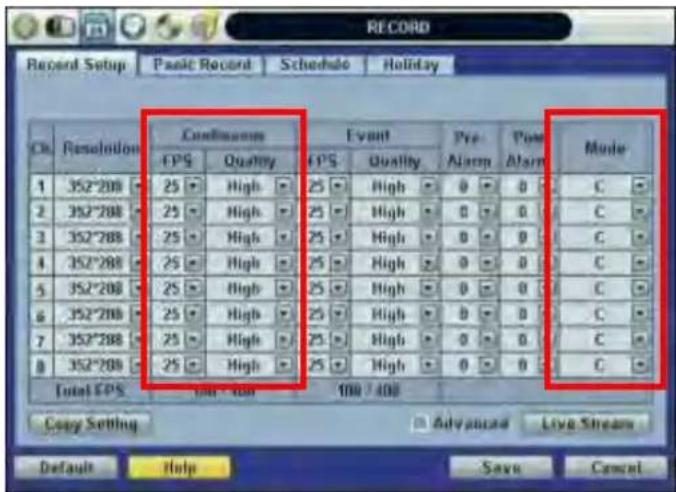
[Continuous Record Setting]
Mode "M" (Motion Detection) or "S" (Sensor/Alarm) uses the Event Recording Settings only.
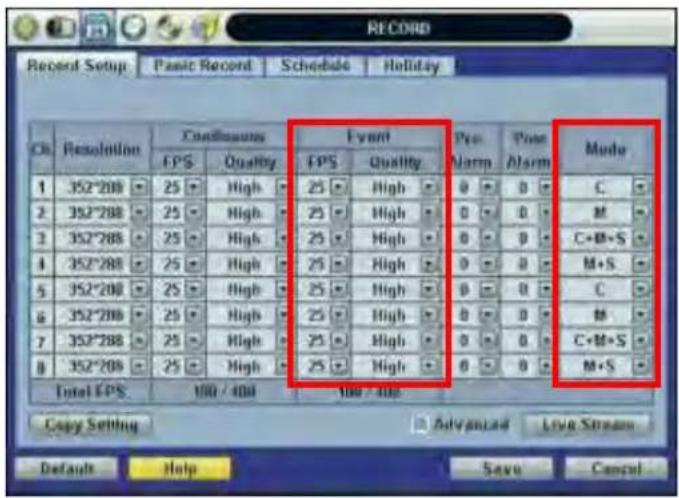
[Event Record Setting]
Mode "C+M" (Continuous + Motion), "C+S" (Continuous + Sensor), or "C+M+S" (Continuous + Motion + Sensor) simultaneously engages both Continuous and Event Recording Settings. DVR records with continuous record settings, but when there is an event (Motion, Sensor, and Alarm), the DVR records with the Event Record Settings.
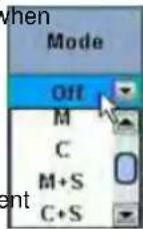
Select "Off" as the Mode to disable a specific camera from recording.
Select the record Resolution for each camera channel. The Resolution is applied to both Continuous and Even Record Settings.
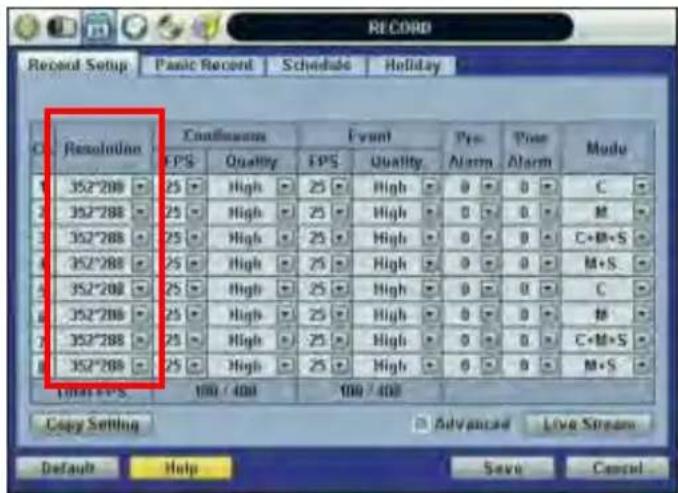
[Resolution Setup]
[Resolution] is the required number of horizontal and vertical pixels in a frame (horizontal pixels x vertical pixels). Select from the options: 352 × 240/288 , 704 × 240/288 , and 704 × 480/576 . Default is 352 × 240/288 . Picture quality gets better, as the resolution increases.
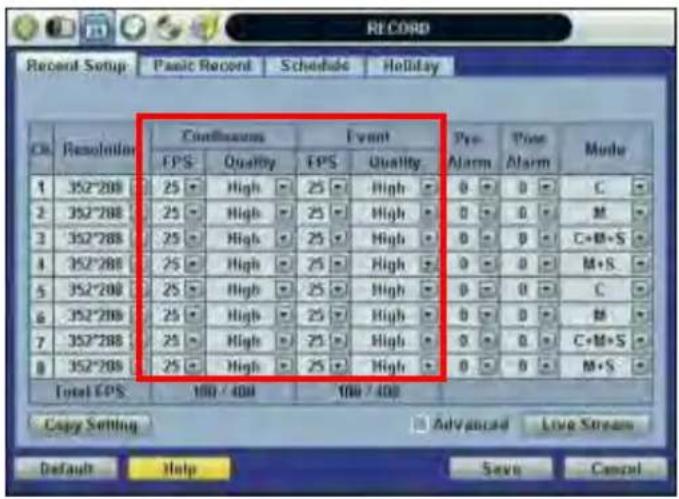
[FPS and Quality Setup]
Select the FPS (Frames Per Second) for each camera channel. The system automatically calculates [Remaining FPS] that users can use.
Quality influences the "byte size per image." When Quality is [Low], both image quality and size is lower. When Quality is [High], both image quality and size is higher. Consider the necessary recording period, the importance of each camera image, and the quality of the analog signal when setting the recording quality.
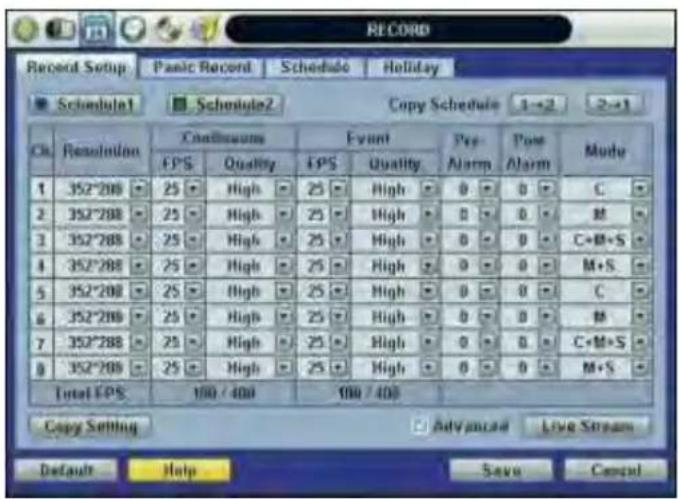
Check the [Advanced] box for a more detailed record setup for each camera channel. When the box is checked, [SCHEDULE 1] and [SCHEDULE 2] buttons appears.
The buttons are simply for two [Record Setup] pages. This enables user to set a combination of two schedules.
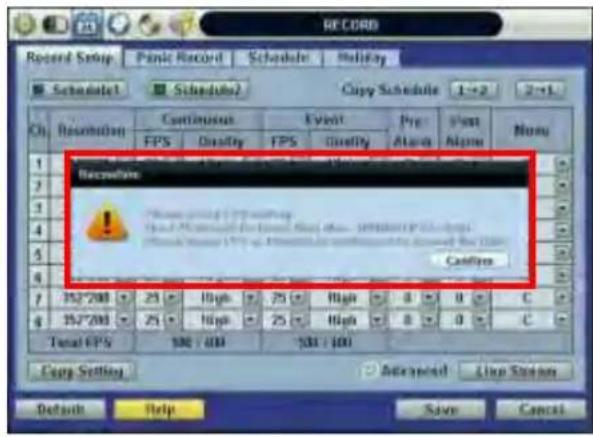
NOTE The maximum number of FPS is 480(400)FPS for the DVR. If the recording setting exceeds the limit while users setup the Resolution and FPS, the popup message "Please check FPS setting." will appear. Please setup the resolution and FPS again based on the "Remaining FPS".
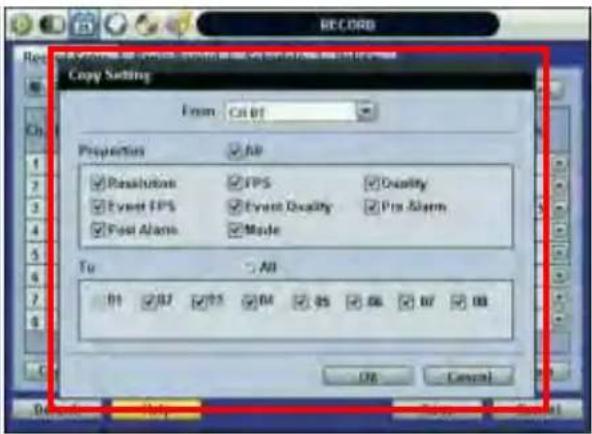
NOTE COPY SETTINGS
Upon pressing [COPY SETTINGS] button, [COPY SETTINGS] window will appear. In this window, select the camera the user wants to copy from. Select or deselect the properties—Resolution, FPS, Quality, Pre Alarm, Post Alarm, and Type—to copy. Select the camera channels to apply the settings to.
NOTE The storage capacity for the same image can be different depending on the resolution. 704x240/288 (2CIF) is twice the size of 352x240/288 (CIF) and takes twice the amount of storage capacity. When high resolution is selected for the same period, the high resolution takes up more storage, and its storage period can be shorter on the same hard disk capacity.
NOTE For the same resolution, frame per byte size will vary according to various reasons, such as the recorded picture quality setting, movement, complexity of the image, and noise. Therefore, the total recording period will differ greatly according to the specific image conditions.
- 352×240/288 : Standard Quality Standard 1\~5KB
- 704×240/288 : Standard Quality Standard 5\~10KB
- 704×480/576 : Standard Quality Standard 10\~20KB
Quality by 40(low), 60(standard), 80(high), and 100(highest) makes frame size different by around 30% in each level.
Configure the Network Stream Settings independently from the Record Settings.
Click [LIVE STREAM] button. [LIVE STREAM] window will now appear, as shown below.
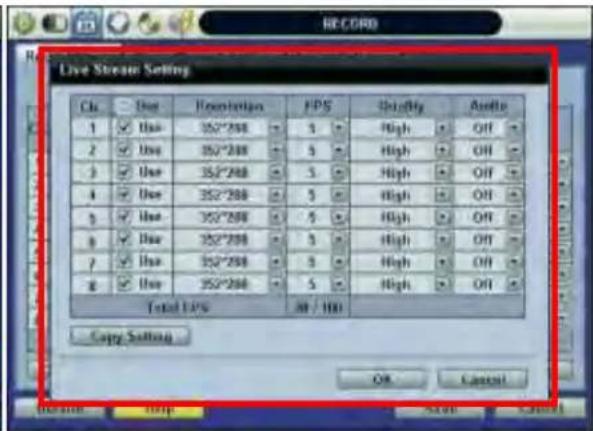
[LIVE STREAM] enables users to optimize data transmitted over the network by configuring the Resolution, FPS, and Quality without affecting the Record Settings.
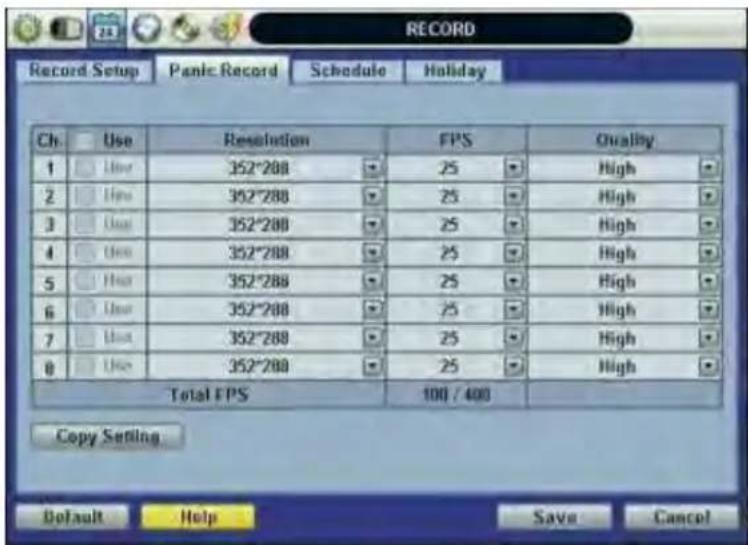
Users also have the option to configure Panic Record settings. The Panic Record Setting is intended to be used under emergency.
To use Panic Record, click the button from the control panel in live mode. For this record type, it is recommended to use maximum resolution, FPS, and quality.
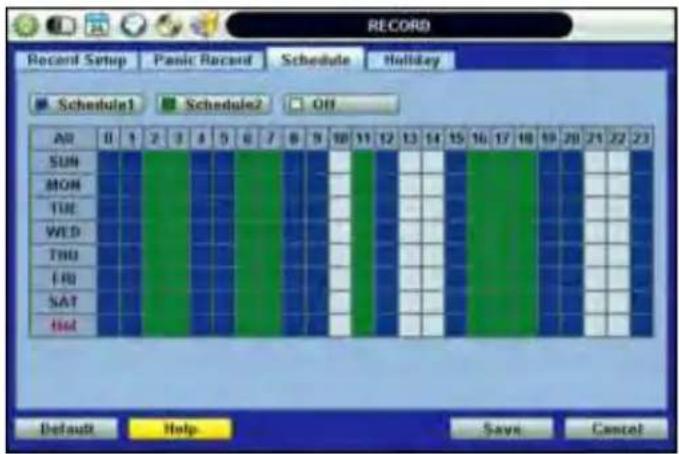
3.3.2 Schedule
Set the Recording Schedule. All Schedules is marked for recording as factory default. To cancel recording for a specific time, select [CLEAR] button and click or drag the specific date/time.
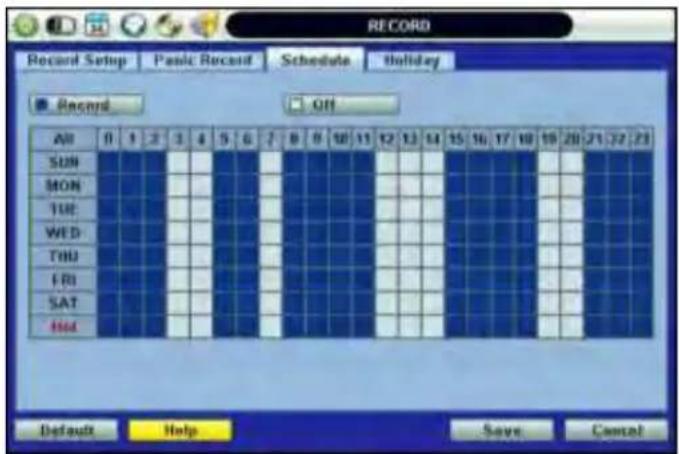
When Advanced Setting is selected, [SCHEDULE 1] and [SCHEDULE2] buttons will appear.
Click the SCHEDULE button you wish to follow in the recording schedule and click the specific dates and times.
3.3.3 Holiday
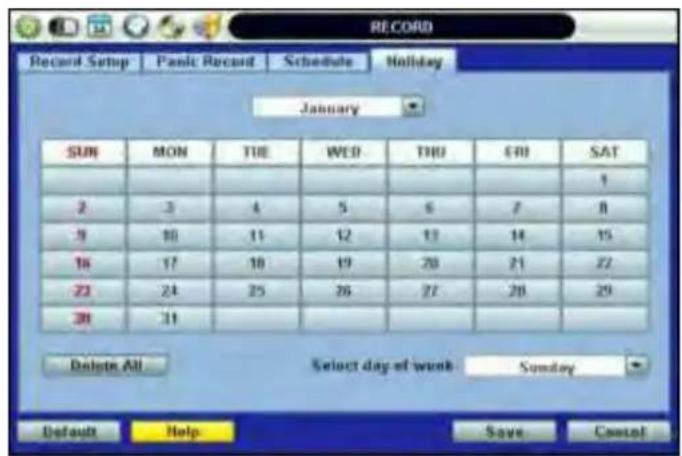
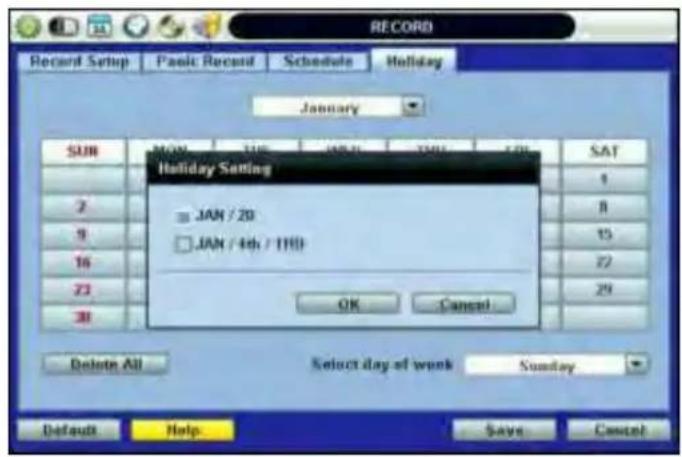
Click [HOLIDAY] tab to assign holidays. Assign a unique schedule for holidays in the [SCHEDULE] tab.
3.4 Network
3.4.1 Network
The DVR has a built-in web server.
Network Type: Select network type. Select LAN for fixed (Static) IP or DHCP for dynamic IP. If you select DHCP, click [IP DETECT] button to detect the network information.
Subnet Mask: Clarifies the subnet that the system belongs to. Standard address is [255.255.255.0]. For more information, please consult your network administrator or your internet service provider.
Gateway: The IP address of the network router or gateway server. The gateway is required in order to connect through the external router from the remote. For more information, please consult your network administrator or your internet provider.
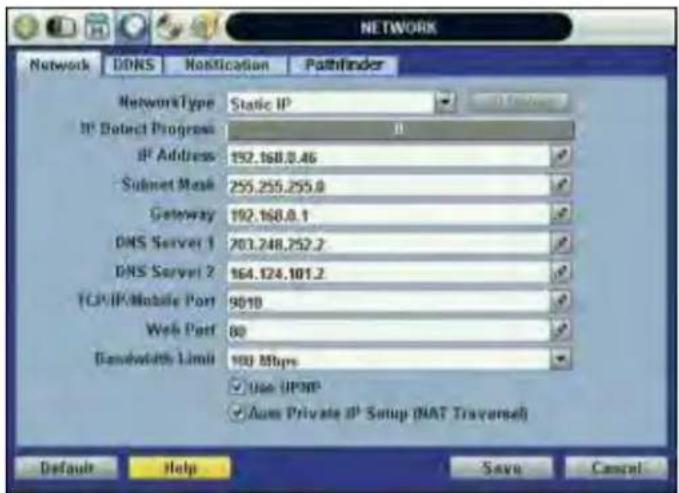
DNS Server: There are two DNS Server settings, one for the Preferred DNS and one for the Alternative DNS. To use the internet, enter the IP address of the Domain Name Server (DNS) Server. Your internet service provider provides this.
[TCP-IP/Mobile Port]: Default is 9010, when connecting locally or remotely using PC, MAC, or Mobile 3G or higher.
Web Port: Default is 80, when connecting using the Web Browser.
NOTE [TCP/IP Port/Mobile Port], and [Web Port] should all be different from each other.
UPnP (Universal Plug and Play): UPnP stands for Universal Plug and Play, which indicates a universal protocol for widespread plug-and-play devices to ease the network implementation. When the PC and DVR have the UPnP installed, the PC automatically begins to recognize the DVR in the same local area network. This way PC can directly connect to the DVR by clicking on the icon representing the DVR in [My Network Places] folder. The first five characters of the detected DVR filename is the firmware version.
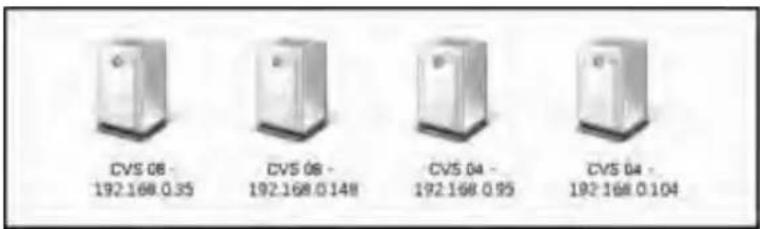
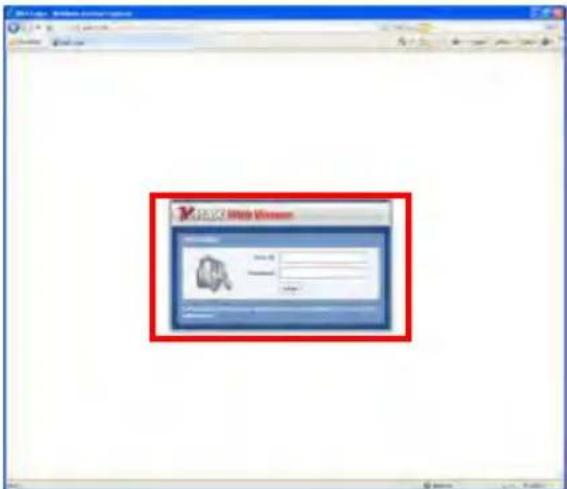
Double click on the desired icon. The icon will open an internet explorer browser that connects to the DVR as shown below. Please type in your User ID and Password and click [LOGIN] button. To connect to the DVR, click [CONNECT] button.
Default Login is "admin" and the password box blank.
![2013.05.19 - Movie Manager [音乐] Video Audio Audio Audio Audio Audio Audio Audio Audio Audio Audio Audio Audio Audio Audio Audio Audio Audio Audio Audio Audio Audio Audio Audio Audio Audio Audio Audio Audio Audio Audio Audio Audio Audio Audio Audio Audio Audio Audio Audio Audio Audio Audio Audio Audio Audio Audio Audio Audio Audio Audio Video](/content/2026/05/1058035/images/a318fc30192d34b5b2c3d8ccb5b086fc4158b909bced41a02febbdc191246f0c.jpg)
Auto Private IP Setup (NAT Traversal): The UPnP NAT Traversal function will help to setup the DVR to connect to the internet via a router.
When a PC connects to a DVR that is not in the same local area network, a real IPO Address and corresponding Port Number is required. However, if the DVR is behind a router, the PC and DVR will communicate through the router. To view images from the DVR on your PC, the router will need to setup Port Mapping (Port Forwarding).
When UPnP NAT Traversal Function is enabled, the DVR will set the router automatically. To do this, check the [AUTO IP (NAT TRAVERSAL)] box in the [UPnP] Menu.
NOTE
The system transfers video images at real-time over the network even during no record. For example, user can monitor live video even when motion has not occurred during motion detection mode.
NOTE
If there is no physical network connection, it may take a few minutes for the system to start working, since the network configuration in DHCP mode and the DHCP connection cannot be made.
NOTE
The maximum number of simultaneous connection is 10 users for each DVR using PC or Mac and 5 users using Mobile devices.
3.4.2 DDNS
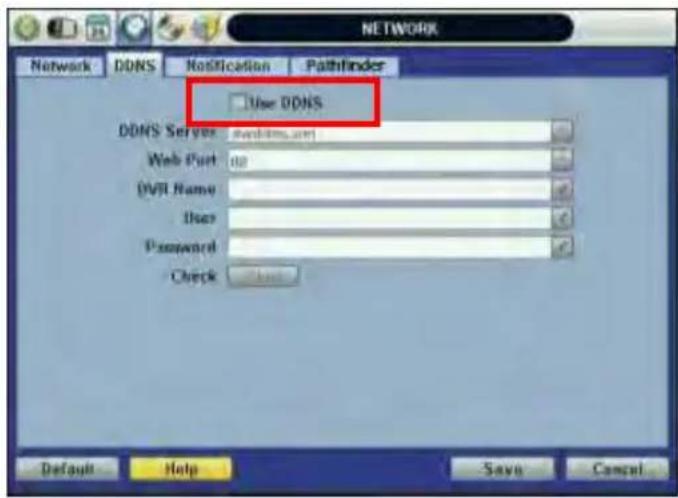
To use DDNS check [USE DDNS] box and input the following information.
[DDNS Server] is dwddns.Net or dyndns.com. ([dwddns.Net] is recommended)
[TCP/IP Port] Default is "80"
[DVR Name] can be the business name or location and press Start to make sure the DVR Name is available.
To connect using the web browser type http://dvrname.dwddns.net
[ID] and Password is required when using dyndns.com
NOTE
To use DDNS make sure the DNS 1 and 2 IP address is correct.
The standard DDNS domain name is [dwddns.net], and users can switch to [dyndns.com] in the drop-down list.

-Technical Tips-
- If your DVR is connected behind the router be sure to login to your router to open TCP/IP Port, Mobile Port, and Web Port and forward them to the DVR IP address.
- If the DNS Server is using an internal IP (192.168.0.2 or 10.10.10.2), the system can block DDNS registration information, due to router setting error or network security reasons in the DHCP setting. Therefore, we recommend the user to use a public DNS instead of an internal IP.
- Ask your Internet Service Provider to get DNS Server IP address. -OR-
- Pick and use one of the following DNS Server from the following list: http://www.dnsserverlist.org. -OR-
- Try one of the following Public DNS Server IP:
168.126.63.1
168.126.63.2
203.248.2
164.124.101.2 - Go to NETWORK > DDNS > TCP/IP Port.
- You can use one of the two ports 80 or 8245. Default is 80.
NOTE It is recommended to reboot the system after setting. Enter your DVR NAME and click [CHECK] button to check out if the DVR name is duplicated or available.
3.4.3 Notification
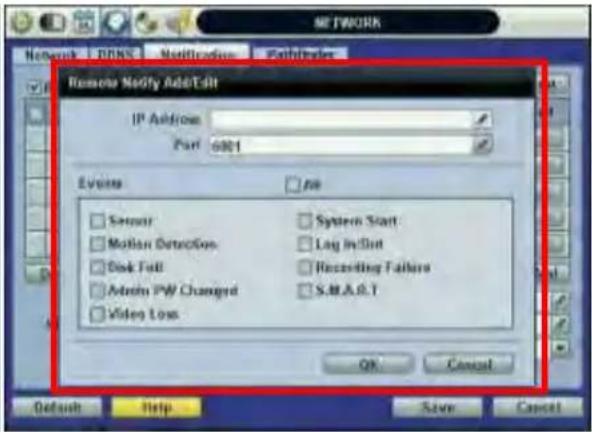
Remote Notify: The system can notify an alarm message to the IP address of ACS (Advanced Client Software) over the network.
Choose from a selection of different kinds of alarms by pressing [ADD] button: Sensor, Motion Detection, Disk Full, Admin PW Changed, S.M.A.R.T, System Start, Log In/Out, Recording Failure, and Video Loss.
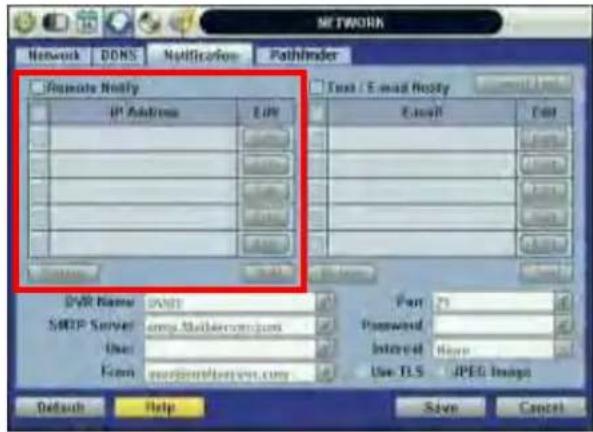
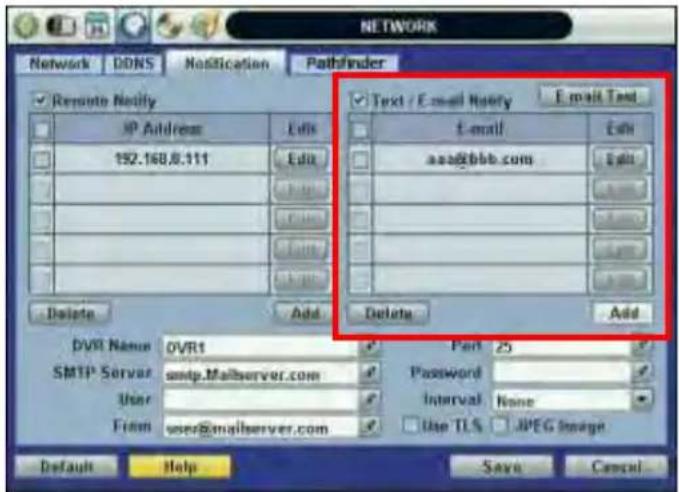
E-Mail Notify: The system can send notification to an Email address, Advanced Client Software, or Central Management Software over the network.
Choose from a selection of different kinds of alarms by pressing [ADD] button. Sensor, Motion Detection, Disk Full, Admin PW Changed, Video Loss, and Power On/Off. Can generate alarms by checking [USE TLS], users can use a public email address such as Yahoo, Google, Hotmail accounts. Type DVR name in the [DVR Name] box. The DVR Name will appear in the email so that users can recognize which DVR sent the e-mail.
NOTE
Configuration's first priority is always given to [RECORD SETUP] of the [RECORD] menu. Thus, [RECORD SETUP] needs to be set, for the system to send alarm message or email notifications.
If user sets "Continuous" for [SCHEDULE] of the [RECORD] menu and checks the [ALL] box in [NOTIFICATION], the system will not send alarm messages. [SCHEDULE] has to be set as "C+M", "M+S", or C+M+S", for [NOTIFICATION] to work properly.
3.5 Backup
3.5.1 Manual Backup
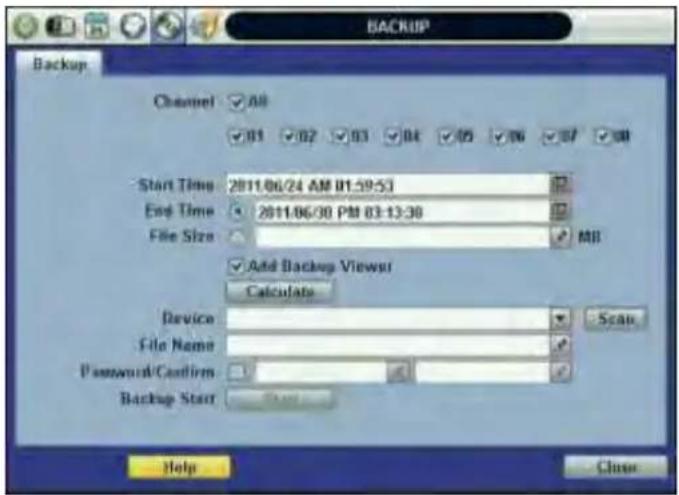
Users can archive a video clip recorded for a certain period on a selected channel or channels as shown below.
Connect an appropriate USB flash drive and press [SCAN] button to get the system to recognize the device before archiving. Necessary file size will be shown before burning.
Users can check the [AUTO PLAYER] box to include the viewer file. This function allows the user to play the video clip without having to install the software on the computer. Otherwise, the file backup format will be in the Manufacturer's Proprietary Format (PSF). ACS (Advance Client Software) Backup Player is required.
NOTE
For proper backup, backup device shall be a well-known major formatted by FAT/FAT32.
CAUTION
DVD-R/+R is supported, but DVD-RW/+RW are generally not supported. Check the compatible media list provided by ODD driver manufacturer.
NOTE
Click the [CALCULATE] button to learn the backup file size before executing backup.
NOTE
Easily backup video with [QUICK BACKUP] during video playback. Refer to section 3.5 for details.
NOTE
Rename the backup file name and set a password before starting backup process for security purposes. User will need to input the password to playback the file.
3.5.2 ACS (Advance Client Software) Backup Player
If [AUTO PLAYER] is checked, there will be a single file after archiving.
Double-click the backup file to open the video data file. If the backup file does not have Auto Player, double-click [BackupPlayer.exe] file in the folder titled with the date to open the video data file in PSF format.
To play video, user can drag the PSF file and drop it in an empty screen of Backup Player as shown in the picture below. Alternatively, click the [OPEN] button located on the top of the Backup Player.
If the user inserts USB memory stick or CD media that has the Video data file, the Backup Player will automatically begin playing the files, starting with the first data file located in the device.
![V3LAX File Edit View Tools Help 1 4 5 10 V3_01 V3_02 V3_03 V3_04 V3_05 V3_06 V3_07 V3_08 V3_09 V3_10 V3_11 V3_12 V3_13 V3_14 V3_15 V3_16 V3_17 V3_18 V3_19 V3_20 V3_21 V3_22 V3_23 V3_24 V3_25 V3_26 V3_27 V3_28 V3_29 V3_30 V3_31 V3_32 V3_33 V3_34 V3_35 V3_36 V3_37 V3_38 V3_39 V3_40 V3_41 V3_42 V3_43 V3_44 V3_45 V3_46 V3_47 V3_48 V3_49 V3_50 V3_51 V3_52 V3_53 V3_54 V3_55 V3_56 V3_57 V3_58 V3_59 V3_60 V3_61 V3_62 V3_63 V3_64 V3_65 V3_66 V3_67 V3_68 V3_69 V3_70 V3_71 V3_72 V3_73 V3_74 V3_75 V3_76 V3_77 V3_78 V3_79 V3_80 V3_81 V3_82 V3_83 V3_84 V3_85 V3_86 V3_87 V3_88 V3_89 V3_90 V3_91 V3_92 V3_93 V3_94 V3_95 V3_96 V3_97 V3_98 V3_99 V4:00:01:01:01:01:01:01:01:01:01:01:01:01:01:01:01:01:01:01:01:01:01:01:01:01:01:01:01:01:01:01:01:01:01:01: [ V1:26.09 02:27] [ A ] [ V2:45.51 ]](/content/2026/05/1058035/images/665e24c9b9a82b1a26a7d9ec83d8fce56f161f3d58243d064b050a06b875c707.jpg)
Use the icons located on top of the player window to capture and print an image, zoom out, make an AF file format, open a file, or change the number of displays on the screen.
NOTE
User can play the backup video clips with Advanced Client Software or Central Management System.
3.6 Quick Setup
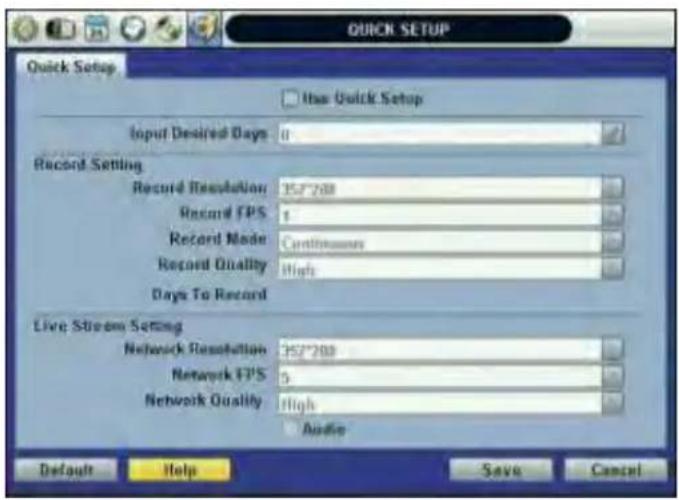
[QUICK SETUP] enables easy setup for recording resolution, recording speed by frame, recording mode, and recording periods.
The system will follow the configurations for [QUICK SETUP] regardless of configurations set in other menus.
Do not check [USE QUICK STEUP], if you want to use full system configuration defined in other menus.
NOTE
Deactivate [QUICK SETUP] to use the configuration from the other menus.
4 WEB SURVEILLANCE
The DVR has a built-in web server.
With an ordinary web-browser over the network, users can stay connected to the system for monitoring, playback, or remote configuration without an Advanced Client Software (ACS).
4.1 Web Login
Indicate the Web Port in the Router; then, input the correct IP address into the web browser. Download Active-X file if needed. The login page will be visible after you download Active-X.
Default User ID is "admin", and there is no default password.
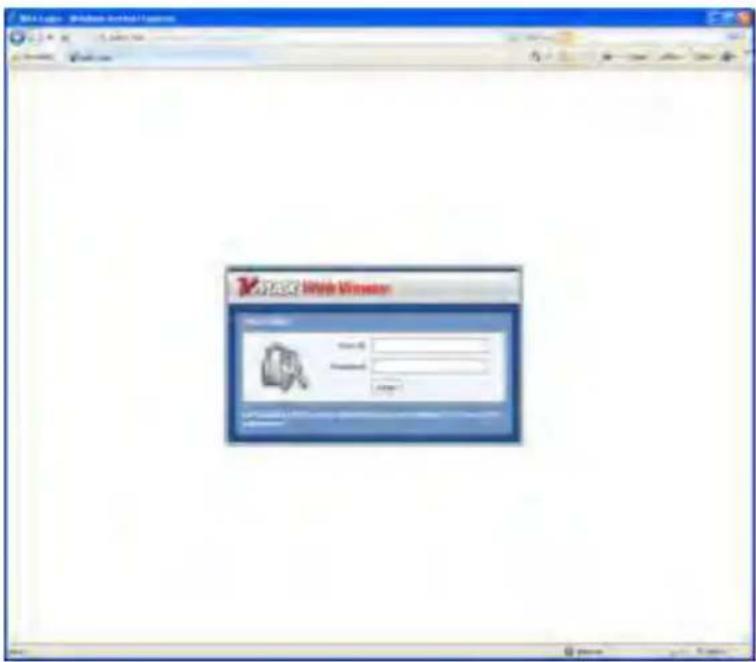
4.2 Web Configuration
| Main Menu | Sub Menu |
| SMART SETUP | SMART SETUP |
| NETWORK | NETWORK |
| DDNS | |
| ACCESS CONTROL | |
| EVENT NOTIFY | SENSOR |
| MOTION ALARM | |
| SYSTEM ALARM | |
| NOTIFICATION | |
| BACKUP | BACKUP |
| QUICK SETUP | DDNS |
| SYSTEM | SYSTEM INFO |
| USER | |
| HDD | |
| DEFAULT |
After logging in with the correct User ID and password, user can make various configuration changes in the Web Configuration window seen below. The Web Configuration Menu is only available to the administrator (admin) account.
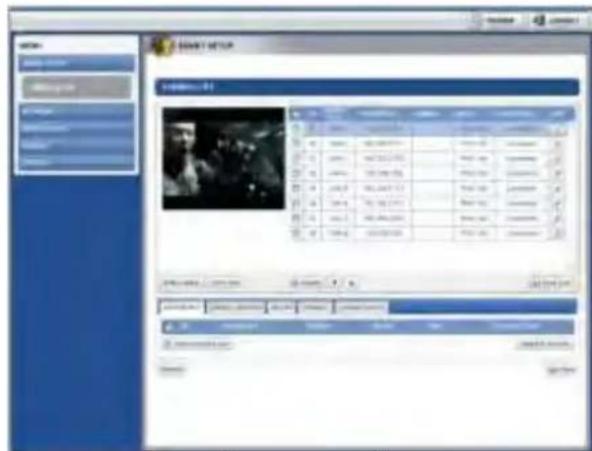
[SMART SETUP]
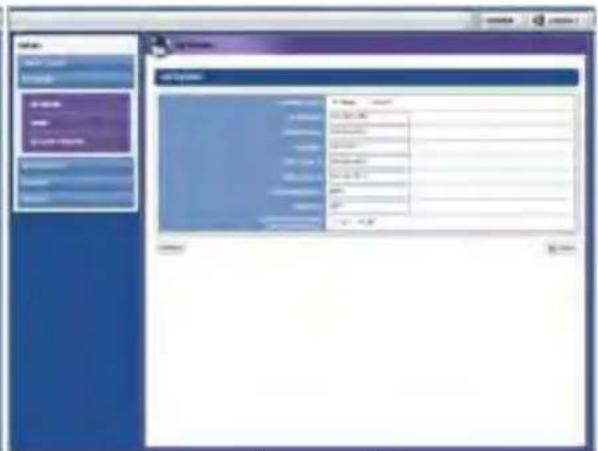
[NETWORK]
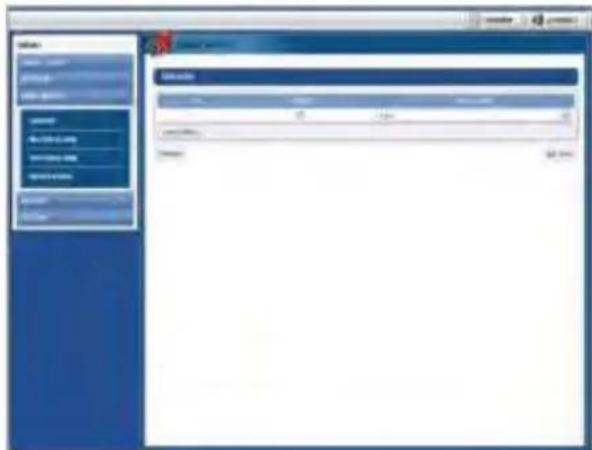
[EVENT NOTIFY]
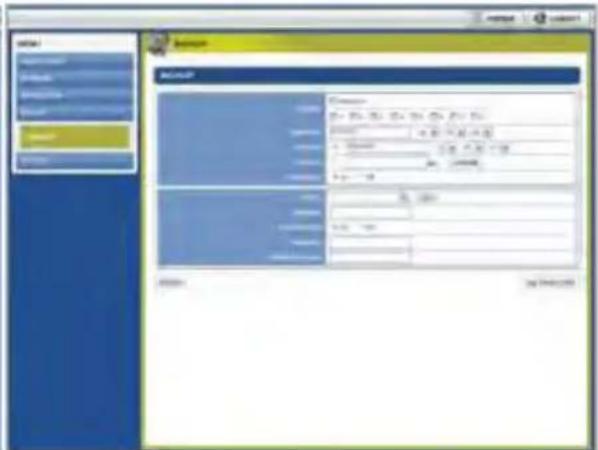
[BACKUP]
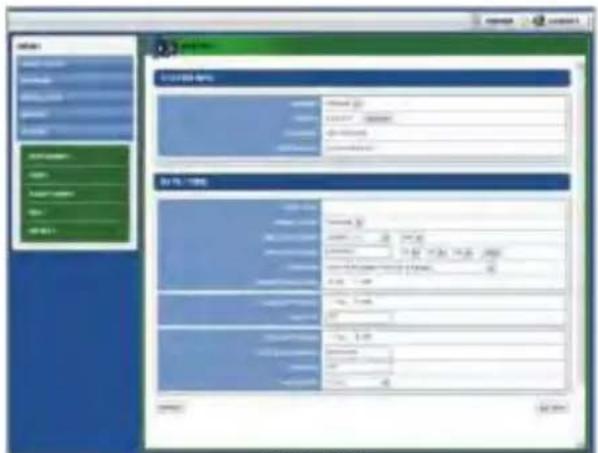
[SYSTEM]
NOTE
This DVR has its own built-in web server.
This Web CGI Screen is supported directly from the built-in web server of the DVR, regardless of Internet connection.
NOTE
[SYSTEM REBOOT] enables you to reboot the system without any changes to the setup.
When the network is disconnected due to abnormal operation of the system, user can use this function and try to reconnect. However, the IP number assigned to the system can change due to the DHCP mode..
4.3 Web Monitoring
The Active-X file from the DVR has to be installed to the workstation PC to monitor live video.
Click [INSTALL] button.
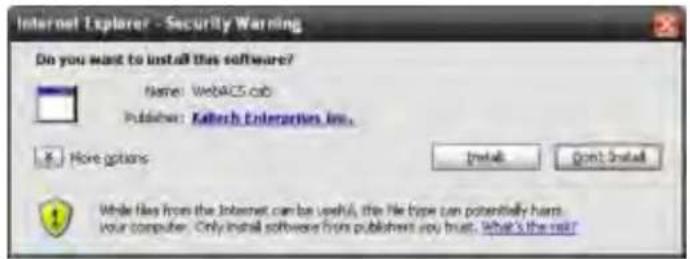
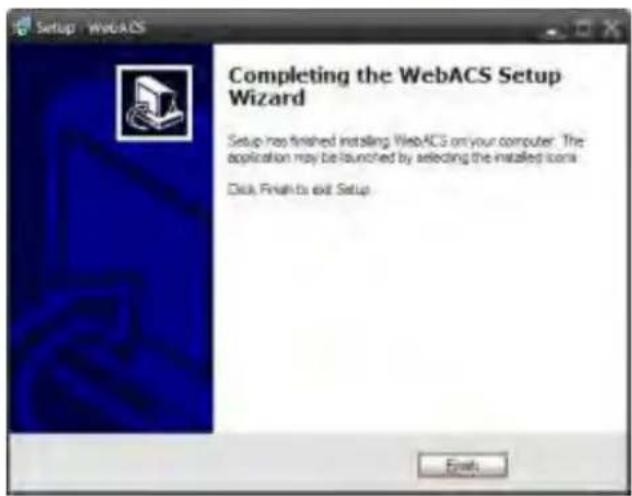
Click [NEXT] button to continue setup. When setup is complete, click [FINISH] button.
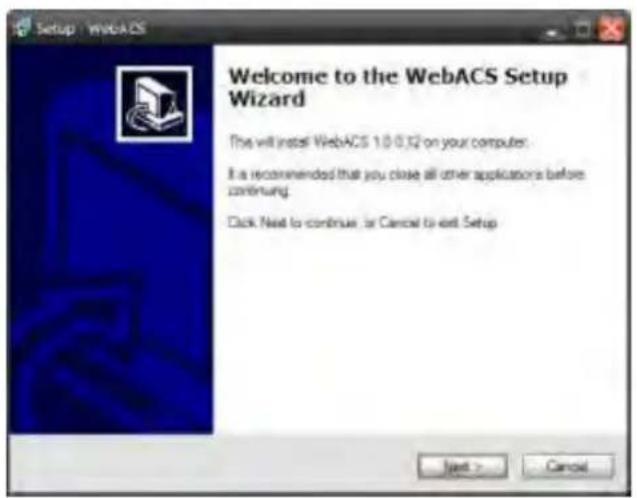
Click [CONNECT] button located on the top left corner to connect to the DVR.
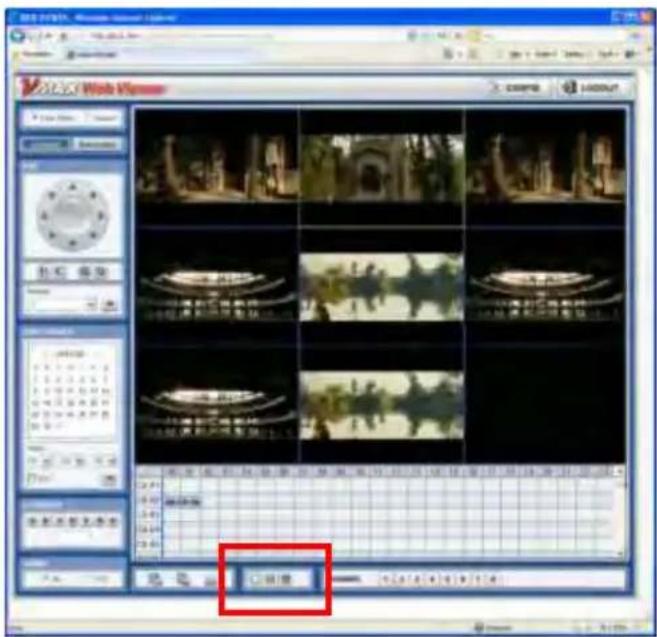
Monitor live video in 1, 4 screen modes. To view a single channel in full-screen, position the mouse cursor on the live video screen you wish to maximize and double-click on the left mouse button.
The image resolution of the live view in the web browser is transferred from the DVR.
(Live image over the web browser depends on the [LIVE STREAM] Value on record mode of DVR.)
Refer to 4.3.1 Record Setup for details.
NOTE
If IE Web Browser does not properly display live image due to network traffic jam or narrow bandwidth, close and re-open the IE Web Browser.
4.4 Web Playback
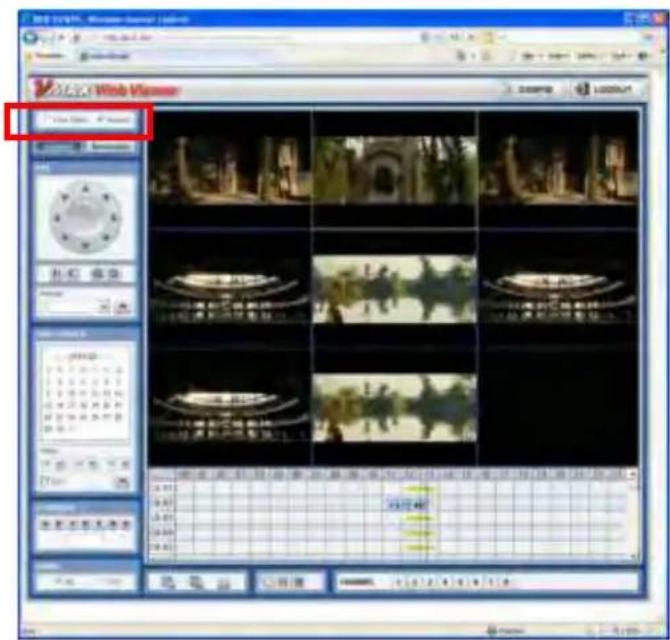
Remotely playback the DVR images by marking the [SEARCH] box on the top left corner of the Web Browser. Click [CONNECT] button to connect to the DVR.
Time Search: Select the date and time on Time Search, located at the center left of the window. Click button.
Playback: Play/Pause is toggled, and playback speed is displayed on the white box.
DST: Check [DST] box to play overlapped videos during DST (Daylight Saving Time) period. Refer to 3.7 DST Setting and Image Playback for details.
Search Bar: Move the blue vertical line to the time that user wants to search. The colors of the time bar are different according to the type of recording mode. Refer to 4.3.2 for details on the different modes and colors.
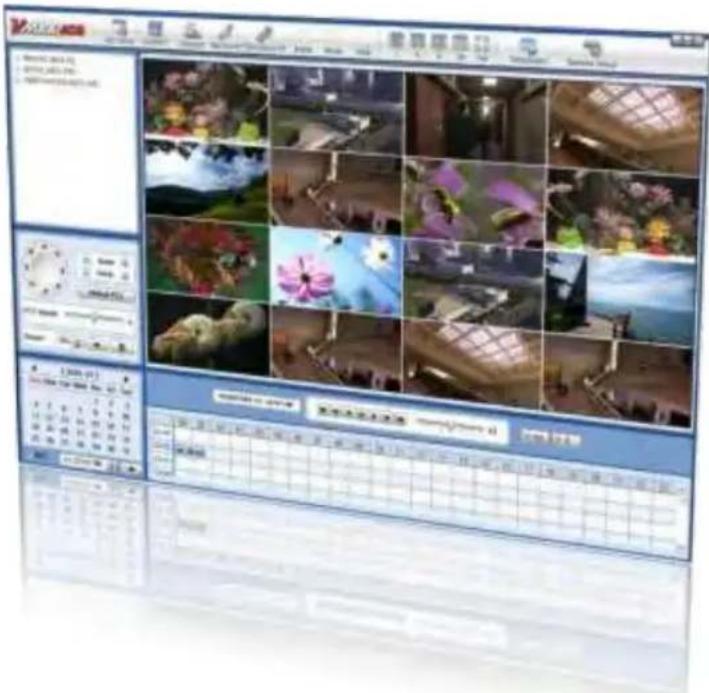
Chapter 2
ACS CLIENT SOFTWARE USER MANUAL
5 ACS (ADVANCE CLIENT SOFTWARE) USER GUIDE
5.1 Recommended PC Requirements
Recommended PC Requirements
| OS | Windows XP, Vista, 7 |
| CPU | Pentium Dual Core 1.8GHz or higher |
| VGA | 1024* 768, 256MB Supporting DirectX |
| RAM | 1GB |
| HDD | 20MB for installation, 10GB for Remote Backup |
Minimum PC Requirement
| OS | Windows XP, Vista |
| CPU | Pentium 4, 2GHz |
| VGA | 1024* 768, 64MB 24Bit Color Graphic Card |
| RAM | 1GB |
| HDD | 20MB Free Space |
5.2 Install
Run [Advanced Client Software Setup.exe] on CD. Then, a Setup Window will appear as below.
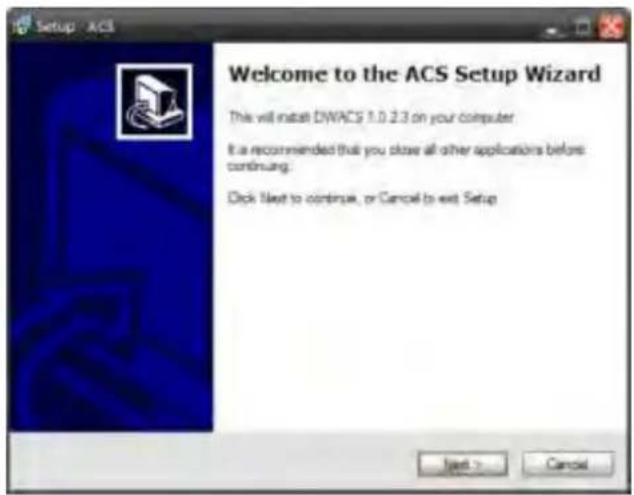
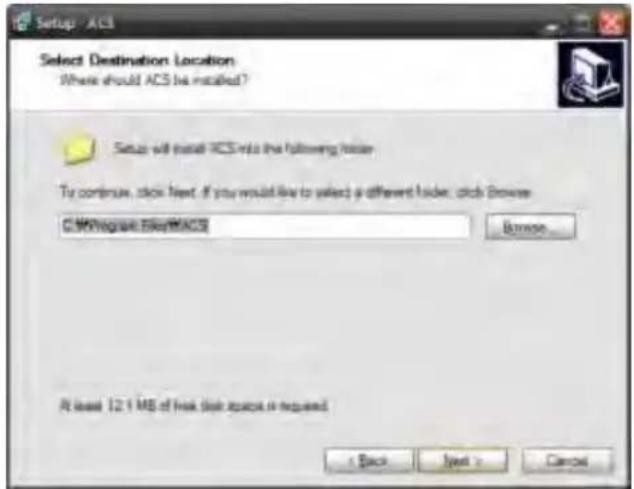
Press [BROWSE...] button if you want to install the program into a different directory. Click [NEXT] button.
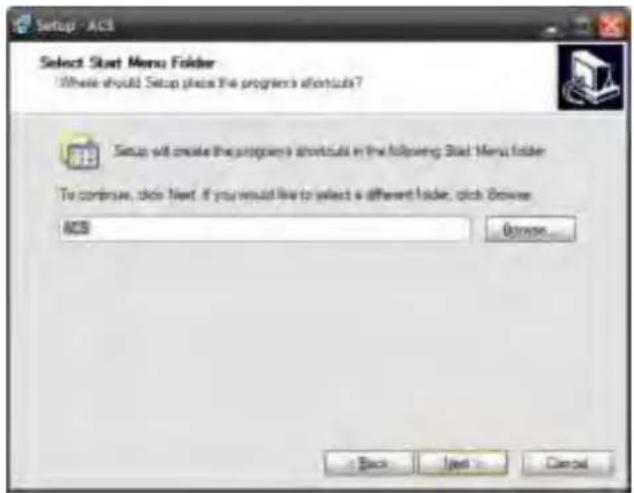
Press [BROWSE...] button if you want to place the shortcuts into a different folder. Click [NEXT] button.
Press the [NEXT] button to move to the next screen. To create a desktop icon, check [CREATE A DESKTOP ICON] box.
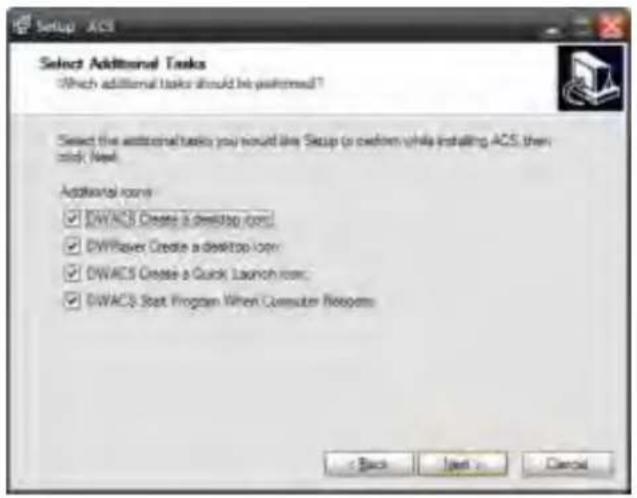
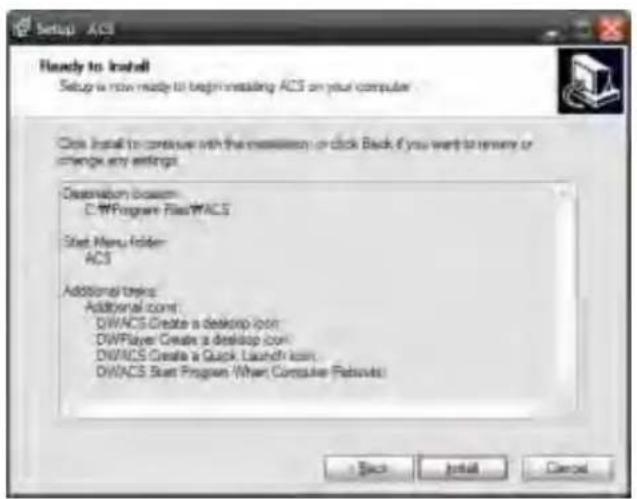
Press the [INSTALL] button to move to the next screen and begin installation.
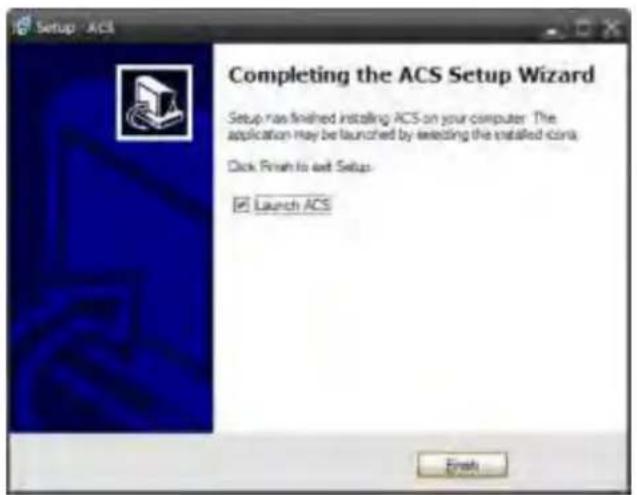
When the installation is complete, the following message appears.
5.3 Uninstall
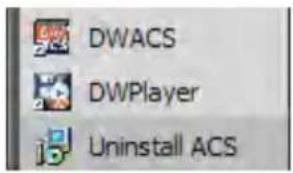
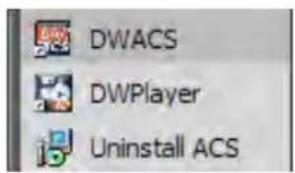
To uninstall ACS, press [Uninstall ACS] from Start Menu.
Account Manager will appear in Windows7 or Windows Vista.
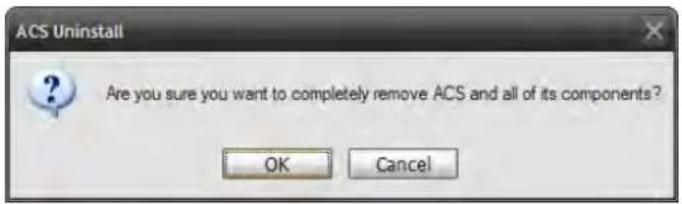
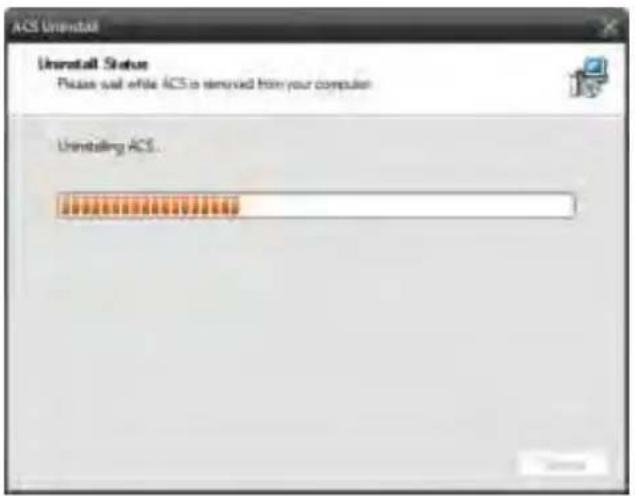
Press [YES] to begin uninstalling. The window below appears.
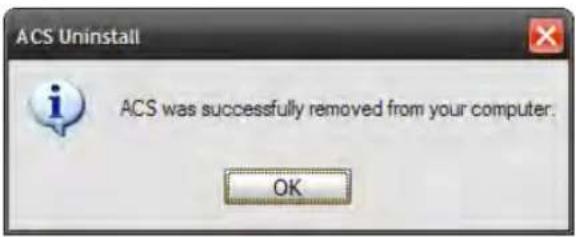
When the un-installation is complete, the following message appears.
5.4 Basic Operation
Click on

icon on Desktop or click on [ACS] link in the start menu.
5.4.1 Login
Administrator is the highest level of authority for the operation of ACS (Advanced Client Software).
Default ID and Password for Administrator
- User ID: Administrator
- Password box is blank
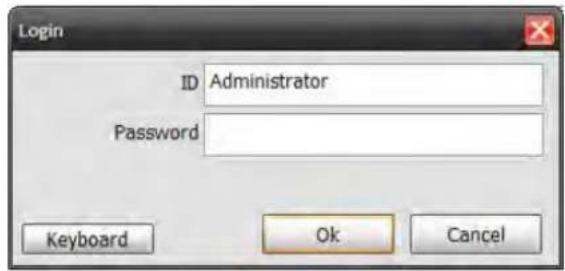
5.4.2 Screen Layout
![VOLAWAOS ACB Setup Correct Correct Discount Discount AI Image Movie Font 1 4 5 10 Rd Time/Event Remote Setup ① + 200[192.168.0.25] + QA[192.168.0.203] + SoftZoom[192.168.0.158] ② Zoom Focus Virtual PTZ PTZ Speed Penset 255 ③ 2010/07/04 12:16:43 PM Turn Allot Top Word Thu Fri Sat 4 5 6 7 8 9 10 11 12 13 14 15 16 17 18 19 20 21 22 23 24 25 26 27 28 29 30 31 DAT 11:22:22 PM ④ ⑤ ⑥ ⑦](/content/2026/05/1058035/images/65ad2c4e77e0909b66def8f6d371f1a23aa3fcb738b35fc23c85918000359251.jpg)
| No. | Item | Description |
| 1 | ACS Toolbar | ACS Setting, Live Mode, Search, Disconnect, Image Save, Video Save, Screen Mode Remote Setup |
| 2 | Sites (DVRs) List Panel | Registered and configured DVR Site list |
| 3 | PTZ Panel | PTZ Camera Control in Live Mode |
| 4 | Calendar Panel | Search by Time and Date |
| 5 | Search Panel | Search mode displays the Recorded Information.Control the speed of Playback and Audio. |
| 6 | Display Panel | Transmitted camera images display. |
| 7 | Event List Panel | Event List Panel Update |
5.4.3 Tool Bar

| No. | Icon | Description |
| 1 | ACS Setup | Option Setup for ACS (Advanced Client Software) |
| 2 | Live | Connect and Display Live channels from selected DVR |
| 3 | Search | Connect and Display Recorded channels from selected DVR |
| 4 | Disconnect | Disconnect a Selected Channel |
| 5 | Disconnect All | Disconnect All Channels |
| 6 | Image | Save the Selected Image |
| 7 | Movie | Save the Selected Video in ASF format. |
| 8 | Print Still image | |
| 9 | Split | Channel Display Mode 1 – 4 – 9 - 16 |
| 10 | Full | Full-Screen Mode (Will hide the tool bar) |
| 11 | Time/Event | Toggle Between Search Panel and Event List Panel |
| 12 | Remote Setup | DVR Remote configuration |
| 13 | Window Control | Minimize, Maximize, & Exit ACS (Advanced Client Software) |
5.4.4 Site List Panel
The Site List Panel of registered DVR. To make a connection select the DVR site and Drag & Drop the site or camera to the camera display panel, select Live or Search mode.
![VMAX ACS ACS Setup Live Connect Search Connect Disconnect Disconnect AI [01] [02] Drag & Drop Live-Search [03] [06] [09] [10]](/content/2026/05/1058035/images/a3dfc06ac3682c5ec8296b8359a5a2bfc9b58e6c60cef1a82f6ddfc9917f6bbd.jpg)
5.4.5 PTZ Control Panel
PTZ Camera Control in Live Mode
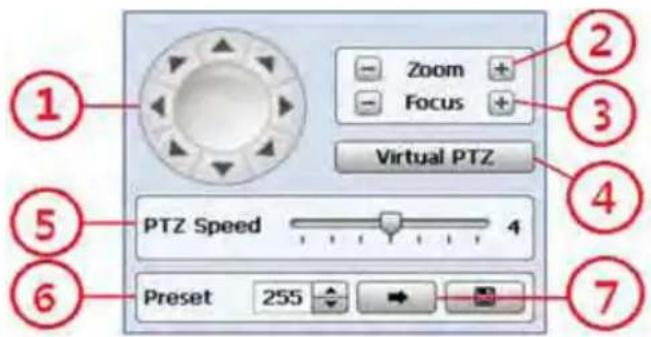
| No. | Button | Description |
| 1 | Directional Arrows | Move PTZ Cameras in 8 directions. |
| 2 | ZOOM | Zoom In (+) & Zoom Out (-) |
| 3 | FOCUS | Focus In (+) & Focus Out (-) |
| 4 | Virtual PTZ | Click button to use mouse to control PTZ cameras. |
| 5 | PTZ Speed | The control bar can operate PTZ moving speed. |
| 6 | PRESET | Select Preset |
| 7 | Go to the Preset location. |
5.4.6 Calendar Panel
Calendar Panel is only available in search mode.
![[ 2010-08 ] Sun Mon Tue Wed Thu Fri Sat 1 2 3 4 5 6 7 8 9 10 11 12 13 14 15 16 17 18 19 20 21 22 23 24 25 26 27 28 29 30 31 DST PM 12:03:12](/content/2026/05/1058035/images/72e31bb28fa363ba1d69c0f0609a6ede8aa8bc5c2afb490225c90eb15bbc995b.jpg)
- The date is emphasized in red if record data exist.
• Should be pressed to start playback from the selected time.
• If DST is enabled, the earlier of the overlapped video will play first.
5.4.7 Search Panel
Search Panel is only available in search mode.
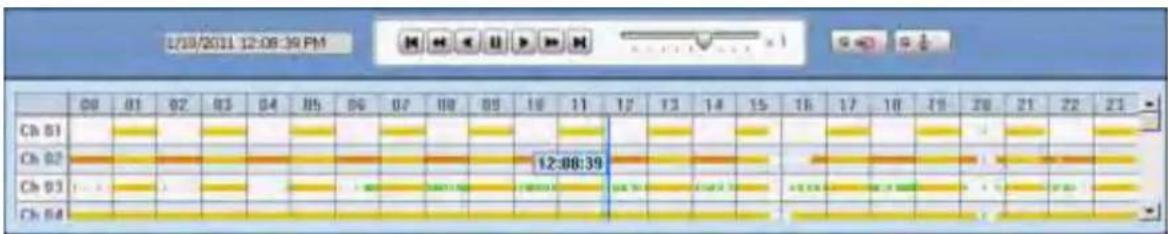
• The Search Panel shows the recorded data for each channel. Record Mode is distinguished by color.
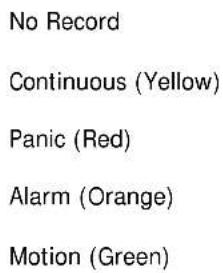

- In the Search Panel, click the time or move the vertical blue bar to the time you want to playback. For a more precise search, double-click the time that you want to jump into. Detailed search is available on a 2-Minute basis.

- Playback Control Panel

| No. | Button | Description |
| 1 |  | Go to First |
| 2 |  | Forward Playback: Decrease the Speed / Reverse Playback : Increase the Speed |
| 3 |  | Reverse Playback |
| 4 | [T83Z] | Pause |
| 5 |  | Forward Playback |
| 6 |  | Forward Playback: Increase the Speed / Reverse Playback: Decrease the Speed |
| 7 |  | Go to Last |
- Audio Control
• (Audio On/Off): Turn On or Off for Audio channel.
- Two-way Audio : Two-Audio between ACS and DVR.
5.4.8 Display Channel
• Showing Live or Search Mode
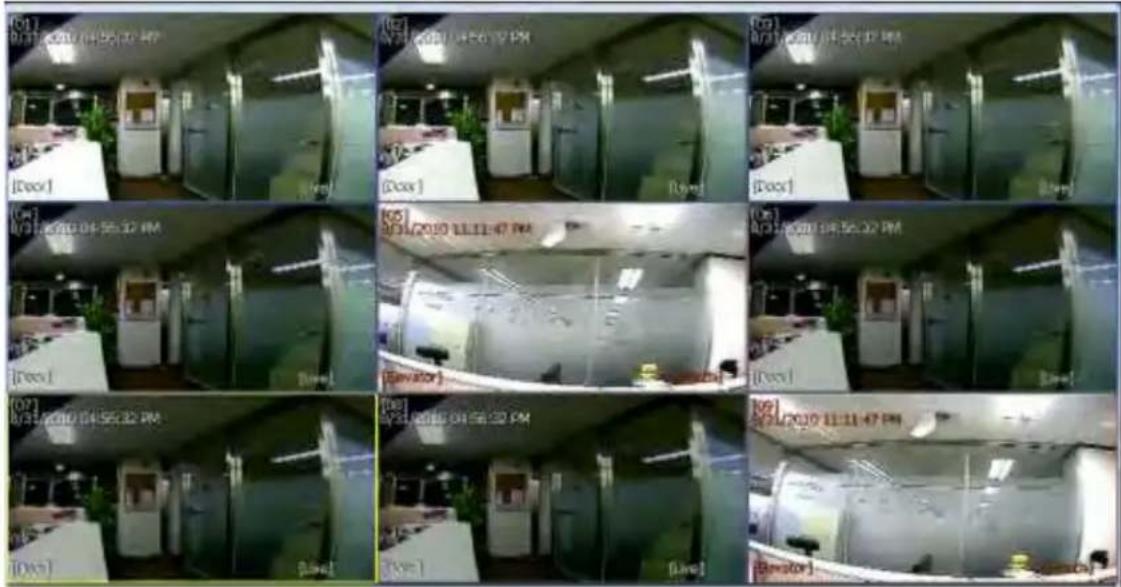
• In Live Mode, the text "Live" will be displayed in white, and the screen will be bordered in blue.
- In Search Mode, the text "Search" will be displayed in red, and the screen will be bordered in red.
- The selected channel will be bordered in yellow.
5.4.9 Event List Panel
| Index | System | Channel | Date/Time | Sensor | Event |
| 5 | 192.168.0.35 | I | 2010/08/31 (23:26:05) | MOTION DETECTION | |
| 4 | 192.168.0.35 | II | 2010/08/31 (23:26:05) | VIDEO LOSS | |
| 3 | 192.168.0.35 | I | 2010/08/31 (23:26:00) | MOTION DETECTION | |
| 2 | 192.168.0.35 | I | 2010/08/31 (23:26:00) | VIDEO LOSS | |
| 1 | 192.168.0.35 | I | 2010/08/31 (23:25:57) | VIDEO LOSS |
- Lists the events from the DVR. Double-click the specific event to start playback.
5.5 Advanced Operation
![VMAX480 Lab[72.243.193.199] Add Site Live Search Disconnect Disconnect All Event Search Remote Backup Firmware Upgrade Remote Setup Ver. 1, 0, 0, 37](/content/2026/05/1058035/images/4d3c559c9453af5a2dfb75bb4b91c39951edbc6ba1644001b535c57f4bbe7ff4.jpg)
Click the right button of the mouse to display the popup menu.
As shown to select:
Add DVR Site
Live
Search
Disconnect
Disconnect All
Event Search
Remote Backup
Firmware update
Remote Setup for the DVR remote configuration
5.5.1 Event Search
Place the mouse cursor on the Site List Panel and click the right mouse button. A popup menu will appear.
Click [EVENT SEARCH].
![Event Search System Connection Info P 2010/09/01 1:30 Port 9090 ID admin Password Connect Documented September, 2010 Sun Mon Tue Wed Thu Fri Sat 24 30 31 4 7 8 9 10 11 5 6 7 8 9 10 11 12 13 14 15 16 17 18 19 20 21 22 23 24 25 26 27 28 29 30 31 32 3 4 AM 12:00:00 PM 11:59:39 Index Channel Date/Time Event 36 8 2010/09/01 [00:30:42] MOTION ON 35 1 2010/09/01 [00:30:42] MOTION ON 34 8 2010/09/01 [00:30:41] MOTION ON 33 1 2010/09/01 [00:30:41] MOTION ON 32 8 2010/09/01 [00:30:30] MOTION ON 31 1 2010/09/01 [00:30:30] MOTION ON 30 8 2010/09/01 [00:30:29] MOTION ON 29 5 2010/09/01 [00:30:29] MOTION ON 28 1 2010/09/01 [00:30:29] MOTION ON 27 8 2010/09/01 [00:30:28] MOTION ON 26 1 2010/09/01 [00:30:28] MOTION ON 25 8 2010/09/01 [00:21:34] MOTION ON 24 1 2010/09/01 [00:21:34] MOTION ON 23 8 2010/09/01 [00:21:33] MOTION ON 22 5 2010/09/01 [00:21:33] MOTION ON 21 1 2010/09/01 [00:21:33] MOTION ON 20 8 2010/09/01 [00:21:32] MOTION ON 19 1 2010/09/01 [00:21:32] MOTION ON 18 8 2010/09/01 [00:20:44] MOTION ON 17 1 2010/09/01 [00:20:44] MOTION ON 16 8 2010/09/01 [00:20:43] MOTION ON 15 5 2010/09/01 [00:20:43] MOTION ON CHANNEL ALL EVENT ALL STOP](/content/2026/05/1058035/images/90ad0f37bb13019c39985f0a5fe07677a047e1f61aaae90b237d1d921a23334c.jpg)
| No. | Function | Description |
| 1 | Connection Info | Type in the DVR info to connect. |
| 2 | Progress Bar | Shows the progress. |
| 3 | Calendar Search | Dates with events will be displayed in bold font. Click the date to start Event Search. |
| 4 | Time Filter | Select the Time for Event Search. |
| 5 | Event List | Shows the list of events. |
| 6 | Time/Event Filter | Select a specific channel or event type to narrow search. |
| 7 | Stop | Stop Event Search. |
5.5.2 Remote Backup
Place the mouse cursor on the Site List Panel and click the right mouse button. A popup menu will appear.
Click [REMOTE BACKUP].
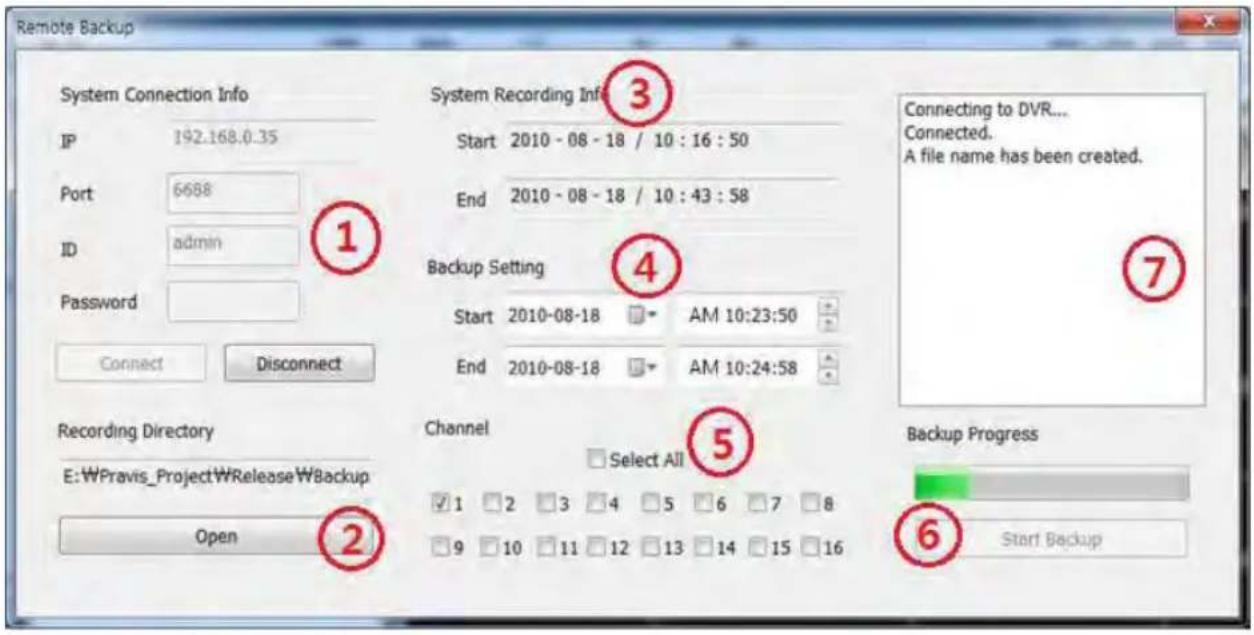
| No. | Function | Description |
| 1 | Connection Info | Type in the DVR info to connect. |
| 2 | Recording Directory | Select or change the backup directory. |
| 3 | Record Info | Display the first and last record. |
| 4 | Backup Setting | Backup time selection. |
| 5 | Channel | Select the channel for backup. |
| 6 | Progress | Showing the backup progress. |
| 7 | Status | Showing the operation status. |
When the backup is complete, the popup below will appear.
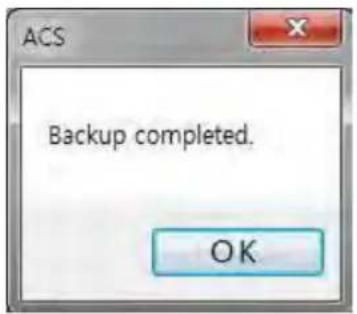
5.5.3 Firmware Upgrade
Place the mouse cursor on the Site List Panel and click the right mouse button. A popup menu will appear.
Click [FIRMWARE UPGRADE].
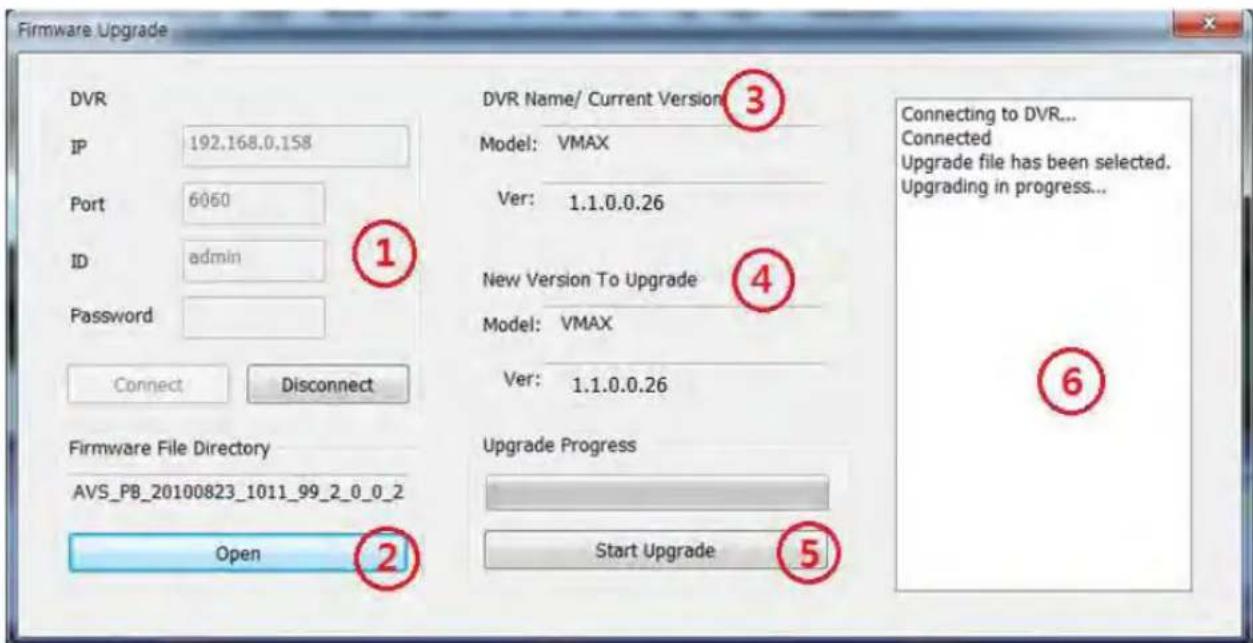
| No. | Function | Description |
| 1 | Connection Info | Type in the DVR info to connect. |
| 2 | Firmware Directory | Select the new firmware to upgrade. |
| 3 | DVR Info | Display the DVR information and firmware version. |
| 4 | New Firmware Info | Display the new firmware information. |
| 5 | Start Upgrade | Start the upgrade. |
| 6 | Status | Showing the status of the operation. |
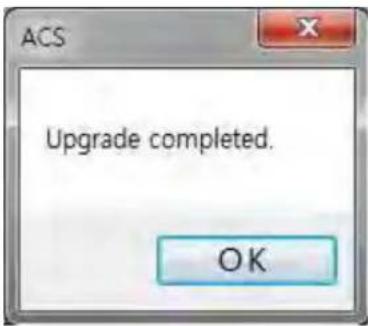
When the upgrade is complete, the popup will appear.
5.6 ACS Setup
This is for DVR Registration, User, Display, and Other Options.
5.6.1 DVR Registration
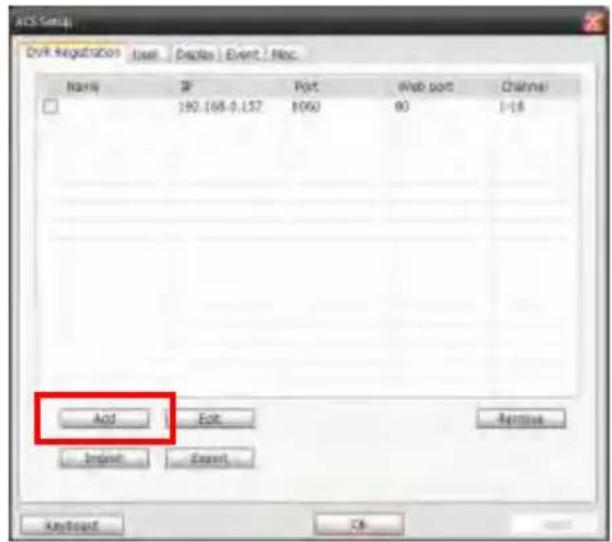
Place the mouse cursor on the Site List Panel and click the right mouse button. A popup menu will appear. Select DVR Registration [ADD], [EDIT], or [REMOVE] DVR site information.
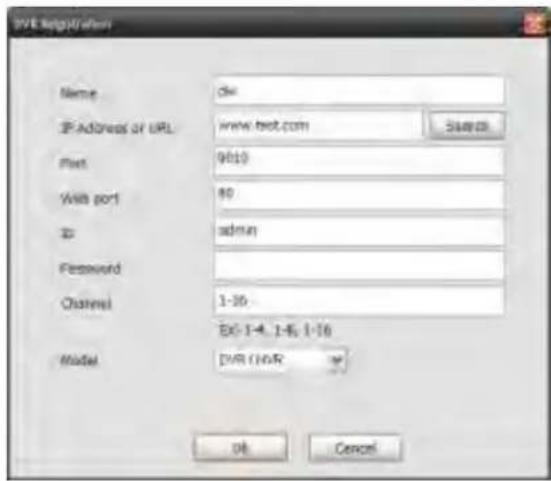
[Adding a New DVR Site]
| Function | Description | |
| 1 | Name | Type Site name or DVR name |
| 2 | IP | Type Public IP Address or DDNS (DVR Name) of the DVR |
| 3 | Port | Type the TCP/IP Port Number. Default is 9010. |
| 4 | Web Port | Type Web Port Number. Default is 80. |
| 5 | ID | Type the DVR user Id (Default is admin) |
| 6 | Password | Type the DVR password (Password box is blank by default) |
| 7 | Channel | Type in the number of DVR Channels. For a 16Ch DVR, type “1-16”. |
To modify and/or remove DVR information, click [Add] or [Remove] to amend DVR site information.
After clicking [OK], the new DVR information will appear on the DVR Site List Panel.
![Cher[97.168.0.15] Cher[192.168.0.35] Ch. 1 Ch. 2 Ch. 3 Ch. 4 Ch. 5 Ch. 6 Ch. 7 Ch. 8 Ch. 9 Ch. 10 Ch. 11 Ch. 12 Ch. 13 Ch. 14 Ch. 15 Ch. 16 Cher[112.216.01.152]](/content/2026/05/1058035/images/159dc5016c68d97db50a82d5a1ba31de1bb65cd4ef068f3654203f0aceb91480.jpg)
5.6.2 Add / Edit / Remove ACS (Advance Client Software) User
User authority can be changed by Administrator account.
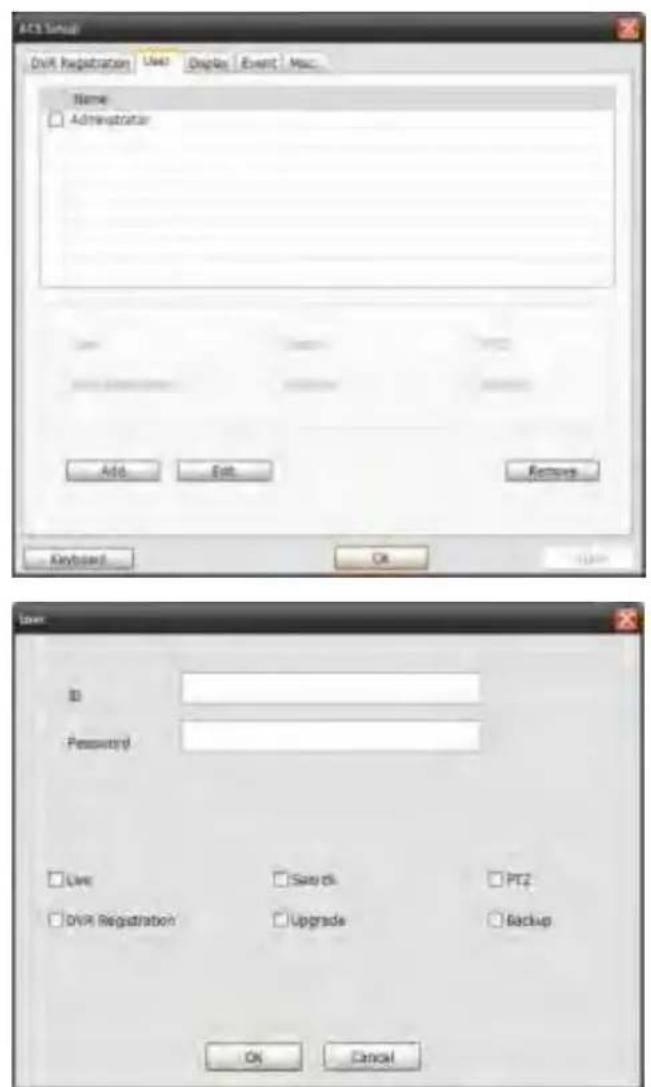
[User Authority Change]
5.6.3 Display
Go here to setup [OSD].

Time Format Sync (DVR: ACS): This option synchronizes the DVR time format with ACS.
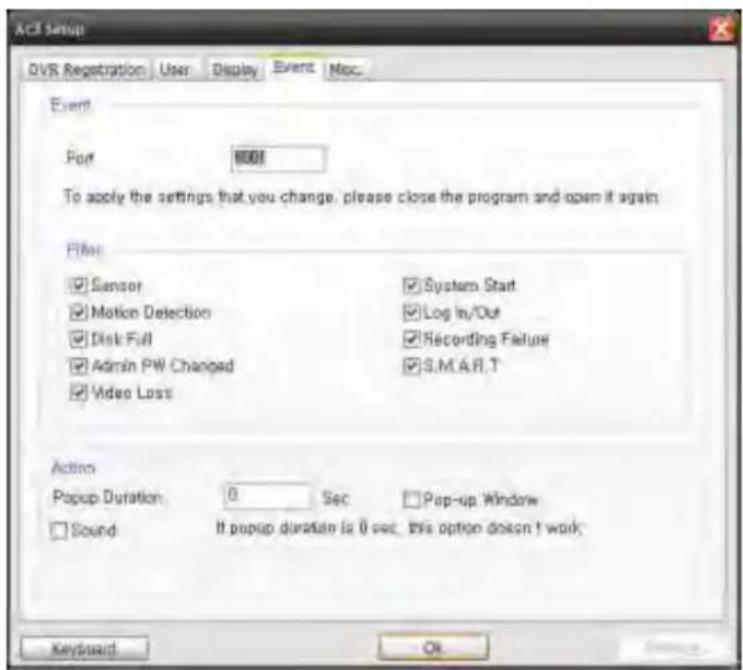
5.6.4 Event
5.6.5 Misc.
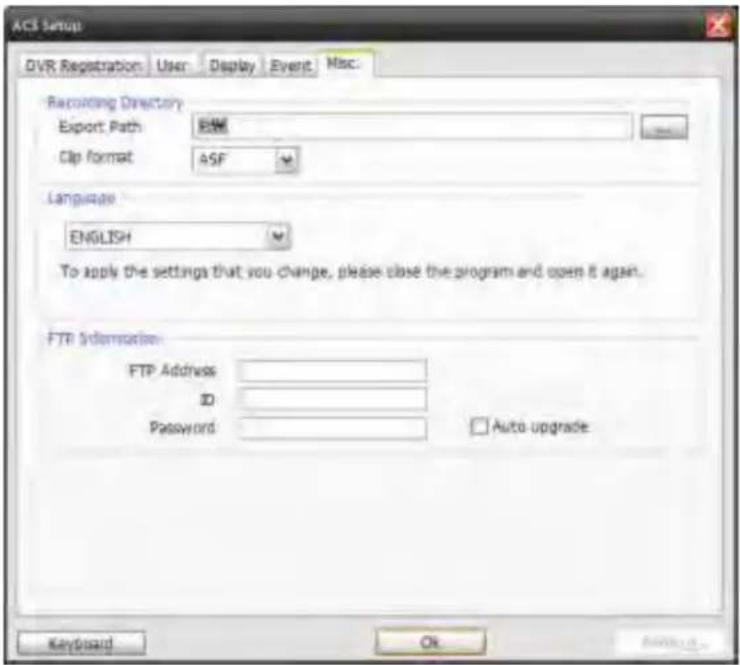
| Function | Description | |
| 1 | Recording Directory | Select or change the directory for where your still images and videos are saved. |
| 2 | Event | Type in the Event Port to receive the event list. 1025 ~ 60000 is recommended. |
| 3 | Language | Select the ACS language. |
Chapter 3
MAC ACS CLIENT SOFTWARE USER MANUAL
6 MAC ACS USER GUIDE
6.1 Mac Requirements
Recommended Mac Requirements
| OS | Mac OS X 10.6 (Snow Leopard) |
| CPU | Built-in Intel CPU MAC |
| VGA | Recommended More than 128MB |
| RAM | Recommended More than 1GB |
| HDD | 20MB Free Space |
Minimum Mac Requirements
| OS | Mac OS X 10.5 (Leopard) |
| CPU | Built-in Intel CPU MAC |
| VGA | 64MB |
| RAM | 512MB |
| HDD | 20 MB Free Space |
6.2 Install
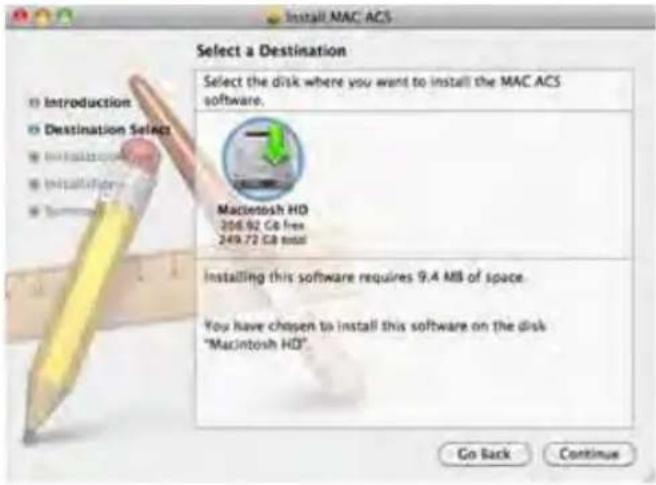
Run [MAC ACS.pkg] on CD, and the below setup menu will appear.
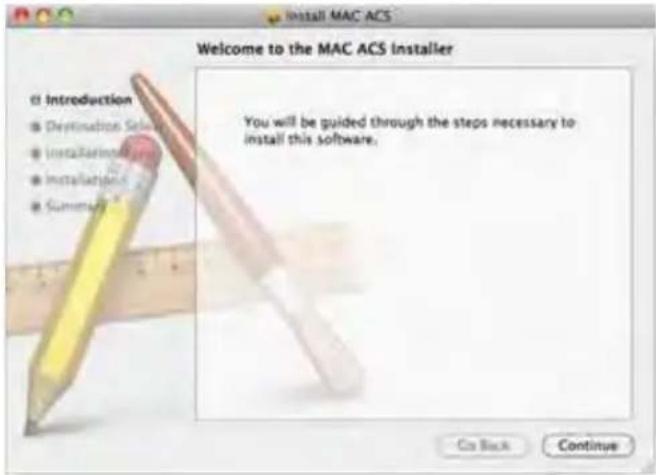
Select the HDD where you wish to install the program. Press the [CONTINUE] button to move to the next screen.
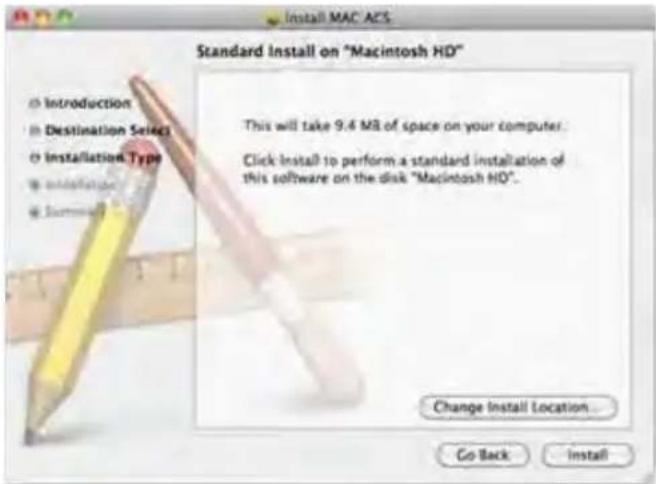
Press the [INSTALL] button to move to the next screen.
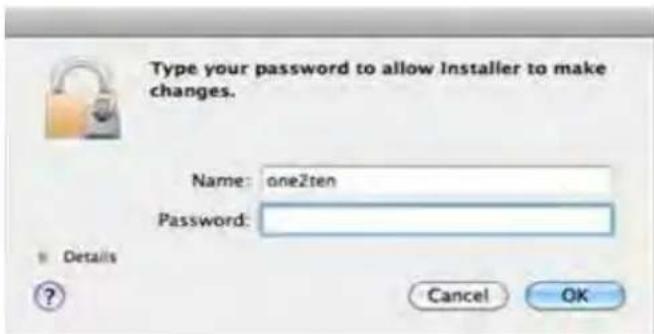
Type in the password and click [OK] to begin installation.
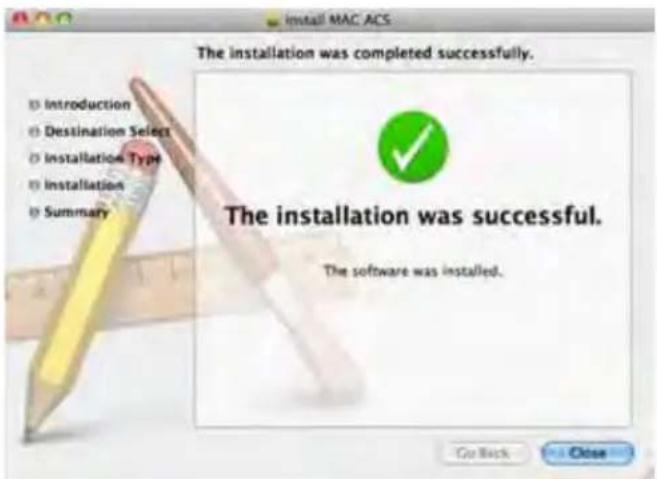
When the installation is complete, the following message will appear. Click [CLOSE] to close the window.
6.3 Basic Operation
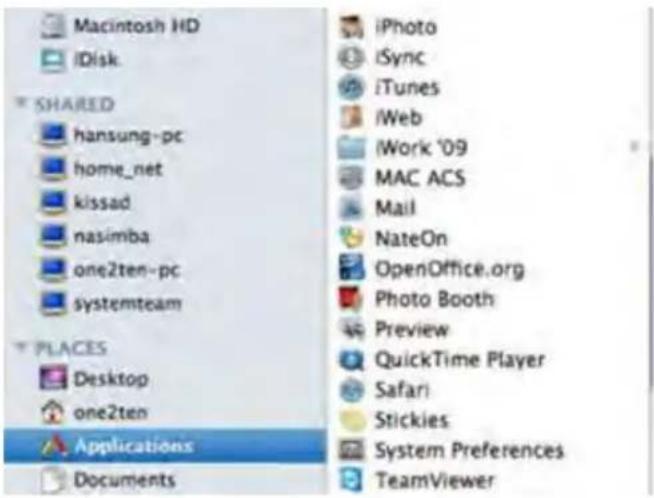
Click on [ACS] icon located in the Application Folder.
6.3.1 Screen Layout
![Advanced Client Software Site Manager Connect Disconnect Disconnect All Print JPG Export MOV Export Name Description 156 192.168.0.155 157 192.168.0.157 new site 192.168.0.239 ② Live Search ③ Zoom Focus ④ Preset 01 Go December 2010 ⑤ 5 8 7 8 9 10 11 12 13 14 15 16 17 18 19 20 21 22 23 24 25 26 27 28 29 30 31 [01] [02] [03] [04] DW DIGITAL WATCHDOG Everything's Digital off off off off off off off off off off off off off off off off off off off off off off off off off off off off off off off off off off off off off off off off off off off off off off off off off off Off: Audio On Off Ch: 00 01 02 03 04 05 06 07 08 09 10 11 12 13 14 15 16 17 18 19 20 21 22 23 01 02 03 04 05 06 07 08 09 10 11 12 13 14 15 16 17 18 19 20 21 22 23 03 04](/content/2026/05/1058035/images/5800db29a16a7e209cb725832dd9d14cc10e025f64fdb56cd522aa2fb2a90549.jpg)
| No. | Item | Description |
| 1 | Main Toolbar | Site Manager, Connect, Disconnect, Disconnect All, Print, JPG Export MOV Export, Screen Display Mode |
| 2 | DVR List Panel | Registered DVR Site List; Connect by Drag & Drop |
| 3 | Live or Search Connect Panel | Click Live or Search Mode to connect to the sites. |
| 4 | PTZ Panel | PTZ Camera Control in Live mode |
| 5 | Calendar Panel | Search by Date and Time |
| 6 | Search Panel | Search mode displays recorded information.Control the speed of Playback and Audio. |
| 7 | Display Panel | Transmitted camera images are displayed (live and playback). |
6.3.2 Main Toolbar



| No. | Button | Description |
| 1 | Site Manager | Register or delete DVR Site |
| 2 | Connect | Connect to a selected DVR site, listed on the DVR list panel.Select Live or Search mode at Connect Mode Panel. |
| 3 | Disconnect | Disconnect a selected channel. |
| 4 | Disconnect All | Disconnect All Channels. |
| 5 | Print out still image. | |
| 6 | JPG Export | Save a selected image to the desktop in JPEG format. |
| 7 | MOV Export | Save a selected video clip to the desktop in MOV format. |
| 8 | Split | Channel Display Mode 1 – 4 – 9 - 16 |
6.3.3 Site List Panel
![Name Description 158 192.168.0.158 35 192.168 0.25 CH. 01 CH. 02 CH. 03 CH. 04 CH. 05 CH. 06 CH. 07 Drag & Drop off [05] Digital WATCHDOG Plaything 1 Digital Live Search](/content/2026/05/1058035/images/ee3f8bba9c8c48940d7766181331c4c64b2dbfc16f5d10cb8775386e3979eca8.jpg)
The Site List Panel shows the list of registered DVRs. To connect, select [Live] or [Search] mode in the Connection Mode Panel and Drag & Drop to the display screen.
16 different channels can be monitored. Even a mixture of different connection modes can be monitored.
6.3.4 PTZ Panel
PTZ Camera Controls in Live Mode. PTZ Camera can be controlled if the channel is activated on PTZ operation.
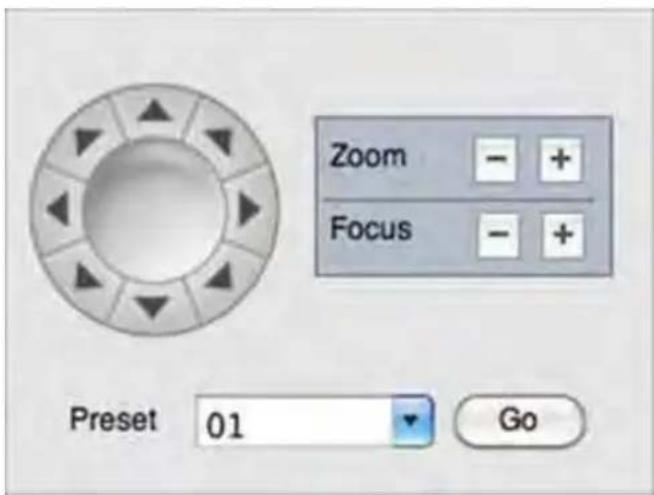
| No. | Button | Description |
| 1 | Navigation Keys | Move PTZ Cameras in 8 directions. |
| 2 | ZOOM | Zoom In (+) and Zoom Out (-) |
| 3 | FOCUS | Focus In (+) and Focus Out (-) |
| 4 | PRESET | Select the preset location. |
| 5 | Go | Go to the preset location. |
6.3.5 Calendar Panel
Calendar Panel is only available in Search Mode.
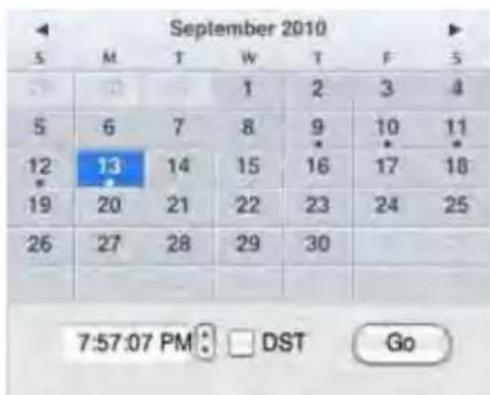
- Dates with recorded data will be highlighted in blue with a white dot located below the number.
- When you click the recorded date on search mode, the system will detect the date automatically.
• [GO] button should be pressed to start playback from the selected date and time.
• If [DST] is enabled, the earlier of the overlapped videos will play first.
6.3.6 Search Panel
Search Panel is only available in Search Mode.

- The Search Panel shows the recorded data for each channel.
- Record Mode is distinguished by color.
No Record
Background Color
Continuous (Yellow Color)

Panic (Red Color)
Alarm (Orange Color)
Motion (Green Color)
• In the Search Panel, click the time or move the vertical blue bar to the time you want to playback.
- Playback Control Panel

| No | Button | Description |
| 1 | Go to First | |
| 2 | Forward Playback : Decrease the Speed / Reverse Playback : Increase the Speed | |
| 3 | Reverse Playback | |
| 4 | Pause | |
| 5 | Forward Playback | |
| 6 | Forward Playback : Increase the Speed / Reverse Playback : Decrease the Speed | |
| 7 | Go 10 Seconds before the Last Data |
6.3.7 Site Manager
[ADD], [MODIFY], or [REMOVE] DVR site information.
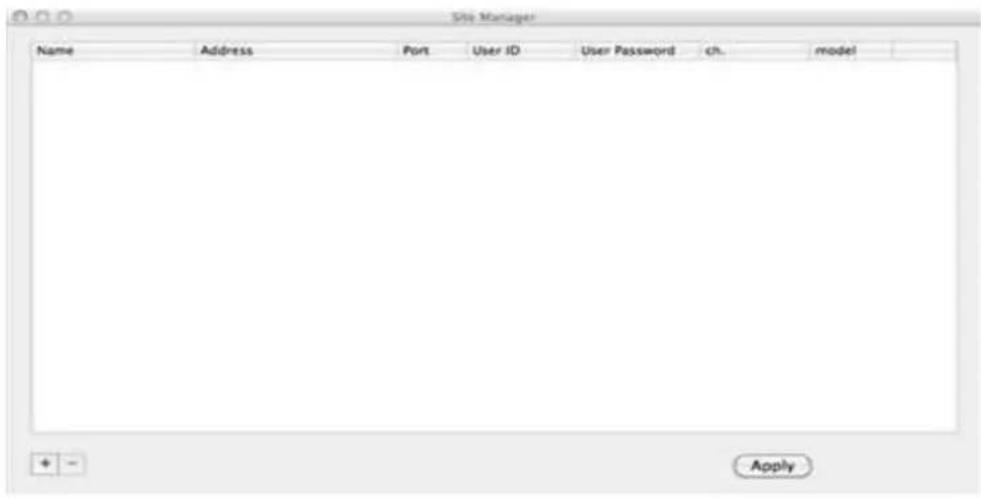
Press to register a DVR. The default value is registered
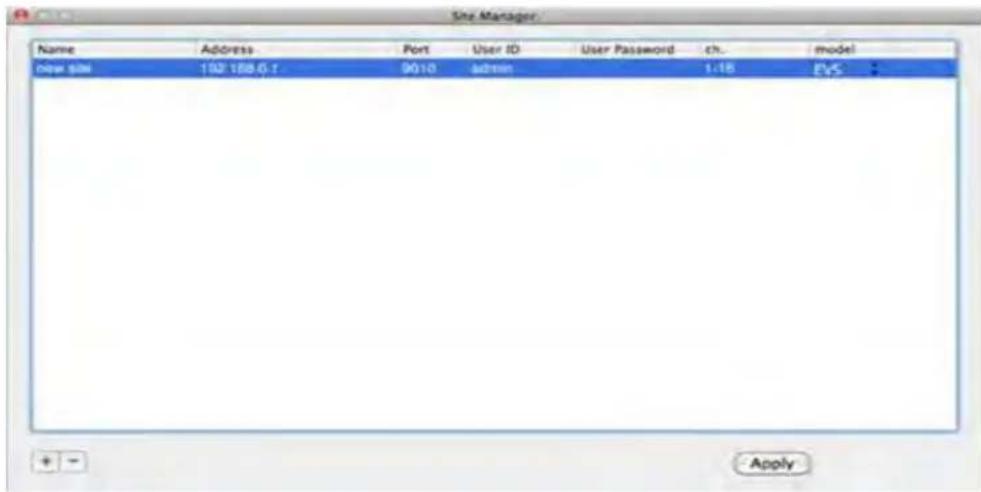
To modify, double-click on the item. For example, double-click [new site] to change the name.
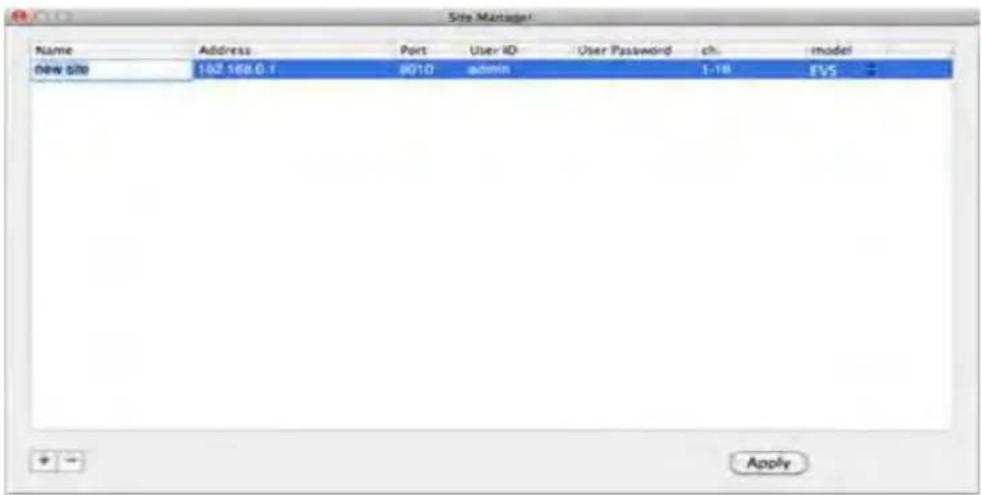
Press after modifications has been made.
| No. | Function | Description |
| 1 | Name | Enter the location name or the DVR name of the site to be registered. |
| 2 | Address | Enter the IP address or DDNS (DVR Name) of the DVR |
| 3 | Port | Enter the port number of the site to be registered. Default is 9010. |
| 4 | User ID | Enter the ID of the DVR to be connected. |
| 5 | User Password | Enter the password of the DVR |
| 6 | channel | Fill in number of channels of the DVR. If the DVR is 1 channels, type in "1-4"; "1-8"; "1-16" |
| 7 | Model | Select model number of the DVR to be registered. |
To delete the registered DVR information, select the DVR and click.
Press after modifications has been made.

natural_image
Apple logo on a blue background (no text or symbols)
natural_image
Android robot logo on blue background (no text or symbols)
natural_image
Abstract blue background with white geometric pattern resembling a stylized 'B' or grid (no text or symbols)Chapter 4
MOBILE PHONE SOFTWARE USER MANUAL
7 MOBILE PHONE SOFTWARE USER GUIDE
7.1 iPhone Application Software
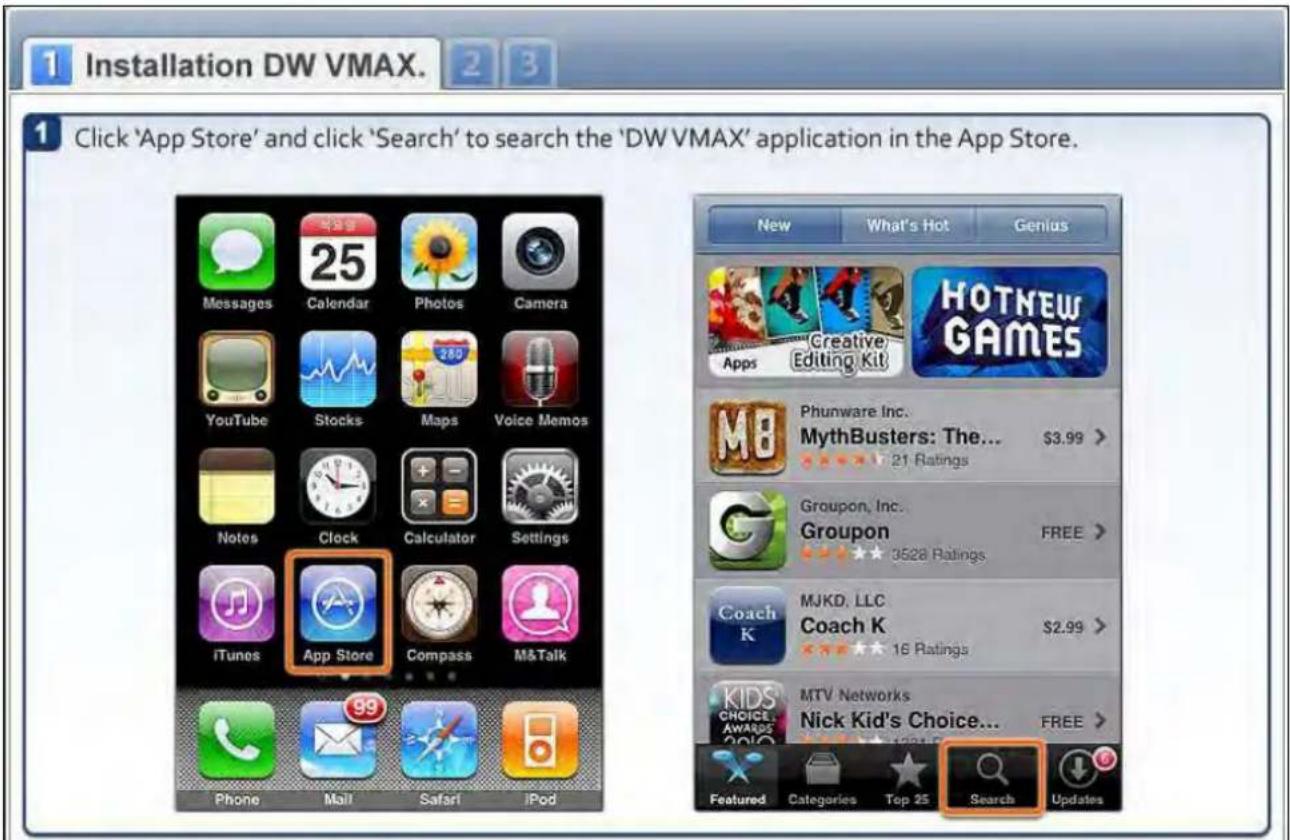
2 Type in 'DW VMAX' and click 'Search', then you will see the 'DW VMAX' application icon on the screen.
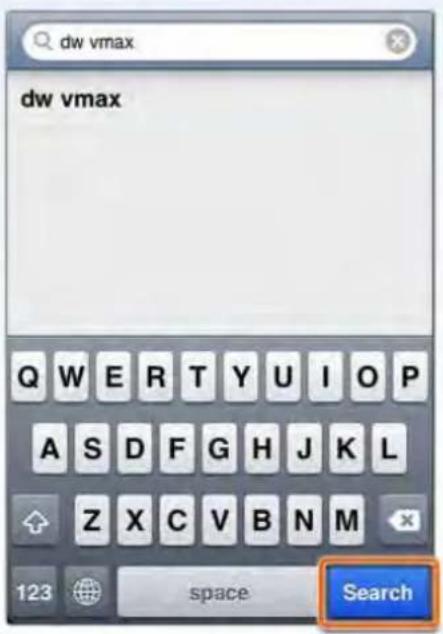
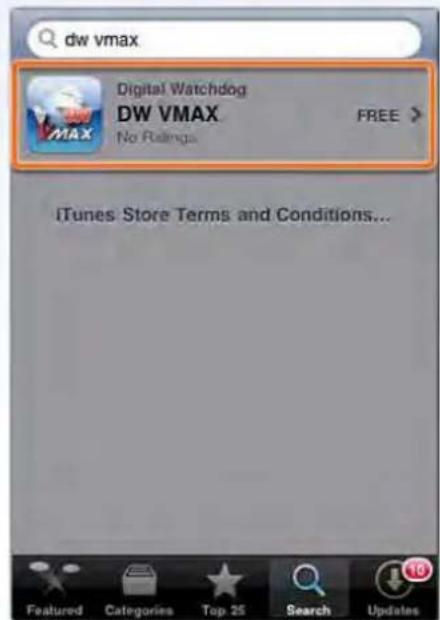
1 Installation DW VMAX.

3 Now you can see the detail information about the 'DW VMAX' application.
Click 'FREE' button then it will change to 'INSTALL' button. Click 'INSTALL' button to proceed.
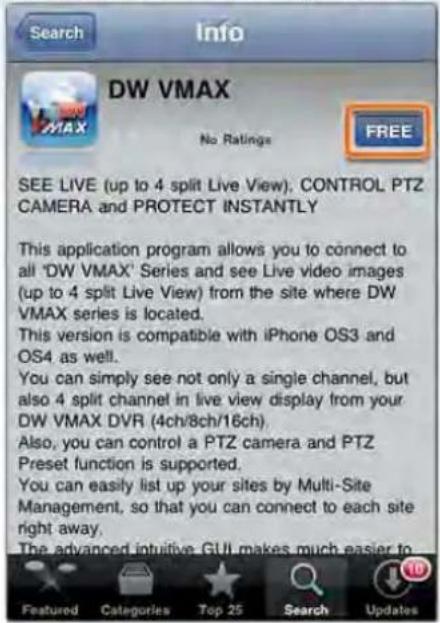
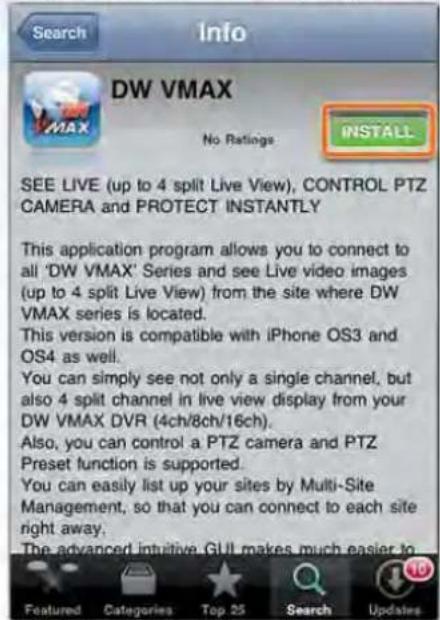
4 Input your User ID and Password. Then, you will see the 'DW VMAX' icon on your iPhone.
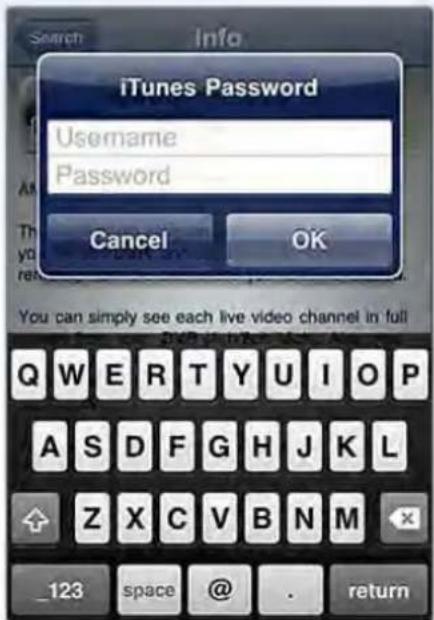

![1 2 How to connect and view. 1 Press '+' button and select DVR Type: Vmax or Vmax480. Then, input the new site information that you would like to connect to. Press 'Save' button to save your settings. DW VMAX Edit Cancel Add Site Save Site Name : Device Name IP Address : Device IP Port : Device Port User ID : User ID Password : User Password Model : VMAX 2 Press 'OK' and 'Connect' button to connect. Then, you will see a single channel live view or four split channel live view of the connected site. Press a desired channel button (Ch1~Ch16) or four-split channel mode to view another set of channels. Done [LIVE] Demo Channel 01 Full Split Channel Preset Done [LIVE] Demo Channel 01 Channel 02 PTZ Channel Selection 1 2 3 4 5 6 7 8 9 10 11 12 13 14 15 16 Full Split Channel Preset](/content/2026/05/1058035/images/a6f08ba3a222454a5bd16b5536f8b05c3c99d3cea127db44a2f3c84bf5448728.jpg)

3 How to search and PTZ control.
1 A single channel search is also available. In order to search data of a channel, touch the screen of live view and touch 'Search' tab located on top of the screen. Click channel icon to view another channel in search mode.
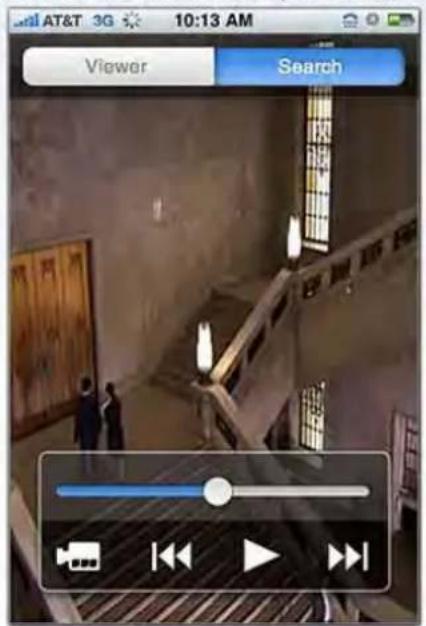
![Done [LIVE] Demo Channel 01 Channel 02 PTZ Channel 03 Channel 04 Full Split Channel Preset](/content/2026/05/1058035/images/42eff1f25ecb634b9b91f19795793ea8b0b4d8874d04ed75104840acf138519d.jpg)
2 A single channel PTZ is simply controlled by using touch screen. First, select a channel, which is a PTZ control camera connected to, for one channel PTZ control in full screen mode.
To move PTZ camera, move your finger tip to the desired direction without losing contact on the screen surface. In order to Zoom In, touch surface with two fingers and bring them closer together.
In order to zoom out, touch surface with two fingers and move them apart.
In order to move PTZ camera to a preset location, select 'PRESET' tab and select a preset channel no. to move.
![[LIVE] Demo Channel 01 Fall Split Channel Preset](/content/2026/05/1058035/images/51d0bbc897a7940a4c40d7ca31323a0f9111b3f26e17a568414b926bff12dce9.jpg)
PTZ
![[LIVE] Demo Channel 01 Zoom Full Split Channel Preset](/content/2026/05/1058035/images/bc93fdac8d6a11908467409cdd5f3a009bf614b5f64f35e057a3fa8e7ec172da.jpg)
Zoom In
![[LIVE] Demo Channel 01 Full Spin Channel Preset](/content/2026/05/1058035/images/372eb31c0c8fe7bcba75afe8b6dba28fb016336f060387829ae8634f22a07634.jpg)
Zoom Out
7.2 Android Application Software
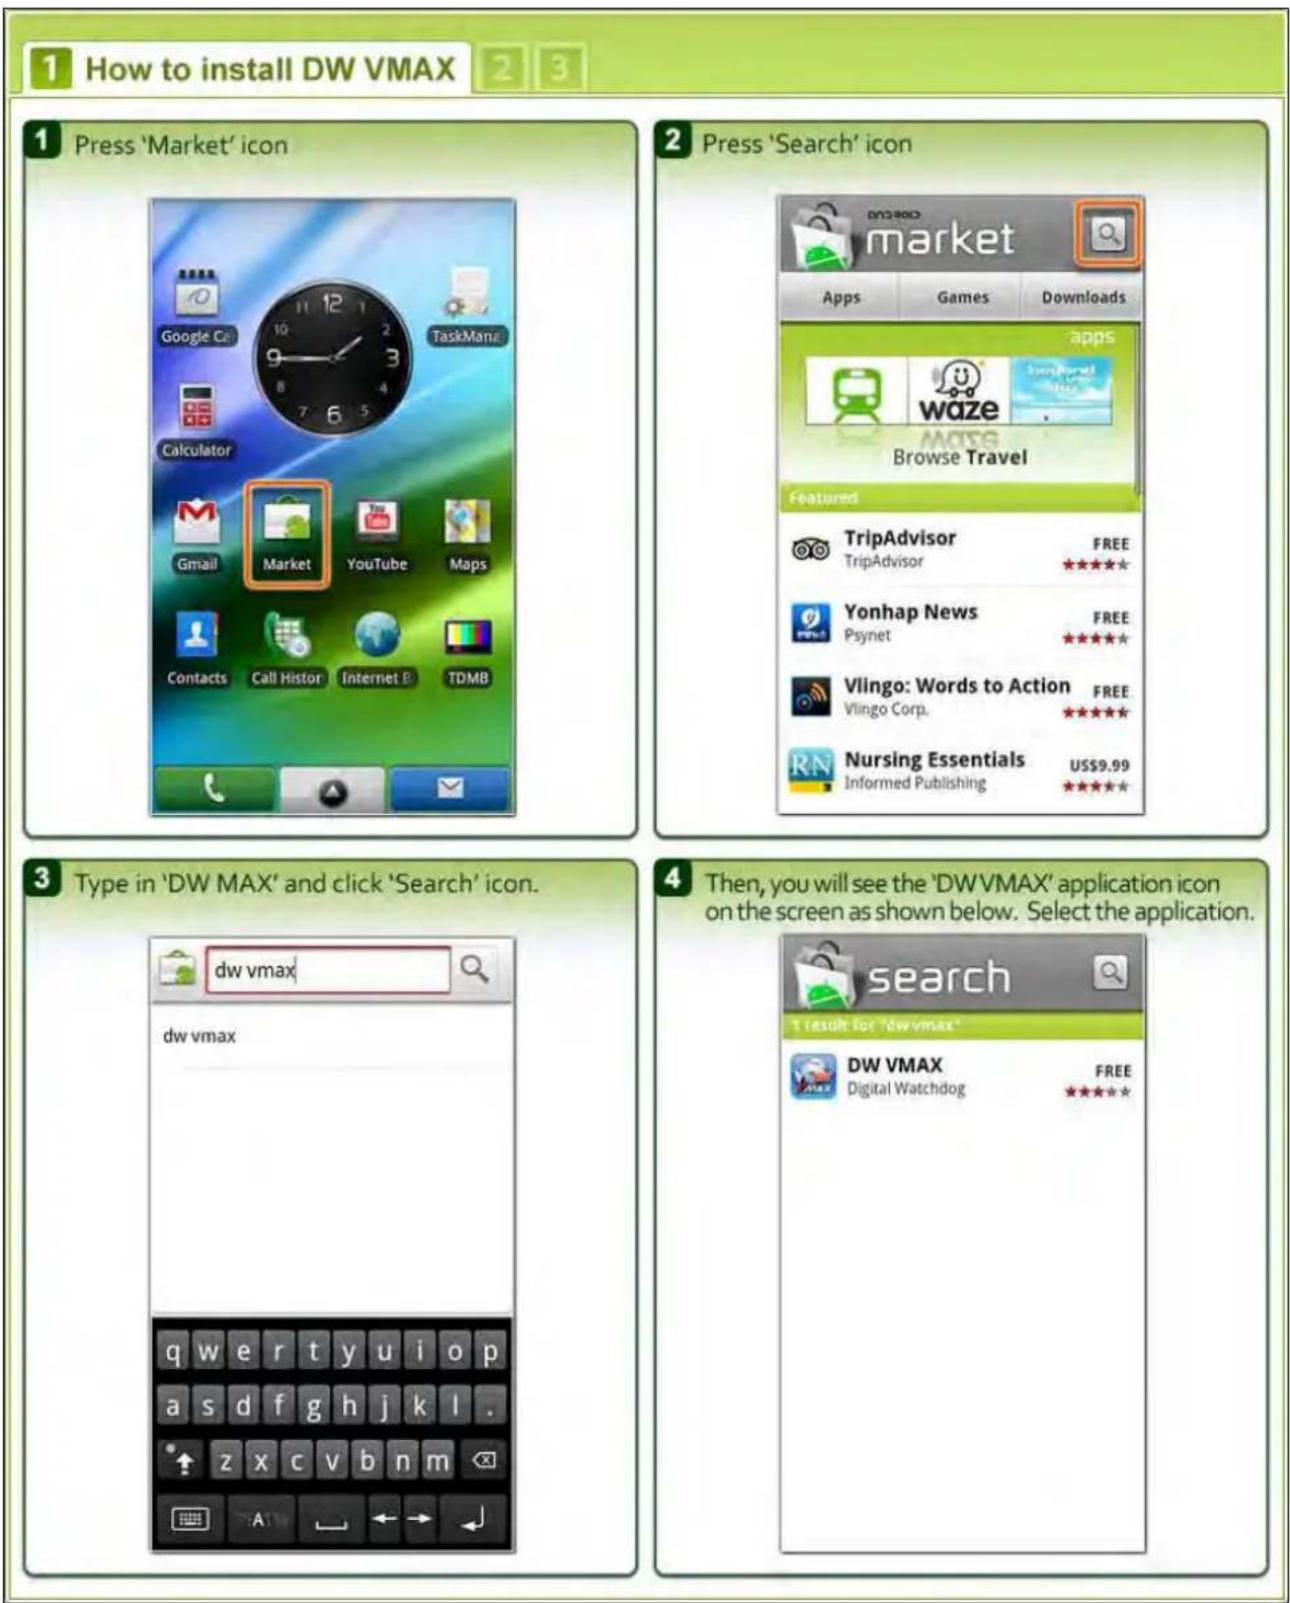

How to install DW VMAX

5
You will see a detailed information about the 'DW MAX' application. Press 'Install' button to install it.
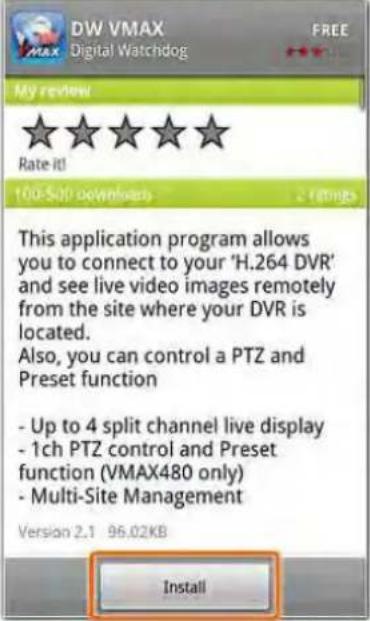
6
Then, click 'OK' to access the internet.
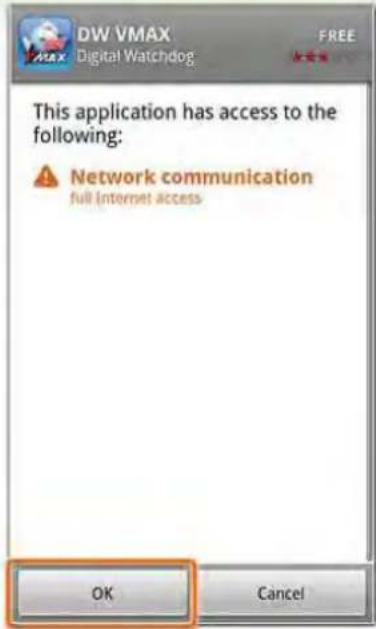
7
Now, you can see the 'DW VMAX' icon on the application tab.
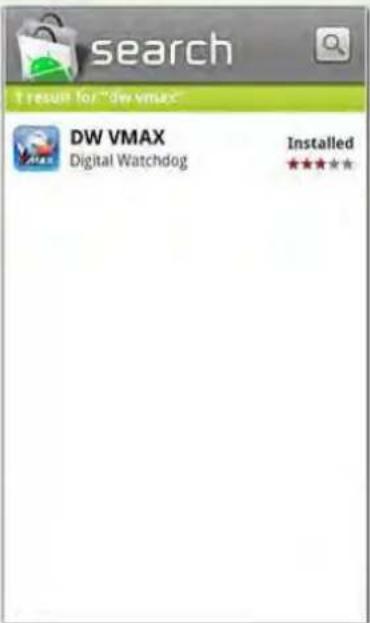
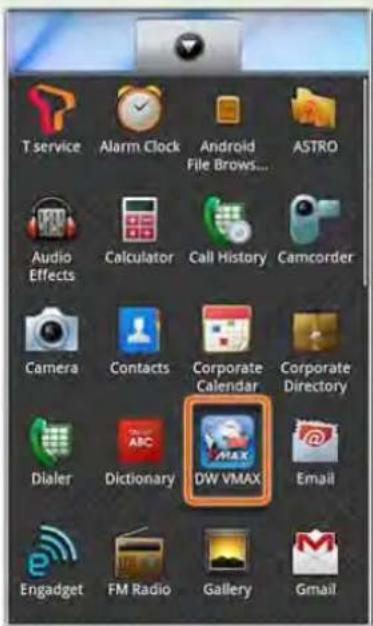
1 2 How to connect and view
1 After running the application, press the 'Menu' button on your phone to bring up the 'Add Site' button.
Then, press 'Add Site' button.
*Please view your phone manual, if you have trouble finding the 'Menu' button.
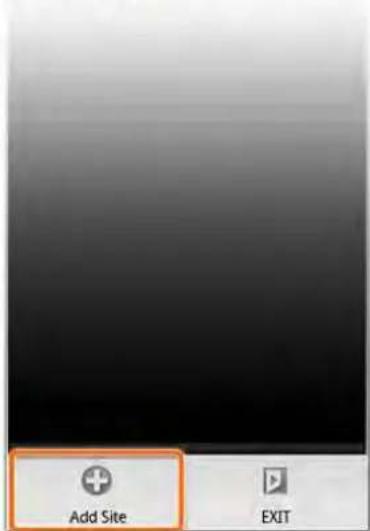
2 First, select DVR Type: VMAX or VMAX480. Input the new site information that you would like to connect to. Press 'Menu' button to bring 'Save' button and click 'Save' to save your settings.
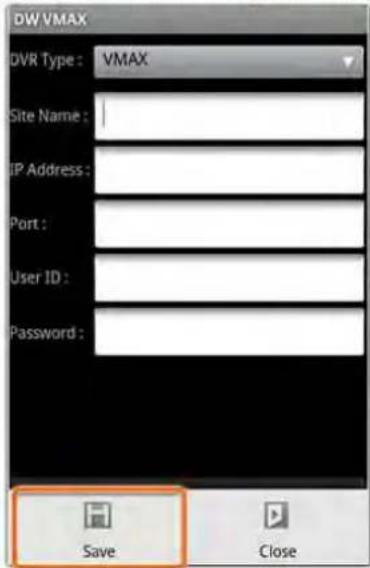
3 Press and hold the desired site in the site list for the connection menu to appear. Press 'Connect' button to connect.
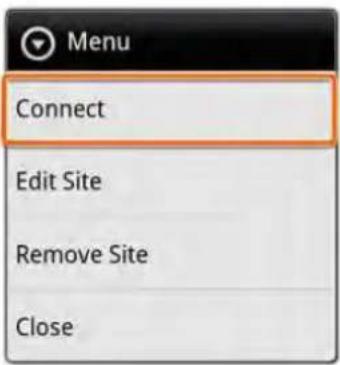
4 You will see a single channel live view or four split channel live view of the connected site. Press a desired channel button (Ch1-Ch16) or four-split channel mode to view another set of channels.
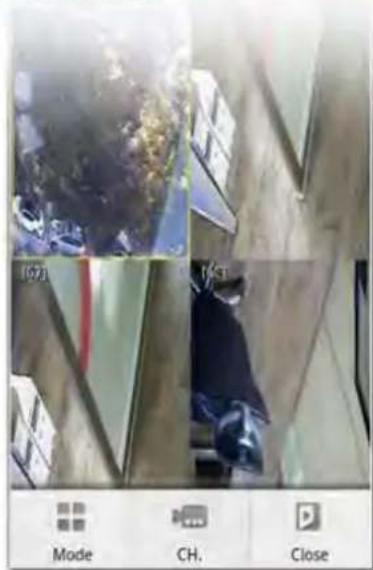
1 2 How to connect and view 3
5 Press a desired channel button (ch1-ch16) or four split channel mode to view another channels as shown below.
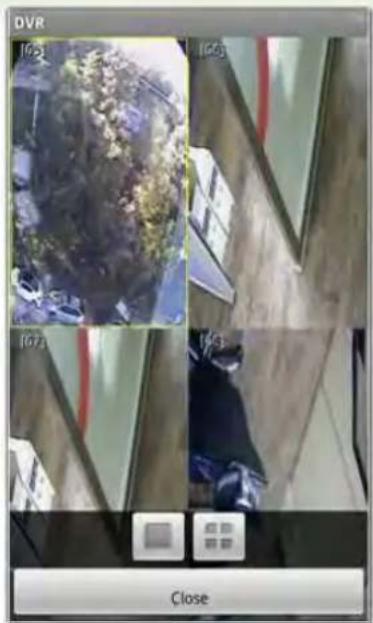
natural_image
Three-panel surveillance camera view showing a close-up of a building interior with visible floor and equipment (no text or symbols)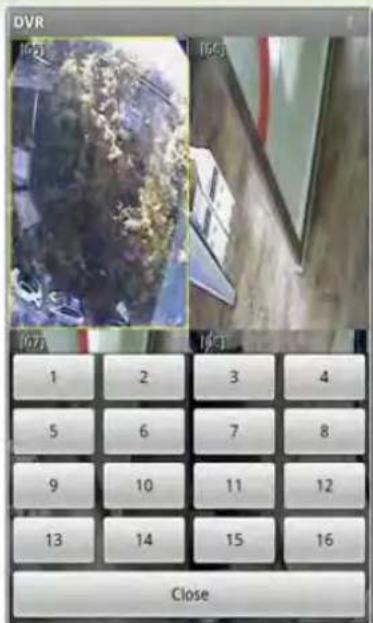

natural_image
Green Android robot logo with no text or symbols1 2 3 How to control PTZ
1 If the DVR Type is a VMAX480 model, you will be able to control a PTZ camera. To do so, select a PTZ channel in full screen mode.
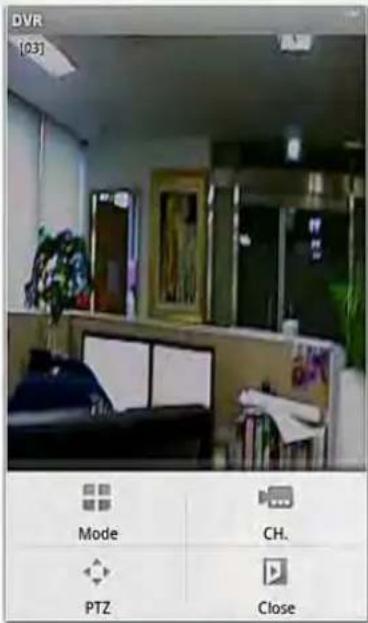
2 To move PTZ camera, press the eight directional arrow buttons. To zoom in or zoom out, press the 'Zoom In/Zoom Out' icon located in the middle. To move PTZ camera to a preset location, press the 'Preset' button and type in the preset channel number.
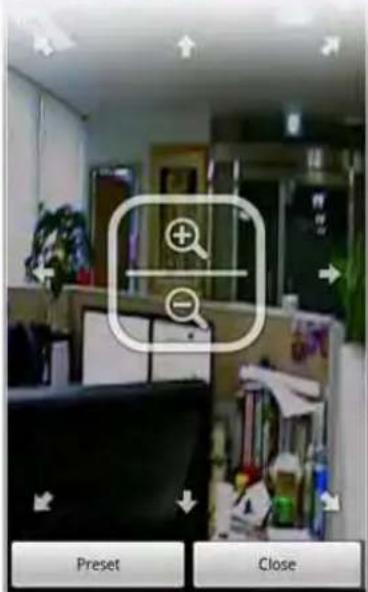
7.3 Blackberry Application Software
1 Installation Mobile ACS.

1 After you unzip the zip folder "StandardMobileACS.ZIP", then you will see two files in there.
Copy these two files to "Downloads" folder in Blackberry.
1) MbileACS.alx
2) MobileACS.cod
Note :
- For more information about how to copy a file to Blackberry, please refer to the Blackberry manual about Blackberry Desktop Manager.
2 Please find 'Downloads' folder in your Blackberry and get into it.
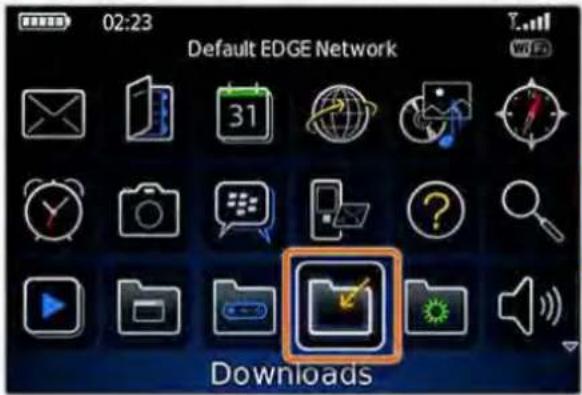
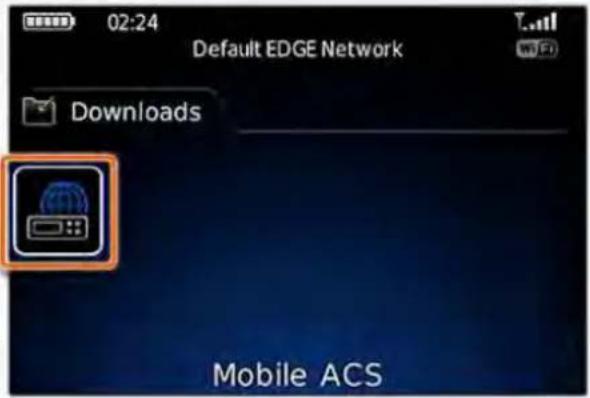
2 How to manage connections (Before you start)

1 Go to 'Manage Connections' in the Blackberry main menu.
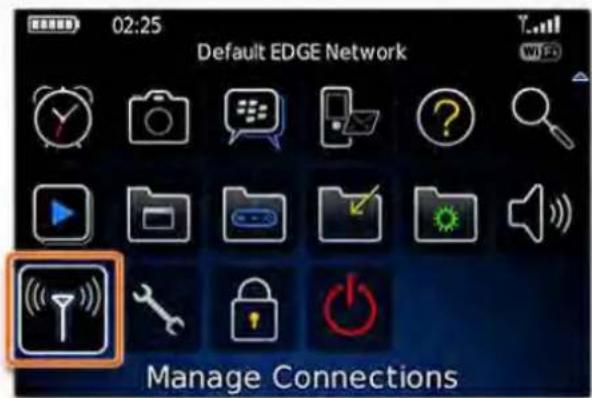
1 2 How to manage connections (Before you start)
2 Have the 'Wi-Fi' check box is checked first. Then, please go to 'Mobile Network Options'.
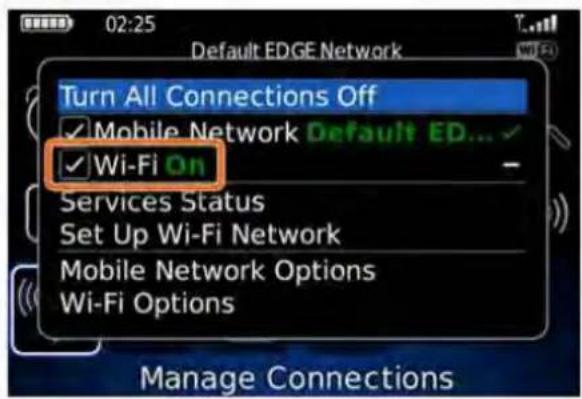
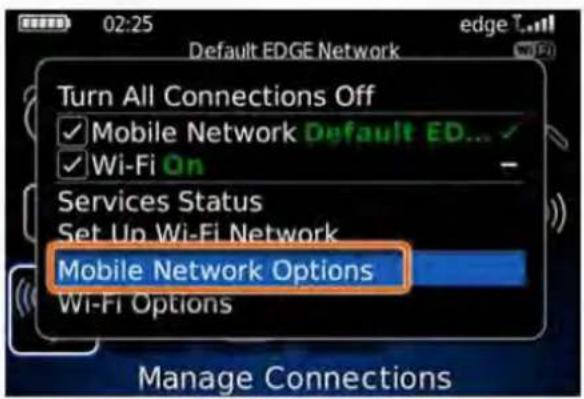
3 You will see the Services Status as shown below. Blackberry Internet Service Connection: Wi-Fi and Wi-Fi Network Information. Also, you will see 'Wi-Fi' connection icon (Light On) on the upper right corner of the main menu.
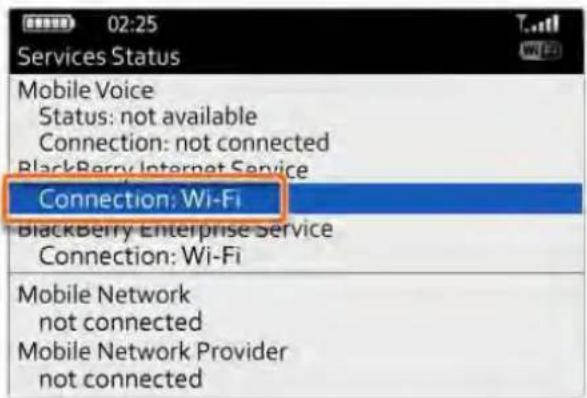
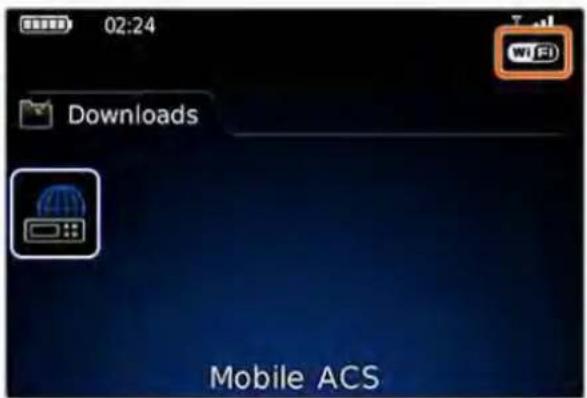
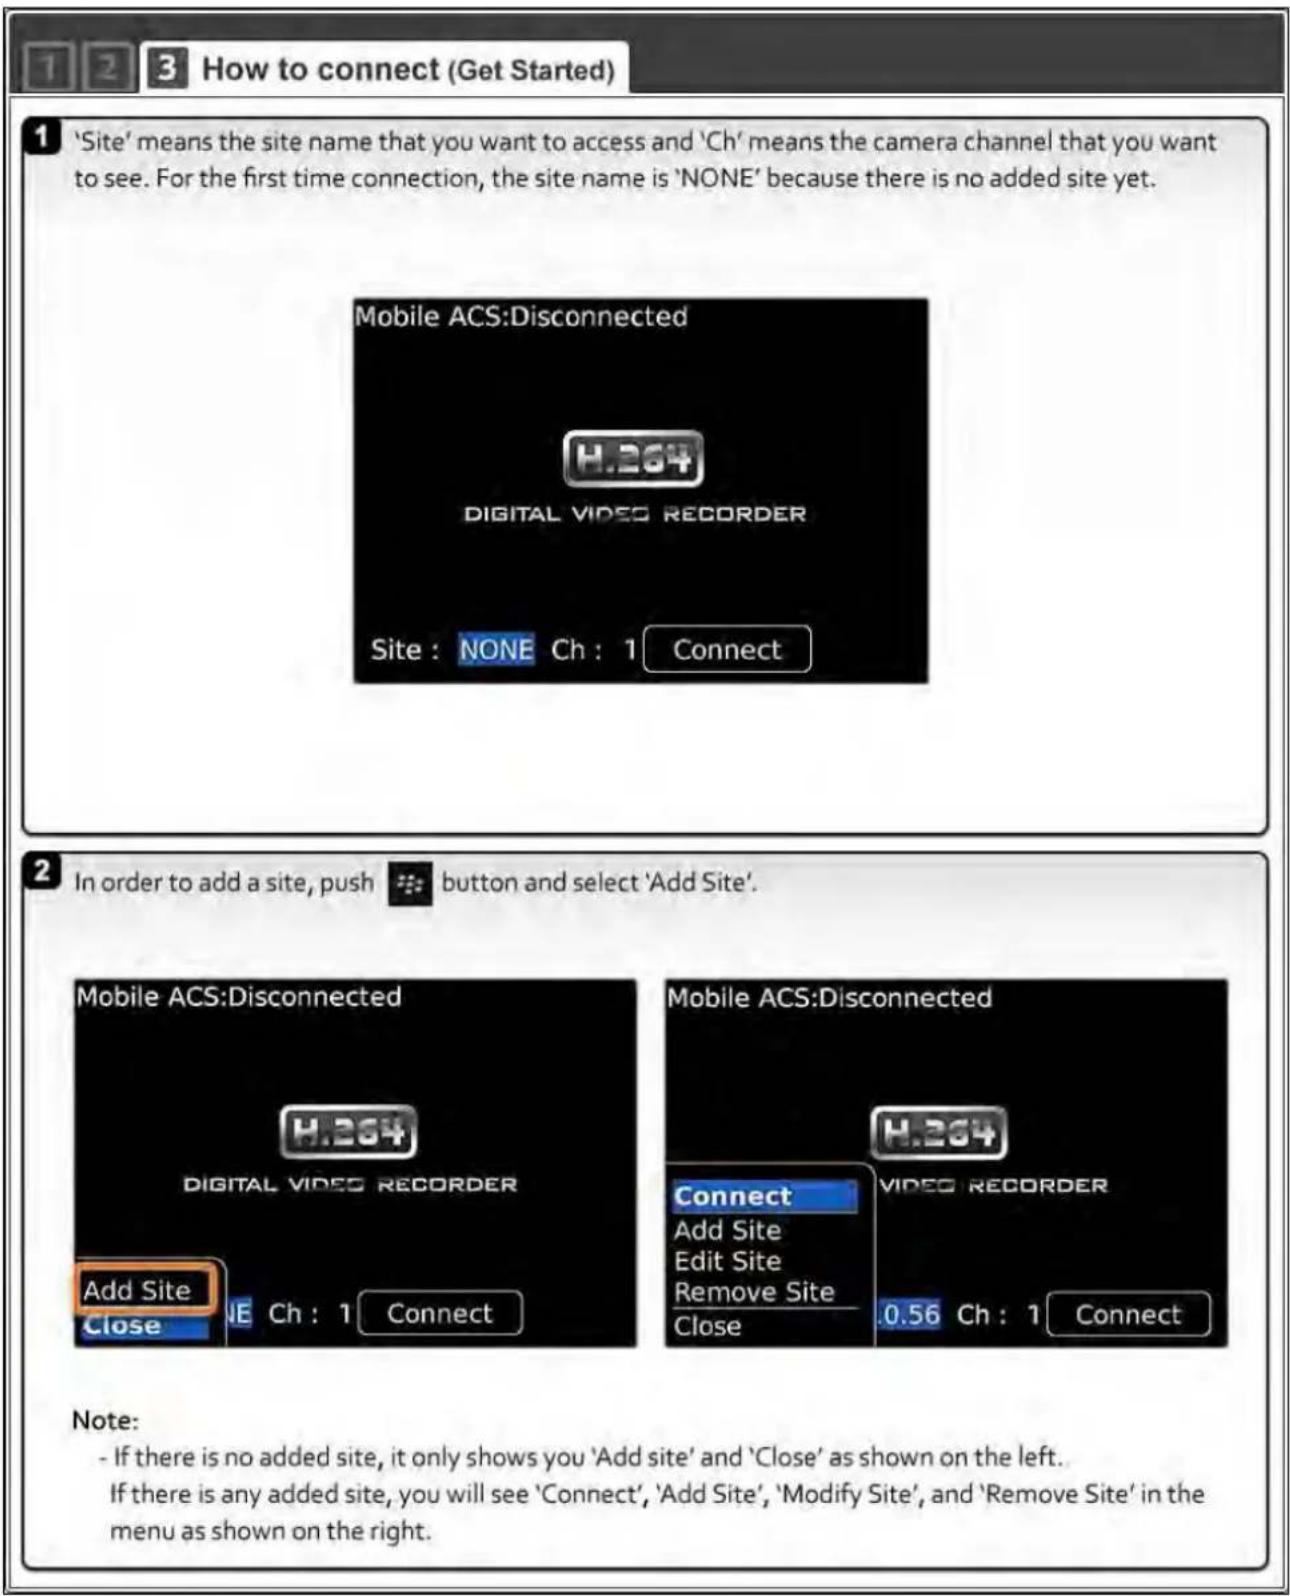
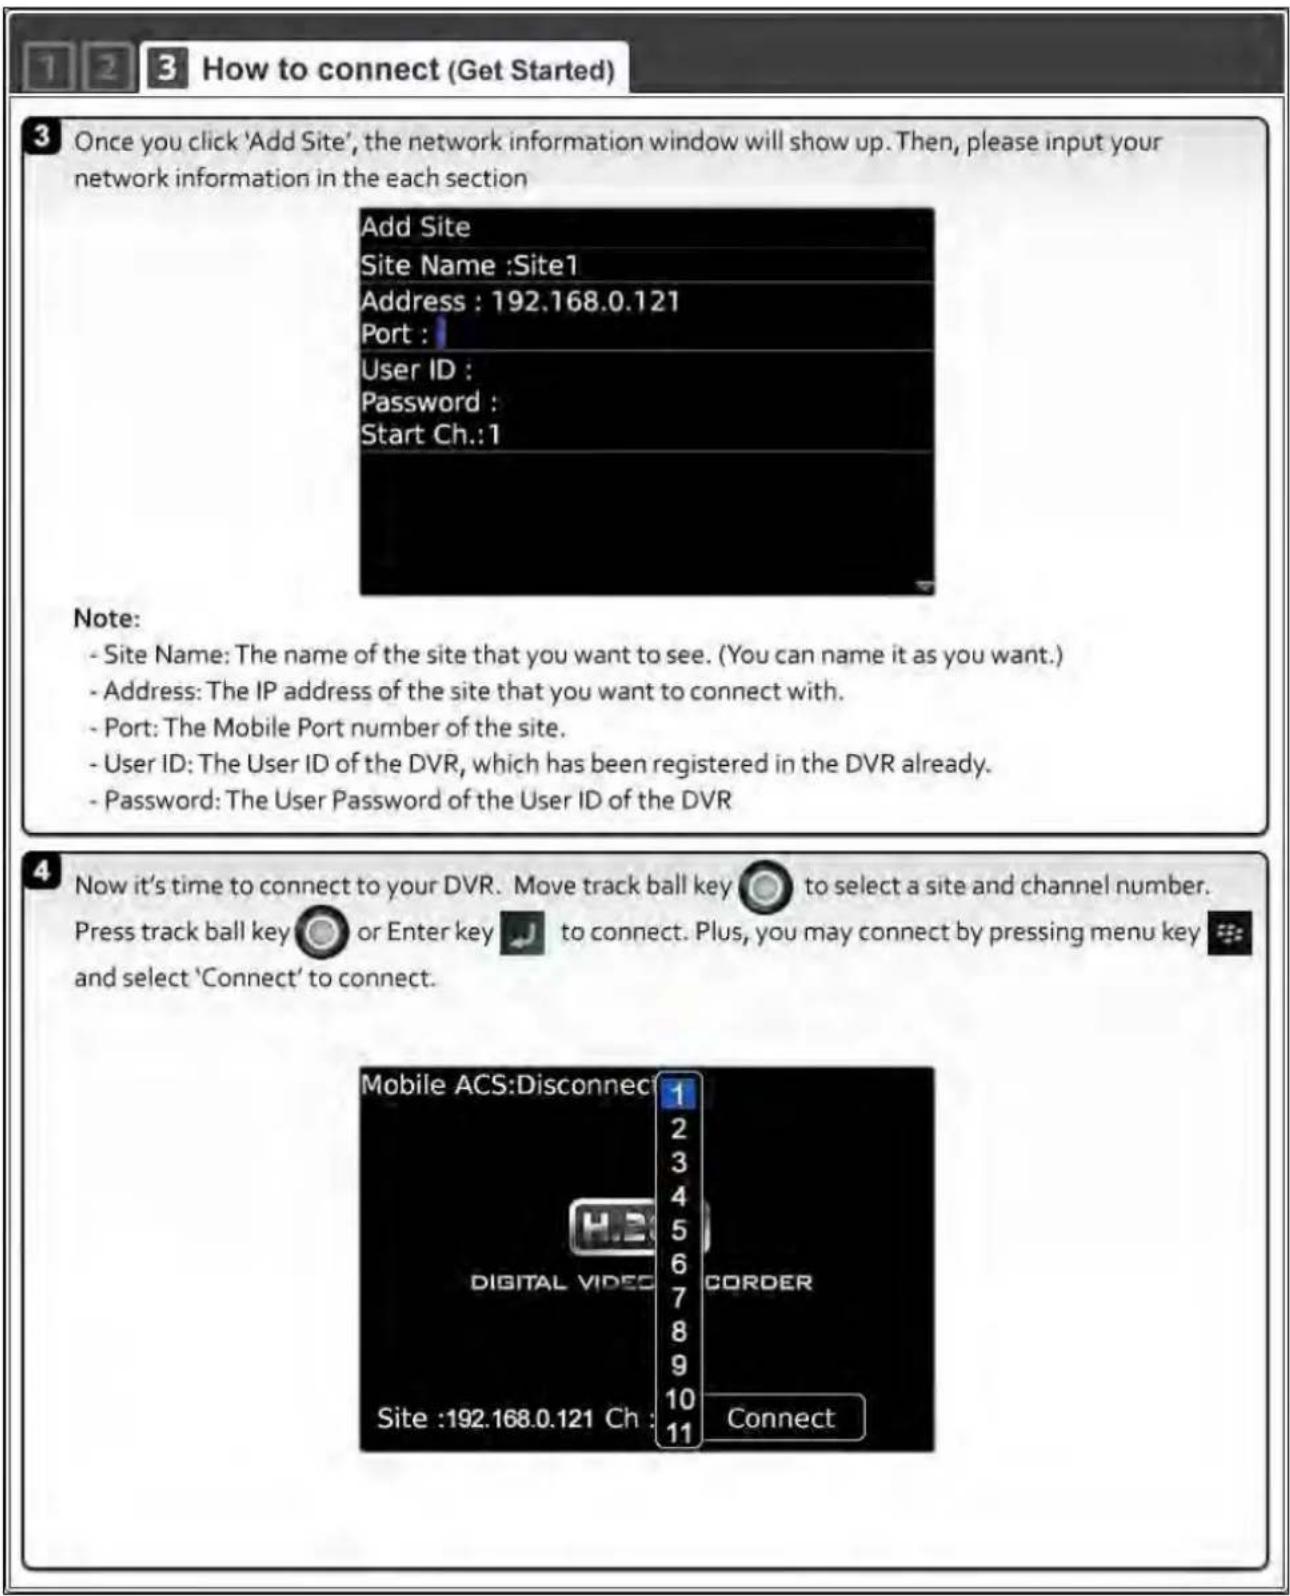
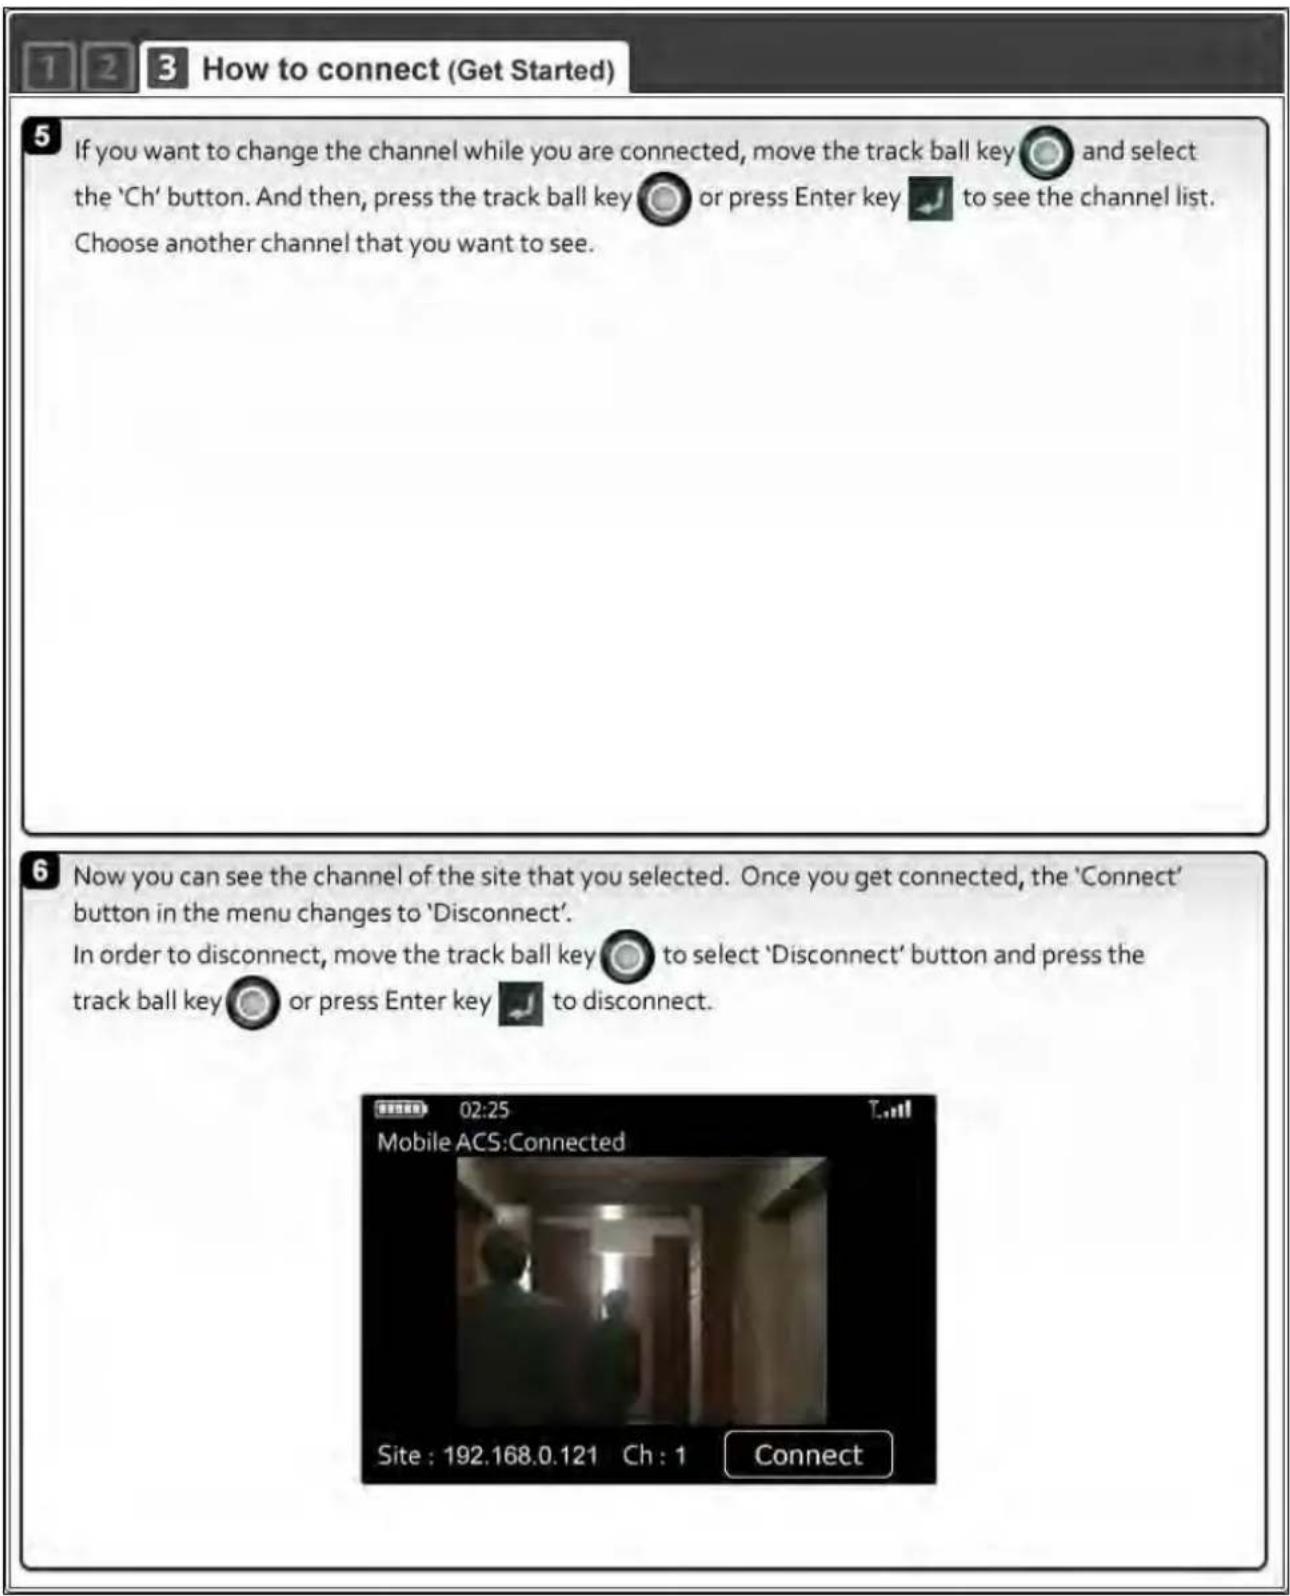
7.4 Using WAP+3G Connection
1 In case of using WAP, 3G Connection
1 First, you need to check out 'WEB PORT' of your DVR, because WAP Base Connection method is mainly based on the Mobile Web Service through the 'WEB PORT'. [Default setting is 80]
2 Type your connection URL in the Internet Browser in your Blackberry. The URL type should be one of the following two URL types.
http://Your_IP_Information/mobile/
[OR] http://Your_IP_Information/mobile/index.html
i.e) http://72.243.193.204/mobile/
[OR] http://72.243.193.204/mobile/index.html
Note:
- You may need to input 'index.html' at the end of your URL depending on your Web Browser Property. Therefore, please try both URL types.
3 If the 'WEB PORT' of your DVR is not '80', but other port number, for example, '8088', then you need to type '8088' at the end of the URL.
i.e) http://72.243.193.204:8088/mobile/ [OR] http://72.243.193.204:8088/mobile/index.html
4 When the connection is successful, you can see the below windows.
Please type in User ID and Password. The default setting is admin(User ID) and No password like below.
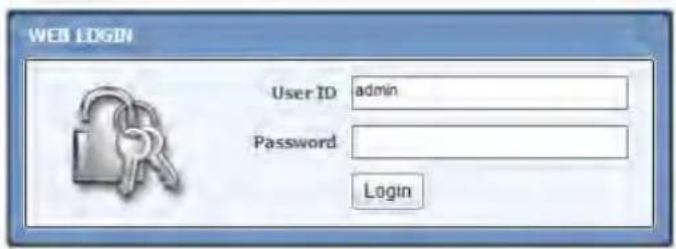
1 In case of using WAP, 3G Connection
Note:
- When connection established successfully, the JPEG image will be refreshing 1 image per about 5 seconds automatically.
* There is a refresh bar at the bottom of Blackberry screen.
- The image resolution is fixed to 320x240(NTSC) / 320x288(PAL) regardless of the recording resolution settings of your DVR.
APPENDIX : SPECIFICATION
| MODEL | DW-VF4 | DW-VF8 | DW-VF16 | |
| Photo |  |  | ||
| Compression Algorithm | Video : H.264, Audio : G723.1 | |||
| HDD | 1ea x SATA | 2ea x SATA | ||
| Max. 2TB HDD | Max. 4TB HDD (2TBx2ea) | |||
| OS | Embedded Linux | |||
| Video | Input | 4CH | 8CH | 16CH |
| Looping | N/A | Option: D-sub (by DW-Loop cable) | ||
| Video Mode | NTSC / PAL Auto Detection | |||
| Display Speed (NTSC/ PAL) | 120/100 fps | 240/200 fps | 480/400 fps | |
| Screen Split | 1,4 & PIP | 1,4,9 & PIP | 1,4,9,16 & PIP | |
| Video-Out | Monitor | 2ea x Main Monitor (Composite & VGA),1 x Spot Monitor (Composite) | 3ea x Main Monitor(Composite, HDMI & VGA),1 x Spot Monitor (Composite) | |
| RecordingSpeed(NTSC/PAL) | 352x240/288(CIF) | 120/100 fps | 240/200 fps | 480/400 fps |
| 704x240/288(2CIF) | 120/100 fps | 240/200 fps | 240/200 fps | |
| 704x480/576(D1) | 120/100 fps | 120/100 fps | 120/100 fps | |
| Recording Resolution | NTSC : 352x240, 704x240, 704x480 / PAL : 352x288, 704x288, 704x576 | |||
| Recording Modes | Continuous, Scheduled, Sensor-Activated, & Motion Detection Recording | |||
| Pre & Post Alarm Recording, Separate Setting for Panic Recording | ||||
| Playback &Search | Speed | x1, x2, x4, x8, x16, x32 | ||
| Function | 1, 4 CH(Multi-ChannelPlayback) | 1, 4, 9 CH(Multi-Channel playback) | 1, 4, 9 & 16 CH(Multi-Channel Playback) | |
| Time Bar Search, Calendar (Date & Time), Event Search, System Log Search,Bookmark | ||||
| Audio Input / Output | 1ea Input / 1ea Output | 4ea Input / 1ea Output | ||
| MIC Input | N/A | 1ea MIC Input | ||
| Alarm Input / Relay Output | 1ea Alarm In / 1ea Relay Out | 16ea Alarm In / 1ea Relay Out / 1ea TTL | ||
| PTZ Control and Port | Preview window on PTZ setup page,Virtual Joy-Stick Control on screen by mouse(3 different moving speed control) | |||
| RS-485 Port (1ea) | RS-485 Port (2ea) / RS-232 (1ea) | |||
| LAN | Auto IP and UPnP Support, Pathfinder Support10/100 Base-Tx Ethernet (RJ45) - Fixed IP, DHCP, DDNS | |||
| Network | 120fps@CIF (* Dual Stream Support: separate setting for Network stream) | |||
| Video Dual-Stream (Local Recording & Network Transmission) | ||||
| Live Monitoring, Remote Playback and File Backup (Triplex-on-Remote) | ||||
| Remote & E-Mail Notification, Remote System Reboot by IE | ||||
| Mobile Device support | iPhone, Backberry, iPad, Android, Galaxy S, Galaxy Tab, 3G WAP connection | |||
| Remote PTZ Control | Pan/Tilt/Zoom/Focus/Iris | |||
| Remote Management | Software | ACS Client S/W, Mobile Phone S/W, CMS S/W, Mac ACS Client S/W | ||
| Web (IE) | Live Monitoring, Playback & System Configuration | |||
| Backup Device | Internal | N/A (No DVD available) | ||
| External | Local Backup by USB Memory Stick (2ea), & Network Backup by CMS | |||
| Advanced Functions | UPnP & Auto Port Forwarding | |||
| Quick Setup with Recording Calculator,System Upgrade by USB & Network (Client S/W, FTP),Email Notification with JPG,E-mail Notification with TLS Certificate (Yahoo, Gmail, Hotmail)Help Menu on Major Functions, Call Monitor, Instant Backup,Simple DDNS SupportPreview window on PTZ setup, 3 different speed level to control PTZ by mouse | ||||
| Configuration Import & Export, AVI File Backup | ||||
| Warning Alarm for Warnings, such as System Over-Temperature, Video Loss,Recording Failure | ||||
| System Operation | Front Button, IR Remote Controller, USB Mouse | |||
| Power | 12V x 3A D/C | 12V x 6.67A D/C | ||
| Storage Temperature and Humidity | -20~60 °C / 20~95% RH | |||
| Operating Temperature and Humidity | 5~40 °C / 20~80% RH | |||
| Certification | CE & FCC & MIC & WEEE, RoHS | |||
- H.264 Digital Video Recorder
- Safety Information
- Preparations before installation
- FCC Information
- UL Information
- Contents
- CHAPTER 1 : DVR USER MANUAL
- GETTING STARTED 6
- OPERATION 15
- SETTING 35
- WEB SURVEILLANCE 64
- CHAPTER 2 : ACS CLIENT SOFTWARE USER MANUAL
- ACS (ADVANCE CLIENT SOFTWARE) USER GUIDE
- CHAPTER 3 : MAC ACS CLIENT SOFTWARE USER MANUAL
- MAC ACS USER GUIDE
- CHAPTER 4 : MOBILE PHONE SOFTWARE USER MANUAL
- MOBILE PHONE SOFTWARE USER GUIDE
- APPENDIX : SPECIFICATION
- DVR USER MANUAL
- GETTING STARTED
- Checking Supplied Items
- System Application Overview
- NOTE
- System Startup and Shutdown
- System Startup
- Front Panel
- IR Sensor Window (Remote Control Receiver)
- Rear Panel
- Channel DVR Compact Case
- Video-In
- Audio-In
- Audio-Out
- Video-Out
- Spot-Out
- VGA-Out
- USB Port (Version 2.0)
- LAN Port
- NTSC / PAL Selection
- RS-485 Terminal Block
- Sensor Terminal Block
- Alarm Terminal Block
- Power Input
- IR Remote Controller
- OPERATION
- User Login
- Live Display Mode
- Channel Selection
- Icons Description
- Toolbar
- Pop-up Menu
- Freeze Mode
- Call Monitor Operation
- PTZ Operation
- CAUTION
- Instant Playback of Recorded Video
- Clean Button During Playback
- Instant Backup (Quick Backup During Playback)
- Search Recording Image
- Date/Time Search
- NO COLOR No Recording
- CAUTION Dark Blue Color
- First Data
- Last Data
- Event Log
- System Log
- | Chapter 1 : DVR User's Manual
- Bookmark
- DST Setting and Screen Saver
- SETTING
- System
- System Info
- PROCEDURE How to upgrade system firmware by using USB memory stick
- How to upgrade system firmware by using FTP server
- User
- Export/Import
- HDD
- Factory Default
- Device
- Camera
- Audio
- Sensor
- Motion Alarm
- Extra Alarm
- PTZ
- PROCEDURE
- How to Setup PTZ Camera with Pelco-D Protocol (example)
- Record
- Record Setup
- NOTE COPY SETTINGS
- Schedule
- Holiday
- Network
- Network
- DDNS
- -Technical Tips-
- Notification
- Backup
- Manual Backup
- ACS (Advance Client Software) Backup Player
- Quick Setup
- WEB SURVEILLANCE
- Web Login
- Web Configuration
- Web Monitoring
- Web Playback
- Chapter 2
- ACS CLIENT SOFTWARE USER MANUAL
- Recommended PC Requirements
- Install
- Uninstall
- Basic Operation
- Login
- Screen Layout
- Tool Bar
- Site List Panel
- PTZ Control Panel
- Calendar Panel
- Search Panel
- Display Channel
- Event List Panel
- Advanced Operation
- Event Search
- Remote Backup
- Firmware Upgrade
- ACS Setup
- DVR Registration
- Add / Edit / Remove ACS (Advance Client Software) User
- Display
- Event
- Misc.
- Chapter 3
- MAC ACS CLIENT SOFTWARE USER MANUAL
- Mac Requirements
- Install
- Basic Operation
- Screen Layout
- Main Toolbar
- Site List Panel
- PTZ Panel
- Calendar Panel
- Search Panel
- Site Manager
- Chapter 4
- MOBILE PHONE SOFTWARE USER MANUAL
- iPhone Application Software
- Installation DW VMAX.
- Now you can see the detail information about the 'DW VMAX' application.
- Input your User ID and Password. Then, you will see the 'DW VMAX' icon on your iPhone.
- How to search and PTZ control.
- Android Application Software
- How to install DW VMAX
- 5
- 6
- 7
- 2 How to connect and view
- After running the application, press the 'Menu' button on your phone to bring up the 'Add Site' button.
- First, select DVR Type: VMAX or VMAX480. Input the new site information that you would like to connect to. Press 'Menu' button to bring 'Save' button and click 'Save' to save your settings.
- Press and hold the desired site in the site list for the connection menu to appear. Press 'Connect' button to connect.
- You will see a single channel live view or four split channel live view of the connected site. Press a desired channel button (Ch1-Ch16) or four-split channel mode to view another set of channels.
- 2 How to connect and view 3
- Press a desired channel button (ch1-ch16) or four split channel mode to view another channels as shown below.
- 2 3 How to control PTZ
- Blackberry Application Software
- Installation Mobile ACS.
- After you unzip the zip folder "StandardMobileACS.ZIP", then you will see two files in there.
- Note :
- Please find 'Downloads' folder in your Blackberry and get into it.
- How to manage connections (Before you start)
- Go to 'Manage Connections' in the Blackberry main menu.
- 2 How to manage connections (Before you start)
- Using WAP+3G Connection
- In case of using WAP, 3G Connection
- Note:
Brand : Digital Watchdog
Model : VMAXFlex DW-VF81T
Category : Video recorder