
TT-8619VNC - Interactive touchscreen Newline - Free user manual and instructions
Find the device manual for free TT-8619VNC Newline in PDF.


| Product Type | Interactive Flat Panel Display |
| Brand | Newline |
| Model | TT-8619VNC |
| Screen Size | 86 inches (diagonal) |
| Resolution | 3840 x 2160 (4K UHD) |
| Touch Technology | Infrared (up to 20 touch points) |
| Brightness | 350 cd/m² |
| Contrast Ratio | 4000:1 |
| Viewing Angle | 178° (horizontal/vertical) |
| Operating System | Android 8.0 (Oreo) or later |
| Built-in Speakers | 2 x 15W |
| Connectivity | HDMI (x3), VGA, USB (x4), LAN, RS232, Audio In/Out |
| Power Supply | AC 100-240V, 50/60Hz |
| Power Consumption | ≤350 W (typical) |
| Dimensions (W x H x D) | 1957 x 1162 x 89 mm (without stand) |
| Weight | Approx. 60 kg (without stand) |
| Mounting | VESA 800 x 600 mm |
| Included Accessories | Remote control, 2 stylus pens, power cable, HDMI cable, USB cable, wall mount kit |
| Cleaning | Use a soft, dry cloth. Avoid abrasive cleaners. |
| Safety | Designed for indoor use only. Do not expose to moisture. |
Frequently Asked Questions - TT-8619VNC Newline
User questions about TT-8619VNC Newline
0 question about this device. Answer the ones you know or ask your own.
Ask a new question about this device
Download the instructions for your Interactive touchscreen in PDF format for free! Find your manual TT-8619VNC - Newline and take your electronic device back in hand. On this page are published all the documents necessary for the use of your device. TT-8619VNC by Newline.
USER MANUAL TT-8619VNC Newline
Thank you for choosing Newline collaboration touch screen.
The symbol of the crossed out wheeled bin indicates this product should not be placed in municipal waste. Instead, dispose of waste equipment by handing it over to a designated collection point for the recycling of electrical and electronic equipment.

natural_image
Symbol of a trash bin with crossed lines indicating no waste or restriction, and a solid black rectangle below (no text or labels)Symbol Conventions
Symbols are used in this document to indicate operations that require special attention. The symbols are defined as follows:
 NOTE NOTE | Used to supplement explanations or descriptions of current operations. |
 CAUTION CAUTION | Used to signal equipment or environmental safety warnings. Not taking heed of said warnings could result in potential danger, equipment damage, data loss, reduced equipment performance, or other unpredictable results. |
 WARNING WARNING | Used to signal potential danger which could result in severe injury or even death. |
Safety Instruction
For your safety, please read the following instructions before you use the product. Improper operations may cause severe injury or property damage. Please refrain from repairing the product on your own.
| WARNING | |
 | If major failures occur, disconnect the product from power source immediately.Major failures include the following:Smoke, peculiar smell or abnormal sound discharged from the product.No image or sound is displayed, or if image error occurs.If the above scenarios occur, do not continue using the product. Disconnect power supply immediately and contact professional staff. |
 | Do not drop liquid, metal or anything combustible into the product.If liquid or pieces of metal get into the product, turn off the power and disconnect the power source, then contact professional staff.Supervise children when they are close to the product. |
| Place the product on a stable surface.An unstable surface includes but is not limited to an inclined surface, a shaky stand, desk or platform, which might cause turnover and damage. | |
 | Do not open the cover or modify the product on your own.High voltage components are installed in the product. When you open the cover, high voltage, electric shock, or other dangerous situations may occur.If inspection, adjustment, or maintenance is required, contact the local distributor for help. |
 | Use the specified power supply voltage.To prevent the product from being damaged, do not use cables other than the one provided with the product.Use a three-wire socket and ensure that it is properly grounded.Pull out the power plug from the socket if the product is not to be used for a long period. |
| Regularly clean the dust and metal around the power plug.Fire or electric shock may be caused if the product is powered on, when you are cleaning.Pull out the power plug before cleaning it with a dried cloth. | |
  | Do not place items on top of the product.Do not put items, such as a liquid container (a vase, flowerpot, cosmetics or liquid medicine) on the top of the product.If any water or liquid is spilled on the product, a short circuit may occur and cause fire or electric shock.Do not install the product in an improper place.Do not install the product in humid places, such as the bathroom, the shower room, near windows, or outdoor environments that experience rain, snow or other harsh weather. Avoid installation near hot spring vapor. The preceding environments may cause faults in the product or electric shock under extreme conditions.Do not put expose the product to a fire source, such as an ignited candle. |
 | Pull out the power plug during thunderstorms.Do not touch the product during a lighting storm to avoid electric shocks.Install or place components that supply high enough voltage out of the reach of children. |
 | Do not touch the power cable with wet hands. |
| CAUTION | |
 | Do not install the product in high temperature environments.Do not install the product near a heat source, such as a radiator, a heat reservoir, a stove or other heating products.Do not expose the product to direct sunlight, which may cause high temperatures and subsequent faults in the product. |
 | Transport of the product.Pack the product for transport or maintenance by using the cartons and cushioning material provided with the product.Keep the product vertical during transport. The screen or other components are easily broken if the product is moved inappropriately.Before you move the product, disconnect all external connections and separate all toppling preventing products. Move the product carefully to prevent it from being hit or squeezed, especially the screen, which may cause injury if broken. |
  | Do not cover or block up any vents on the product. Any overheated components may cause fire, damage the product, and shorten the product's service life.Do not lay the product down where the venting surface will be covered.Do not install the product on a carpet or cloth.Do not use a cloth such as table cloth to cover the product.Keep away from the product when using a radio.The product complies with the international EMI standard regarding prevention of radio interference. However, interference may still exist and cause noises to the radio. If noise occurs in the radio, try the following solutions.Adjust the direction of the radio antenna to avoid the interference from the product.Keep the radio away from the product. |
| Do not damage the power cable.Do not damage, change, twist, bend, or forcibly drag the power cable.Do not put weights (such as the product itself) on top of the power cable.Do not forcibly drag the cable when you pull out the power plug. If the power cable is damaged, please contact the local distributor to repair or replace it.The power cable in the accessory box is for this product only. Do not use it on other products. | |
| Correct battery usage.Galvanic corrosion, electric leakage, and even fire may be caused by improper battery usage.It is recommended to use the designated type of battery and install the battery by correct electrodes (positive and negative).Do not use a new battery alongside a used one.Take out the batteries if the remote control is not to be used for a long period.Do not expose the batteries to overheated environments such as sunlight and firing.Dispose of used batteries based on your local regulations. | |
| Suggestions for usage:Use the product in an environment with comfortable lighting. It is harmful to your eyes to watch in a too bright or too dark environment.Rest your eyes after an extended period of usage.Keep sufficient distance from the product to protect your eyes and prevent eyestrain.Adjust the volume to an appropriate level, especially at night.Use amplifier equipment as the audio input source with caution. If you must use amplifier equipment, the input power should not exceed the maximum of speaker power. Otherwise, the speaker can become overpowered and damaged. | |
| Special note:Zero energy consumption can be achieved when the product isn't connected to any external power supply. Therefore, it is recommended to shut down the device when not watching.Under the premise of ensuring the display quality, the energy consumption can be reduced by reducing the brightness of the display.This product can be paired with various internal PC, which can be upgraded or replaced according to your needs. | |

CAUTION
There are electronic components in the plastic parts at the bottom of the product. If the plastic parts are damaged, the camera or the product may malfunction. To avoid damage to the plastic parts, please pay attention to the following:
- Do not squeeze, knock at or disassemble the plastic parts.
- Do not place heavy objects on plastic parts.
- When transporting the product, do not impact the plastic parts at the bottom.
- When transporting the product, do not place the plastic parts on the ground.
Appearance
- Front View
• TT-6519VNC/TT-7519VNC/TT-8619VNC:

- Rear View
• TT-6519VNC/TT-7519VNC/TT-8619VNC:

1 Touch screen
6 Microphone
11 Speaker
2 Light sensor
7 Camera
12 Rear port 1
3 Power button
8 Camera indicator
13 Rear port 2
4 IR receiver
9 Power socket
14 Internal PC
5 Bottom plastic part
10 Power switch
15 Bar interface
Front Buttons

| Button Function description | |
| Power on/off.In power-on state, press it to enter the sleep state, press and hold for 2 seconds to shut down.In power-off state, press it to turn on the power. | |
Rear Port

WARNING
Voltage/current output of the power supply: 5V/2A (Max.); please follow the requirements and do not use it on products that do not meet the specifications, or else it may cause fire or electric shock.

| Name Function description | |
| MIC Microphone input port. | |
| Audio In Audio input port, used in combination with “ VGA In”. | |
| VGA In | VGA signal input port.Used in combination with “USB 3.0 Touch” to operate the PC in touch mode. |
| HDMI 1 In | HD signal input port 1.Used in combination with “USB 3.0 Touch” to operate the PC in touch mode. |
| HDMI 2 In | HD signal input port 2.Used in combination with “USB 3.0 Touch” to operate the PC in touch mode. |
| Touch USB 3.0 Connect to the touch port of your PC. | |
| Type C | Connect to USB flash drive, MAC, PC, or mobile phone with OTG function. Output 5V 3A power supply. Support data, audio, video, and charging. The transmission rate is 5Gbps. The maximum resolution of video transmission is 3840 x 2160@60Hz. |
| USB 3.0 | Connect to USB devices such as mobile hard disk, USB flash drive, USB keyboard and mouse. When the interface is Android, the device on the USB is used by Android. When it switches to Windows, the USB device is connected to Windows. |
| USB 2.0 Embedded | For system upgrade. |
| WAN Network interface, connecting to RJ45 terminal. | |
| Network reset button | Press the reset button for 5 seconds with a pinhole object to reset the network settings of the product to default. |
| RS232 | Serial port signal input interface, which allows inputting serial port settings through a specific serial port control device to achieve the purpose of controlling the product. |
| HDMI Out Connect to an electronic video device with HDMI input. | |
| Line Out Connect to audio output device such as headphone and speaker. | |
| SPDIF | Digital audio interface, optical output interface. Connect audio equipment with fiber optic input; such as amplifiers, stereos, and speakers. |
| Bar interface | Dedicated interface for bar speaker (optional)Warning:This interface is dedicated for bar speaker. Do not connect any other device to it, or else the device or interface may be damaged. |
Remote Control
- Remote Control Buttons
| Buttons Function | |
| Power on/off. | |
| Standby | Enter/exit the standby mode. |
| Mute or unmute. | |
| Microphone switch. | |
| Up/Down/Left/Right selection button. | |
| OK | Confirm button. |
| Press once to return to the previous page;Press twice to exit the current program.Note: In the settings page, press once to exit. | |
| Return to homepage. | |
| Open the task management sidebar. | |
| Decrease the volume. | |
| Increase the volume. | |
| Open the bottom toolbar (no function on the homepage and the “All Apps” page). | |
| Open the “All Apps” page. | |
| Turn the brightness bar on/off (drag the slider to adjust the brightness) | |
| Enter the Settings interface. | |
| HDMI | Switch to HDMI signal source. |
| Type-c | Switch to TYPE-C signal source. |
| Buttons Function | |
| Lock/unlock screen touch function. | |
| HDMI1 | Switch to HDMI1 signal source. |
| HDMI2 | Switch to HDMI2 signal source. |
| Take a screenshot. | |
| VGA | Switch to VGA signal source. |
| PC | Switch to the internal PC source. |

- Remote Control Usage Instructions

CAUTION
To avoid potential malfunctions, please read the following instructions and use the remote control appropriately.
- Do not drop or smack the remote control.
- Do not spill liquids on the remote control.
- Do not place the remote control on a wet object.
- Do not expose the remote control to direct sunlight or other heat sources.
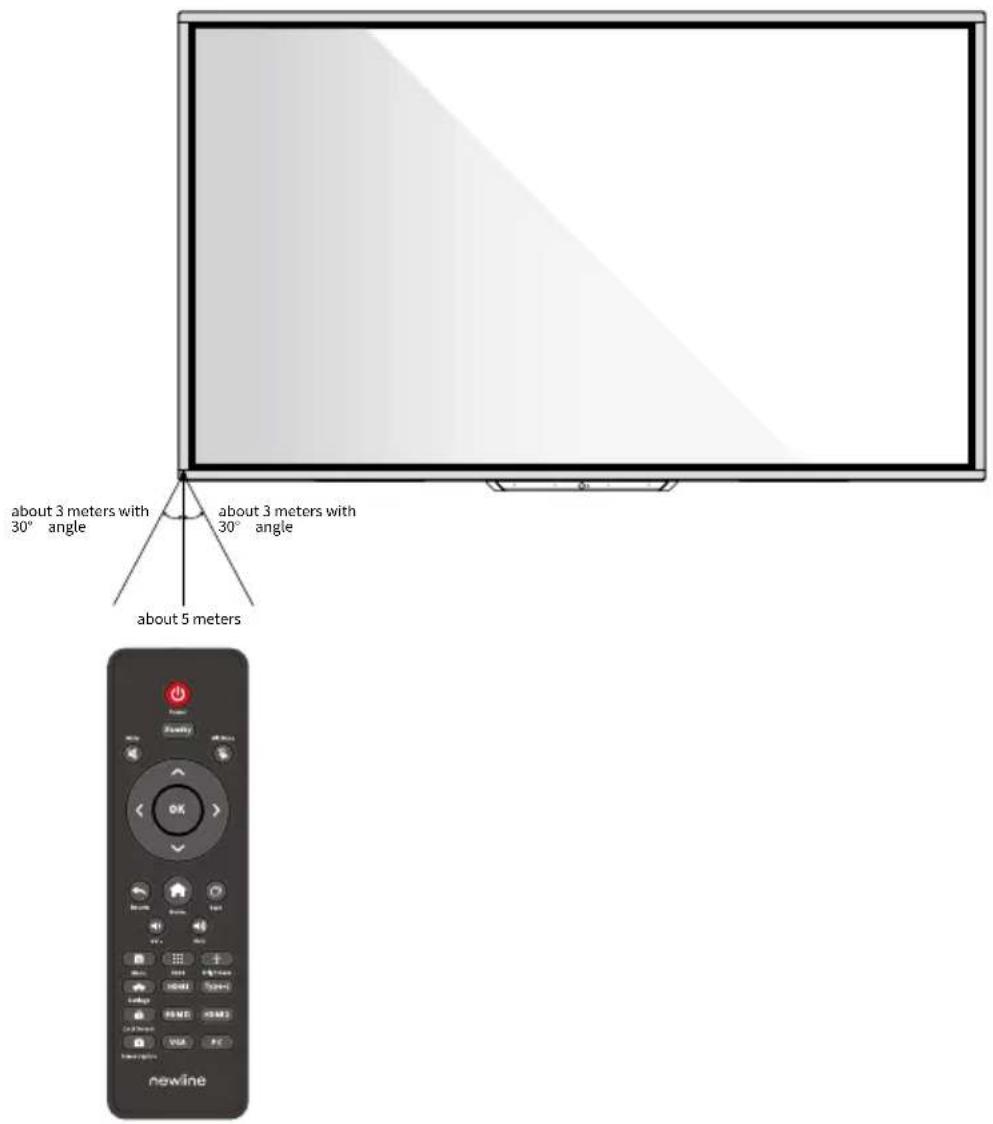
Use the remote control within 5 meters in front of the remote-control receiver and at an approximate 30^ angle from both sides.
Precautions
Environment
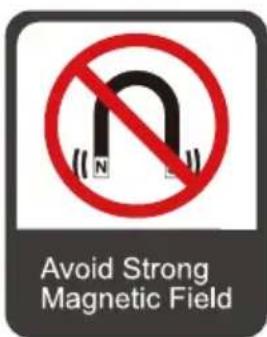


Keep Away From Combustible Gas

Avoid Any Corrosive Liquids

Indoor Use Only
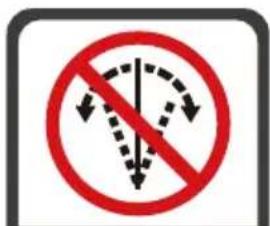
Do Not Install Tilted
Direction
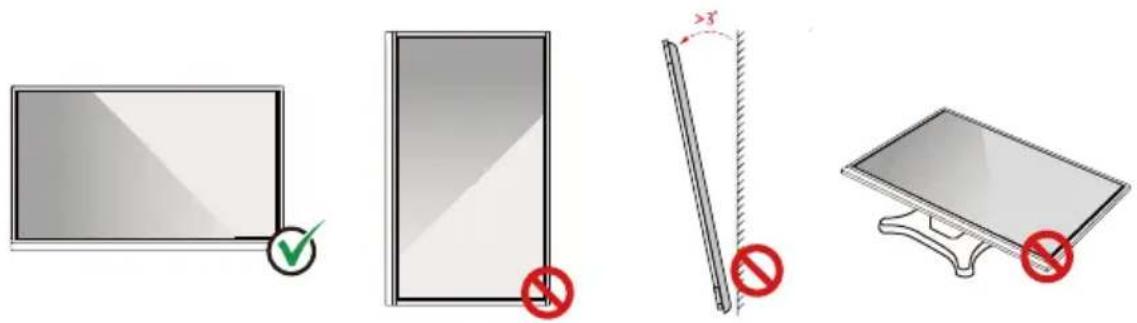
Hang the Product Horizontally No Vertical Installation Do Not Lay/Not Install Tilted
Load Bearing
You can select moveable installation or wall mounting according to your own needs. Wall mounting can help users significantly reduce occupied space.
When using moveable installation, use the mobile stand specified by the manufacturer. If you use a self-made mounting bracket, its carrying capacity should be at least 4 times the actual carrying weight. The carrying capacity of the support table should be at least 4 times the actual carrying weight, and the product shall be stably mounted.
When using wall mounting, the mounting surface carrying the product should be strong enough to bear at least 4 times the actual carrying weight. When the mounting surface is the wall or roof of a building, it must be solid brick, concrete or a mounting surface of equivalent strength. If the mounting surface is loose (such as old-style brick walls, wood, solid brick walls, etc.), or a metal or non-metal structure, or if the surface decoration layer is too thick and obviously insufficient in strength, reinforcement and support measures should be implemented to prevent potential safety hazards.
- Vertical installation
When installing, try to keep the product vertical. The vertical tilt range allowing for wall-mount installation is ±3 degrees. Excessive tilt angle may cause the screen glass to fall off or the product to collapse.

Note
- In case of screen glass breakage, keep all personnel 3 meters away from the screen to ensure safety.
- Do not perform any installation or disassembly when the screen glass is broken or falls off.
- For any problem, please contact our support desk. Our company is not responsible for any damage or losses incurred by users if the users fails to follow the instructions.
Ventilation
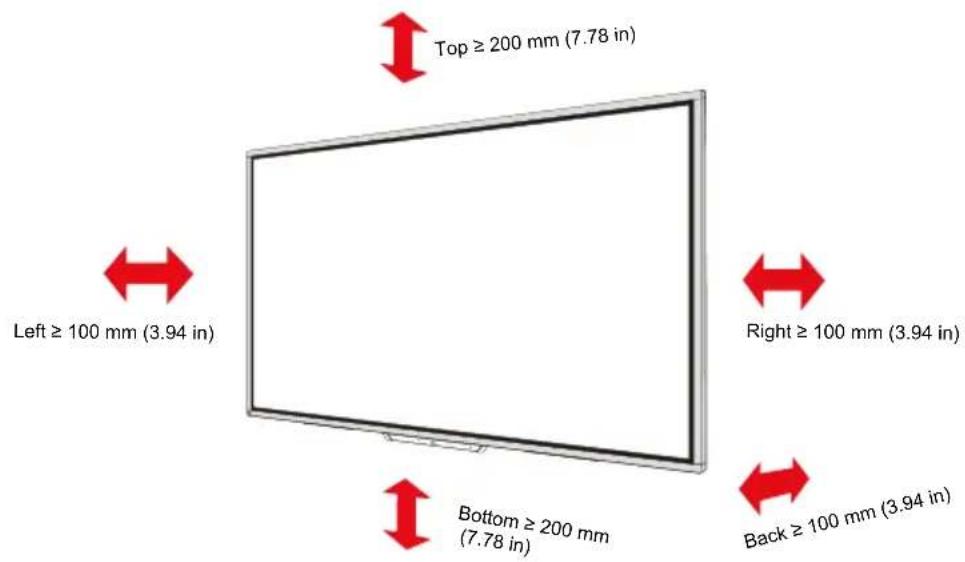
| Distance from mounting surface (mm) | |||
| Left and right sides | Top Bottom Rear | ||
| 100 200 200 | 100 | ||

CAUTION
- In addition to the above requirements, the area of the bottom, side and top vents should not be less than 50% of the sealing area and good air circulation must be maintained when the product is embedded in the wall and a cabinet.
- For wall mounting, the depth of wall bolts should be greater than 10mm.
Internal PC Installation

WARNING
Do not perform the following on the internal PC, otherwise the product may be damaged or end up being unusable!
- Do not plug or unplug the internal PC with power connected. Please make sure that the power has been turned off before power off.
- Do not use the internal PC before the screws have been tightened or if any screws are missing.
Step 1: (Optional) Unscrew the M3 screws by hand to remove the internal PC shielding cover.
Note
This step is optional and suitable for models with the internal PC shielding cover.

Step 1: Push the internal PC horizontally into the interface port.

Step 3: Pass the fixing screws through the upper and lower lugs and tighten them.

natural_image
Pure electrical circuit lines without any symbolsNote
If the screen fuzzes, flashes or if no signal is received from the internal PC after turning on the power, it means that the internal PC has not been properly installed. Please check it and re-install.
Power On
Step 1: Use AC power (100V\~240V, 50Hz/60Hz) as the product power source. Make sure the power plug fully inserted and that the ground wire of the outlet is properly connected.

natural_image
Technical line drawing of a mechanical assembly with grid-patterned components and a pressure gauge (no text or symbols)Step 2: Turn on the rocker switch (on the rear side of the screen, next to the power socket) after a power source has been connected. The power indicator should be red.

Step 3: Press the “💡” button on the product or the “💡” button on the remote control to start the product (the indicator light turns green).
Power Off
Step 1: Press the “💡” button on the remote control or press and hold the “💡” button on the front panel to turn the power off. The indicator light turns red.
Step 2: If you want to completely turn off the product, turn off the rocker switch under the product (next to the Power socket) and unplug the power cord.

CAUTION
- When the product enters sleep mode or shutdown, the system will first detect whether the internal PC is turned off. If not, it first turns off the internal PC before it enters sleep mode or shutdown.
- Please shut down the product before disconnecting the power source or it may damage the machine. Accidental power failure may cause damage to the machine.
- Do not repeatedly turn the power on & off in a short period of time as it may cause malfunction.
Indicator status:
| Indicator Product status | |
| Off Shut down or power | disconnected |
| Red Shutdown | |
| Green Standby / working | state |
| Green flashes (every 2 seconds) Sleep mode | |
| Green on, red flashes once every 3 seconds | Locked screen |
Note
- Enter standby mode: When the product is turned on, press the "Standby" button on the remote control or hold the screen for more than 3 seconds with 3 fingers.
- Exit standby mode: press the power button on the front panel, or press any button on the remote control or tap the screen.
- Enter sleep mode: When the product is turned on, press the “ 🔊 ” button on the front panel.
- Exit sleep mode: press the power button on the front panel, or press any button on the remote control or tap the screen twice.
- Lock screen: When the product is turned on, press the "Lock screen" button on the remote control.
- Unlock screen: Press the “Lock screen” button on the remote control, press the power button on the front panel, or tap the screen three times in quick succession to resume touch control.
newline
For more product information, please visit https://newline-interactive.com
National Service Hotline: +1 888 233 0868
The company is committed to product updates and technical improvements. The technical parameters and specifications are subject to change without prior notice. The pictures in this manual are for reference only.
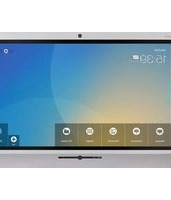
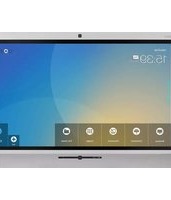
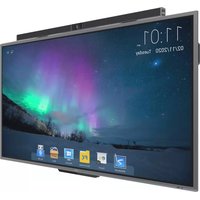


Brand : Newline
Model : TT-8619VNC
Category : Interactive touchscreen