TATO - Car audio interface PAC - Free user manual and instructions
Find the device manual for free TATO PAC in PDF.


| Product Type | Portable electronic device |
| Brand | PAC |
| Model | TATO |
| Dimensions (L x W x H) | 15 x 10 x 2.5 cm |
| Weight | 250 g |
| Power Supply | Built-in rechargeable battery, 5V DC via USB |
| Battery Capacity | 1500 mAh |
| Charging Time | Approximately 2 hours |
| Display | 1.5-inch monochrome LCD |
| Main Functions | Time display, alarm, stopwatch, temperature reading |
| Connectivity | None (standalone operation) |
| Memory | No internal storage |
| Water Resistance | Not waterproof, keep dry |
| Operating Temperature | 0°C to 40°C |
| Cleaning | Wipe with a soft, dry cloth. Do not use liquids or abrasives. |
| Safety Precautions | Do not expose to extreme temperatures or humidity. Keep away from children under 3 years (small parts). |
| Spare Parts Available | Only battery (replaceable by professional). No other spare parts. |
| Repairability | Not user-serviceable. Contact authorized service center for repairs. |
| Country of Origin | China |
| Warranty | 1 year limited warranty |
Frequently Asked Questions - TATO PAC
User questions about TATO PAC
0 question about this device. Answer the ones you know or ask your own.
Ask a new question about this device
Download the instructions for your Car audio interface in PDF format for free! Find your manual TATO - PAC and take your electronic device back in hand. On this page are published all the documents necessary for the use of your device. TATO by PAC.
USER MANUAL TATO PAC
The TATO is designed to control the power and audio levels of the factory installed. JBL amplifier allowing the OEM radio to be removed and replaced with an aftermarket stereo.
Installation:
Note: BEFORE REMOVING THE FACTORY RADIO: BALANCE AND FADE IT TO THE CENTER, TURN THE RADIO UP TO AT LEAST 3/4 VOLUME, TURN THE RADIO OFF, TURN THE IGNITION OFF & THEN PROCEED WITH REMOVING THE FACTORY RADIO
Disconnect the factory radio from the OEM wiring harness and remove it from the vehicle. Make the following connections of the TATO wiring harness to the aftermarket radio:
Connections:
Yellow Wire - Connect to 12 Volt Constant Power on aftermarket radio•
Red Wire - Connect to Accessory on aftermarket radio•
Black Wire - Connect to Ground on aftermarket radio•
Orange/White Wire - Connect to Dimmer on aftermarket radio
- *11 Pin Harness - Connect to PAC's SWI-X, SWI-JACK, SWI-PS or SWI-ECL2 (Sold Separately)
Red Bullet Connector - Connect to Accessory
Black Bullet Connector - Connect to Ground
- Connect the 4 RCA connectors to the RCA outputs of the aftermarket radio
Front Left - White RCA Front Right - Grey RCA
Rear Left - Green RCA Rear Right - Purple RCA
If connecting the TATO to a head unit with only 2 Channel RCA outputs, use two pairs of RCA splitters (1M-2F) to split the signal. Failure to connect all 4 inputs of the TATO will result in loss of audio performance. Fade audio controls will only function with a 4 channel aftermarket deck.
Connections to the TATO Interface:
- Connect 24-pin translucent connector to the side of the TATO.
- Connect 8-pin DIN cable to the plug on the side of the TATO.
Connections to the Vehicle:
- Plug the main 20-pin Toyota harness into the matching factory wiring harness.
- *If using PAC's SWI-X, SWI-JACK, SWI-PS or SWI-ECL2, Plug the smaller 20-pin harness into the matching factory wiring harness. Program PAC's SWI-X, SWI-JACK, SWI-PS or SWI-ECL2 for version #8 and follow the programming instructions included with PAC's SWI-X, SWI-JACK, SWI-PS or SWI-ECL2.
DISCLAIMER: Under no circumstances shall the manufacturer or the distributors of the TATO be held liable for consequential damages sustained in connection with the TATO. The manufacture and its distributors will not, nor will they authorize any representative or any other individual to assume obligation or liability in relation to the TATO other than its replacement.

Adjusting Volume Output:
When initially connecting the TATO to the vehicle the max output might not meet that of the factory radio. If the volume is low you can adjust the output using the dip switches on the side of the module. It is recommended to use a 4 volt RMS capable aftermarket radio. When adjusting the gain output it is recommended to start with the plus 7dB setting and working your way down.
Note: It may take up to 10 seconds before the gain adjustment is heard.
The dB gain adjustments are as follows:
| Dip Switch Settings | |||
| Dip Switch 1 | Dip Switch 2 | Dip Switch 3 | dB Gain |
| Off | Off | Off | Plus 0dB |
| On | Off | Off | Plus 1dB |
| Off | On | Off | Plus 2dB |
| On | On | Off | Plus 3dB |
| Off | Off | On | Plus 4dB |
| On | Off | On | Plus 5dB |
| Off | On | On | Plus 6dB |
| On | On | On | Plus 7dB |
Set all other dip switches 4-8 to OFF (up) position
Troubleshooting
| Symptom | Resolution |
| No audio from rear speakers | all 4 RCA connections on the TJA need to be connected to the Aftermarket head unit |
| No fade from front to back | Only a head unit with 4 RCA outputs will provide fade control |
| No audio through any speakers | Check the Dip Switches on the side of the TJA interface. Verify they are all "OFF" (Up) |
Warranty:
One Year Limited Warranty
The quality controls used in the manufacture of this product will ensure your satisfaction. This warranty applies only to the original purchaser of this product from an authorized Pacific Accessory Corporation dealer. This warranty covers any supplied or manufactured parts of this product that, upon inspection by Pacific Accessory Corporation authorized personnel, is found to have failed in normal use due to defects in material or workmanship. This warranty does not apply to installation expenses. Attempting to service or modify this unit, operating this unit under conditions other than the recommended voltage will render this WARRANTY VOID. Unless otherwise prescribed by law, Pacific Accessory Corporation shall not be liable for any personal injury, property damage and or any incidental or consequential damages of any kind (including water damage) resulting from malfunctions, defects, misuse, improper installation or alteration of this product.
All parts of this Pacific Accessory Corporation product are guaranteed for a period of 1 year as follows: Within the first 12 months from date of purchase, subject to the conditions above, Pacific Accessory Corporation will repair or replace the product at their discretion, if it is defective in material or workmanship providing it is returned to an Authorized Pacific Accessory Corporation Dealer, with PROOF OF PURCHASE from an authorized Pacific Accessory Corporation dealer.
Warning:
This equipment may be reset by unintentional electrostatic discharge during operation. Exposure to direct sunlight or extreme heat may cause damage or malfunction.
FCC Class B Radio Frequency
Interference Statement:
This equipment has been tested and found to comply with the limits for a Class B digital device, pursuant to Part 15 of FCC rules. These limits are designed to provide reasonable protection against harmful interference in a residential installation. This equipment generates, uses, and can radiate radio frequency energy and, if not installed and used in accordance with the instructions, may cause harmful interference to radio communications. However, there is no guarantee that interference will not occur in a particular installation. If this equipment does cause harmful interference to radio or television reception, which can be determined by turning the equipment off and on, the user is encouraged to try to correct the interference by one or more of the following measures:
-
Re-orientate or relocate the receiving antenna.
-
Increase the separation between the equipment and receiver.
-
Connect the equipment into an outlet on a circuit different from that of which the receiver is connected.
-
Consult the dealer or an experienced radio / television technical for help
Notice : The changes or modifications not expressly approved by the party responsible for compliance could void the user authority to operate the equipment.
DISCLAIMER: Under no circumstances shall the manufacturer or the distributors of the TATO be held liable for consequential damages sustained in connection with the TATO. The manufacture and its distributors will not, nor will they authorize any representative or any other individual to assume obligation or liability in relation to the TATO other than its replacement.
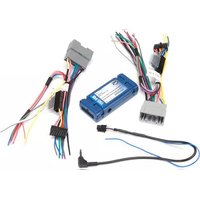
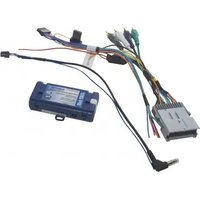
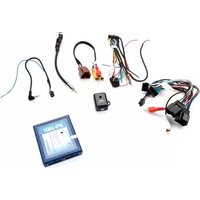

Brand : PAC
Model : TATO
Category : Car audio interface