
the Crisp Control BWM250 - Cupcake Machine BREVILLE - Free user manual and instructions
Find the device manual for free the Crisp Control BWM250 BREVILLE in PDF.


| Brand | Breville |
| Model | the Crisp Control BWM250 |
| Product Type | Cupcake Maker / Mini Oven |
| Dimensions (W x D x H) | 12.2 x 10.6 x 8.5 in (31 x 27 x 21.5 cm) |
| Weight | 9.5 lbs (4.3 kg) |
| Power Rating | 1200 W |
| Voltage | 120 V ~ 60 Hz |
| Capacity | Up to 6 standard cupcakes |
| Temperature Range | 150°F - 450°F (65°C - 230°C) |
| Timer | 60-minute with auto shut-off |
| Cooking Functions | Bake, Broil, Toast, Reheat, Keep Warm, Crisp |
| Heating System | Convection fan with quartz and metal heating elements |
| Interior Coating | Nonstick interior for easy cleaning |
| Included Accessories | Baking pan, wire rack, crumb tray |
| Safety Features | Auto shut-off, cool-touch handle, overheat protection |
| Cleaning and Maintenance | Wipe interior with damp cloth; wash accessories in warm soapy water |
| Warranty | 1-year limited warranty |
| Spare Parts Availability | Replacement baking pans and racks available via Breville support |
Frequently Asked Questions - the Crisp Control BWM250 BREVILLE
User questions about the Crisp Control BWM250 BREVILLE
0 question about this device. Answer the ones you know or ask your own.
Ask a new question about this device
Download the instructions for your Cupcake Machine in PDF format for free! Find your manual the Crisp Control BWM250 - BREVILLE and take your electronic device back in hand. On this page are published all the documents necessary for the use of your device. the Crisp Control BWM250 by BREVILLE.
USER MANUAL the Crisp Control BWM250 BREVILLE
Breville Customer Service Centre
Australian Customers
Mail: PO Box 22
Botany NSW 2019
AUSTRALIA
Phone: 1300 139 798
Fax: (02) 9384 9601
Email: Customer Service:
askus@breville.com.au
New Zealand Customers
Mail: Private Bag 94411
Botany Manukau 2163
Auckland NEW ZEALAND
Phone: 0800 273 845
Fax: 0800 288 513
Email: Customer Service:
askus@breville.com.au
www.breville.com.au
Breville is a registered trademark of Breville Pty. Ltd. A.B.N. 98 000 092 928.
Copyright Breville Pty. Ltd. 2013.
Due to continued product improvement, the products illustrated/photographed
in this brochure may vary slightly from the actual product.
BWM250 Issue - A13
Breville
the Crisp Control™
Instruction Booklet
natural_image
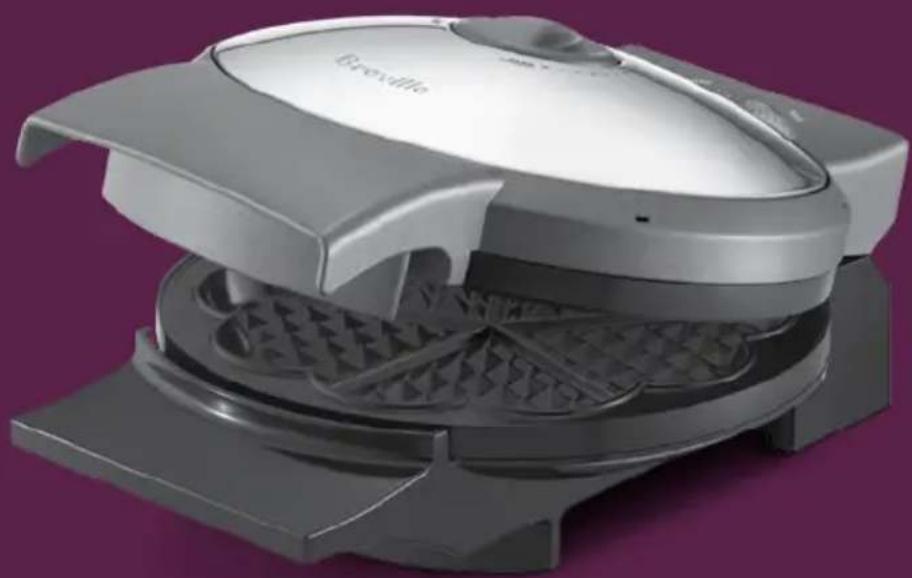
Exterior view of a modern stainless steel waffle grater with a flat lid (no text or symbols visible)CONTENTS
3 Breville recommends safety first
5 Know your Breville product
6 Operating your Breville product
7 Care & cleaning
8 Recipes
IMPORTANT SAFEGuARDS
READ ALL INSTRuCTIONS BEFORE uSE AND SAVE FOR FuTuRE REFERENCE
- Remove and safely discard any packaging material and promotional labels before use.
- To eliminate a choking hazard for young children, remove and safely discard the protective cover fitted to the power plug of this appliance.
• Always ensure the appliance is properly assembled before use. Follow the instructions provided in this book. - Do not touch hot surfaces. Appliance surfaces are hot during and after operation. To prevent burns or personal injury, always use protective hot pads or insulated oven mitts, or use handles or knobs where available.
- Do not place the appliance near the edge of a bench or table during operation. Ensure that the surface is dry, level, clean and free of any liquid and other substances.
-
Always operate the appliance on a stable and heat resistant surface. Do not use on a cloth-covered surface, and position the appliance at a minimum distance of 20cm away from walls, curtains, cloths and other heat sensitive materials.
-
Do not place this appliance on or near a hot gas or electric burner, or where it could touch a heated oven.
- Do not operate the appliance on a sink drain board.
- When operating the appliance, ensure the power cord is kept away from any heat source including the surface of the appliance. Ensure the power cord does not become trapped between the upper and lower hot plates of the appliance during use and storage.
- Do not place anything on top of the appliance lid when the lid is closed, when in use and when stored.
- Do not use harsh abrasives, caustic cleaners or oven cleaners when cleaning this appliance. Keep the appliance clean and refer to care and cleaning section.
- Do not attempt to operate the appliance by any method other than those described in this booklet. Do not leave the appliance unattended when in use.
IMPORTANT SAFEGuARDS FOR ALL ELECTRICAL APPLIANCES
- Unwind the power cord fully before use.
- Do not let the power cord hang over the edge of a bench or table, touch hot surfaces or become knotted.
- Connect only to a 230V or 240V power outlet.
- To protect against electric shock, do not immerse the power cord, power plug or appliance in water or any other liquid.
- Always turn the power off at the power outlet, remove the plug and allow all parts to cool before attempting to move the appliance, when the appliance is not in use, before cleaning and when storing.
-
The appliance is not intended for use by persons (including children) with reduced physical, sensory or mental capabilities, or lack of experience and knowledge, unless they have been given supervision or instruction concerning use of the appliance, by a person responsible for their safety.
• Children should be supervised to ensure that they do not play with the appliance. -
It is recommended to regularly inspect the appliance. Do not use the appliance if the power cord, power plug or appliance becomes damaged in any way. Return the entire appliance to the nearest authorised Breville Service Centre for examination and/or repair.
- Any maintenance, other than cleaning, should be performed at an authorised Breville Service Centre.
- This appliance is for household use only. Do not use this appliance for other than its intended use. Do not use in moving vehicles or boats. Do not use outdoors. Misuse may cause injury.
- The appliance is not intended to be operated by means of an external timer or separate remote control system.
- The installation of a residual current device (safety switch) is recommended to provide additional safety protection when using electrical appliances. It is advisable that a safety switch with a rated residual operating current not exceeding 30mA be installed in the electrical circuit supplying the appliance. See your electrician for professional advice.
SAVE THESE INSTRuCTIONS
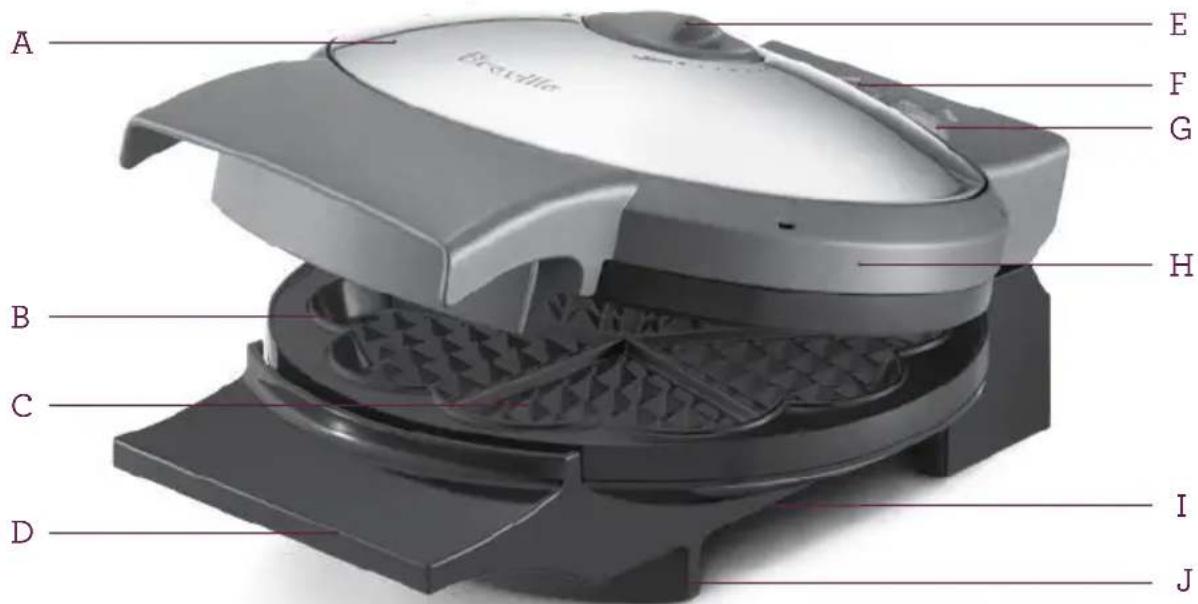
A. Polished stainless steel cover
B. Durable non-stick
For easy cleaning.
C. Cooking plates
To cook waffles that are light textured on the inside and crisp on the outside.
D. Heat proof plastic handles
E. Temperature control dial
For light and soft waffles to dark and crisp waffles.
F. Power & Heating light
Lights up orange to indicate that the unit is on and heating.
G. Ready light
Lights up green to indicate that the unit has reached cooking temperature.
H. 1000W powerful heating elements
Cooks waffles in under 3 minutes.
I. Cord wrap (under base)
For tidy storage.
J. Non-slip rubber feet
BEFORE FIRST uSE
Check that the cooking plates are clean and free of dust. If necessary, wipe over with a damp cloth
- Insert the plug into a 230/240V power outlet and turn the power 'On'. The orange power 'On' light will illuminate.
- Turn the temperature control dial to PREHEAT until the green READY light switches on. The upper lid must be closed.
- Turn the temperature control dial anticlockwise to the desired setting. When making your first waffle we suggest you use a middle setting.
- For a dark, crisp waffle turn dial clockwise, and select a setting near DARK.
- For a lighter, softer waffle turn the dial anticlockwise, and select a setting near LIGHT.
- Open the lid and place approximately half a cup of batter onto the middle of the lower waffle plate and spread batter evenly over the plate with a spatula. Be careful not to overfill as this will cause the mixture to overflow over the sides of the unit.
- Lower the lid and hold the two handles. Allow the waffle to cook for 212 - 3 minutes (depending on desired brownness).
- Remove the waffle with a plastic spatula. Do not use metal utensils as this may damage the nonstick coating.
- Before making the next waffle ensure that the green READY light has switched on. This means that the unit has now reached the correct temperature and is ready to use.
NOTE
The lid must be closed at all times when cooking.
When using the waffle maker for the first time you may notice a fine smoke haze. This is caused by the initial heating of some of the components. There is no need for concern.
CARE AND CLEANING
• Always clean your waffle maker after each use to prevent a build up of baked-on batter.
- Before cleaning, turn the power off at the power outlet and then remove the plug. Allow your waffle maker to cool slightly. The unit is easier to clean when slightly warm.
- Wipe cooking plates with a soft cloth. If cooked on batter is not removed by this method, brush with a little oil or melted butter. Allow to stand for five minutes then wipe with a damp cloth.
- The body of the waffle maker can be wiped over with a soft damp cloth.
NOTE
The cooking plates are coated with a non-stick surface, do not use abrasives.
RECIPES
PLAIN BATTER
Makes 6
INGREDIENTS
2^1/4 cups plain flour (340g)
2^1/2 teaspoons baking powder
^1/_4 teaspoon salt
3 tablespoons sugar
3 x 60g eggs, separated
1 12 cups milk
125g butter or margarine melted
METHOD
- Sift flour, baking powder and salt into a large bowl.
- Stir in sugar. Make a well in the centre and add egg yolks, milk and butter, gradually stir into the flour mixture.
- Beat mixture into a smooth batter.
- Whisk egg whites until stiff and fold into the batter.
- Use 12 cup of batter for each waffle.
CRISPY BATTER
Makes 6
INGREDIENTS
2 x 60g eggs, separated
2 teaspoons sugar
^3/4 cup milk
12 cup water
1 teaspoon vanilla
^1/4 teaspoon salt
2 cups self raising flour (300g)
2 tablespoons cornflour
80g butter or margarine melted
METHOD
- Beat egg yolks and sugar together, add milk, water and vanilla, mix well.
- Sift dry ingredients into a bowl, add the egg mixture and melted butter.
- Beat mixture well into a smooth batter.
- Beat egg whites until stiff, fold into the batter.
- Allow to stand for 10 minutes before use.
- Use 12 cup of batter for each waffle.
BuTTERMILK BATTER
Makes 6
INGREDIENTS
2^1/4 cups plain flour (340g)
2^1/2 teaspoons baking powder
^1/_4 teaspoon salt
3 x 60g eggs, separated
1 12 cups buttermilk
3 tablespoons honey
125g butter or margarine melted
METHOD
- Sift flour, baking powder and salt into a bowl.
- Beat egg yolks until thick, add buttermilk, honey and melted butter.
- Gradually add to dry ingredients, beat until smooth.
- Beat egg whites until stiff, fold into the batter.
- Use 12 cup of batter for each waffle.
CRISPY CHOCOLATE BATTER
Makes 6
INGREDIENTS
1^1/2 cups self raising flour (225g)
2 tablespoons cocoa
3 tablespoons sugar
12 teaspoon salt
2 x 60g eggs, separated
1 12 cups cream
1 12 tablespoons melted butter
METHOD
- Sift flour, cocoa, sugar and salt into a bowl.
- Beat egg yolks until thick, add cream and mix lightly.
- Combine the egg yolk mixture and dry ingredients, stir until smooth.
- Mix in the melted butter.
- Beat egg whites until stiff and fold into the batter.
- Use 12 cup of batter for each waffle.
RECIPES
GLuTEN FREE BATTER
Makes 4
INGREDIENTS
2 cups gluten free bread mix
^1/_2 cup milk
1 teaspoon sugar
2 eggs
METHOD
- Beat all ingredients to a smooth batter.
- Use 12 cup of batter for each waffle.
- Breville Customer Service Centre
- Breville
- CONTENTS
- IMPORTANT SAFEGuARDS
- READ ALL INSTRuCTIONS BEFORE uSE AND SAVE FOR FuTuRE REFERENCE
- IMPORTANT SAFEGuARDS FOR ALL ELECTRICAL APPLIANCES
- SAVE THESE INSTRuCTIONS
- BEFORE FIRST uSE
- NOTE
- CARE AND CLEANING
- RECIPES
- PLAIN BATTER
- INGREDIENTS
- METHOD
- CRISPY BATTER
- BuTTERMILK BATTER
- CRISPY CHOCOLATE BATTER
- GLuTEN FREE BATTER
Brand : BREVILLE
Model : the Crisp Control BWM250
Category : Cupcake Machine