GT-120WD - Uncategorized GVM - Free user manual and instructions
Find the device manual for free GT-120WD GVM in PDF.


| Product Type | Motorized Camera Slider |
| Brand | GVM |
| Model | GT-120WD |
| Slide Length | 120 cm (47.2 inches) |
| Maximum Load Capacity | Approx. 5 kg (11 lbs) |
| Weight | Approx. 2.5 kg (5.5 lbs) |
| Power Supply | Rechargeable battery (included) |
| Controller | Wireless remote controller with Bluetooth |
| Operating Modes | Manual, Auto Loop, Time Lapse, Panorama |
| Speed Adjustment | Adjustable (0-100% speed) |
| Compatible Cameras | DSLR, mirrorless, action cameras with 1/4" screw |
| Construction Material | Aluminum alloy |
| Included Accessories | Wireless controller, battery, extension shutter cable |
| Bluetooth Range | Up to 10 meters (33 feet) |
| Battery Life | Approx. 2-3 hours (depending on usage) |
| Charging Time | Approx. 2 hours |
| Warranty | 1 year limited warranty |
Frequently Asked Questions - GT-120WD GVM
User questions about GT-120WD GVM
0 question about this device. Answer the ones you know or ask your own.
Ask a new question about this device
Download the instructions for your Uncategorized in PDF format for free! Find your manual GT-120WD - GVM and take your electronic device back in hand. On this page are published all the documents necessary for the use of your device. GT-120WD by GVM.
USER MANUAL GT-120WD GVM

Mounting the slider and camera
- Please charge the wireless controller and battery before using this product.
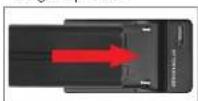
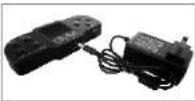
sketch of charge the wireless controllerskatch of charge the battery
- Please install and use this product as shown in the picture.
1) Mounting the motorized camera head on the slider. (As shown below)
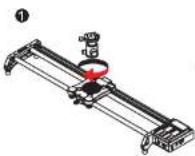
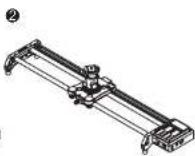
1
2) Mounting the camera on the slider. (As shown below)
1
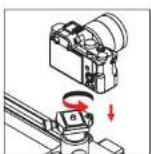
②
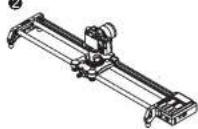
3) Connect the extension shutter cable.(As shown below)
①
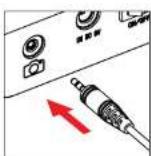
②
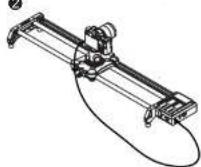
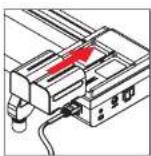
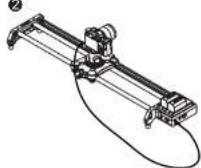
4) Install the battery on the slider and check the signal cable or shutter cable connecting correctly or not. (As shown below)
①
②

Slider motion
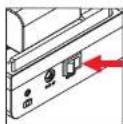
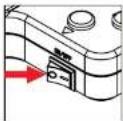
- Tum on the slider and wireless controller. (The slider's LED indicator light open and blinking, the controller's screen open as shown below)
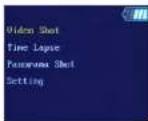
2
- Bluetooth wireless connection: press "Setting"-
*Bluetooth Setting"-Searching Device"-choose the device
code which start with letter D-press'OK" button to confirm
the device(The upper right of the screen will show
the connecting is successful)
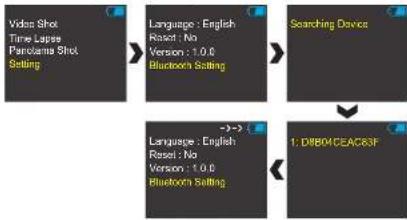
flowchart
graph TD
    A["Video Shot\nTime Lapse\nPanorama Shot\nSetting"] --> B["Language: English\nReset: No\nVersion: 1.0.0\nBluetooth Setting"]
    B --> C["Searching Device"]
    C --> D["Language: English\nReset: No\nVersion: 1.0.0\nBluetooth Setting"]
    D --> E["1: DB01CEAC63F"]
- Manual operation mode: "Video Shot"-"Manual Mode" (Press the button of the controller and the orbit will act accordingly)-choose the "speed" menu can adjust the current speed.
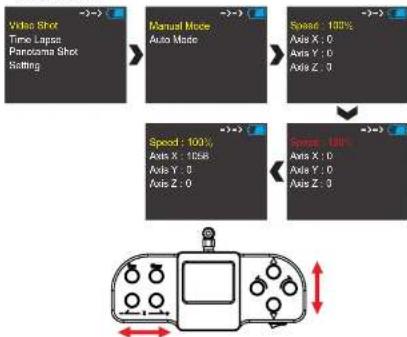
flowchart
graph TD
    A["Video Shot"] --> B["Manual Mode"]
    B --> C["Speed: 100%"]
    C --> D["Speed: 100%"]
    D --> E["Speed: 100%"]
    style A fill:#f9f,stroke:#333
    style B fill:#ccf,stroke:#333
    style C fill:#cfc,stroke:#333
    style D fill:#fcc,stroke:#333
    style E fill:#ffc,stroke:#333
- Auto operation mode:
① Setting the append point:
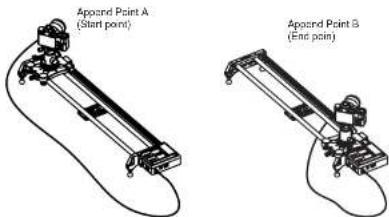
A: "Video Shot"- "Auto Mode"- "Set key"- "Append Point A" (Move the camera to the start point you need)- "Save:Yes" (As shown below)
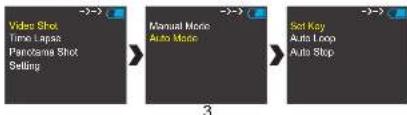
flowchart
graph LR
    A["Video Shot"] --> B["Manual Move"]
    B --> C["Set Key"]
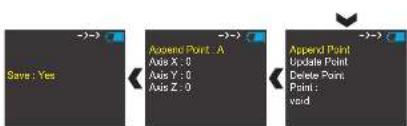
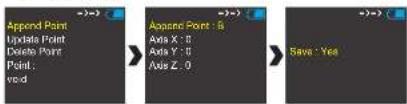
B: "Video Shot"- "Auto Mode"- "Set key"- "Append Point B" (Move the camera to the end point you need)- "Save:Yes" (As shown below)
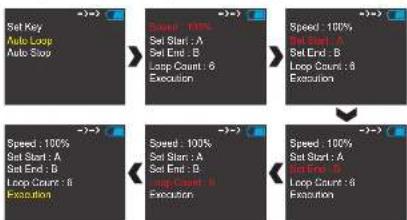
② Auto Loop mode:
"Video Shot"- "Auto Mode"- "Auto Loop"- adjust the "Speed"- setting the start point-setting the end point-setting the "Loop Count"- "Execution"(As shown below)
4
- Time Lapse: "Time Lapse Setting" - setting the "Times", *Photos", "Stop Time", "Delay Time", Set start and "set End" - "Execution"(As shown below)
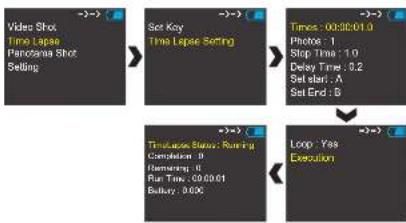
flowchart
graph TD
    A["Video Shot\nTime Lapse\nPanorama Shot\nSetting"] --> B["Set Key\nTime Lapse Setting"]
    B --> C["Seconds: 0.03501.0\nPhoto: 1\nStop Time: 1.0\nDelay Time: 0.2\nSet start: 5\nSet End: 5"]
    C --> D["Time/Case Status: Running\nCompletion: 0\nDemographic: 6\nRun Time: 00:00:01\nBattery: 0.000"]
    D --> E["Loop: Yes\nExecution"]
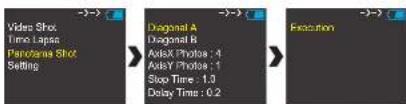
- panorama shot: Setting the "Diagonal A" and "Diagonal B" - Setting the "Axis X photos"(As shown below), then press "Execution"

natural_image
Panoramic cityscape with lakes and modern buildings under a partly cloudy sky (no visible text or symbols)5

natural_image
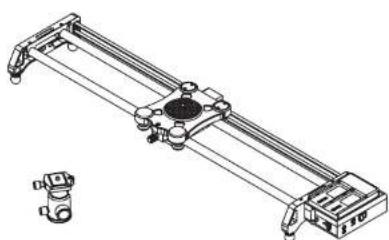
Technical line drawing of a mechanical device with a central hub and two small inset views (no text or symbols)GT-80WD GT-120WD
MOTORIZED SLIDER
Brand : GVM
Model : GT-120WD
Category : Uncategorized