
DA1 - Remote control Code Alarm - Free user manual and instructions
Find the device manual for free DA1 Code Alarm in PDF.


| Product Type | Car Remote Control Key Fob |
| Brand | Code Alarm |
| Model | DA1 |
| Dimensions (approx) | 60 x 40 x 15 mm |
| Weight (approx) | 30 g |
| Power Source | CR2032 3V Lithium Battery |
| Battery Life | 1-2 years typical |
| Operating Frequency | 315 MHz or 433 MHz |
| Range | Up to 30 meters (open area) |
| Primary Functions | Lock, Unlock, Panic, Trunk Release |
| Security | Rolling Code Encryption |
| Material | Plastic (ABS) |
| Color | Black (common) |
| Water Resistance | Not waterproof; avoid moisture |
| Programming | Requires vehicle-specific procedure |
| Spare Parts | Battery (CR2032), Replacement Fob |
| Repairability | Battery replacement only; otherwise replace unit |
| Maintenance | Clean with dry cloth; avoid solvents |
| Compatibility | Designed for Code Alarm systems |
Frequently Asked Questions - DA1 Code Alarm
User questions about DA1 Code Alarm
0 question about this device. Answer the ones you know or ask your own.
Ask a new question about this device
Download the instructions for your Remote control in PDF format for free! Find your manual DA1 - Code Alarm and take your electronic device back in hand. On this page are published all the documents necessary for the use of your device. DA1 by Code Alarm.
USER MANUAL DA1 Code Alarm
INSTALLATION GUIDE FOR THE:
DA-1 Power Door Lock Actuator
Printed in Taiwan
Form No. DA-1
DOOR LOCK ACTUATOR INSTALLATION
1.) Carefully remove the door panel. 2.) Mount the actuator to the vehicle's door in a position that will allow the actuator's connecting rod to freely move the vehicle's locking rod. Ensure the placement of the actuator does not inhibit window movement or door panel replacement. 3.) Slide the actuator connecting rod into the connecting rod clamp and tighten. 4.) Set door lock in the unlock position. 5.) Pull actuator connector rod until the actuator is fully extended, then tighten connecting rod clamp to existing factory door rod. 6.) Wire the actuator as illustrated below. When using a keyless entry system with on board relays, refer to the systems manual for wiring instructions.
![graph TD A["Blue Input"] --> B["Door Lock Actuator"] A --> C["Green Input"] B --> D["Chassis Ground"] B --> E["87a 30"] E --> F["Fused +12 Volt Battery Source"] E --> G["Fused +12 Volt Battery Source"] E --> H["Fused +12 Volt Battery Source"] E --> I["Fused +12 Volt Battery Source"] E --> J["Fused +…](/content/2026/05/1052100/images/ba6d88444d52ad5e21eccc10ae1144eb8b51a9c9d1ca11ce33a48a1b79d12b0b.jpg)
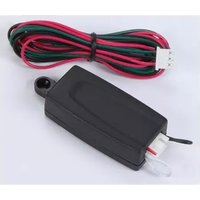
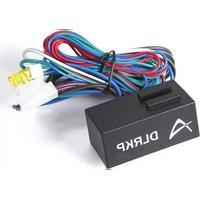


Brand : Code Alarm
Model : DA1
Category : Remote control