
PN 641 /I (OW) - Cooker INDESIT - Free user manual and instructions
Find the device manual for free PN 641 /I (OW) INDESIT in PDF.
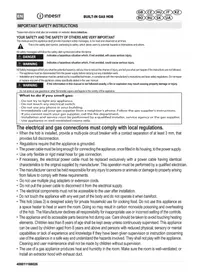


| Product Type | Freestanding Cooker |
| Brand | Indesit |
| Model | PN 641 /I (OW) |
| Width | 60 cm |
| Depth | 60 cm |
| Height | 85 cm (adjustable) |
| Weight | Approximately 50 kg |
| Hob Type | Gas hob with 4 burners |
| Oven Type | Electric fan-assisted oven |
| Oven Capacity | 58 liters |
| Oven Functions | Convection, grill, bottom heat, fan grill |
| Grill | Yes, electric grill |
| Energy Rating | Class A |
| Power Supply | Gas: Natural gas (LPG convertible); Oven: 230V~50Hz |
| Ignition | Automatic electronic ignition on hob |
| Safety Features | Flame failure safety device on all gas burners, oven door safety lock |
| Cleaning | Enamel oven cavity, removable oven door |
| Spare Parts Availability | Available through authorized service centers (7 years after discontinuation) |
| Repairability Index | 8.1 / 10 (if applicable in region) |
Frequently Asked Questions - PN 641 /I (OW) INDESIT
User questions about PN 641 /I (OW) INDESIT
0 question about this device. Answer the ones you know or ask your own.
Ask a new question about this device
Download the instructions for your Cooker in PDF format for free! Find your manual PN 641 /I (OW) - INDESIT and take your electronic device back in hand. On this page are published all the documents necessary for the use of your device. PN 641 /I (OW) by INDESIT.
USER MANUAL PN 641 /I (OW) INDESIT
IMPORTANT SAFETY INSTRUCTIONS
These instructions shall also be available on website: docs.indesit.eu
YOUR SAFETY AND THE SAFETY OF OTHERS ARE VERY IMPORTANT
This manual and the appliance itself provide important safety messages, to be read and observed at all times.

This is the safety alert symbol, pertaining to safety, which alerts users to potential hazards to themselves and others.
All safety messages will follow the safety alert symbol and either the terms:

DANGER
Indicates a hazardous situation which, if not avoided, will cause serious injury.

WARNING
Indicates a hazardous situation which, if not avoided, could cause serious injury.
All Safety messages will tell you what the potential hazard is, tell you how to reduce the chance of injury, and tell you what can happen if the instructions are not followed.
- The appliance must be disconnected from the power supply before carrying out any installation work.
- Installation and maintenance must be carried out by a qualified technician, in compliance with the manufacturer's instructions and local safety regulations. Do not repair or replace any part of the appliance unless specifically stated in the user manual.

WARNING
If the information in this manual is not followed exactly, a fire or explosion may result causing property damage or injury.
Do not store or use gasoline or other flammable vapors and liquids in the vicinity of this appliance.
What to do if you smell gas:
- Do not try to light any appliance.
- Do not touch any electrical switch.
- Do not use any phone in your building.
- Immediately call your gas supplier from a neighbor's phone. Follow the gas supplier's instructions.
- If you cannot reach your gas supplier, call the fire department.
- Installation and service must be performed by a qualified installer, service agency or the gas supplier.
- Use appliance in well ventilated rooms only.
The electrical and gas connections must comply with local regulations.
- When the hob is installed, provide a multi-pole circuit breaker with a contact separation of at least 3 mm, that provides full disconnection.
- Regulations require that the appliance is grounded.
- The power cable must be long enough for connecting the appliance, once fitted in its housing, to the power supply.
- Use only flexible or rigid metal hose for gas connection.
- If necessary, the electrical power cable must be replaced exclusively with a power cable having identical characteristics to the original supplied by manufacturer. This operation must be performed by a qualified electrician.
- The manufacturer cannot be held responsible for any injury to persons or animals or damage to property arising from failure to comply with these requirements.
- Do not use multiple plug adapters or extension cords.
- Do not pull the power cable to disconnect it from the electrical supply.
- The electrical components must not be accessible to the user after installation.
- Do not touch the appliance with any wet part of the body and do not operate it when barefoot.
- This hob (class 3) is designed solely for private household use for cooking food. Do not use this appliance as a space heater to heat or warm the room. Doing so may result in carbon monoxide poisoning and overheating of the hob. The Manufacturer declines all responsibility for inappropriate use or incorrect setting of the controls.
- The appliance and its accessible parts become hot during use. Care should be taken to avoid touching heating elements. Children less than 8 years of age shall be kept away unless continuously supervised. This appliance can be used by children aged from 8 years and above and persons with reduced physical, sensory or mental capabilities or lack of experience and knowledge if they have been given supervision or instruction concerning use of the appliance in a safe way and understand the hazards involved. They shall not play with the appliance. Cleaning and user maintenance shall not be made by children without supervision.
- The use of a gas appliance produces heat and humidity in the room. Make sure the room is well-ventilated, or install an extractor hood with exhaust duct.
• Domestic animals should be kept away from the appliance. - In case of prolonged use, additional ventilation may be necessary (by opening a window or increasing the hood extraction speed). • After use, make sure the knobs are in off position and close the main gas supply cock or the gas cylinder valve. • Overheated oils and fats catch fire easily. Always remain vigilant when cooking foods rich in fat, oil or alcohol (e.g. rum, cognac, wine). - Keep the packaging materials out of the reach of children. - Before cleaning or maintenance wait for hob to cool down. - Unattended cooking on a hob with fat or oil can be dangerous and may result in fire. NEVER try to extinguish a fire with water, but switch off the appliance and then cover flame e.g. with a lid or a fire blanket. - Danger of fire: do not store items on the cooking surfaces.
SAVE THESE INSTRUCTIONS
INSTALLATION
After unpacking the hob, make sure that it has not been damaged during transport. In the event of problems, contact the dealer or your nearest After-sales Service. These instructions are only valid for the countries whose symbols is given on the data plate (under the hob).
TECHNICAL INFORMATION FOR THE INSTALLER
- This product can be embedded in a worktop 20 to 50 mm thick.
- If there is no oven beneath the hob, insert a separator panel that has a surface at least equal to the opening in the work surface. This panel, which must completely close the cutout to avoid any contact with the bottom part of the hob, must be positioned at a maximum distance of 150 mm below the upper surface of the work surface, but in no case less than 20 mm from the bottom of the hob. If you intend to install an oven beneath the hob, make sure that it is manufactured by Whirlpool and equipped with a cooling system. The manufacturer declines all liability if another brand of oven is installed beneath the hob. Before installation, make sure that:
- the local gas delivery conditions (nature and pressure) are compatible with the settings of the hob (see the rating plate and injector table);
- the outer surfaces of the furniture or appliances adjacent to the hob are heat resistant according to local regulations;
- this appliance is not connected to a fume exhaust device. It shall be installed in accordance with current installation regulations. Particular attention shall be given to the relevant requirements regarding ventilation.
- combustion products are discharged outdoors through specific hoods or wall and/or window mounted electrical fans.
GAS CONNECTION

WARNING
This operation must be performed by a qualified technician.
- The gas supply system must comply with local regulations.
- You can find specific local regulations for some countries in the paragraph "Reference to Local Regulations". If no information concerning your country is given, please ask details from your installer.
- The connection of the hob to the gas pipe network or gas cylinder must be made by means of a rigid copper or steel pipe with fittings complying with local regulations, or by means of a continuous-surface stainless steel hose complying with local regulations. Interpose gasket (B) in the elbow connection. The maximum length of the hose is 2 m.
• FOR BELGIUM ONLY: It is necessary to replace the elbow connection (A) on the appliance with the one supplied (if present).
IMPORTANT: if a stainless steel hose is used, it must be installed so as not to touch any mobile part of the furniture. It must pass through an area where there are no obstructions and where it is possible to inspect it along its entire length.
- After connection to the gas supply, check for leaks with soapy water. Light up the burners and turn the knobs from max position to minimum position to check flame stability.

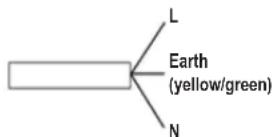
ELECTRICAL CONNECTION.

WARNING

WARNING
This operation must be performed by a qualified technician.
- The electrical connections must comply with local regulations.
- The earthing of this appliance is compulsory by law.
- Do not use an extension cord.
IMPORTANT: the data relevant to the voltage and power absorption are indicated on the rating plate.
ASSEMBLY
After having cleaned the perimeter surface, apply the supplied gasket to the hob as shown in the figure.

Position the hob in the worktop opening made respecting the dimensions indicated in the Instruction.
NOTE: the power supply cable must be long enough to permit its upward extraction.
To secure the hob, use the brackets (A) provided with it. Fit the brackets into the relevant bores shown by the arrow and fasten them by means of their screws in accordance with the thickness of the worktop (see the following figures).

ADJUSTMENT TO DIFFERENT TYPES OF GAS

WARNING
This operation must be performed by a qualified technician.
If the appliance is intended to operate with a different gas from the gas type stated on the rating plate and information label on the top of the hob, change the injectors. Remove the information label and keep it with the instructions booklet.
Use pressure regulators suitable for the gas pressure indicated in the Instruction.
- The gas nozzles must be changed by After Sales Service or a qualified technician.
- Nozzles not supplied with the appliance must be ordered from After Sales Service.
- Adjust the minimum setting of the taps.
NOTE: when liquid petroleum gas is used (G30/G31), the minimum gas setting screw must be tightened as far as it will go.
IMPORTANT: should you experience difficulty in turning the burners knobs, please contact the After Sales Service for the replacement of the burner tap if found to be faulty.
REPLACING THE INJECTORS (see the injector table in the Instruction)
- Remove grids (A).
- Extract burners (B). • Using a socket spanner of the appropriate size unscrew the injector (C), unscrew the injector to be replaced.
- Replace it with the injector suitable for the new type of gas. • Re-assemble the injector in (D).
- If you have a multiple crown burner use side spanner to replace the injector (E). Before installing the hob, remember to affix the gas calibration plate supplied with the injectors in such a way that it covers the existing information relating to gas calibration.
ADJUSTING MINIMUM GAS SETTING OF TAPS
To ensure that the minimum setting is correctly adjusted, remove the knob and proceed as follows:
- tighten screw to reduce the flame height (-);
- Loosen the screw to increase the flame height (+). The adjustment must be performed with the tap in the minimum gas setting position (small flame). The primary air of the burners does not need to be adjusted.
At this stage, light up the burners and turn the knobs from the maximum position to the minimum position to check flame stability. Upon completion of adjustment, reseal using sealing wax or an equivalent material.


Provision for ventilation
The room in which the appliance is installed must have an air supply to current B.S. 5440 - Part 2 standards.
All rooms require a permanent vent in addition to the openable window.
If there are other fuel burning appliances in the same room, B.S. 5440 - Part 2 should be consulted to determine the air vent requirements.
If the appliance is installed in a cellar or basement, it is advisable to provide an air vent of 65 cm, irrespective of the room volume.
Gas Safety Regulations
The law requires that all gas appliances are installed by competent persons in accordance with the current gas safety regulations. Failure to install appliances correctly may lead to prosecution.
It is in your own interest, and that of safety, to ensure that the law is complied with. The hob should be installed in accordance with the Gas Safety (Installation and Use) Regulations, the Building Regulations issued by the Department of the Environment, and the Building Standard (Scotland) (Consolidation) Regulations issued by the Scottish Development Department.
In the G.B., CORGI registered installers work to safe standards of practice.
AFTER-SALES SERVICE
Before calling the After-Sales Service, make sure you can give the following information:
- type of fault or problem;
- exact model (written on the label affixed to the instruction/warranty);
- service number that follows the word SERVICE on the rating plate under the hob and on the label affixed to instruction/warranty;
- your complete address and phone number.
If any repairs are required, please contact an authorized After-Sales Service, as indicated in the warranty.
TROUBLESHOOTING GUIDE
If the hob will not operate correctly, before calling the After-Sales Service, refer to the Troubleshooting Guide to determine the problem.
1. The burner fails to ignite or the flame is not even
Check that:
- The gas or electrical supplies are not shut off and especially that the gas supply tap is open.
- The gas cylinder (liquid gas) is not empty.
- The burner openings are not clogged.
- The plug end is not dirty.
- All the burner parts have been positioned correctly.
- There are no draughts near the hob.
2. The burner does not stay lit
Check that:
- When lighting the burner, the knob has been pressed for enough time to activate the protection device.
- The burner openings are not clogged near the thermocouple.
- The end of the safety device is not dirty.
- The minimum gas setting is correct (see relevant paragraph).
3. The containers are not stable
Check that:
• The bottom of the container is perfectly flat
- The container is centered on the burner.
- The grids have not been exchanged or positioned incorrectly.
If after the above checks the fault still occurs, get in touch with the nearest After Sales Service.
CLEANING THE HOB SURFACE

WARNING
Disconnect power before servicing.
- All the enamelled and glass parts should be cleaned with warm water and neutral solution.
- Stainless steel surfaces may be stained by calcareous water or aggressive detergents if left in contact for too long. Any food spills (water, sauce, coffee, etc.) should be wiped away before they dry.
- Clean with warm water and neutral detergent, and then dry with a soft cloth or chamois. Remove baked-on dirt with specific cleaners for stainless steel surfaces.
NOTE: clean stainless steel only with soft cloth or sponge.
- Do not use abrasive or corrosive products, chlorine-based cleaners or pan scourers.
- Do not use steam cleaning appliances.
- Do not use flammable products.
- Do not leave acid or alkaline substances, such as vinegar, mustard, salt, sugar or lemon juice on the hob.
CLEANING THE HOB PARTS
- Grids, burner caps and burners can be removed to be cleaned.
- Clean them by hand with warm water and non-abrasive detergent, removing any food residues and checking that none of the burner openings is clogged.
- Rinse and dry
- Refit burners and burner caps correctly in the respective housings.
- When replacing the grids, make sure that the panstand area is aligned with the burner.
- Models equipped with electrical ignition plugs and safety device require thorough cleaning of the plug end in order to ensure correct operation. Check these items frequently, and if necessary, clean them with a damp cloth. Any baked-on food should be removed with a toothpick or needle.
NOTE: to avoid damaging the electric ignition device, do not use it when the burners are not in their housing.
DECLARATION OF CONFORMITY C€
- This hob has been designed, constructed and marketed in compliance with:
- safety requirements of "Gas" Directive 2009/142/EC (ex: EEC 90/396);
- safety objectives of the "Low Voltage" Directive 2006/95/EC (which replaces 73/23/EEC and subsequent amendments);
- protection requirements of EEC Directive "EMC" 2004/108/EC;
• This appliance meets the eco design requirements of European regulation n. 66/2014, in conformity to the european standard EN 30-2-1.
SAFEGUARDING THE ENVIRONMENT
Disposal of packing material
The packing material is 100% recyclable and is marked with the recycle symbol ( ). The various parts of the packing must therefore be disposed of responsibly and in full compliance with local authority regulations governing waste disposal.
Scrapping the product:
- This appliance is marked in compliance with European Directive 2012/19/EC, Waste Electrical and Electronic Equipment (WEEE).
- By ensuring this product is disposed of correctly, you will help prevent potential negative consequences for the environment and human health, which could otherwise be caused by inappropriate waste handling of this product.
- The symbol ☒ on the product or on the accompanying documentation indicates that it should not be treated as domestic waste but must be taken to an appropriate collection centre for the recycling of electrical and electronic equipment.
PRODUCT DESCRIPTION

- Removable panstand grids
- Rapid burner
- Semi-rapid burner
- Semi-rapid burner
- Auxiliary burner
6-9. Control knobs
Symbols
Shaded circle
Large flame
Small flame
Star
Tap closed
Maximum opening/delivery
Minimum opening or reduced delivery
Electric ignition
The symbols 📄 indicate which cooking field this knob activates.
Note: your hob aesthetics can be slightly different from the drawing.
PRACTICAL ADVICE FOR USING THE BURNERS
This hob has burners of different diameters. For better burner performance, please stick to the following rules:
- Use pots and pans with bottoms the same width as that of the burners or slightly larger (see table on the right).
- Only use flat-bottomed pots and pans.
- Use the correct amount of water for cooking foods and keep the pot covered.
- Make sure pots on the grates do not protrude beyond the edge of the hob.
IMPORTANT: improper use of the grids can result in damage to the hob: do not position the grids upside down or slide them across the hob.
Do not use:
- Cast iron griddles, ollar stones, terracotta pots and pans.
- Heat diffusers such as metal mesh, or any other types.
- Two burners simultaneously for one receptacle (e.g. fish kettle).
HOW TO USE THE HOB
| Burner | Pot ∅ |
| Rapid | From 24 to 26 |
| Semi-rapid | From 16 to 24 |
| Auxiliary | From 8 to 14 |
WARNING
Do not let the burner flame extend beyond the edge of the pan.
IMPORTANT: WHEN THE HOB IS IN USE, THE ENTIRE HOB AREA MAY BECOME HOT.
- To ignite one of the burners, turn the relative knob anti-clockwise to the maximum flame setting.
- Press the knob against the control panel to ignite the burner.
- After the burner has ignited, keep the knob pressed for about 5-10 seconds to allow proper device operation. This burner safety device shuts off the gas supply to the burner if the flame goes out accidentally (because of sudden draught, an interruption in the gas delivery, boiling over of liquids, etc.).
- The knob must not be pressed for more than 15 sec. If, after that time has elapsed, the burner does not remain lit, wait at least one minute before trying to light it again. In the event of the burners flames being accidentally extinguished, turn off the burner control and do not attempt to reignite it for at least one minute. NOTE: should particular local conditions of the delivered gas make the ignition of burner difficult, it is advisable to repeat the operation with the knob turned to small flame setting.
The burner might go out when the knob is released. This means that the safety device has not warmed up enough. In this case, repeat the operations described above.
DIMENSIONS OF COOKING HOB AND WORKTOP (mm)

NOTE: if the distance "A" between the wall cabinets is between 600 mm and 680 mm, the height "B" must be a minimum of 520 mm. If the distance "A" between the wall cabinets is greater than the width of the hob, the height "B" must be a minimum of 400 mm. In case of installation of a hood above the hob, please refer to the hood instructions for the correct distance.

| Type of gas used | Model configuration4 BURNERS | Rated thermalflow rate (kW) | Total ratedconsumption | Air required ( m3 ) forburning 1 m3 of gas |
| G20 20 mbar | 1 R - 2 SR - 1 AUX | 7.30 | 715 l/h | 9.52 |
| G30/G31 30 mbar | 1 R - 2 SR - 1 AUX | 7.30 | 545 g/h | 30.94 |
ELECTRIC SUPPLY: 220-240 V ~ 50/60 Hz
- IMPORTANT SAFETY INSTRUCTIONS
- YOUR SAFETY AND THE SAFETY OF OTHERS ARE VERY IMPORTANT
- DANGER
- WARNING
- WHAT TO DO IF YOU SMELL GAS
- THE ELECTRICAL AND GAS CONNECTIONS MUST COMPLY WITH LOCAL REGULATIONS
- SAVE THESE INSTRUCTIONS
- INSTALLATION
- TECHNICAL INFORMATION FOR THE INSTALLER
- GAS CONNECTION
- ELECTRICAL CONNECTION
- ASSEMBLY
- ADJUSTMENT TO DIFFERENT TYPES OF GAS
- REPLACING THE INJECTORS (SEE THE INJECTOR TABLE IN THE INSTRUCTION)
- ADJUSTING MINIMUM GAS SETTING OF TAPS
- PROVISION FOR VENTILATION
- GAS SAFETY REGULATIONS
- AFTER-SALES SERVICE
- TROUBLESHOOTING GUIDE
- THE BURNER FAILS TO IGNITE OR THE FLAME IS NOT EVEN
- THE BURNER DOES NOT STAY LIT
- THE CONTAINERS ARE NOT STABLE
- CLEANING THE HOB SURFACE
- DISCONNECT POWER BEFORE SERVICING
- CLEANING THE HOB PARTS
- DECLARATION OF CONFORMITY C€
- SAFEGUARDING THE ENVIRONMENT
- DISPOSAL OF PACKING MATERIAL
- SCRAPPING THE PRODUCT
- PRODUCT DESCRIPTION
- SYMBOLS
- PRACTICAL ADVICE FOR USING THE BURNERS
- DO NOT USE
- HOW TO USE THE HOB
- IMPORTANT: WHEN THE HOB IS IN USE, THE ENTIRE HOB AREA MAY BECOME HOT
- DIMENSIONS OF COOKING HOB AND WORKTOP (MM)
Brand : INDESIT
Model : PN 641 /I (OW)
Category : Cooker