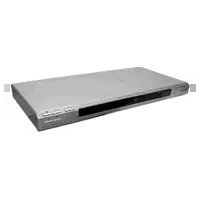
SLV-D271P - Cassette player SONY - Free user manual and instructions
Find the device manual for free SLV-D271P SONY in PDF.


| Product Type | VCR/DVD Combo Player |
| Brand | Sony |
| Model | SLV-D271P |
| Dimensions (W x H x D) | 430 x 90 x 300 mm |
| Weight | 4.5 kg |
| Power Consumption | 25 W |
| Power Supply | AC 120V, 60 Hz |
| Playback Formats | VHS, DVD, DVD-R/RW, CD, CD-R/RW |
| Recording Formats | VHS (SP/LP/SLP) |
| Video Output | Composite, S-Video, Component |
| Audio Output | Stereo RCA, Optical Digital |
| Headphone Jack | Yes, 3.5mm |
| Remote Control | Included (RMT-V201E) |
| Maintenance | Clean heads with a cleaning cassette; keep vents dust-free |
| Safety | Do not disassemble; avoid moisture and extreme temperatures |
| Spare Parts | Remote control, AC power cord, audio/video cables |
| Repairability | Repair by qualified technician only; service manual available |
| Warranty | 1 year limited warranty |
| Accessories Included | Remote control, batteries, audio/video cable, antenna cable |
Frequently Asked Questions - SLV-D271P SONY
User questions about SLV-D271P SONY
0 question about this device. Answer the ones you know or ask your own.
Ask a new question about this device
Download the instructions for your Cassette player in PDF format for free! Find your manual SLV-D271P - SONY and take your electronic device back in hand. On this page are published all the documents necessary for the use of your device. SLV-D271P by SONY.
USER MANUAL SLV-D271P SONY
DVD Player/ Video Cassette Recorder
Operating Instructions
For customers in the USA
If you have any questions about your Sony DVD-VCR, you may call Sony Customer Information Center at 1-800-VHS-SONY (847-7669).
For all other Sony product questions, please call Sony Customer Information Center at 1-800-222-SONY (7669).
Or write to: Sony Customer Information Center 12451 Gateway Boulevard Ft. Myers, FL 33913
For Customers in Canada
If this product is not working properly, please call 1-877-602-2008 for Peace of Mind Warranty Replacement service.
For other product related questions please contact our Customer Information Service
Center at 1-877-899-7669 or write to us at: Customer Information Service 115 Gordon Baker Road, Toronto, Ontario, M2H 3R6
VHS
Hi-Fi
COMPACT disc DIGITAL VIDEO
DVD VIDEO
SLV-D271P
WARNING
To reduce the risk of fire or electric shock, do not expose this apparatus to rain or moisture.
To avoid electrical shock, do not open the cabinet. Refer servicing to qualified personnel only.
CAUTION
The use of optical instruments with this product will increase eye hazard. As the laser beam used in this DVD player is harmful to eyes, do not attempt to disassemble the cabinet.
Refer servicing to qualified personnel only.
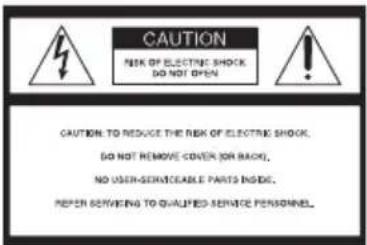

This symbol is intended to alert the user to the presence of uninsulated "dangerous voltage" within the product's enclosure that may be of sufficient magnitude to constitute a risk of electric shock to persons.

This symbol is intended to alert the user to the presence of important operating and maintenance (servicing) instructions in the literature accompanying the appliance.
For customers in the U.S.A Owner's Record
The model and serial numbers are located at the rear of the unit. Record the serial number in the space provided below. Refer to them whenever you call upon your Sony dealer regarding this product.
Model No. ____ Serial No. ____
CAUTION
You are cautioned that any changes or modifications not expressly approved in this manual could void your authority to operate this equipment.
Note
This equipment has been tested and found to comply with the limits for a Class B digital device, pursuant to Part 15 of the FCC Rules. These limits are designed to provide reasonable protection against harmful interference in a residential installation. This equipment generates, uses, and can radiate radio frequency energy and, if not installed and used in accordance with the instructions, may cause harmful interference to radio communications. However, there is no guarantee that interference will not occur in a particular installation. If this equipment does cause harmful interference to radio or television reception, which can be determined by turning the equipment off and on, the user is encouraged to try to correct the interference by one or more of the following measures:
– Reorient or relocate the receiving antenna.
– Increase the separation between the equipment and receiver.
- Connect the equipment into an outlet on a circuit different from that to which the receiver is connected.
- Consult the dealer or an experienced radio/TV technician for help.
Notes about discs
• To keep the disc clean, handle the disc by its edge. Do not touch the surface.

natural_image
Illustration of a hand holding a circular object with a central rod (no text or symbols)
- Do not expose the disc to direct sunlight or heat sources such as hot air ducts, or leave it in a car parked in direct sunlight as the temperature may rise considerably inside the car.
• After playing, store the disc in its case. - Clean the disc with a cleaning cloth. Wipe the disc from the center out.

- Do not use solvents such as benzine, thinner, commercially available disc/lens cleaners, or anti-static spray intended for vinyl LPs.
- If you have printed the disc's label, dry the label before playing.
Precautions
On safety
- To prevent fire or shock hazard, do not place objects filled with liquids, such as vases, on the apparatus.
- Should any solid object or liquid fall into the cabinet, unplug the player and have it checked by qualified personnel before operating it any further.
On power sources
- Operate the unit only on 120 V AC, 60 Hz.
- This unit is not disconnected from the AC power source (mains) as long as it is connected to the wall outlet, even if the unit itself has been turned off.
- Unplug the unit from the wall outlet if you do not intend to use it for an extended period of time. To disconnect the cord, pull it out by the plug, never by the cord.
On placement
- Do not install the unit in a confined space such as a bookshelf or similar unit.
- Do not install the unit in an inclined position. It is designed to be operated in a horizontal position only.
- Keep the unit, discs and cassettes away from equipment with strong magnets, such as microwave ovens or large loudspeakers.
- Do not place heavy objects on the unit.
On operation
- When you move the player, take out any discs. If you don't, the disc may be damaged.
- If the unit is brought directly from a cold to a warm location, or is placed in a very damp room, moisture may condense on the lenses inside the player and cause damage to the video head, tape, and the optical block. Should this occur, the player may not operate properly. When you first install the player, or when you move it from a cold to a warm location, remove the disc and tape and leave the player turned on for about three hours before operating the player.
On adjusting volume
Do not turn up the volume while listening to a section with very low level inputs or no audio signals. If you do, the speakers may be damaged when a peak level section is played.
On cleaning
Clean the cabinet, panel and controls with a soft cloth slightly moistened with a mild detergent solution. Do not use any type of abrasive pad, scouring powder or solvent, such as alcohol or benzine.
On cleaning discs, disc/lens cleaners
Do not use a commercially available cleaning disc or disc/lens cleaner (wet or spray type). These may cause the apparatus to malfunction.
On cleaning the video heads
- Rough picture
- Unclear picture
• No picture (or black & white screen appears)


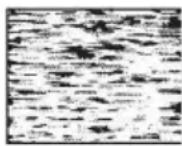
initial contamination
terminal
When the video heads are dirty, clean the video heads using a Sony video head cleaning cassette. If a Sony cleaning cassette is not available in your area, have the heads cleaned at your nearest Sony dealer (a standard service fee will be charged). Do not use a commercially available liquid type cleaning cassette, as it may damage the video heads.
Copyright
- Television programs, films, video tapes and other materials may be copyrighted. Unauthorized recording of such material may be contrary to the provisions of the copyright laws. Also, use of this recorder with cable television transmission may require authorization from the cable television transmission and/or program owner.
- This product incorporates copyright protection technology that is protected by U.S. patents and other intellectual property rights. Use of this copyright protection technology must be authorized by Macrovision, and is intended for home and other limited viewing uses only unless otherwise authorized by Macrovision. Reverse engineering or disassembly is prohibited.
IMPORTANT NOTICE
Caution: This player is capable of holding a still video image or on-screen display image on your television screen indefinitely. If you leave the still video image or on-screen display image displayed on your TV for an extended period of time you risk permanent damage to your television screen. Projection televisions are especially susceptible to this.
Important Safety Instructions
1 Read these instructions.
2 Keep these instructions.
3 Heed all warnings.
4 Follow all instructions.
5 Do not use this apparatus near water.
6 Clean only with dry cloth.
7 Do not block any ventilation openings. Install in accordance with the manufacturer's instructions.
8 Do not install near any heat sources such as radiators, heat registers, stoves, or other apparatus (including amplifiers) that produce heat.
9 Do not defeat the safety purpose of the polarized or grounding-type plug. A polarized plug has two blades with one wider than the other. A grounding type plug has two blades and a third grounding prong. The wide blade or the third prong are provided for your safety. If the provided plug does not fit into your outlet, consult an electrician for replacement of the obsolete outlet.
10 Protect the power cord from being walked on or pinched particularly at plugs, convenience receptacles, and the point where they exit from the apparatus.
11 Only use attachments/accessories specified by the manufacturer.
12 Use only with the cart, stand, tripod, bracket, or table specified by the manufacturer, or sold with the apparatus. When a cart is used, use caution when moving the cart/apparatus combination to avoid injury from tip-over.
13 Unplug this apparatus during lightning storms or when unused for long periods of time.
14 Refer all servicing to qualified service personnel. Servicing is required when the apparatus has been damaged in any way, such as power-supply cord or plug is damaged, liquid has been spilled or objects have fallen into the apparatus, the apparatus has been exposed to rain or moisture, does not operate normally, or has been dropped.

Table of contents
2 WARNING
2 Notes about discs
3 Precautions
7 About this manual
7 This player can play the following discs
Getting Started
10 Step 1 : Unpacking
11 Step 2 : Setting up the remote commander
14 Step 3 : Basic hookups
20 Step 4 : Selecting a language
22 Step 5 : Setting the clock
26 Step 6 : Presetting channels
Advanced Hookups
30 S-Video/Component Video hookup
32 A/V Receiver hookup
Basic Operations
34 Playing discs
38 Guide to the on-screen display
41 Playing a tape
45 Recording TV programs
48 Recording TV programs using the timer
51 Checking/changing/canceling timer settings
53 Locking the DVD-VCR (Child Lock)
DVD Settings and Adjustments
54 Audio Setup
56 Screen Setup
60 Setting the display or sound track language
62 Parental Control (limiting playback by children)
DVD Additional Operations
65 Using the DVD's menu
66 Zooming into a scene
67 Changing the angles
68 Displaying the subtitle
70 Various play mode functions (Program play, Shuffle play, Repeat play)
74 Changing the sound
76 Virtual surround setting
78 Playing an MP3 audio track
84 Playing JPEG image files
88 Playing VIDEO CDs with "PBC ON/OFF" Functions
VCR Additional Operations
90 Quick Timer Recording
91 Recording stereo and bilingual programs
92 Searching using various functions
94 Changing menu options
96 Editing with another VCR
Additional Information
98 General setup information
101 Troubleshooting
106 Glossary
108 Specifications
109 Index to parts and controls
113 DVD Audio/Subtitle Language
114 Index
About this manual
- This manual mainly explains operations using the remote, but the same operations can also be performed using the buttons on the DVD-VCR having the same or similar names.
- “DVD” may be used as a general term for DVD VIDEOS, DVD-RWs/DVD-Rs, and DVD+RWs/DVD+Rs.
- The meaning of the icons used in this manual is described below:
| Icon Meaning | |
| DVD-V | Functions available for DVD VIDEOs and DVD-RWs/DVD-Rs in video mode or DVD+RWs/ DVD+Rs |
| DVD-RW | Functions available for DVD-RWs/DVD-Rs in VR (Video Recording) mode |
| VCD | Functions available for VIDEO CDs, Super VCDs or CD-Rs/CD-RWs in video CD format or Super VCD format |
| CD | Functions available for music CDs or CD-Rs/CD-RWs in music CD format |
| DATA-CD | Functions available for DATA CDs (CD-ROMs/CD-Rs/CD-RWs containing MP3 * audio tracks or JPEG files) |
| DATA-DVD | Functions available for DATA DVDs (DVD-ROMs/DVD+RWs/ DVD+Rs/DVD-RWs/DVD-Rs containing MP3 * audio tracks or JPEG files) |
| VHS | Functions available for VHS VIDEOs |
* MP3 (MPEG 1 Audio Layer 3) is a standard format defined by ISO/MPEG which compresses audio data.
This player can play the following discs
| Format of discs | ||
| DVD VIDEO |  | |
| DVD-RW/-R |  |  |
| R4.7 | ||
| DVD+RW/+R |  |  |
| DVD + ReWritable | DVD+R | |
 | ||
| VIDEO CD/Music CD |  |  |
| CD-RW/-R |  |  |
“DVD+RW,” “DVD-RW,” “DVD+R,” “DVD+R DL,” “DVD-R,” “DVD VIDEO,” and “CD” logos are trademarks.
Note about CDs/DVDs
The player can play CD-ROMs/CD-Rs/CD-RWs recorded in the following formats:
- music CD format
- video CD format
- MP3 audio tracks and JPEG image files of format conforming to ISO 9660* Level 1/Level 2, or its extended format, Joliet
- KODAK Picture CD format
* A logical format of files and folders on CD-ROMs, defined by ISO (International Organization for Standardization).
The player can play DVD-ROMs/DVD+RWs/DVD+Rs/DVD-RWs/DVD-Rs recorded in the following formats:
- MP3 audio tracks and JPEG image files of format conforming to UDF (Universal Disk Format)
- 8 cm DVD+RW, DVD-RW, and DVD-R recorded with a DVD Video camera
continued
Region code
Your player has a region code printed on the back of the unit and only will play DVD VIDEO discs ( playback only) labeled with identical region codes. This system is used to protect copyrights.
DVDs labeled 📄 all also play on this player.
If you try to play any other DVD VIDEO, a message will appear on the TV screen to indicate that the disc is not playable. Depending on the DVD VIDEO, no region code indication may be labeled even though playing the DVD VIDEO is prohibited by area restrictions.

Example of discs that the player cannot play
The player cannot play the following discs:
- CD-ROMs/CD-Rs/CD-RWs other than those recorded in the formats listed on the previous page.
- CD-ROMs recorded in PHOTO CD format.
• Data part of CD-Extras
• DVD Audios
• HD layer on Super Audio CDs
Also, the player cannot play the following discs:
• A DVD VIDEO with a different region code.
- A disc recorded in a color system other than NTSC, such as PAL or SECAM (this player conforms to the NTSC color system).
- A disc that has a non-standard shape (e.g., card, heart).
• A disc with paper or stickers on it.
- A disc that has the adhesive of cellophane tape or a sticker still left on it.
Notes about DVD+RWs/ DVD+Rs, DVD-RWs/DVD-Rs or CD-Rs/CD-RWs
Some DVD+RWs/DVD+Rs, DVD-RWs/DVD-Rs or CD-Rs/CD-RWs cannot be played on this player due to the recording quality or physical condition of the disc, or the characteristics of the recording device and authoring software.
The disc will not play if it has not been correctly finalized. For more information, refer to the operating instructions for the recording device. Note that some playback functions may not work with some DVD+RWs/DVD+Rs, even if they have been correctly finalized. In this case, view the disc by normal playback. Also some DATA CDs/DATA DVDs created in Packet Write format cannot be played.
Note on playback operations of DVDs and VIDEO CDs
Some playback operations of DVDs and VIDEO CDs may be intentionally set by software producers. Since this player plays DVDs and VIDEO CDs according to the disc contents the software producers designed, some playback features may not be available. Also, refer to the instructions supplied with the DVDs or VIDEO CDs.
Music discs encoded with copyright protection technologies
This product is designed to playback discs that conform to the Compact Disc (CD) standard. Recently, various music discs encoded with copyright protection technologies are marketed by some record companies. Please be aware that among those discs, there are some that do not conform to the CD standard and may not be playable by this product.
Note on DualDiscs
This product is designed to playback discs that conform to the Compact Disc (CD) standard. A DualDisc is a two sided disc product which mates DVD recorded material on one side with digital audio material on the other side. Please be aware that the audio side of a DualDisc may not play on this product because these discs do not conform to the CD standard.
“DualDisc” is a trademark of the Recording Industry Association of America (RIAA).
Step 1 : Unpacking
Check that you have received the following items with the DVD-VCR:
- Remote commander • 75-ohm coaxial cable with F-type
connectors

natural_image
Line drawing of a remote control with buttons and dials (no text or symbols)
natural_image
Line drawing of a coiled cable with two connectors tied at the end (no text or symbols)- Size AA (R6) batteries

Note
- The supplied remote commander is for the exclusive use of this DVD-VCR.
Step 2 : Setting up the remote commander
Inserting the batteries
Insert two size AA (R6) batteries by matching the + and - on the batteries to the diagram inside the battery compartment.
Insert the negative (−) end first, then push in and down until the positive (+) end clicks into position.
Reattach the cover after inserting the battery.

natural_image
Diagram of a car's rearview door mechanism showing battery placement and lifting mechanism (no text or labels)Using the remote commander
You can use this remote commander to operate this DVD-VCR and a Sony TV. Buttons on the remote commander marked with an orange dot (•) can be used to operate your Sony TV.
If the TV does not have the Symbol near the remote sensor, this remote commander will not operate the TV.

| To operate Set TV | / DVD-VIDEO switch to |
| the DVD player DVD | •VIDEO ____, then press SELECT DVD and point at the remote sensor at the DVD-VCR |
| the VCR DVD-VIDEO | O____, then press SELECT VIDEO and point at the remote sensor at the DVD-VCR |
| a Sony TV TV | ___ and point at the remote sensor at a Sony TV |
Notes
- With normal use, the batteries should last about three to six months.
- If you do not use the remote commander for an extended period of time, remove the batteries to avoid possible damage from battery leakage.
- Do not use a new battery with an old one.
- Do not use different types of batteries.
- Do not leave the remote commander in an extremely hot or humid place.
- Do not drop any foreign object into the remote casing, particularly when replacing the batteries.
- Do not expose the remote sensor to direct light from the sun or lighting apparatus. Doing so may cause a malfunction.
Controlling a Sony TV with the remote commander
You can use this remote to operate your Sony TV. Use the buttons marked with an orange dot ( ).
When the TV / DVD-VIDEO switch is set to TV, the remote performs the following:
Buttons Operations
| I/⏻ Turns a Sony TV on or off |
| VOL +/- Adjusts the volume of a Sony TV |
| CH +/- Selects the channel on a Sony TV |
| Number buttons and ENTER Selects the channel on a Sony TV |
| MUTING Mutes a Sony TV equipped with the muting function |
| TV/VIDEO Switches a Sony TV’s input source |
To control the DVD-VCR, reset TV / DVD·VIDEO switch to DVD·VIDEO.
Step 3 : Basic hookups
Before you get started
- Be sure to disconnect the AC power cord of each component before connecting.
- Turn off the power to all equipment.
- Do not connect the AC power cords until all of the connections are completed. If you connect the AC power cord before the connections are completed, you may not be able to use the Plug and Play function.
- Be sure you make connections firmly. Loose connections may cause picture distortion.
- If your TV does not match any of the examples provided, see your nearest Sony dealer or qualified technician.
Selecting the best hookup option
There are many ways in which your DVD-VCR can be hooked up. To hook up your DVD-VCR so that it works best for you, first scan through the table below. Then use the accompanying diagrams and procedures on the following pages to set up your DVD-VCR.
If your TV has audio/video inputs, refer to page 15 for audio/video (A/V) hookup. Then follow one of the hookups below. If your TV does not have A/V inputs, go directly to one of the hookups below.
| If you have Use Refer to | ||
| Antenna only, no cable TV | Hookup 1 A or B(Plug and Play) | Page 16 and 18 |
| No cable box or cable box with only a few scrambled channels | Hookup 1 C(Plug and Play) | Page 17 and 18 |
| Cable box with many scrambled channels Hookup 2 Page 19 | ||
After you have completed the connections, follow the instructions for setup.
After you have completed the setup, you are ready to use your DVD-VCR. Procedures differ depending on the hookup you used.
Caution
Connections between the DVD-VCR's VHF/UHF connector and the antenna terminals of the TV receiver should be made only as shown in the following instructions. Failure to do so may result in operation that violates the regulations of the Federal Communications Commission regarding the use and operation of RF devices. Never connect the output of the DVD-VCR to an antenna or make simultaneous (parallel) antenna and DVD-VCR connections at the antenna terminals of your receiver.
Note to CATV system installer (in USA)
This reminder is provided to call the CATV system installer's attention to Article 820-40 of the NEC that provides guidelines for proper grounding and, in particular, specifies that the cable ground shall be connected to the grounding system of the building, as close to the point of cable entry as practical.
Audio/video (A/V) hookup
If your TV has audio/video (A/V) input jacks, you will get better picture and sound if you hook up your DVD-VCR using these connections. If your TV does not have A/V inputs, see the following pages for antenna or cable hookups. Note that “Advanced Hookups” (page 30) explains additional hookup methods that will optimize the picture and sound for a true “hometheater” experience.
If you are not planning to use your DVD-VCR to record programs, you only need to make the connections shown on this page. If you want to record regular or cable TV programs, complete these connections first, and then go to the following pages for antenna or cable hookups.
A Use this hookup if your TV has stereo jacks

flowchart
graph LR
    A["TV"] -->|Audio/video cord (not supplied)| B["Line IN 1 OUT"]
    A -->|Audio video cord (not supplied)| C["Video"]
    A -->|Audio OUT| D["Video"]
    A --> E["AUX IN"]
    A --> F["Stereo receiverDVD-VCR"]
    style A fill:#f9f,stroke:#333
    style B fill:#ccf,stroke:#333
    style C fill:#cfc,stroke:#333
    style D fill:#fcc,stroke:#333
    style E fill:#cff,stroke:#333
    style F fill:#ffc,stroke:#333
B Use this hookup if your TV does not have stereo jacks

flowchart
graph LR
    A["LINE LINE IN 1 OUT"] --> B["TV"]
    C["VIDEO"] --> B
    D["Audio"] --> B
    B --> E["AUX IN"]
    F["Video cord (not supplied)"] --> B
    G["Audio cord (not supplied)"] --> B
    H["Stereo receiverDVD-VCR"] --> I["AUX IN"]
Notes
- To play a tape/disc in stereo, you must use the A/V connection.
- If you do not have a stereo receiver, connect the white LINE OUT/AUDIO L jack to the AUDIO IN jack on your TV.
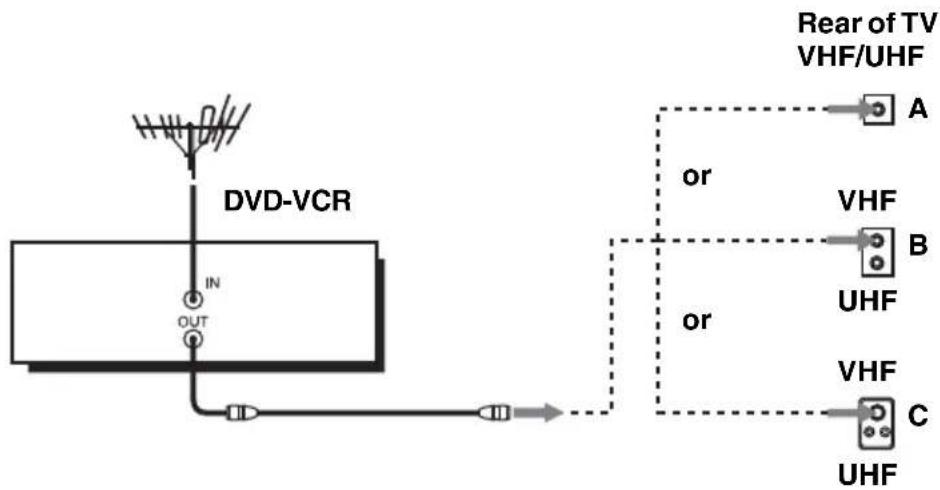
Hookup 1 (Plug and Play)
A Use this hookup if you are using:
• VHF/UHF antenna (you get channels 2–13 and channels 14 and higher)
• UHF-only antenna (you get channels 14 and higher)
- Separate VHF and UHF antennas

flowchart
graph TD
    A["In"] --> B["DVD-VCR"]
    B --> C["OUT"]
    C --> D["Output"]
    D --> E["Rear of TV VHF/UHF"]
    E --> F["A"]
    E --> G["B"]
    E --> H["UHF"]
    E --> I["C"]
    style A fill:#f9f,stroke:#333
    style B fill:#ccf,stroke:#333
    style C fill:#cfc,stroke:#333
    style D fill:#fcc,stroke:#333
    style E fill:#ffc,stroke:#333
    style F fill:#fff,stroke:#333
    style G fill:#fff,stroke:#333
    style H fill:#fff,stroke:#333
    style I fill:#fff,stroke:#333
Match the type of connector on your TV: A, B, or C.
B Use this hookup if you are using a VHF-only antenna (you get channels 2–13 only)
flowchart
graph TD
    A["In"] --> B["DVD-VCR"]
    B --> C["OUT"]
    C --> D["Device"]
    D --> E["Rear of TV VHF/UHF"]
    E --> F["A"]
    E --> G["B"]
    E --> H["UHF"]
    E --> I["VHF"]
    E --> J["C"]
    style A fill:#f9f,stroke:#333
    style B fill:#ccf,stroke:#333
    style C fill:#cfc,stroke:#333
    style D fill:#fcc,stroke:#333
    style E fill:#ffc,stroke:#333
    style F fill:#cff,stroke:#333
    style G fill:#ffc,stroke:#333
    style H fill:#cff,stroke:#333
    style I fill:#ffc,stroke:#333
    style J fill:#cff,stroke:#333
Match the type of connector on your TV: A, B, or C.
For connector types B and C, no UHF connection is required.
If you cannot connect your antenna cable to the DVD-VCR directly
If your antenna cable is a flat cable (300-ohm twin lead cable), attach an external antenna connector (not supplied) so you can connect the cable to the IN connector. If you have separate cables for VHF and UHF antennas, you should use a U/V band mixer (not supplied) (page 100).
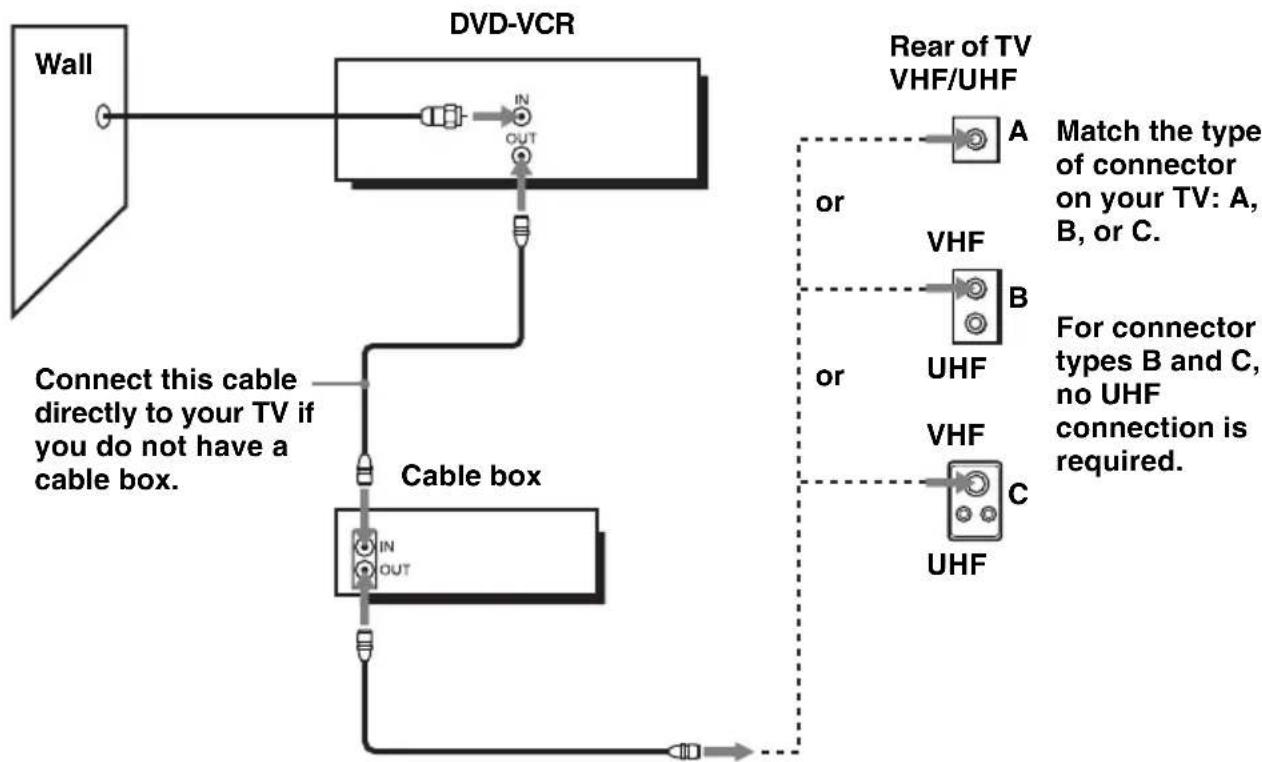
C Use this hookup if you have no cable box, or a cable box with only a few scrambled channels
What you can do with this hookup
- Record any unscrambled channel by selecting the channel on the VCR
What you cannot do
- Record scrambled channels that require a cable box
flowchart
graph TD
    A["Wall"] --> B["DVD-VCR"]
    B --> C["Cable box"]
    C --> D["Connect this cable directly to your TV if you do not have a cable box."]
    D --> E["In/OUT"]
    E --> F["Rear of TV VHF/UHF"]
    F --> G["A"]
    F --> H["B"]
    F --> I["UHF"]
    F --> J["VHF"]
    F --> K["C"]
    style A fill:#f9f,stroke:#333
    style B fill:#ccf,stroke:#333
    style C fill:#cfc,stroke:#333
    style D fill:#fcc,stroke:#333
    style E fill:#cff,stroke:#333
    style F fill:#ffc,stroke:#333
    style G fill:#fcc,stroke:#333
    style H fill:#fcc,stroke:#333
    style I fill:#fcc,stroke:#333
    style J fill:#fcc,stroke:#333
    style K fill:#fcc,stroke:#333
DVD-VCR setup (Hookup 1 continued)
Plug the DVD-VCR into an AC outlet.
The DVD-VCR automatically presets the DVD-VCR's clock and TV channels when the DVD-VCR is plugged into the AC outlet.

The DVD-VCR starts presetting the clock and channels.
When Auto preset is completed, the current time appears in the display window.

You have now completed DVD-VCR setup.
To begin using your DVD-VCR, go to "Basic Operations" on page 34.
To change the on-screen display language to French or Spanish, see "Step 4: Selecting a language" on page 20.
The clock is set using a time signal provided by some TV channels. If the clock is incorrect, or “-:-” appears in the display window, see “Using Manual Clock Set” on page 24.
To add or disable channels manually, see “Presetting/disabling channels manually” on page 28.
Notes
- If you connect the AC power cord before the antenna connections are completed, the channels may be incorrectly set. If this happens, see “Step 6 : Presetting channels” on page 26.
- Do not press any buttons on the DVD-VCR or remote commander during Auto preset.
- Auto preset starts automatically only when you plug in the AC power cord for the first time after you purchase the DVD-VCR.
- Auto preset can be performed by pressing ■ on the unit continuously for 5 seconds or more with the DVD-VCR power turned off.
Hookup 2
Use this hookup if you are connecting a cable box with many scrambled channels
What you can do with this hookup
- Record any channel by selecting the channel on the cable box
What you cannot do
- Record with the cable box turned off
- Record one channel while watching another channel

flowchart
graph TD
    A["Wall"] --> B["Cable box"]
    B --> C["DVD-VCR"]
    C --> D["Rear of TV VHF/UHF"]
    D --> E["A"]
    D --> F["B"]
    D --> G["C"]
    style A fill:#f9f,stroke:#333
    style B fill:#ccf,stroke:#333
    style C fill:#cfc,stroke:#333
    style D fill:#fcc,stroke:#333
    note right of D "or"
        Match the type of connector on your TV: A, B, or C.
        for connector types B and C, no UHF connection is required.
    end
After you have completed hookup...
After you have completed hookup, plug the DVD-VCR into an AC outlet and see "Step 4: Selecting a language" on page 20.

Step 4 : Selecting a language
You can change the on-screen display language.
Before you start...
- Turn on the DVD-VCR and your TV.
- Set the TV to video input so that the signal from the player appears on the TV screen.
- S e_t /IDVD·VIDEO switch to DVD·VIDEO on the remote.
- If the DVD player is in play mode, you cannot display the setup menu. Stop the DVD playback.

1
SET UP

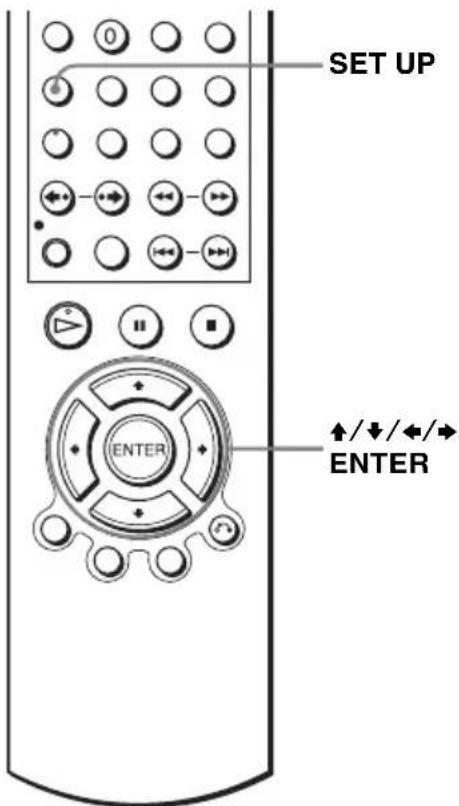
Press SET UP, then press / to select (OPTION) and press ENTER.


![OPTION SETUP Language :English Clock Set/Adjust Channel Setup Auto Power Off [ Off ] RF Output Channel [3CH] ENTER RETURN SET UP](/content/2026/05/1049605/images/12c3d961e7769b0d42b5fb2184a752eb3a70e4d4be2ef086cbe2274251aa4800.jpg)
2

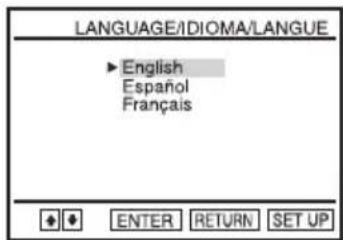
Press / to select "Language", then press ENTER.
The "LANGUAGE/IDIOMA/LANGUE" menu appears.
3

Press / to select the desired language, English, Spanish or French, then press ENTER.
4
SET UP

Press SET UP to exit the menu.
Step 5 : Setting the clock
You must set the clock on the DVD-VCR to use the timer features properly.
Using the Auto Clock Set feature
Some TV and cable channels transmit time signals with their broadcasts. Your DVD-VCR can pick up this time signal to automatically set the clock.
The Auto Clock Set feature works only if a channel in your area is broadcasting a time signal. If broadcasters in your area are not sending time signals, set the time manually (page 24).
Before you start...
- Turn on the DVD-VCR and your TV. When using a cable box, turn it on.
- Set the TV to video input so that the signal from the player appears on the TV screen.
- S e_t /IDVD·VIDEO switch to DVD·VIDEO on the remote.
- If the DVD player is in play mode, you cannot display the setup menu. Stop the DVD playback.

1
SET UP


Press SET UP, then press / to select (OPTION) and press ENTER.

![OPTION SETUP Language :English Clock Set/Adjust Channel Setup Auto Power Off [ Off ] RF Output Channel [3CH] ENTER RETURN SET UP](/content/2026/05/1049605/images/dad95bd06092d9f2809e0f0e6e72697d20b91a943661095ed8c8442afac81dbf.jpg)
2

Press ↑/↓ to select "Clock Set/Adjust", then press ENTER.
The "CLOCK SET/ADJUST" menu appears.

3

Press ↑/↓ to select "Auto", then press ENTER.
![CLOCK SET/ADJUST Clock data CH [ Auto ] Time zone [ Auto ] Daylight saving [ Auto ] RETURN SET UP](/content/2026/05/1049605/images/283b7a169f729aa1603d133024abdecd06a1e34c37bc3d7bbc666ae5f785439e.jpg)
4

Press ↑/↓ to select the item you want, then press ←/→ to make the setting.
- For "Clock data CH"
Leave the setting to “Auto” to have the DVD-VCR automatically search for a channel that carries a time signal. Press ◀/→ to select a channel that carries a time signal. Use this option if you know of a channel that carries a time signal. Most PBS member stations broadcast a time signal. For the fastest response, select your local PBS station.
- For "Time zone"
Select the time zone of your area, or select "Auto" to have the DVD-VCR automatically set your time zone.
The options are:
Auto Atl. (Atlantic) East (Eastern) Cen. (Central) Mtn. (Mountain) Pac. (Pacific) Alas (Alaska) Haw. (Hawaii) Auto
- For "Daylight saving"
Select “Yes” or “No” (standard time), or “Auto” to have the DVD-VCR automatically set the daylight saving time.
![CLOCK SET/ADJUST Clock data CH [123] Time zone [Auto] Daylight saving [Auto] RETURN SET UP](/content/2026/05/1049605/images/e84d5d4183ad1163566269b93102cb072ab0f89627c04a1efa9e0ae4f54b36cd.jpg)
![CLOCK SET/ADJUST Clock data CH [ Auto ] Time zone [ Pac. ] Daylight saving [ Auto ] RETURN SET UP](/content/2026/05/1049605/images/7ec6f4e1039bb5a097b9d0389fbe3c73ee3f058919eb9e7b43dfa4334d1b53de.jpg)
![CLOCK SET/ADJUST Clock data CH [Auto] Time zone [Auto] Daylight saving [No] RETURN SET UP](/content/2026/05/1049605/images/6c65440816a1ba07c64f08c18d765752ea5f6beb85951d8ea23f61f8cc07bbc9.jpg)
5

SET UP

Press ⬇ RETURN, then press SET UP to exit the menu.
6
To activate the Auto Clock Set function, turn off the DVD-VCR.
Notes
- The clock cannot be set automatically if you do not receive a channel that carries a time signal in your area. If so, set the clock manually (page 24).
- If there are only a few channels in your area that carry time signals, setting the clock automatically may take up to about 20 minutes. If nothing happens even after you wait about 20 minutes, set the clock manually (page 24).
- If you made Hookup 2, make sure you leave the cable box on.
- The clock display appears when VIDEO mode is selected with no tape inserted or when the DVD-VCR is turned off.
Using Manual Clock Set
Before you start...
- Turn on the DVD-VCR and your TV.
- Set the TV to video input so that the signal from the player appears on the TV screen.
- S e_t /IDVD·VIDEO switch to DVD·VIDEO on the remote.
- If the DVD player is in play mode, you cannot display the setup menu. Stop the DVD playback.
1
Press SET UP, then press / to select (OPTION) and press ENTER.


![OPTION SETUP Language :English Clock Set/Adjust Channel Setup Auto Power Off [ Off ] RF Output Channel [3CH] ENTER RETURN SET UP](/content/2026/05/1049605/images/38a83837b78e3db92ad2a63aaa05385db416979e2330ae8ee700ec30ba8a6f30.jpg)
2

Press ↑/↓ to select "Clock Set/Adjust", then press ENTER. The "CLOCK SET/ADJUST" menu appears.

3

Press ↑/↓ to select "Manual", then press ENTER.
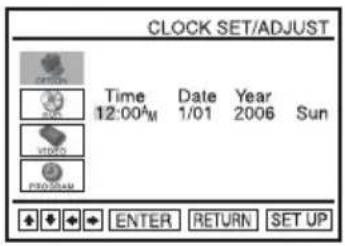
4

Set the hour, minutes, month, day and year in sequence by pressing / to select the item to be set, and press / to select the digits. The day of the week is set automatically.

5

Press ENTER to confirm the setting.
6
SET UP

Press SET UP to exit the menu.
Note
- The clock display appears when VIDEO mode is selected with no tape inserted or when the DVD-VCR is turned off.
Step 6 : Presetting channels
This DVD-VCR is capable of receiving VHF channels 2 to 13, UHF channels 14 to 69 and unscrambled CATV channels 1 to 125. First, we recommend that you preset the receivable channels in your area using automatic presetting methods. Then, if there are any unwanted channels, disable them manually. If you have already decided which channels you wish to preset, set them directly using manual presetting methods (page 28).
Presetting all receivable channels automatically
Before you start...
- Turn on the DVD-VCR and your TV. When using a cable box, turn it on.
- Set the TV to video input so that the signal from the player appears on the TV screen.
- S e t /IDVD·VIDEO switch to DVD·VIDEO on the remote.
- If the DVD player is in play mode, you cannot display the setup menu. Stop the DVD playback.

1

Press SET UP, then press / to select (OPTION) and press ENTER.


![OPTION SETUP Language :English Clock Set/Adjust Channel Setup Auto Power Off [ Off ] RF Output Channel [3CH] ENTER RETURN SET UP](/content/2026/05/1049605/images/d8a46bee5642aa8b367a1bda631f928a2e7a87904f96ab27ab1b8f7aedbb73a5.jpg)
2

Press ↑/↓ to select "Channel Setup", then press ENTER.
The "CHANNEL SETUP" menu appears.
![CHANNEL SETUP Ant/Cable [ Cable TV ] Auto Channel Memory Channel Add/Delete PRO/DOAM RETURN SET UP](/content/2026/05/1049605/images/8aad24845cefe2de01cb3b6eab7024b6d20c4adc3aba6ebfab7fadcda5ff5982.jpg)
3

Press / to select "Ant/Cable."
4

- To preset cable TV channels: Press / to select "Cable TV."
- To preset VHF and UHF channels: Press / to select "Antenna."
![CHANNEL SETUP Ant/Cable [ Cable TV ] Auto Channel Memory Channel Add/Delete PROGRAM RETURN SET UP](/content/2026/05/1049605/images/982dc02d7bfb4c8478e242f1be1d6a12eec4aacfb72962468e70934751824ffe.jpg)
![CHANNEL SETUP Ant/Cable [ Antenna ] Auto Channel Memory Channel Add/Delete PROGRAM RETURN SET UP](/content/2026/05/1049605/images/2b4262d4298afc6034a976aa0f59d75b3bba7ede1b1c004f9208a7b05f1ce806.jpg)
5

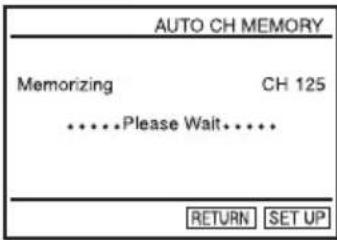
Press ↑/↓ to select "Auto Channel Memory," then press ENTER.
All receivable channels are preset in numerical sequence. When no more receivable channels can be found, presetting stops and the picture from the lowest numbered channel is displayed on the TV screen.
Presetting/disabling channels manually
Before you start...
- Turn on the DVD-VCR and your TV. When using a cable box, turn it on.
- Set the TV to video input so that the signal from the player appears on the TV screen.
- Set /IDVD·VIDEO switch to DVD·VIDEO on the remote.
- If the DVD player is in play mode, you cannot display the setup menu. Stop the DVD playback.
1
SET UP


Press SET UP, then press / to select (OPTION) and press ENTER.

![OPTION SETUP Language :English Clock Set/Adjust Channel Setup Auto Power Off [ Off ] RF Output Channel [3CH] ENTER RETURN SET UP](/content/2026/05/1049605/images/9aabac1d0d16e1f3f24cd002a150188e2d29ff06399c184620155a1c34fd5fb7.jpg)
2

Press ↑/↓ to select "Channel Setup", then press ENTER.
The "CHANNEL SETUP" menu appears.
![CHANNEL SETUP Ant/Cable [ Cable TV ] Auto Channel Memory Channel Add/Delete RETURN SET UP](/content/2026/05/1049605/images/218cd129a0396f1912a6c0fbc9af1b186d2c36ee43c767487871cda766c55989.jpg)
3

Press ↑/↓ to select "Channel Add/Delete," then press ENTER.
4
• CH/TRACKING

To preset/disable a channel:
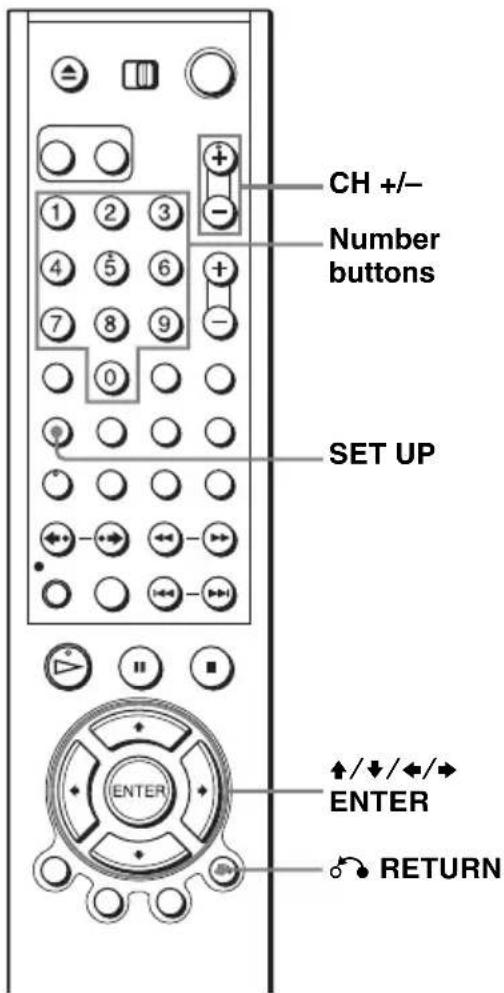
1 Press CH +/- or number buttons to enter the channel number.
2 Press ←/→ to select "ADD" (in memory) or "DELETE" (deleted).
3 Press ENTER.
Channel to be preset
![CHANNEL ADD/DELETE Select channel: (in memory) and press [♦] to ADD press [♦] to DELETE RETURN CH ▲▼](/content/2026/05/1049605/images/8b3222d3b4b55c93151383a0928181f9acb15b282bf713c61287d1afadae9f70.jpg)

Channel to be disabled
![CHANNEL ADD/DELETE Select channel: (deleted) and press [♦] to ADD press [♦] to DELETE RETURN CH ▲▼](/content/2026/05/1049605/images/c89fe5bc80d751d415bf5dc4717a2cae6eef8262c64177efb86a4618759f9740.jpg)
5

RETURN
Press ⬇ RETURN to confirm the setting.
6
SET UP

Press SET UP to exit the menu.
Note
- If you have not preset channels automatically, you cannot preset/disable channels manually.
S-Video/Component Video hookup
DVD-V DVD-RW VCD DATA-CD DATA-DVD
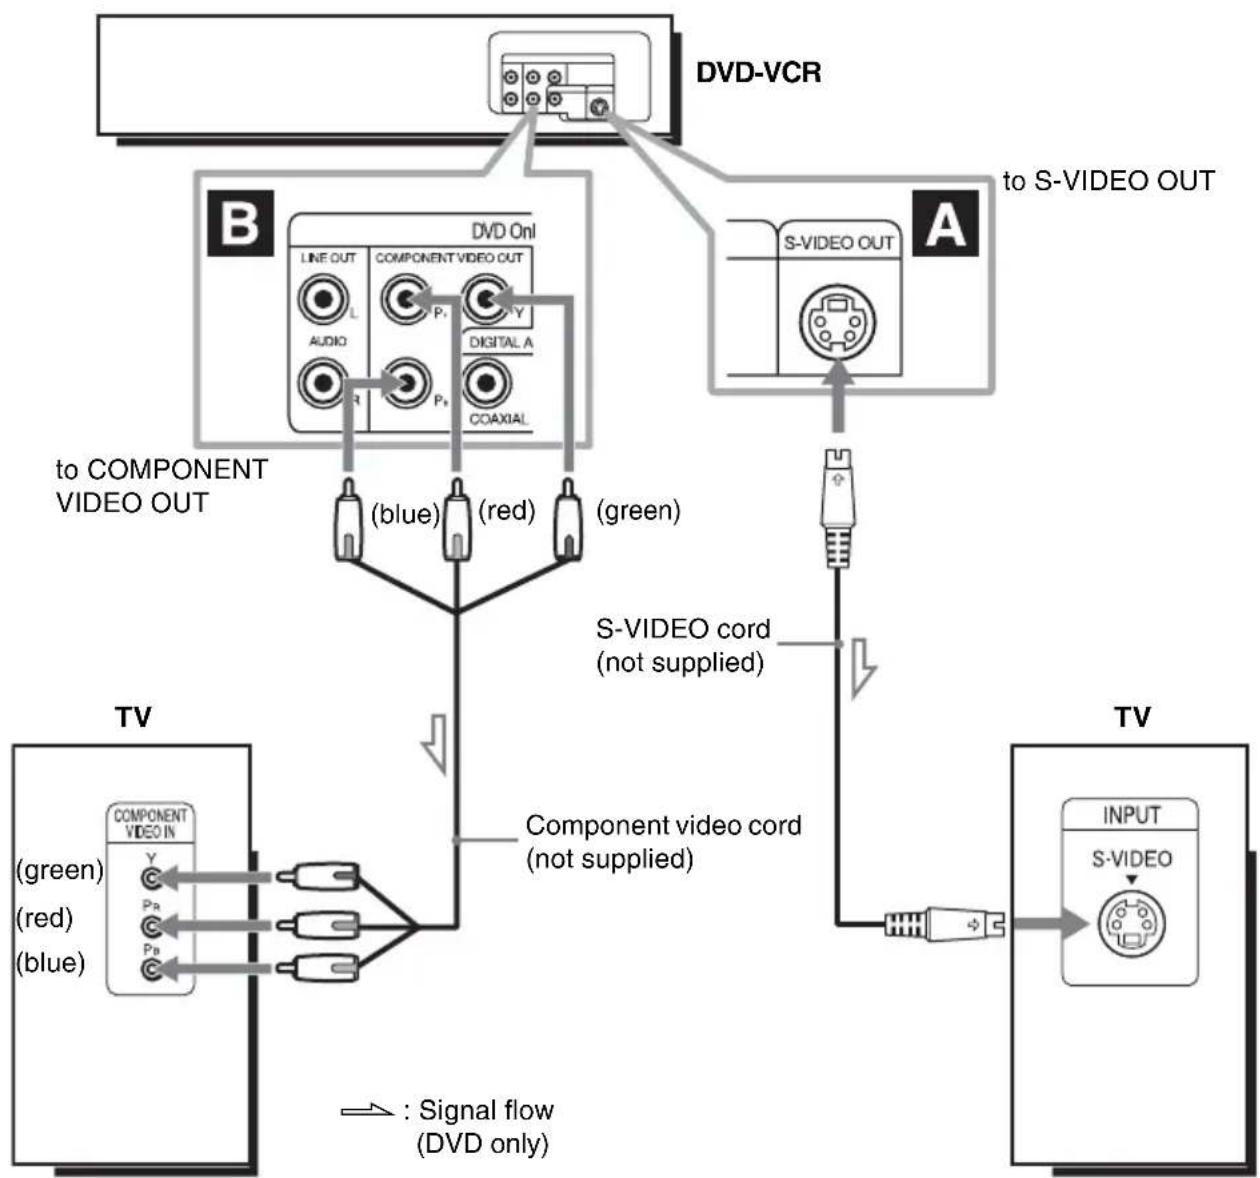
Select one of the following patterns A or B, according to the input jack on your TV monitor, projector, or AV amplifier (receiver). You can enjoy higher quality images when playing DVDs.
Make audio connections using the LINE OUT AUDIO L/R jacks or DIGITAL AUDIO OUT (COAXIAL) jacks on the right side of the DVD-VCR when you use S-VIDEO/Component Video hookup. See page 32 for audio connections.
If your TV accepts progressive (480p) format signals, you must use the connection B.
flowchart
graph TD
    A["TV"] --> B["COMPONENT VIDEO IN"]
    B --> C["COMPONENT VIDEO OUT"]
    C --> D["DVD Onl"]
    D --> E["LINE OUT"]
    D --> F["L"]
    D --> G["AUDIO"]
    D --> H["R"]
    D --> I["P1"]
    D --> J["P2"]
    D --> K["COAXIAL"]
    D --> L["(blue)"]
    D --> M["(red)"]
    D --> N["(green)"]
    D --> O["S-VIDEO OUT"]
    O --> P["S-VIDEO cord (not supplied)"]
    P --> Q["COMPONENT VIDEO cord (not supplied)"]
    Q --> R["COMPONENT VIDEO OUT"]
    R --> S["TV"]
    S --> T["INPUT"]
    T --> U["S-VIDEO"]
    U --> V["OUTPUT"]
    style A fill:#f9f,stroke:#333
    style V fill:#ccf,stroke:#333
A Use this hookup if your TV has an S-VIDEO input jack
Connect an S-VIDEO cord (not supplied). You will enjoy high quality images.
B Use this hookup if your TV has component video input jacks
Connect a component video cord (not supplied) or three video cords (not supplied) of the same kind and length. You will enjoy accurate color reproduction and high quality images.
If your TV accepts progressive (480p) format signals, you must use this connection and then set “Progressive” to “On” in the “SCREEN SETUP” menu. For details, see “To set the “Progressive” setting” (page 58).
Notes
- The connection using S-VIDEO OUT and COMPONENT VIDEO OUT jacks are only for the DVD player. The signal from the VCR will not be output.
- In the connection using S-VIDEO OUT jack, if you set “Progressive” to “On” in the “SCREEN SETUP” menu, S-Video playback may be distorted.
A/V Receiver hookup
DVD-V DVD-RW VCD CD DATA-CD DATA-DVD
Select one of the following patterns A or B, according to the input jack on your AV amplifier (receiver). This will enable you to listen to DVD audio tracks through your AV amplifier (receiver).
For correct speaker location, see the operating instructions supplied with the connected components.

flowchart
graph TD
    A["Line OUT L/R (AUDIO)"] --> B["(white)"]
    A --> C["(red)"]
    B --> D["Stereo audio cord (not supplied)"]
    C --> E["or"]
    D --> F["AV amplifier (receiver) with a decoder"]
    E --> G["Coaxial digital cord (not supplied)"]
    F --> H["[Speakers"]]
    H --> I["Rear (L)"]
    H --> J["Front (L)"]
    H --> K["Center"]
    G --> L["[Speakers"]]
    L --> M["Rear (R)"]
    L --> N["Front (R)"]
    L --> O["Subwoofer"]
    P["DVD-VCR"] --> Q["Line OUT"]
    P --> R["COMPONENT"]
    P --> S["VIDEO"]
    P --> T["COAXIAL"]
    U["Digital Audio Out (COAXIAL)"] --> V["to DIGITAL AUDIO OUT (COAXIAL)"]
    W["Signal flow"] --> X["to audio input"]
    X --> Y["AV amplifier with a decoder"]
A Connecting to audio L/R jacks
This connection uses a stereo amplifier's (receiver's) two front speakers for sound. You can enjoy the surround function that creates virtual speakers from two stereo speakers. Select from “Surround1”, “Surround2” or “Surround3” of the surround effects (page 76).
B Connecting to a digital audio (COAXIAL) input jack
Use this connection if your AV amplifier (receiver) has a Dolby* Digital or DTS*2 decoder and a digital input jack. You can enjoy the surround effect of Dolby Digital (5.1ch) or DTS (5.1ch).
*1 Manufactured under license from Dolby Laboratories.
“Dolby” and the double-D symbol are trademarks of Dolby Laboratories.
*2 "DTS" and "DTS Digital Out" are trademarks of Digital Theater Systems, Inc.
Notes
- After you have completed the connection using DIGITAL AUDIO OUT (COAXIAL), be sure to set “Dolby Digital” to “Dolby Digital” and “DTS” to “On” in “AUDIO SETUP” menu (page 54). Otherwise, no sound or a loud noise will come from the speakers.
- With a coaxial digital connection, you cannot use the virtual surround effects of this recorder.
Playing

Depending on the disc, some operations may be different or restricted. Refer to the operating instructions supplied with your disc.
Before you start ...
- Turn on the DVD-VCR and your TV.
- Set the TV to video input so that the signal from the player appears on the TV screen.

1

Press SELECT DVD to control the DVD player.
2

Press ▲ to open the disc tray and place a disc on the disc tray.

3
PLAY

Press ▷ PLAY.
The disc tray closes and the DVD player starts playback. The display window shows the playback time*.
Depending on the disc, a menu may appear on the TV screen.
For DVDs, see page 65. For VIDEO CDs, see page 88.
* “----” appears when no disc is loaded.
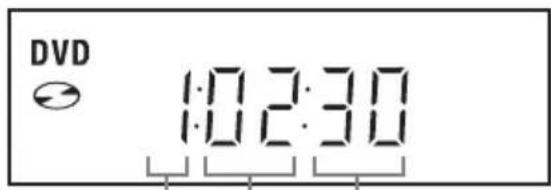
Hour SecondMinute
Tip
- To make a video timer reservation during DVD playback, we recommend performing the operations under “Quick Timer Recording” (page 90).
Notes
- You can change the screen type using the "SCREEN SETUP" menu (see "Screen Setup" on page 56).
- Stop VIDEO playback while playing back a disc.
- If you play a DVD or VIDEO CD that has scratches, the player may stop playback at the point of the scratch.
- Playback of play lists longer than 10 hours recorded in VR mode is not guaranteed.
Additional operations
| To Press | |
| Stop play ■ STOP | |
| Pause play || PAUSE | If you pause the DVD player for more than 5 minutes, the DVD player will automatically stop. |
| Resume play after pause ▷ PLAY | |
| Go to the next frame in pause mode SKIP | ●→ |
| Go to the previous frame in pause mode REPLAY | |
| Go to the next chapter, track, or scene in continuous play mode | ▶▶ NEXT on the remote or ▶▶ on the unit |
| Go back to the previous chapter, track, or scene in continuous play mode | ◀◀ PREV on the remote or ◀◀ on the unit |
| Locate a point quickly | ◀◀ or ▶▶ on the remote (or hold down ◀◀ or ▶▶ on the unit)The playback speed changes as follows each time you press the button on the remote (or depending on how long you press the button on the unit):• DVDfast forward: PLAY → ×1.4 ••▶••*1 → 1▶▶ → 2▶▶→ 3▶▶ → 4▶▶ → 5▶▶ → 6▶▶fast reverse: PLAY → 1◀◀ → 2◀◀ → 3◀◀ → 4◀◀→ 5◀◀ → 6◀◀• CD, MP3 and VIDEO CDfast forward: PLAY → 1▶▶ → 2▶▶ → 3▶▶fast reverse: PLAY → 1◀◀ → 2◀◀ → 3◀◀When you find the point you want, press ▷ PLAY. |
| Watch slow motion in continuous play mode (DVD and VIDEO CD only) | ■ PAUSE during playback, then press ◀◀ or ▶▶The playback speed changes as follows each time you press◀◀ or ▶▶:• DVDforward slow motion: ×0.6 ••▶••*1 → 2 ▶▶ → 3 ▶▶reverse slow motion (except for DVD-RW in VR mode): 1◀◀ → 2 ◀◀ 3 ◀◀• V I D E O C Dforward slow motion only: 1 ▶▶ → 2 ▶▶ → 3 ▶▶To resume normal playback, press ▷ PLAY. |
| Replay the previous scene for 10 seconds in continuous play mode*2(Instant Replay) | ◀◀ REPLAY |
| Briefly fast forward the current scene for 30 seconds in continuous play mode*2(Instant Advance) | ●▶ SKIPYou can press ●SKIP up to 4 times. This allows you to fast forward up to 2 minutes in total. |
| Stop play and remove the disc ▲ |
*1 Playback quickly or slowly with sound (See “To playback quickly or slowly with sound (DVD only)” on page 37.)
* 2 For DVD VIDEOS and DVD-RWs/DVD-Rs or DVD+RWs/DVD+Rs only
Notes
- No sound is output except for:
- during normal play - during playback quickly or slowly with sound
- You cannot perform playback quickly or slowly with sound when a virtual surround effect is set.
- The fast reverse operation may not be possible for CD, MP3 and VIDEO CD depending on the recording method.
- You may not be able to use the Instant Replay or Instant Advance function with some scenes.
- Switching between original (ORG) and play list (PL) within a disc recorded in VR mode is possible only while the disc is stopped. Press TOP MENU to switch between ORG and PL.
To playback quickly or slowly with sound (DVD only)
You can listen to dialog or sound while playing the current scene quickly or slowly.
To playback quickly, press ▶▶ during playback.
To playback slowly, press ■■ PAUSE, then press▶ during playback.
Press PLAY to return to normal playback.
Notes
- You cannot set virtual surround effects while performing playback quickly or slowly with sound. In addition, you cannot perform playback quickly or slowly with sound when a virtual surround effect is set.
- You cannot perform DTS audio output during playback quickly or slowly with sound. In addition, you cannot perform playback quickly or slowly with sound when DTS audio output is set.
To Resume playback for the current disc (Resume Play)
The DVD player remembers the point where you stopped the disc even if the DVD player enters standby mode by pressing I/☐.
1 While playing a disc, press ■ STOP to stop playback.
2 Press ▷ PLAY.
The DVD player starts playback from the point where you stopped the disc in Step 1.
Tip
- To begin playback from the top of the disc, press ■ STOP twice then press ▷ PLAY.
Notes on playing DTS\* sound tracks on a CD
- When playing DTS-encoded CDs, excessive noise will be heard from the analog stereo jacks. To avoid possible damage to the audio system, the consumer should take proper precautions when the analog stereo jacks of the DVD player are connected to an amplification system. To enjoy DTS Digital Surround™ playback, an external 5.1-channel decoder system must be connected to the digital jack of the DVD player.
- Set the sound to “Stereo” using the AUDIO button when you play DTS sound tracks on a CD (page 74).
- Do not play DTS sound tracks without first connecting the DVD player to an audio component having a built-in DTS decoder. The DVD player outputs the DTS signal via the DIGITAL AUDIO OUT (COAXIAL) jack even if “DTS” is set to “Off” in “AUDIO SETUP” menu (page 54), and may affect your ears or cause your speakers to be damaged.
Notes on playing DVDs with a DTS sound track
- DTS audio signals are output only through the DIGITAL AUDIO OUT (COAXIAL) jack.
- When you play a DVD with DTS sound tracks, set “DTS” to “On” in “AUDIO SETUP” menu (page 54).
- If you connect the player to audio equipment without a DTS decoder, do not set “DTS” to “On” in “AUDIO SETUP” menu (page 54). A loud noise may come out from the speakers, affecting your ears or causing the speakers to be damaged.
* “DTS” and “DTS Digital Out” are trademarks of Digital Theater Systems, Inc.
Guide to the on-screen display
DVD-V DVD-RW VCD CD
You can check disc information during playback.
The displayed contents differ according to the type of disc being played.
Before you start...
- S e_t /IDVD·VIDEO switch to DVD·VIDEO on the remote.

Press DISPLAY during playback. The following information appears; type of disc, current title/track, chapter, counter position, voice language, subtitle language and Custom AV Mode setting. Refer to “DVD Audio/Subtitle Language” on page 113 for the abbreviation of the language.

Note
- You cannot select disc information items when the disc is stopped.
To playback the desired title/track or chapter
You can playback the desired title/track or chapter using this menu.
1 Press ↑/↓ during playback to select the desired item.
2 Press / to change the item.
3 Press ENTER to start playback.
4 Press DISPLAY or ⬆ RETURN to turn off the menu.
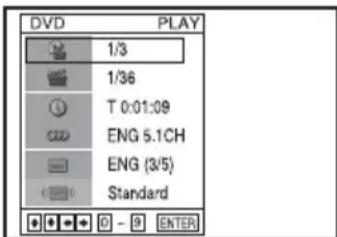
The title/track or chapter icon will appear on the DVD playback screen followed by the current title/track or chapter number and the counter position.
To playback from the desired title/track counter position
You can playback from the desired title/track counter position using this menu.
1 Press ↑/↓ during playback to select the counter position icon.
2 Enter the desired elapsed playing time of the current title/track using the number buttons.
3 Press ENTER to start playback.
4 Press DISPLAY or ⬇ RETURN to turn off the menu.
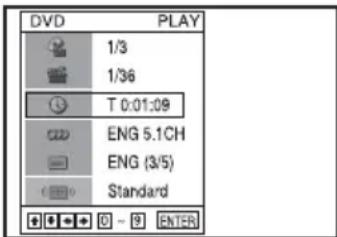
Tip
- You can change the counter position information (playing time or remaining time) using / (DVD and CD only).
DVD
| Indication Counter information | |
| T * : ** : ** | Elapsed playing time of the current title |
| T- * : ** : ** | Remaining time of the current title |
| C * : ** : ** | Elapsed playing time of the current chapter |
| C- * : ** : ** | Remaining time of the current chapter |
CD
| Indication Counter information | |
| T * : ** : ** | Elapsed playing time of the current track |
| T- * : ** : ** | Remaining time of the current track |
| D * : ** : ** | Elapsed playing time of the disc |
| D- * : ** : ** | Remaining time of the disc |
continued
Notes
- The display may not change as operated depending on the disc.
- The display window continue indicating the playing time even when the counter position information on the on-screen display is being changed.
To adjust the playback picture (Custom AV Mode)
You can adjust the video signal of the DVD or VIDEO CD (with PBC function off) from the player to obtain the picture quality you want. Choose the setting that best suits the program you are watching.
1 Press ↑/↓ during playback to select the Custom AV Mode icon.

2 Press ←/→ to change the setting.
| Setting Video Setting Audio Setting | |
| Dynamic 1 Produces a bold dynamic picture by increasing the picture contrast and the color intensity. | Full (modulated) sound with clear treble and bass. |
| Dynamic 2 Produces a more dynamic picture than Dynamic 1 by further increasing the picture contrast and the color intensity. | Full (modulated) sound with even clearer treble and bass than Dynamic 1. |
| Standard Off (Default setting) Displays a standard picture. | Standard sound. |
| Cinema 2 Enhances details in dark areas by increasing the black level. | Powerful sound with even stronger bass than Cinema 1. |
| Cinema 1 White colors become brighter and black colors become richer, and the color contrast is increased. | Powerful sound with strong bass. |
Tip
- When you watch a movie, “Cinema 1” or “Cinema 2” is recommended.
Playing a tape VHS
Before you start ...
- Turn on the DVD-VCR and your TV.
- Set the TV to video input so that the signal from the player appears on the TV screen.
- S e_t /T DVD·VIDEO switch to DVD·VIDEO on the remote.
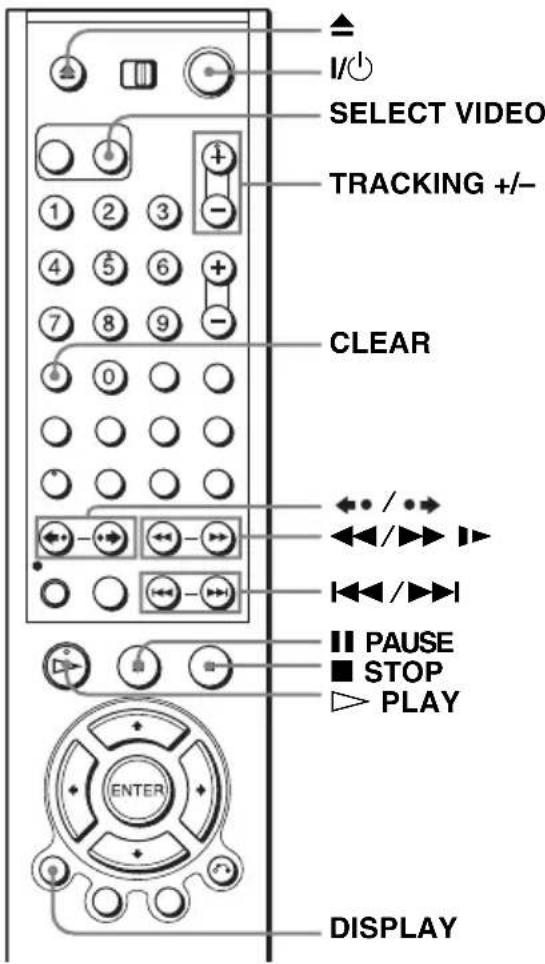
1

Press SELECT VIDEO to control the VCR player.
2
Insert a tape.
The VCR starts playing automatically if you insert a tape with its safety tab removed.

natural_image
Line drawing of a CD-ROM device with front panel and control buttons (no text or symbols)3

Press ▷ PLAY.
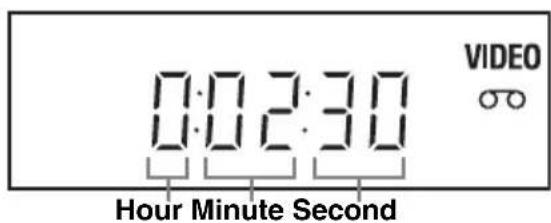
The display window shows the playback time.
When the tape reaches the end, it will rewind automatically.
Additional operations
| To Press | |
| Stop play ■ STOP | |
| Pause play || PAUSE | If you pause the VCR for more than 5 minutes, the VCR will automatically resume play. |
| Resume play after pause | || PAUSE or ▷ PLAY |
| Fast-forward the tape ►▶ during stop | |
| Rewind the tape ◀◀ during stop | |
| Eject the tape ▲ | |
| View the picture during fast-forward or rewind | During fast-forward, hold down ►▶. During rewind, hold down ◀◀. |
| Play at high speed | • During playback, briefly press ►▶ or ◀◀. The tape continues to play at 5 times normal speed.• During playback, hold down ►▶ or ◀◀. The tape continues to play at 5 times normal speed. When you release the button, normal playback resumes. |
| Play in slow motion | During pause, press ►▶. |
| Play frame by frame | During pause, press ●▶ SKIP. |
| Replay the previous scene in continuous play mode* (Instant Replay) | During playback, press ◀●REPLAY. |
| Fast forward the current scene for 30 seconds in continuous play mode (Instant Skip) | During playback, press ●▶ SKIP.You can press ●▶ SKIP up to 4 times. This allows you to fast forward up to 2 minutes in total. |
| Play at various speeds (Shuttle play) | During playback, press ◀◀ or ►▶. You can change the playback speed as follows.-×7 ↔ -×5 ↔ -×3 ↔ STILL ↔ SLOW ↔ PLAY ↔ ×2 ↔ ×3 ↔ ×5 ↔ ×7 |
* For 10 seconds in SP or LP mode/for 15 seconds in EP mode
To resume normal playback
Press ▷ PLAY.
To turn off the power while rewinding (Rewind Shut Off)
Press I/While the tape is rewinding. The power will turn off but the tape will keep rewinding until it reaches the end.
To use the time counter
Press CLEAR at the point on the tape that you want to find later. The counter in the display window resets to “0:00:00.” To search for the counter 0:00:00 point automatically, see “Searching using various functions” on page 92.
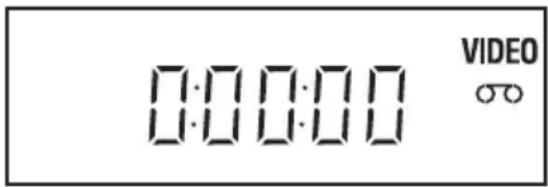
To display the counter on the TV screen, press DISPLAY during normal playback.
Tip
- Adjust the picture using the TRACKING +/- buttons if:
- Streaks appear while playing in slow motion.
– Bands appear at the top or bottom while pausing.
– The picture shakes during pause.
Notes
- Tapes recorded in LP mode on other VCRs can be played back on this VCR but the picture quality cannot be guaranteed.
- The counter resets to “0:00:00” whenever a tape is reinserted.
- The counter stops counting when it comes to a portion with no recording.
- When 10 hours have passed, the counter in the display window returns to “0:00:00” and the count starts over again.
- No sound is output during playback at various speeds.
- The picture may show noise when playing at high speed in reverse.
- While playing a tape, you can display the setup menu, but the remote commander's function switches to DVD automatically. Press ⬇ RETURN repeatedly to exit the menu.
- When playback does not start even if you insert a tape with its safety tab removed, set “Auto Play” to “On” in the “VIDEO FUNCTION SETUP” menu (page 94).
- Stop disc playback while playing back a video.
- The VCR can also play S-VHS tapes recorded by S-VHS mode. The VCR will automatically identify the type of tape inserted in the VCR (either VHS or S-VHS). When S-VHS tapes are played in the VCR, the enhanced resolution will not be visible on screen; there may also be picture distortion while playing the S-VHS tape in slow motion or while utilizing other special playback modes. The VCR will not record in S-VHS mode on an S-VHS tape.
- The playback of S-VHS tapes recorded in EP/LP mode cannot be guaranteed.
Adjusting the picture (tracking) VHS
Although the VCR automatically adjusts the tracking when playing a tape, distortion may occur if the recording is in poor condition. In this case, manually adjust the tracking.
Press TRACKING +/- to display the tracking meter. The distortion should disappear as you press one of the two tracking buttons.
To resume automatic tracking adjustment, eject the tape and reinsert it.

Note
- The auto tracking adjustment cannot be guaranteed to work with tapes recorded in the LP mode on other VCRs.
Recording TV programs VHS
Before you start ...
- Turn on the DVD-VCR and your TV. When using a cable box, turn it on.
- Set the TV to video input so that the signal from the player appears on the TV screen.
- S e_t /DWD·VIDEO switch to DVD·VIDEO on the remote.
• Make sure the tape is longer than the total recording time.

1
Press SELECT VIDEO to control the VCR.
2
Insert a tape with its safety tab in place.

natural_image
Line drawing of a CD-ROM front panel with control buttons and drive slots (no text or symbols)3
• CH/TRACKING

INPUT SELECT

Press CH +/- to select the channel or line input video source you want to record.

You can select a video source from the LINE IN 1 or LINE-2 IN jacks using the INPUT SELECT button. "L1" or "L2" appears in the display window.
continued
4
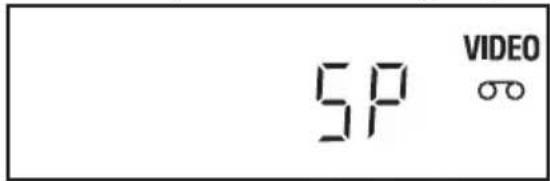
SP / EP

Press SP/EP to select the tape speed, SP or EP.
EP (Extended Play) provides recording time three times as long as SP (Standard Play). However, SP produces better picture and audio quality.
5

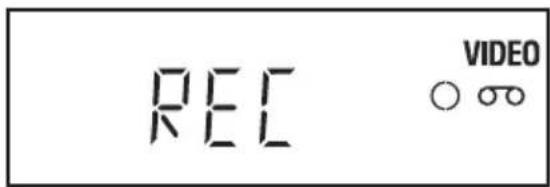
Press ● REC to start recording.
"REC" appears in the display window.
To check the remaining tape length
Press DISPLAY to display the time counter. With the display on, press DISPLAY again to check the remaining time. The white bar indicates the current location in relation to the entire tape length. The remaining time also appears. Press DISPLAY to turn off the indicators.


To check the remaining tape length of a tape, set "Tape Length" in the "VIDEO FUNCTION SETUP" menu correctly (page 94).
Maximum Recording Time
| Tape Length SP EP | ||
| T-120 2 hrs 6 hrs | ||
| T-160 2 hrs 40 mins 8 hrs | ||
| T-180 3 hrs 9 hrs |
To watch another TV program while recording
1 Set TV / DVD·VIDEO switch to DVD·VIDEO on the remote.
2 Press TV/VIDEO to display "TV" in the display window.

3 If your TV is connected to the VCR using A/V connections, set the TV to the TV's antenna input; if not, skip this step.
4 Select another channel on the TV.
To watch a DVD while recording
1 Press SELECT DVD to control the DVD player.
2 Press ▲ and place the disc on the disc tray.
3 Press ▷ PLAY.
The disc tray closes and the DVD player starts playback. The TV screen will automatically change to the DVD playback screen.
To save a recording
To prevent accidental erasure, break off the safety tab as illustrated. To record on the tape again, cover the tab hole with adhesive tape.

Tips
- To select a channel, you can use the number buttons on the remote commander. Enter the channel number, then press ENTER.
- The display appears on the TV screen indicating information about the tape, but the information will not be recorded on the tape.
- If you do not want to watch TV while recording, you can turn off the TV. When using a cable box, make sure to leave it on.
Notes
- The remaining tape length may not be indicated accurately for short tapes such as T-20 or T-30, or tapes recorded in LP mode.
- It may take up to one minute for the VCR to calculate and display the remaining tape length after you press DISPLAY.
- You cannot record a DVD directly to a VCR tape using your DVD-VCR.
- To watch a TV program during video recording, stop disc playback.
Recording TV programs using the timer
VHS
You can preset up to eight programs at a time.
Before you start...
- Check that the DVD-VCR clock is set to the correct time.
- Turn on the DVD-VCR and your TV. When using a cable box, turn it on.
- Set the TV to video input so that the signal from the player appears on the TV screen.
- S e_t /IDVD·VIDEO switch to DVD·VIDEO on the remote.
- Insert a tape with its safety tab in place. Make sure the tape is longer than the total recording time.
- If the DVD player is in play mode, you cannot display the setup menu. Stop the DVD playback.

1

Press SELECT VIDEO to control the VCR.
2

Press TIMER.
The timer programming menu appears.

Set the channel number, start and stop times, date, and tape speed:
1 Press to select each item in turn.
2 Press / to set each item.
To correct a setting, press to return to that setting and reset.
| CH | START | END | DATE | SPEED |
| 35 | 10:00 ^A W | 12:00 ^A W | 10/13 | Auto |
INPUT SELECT

- To record from a source connected to the LINE IN 1 or LINE-2 IN jacks, press INPUT SELECT or / to display "L1" or "L2" in the "CH" position.
- To record the same program every day or the same day every week, press while the date is flashing. For details, see "Daily/weekly recording" on page 49.
- To use the Auto Tape Speed function, press ↓ to display “Auto” in the “SPEED” position. For details, see “To use the Auto Tape Speed function” on page 50.
4
Press to confirm the setting.
To enter another setting, press / to select the next row and repeat step 3. Press CLEAR to cancel the setting.
CLEAR

5

Press 🔍 RETURN to exit the menu.
RETURN
6
The Ⓤ indicator appears in the display window and the VCR stands by for recording. Timer recording will operate properly regardless if the DVD-VCR power is on or off.
To record from a decoder or other source, leave the connected equipment switched on.
To stop recording
To stop the DVD-VCR while recording, press SELECT VIDEO and then press ■ STOP.
Daily/weekly recording
In step 3, press ↓ to select the recording pattern. Each time you press ↓, the indication changes as shown below. Press ↑ to change the indication in reverse order.
the current date → Daily → Mo\~Sa → Mo\~Fr → Sun's → Mon's → ..... → Sat's → 1 month later → (dates count down) → the current date
continued
To use the Auto Tape Speed function
When you are recording a program in the Auto mode and the remaining tape becomes shorter than the recording time, the tape speed is automatically changed to EP mode. Note that some noise will appear on the picture when the tape speed is changed. If you want to keep the tape speed, select SP. To operate this function, set “Tape Length” in “VIDEO FUNCTION SETUP” menu correctly (page 94).
To watch another TV program after setting the timer
1 Set TV / DVD·VIDEO switch to DVD·VIDEO on the remote.
2 Press TV/VIDEO to display "TV" in the display window.

3 If your TV is connected to the VCR using A/V connections, set the TV to the TV's antenna input; if not, skip this step.
4 Select another channel on the TV.
To watch a DVD after setting the timer
1 Press SELECT DVD to control the DVD player.
2 Press ▲ and place the disc on the disc tray.
3 Press ▷ PLAY.
The disc tray closes and the DVD player starts playback. The TV screen will automatically change to the DVD playback screen.
Tips
- If the indicator appears, the timer settings overlap. To check, change or cancel the timer setting, see “Checking/changing/canceling timer settings” on page 51.
- If the indicator appears, this means that the VCR is currently recording this program.
- You can also do the following tasks while the VCR is recording:
- Reset the counter (page 43). - Display tape information on the TV screen (page 46).
- You can also display the timer programming menu by first pressing SET UP, then / to select (PROGRAM) and pressing ENTER in step 2.
Note
- The indicator flashes in the display window when you complete the timer setting with no tape inserted.
Checking/changing/canceling timer settings VHS
Before you start...
- Check that the DVD-VCR clock is set to the correct time.
- Turn on the DVD-VCR and your TV. When using a cable box or a decoder, turn it on.
- Set the TV to video input so that the signal from the player appears on the TV screen.
- S e_t /TWD·VIDEO switch to DVD·VIDEO on the remote.
- Insert a tape with its safety tab in place. Make sure the tape is longer than the total recording time.
- If the DVD player is in play mode, you cannot display the setup menu. Stop the DVD playback.

1

Press SELECT VIDEO to control the VCR.
2

Press TIMER.
The timer programming menu appears.

continued
3

Press ↑/↓ to select setting you want to change or cancel.
- To change the setting, press / to select the item you want to change, and press / to change it.
• To cancel the setting, press CLEAR.
| CH | START | END | DATE | SPEED |
| 01 | 05:31 ^2 M | 07:31 ^2 M | 1/20 | SP |
| 03 | 01:31 ^2 M | 03:32 ^2 M | 1/21 | Auto |
| 06 | 06:32 ^2 M | 08:32 ^2 M | 1/21 | EP |
| --- | --- | --- | --- | --- |
| --- | --- | --- | --- | --- |
| --- | --- | --- | --- | --- |
| --- | --- | --- | --- | --- |
| --- | --- | --- | --- | --- |
| --- | --- | --- | --- | --- |
4

Press ⬇ RETURN to confirm the setting.
Press 📞 RETURN again to exit the menu.
When the timer settings overlap
The program that starts first has priority and the second program starts recording only after the first program has finished. If the programs start at the same time, the program listed first in the menu has priority.
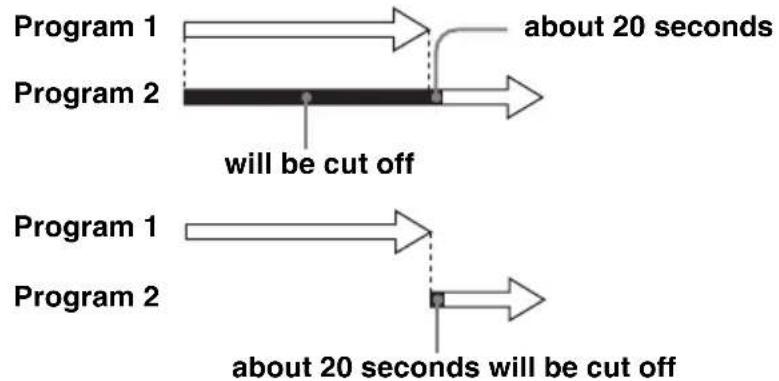
flowchart
graph TD
    A["Program 1"] --> B["Start"]
    C["Program 2"] --> D["Start"]
    E["Program 1"] --> F["End"]
    G["Program 2"] --> H["End"]
    style A fill:#f9f,stroke:#333
    style C fill:#f9f,stroke:#333
    style E fill:#f9f,stroke:#333
    style G fill:#f9f,stroke:#333
    note right of A: "will be cut off"
    note right of C: "about 20 seconds"
    note right of G: "about 20 seconds will be cut off"
Tips
- If the indicator appears, the timer settings overlap.
- You can also display the timer programming menu by first pressing SET UP, then / to select (PROGRAM) and pressing ENTER in step 2.
Locking the DVD-VCR (Child Lock)
After you have set the timer, you can lock all of the buttons on the DVD-VCR so that the settings are not canceled by mistake.
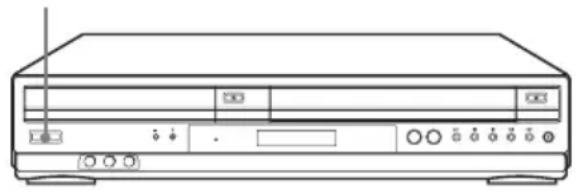
I/POWER
natural_image
Line drawing of a front-mounted electronic device with ports and indicator lights (no text or symbols)To lock the DVD-VCR
When the DVD-VCR is turned on, hold down I/POWER on the unit until “LOCK” appears in the display window. The DVD-VCR turns off and the indicator remains lit if there is a timer setting. The DVD-VCR will not work except for timer recordings.
To unlock the DVD-VCR
Hold down I/POWER on the unit until “LOCK” disappears from the display window. The DVD-VCR is unlocked and turns on.
To stop timer recording while the DVD-VCR is locked, press ■. The recording stops and the DVD-VCR is unlocked.
Note
• The DVD-VCR will be unlocked when:
- You stop timer recording by pressing ■.
- You insert a tape.
- The AC power cord is disconnected or power supply stops.
Audio Setup DVD-V DVD-RW
"Audio Setup" allows you to set the sound according to the playback and connection conditions.
Before you start...
- S e t /IDVD·VIDEO switch to DVD·VIDEO on the remote.

1 SET UP Press SET UP when the DVD player is in stop mode, then press ↑/↓ to select (DVD), then press ENTER.


2 Press ↑/↓ to select "Audio Setup," then press ENTER.
![AUDIO SETUP Dolby Digital [ D-PCM ] DTS [ Off ] Audio DRC [ Standard ] RETURN SET UP](/content/2026/05/1049605/images/8d41e1bca779fa4de6cbc903d0074b4ce74d5bb8e48a1946f9a7a039f6966475.jpg)

Press ↑/↓ to select the setup item from the displayed list: "Dolby Digital," "DTS" or "Audio DRC."

4

Press / to select an item.
5
SET UP

Press SET UP to exit the menu.
Menu choices
- Dolby Digital
Selects the type of Dolby Digital signal.
The default setting is indicated in bold print.
| D-PCM Select this when the | player is connected to an audio componentlacking a built-in Dolby Digital decoder. |
| Dolby Digital Select this when the player is connected to an audio componentwith a built-in Dolby Digital decoder. | |
• DTS
Selects whether or not to output DTS signals.
The default setting is indicated in bold print.
| Off Select this when the player | is connected to an audio component lacking a built-in DTS decoder. |
| On Select this when the player | is connected to an audio component with a built-in DTS decoder. |
• Audio DRC (Dynamic Range Control)
Makes the sound clear when the volume is turned down when playing a DVD that conforms to “Audio DRC.” This affects the output from the following jacks:
– LINE OUT AUDIO L/R jacks
- DIGITAL AUDIO OUT (COAXIAL) jack only when “Dolby Digital” is set to “D-PCM”.
The default setting is indicated in bold print.
| Standard Normally select this positon. |
| Wide Range Gives you the feeling of being at alive performance. |
Notes
- If you connect a component that does not conform to the selected audio signal, a loud noise (or no sound) will come out from the speakers, affecting your ears or causing the speakers to be damaged.
- Noise may occur in the LinearPCM double-speed audio. This is not a malfunction.
Screen Setup DVD-V
“Screen Setup” allows you to set the screen according to the playback and connection conditions.
Before you start...
- S e t /IDVD·VIDEO switch to DVD·VIDEO on the remote.
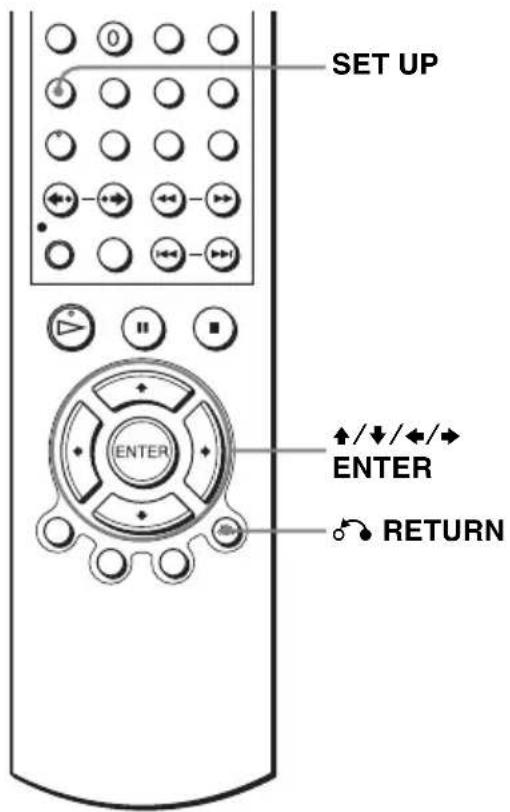
1 SET UP Press SET UP when the DVD player is in stop mode, then press ↑/↓ to select (DVD), then press ENTER.


2 Press ↑/↓ to select "Screen Setup," then press ENTER.

![SCREEN SETUP TV Type [4:3 Letter Box] Black Level [Off] Progressive [Off] RETURN SET UP](/content/2026/05/1049605/images/a16a3b1d1c01fa8c9d3dc5452d2efc0fb31f42c7ea2775cf632fe101a7bc28a9.jpg)
3 Press ↑/↓ to select the setup item from the displayed list: "TV Type," or "Black Level."

To set the “Progressive” setting, see page 58.
4

Press / to select an item.
5
SET UP

Press SET UP to exit the menu.
Menu choices
• TV Type
Selects the aspect ratio of the connected TV (4:3 standard or wide).
The default setting is indicated in bold print.
| 4:3 Letter Box Select this when you connect a 4:3 screen TV. Displays a wide picture with bands on the upper and lower portions of the screen. | |
| 4:3 Pan Scan Select this when you connect a 4:3 screen TV. Automatically displays the wide picture on the entire screen and cuts off the portions that do not fit. | |
| 16:9 Select this when you connect a wide-screen TV or a TV with a wide mode function. |

4:3 Pan Scan4:3 Letter Box 16:9

natural_image
Simple line drawing of a mountain landscape with trees and water (no text or symbols)
natural_image
Simple line drawing of a mountain landscape with trees and water (no text or symbols)- Black Level
You can enhance the black level by increasing the brightness and contrast when viewing DVD VIDEOS with the PROGRESSIVE indicator turned off.
The default setting is indicated in bold print.
| Off Stops the increase of | the contrast. |
| On Increases the contrast |
Notes
- Playback settings stored in the disc take priority over the “DVD SETUP” menu settings and not all the functions described may work.
- Depending on the DVD VIDEO, "4:3 Letter Box" may be selected automatically instead of "4:3 Pan Scan" or vice versa.
To set the “Progressive” setting
If your TV accepts progressive (480p) format signals, you will enjoy accurate color reproduction and high quality image.
1 Follow step 1 and 2 on page 56, then press / to select "Progressive."
![SCREEN SETUP TV Type [4:3 Letter Box] Black Level [Off] Progressive [Off] RETURN SET UP](/content/2026/05/1049605/images/9f670d31cfd3f1d431766e9bb1968ccd2cf9686d21e454bfe18dee68f8d29bdd.jpg)
2 Press / to select "On," then press ENTER.
![SCREEN SETUP TV Type [4:3 Letter Box] Black Level [Off] Progressive [On]](/content/2026/05/1049605/images/08580ee12fc83d14bc67601571e589c33c2342fe1a526ba80379515d33e05537.jpg)
3 Follow the instructions appearing on the screen.
1 Ensure your TV is (480p) Progressive Scan capable.
2 Connect with Component Video Output jacks (red/green/blue connections).
For details, see the connection B on page 30.
3 Press / to select [OK] to test your video signal.


4 If video signal appears OK, video connection is complete. Press ENTER.
The PROGRESSIVE indicator on the unit lights up in orange.
![SCREEN SETUP If picture is OK, press [ENTER] key. If picture is distorted, press [RETURN] key. To Deactivate Press [PAUSE] on the unit for 5 seconds. ENTER RETURN](/content/2026/05/1049605/images/5a7a3339c60ce027a53a23eca1944b670181fb0c4ae1bf64f2e3e0f1a7e2710b.jpg)

If picture is distorted, press ⬇ RETURN. Check the connection (page 30).
![SCREEN SETUP TV Type [4:3 Letter Box] Black Level [Off] Progressive [On] RETURN SET UP](/content/2026/05/1049605/images/8b0a2ddff0bc056ddc7bd4482989f296b5cb282ab37235bbec82d54d8c41d25f.jpg)
To cancel the "Progressive" setting
Select "Off" in step 2.
You can also cancel by pressing SELECT DVD and then press ■ on the unit continuously for 5 seconds or more.
Note
- If you select progressive signal when you connect the DVD player to a TV that cannot accept the signal in progressive format, the image quality will deteriorate. In this case, set “Progressive” to “Off”.
Setting the display or sound track language DVD-V
You can set various languages for the disc's menu, sound track or subtitle.
Before you start...
- S e t /IDVD·VIDEO switch to DVD·VIDEO on the remote.

1
SET UP


Press SET UP when the DVD player is in stop mode, then press / to select (DVD) and press ENTER.
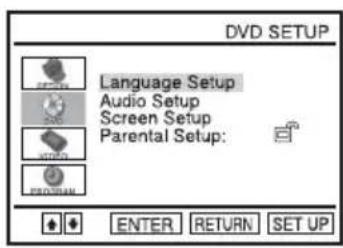
2

Press ↑/↓ to select "Language Setup," then press ENTER.
The "LANGUAGE SET UP" menu appears.
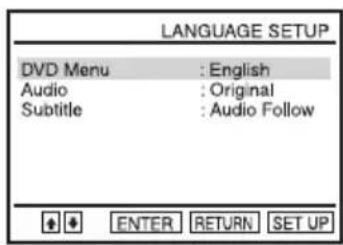
3

Press ↑/↓ to select the language setup item from the displayed list: "DVD Menu," "Audio," or "Subtitle."
Then press ENTER.
4

Press / to select the desired language, then press ENTER.
• DVD MENU LANGUAGE
You can select the desired language for the disc's menu.

• AUDIO LANGUAGE
Switches the language of the sound track. When you select "Original," the language given priority in the disc is selected.

• SUBTITLE LANGUAGE
Switches the language of the subtitle recorded on the DVD VIDEO. When you select “Audio Follow,” the language for the subtitle changes according to the language you selected for the sound track.

5
SET UP

Press SET UP to exit the menu.
Tip
- If you select “Others” in step 4, an additional language menu appears. Press /// to select the desired language, then press ENTER.

Notes
- When you select a language that is not recorded on the DVD VIDEO in step 4, one of the recorded languages will be automatically selected.
- Playback settings stored in the disc take priority over the DVD SETUP settings and not all the functions described may work.
Parental Control (limiting playback by children)
DVD-V
Playback of some DVD VIDEOS can be limited according to a predetermined level such as the age of the users. The “Parental Control” function allows you to set a playback limitation level.
Before you start...
- S e_t /IDVD·VIDEO switch to DVD·VIDEO on the remote.

1
SET UP


Press SET UP when the DVD player is in stop mode, then press / to select (DVD) and press ENTER.
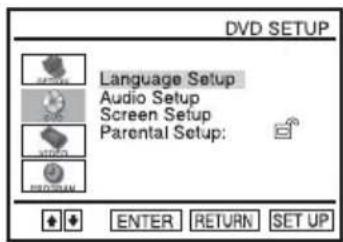
2

Press ↑/↓ to select "Parental Setup," then press ENTER.
![PARENTAL SETUP Use Password [ No ] RETURN SET UP](/content/2026/05/1049605/images/3d52284a39b5277f9be22dca5421ed47c4d20cd0c28d5a44077462fea04e8f72.jpg)
3


Press to set the parental control.
- If you have not entered a password The display for registering a new password appears. Enter a 4-digit password using the number buttons.
The display for confirming the password appears.
Re-enter the password.
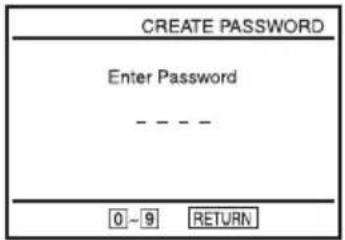

- When you have already registered a password The display for entering the password appears. Enter a 4-digit password using the number buttons. After registering a password, if you set “Use Password” to “No,” “PASSWORD CHECK” screen will not appear.

![PARENTAL SETUP Use Password [ Yes ] Rating Level :1 Change Password RETURN SET UP](/content/2026/05/1049605/images/dee71251529a2763674330ceddec2464dcdd4349fdf11729e7b8a5c7e927fb90.jpg)
4

Press / to select "Rating Level," then press ENTER.

5

Press ↑/↓ to select the level you want, then press ENTER.
The options are as follows.
Level 8 Adult Level 7 Level 6 Level 5 Level 4 Level 3 Level 2 Level 1 Kids Safe
The lower the value, the stricter the limitation.

6
SET UP

Press SET UP to exit the menu.
continued
To change the password
1 Select "Change Password" in step 4 on page 63. The display for entering a new password appears.
2 Enter a new 4-digit password using the number buttons. The display for confirming the password appears.
3 Re-enter the new password.
To turn off the Parental Control function
Set "Use Password" to "No" in step 3 on page 63.
To play a disc for which Parental Control is set
1 Insert the disc, then press ▷ PLAY.
The display for entering your password appears.
2 Enter your 4-digit password using the number buttons. The player starts playback.
If you forget your password
1 Turn on the DVD-VCR.
2 Remove the disc and close the disc tray.
3 Hold down ◀◀ and ▶▶ on the front panel simultaneously for 5 seconds. "Reset OK" appears on the screen.
4 Turn off the DVD-VCR. The password is cleared.
5 To create a new password, follow step 3 on page 63.
Notes
- When you play DVD VIDEOS which do not have the Parental Control function, playback cannot be limited on this player.
- All the ratings higher than the level you select will be blocked.
- Write your password down and keep it in a safe place in case you forget it.
- When you clear the password, “Language” in the “OPTION SETUP” menu and all items in the “DVD SETUP” menu are returned to the default setting.
Using the DVD's menu DVD-V
A DVD is divided into long sections of a picture or a music feature called “titles.” When you play a DVD VIDEO which contains several titles, you can select the title you want using the TOP MENU button.
When you play DVD VIDEOS that allow you to select items such as the language for the subtitles and the language for the sound, select these items using the MENU button.
Before you start...
- S e t /DWD·VIDEO switch to DVD·VIDEO on the remote.
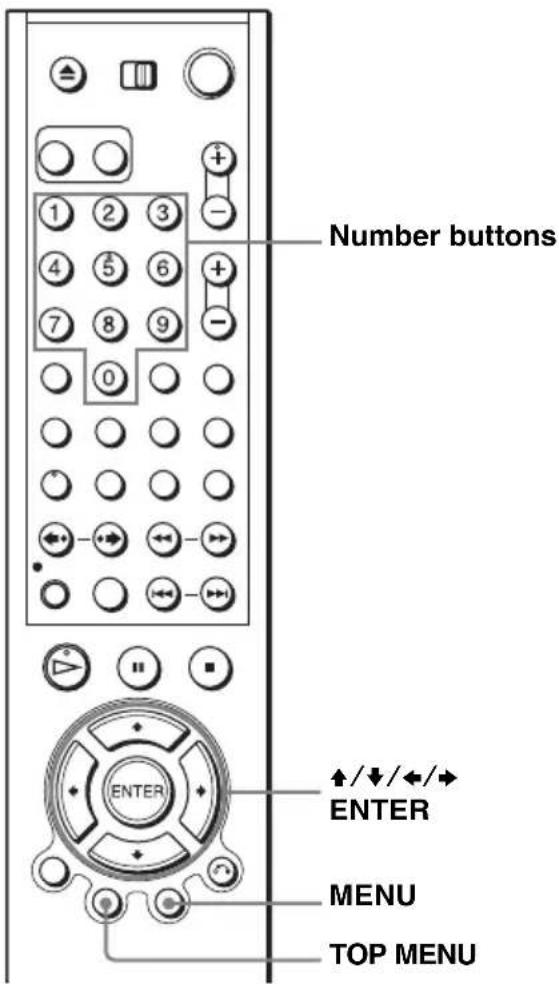
1

Press TOP MENU or MENU.
The disc's menu appears on the TV screen.
The contents of the menu vary from disc to disc.
2

Press ↑/↓/↔/→ to select the item you want to play or change, then press ENTER.
You can also use the number buttons to select the item.
Note
- Depending on the DVD VIDEO, you may not be able to use the TOP MENU button or search a point by setting the time.
Zooming into a scene DVD-V DVD-RW VCD
You can zoom into a scene during playback or still mode.
To zoom into a JPEG image, see "Playing JPEG image files" on page 84.
Before you start...
- S e_t /IDVD·VIDEO switch to DVD·VIDEO on the remote.

1
MUTING/ ZOOM

Press ZOOM.
“”appears.

natural_image
Simple diagram with a central square and four dashed arrows pointing outward, no text or symbols present.2

Press ↑/↓/←/→ to move “ 🔒 ” to the position where you want to zoom in.
3

Press ENTER repeatedly to change the magnification.
Each time you press the button, the magnification changes as shown below.
2 × 4 × 2 × normal magnification
Notes
- You cannot use 4 × magnification when you play VIDEO CDs.
- The zoom function may not work depending on the DVD.
Changing the angles DVD-V
If various angles (multi-angles) for a scene are recorded on the DVD VIDEO, “☐” appears in the display window. This means that you can change the viewing angle.

1

Press ANGLE during playback.
The angle number appears on the display.
The number after the slash indicates the total number of angles.

2

Press / repeatedly to select the angle number.
The scene changes to the selected angle.
Note
- Depending on the DVD VIDEO, you may not be able to change the angles even if multiangles are recorded on the DVD VIDEO.
Displaying the subtitle
DVD-V DVD-RW
If subtitles are recorded on the disc, you can change the subtitles or turn them on and off whenever you want while playing a DVD.

1

Press SELECT DVD to control the DVD player.
2

Press SUBTITLE during playback.

3

Press / repeatedly to select the language.
Depending on the DVD, the choice of language varies. Refer to “DVD Audio/Subtitle Language” on page 113 for the abbreviation of the language.
4

Press ↑/↓ repeatedly to select “On.”
To turn off the subtitles
Select "Off" in step 4.
Note
- Depending on the DVD, you may not be able to change the subtitles even if multilingual subtitles are recorded on it. You also may not be able to turn them off.
Various play mode functions (Program play, Shuffle play, Repeat play)
DVD-V DVD-RW VCD CD DATA-CD DATA-DVD
Before you start...
- S e t /IDVD·VIDEO switch to DVD·VIDEO on the remote.
Notes
- The play mode is canceled when: - you open the disc tray - the player enters standby mode by pressing I/⏻.
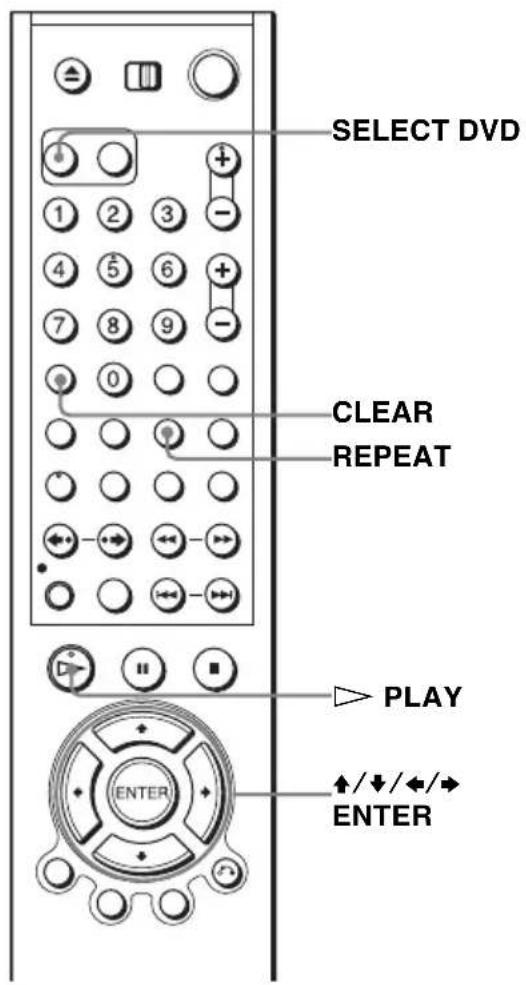
Creating your own program (Program play) CD
You can play the contents of a disc in the order you want by arranging the order of the tracks on the disc to create your own program. You can program up to 20 tracks.
To program MP3 audio tracks, see page 80.
1 Press SELECT DVD to control the DVD player.
2 Press REPEAT when the DVD player is in stop mode.

3 Press ◀/→ to select "PROGRAM", then press ENTER.
4 Press /// to select the track number you want to program, then press ENTER.
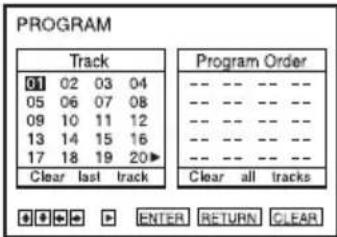
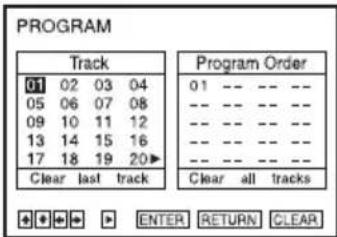
5 To program other tracks, repeat step 4.
The programmed track numbers are displayed in the selected order.
6 Press ▷ PLAY to start program play.
Program play starts.
When the program ends, you can restart the same program again by pressing ▷ PLAY.
To stop program play
Press CLEAR until “Off” appears at the upper left top of the TV screen during programme play.
To change or cancel a program
1 Follow steps 1 to 3 of “Creating your own program (Program play).”
2 Press ↓ repeatedly to select “Clear last track,” then press ENTER. Each time you press the button, the last programmed number is canceled. You can also cancel the last programmed number by pressing CLEAR.
3 Follow step 4 for new programming.
To cancel all the programmed numbers
1 Follow steps 1 to 3 of “Creating your own program (Program play).”
2 Press ↓ repeatedly to select “Clear last track,” then press ➤ to select “Clear all tracks” and press ENTER.
All the programmed numbers are canceled.
Notes
- Up to 99 tracks can be displayed.
- You cannot repeat play while in program play.
Playing in random order (Shuffle play) CD
You can shuffle the playback order of tracks. Subsequent “shuffling” may produce a different playing order.
To shuffle MP3 audio tracks, see page 81.
1 Press SELECT DVD to control the DVD player.
2 Press REPEAT when the DVD player is in stop mode.

3 Press / to select "SHUFFLE", then press ENTER.
To return to normal play
Press CLEAR until “Off” appears at the upper left top of the TV screen during shuffle play.
Tip
- Shuffle play will stop when all the tracks are played back.
Note
- You cannot repeat play while in shuffle play.
Playing repeatedly (Repeat play) DVD-V DVD-RW VCD CD DATA-CD DATA-DVD
You can play all of the titles or tracks on a disc or a single title, chapter, or track repeatedly.
1 Press SELECT DVD to control the DVD player.
2 Press REPEAT during playback.

3 Press REPEAT or ◀/▶ repeatedly to select the item to be repeated.
When playing a DVD
• Chapter: repeats the current chapter.
• Title: repeats the current title on a disc.
When playing a VIDEO CD (with PBC function off) or CD
- Track: repeats the current track.
• Disc: repeats all of the tracks.
When playing a DATA CD/DATA DVD (MP3 audio)
- FILE: repeats the current track (file).
• DIR: repeats the current album (directory).
• DISC: repeats the current disc.
To return to normal play
Select "Off" in step 3 or press CLEAR during repeat play.
Tip
- When you press ■ STOP during repeat play, repeat play is canceled.
Notes
- You cannot repeat play with DVD-RW in VR mode.
- You cannot repeat play VIDEO CDs with PBC function on. See “Playing VIDEO CDs with “PBC ON/OFF” Functions” on page 88.
- You cannot repeat play while in program play or shuffle play.
Changing the sound DVD-V DVD-RW VCD CD
When playing a DVD recorded in multiple audio formats (PCM, Dolby Digital, or DTS), you can change the audio format. If the DVD is recorded with multilingual tracks, you can also select the language.
With CDs or VIDEO CDs, you can select the sound from the right or left channel and listen to the sound of the selected channel through both the right and left speakers. For example, when playing a Karaoke VIDEO CD containing a song with the vocals on the right channel and the instruments on the left channel, you can hear the instruments from both speakers by selecting the left channel.
| Disc type | Playback instruments only |
| Karaoke VIDEO CD Yes | |
| Karaoke DVD No | |

1

Press AUDIO during playback.

2

Press / repeatedly to select the desired language/audio setting.
- When playing a DVD Depending on the DVD, the choice of language varies. Refer to “DVD Audio/Subtitle Language” on page 113 for the abbreviation of the language.
- When playing a VIDEO CD or CD The default setting is indicated in bold print.
| Stereo The standard stereo | sound |
| Left The sound of the left channel (monaural) | |
| Right The sound of the right channel (monaural) | |
Notes
- To enjoy Dolby Digital or DTS effect from a LinearPCM format disc, you have to make the connection using DIGITAL AUDIO OUT (COAXIAL) (page 32).
- When you play a DVD with DTS sound tracks, set “DTS” to “On” in “AUDIO SETUP” menu (page 54).
- If you set DTS audio output, you cannot select surround setting (page 76).
- You cannot perform playback quickly or slowly with sound when DTS audio output is set (page 37).
Virtual surround setting DVD-V DVD-RW VCD CD
When you connect a stereo TV or 2 front speakers, SURROUND lets you enjoy surround sound effects by using sound imaging to create virtual rear speakers from the sound of the front speakers without using actual rear speakers.

1 SURROUND Press SURROUND during playback.

2 Press repeatedly to select "Surround1," "Surround2," "Surround3." Surround effect increases as shown below.
Surround1 Surround2 Surround3


flowchart
graph TD
    A["Computer"] --> B["Square Node 1"]
    A --> C["Square Node 2"]
    A --> D["Square Node 3"]
    A --> E["Square Node 4"]
    A --> F["Square Node 5"]
    A --> G["Square Node 6"]
    A --> H["Square Node 7"]
    A --> I["Square Node 8"]
    A --> J["Square Node 9"]
    A --> K["Square Node 10"]

flowchart
graph TD
    A["Monitor"] --> B["Square Node 1"]
    A --> C["Square Node 2"]
    A --> D["Square Node 3"]
    A --> E["Square Node 4"]
    A --> F["Square Node 5"]
    A --> G["Square Node 6"]
    A --> H["Square Node 7"]
    A --> I["Square Node 8"]
    A --> J["Square Node 9"]
    A --> K["Square Node 10"]
    A --> L["Square Node 11"]
    A --> M["Square Node 12"]
    A --> N["Square Node 13"]
    A --> O["Square Node 14"]
    A --> P["Square Node 15"]
    A --> Q["Square Node 16"]
    A --> R["Square Node 17"]
    A --> S["Square Node 18"]
    A --> T["Square Node 19"]
    A --> U["Square Node 20"]
    A --> V["Square Node 21"]
    A --> W["Square Node 22"]
    A --> X["Square Node 23"]
    A --> Y["Square Node 24"]
    A --> Z["Square Node 25"]
: Virtual speaker
To cancel the setting
Select "Off" in step 2.
Notes
- When the playing signal does not contain a signal for the rear speakers, the surround effects will be difficult to hear.
- When you activate the surround effect, turn off the surround setting of the connected TV or amplifier (receiver).
- Make sure that your listening position is between and at an equal distance from your speakers, and that the speakers are located in similar surroundings.
- If you use the DIGITAL AUDIO OUT (COAXIAL) jack and set “Dolby Digital” to “Dolby Digital” or “DTS” to “On” in “AUDIO SETUP” menu (page 54), sound will come from your speakers but it will not have the surround effect.
- You cannot perform playback quickly or slowly with sound when a virtual surround effect is set (page 37).
Playing an MP3 audio track DATA-CD DATA-DVD
You can play back DATA CDs (CD-ROMs/CD-Rs/CD-RWs) or DATA DVDs (DVD-ROMs/DVD+RWs/DVD+Rs/DVD-RWs/DVD-Rs) recorded in MP3 (MPEG1 Audio Layer 3) format.
Before you start...
- S e t /IDVD·VIDEO switch to DVD·VIDEO on the remote.
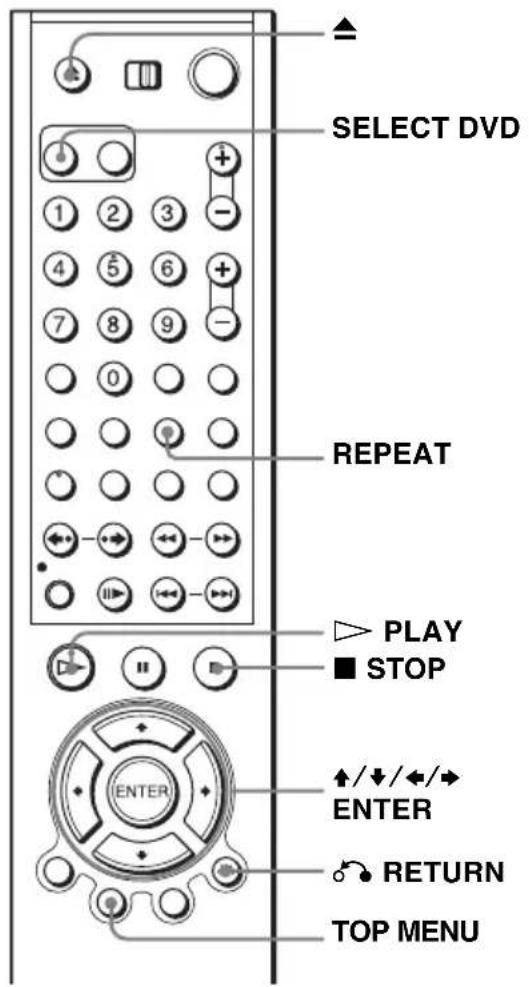
1
SELECT
Press SELECT DVD to control the DVD player.
2

Press ▲ and place a DATA CD or DATA DVD on the disc tray, then press ▲ to close the tray.
When you load a DATA CD or DATA DVD which contains MP3 audio tracks and JPEG image files, "Select a Media Type" menu appears.
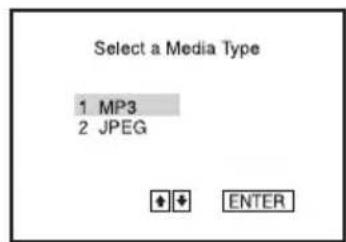
If you load a DATA CD or DATA DVD which contains only MP3 audio files, the MP3 display appears. Then you can skip step 3.
3

Press ↑/↓ to select "MP3", then press ENTER.
The first track starts playing. Press ■ STOP if necessary.
Repeat mode
Elapsed playing time

4

RETURN

Press ⬇ RETURN, then press ↑/↓ to select the desired directory in the left column, then press ENTER.

5

Press / to select the desired track in the right column, then press ENTER.
The selected track starts playing.
When a track or album is being played, the title is shown in a box. The playing track number appears on the display window.

To stop play
Press ■ STOP.
To repeat play
Press REPEAT repeatedly during playback to change the repeat mode.
- FILE: repeats the current track (file).
• DIR: repeats the current album (directory).
• DISC: repeats the current disc.
For details, see "Playing repeatedly (Repeat play)" (page 73).
To go to the next or previous page
Press → or ←.
To return to the previous display
Press 📌 RETURN.
To return to the "Select a Media Type" menu
Press ■ STOP twice, then press TOP MENU.
continued
To turn off the display
Press ■ STOP twice, then press ⬇ RETURN repeatedly.
Notes
- Only the letters in the alphabet and numbers can be used for album or track names. Anything else is displayed as an asterisk.
- Up to 12 alphanumeric characters can be displayed for album or track names.
• ID3 tags cannot be displayed. - You cannot repeat play while in program play or shuffle play.
To program MP3 audio tracks
1 Press ■ STOP twice, then press REPEAT.

2 Press to select "PROGRAM," then press ENTER.

3 Press / to select the desired directory in the left column, then press ENTER.
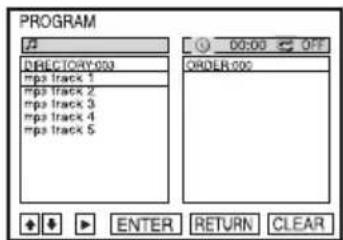
4 Press ↑/↓ to select the track you want to program, then press ENTER.
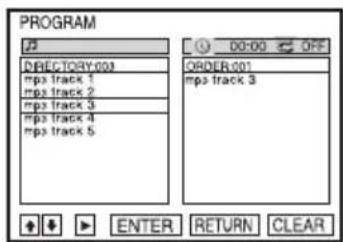
5 To program other tracks, repeat step 4.
The programmed tracks are displayed in the selected order. Press CLEAR to cancel the last programmed track.
6 Press ▷ PLAY to start program play.
Program play starts. When the program ends, you can restart the same program again by pressing ▷ PLAY.
To stop program play
Press ■ STOP during program play.
To return to normal play
Press CLEAR during program play.
Notes
- Up to 20 tracks can be programmed at one time.
- You cannot repeat play while in program play.
To shuffle MP3 audio tracks
1 Press REPEAT when the MP3 is in stop mode.
2 Press ◀/→ to select "SHUFFLE," then press ENTER.
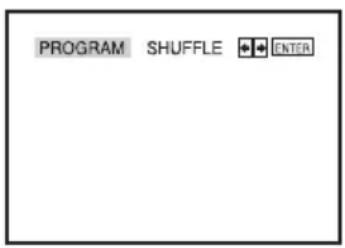
To return to normal play
Press CLEAR during shuffle play.
Tip
- Shuffle play will stop when all the tracks are played back.
- You cannot repeat play while in shuffle play.
Note
About MP3 audio tracks
You can play back DATA CDs (CD-ROMs/CD-Rs/CD-RWs) or DATA DVDs (DVD-ROMs/DVD+RWs/DVD+Rs/DVD-RWs/DVD-Rs) recorded in MP3 (MPEG-1 Audio Layer III) format. However, the discs must be recorded according to ISO9660 Level 1/Level 2 or Joliet format and DATA DVDs of Universal Disk Format (UDF) for the player to recognize the tracks (or files). You can also play DATA CDs or DATA DVDs recorded in Multi Session or Multi Border (see “Note on Multi Session/Border discs” on page 81).
Refer to the instructions supplied with the CD-R/CD-RW/DVD-R/DVD-RW drives and the recording software (not supplied) for details on the recording format.
Note on Multi Session/Border discs
If MP3 audio tracks are recorded in the first session/border, the player will also play MP3 audio tracks in other session/border. If audio tracks and images in Music CD format or Video CD format are recorded in the first session/border, only the first session/border will be played back.
Notes
- If you put the extension “.MP3” to data not in MP3 format, the player cannot recognize the data properly and will generate a loud noise which could damage your speaker system.
• The player cannot play audio tracks in MP3PRO format.
- The player may not be able to play some DATA CDs/DATA DVDs created in the Packet Write format.
- If both video data and MP3 audio tracks exist on a DATA DVD, the player recognizes only the video data.
- This player supports MP3 audio tracks recorded with a bit rate of 128 kbps and a sampling frequency of 44.1 kHz. Attempting to play MP3 audio tracks recorded with different specifications may result in loud noise, sound skipping or speaker damage.
- Depending on the disc contents, playback may take some time to start.
The Playback order of MP3 audio tracks
The playback order of albums and tracks recorded on a DATA CD or DATA DVD is as follows.
• Structure of disc contents
Tree 1 Tree 2 Tree 3 Tree 4 Tree 5

flowchart
graph TD
    A["ROOT"] --> B["①"]
    A --> C["②"]
    A --> D["③"]
    A --> E["④"]
    A --> F["⑤"]
    A --> G["⑥"]
    A --> H["⑦"]
    C --> I["②"]
    C --> J["③"]
    C --> K["④"]
    C --> L["⑤"]
    C --> M["⑥"]
    C --> N["⑦"]

When you insert a DATA CD or DATA DVD and press ▷ PLAY, the numbered tracks are played sequentially, from ① through ⑦. Any sub-albums/tracks contained within a currently selected album does not take priority over the next album in the same tree. (Example: Ⓔ contains Ⓖ but ⑥ is played before ⑦.)
When you press ⬆ RETURN and the list of MP3 albums appears (page 79), the albums are arranged in the following order: A → B → D → E → F → G. Albums that do not contain tracks (such as album C) do not appear in the list.
Tips
- If you add numbers (01, 02, 03, etc.) to the front of the track file names, the tracks will be played in that order.
- A disc with many trees takes longer to start playback. Some discs with many trees cannot be played back.
Notes
- Depending on the software you use to create the DATA CD or DATA DVD, the playback order may differ from the illustration above.
- The playback order above may not be applicable if there are more than a total of 1000 albums and tracks in the DATA CD or DATA DVD.
- A total of up to 999 files can be recognized for discs that contain both MP3 and JPEG files. Files are recognized in the order that they were recorded. For example, if 990 JPEG files are recorded then 100 MP3 files are recorded, the 990 JPEG files recorded first and only the first 9 MP3 files can be recognized.
- Depending on the disc contents, playback may take some time to start.
Playing JPEG image files DATA-CD DATA-DVD
You can play JPEG image files on DATA CDs (CD-ROMs/CD-Rs/CD-RWs) or DATA DVDs (DVD-ROMs/DVD+RWs/DVD+Rs/DVD-RWs/DVD-Rs).
Before you start...
- S e_t /IDVD·VIDEO switch to DVD·VIDEO on the remote.

1
SELECT

Press SELECT DVD to control the DVD player.
2

Press ▲ and place a DATA CD or DATA DVD on the disc tray, then press ▲ to close the tray.
When you load a DATA CD or DATA DVD which contains MP3 audio tracks and JPEG image files, "Select a Media Type" menu appears.

If you load a DATA CD or DATA DVD which contains only JPEG image files, the “Album” display appears. Then you can skip step 3.
3

Press ↑/↓ to select "JPEG", then press ENTER.
The “Album” display will appears.
If you do not press ENTER after selecting a media type, the selected media will be automatically played.

4

Press ◀◀◀/▶▶▶ to select the next/previous album page, then press ↑/↓/◀/▶ to select an image in the “Album” display.

To display the selected image

1 Press ENTER.
The selected image number appears in the display window.
2 To display the next/previous image, press


PLAY

To play the Slide show
1 Press ▷ PLAY.
You can also play the Slide show using the menu on the selected image.
For details, see "To enjoy the Slide show" on page 86.
2 Press to select the desired playing speed on the "Interval" menu, then pres ENTER.
Slide show starts from the selected image.

To rotate the selected image
1 Press ♦/▼/◄/► to select an image in the "Album" display, then press ENTER.
2 Press ←/→ to select “ ” then press ENTER.
Each time you press ENTER, the image turns clockwise by 90°.

To zoom in an image
1 Press ↑/↓/↔/→ to select an image in the “Album” display, then press ENTER.
2 Press / to select “”, then press ENTER. “” appears.
3 Press /// to move " & to the position where you want to zoom in.
4 Press ENTER repeatedly to change the magnification. Each time you press ENTER, the magnification changes as shown below.
2 × normal magnification

Note
- You cannot use ZOOM on the remote in JPEG image files on DATA CD/DATA DVD.
To enjoy the Slide show
1 Press /// to select an image in the "Album" display, then press ENTER.
2 Press ←/→ to select “ 🔊, then press ENTER.
The “Interval” menu appears.
3 Press / to select the desired play speed, then press ENTER.
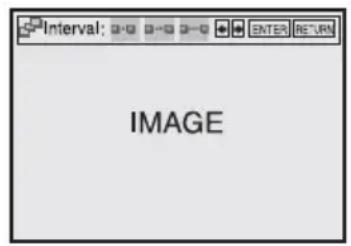
Slide show starts.
To turn on/off the menu in the single image display
Press CLEAR to turn off the menu. Press or to turn on the menu.
To return to the "Album" display
Press MENU to return to the “Album” display. Press ◀ repeatedly to return to the first “Album” page.
To return to the "Select a Media Type" menu
Press ■ STOP twice, then press TOP MENU.
Notes
- Slide show can play in only one direction.
- You cannot rotate or zoom in the image during Slide show.
- If you select “ ” in the rotated image display, the images in the “Album” display will not be rotated. But if you start the slide show, the images will be rotated. Correct the rotation in the “ ” menu.
About JPEG image files
You can play back DATA CDs (CD-ROMs/CD-Rs/CD-RWs) or DATA DVDs (DVD-ROMs/DVD+RWs/DVD+Rs/DVD-RWs/DVD-Rs) recorded in JPEG format. However, the discs must be recorded according to ISO9660 Level 1/Level 2 or Joliet format and DATA DVDs of Universal Disk Format (UDF) for the player to recognize the tracks (or files). You can also play DATA CDs or DATA DVDs recorded in Multi Session or Multi Border (see “Note on Multi Session/Border discs” on page 87).
Refer to the instructions supplied with the CD-R/CD-RW/DVD-R/DVD-RW drives and the recording software (not supplied) for details on the recording format.
Notes
- If both video data and JPEG image files exist on a DATA DVD, the player recognizes only the video data.
- A total of up to 999 files can be recognized for discs that contain both MP3 and JPEG files. Files are recognized in the order that they were recorded. For example, if 990 JPEG files are recorded then 100 MP3 files are recorded, the 990 JPEG files recorded first and only the first 9 MP3 files can be recognized.
Note on Multi Session/Border discs
If JPEG image files are recorded in the first session/border, the player will also play JPEG image files in other session/border. If audio tracks and images in Music CD format or Video CD format are recorded in the first session/border, only the first session/border will be played back.
Tip
- If you add numbers (01, 02, 03, etc.) to the front of the file names, the files will be played in that order.
Notes
- This player can play JPEG image files with the extension “.JPEG” or “.JPG.”
- Some DATA CDs or DATA DVDs cannot be played on this system depending on file format.
- The player may not be able to play some DATA CDs/DATA DVDs created in the Packet Write format.
- If you add the extension “.JPG” or “.JPEG” to data not in JPEG format, “Can not Display” will appear.
- Depending on the disc or the size of image files, playback may take some time to start.
- Progressive and lossless compression JPEG image files are not supported.
- The image size that can be displayed is limited. You can display the following images; width 32 - 7680 pixels by height 32 - 8192 pixels.
Playing VIDEO CDs with "PBC ON/OFF" Functions VCD
The PBC (Playback control) function allows you to search and perform other operations interactively. PBC playback follows a selection menu displayed on your TV screen.
Before you start...
- S e_t /IDVD·VIDEO switch to DVD·VIDEO on the remote.

1

MENU
Press MENU to select "PBC ON."
The menu for your selection appears.
2


Press / to select the item number you want.
You can also use the number buttons to select the item number and track.
3

Press ENTER.
4
Follow the instructions in the menu for interactive operations.
Refer to the instructions supplied with the disc, as the operating procedure may differ depending on the VIDEO CD.
To return to the menu
Press 📌 RETURN.
To play using "PBC OFF"
Press MENU to select "PBC OFF."
When "PBC OFF" is selected, the DVD player starts continuous play. You cannot play still pictures such as a menu.
To return to "PBC ON," press MENU to select "PBC ON."
Note
- Depending on the VIDEO CD, "Press ENTER" in step 3 may appear as "Press SELECT" in the instructions supplied with the disc. In this case, press PLAY.
Quick Timer Recording VHS
After you have started recording, you can have the VCR stop recording automatically after a specified duration.

1 While recording, press ● REC.
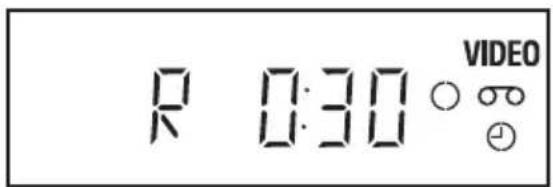
2 Press ● REC repeatedly to set the duration time.
Each press advances the time as follows.

flowchart
graph LR
    A["0:30 1:00"] --> B["1:30 4:00"]
    B --> C["Normal recording"]
The tape counter decreases minute by minute to 0:00, then the VCR stops recording.
To extend the duration
Press ● REC repeatedly to set a new duration time.
To cancel the duration
Press ● REC repeatedly until the ⏻ indicator disappears and the VCR returns to normal recording mode.
To stop while recording
Press ■ STOP.
Note
- You cannot display the current tape time in the display window when setting the recording duration time.
Recording stereo and bilingual programs
VHS
Recording stereo programs
When you receive a program broadcast in stereo, press AUDIO to display “Hi-Fi” on the TV screen. You can also select “Left,” “Right,” or “Mono.” If there is noise in the stereo program, select “Mono.” The sound will be recorded in monaural (on both hi-fi and normal audio tracks) but with less noise.
Recording bilingual programs
Press AUDIO to display “SAP” on the TV screen. When a SAP (Second Audio Program) is received, “SAP” appears on the TV screen. When “MAIN” is selected, the VCR records only the main sound.
Selecting the sound during playback
During playback, press AUDIO to select the sound you want.
| To listen to On-screen display Display window | ||
| Stereo Hi-Fi STEREO indicator | ||
| Left channel Left STEREO indicator | ||
| Right channel Right STEREO indicator | ||
| Monaural sound on the normal audio track Mono No indicator |
How sound is recorded on a video tape
The VCR records sound onto two separate tracks. Hi-fi audio is recorded onto the main track along with the picture. Monaural sound is recorded onto the normal audio track along the edge of the tape.

Notes
- To play a tape in stereo, you must use the A/V connections.
- When you play a tape recorded in monaural, the sound is heard in monaural regardless of the AUDIO setting.
Searching using various functions VHS
The VCR automatically marks the tape with an index signal at the point where each recording begins.
You can easily find a specific point using various search functions.

1
Press SELECT VIDEO to control the VCR.
2
Insert an indexed tape into the VCR.
3
REPEAT/SEARCH

Press SEARCH.
![Scan and play: Press [♦] or [♦] Go to [0:00:00]: Press [♦] End search: Press [♦] 0:01:30](/content/2026/05/1049605/images/de0e1a3e4f7ff36a0712b4186589825f54ad69e4251dc3d41694e549f262fd1f.jpg)
4


- Scan and Play (To search using the index function):
1 Press to scan ahead, or to scan backwards. The VCR searches and then plays back for about five seconds.
2 Press ▷ PLAY to view the program. If you do not press ▷ PLAY, the VCR automatically searches for the next index mark, or until it reaches the end of the tape.
- Go to [0:00:00] (To search for the counter 0:00:00 point):
Press .
The VCR starts searching and automatically stops at the 0:00:00 point.
To mark a point on the tape that you want to find later, press CLEAR to reset the tape counter to "0:00:00."
• End search (To search for a blank portion of the tape)
Press ↓.
The VCR starts searching and automatically stops at the beginning of a blank space. If no blank space is found, the VCR reaches the end.

![Go to [0:00:00] 0:01:30](/content/2026/05/1049605/images/22d6b1e7e3b824db40ab2fea3c82213728be9821983307bb465d258dd9e11be1.jpg)

Note
- Once in recording mode, if the VCR is put in pause and then released to start the recording, no index mark will be inserted. An index mark will be inserted if the channel is changed while VCR is put in pause.
Changing menu options VHS
You can change the tape length, auto play and auto repeat settings. Normally the default settings are used. Change these settings if necessary.
Before you start...
- S e_t /IDVD·VIDEO switch to DVD·VIDEO on the remote.

1 SET UP Press SET UP when the DVD player is in stop mode.
![OPTION SETUP Language :English Clock Set/Adjust Channel Setup Auto Power Off [ Off ] RF Output Channel [3CH] ENTER RETURN SET UP](/content/2026/05/1049605/images/251d180e9bfb0ffcc26cad835c370a0be459fe573a72249e223ca165ae8b6495.jpg)
2 Press ↑/↓ to select (VIDEO) and press ENTER.
![VIDEO FUNCTION SETUP Tape Length [T120] Auto Play [On] Auto Repeat [Off] RETURN SET UP](/content/2026/05/1049605/images/d637a1192176617b90f7143d52183bb8d0acd7cf2b1c1ed151c2683f3b7a6a41.jpg)

Press ↑/↓ to select the option to change.

![VIDEO FUNCTION SETUP Tape Length [ T120 ] Auto Play [ On ] Auto Repeat [ Off ] RETURN SET UP](/content/2026/05/1049605/images/3ed65a0093e7876d763be03ae0dba25ef44f08f85462e8b98017d07e28a38c69.jpg)
4

Press to change the setting.
5
SET UP

Press SET UP to exit the menu.
Menu choices
The default settings are indicated in bold print.
| Menu option Set this option to | |
| Tape Length | • T-120 when using a T-120 or shorter length tape.• T-160 when using a T-160 length tape.• T-180 when using a T-180 or longer length tape. |
| Auto Play | • On to start playback automatically, when you insert a tape with its safety tab removed.• Off to turn off Auto play. You need to press ▷ PLAY to start playback, even if you insert a tape with its safety tab removed. |
| Auto Repeat • On to play back a tape repeatedly. The VCR rewinds a tape to the beginning and restarts playback automatically.• Off to turn off Auto repeat. | |
Editing with another VCR VHS
How to connect to record on this VCR
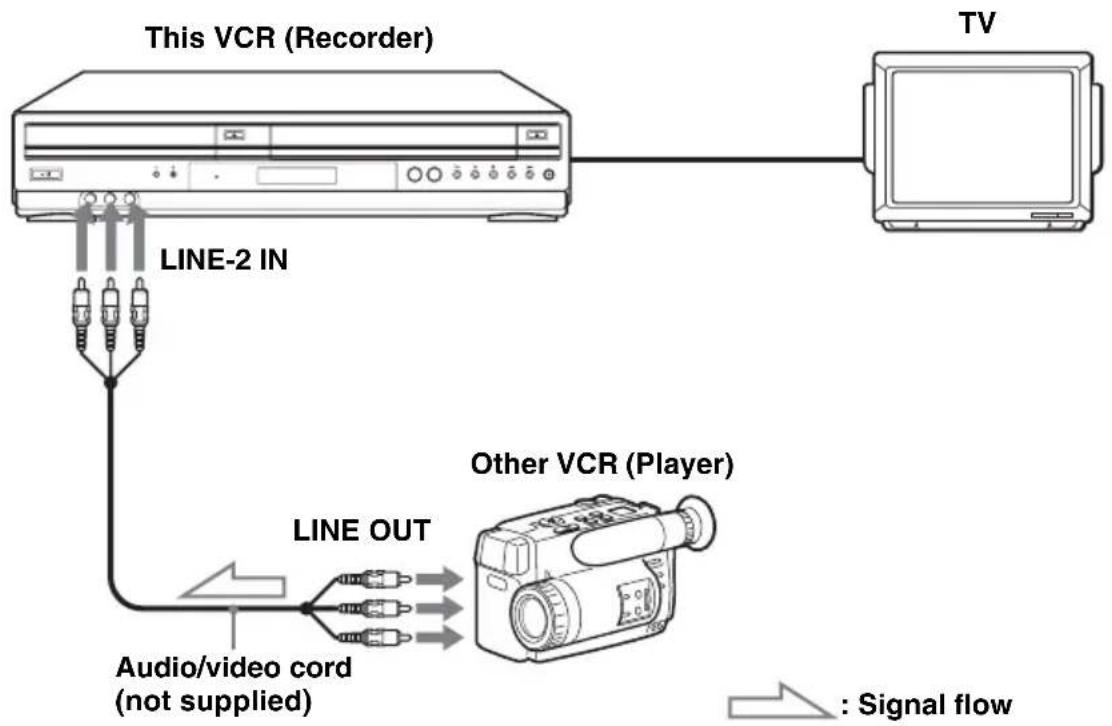
flowchart
graph TD
    A["This VCR (Recorder)"] -->|LINE-2 IN| B["TV"]
    A -->|LINE OUT| C["Other VCR (Player)"]
    C -->|Audio/video cord (not supplied)| A
    style A fill:#f9f,stroke:#333
    style C fill:#ccf,stroke:#333
    note right of C: Signal flow
Notes
- Make sure you connect the plugs to jacks of the same color.
- If the other VCR is a monaural type and connected to this VCR's LINE-2 IN jacks, connect the audio plug to the AUDIO L (white) jack. The sound is recorded on both right and left channels. If you connect to the AUDIO R (red) jack, the sound is recorded only on the right channel.
- If you connected this VCR to both the LINE IN and LINE OUT jacks of the other VCR, select the input correctly to prevent a humming noise.
- You can use the LINE IN 1 jacks for editing. If the other VCR is a monaural type the sound is recorded only on the channel whose jack is connected to the audio plug. To record on both right and left channels, connect the audio plugs to the AUDIO L/R jacks using an audio/video cord (not supplied).
Operation (when recording on this VCR)
Before you start editing
- Turn on the VCR and the TV and set it to the video channel.
- Press INPUT SELECT to display “L1” or “L2” in the display window.
- Press SP/EP to select the tape speed, SP or EP.
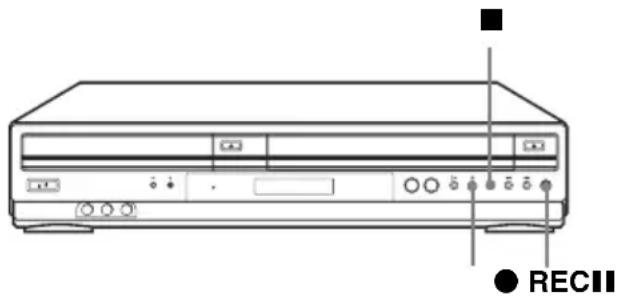
natural_image
Line drawing of a CD-ROM front panel with control buttons and indicator lights (no text or symbols)1 Insert a source tape with its safety tab removed into the other (playback) VCR. Search for the point to start playback and set it to playback pause.
2 Insert a tape into this (recording) VCR. Search for the point to start recording and press Ⅱ.
3 Press ● REC on this VCR to set it to recording pause.
4 To start editing, press the Ⅱ (pause) buttons on both VCRs at the same time.
To stop editing
Press the ■ (stop) buttons on both VCRs.
Tip
- To cut out unwanted scenes while editing, press ■ on this VCR when an unwanted scene begins. When it ends, press ■ again to resume recording.
General setup information
Before you start...
- S e t /IDVD·VIDEO switch to DVD·VIDEO on the remote.
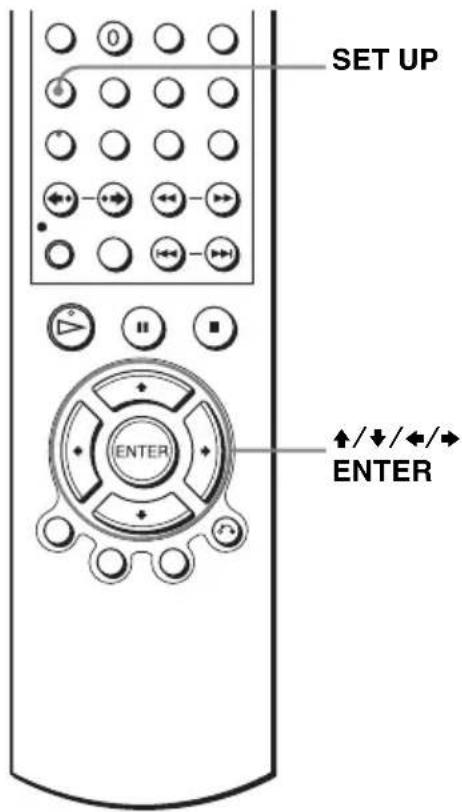
1
SET UP

Press SET UP when the DVD player is in stop mode, then press ↑/↓ to select (OPTION), then press ENTER.


![OPTION SETUP Language :English Clock Set/Adjust Channel Setup Auto Power Off [ Off ] RF Output Channel [3CH] ENTER RETURN SET UP](/content/2026/05/1049605/images/707976e80b50465f2ba3b826cfbbd643fcc13449b04ddc03de451562d9ccd3ca.jpg)
2

Press / to select the option to change.
![OPTION SETUP Language :English Clock Set/Adjust Channel Setup Auto Power Off [ Off ] RF Output Channel [3CH] RETURN SET UP](/content/2026/05/1049605/images/2134a1daa0142717939106524b460c814c254720cf606989a3f9ab9a448ef8f7.jpg)
3

Press / to change the setting.
When changing the “RF Output Channel,” confirmation messages will appear. Press ENTER to confirm the messages.
Menu choices
The default settings are indicated in bold print.
| Menu option Set this option to | |
| Auto Power Off | “Off” to deactivate the Auto Power Off function.“1Hr”/“2Hr” to turn the DVD-VCR off automatically if no signal is received and you do not press any of the buttons during this time. |
| RF Output Channel | “3CH” when using channel 3 to receive the VCR signal.“4CH” when using channel 4 to receive the VCR signal. For details, see page 99. |
Setting the RF Output channel
When connecting the DVD-VCR to the TV using only the antenna cable, you must set the RF Output channel in the "OPTION SETUP" menu so that the TV can receive the correct signal from the DVD-VCR.

1 Set the RF Output channel to "3CH" or "4CH" (see page 98 to set the channel), whichever channel is not used in your area. If both are used, set the switch to either channel.
2 Press I/⏻ to turn on the DVD-VCR.
3 Press TV/VIDEO to turn on "VIDEO" in the DVD-VCR's display window.

4 Press CH +/- to display a channel number in the display window.
Select an active channel number in your area.
5 Turn on your TV and set it to the channel you selected in step 1 (3CH or 4CH).
The channel you selected in step 4 appears on the TV screen. If the channels change when you press CH +/-, you have made the correct setting.
Whenever you use the DVD-VCR, set the TV to the channel selected in step 1.
Attaching the external antenna connector
When using a 300-ohm twin lead cable for a VHF/UHF antenna, use an antenna connector (not supplied) to connect the antenna to the DVD-VCR.

300-ohm twin lead cable
Antenna connector (not supplied)
1 Loosen the screws on the antenna connector.
2 Wind the twin leads around the screws on the antenna connector.
3 Retighten the screws.
Attaching a VHF/UHF band mixer
When using both a 75-ohm coaxial cable and a 300-ohm twin lead cable for a VHF/UHF antenna, use a VHF/UHF band separator/mixer (not supplied) to connect the antenna to the DVD-VCR.

1 Loosen the screws on the mixer.
2 Wind the twin leads around the screws on the mixer.
3 Retighten the screws.
4 Connect the 75-ohm coaxial cable to the mixer.
Troubleshooting
If you have any questions or problems not covered below, please consult your nearest Sony dealer. (For customers in USA)
General Troubleshooting
| Symptom Remedy | ||
| Power | The I/⏻ switch does not function. | Connect the AC power cord securely. |
| The power is turned on but the DVD-VCR does not operate. | Moisture condensation has occurred. Turn the power off, unplug the AC power cord and leave the DVD-VCR to dry for over three hours. | |
| Clock | The clock has stopped and “-:-” appears in the display window. | The clock stops if the DVD-VCR is disconnected from the wall outlet. Reset the clock (and timer). |
| Others | The remote commander does not function. | Make sure you are pointing the remote commander at the remote sensor on the DVD-VCR.Replace all the batteries in the remote commander with new ones if they are weak.Make sure the TV / DVD·VIDEO switch is set correctly.Select correctly VIDEO or DVD with the SELECT DVD/VIDEO button. |
| The tracking meter does not appear on the screen. | The recording condition of the tape is very poor and tracking cannot be adjusted. |
DVD Troubleshooting
| Symptom Remedy | ||
| Picture | There is no picture/picture noise appears. | ·Re-connect the connecting cord securely.·The connecting cords are damaged.·Check the connection to your TV (page 14) and switch the input selector on your TV so that the signal from the player appears on the TV screen.·The disc is dirty or flawed.·If the picture output from your player goes through your VCR to get to your TV or if you are connected to a combination TV/VIDEO player, the copy-protection signal applied to some DVD programs could affect picture quality. If you still experience problems even when you connect your player directly to your TV, please try connecting your player to your TV's S-VIDEO input (page 30).·You have set the player to progressive format (the PROGRESSIVE indicator lights up in orange) even though your TV cannot accept the progressive signal. In this case, set “Progressive” to “Off” (page 58).·Even if your TV is compatible with progressive format (480p) signals, the image may be affected when you set the player to progressive format. In this case, set “Progressive” to “Off” and the player is set to normal (interlace) format (page 58).·COMPONENT VIDEO OUT jack is not used or “Progressive” of the “SCREEN SETUP” menu is not set correctly while the PROGRESSIVE indicator lights up in orange. Check the setting (page 56) and connection (page 30). |
| Even though you set the aspect ratio in “TV Type” of the “SCREEN SETUP” menu the picture does not fill the screen. | ·The aspect ratio of the disc is fixed on your DVD. | |
| There is no picture from your VCR connected to the LINE IN jacks. | ·The DVD player must be in standby mode to view pictures from your VCR. | |
| Sound | There is no sound. · Re-connect the connecting cord securely.·The connecting cord is damaged.·The player is connected to the wrong input jack on the amplifier (receiver) (page 15).·The amplifier (receiver) input is not correctly set.·The player is in pause mode or in Slow-motion Play mode.·The player is in fast forward or fast reverse mode.·If the audio signal does not come through the DIGITAL AUDIO OUT (COAXIAL) jack, check the audio settings (page 54). | |
| Sound is noisy. · When playing a CD with DTS sound tracks, noise will come from the LINE OUT L/R (AUDIO) jacks (page 37) or DIGITAL AUDIO OUT (COAXIAL) jack. | ||
| The sound volume is low. · The sound volume is low on some DVDs. The sound volume may improve if you set “Audio DRC” to “Wide Range” (page 55). | ||
| Operation | The disc does not play. • The disc is turned over.• Insert the disc with the playback side facing down on the disc tray.• The disc is skewed.• The player cannot play certain discs (page 7).• The region code on the DVD does not match the player.• Moisture has condensed inside the player (page 3).• The player cannot play a recorded disc that is not correctly finalized (page 8).• Make sure the TV / DVD·VIDEO switch is set correctly.• Select correctly VIDEO or DVD with SELECT DVD/VIDEO button. | |
| The MP3 audio track cannot be played (page 78). | • The DATA CD or DATA DVD is not recorded in the MP3 format that conforms to ISO9660 Level 1/Level 2 or UDF.• The MP3 audio track does not have the extension “.MP3.”• The data is not formatted in MP3 even though it has the extension “.MP3.”• The data is not MPEG1 Audio Layer 3 data.• The player cannot play audio tracks in MP3PRO format. | |
| The JPEG image file cannot be played. | • The DATA CD or DATA DVD is not recorded in JPEG format that conforms to ISO9660 Level 1/Level 2 or UDF.• The JPEG image file does not have the extension “.JPG” or “.JPEG.”• The data is not formatted in JPEG even though it has the extension “.JPG” or “JPEG.”• Length or width of the image is more than 4720 dots. | |
| The title of the MP3 audio album/track or JPEG image album/file is not correctly displayed. | • The player can only display numbers and alphabet. Other characters are displayed as asterisks. | |
| The disc does not start playing from the beginning. | • Program play, shuffle play, or repeat play, has been selected (pages 70, 72, 73).• Resume play has taken effect (page 37). | |
| The player starts playing the disc automatically. | • The disc features an auto playback function. | |
| Playback stops automatically. • While | playing discs with an auto pause signal, the player stops playback at the auto pause signal. | |
| You cannot perform some functions such as stop, search, slow-motion play, repeat play, shuffle play, or program play. | • Depending on the disc, you may not be able to do some operations. See the operating manual that comes with the disc. | |
| The language for the sound track cannot be changed. | • Try using the DVD’s menu instead of the direct selection button on the remote (page 65).• Multilingual tracks are not recorded on the DVD being played.• The DVD prohibits the changing of the language for the sound track. | |
| Operation | The subtitle language cannot be changed or turned off. | Try using the DVD’s menu instead of the direct selection button on the remote (page 65).Multilingual subtitles are not recorded on the DVD being played.The DVD prohibits the changing of the subtitles. |
| The angles cannot be changed. Try using the DVD’s menu instead of the direct selection button on the remote (page 65).Multi-angles are not recorded on the DVD being played.The DVD prohibits changing of the angles. | ||
| The player does not operate properly. | When static electricity, etc., causes the player to operate abnormally, unplug the player. | |
VCR Troubleshooting
| Symptom Remedy | ||
| Playback | The playback picture does not appear on the TV screen. | Make sure the TV is set to the channel for the VCR. If you are using a monitor, set it to video input. |
| The picture is not clear. • Adjust the tracking with the TRACKING +/- buttons.The video heads are dirty (see “On cleaning the video heads” (page 3)). Clean the video heads using a Sony video head cleaning cassette. If a Sony cleaning cassette is not available in your area, have the heads cleaned at your nearest Sony dealer (a standard service fee will be charged). Do not use a commercially available liquid type cleaning cassette, as it may damage the video heads.The video heads may have to be replaced. Consult your local Sony dealer for more information. | ||
| The picture rolls vertically during picture search. | Adjust the vertical hold control on the TV or monitor. | |
| The picture has no sound. • The tape is defective.If you made A/V connections, check the audio cord connection. | ||
| Recording | A TV program does not appear on the TV screen. | Make sure the TV is set to the channel for the VCR. If you are using a monitor, set it to video input.Select the correct source with the INPUT SELECT or CH +/- buttons. Select a channel number when recording TV programs; select “L1” or “L2” when recording from other equipment. |
| TV reception is poor. • Adjust the TV antenna. | ||
| The tape starts playing as soon as it is inserted. | The safety tab has been removed. To record on this tape, cover the tab hole. | |
| The tape is ejected when you press● REC. | Check that the safety tab has not been removed. | |
| Nothing happens when you press● REC. | Make sure the tape is not at its end. | |
| Timer recording | The timer does not operate. • Check that the clock is set.Make sure a tape has been inserted.Check that the safety tab has not been removed.Make sure the tape is not at its end.Make sure a program has been set for timer recording.Make sure your timer settings are past the current time.Check that the cable box is turned on.The clock stops if the DVD-VCR is disconnected from the wall outlet for more than one minute. Reset the clock and timer.Turn the power off and unplug the AC power cord. | |
| Others | A tape cannot be inserted. • Check that a tape is not already in the tape compartment. | |
| Control by AV mouse is not possible. • The unit is not compatible with satellite TV receiver AV mouse, etc. | ||
Glossary
Chapter (page 38)
Sections of a picture or a music feature that are smaller than titles. A title is composed of several chapters. Depending on the disc, no chapters may be recorded.
Dolby Digital (pages 32 and 55)
Digital audio compression technology developed by Dolby Laboratories. This technology conforms to 5.1-channel surround sound. The rear channel is stereo and there is a discrete subwoofer channel in this format. Dolby Digital provides the same 5.1 discrete channels of high quality digital audio found in Dolby Digital cinema audio systems. Good channel separation is realized because all of the channel data are recorded discretely and little deterioration is realized because all channel data processing is digital.
Dolby Surround (page 33)
Audio signal processing technology that Dolby Laboratories developed for surround sound. When the input signal contains a surround component, the process outputs the front, center and rear signals. The rear channel is monaural.
DTS (page 55)
Digital audio compression technology that Digital Theater Systems, Inc. developed. This technology conforms to 5.1-channel surround sound. The rear channel is stereo and there is a discrete subwoofer channel in this format. DTS provides the same 5.1 discrete channels of high quality digital audio.
Good channel separation is realized because all of the channel data is recorded discretely and little deterioration is realized because all channel data processing is digital.
DVD (page 7)
A disc that contains up to 8 hours of moving pictures even though its diameter is the same as a CD.
The data capacity of a single-layer and single-sided DVD is 4.7 GB (Giga Byte), which is 7 times that of a CD. The data capacity of a double-layer and single-sided DVD is 8.5 GB, a single-layer and double-sided DVD is 9.4 GB, and double-layer and double-sided DVD is 17GB.
The picture data uses the MPEG 2 format, one of the worldwide standards of digital compression technology. The picture data is compressed to about 1/40 (average) of its original size. The DVD also uses a variable rate coding technology that changes the data to be allocated according to the status of the picture. Audio information is recorded in a multi-channel format, such as Dolby Digital, allowing you to enjoy a more real audio presence.
Furthermore, various advanced functions such as the multi-angle, multilingual, and Parental Control functions are provided with the DVD.
DVD+R (page 7)
A DVD+R (read “plus R”) is a recordable disc that is the same size as a DVD VIDEO. Contents can be recorded only once to a DVD+R, and will have the same format as a DVD VIDEO.
DVD-R (page 7)
A DVD-R is a recordable disc that is the same size as a DVD VIDEO. Contents can be recorded only once to a DVD-R, and will have the same format as a DVD VIDEO.
The DVD-R has two different modes: VR mode and Video mode. DVDs created in Video mode have the same format as a DVD VIDEO, while discs created in VR (Video Recording) mode allow the contents to be programmed or edited.
DVD-RW (page 7)
A DVD-RW is a recordable and rewritable disc that is the same size as a DVD VIDEO. The DVD-RW has two different modes: VR mode and Video mode. DVD-RWs created in Video mode have the same format as a DVD VIDEO, while discs created in VR (Video Recording) mode allow the contents to be programmed or edited.
DVD+RW (page 7)
A DVD+RW (plus RW) is a recordable and rewritable disc. DVD+RWs use a recording format that is comparable to the DVD VIDEO format.
Interlace format
Interlace format shows every other line of an image as a single “field” and is the standard method for displaying images on television. The even number field shows the even numbered lines of an image, and the odd numbered field shows the odd numbered lines of an image.
Progressive format (pages 31 and 58)
Compared to the Interlace format that alternately shows every other line of an image (field) to create one frame, the Progressive format shows the entire image at once as a single frame. This means that while the Interlace format can show 30 frames/60 fields in one second, the Progressive format can show 60 frames in one second. The overall picture quality increases and still images, text, and horizontal lines appear sharper. This player is compatible with the 480 progressive format.
Title (page 38)
The longest section of a picture or music feature on a DVD, movie, etc., in video software, or the entire album in audio software.
Track (page 38)
Sections of a picture or a music feature on a CD or VIDEO CD (the length of a song).
Specifications
System
Laser
Semiconductor laser
Format
VHS NTSC standard
Video recording system
Rotary head helical scanning FM system
Video heads
Double azimuth four heads
Video signal
NTSC color, EIA standards
Tape speed
SP: 33.35 mm/s (1 38 inches/s)
EP: 11.12 mm/s ( 716 inches/s)
LP: 16.67 mm/s ( ^11/_16 inches/s), playback only
Maximum recording/playback time
8 hrs. in EP mode (with T-160 tape)
Rewind time
Approx. 1 min (with T-120 tape)
Tuner section
Channel coverage
VHF 2 to 13
UHF 14 to 69
CATV A-8 to A-1, A to W, W+1 to W+84
Antenna
75-ohm antenna terminal for VHF/UHF
Inputs and outputs
LINE IN 1 and LINE-2 IN
VIDEO IN, phono jack (1 each)
Input signal: 1 Vp-p, 75 ohms, unbalanced, sync negative
AUDIO IN, phono jacks (2 each)
Input level: 327 mVrms
Input impedance: more than 47 kilohms
LINE OUT
VIDEO OUT, phono jack (1)
Output signal: 1 Vp-p, 75 ohms, unbalanced, sync negative
AUDIO OUT, phono jacks (2)
Standard output: 327 mVrms
Load impedance: 47 kilohms
Output impedance: less than 10 kilohms
DIGITAL OUT
COAXIAL, phono jack
Output signal: 0.5 Vp-p, 75 ohms
COMPONENT VIDEO OUT (Y, Pb, Pr)
Phono jack
Y: 1.0 Vp-p/Pb, Pr: 0.7 Vp-p, 75 ohms
S-VIDEO OUT
4-pin, mini-DIN jack
Y: 1.0 Vp-p, unbalanced, sync negative
C: 0.286 Vp-p, load impedance 75 ohms
Timer section
Clock
Quartz locked
Timer indication
12-hour cycle
Timer setting
8 programs (max.)
General
Power requirements
120 V AC, 60 Hz
Power consumption
25 W
Power back-up
Back-up duration: 0 min
Operating temperature
0^ to 45^ (32°F to 113°F)
Storage temperature
-20^ to 60^ (-4^ to 140^)
Operating humidity
25% to 80%
Dimensions including projecting parts and controls (w/h/d)
Approx. 430 × 85 × 287 mm
(Approx. 17 × 3^3 × 11 inches)
Mass
Approx. 3.6 kg (Approx. 7.9 lbs)
Supplied accessories
Remote commander (1)
Size AA (R6) batteries (2)
75-ohm coaxial cable with F-type connectors (1)
Design and specifications are subject to change without notice.
Index to parts and controls
Refer to the pages indicated in parentheses ( ) for details.
Front panel

1 I/↓ POWER (on/standby) switch (37)
(42)
2Disc tray (34)
3 ≜ (open/close) button (34) (36)
4 Tape compartment (41)
5 ≜ (eject) button (42)
6● REC (record) button (46)
7 ◀◀◀ (rewind)/▶▶ (fast-forward) button
(36) (42)
8 ■ (stop) button (35) (42)
9 II (pause) button (35) (42)
10▷ (play) button (35) (41)
11 SELECT DVD/VIDEO buttons (12)
12 Remote sensor (12)
13 PROGRESSIVE indicator (58)
14 CHANNEL/TRACKING +/- buttons*
(44) (45)
15LINE-2 IN VIDEO/AUDIO L (MONO)/R jacks (96)
* CHANNEL/TRACKING + buttons have a tactile dot. Use the tactile dot as a reference.
Display window

① DVD indicator (35)
2 Angle indicator (67)
3Record indicator (46)
④VIDEO indicator (41)
5 Tape indicator (41)
6 Timer indicator (49)
Rear panel
⑦STEREO indicator (91)
8 Playing time/clock/current status indicator (35) (41)
9 SURR (surround) indicator (76)
10 DTS indicator (55)
11Disc indicator (35)
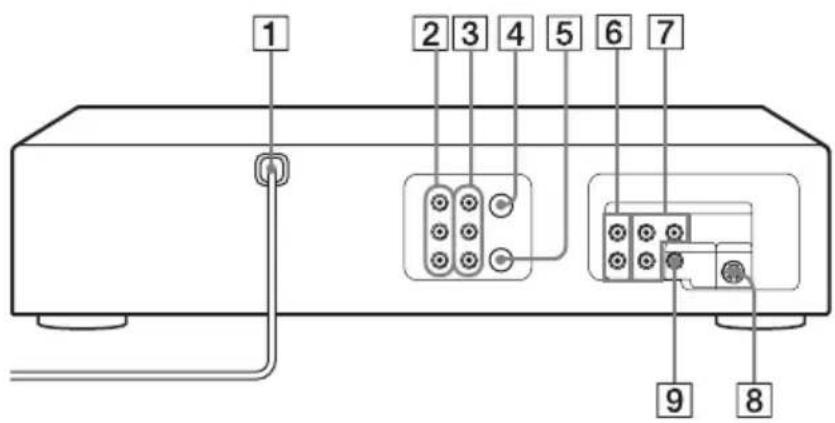
DVD player and VCR
1 AC power cord (14) (18)
2LINE IN 1 VIDEO/AUDIO L/R jacks (96)
3LINE OUT VIDEO/AUDIO L/R jacks (15)
4 IN (FROM ANT.) connector (16)
5 OUT (TO TV) connector (16)
DVD player only
6LINE OUT AUDIO L/R jacks (30)
7COMPONENT VIDEO OUT Pr/Pb/Y jacks (31)
8S-VIDEO OUT jack (31)
9 DIGITAL AUDIO OUT/COAXIAL jack (33)
Remote commander for DVD

1 ▲ (open/close) button (34) (36)
2 TV / DVD·VIDEO switch (12)
3 SELECT DVD button (12)
4 Number buttons* (29)
5 CLEAR button (71)
6 ANGLE button (67)
7 SET UP button (20)
8 SUBTITLE button (68)
9 AUDIO button* (74)
10 •→ SKIP button (35)
11 ↔ REPLAY button (35)
12 II PAUSE button (35)
13▷ PLAY button* (35)
14 ↑/↓/←/→ buttons (20)
ENTER button (20)
15DISPLAY button (39)
16 TOP MENU button (65)
17I/ ^1 (on/standby) switch (13) (37)
18 VOL (volume) +/- buttons (13)
19 ZOOM button (66)
20 ENTER button (20)
21REPEAT button (70)
22 SURROUND button (76)
23 <◀◀◀/▶▶▶ buttons (35)
24 ◀◀◀ PREV (previous)/▶▶ NEXT button (35)
25 ■ STOP button (35)
26 RETURN button (23)
27MENU button (65)
* Number 5, AUDIO and ▷ PLAY buttons have a tactile dot. Use the tactile dot as a reference.
*Remote commander for VIDEO
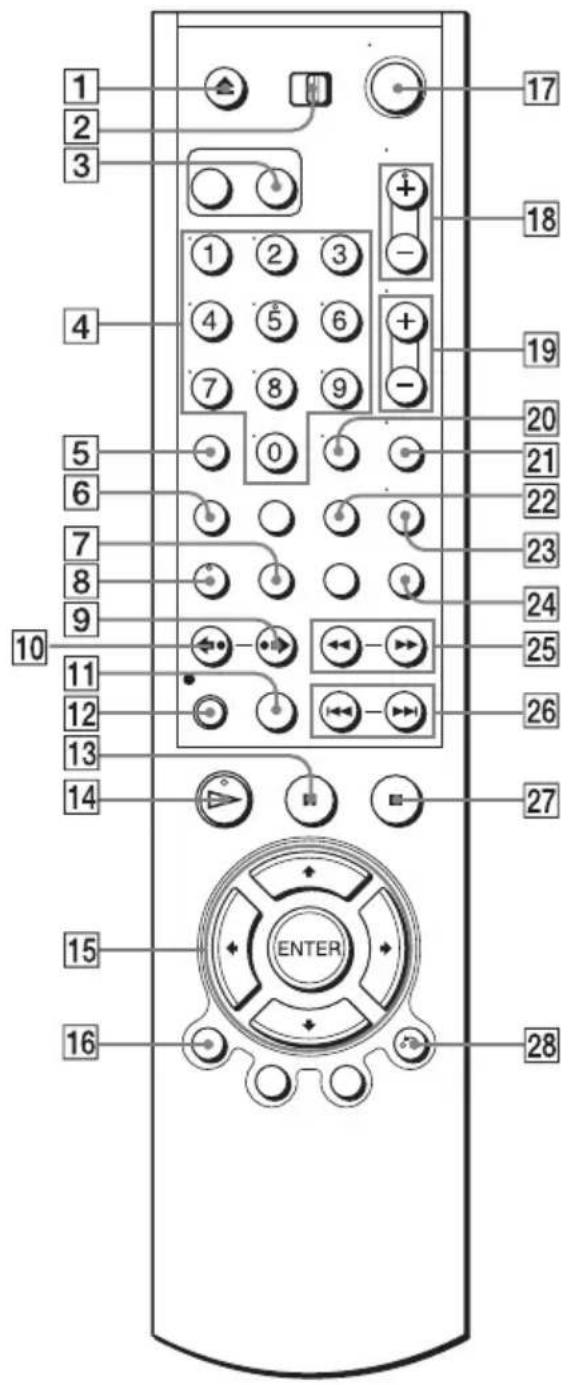
1▲ (eject) button (42)
2 TV / DVD·VIDEO switch (12)
3 SELECT VIDEO button (12)
4 Number buttons* (29)
5 CLEAR button (43) (49)
6 SET UP button (20)
7 TIMER button (48)
8 AUDIO button* (91)
9 → SKIP button (42)
10 ↔ REPLAY button (42)
11 SP (Standard Play)/EP (Extended Play) button (46)
12● REC (record) button (46)
13 | | PAUSE button (4 2)
14▷ PLAY button* (41)
15 ↑/↓/←/→ buttons (20)
ENTER button (20)
16DISPLAY button (43)
17I/ (on/standby) switch (13) (42)
18 CH (channel)/TRACKING +/- buttons*
(44) (45)
19 VOL (volume) +/- buttons (13)
20 ENTER button (20)
21MUTING button (13)
22SEARCH button (92)
23 TV/VIDEO button (47)
24 INPUT SELECT button (45)
25 ◀◀ (rewind)/▶▶ (fast-forward)/▶▶ (slow) buttons (42)
26 ◀◀◀/▶▶ SHUTTLE button (42)
27 ■ STOP button (42)
28 RETURN button (23)
* Number 5, AUDIO, ▷ PLAY and CH/TRACKING + buttons have a tactile dot. Use the tactile dot as a reference.
DVD Audio/Subtitle Language
| Abbreviation Language | |
| ARA Arabic | |
| BUL Bulgarian | |
| CHI Chinese | |
| CRO Croatian | |
| CZE Czech | |
| DAN Danish | |
| DEU German | |
| ENG English | |
| ESP Spanish | |
| FIN Finish | |
| FRA French | |
| GRE Greek | |
| HUN Hungarian | |
| IDN Indonesian | |
| IND Hindi | |
| ISL Icelandic | |
| ITA Italian | |
| IWR Hebrew | |
| JPN Japanese | |
| KOR Korean | |
| MAL Malay | |
| NLD Dutch | |
| NOR Norwegian | |
| POL Polish | |
| POR Portuguese | |
| RUS Russian | |
| SVE Swedish | |
| THA Thai | |
| TUR Turkish | |
| VIE Vietnamese | |
| ZAF Afrikaans |
Index
Numerics
16:9 57
4:3 Letter Box 57
4:3 Pan Scan 57
A
Adjusting
picture 44
tracking 44
Angle 67
Audio track 91
Audio/video (A/V) hookup 15
Auto Clock Set 22
C
Cable hookup 14
Cleaning the video heads 3
Clock setting 22
Connecting
Cable TV 19
external antenna connector 100
VHF/UHF band mixer 100
Counter 43
Custom AV Mode 40
D
DATA CD 7, 78, 84
DATA DVD 7, 78, 84
Disabling channels 28
DOLBY DIGITAL 74
DTS 74
Dubbing. see Editing
DVD 7
E
Editing 96
EP mode 46
H
Handling discs 2
Hi-fi audio track 91
|
Instant Advance 36
Instant Replay 36, 42
Instant Skip 42
J
JPEG 7, 84
L
Language selecting 20
LP mode 47
M
Monaural 91
Monitoring audio during
playback 91
MP3 7, 78
N
Normal audio track 91
P
Parental Control 62
PBC (Playback control) 88
Picture adjustment 44
Playback
at various speeds 36, 42
frame by frame 42
MP3 audio track78
program play 70
repeat play 73
selecting the sound 91
shuffle play72
shuttle play 42
slow motion 36, 42
VIDEO CDs 88
Playback quickly or slowly with sound 37
Presetting channels 26
Program play 70
Progressive 107
R
Recording
bilingual programs 91
SAP broadcasts 91
saving47
stereo broadcasts 91
while watching another
program 47, 50
Repeat play 73
Resume Play 37
RF channel 99
S
Safety tab 47
SAP (Second Audio Program)
91
Searching
at various speeds 36, 42
for a blank portion 93
for the counter 0 point 93
Scan and Play 93
Shuffle play 72
Shuttle play 42
SP mode 46
STEREO 74
Stereo 91
Subtitle 68
Surround 76
T
Timer setting
daily/weekly recording 49
Tracking adjustment. see
Adjusting
U
Usable discs 7
V
VIDEO CD 7, 88
Z
Zoom 66
Índice
natural_image
Line drawing of a CD-ROM device with front panel and rear panel (no text or symbols)3 Pulse ▷ PLAY.
- DVD Player/ Video Cassette Recorder
- For customers in the USA
- For Customers in Canada
- WARNING
- CAUTION
- For customers in the U.S.A Owner's Record
- Note
- Notes about discs
- Precautions
- On safety
- On power sources
- On placement
- On operation
- On adjusting volume
- On cleaning
- On cleaning discs, disc/lens cleaners
- On cleaning the video heads
- Copyright
- IMPORTANT NOTICE
- Important Safety Instructions
- Table of contents
- Getting Started
- Advanced Hookups
- Basic Operations
- DVD Settings and Adjustments
- DVD Additional Operations
- VCR Additional Operations
- Additional Information
- About this manual
- This player can play the following discs
- Note about CDs/DVDs
- Region code
- Example of discs that the player cannot play
- Notes about DVD+RWs/ DVD+Rs, DVD-RWs/DVD-Rs or CD-Rs/CD-RWs
- Note on playback operations of DVDs and VIDEO CDs
- Music discs encoded with copyright protection technologies
- Note on DualDiscs
- Step 1 : Unpacking
- Step 2 : Setting up the remote commander
- Inserting the batteries
- Using the remote commander
- Notes
- Controlling a Sony TV with the remote commander
- Step 3 : Basic hookups
- Before you get started
- Selecting the best hookup option
- Note to CATV system installer (in USA)
- Audio/video (A/V) hookup
- A Use this hookup if your TV has stereo jacks
- B Use this hookup if your TV does not have stereo jacks
- Hookup 1 (Plug and Play)
- A Use this hookup if you are using:
- If you cannot connect your antenna cable to the DVD-VCR directly
- C Use this hookup if you have no cable box, or a cable box with only a few scrambled channels
- What you can do with this hookup
- What you cannot do
- DVD-VCR setup (Hookup 1 continued)
- Plug the DVD-VCR into an AC outlet.
- You have now completed DVD-VCR setup.
- To begin using your DVD-VCR, go to "Basic Operations" on page 34.
- Hookup 2
- Use this hookup if you are connecting a cable box with many scrambled channels
- After you have completed hookup...
- Step 4 : Selecting a language
- Before you start...
- Step 5 : Setting the clock
- Using the Auto Clock Set feature
- 3
- 4
- 5
- 6
- Using Manual Clock Set
- Step 6 : Presetting channels
- Presetting all receivable channels automatically
- 2
- Presetting/disabling channels manually
- S-Video/Component Video hookup
- A Use this hookup if your TV has an S-VIDEO input jack
- B Use this hookup if your TV has component video input jacks
- A/V Receiver hookup
- A Connecting to audio L/R jacks
- B Connecting to a digital audio (COAXIAL) input jack
- Playing
- Before you start ...
- Tip
- To playback quickly or slowly with sound (DVD only)
- To Resume playback for the current disc (Resume Play)
- Notes on playing DTS\* sound tracks on a CD
- Notes on playing DVDs with a DTS sound track
- Guide to the on-screen display
- To playback the desired title/track or chapter
- To playback from the desired title/track counter position
- To adjust the playback picture (Custom AV Mode)
- Playing a tape VHS
- Additional operations
- To resume normal playback
- To turn off the power while rewinding (Rewind Shut Off)
- To use the time counter
- Adjusting the picture (tracking) VHS
- Recording TV programs VHS
- To check the remaining tape length
- To watch another TV program while recording
- To watch a DVD while recording
- To save a recording
- Tips
- Recording TV programs using the timer
- VHS
- To stop recording
- Daily/weekly recording
- To use the Auto Tape Speed function
- To watch another TV program after setting the timer
- To watch a DVD after setting the timer
- Checking/changing/canceling timer settings VHS
- When the timer settings overlap
- Locking the DVD-VCR (Child Lock)
- To lock the DVD-VCR
- To unlock the DVD-VCR
- Audio Setup DVD-V DVD-RW
- Menu choices
- Screen Setup DVD-V
- To set the “Progressive” setting
- To cancel the "Progressive" setting
- Setting the display or sound track language DVD-V
- Parental Control (limiting playback by children)
- DVD-V
- To change the password
- To turn off the Parental Control function
- To play a disc for which Parental Control is set
- If you forget your password
- Using the DVD's menu DVD-V
- Zooming into a scene DVD-V DVD-RW VCD
- Changing the angles DVD-V
- Displaying the subtitle
- To turn off the subtitles
- Various play mode functions (Program play, Shuffle play, Repeat play)
- Creating your own program (Program play) CD
- To stop program play
- To change or cancel a program
- To cancel all the programmed numbers
- Playing in random order (Shuffle play) CD
- To return to normal play
- Playing repeatedly (Repeat play) DVD-V DVD-RW VCD CD DATA-CD DATA-DVD
- When playing a DVD
- When playing a VIDEO CD (with PBC function off) or CD
- When playing a DATA CD/DATA DVD (MP3 audio)
- Changing the sound DVD-V DVD-RW VCD CD
- Virtual surround setting DVD-V DVD-RW VCD CD
- To cancel the setting
- Playing an MP3 audio track DATA-CD DATA-DVD
- To stop play
- To repeat play
- To go to the next or previous page
- To return to the previous display
- To return to the "Select a Media Type" menu
- To turn off the display
- To program MP3 audio tracks
- To shuffle MP3 audio tracks
- About MP3 audio tracks
- Note on Multi Session/Border discs
- The Playback order of MP3 audio tracks
- Playing JPEG image files DATA-CD DATA-DVD
- To display the selected image
- To play the Slide show
- To rotate the selected image
- To zoom in an image
- To enjoy the Slide show
- To turn on/off the menu in the single image display
- To return to the "Album" display
- About JPEG image files
- Playing VIDEO CDs with "PBC ON/OFF" Functions VCD
- To return to the menu
- To play using "PBC OFF"
- Quick Timer Recording VHS
- To extend the duration
- To cancel the duration
- To stop while recording
- Recording stereo and bilingual programs
- Recording stereo programs
- Recording bilingual programs
- Selecting the sound during playback
- How sound is recorded on a video tape
- Searching using various functions VHS
- Changing menu options VHS
- Editing with another VCR VHS
- How to connect to record on this VCR
- Operation (when recording on this VCR)
- Before you start editing
- To stop editing
- General setup information
- 1
- Setting the RF Output channel
- Attaching the external antenna connector
- Attaching a VHF/UHF band mixer
- Troubleshooting
- Glossary
- Chapter (page 38)
- Dolby Digital (pages 32 and 55)
- Dolby Surround (page 33)
- DTS (page 55)
- DVD (page 7)
- DVD+R (page 7)
- DVD-R (page 7)
- DVD-RW (page 7)
- DVD+RW (page 7)
- Interlace format
- Progressive format (pages 31 and 58)
- Title (page 38)
- Track (page 38)
- Specifications
- System
- Tuner section
- Inputs and outputs
- Timer section
- General
- Supplied accessories
- Index to parts and controls
- Front panel
- Display window
- Rear panel
- DVD player and VCR
- DVD player only
- DVD Audio/Subtitle Language
- Index
- Numerics
- A
- C
- D
- E
- H
- |
- J
- L
- M
- N
- P
- R
- S
- T
- U
- V
- Z
- Índice
Brand : SONY
Model : SLV-D271P
Category : Cassette player