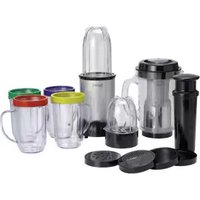
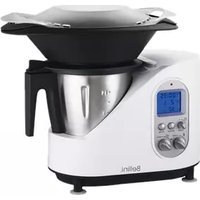
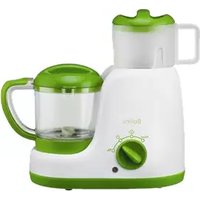
BTGW10 - Blender Bellini - Free user manual and instructions
Find the device manual for free BTGW10 Bellini in PDF.


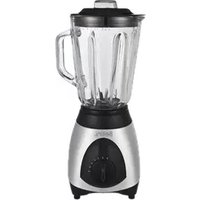
| Product Type | Blender |
| Brand | Bellini |
| Model | BTGW10 |
| Dimensions (W x D x H) | 20 cm x 20 cm x 40 cm |
| Weight | 2.5 kg |
| Power | 500 W |
| Voltage / Frequency | 220-240 V / 50-60 Hz |
| Bowl Capacity | 1.5 liters |
| Jar Material | Plastic (BPA-free) |
| Blade Material | Stainless steel |
| Speed Settings | 2 speeds + pulse |
| Functions | Blend, mix, crush ice, puree |
| Safety Features | Lid lock, non-slip feet, thermal protection |
| Dishwasher Safe Parts | Jar, lid, and blades |
| Cleaning | Easy-clean design, removable blades |
| Spare Parts Available | Jar, lid, blade assembly, seal rings |
| Repairability | User replaceable parts, professional service recommended for motor |
| Warranty | 1 year limited warranty |
| Certifications | CE, RoHS |
| Country of Origin | China |
Frequently Asked Questions - BTGW10 Bellini
User questions about BTGW10 Bellini
0 question about this device. Answer the ones you know or ask your own.
Ask a new question about this device
Download the instructions for your Blender in PDF format for free! Find your manual BTGW10 - Bellini and take your electronic device back in hand. On this page are published all the documents necessary for the use of your device. BTGW10 by Bellini.
USER MANUAL BTGW10 Bellini
Bellini Gourmet Wizard™

BTGW10

Important Safeguards
When using electrical appliances, in order to reduce the risk of electric shock and/or injury to persons, basic safety precautions should always be followed, including:
For Your Safety
Read all instructions carefully, even if you are familiar with the appliance.
- To protect against the risk of electric shock, DO NOT IMMERSE the appliance power cord set or plug in water or any other liquid.
- This appliance is not intended for use by persons (including children) with reduced physical, sensory and mental capabilities, or lack of experience and knowledge, unless they have been given supervision or instruction concerning use of the appliance by a person responsible for their safety.
• Children should be supervised to ensure that they do not play with the appliance. - Switch off the power outlet and remove the plug before cleaning or when the appliance is not in use.
- Do not operate any appliance with a damaged power cord or plug; if the appliance malfunctions; or if it is dropped or damaged in any manner.
- Do not allow the power cord to hang over the edge of a table or counter, or to touch hot surfaces.
- Do not operate or place any part of this appliance on or near a hot gas or electric burner, or in a heated oven.
- The use of attachments or accessories not recommended or sold by the manufacturer can cause electric shock or injury.
- Operate on a dry level surface; sinks, drainboards or uneven surfaces must be avoided.
- Do not use any appliance for anything other than its intended use. This product is intended for household use only.
- This appliance is intended to be plugged in a standard domestic power outlet only.
-
Do not use outdoors.
-
Do not misuse the power cord. Never carry the appliance by the power cord or pull it to disconnect from the power outlet. Instead, grasp the plug and pull to disconnect.
- Do not carry the appliance by the power cord.
- Do not attempt to repair or disassemble the appliance. There are no user-serviceable parts.
- Extreme caution is necessary when moving any appliance containing hot liquids.
- The cutting blades are sharp, so care must be taken when detaching from its mixing container, when emptying contents of the container or cleaning blades when detached.
- Ensure that the appliance is switched off before moving it and do not move it during use.
- The mixing container is microwave safe, but mixing blades MUST be removed before placing in microwave and be covered with the shaker or steamer lid.
- During microwaving beware that steam maybe released from the mixing container and that container can get hot, so use oven mitts to remove container from Microwave.
- Juice Cups are not Microwave safe, so do NOT use these containers for microwaving foods /liquids.
- Only run the motor of the appliance for a maximum of 30 Seconds at any time and with ingredients only, do NOT run without contents.
- This appliance is not intended to be operated by means of an external timer or separate remote-control system.
FAILURE TO OBSERVE THESE CAUTIONS MAY RESULT IN DAMAGE TO THE APPLIANCE.
Warning
If the supply power cord is damaged, the power cord must be replaced by the manufacturer, its service agent or similarly qualified persons in order to avoid a hazard.
This product has not been designed for any uses other than those specified in this booklet.
Save These Instructions
Features of Bellini Gourmet Wizard™

Combinations of Large, Small mixing containers or juice cup.
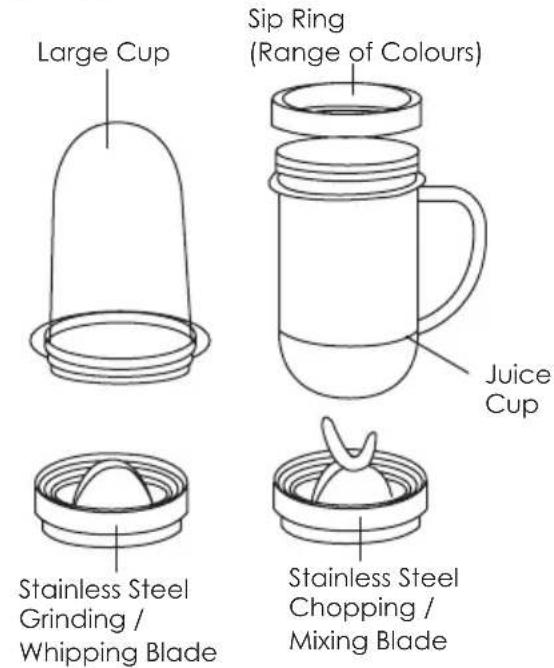
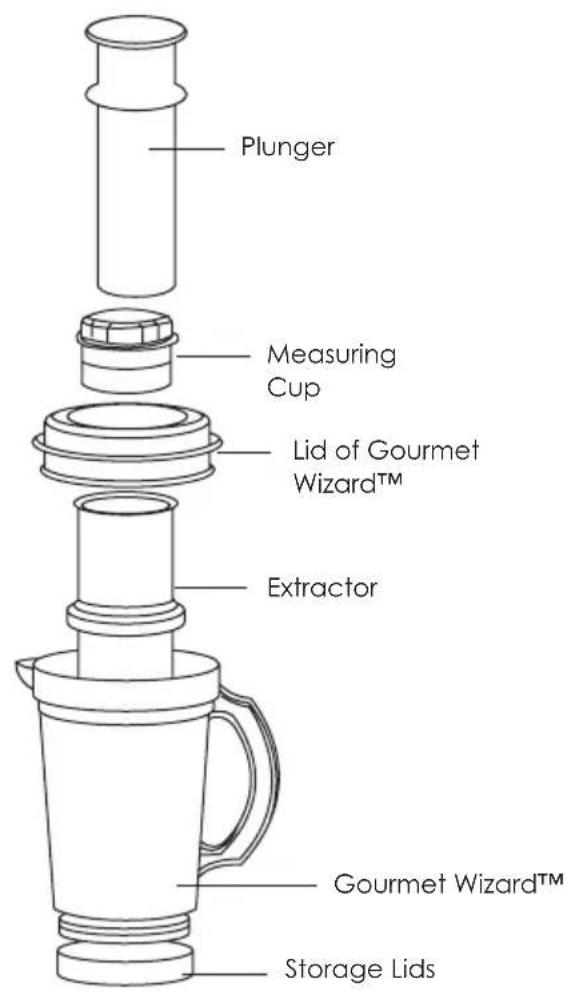
Getting to Know Your Bellini Gourmet Wizard™
Congratulations on purchasing the Gourmet Wizard™.
The Gourmet Wizard is the must have appliance for all your chopping, grinding, grating and whipping needs and takes up very little space on your kitchen bench top, so you could simply leave it there for easy access.
Your Gourmet Wizard Components
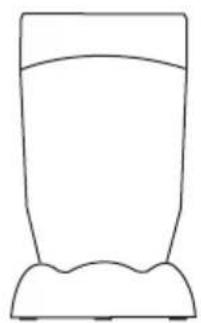
Appliance Base
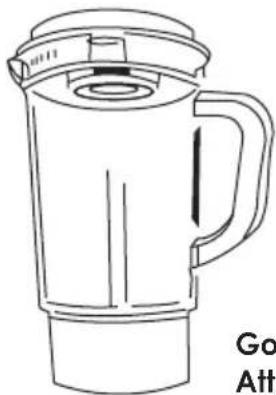
Gourmet Blender & Lid Attachment

Plunger

Extractor

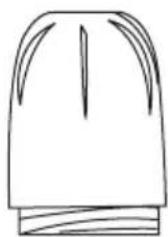

Large, Small Mixing Container and Juice Cup

Steamer / Shaker lids


Chopping / Mixing Blade
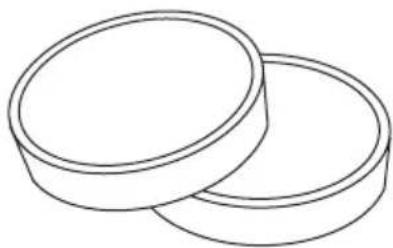
Storage Lids

Grinding / Whipping Blade
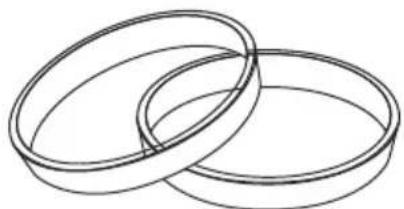
Sip Rings
Large and Small mixing containers
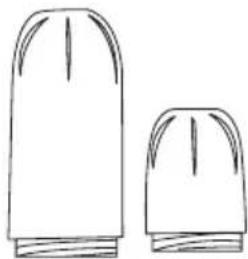
These containers are used to Chop and Mix your ingredients and handy storage combined with storage lids.
They are microwave -safe and dishwasher -safe when placed in the top rack of your Dishwasher.
Juice Cups with complimenting Sip Rings
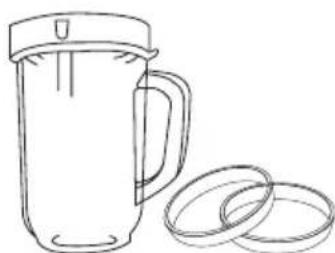
Your Gourmet Wizard™ comes with four Juice Cups and complimenting various coloured Sip Rings (To cover the threaded portion of the juice cup) to easily identify the users juice cup, particularly handy at Kids parties.
Frozen drinks can directly be made in the juice cup it self in combination with the Chopping / Mixing Blade.
Note : Unlike the Large and Small mixing containers, the Juice Cups are NOT Microwave -Safe.
Appliance Base

The Appliance Base is the driver of the Gourmet Wizard™.
Select any one of the Mixing containers, juice cups and blade combinations and position on the Appliance Base.
Caution : Do not place the Appliance Base on wet surfaces or submerge it in water and ensure to unplug the appliance before cleaning it.
Chopping / Mixing Blade and Grinding / Whipping Blade

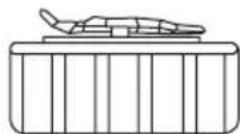
The Gourmet Wizard™ is supplied with two distinct blade assemblies that will suit various blending requirements.
The Chopping / Mixing blade is suitable for chopping, grating and blending of vegetables, fruits, meats, cheeses and frozen drinks. The Grinding / Whipping blade is suitable for grinding Nuts, Coffee Beans, hard spices etc. and whipping cream.
NOTE : Both blade assemblies are not dishwasher-safe and must be hand washed, taking care as the blades have sharp edges.
The blade assemblies have a gasket that seals against the Mixing containers/Juice Cups and after washing must ensure that gasket remains correctly positioned at all times before securing to containers.
Storage Lids

The Storage Lids can be used in conjunction with the Mixing containers or juice cups to store any foods (Cooked or uncooked) and provide a satisfactory seal to keep foods fresh for days in the fridge compartment of your refrigerator.
Gourmet Wizard™ and Lid
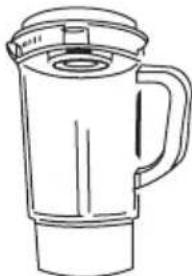
Adding this Blender attachment will achieve the same results as a conventional stand alone purpose blender and its uses and only takes up a fraction of the space.
At the same time you can add ingredients through a pop up top whilst blender is running.
Gourmet Wizard™ Juice Extractor Kit
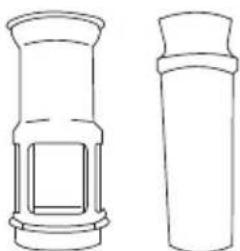
These accessories allows you , in conjunction withthe above blender attachment to transform itto the Gourmet Wizard juicer with the benefit ofeasy clean up afterwards.
Steamer and Shaker Lids
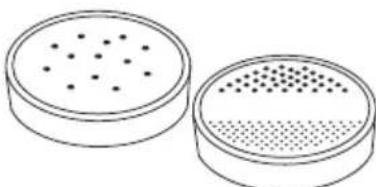
Part of the Gourmet Wizard™ are the Shaker and Steamer Lids.
These are not for food storage, but should and both can be used for lids on the mixing containers ( Only the mixing containers are Microwave-Safe ) when heating foods inside the Microwave.
Alternatively they can be used as Shaker lids on both the Mixing containers or juice cups with either coarse or fine grounded dry ingredients, e.g. Parmesan Cheese or various spices.
Before First Use
Before using your Gourmet Wizard™ for the first time it is important that you read and follow the instructions in this use and care booklet, even if you feel you are familiar with this type of appliance.
Your attention is drawn in particular to the section dealing with IMPORTANT SAFEGUARDS.
Find a safe and convenient place to keep this booklet handy for future reference. This appliance has been designed to operate from a standard domestic power outlet. It is not intended for industrial or commercial use. Carefully unpack the Gourmet Wizard™. Remove all packaging materials and either discard or retain for future use.
Ensure that the voltage of your electricity supply is the same as that indicated on the rating label on the appliance (230-240V). Remove the plastic components and wash in warm soapy water. Dry thoroughly and replace. Wipe over the exterior of the casing with a damp sponge or cloth. Do not use abrasive cleaners.
How to Use Your Gourmet Wizard™
Choosing the Right Blade
Particular care is required during handling of the cutting blades in the process of removing ingredients from mixing containers / juice cups, detaching blade assembly from containers or hand washing blade assembly after use, as the blades are sharp.
The Gourmet Wizard™ is supplied with two unique blade assemblies:
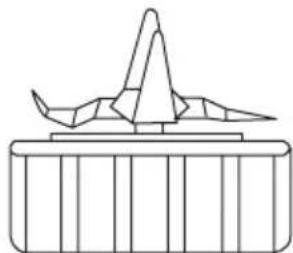
Chopping / Mixing Blade
Chopping - Ingredients like Vegetables and Fruits and preparing dips, Salsa, Pesto's etc.
Blending - Crushing of Ice or preparing smoothies, milkshakes, slurpies and cocktails etc.
Mixing - preparation of various cake mixes, batters or cake fillings
Grating - Hard Cheeses, Chocolate etc.
Pureeing - Apple sauce, Baby foods, Home made soups.
Pulverising - Frozen fruits for cold fruit drinks, sorbets or for adding to ice creams.
Grinding Meats - for addition to salads or making of pates.
Grinding / Whipping Blade

This blade is particularly useful for grinding down small batches of harder ingredients like:
Coffee Beans Dried Fruits Various Nuts
Or whipping of creams, cake mixes, butters etc.
Gourmet Wizard™ Techniques
There are two techniques that can be used with the Rocket Multi Blender, each specific to your needs.
The "Continues" Blending technique or The "Pulse" technique.
Continues Blending Technique (Do no operate for any longer than 30 Seconds)
This requires for the Mixing Container or Juice Cup to be locked in position and be unlocked when maximum 30 seconds has expired. In this mode all ingredients will be very finely chopped or blended.
To activate, hold the Appliance Base with one hand and position the Mixing Container or Juice Cup with the other hand by aligning the three protruding lugs on the container or juice cup with the corresponding slots on the Appliance Base, push the Mixing Container or Juice Cup down and then turn in clock wise direction to fully lock into position (It will start automatically after partial lock in), hold and unlock in anti-clockwise direction after maximum of 30 seconds, lift to remove mixing container / juice cup from Appliance Base. Unscrew blade assembly to gain access to ingredients.
The "Pulse" Technique.
This technique allows the ingredients to be coarsely chopped but requires intermittent manual interference by the user.
This technique is an abbreviated action of the above “Continues” blending technique, by not fully locking Mixing Container into position, rotating mixing container back and forth, releasing down ward pressure on mixing container and reapplying pressure on mixing container.
It will take a little bit of getting used to this action, but once tried it becomes second nature.
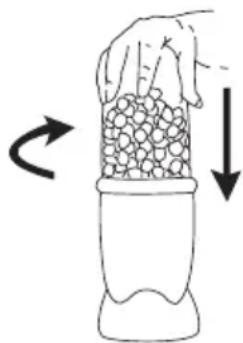
Assembling the Gourmet Wizard™

Attach the Chopping / Mixing Blade to the base of the blender jug and secure by turning in clockwise direction.
Then simply place the blender assembly onto the Appliance Base.
Using the Gourmet Wizard™
The attachment Gourmet Wizard Blender is just like a conventional blender.
- Place assembled Blender attachment onto the Appliance Base, with blender lid in position.
- Push down on the Blender assembly and turn clock wise to fully lock in (The blender will automatically start to blend without the need to press button, to stop simply unlock by turning in anti-clockwise direction).
Never run the Gourmet Wizard™ for more than 30 Seconds at a time, as it can cause permanent damage to the motor. If the motor stops working, unplug the Appliance Base and let it cool for a few hours before attempting to use it again.
Assembling the Gourmet Wizard™ Juicer

Caution: Caution : When using the Extractor ensure that it will ONLY BE USED in conjunction with Chopping / Mixing Blade, use of the Grinding / Whipping blade will damage the unit.
- Attach the Chopping / Mixing Blade to the base of the blender attachment and secure by turning in clockwise direction.
- Insert the Extractor into the Blender assembly and centralise by aligning the three notches on the Extractor with the three ribs inside the Blender assembly.
- Place the lid onto the Blender Assembly and lock into place by aligning lid straining pourer with the spout.
- Place the Blender Assembly on the Gourmet Wizard Appliance Base, DO NOT lock into position at this stage.
Using the Gourmet Wizard™
Before starting the juicer, prepare ingredients by cutting them in small enough pieces to fit the Extractor.
- Remove the pop-top from the lid of the Blender Assembly.
Place Blender Assembly onto the Appliance Base.
- Press Blender assembly down and turn clockwise and lock into position (Motor will Start running automatically).
At this stage ONLY can you start adding the ingredients into the Extractor and start pushing down with plunger, otherwise adding ingredients without motor running can jam the blades, which can cause irreversible motor damage.
How to Care for Your Gourmet Wizard™
Caution: Always unplug the Gourmet Wizard when cleaning or assembling.
Washing Gourmet Wizard Attachments
The Gourmet Wizard attachments (measuring cups and Juice Cups) are able to be placed on the top shelf of the dishwasher or alternatively they can be hand washed with warm soapy water and then rinsed.
Always make sure the gaskets are still inside after cleaning. The heat from some dishwashers can cause them to become loose and pop out.
Note: Blades are to be hand washed only, they are not dishwasher safe.
Cleaning the Gourmet Wizard Appliance Base
- The most important thing is to UNPLUG the Appliance Base before washing.
- Use a damp cloth to wipe down the inside and outside of the Appliance Base.
- Use a damp cloth to soften any grime around the activators as you work the activator buttons up and down until they move freely again.
NEVER SUBMERGE THE APPLIANCE BASE IN WATER OR PLACE IT IN THE DISHWASHER.
Never put your hands or utensils near the moving blade and never use your hands or utensils to press the activator buttons down while the Appliance Base is plugged in.
Recipes for the Gourmet Wizard™
Guacamole
Makes 1 Cup
1 ripe avocado, peeled and roughly chopped
2 teaspoons lemon juice
1/4 - 1/2 small red chilli, finely chopped
2 teaspoons fresh coriander leaves
1-2 drops Tobacco sauce salt and pepper, to taste
1/2 Roma tomato, roughly chopped
- Place all ingredients, except the tomato into the tall cup, in the order listed. Twist on the cross blade.
- Blend, using a pulse action, 4-5 times or until the mixture is smooth (shaking occasionally if necessary).
- Remove the blade and add Roma tomato. Replace the blade and blend for a further 1-2 pulses, or until the tomato is just chopped, but not completely pureed.
- Allow to chill, serve with corn chips or nachos.
Basil Pesto
Makes 3/4 Cup
1 1/2 cups lightly packed fresh basil leaves
2 cloves garlic, peeled
2 tablespoons toasted pinenuts
2 tablespoons shredded Parmesan
1/4 cup extra virgin olive oil salt and pepper, to taste
- Place all ingredients into the tall cup, in the order listed. Twist on the cross blade.
- Blend, using a pulse action, until all ingredients are combined and no large pieces remain. Do not over-blend, pesto should be a little chunky, with a grainy texture.
- Use as a delicious dip, or heat gently in the cup (using a steamer lid) and serve poured over your favourite cooked pasta.
Roasted Vegetable Soup
Serves 6
1 tablespoon olive oil
2 cloves garlic, peeled
600 grams butternut pumpkin, peeled and roughly chopped
2 large Roma tomatoes, quartered
1 large onion, cut into wedges
1 small sweet potato, peeled and roughly chopped
1 tablespoon fresh rosemary
4 - 5 cups chicken stock
salt and pepper, to taste
1/2 cup cream, for serving, if desired
- Place vegetables into a large roasting dish, drizzle with olive oil and sprinkle with rosemary. Bake at 180C for 1 1/2 hours or until the vegetables are tender.
- Transfer cooked vegetables to a large saucepan, add chicken stock and bring to the boil. Reduce heat and simmer, covered for 10 minutes.
- Allow soup to cool until just warm. Puree in the blender, in 2 batches.
- Reheat, season to taste and serve with a swirl or cream and sprig of rosemary, if desired.
Banana Nutmeg Pikelets
Makes 10
1/2 cup self raising flour
2 teaspoons caster sugar
pinch nutmeg
1 egg
1/2 banana, roughly chopped
1/4 cup milk
20 grams butter, for frying
cinnamon sugar, for serving
- Place all ingredients into the tall cup, in the order listed. Twist on the cross blade.
- Blend, using a pulse action for 5-10 seconds, or until the batter is smooth.
- Melt butter in frying pan over medium heat. Pour tablespoonsful of the batter into the frying pan, allowing room for spreading.
- When small bubbles begin to form in the batter, flip the pikelets over and cook for 2-3 minutes on the other side.
- Serve immediately, sprinkled with cinnamon sugar, if desired.
Speedy Chocolate Mousse
Serves 2
3/4 cup thickened cream
- Place all ingredients into the tall cup, in the order listed. Twist on the flat blade.
- Blend for 4-5 seconds, taking care not to over-blend or mixture will curdle. Mixture should be evenly mixed, but quite thin when ready.
- Pour mixture into serving bowls and refrigerate until set.
- Serve with berries as an indulgent dessert, or pipe onto shortbread or Florentine biscuits and dust with cocoa, as a treat to serve with coffee.
Rum and Raisin Cheesecake with Mascarpone
Serve 6-8
1/2 cup seeded raisins, roughly chopped
2 tablespoons dark rum
1/2 teaspoon cinnamon
1 cup sweet biscuit crumbs
50 grams butter, melted
250 grams cream cheese, softened
250 grams mascarpone cheese
1/2 cup sugar
1 teaspoon vanilla essence
4 eggs
whipped cream, for serving
- Combine raisins with rum and cinnamon and allow to stand for 2-3 hours.
- Combine the biscuit crumbs with the melted butter. Press into the base of a greased and lined 20cm springform pan.
- Place softened cream cheese and mascarpone into the blender, blend until evenly combined and smooth.
- Add the sugar, vanilla essence and eggs to the blender and blend briefly until smooth.
- Stir in rum and raisin mixture.
- Pour filling into the prepared tin. Bake at 180C for 1-1 1/4 hours, or until cooked. Allow to cool in the oven so the cheesecake doesn't crack.
- Refrigerate for 2-3 hours. Serve with whipped cream, if desired.
Berry Yoghurt Smoothie
Serves 1
1/3 - 1/2 cup frozen berries
1/4 cup berry flavoured yoghurt
scoop vanilla ice-cream or frozen yoghurt
3/4 cup milk
3-4 small ice cubes
- Place all ingredients into one of the party cups, in the order listed. Twist on the cross blade.
- Blend, using a pulse action for 10-20 seconds or until all ingredients are combined and the ice is crushed.
- Place one of the comfort lip rings on the party juice cup and serve immediately.
Apricot Breakfast Smoothie
Serves 1
2 tablespoons roughly chopped dried apricots
2 tablespoons hot water
1/2 small banana, peeled and roughly chopped
1/2 cup apricot or tropical fruit yoghurt
1/2 - 3/4 cup milk
3-4 small ice cubes
- Combine the apricots and the hot water and allow to stand for 10 minutes to soften apricots.
- Drain the apricots and place all ingredients into one of the party cups. Twist on the cross blade.
- Blend for 10-20 seconds, or until smooth.
- Serve immediately.
Frozen Raspberry Margarita
Serves 1
30ml Tequila
30ml Cointreau
30ml fresh lime juice
1/3 cup frozen raspberries
1/2 - 3/4 cup small ice cubes
- Place all ingredients into one of the party juice cups, in the order listed. Twist on the cross blade.
- Blend until smooth, shaking to distribute ice.
- Twist comfort lip ring onto juice cup and serve immediately.

Gerard Sourcing & Manufacturing
GSM International Ltd.
Consumer Service Centre : 1300 373 199
GSM International Ltd has a policy of continual improvement throughout the product range. As such the unit contained within may differ slightly from the unit illustrated on the pack.
MADE IN CHINA for GSM International Ltd.
- BELLINI GOURMET WIZARD™
- IMPORTANT SAFEGUARDS
- FOR YOUR SAFETY
- FAILURE TO OBSERVE THESE CAUTIONS MAY RESULT IN DAMAGE TO THE APPLIANCE
- WARNING
- SAVE THESE INSTRUCTIONS
- FEATURES OF BELLINI GOURMET WIZARD™
- GETTING TO KNOW YOUR BELLINI GOURMET WIZARD™
- LARGE AND SMALL MIXING CONTAINERS
- JUICE CUPS WITH COMPLIMENTING SIP RINGS
- APPLIANCE BASE
- CHOPPING / MIXING BLADE AND GRINDING / WHIPPING BLADE
- STORAGE LIDS
- GOURMET WIZARD™ AND LID
- GOURMET WIZARD™ JUICE EXTRACTOR KIT
- STEAMER AND SHAKER LIDS
- BEFORE FIRST USE
- HOW TO USE YOUR GOURMET WIZARD™
- CHOOSING THE RIGHT BLADE
- CHOPPING / MIXING BLADE
- GRINDING / WHIPPING BLADE
- GOURMET WIZARD™ TECHNIQUES
- ASSEMBLING THE GOURMET WIZARD™
- USING THE GOURMET WIZARD™
- ASSEMBLING THE GOURMET WIZARD™ JUICER
- HOW TO CARE FOR YOUR GOURMET WIZARD™
- WASHING GOURMET WIZARD ATTACHMENTS
- CLEANING THE GOURMET WIZARD APPLIANCE BASE
- NEVER SUBMERGE THE APPLIANCE BASE IN WATER OR PLACE IT IN THE DISHWASHER
- RECIPES FOR THE GOURMET WIZARD™
- GUACAMOLE
- MAKES 1 CUP
- BASIL PESTO
- MAKES 3/4 CUP
- ROASTED VEGETABLE SOUP
- SERVES 6
- BANANA NUTMEG PIKELETS
- SPEEDY CHOCOLATE MOUSSE
- RUM AND RAISIN CHEESECAKE WITH MASCARPONE
- BERRY YOGHURT SMOOTHIE
- APRICOT BREAKFAST SMOOTHIE
- FROZEN RASPBERRY MARGARITA
- GSM INTERNATIONAL LTD
Brand : Bellini
Model : BTGW10
Category : Blender