
PRJTPS37 - Tripod Pyle - Free user manual and instructions
Find the device manual for free PRJTPS37 Pyle in PDF.


| Product Type | Tripod |
| Brand | Pyle |
| Model | PRJTPS37 |
| Material | Aluminum alloy |
| Maximum Height | 60 inches (152.4 cm) |
| Minimum Height | 22 inches (55.9 cm) |
| Folded Length | 24 inches (61 cm) |
| Weight | 4.2 lbs (1.9 kg) |
| Load Capacity | 11 lbs (5 kg) |
| Leg Sections | 3 |
| Head Type | Pan tilt with quick release plate |
| Quick Release Plate | Yes, with 1/4 inch screw |
| Bubble Level | Yes |
| Compatibility | Cameras, camcorders, and devices with 1/4 inch tripod mount |
| Maintenance | Wipe with a dry soft cloth; avoid harsh chemicals |
| Safety | Ensure all leg locks and head knobs are securely tightened before use |
Frequently Asked Questions - PRJTPS37 Pyle
User questions about PRJTPS37 Pyle
0 question about this device. Answer the ones you know or ask your own.
Ask a new question about this device
Download the instructions for your Tripod in PDF format for free! Find your manual PRJTPS37 - Pyle and take your electronic device back in hand. On this page are published all the documents necessary for the use of your device. PRJTPS37 by Pyle.
USER MANUAL PRJTPS37 Pyle
natural_image
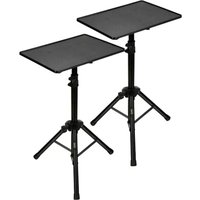
Metal tripod with black adjustable legs and a flat top, isolated on white background (no text or symbols)User Manual

Step One: Aer removing the tripod from the packaging, unlock the middle wrench in order to separate the legs of the tripod (this will extend the tripod). Tighten the wrench when it is fully extended.
Step Two: Following the same method as in step one, loosen the wrenches on each leg of the tripod. Extend the legs outward as far as they can go (without stressing the tripod) and then ghten the wrenches again.
Step Three: Put the tripod on the ground and test the weight by pung some pressure on the top. None of the tripod feet should move or be loose.
Step Four: Slowly ghten "Screw A"
Step Five: Set the plate onto the tripod stand and x it to the projector. Raise the plate until it is at the desired height and then ghten "Screw B". Make sure everything is completely secure before placing the projector on to the tripod.

Brand : Pyle
Model : PRJTPS37
Category : Tripod