USER MANUAL ES4815 PANASONIC
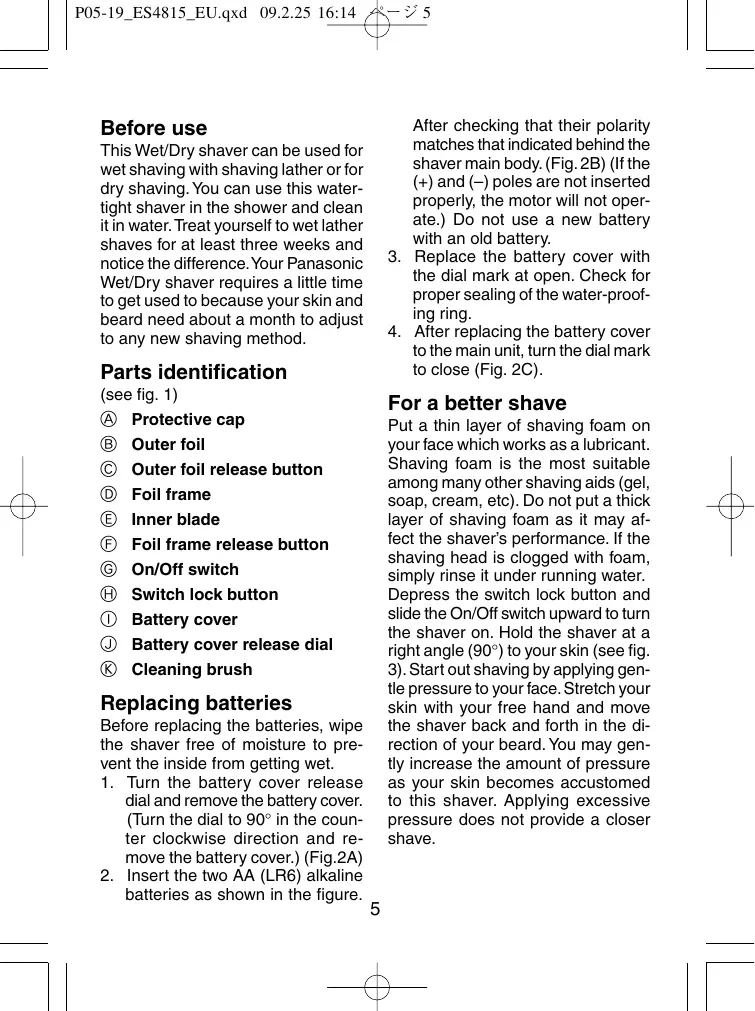
Wet/Dry Battery Operated Shaver
Operating Instructions
Model No. ES4815
Ltd.
Before operating this unit, please read these instructions completely.
1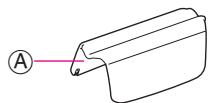
2 (A)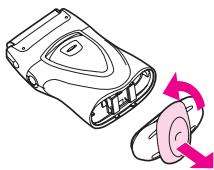
(B)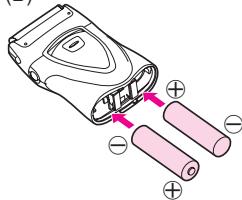
(C)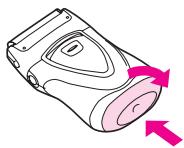
3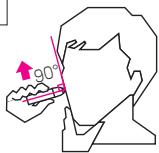
Index
| ENGLISH | Page | 5 | SVENSKA | Sid | 32 |
| DEUTSCH | Seite | 8 | SUOMI | Sivu | 35 |
| FRANCAIS | Page | 11 | POLSKI | Strona | 38 |
| ITALIANO | Pagina | 14 | ČESKY | Strona | 41 |
| NEDERLANDS | Pagina | 17 | MAGYAR | Oldal | 44 |
| ESPÁÑOL | Pagina | 20 | ROMANA | Pagina | 47 |
| DANSK | Side | 23 | PYCCKÍN | Сtrпаница | 50 |
| PORTUGUES | Pagina | 26 | TÜRKQE | Sayfa | 54 |
| NORSK | Side | 29 | Украïнсыкý | Сторінka | 57 |
Before use
This Wet/Dry shaver can be used for wet shaving with shaving lather or for dry shaving. You can use this watertight shaver in the shower and clean it in water. Treat yourself to wet lather shaves for at least three weeks and notice the difference. Your Panasonic Wet/Dry shaver requires a little time to get used to because your skin and beard need about a month to adjust to any new shaving method.
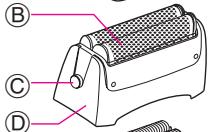
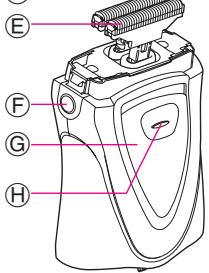
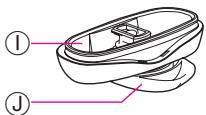
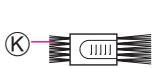
Parts identification
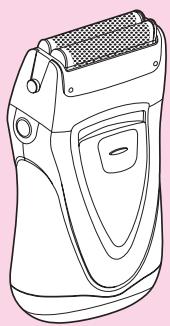
(see fig. 1)
Protective cap, Outer foil, Outer foil release button, Foil frame, Inner blade, Foil frame release button, On/Off switch, Switch lock button, Battery cover, Battery cover release dial, Cleaning brush
Replacing batteries
Before replacing the batteries, wipe the shaver free of moisture to prevent the inside from getting wet.
- Turn the battery cover release dial and remove the battery cover. (Turn the dial 90° counterclockwise and remove the battery cover.) (Fig. 2A)
- Insert the two AA (LR6) alkaline batteries as shown in the figure.
After checking that their polarity matches that indicated behind the shaver main body. (Fig. 2B) (If the (+) and (-) poles are not inserted properly, the motor will not operate.) Do not use a new battery with an old battery.
- Replace the battery cover with the dial mark at open. Check for proper sealing of the water-proofing ring.
- After replacing the battery cover to the main unit, turn the dial mark to close (Fig. 2C).
For a better shave
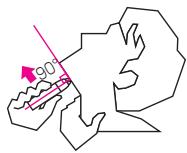
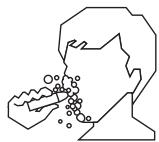
Put a thin layer of shaving foam on your face which works as a lubricant. Shaving foam is the most suitable among many other shaving aids (gel, soap, cream, etc). Do not put a thick layer of shaving foam as it may affect the shaver's performance. If the shaving head is clogged with foam, simply rinse it under running water. Depress the switch lock button and slide the On/Off switch upward to turn the shaver on. Hold the shaver at a right angle (90°) to your skin (see fig. 3). Start out shaving by applying gentle pressure to your face. Stretch your skin with your free hand and move the shaver back and forth in the direction of your beard. You may gently increase the amount of pressure as your skin becomes accustomed to this shaver. Applying excessive pressure does not provide a closer shave.
Cleaning your shaver
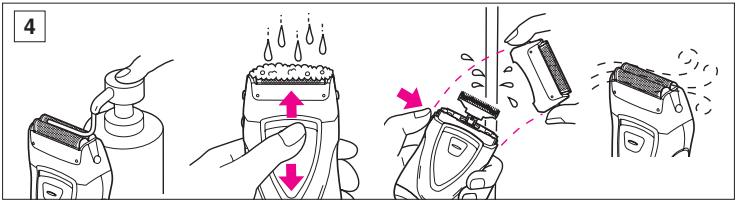
(see fig. 4)
For cleanliness and convenience, we recommend that you clean your shaver with water and some liquid hand soap. Regular cleaning will keep your shaver in good condition while preventing odors or bacteria from developing, and maintain the cutting performance.
With the outer foil in place, apply some hand soap onto the outer foil. Turn the shaver on and pour a small amount of water over the outer foil. After about 10-20 seconds, turn the shaver off.
Remove the foil frame and rinse it under tap water.
Wipe off any moisture from the shaver with a dry cloth and remove the protective cap to allow the outer foil to dry completely.
Brush cleaning
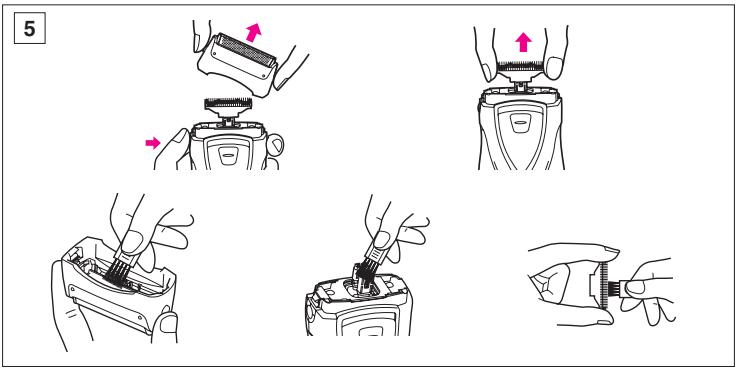
(see fig. 5)
Squeeze the foil frame release button and lift the foil frame upwards to remove it. Remove the inner blades one at a time by grasping it firmly at both ends and pulling it straight away from the shaver. Clean the outer foil, the shaver body with the long side of the brush. Clean the inner blades with the short side of the brush. Do not use the short brush to clean the outer foil.
Replacing shaving head components
It is recommended that you replace the outer foil at least once a year and the inner blades at least once every 2 years to maintain your shaver's cutting performance.
Replacing the outer foil
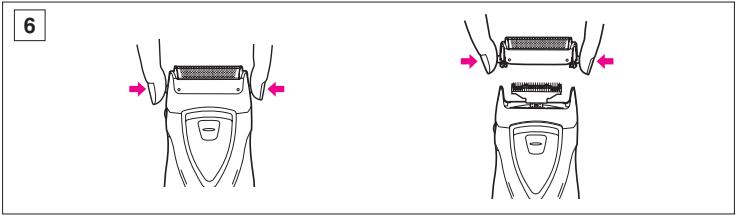
(see fig. 6)
Squeeze the outer foil release buttons and lift the outer foil upward to remove it. To insert the new outer foil, press down until it snaps into place.
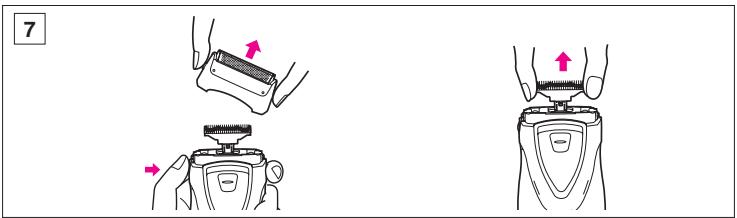
Replacing the inner blades (see fig. 7)
Press the foil frame release button and remove the foil frame. Remove the inner blade one at a time by grasping it firmly at both ends and pulling straight away from the shaver. To insert the new inner blades, hold the blade one at a time at both ends and press downward until it snaps into the shaver.
Caution
- Do not leave the appliance in places where it will be exposed to high temperature or direct contact with sunlight.
- Do not leave the shaver in direct sunlight to dry with the outer foil removed.
- The outer foil is very thin. If handled improperly, it can be easily damaged. To avoid personal injury, do not use the shaver if it has a damaged foil or inner blade.
- Wash the shaver with tap water. Do not use salt water or boiling water.
Also, do not use cleaning products that are designed for toilets, bathrooms or kitchen appliances. Do not submerge the shaver in the water for a long time.
- Do not wipe any part of the shaver with thinner, benzine or alcohol. Clean it by using a cloth dampened with soapy water.
- Do not take the housing apart as this can affect the watertight construction.
- If the shaver is not used for a long time, remove the batteries to prevent possible leakage.
- If the shaver is not working properly, have it inspected at the place of purchase or an authorized service center.
- Always use your shaver for its intended use, as described in this manual.
This product is intended for household use only.
Before use
Participants in the meeting include: - Participants in the meeting
- Participants in the meeting
- Participants in the meeting
- Participants in the meeting - The blade is very thin. If handled incorrectly, it can easily break. To avoid injury, do not use the shaver if the blade or cutter is damaged. - Clean the shaver under the tap. Use...
Name of units and parts
(see fig. 1)
A Protective cap B Outer foil C Foil frame D Inner blade E Foil fixing frame F Switch "on/off" G Switch lock
① Battery compartment lid opening disc
Foil
Battery replacement
Remove the batteries before cleaning the shaver to prevent moisture from entering the interior.
- Turn the disc counterclockwise and remove the blade unit cover. (Turn the disc 90° counterclockwise and remove the blade unit cover.) (Fig. 2A)
- Insert two rechargeable batteries (LR6) as shown in the figure. After this, check that the polarity matches the markings on the inside of the main body of the shaver. (Fig. 2B) (If the (+) pole is inserted incorrectly, the motor will not work.) Do not use a new battery together with an old battery.
- Install the battery compartment cover; at the same time, the mark on the disc should be in the open position. Make sure the waterproof ring is properly seated.
- After installing the battery compartment cover on the main body, turn the disc mark to the closed position (Pm).
Wanbao Base Shiguang Road, Panyu District, Guangzhou, Guangdong, 511495 CHINA
Y. No.4 EN, GR, FR, IT, NE, SP, DN, PO, NR, SW, FN, Po, Cz, Hu, Ru, Russi, TU, Uk Printed in China